 Michael Graham
-
11Drawing- Convert Image to Gcode & Send
We use a combination of RepetierHost https://www.repetier.com/ and Slic3r http://slic3r.org/ to prepare the gcode. Both are free open source actively supported programs. (In this way you can teach/learn the real 3d printing tool path in a meaningful way without a 3d printer!)
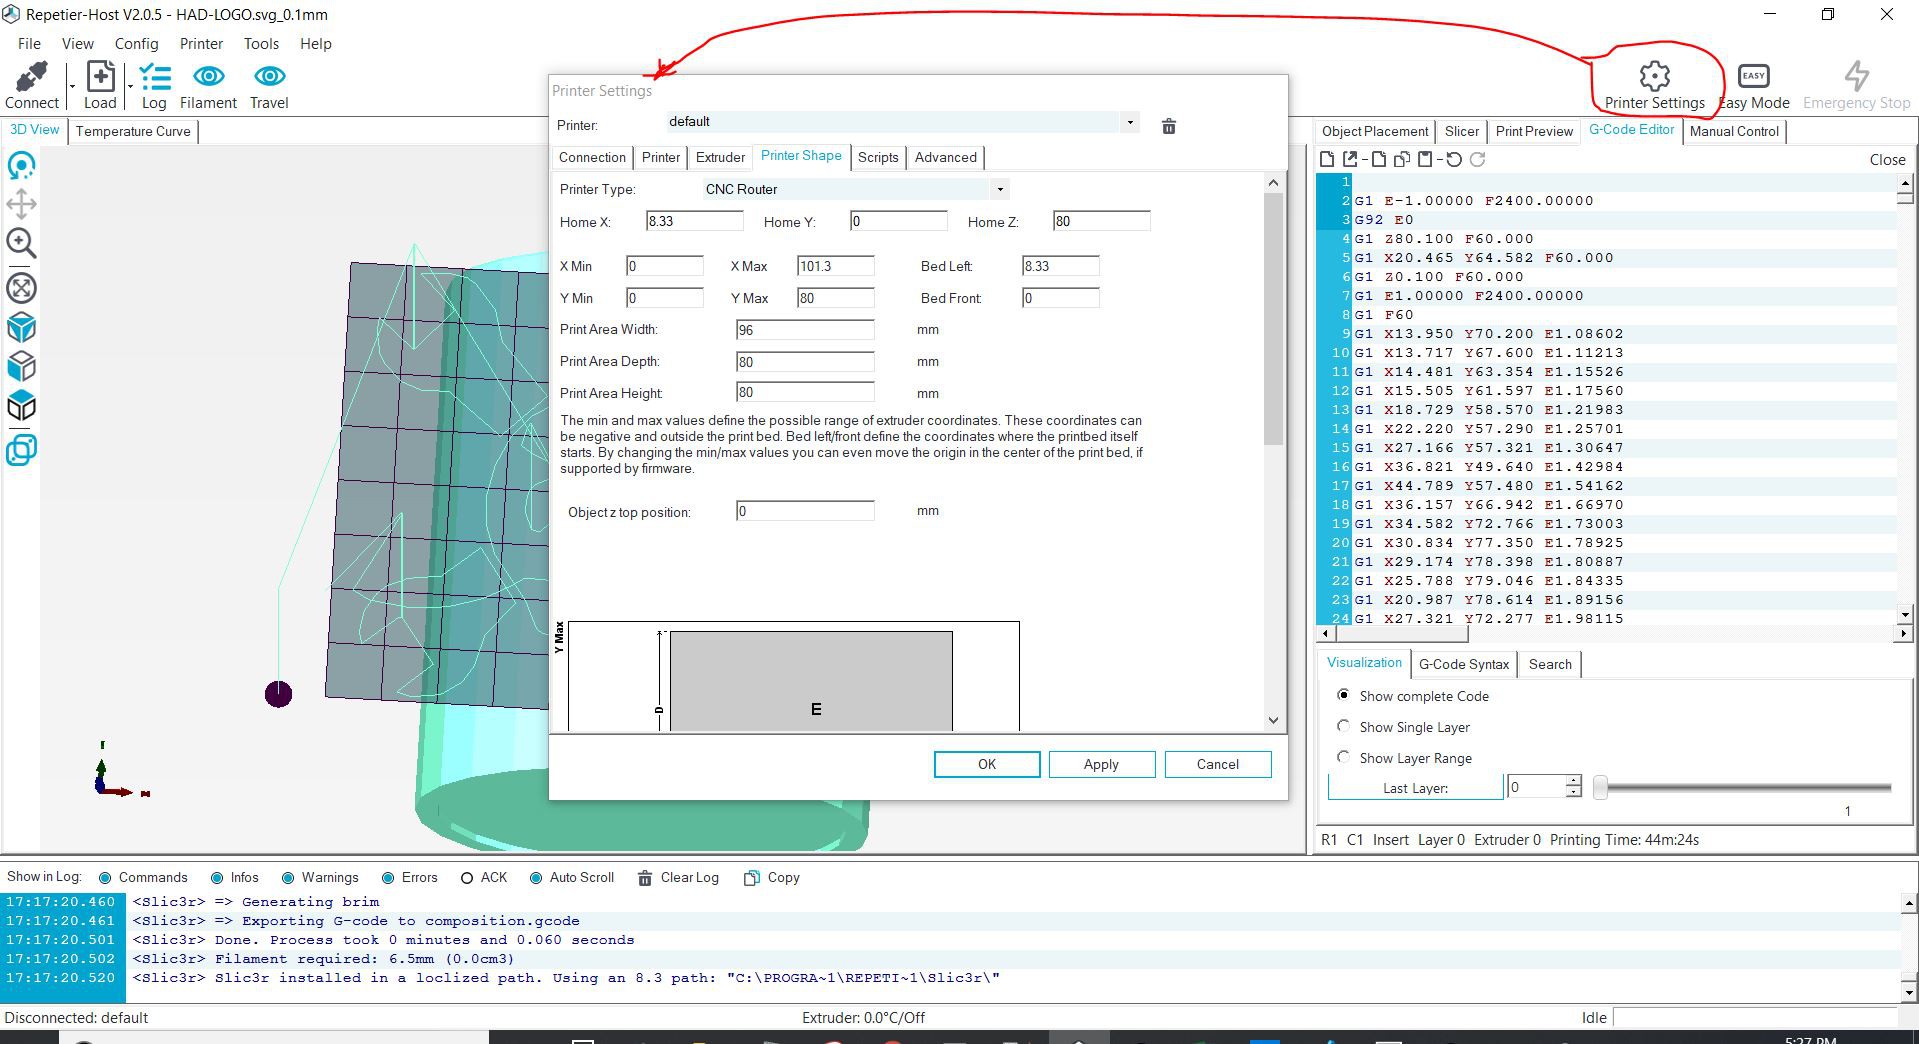
If you are doing this for the first time you will have to setup the printer dimensions in RepetierHost & Slic3r. Do this by hitting the Printer Settings Tap and typing in the below values shown. These values are the travel limits in mm of the Mug-O-Matic, mathematically derived based on the drawable area. (Note, if you like having the fancy mug background like I have shown to help orient you, scroll down in that printer settings window and import the STL file from this collection named "CoffeeMug-RepetierHost")
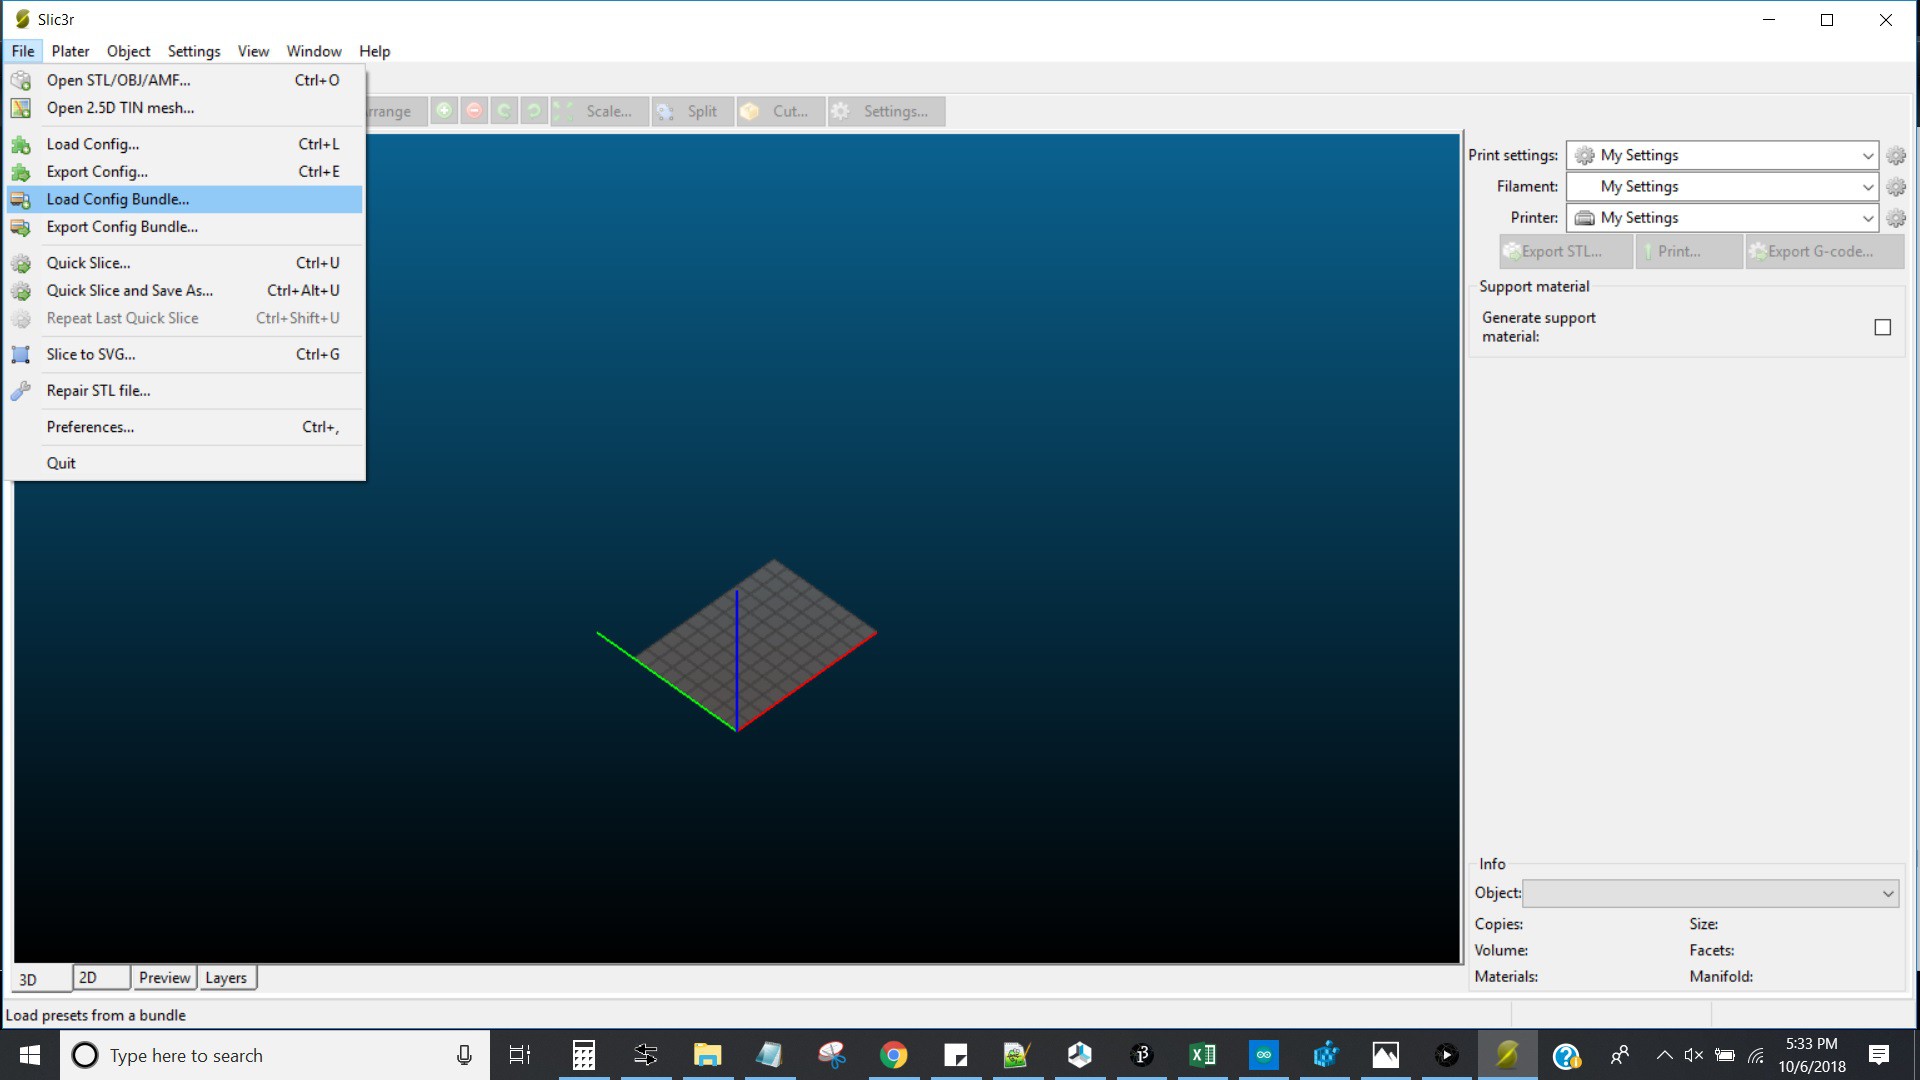
Next, in RepetierHost on the Slicer tab click configuration. This will open Slic3r. In Slic3r click File > Load Config Bundle, and import the file named "SLIC3R_CONFIG" from Github.
![]()
![]()
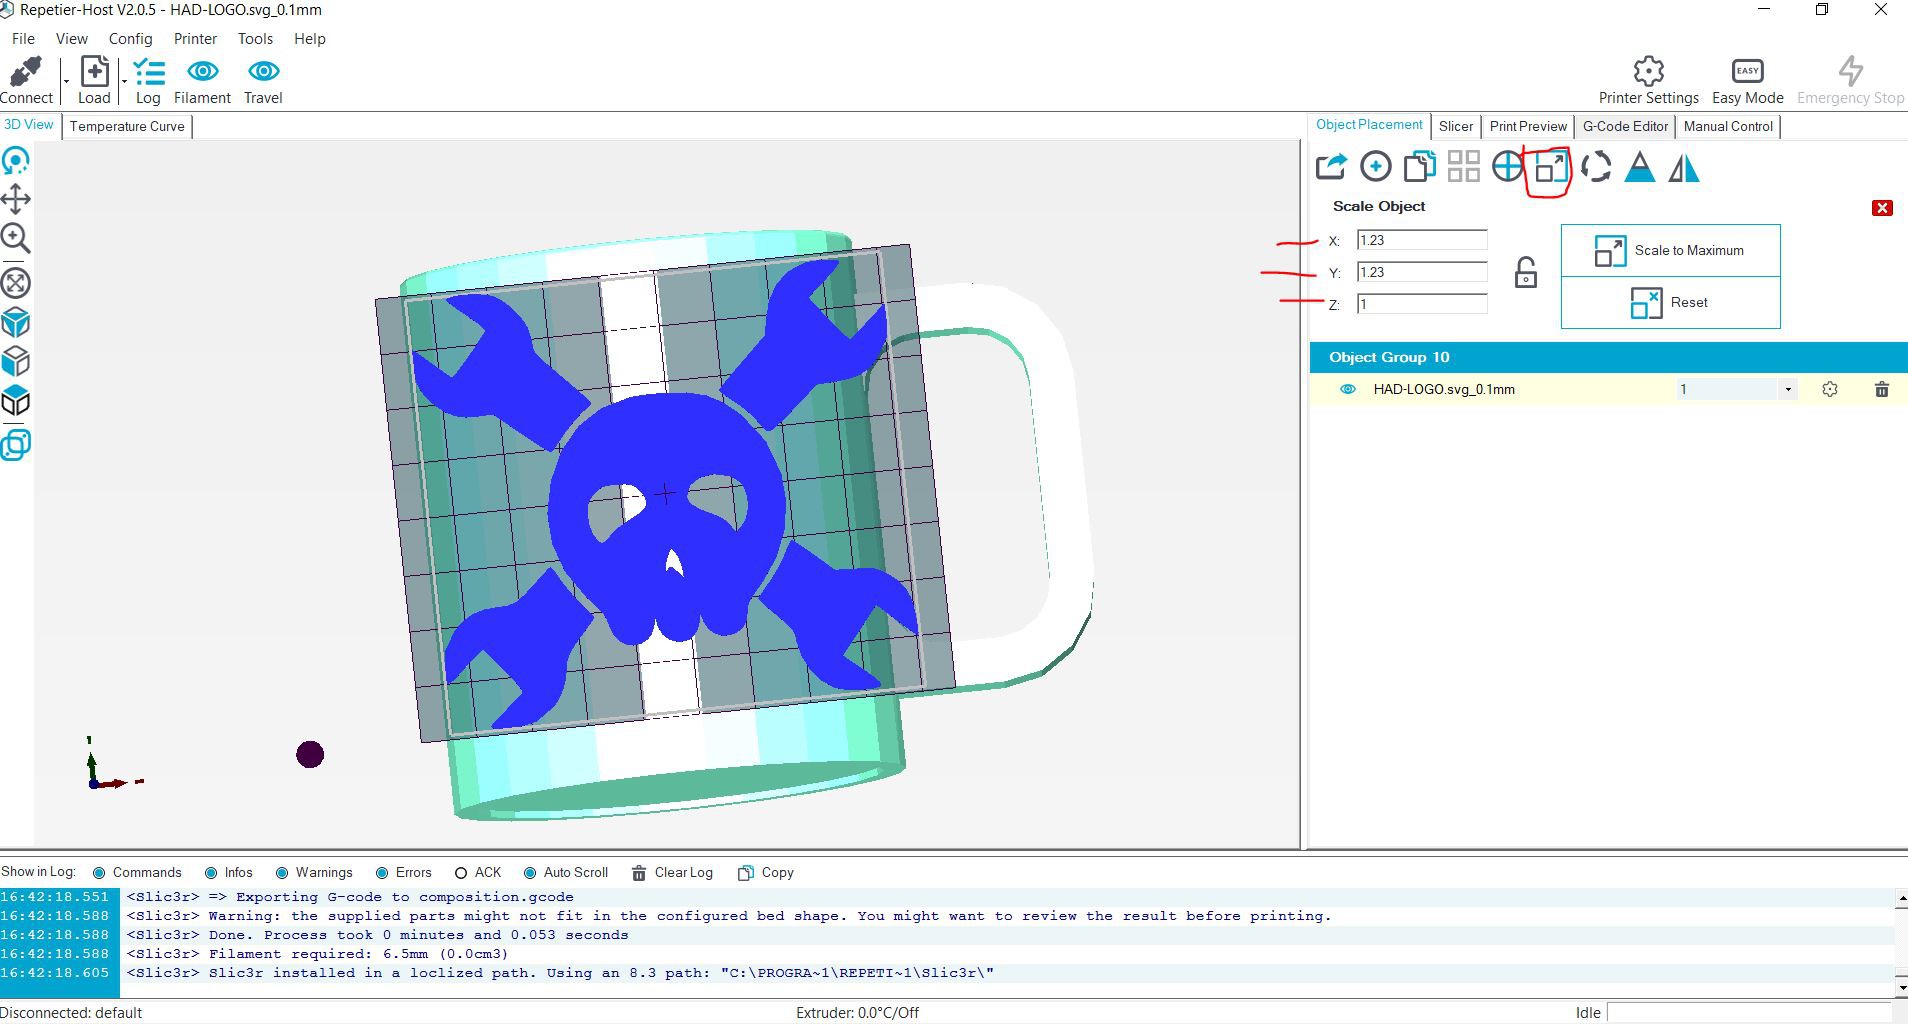
Once that is setup you can import the STL file you created. Scale it how you want, the bigger it is the easier it will be to draw. Just make sure not to scale the Z axis, so the stl file remains at 0.1mm tall. If you scale it down it will throw an error, and if you scale it up it will draw the same thing over and over again.
In the document attachments there is a folder with some prepared files named "Example Drawing Files"
![]()
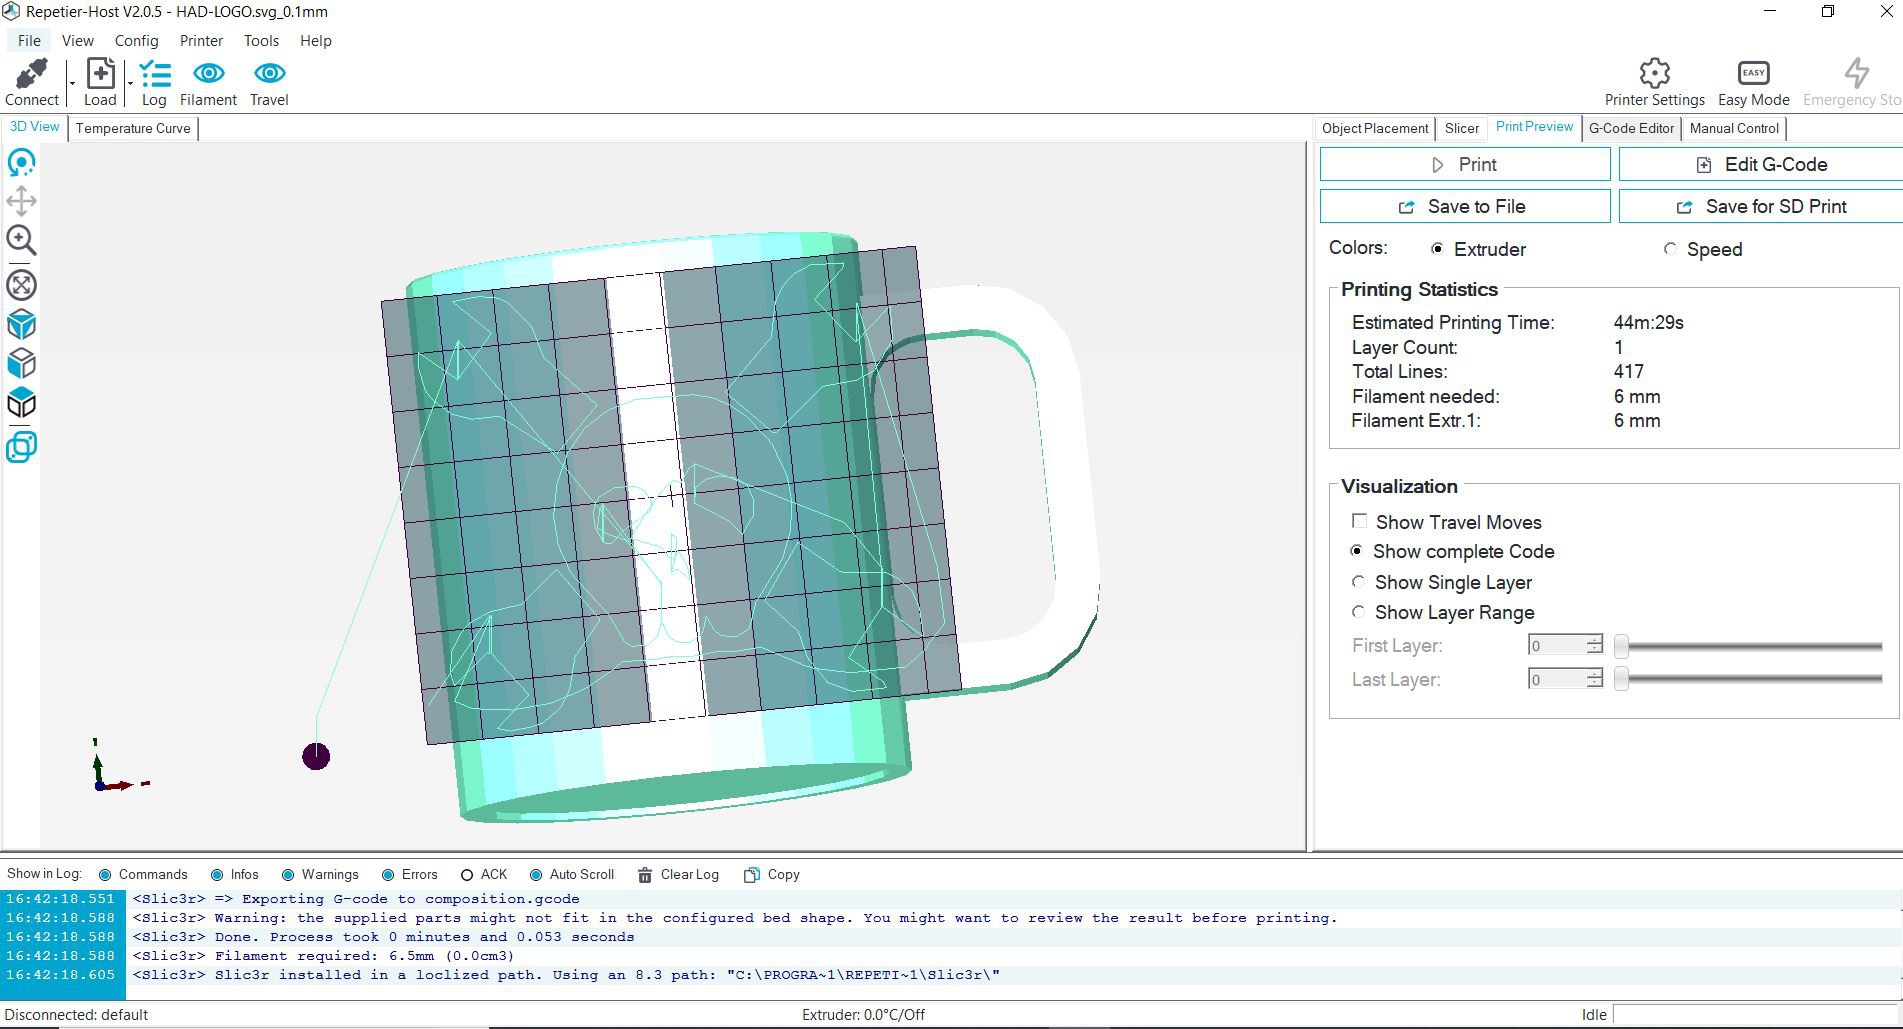
Then Click the big slice with Slic3r button to generate the gcode. You can check to make sure it is only drawing one layer in the Z axis. (The estimated print timer is useless here, but you can estimate exactly how long a job will take because each line takes the same amount of time to complete ~3 sec, see below)
![]()
The first 17 lines of the auto-generated gcode will be useless information and will slow down our drawing process. (because our program will have to take the time to send the liens one by one). In the Gcode Editor tab I highlight lines 1-17 and delete them.
Then export the gcode by clicking on the 'print preview' tab and click the 'save to file' button. The name you choose is important because our processing program will have to find this file and read it. Pick the name "GCODE".
Next we use a program called "Processing" to send the gcode. https://processing.org/
Find this specific code saved as filename 'processing' in the TinyCNC Github: https://github.com/mechengineermike/Mug-O-Matic/tree/master
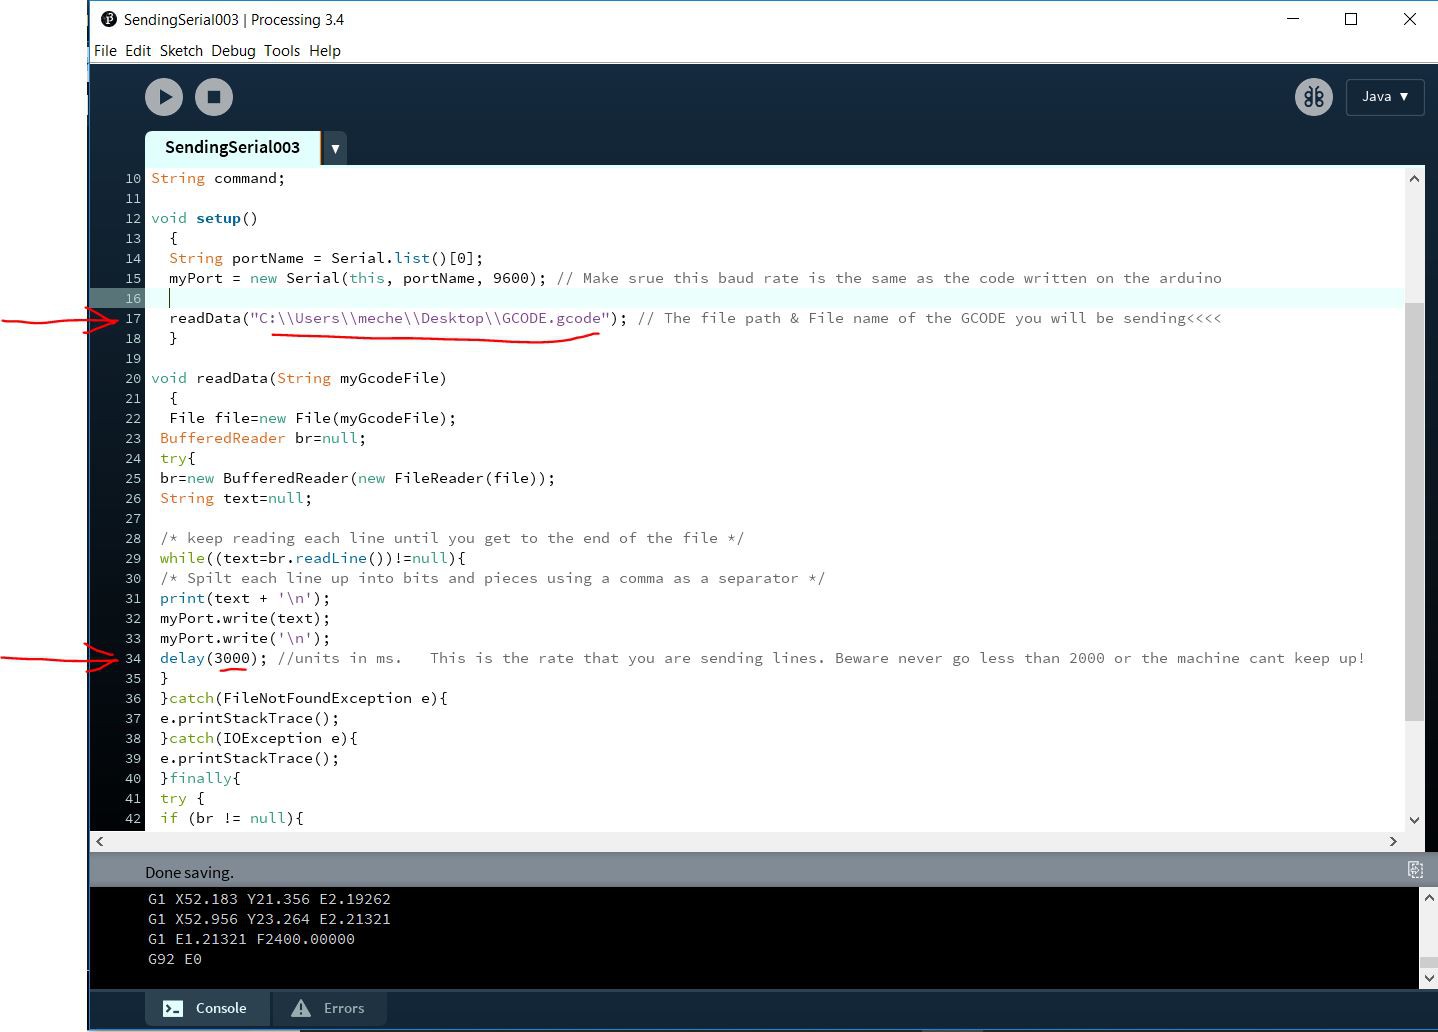
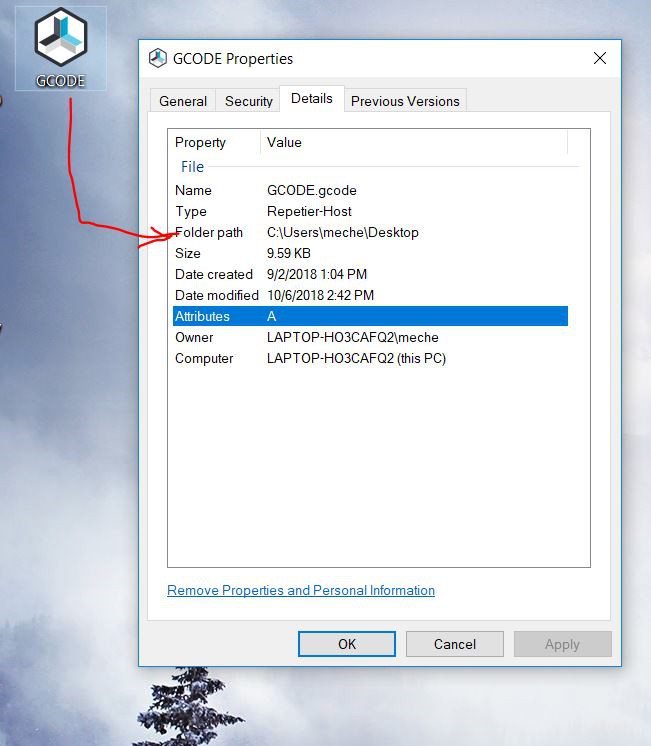
Note that the only things you will want to change on this document are the two lines highlighted in red below. Line 17 is the filepath to where ever you saved your GCODE file. I saved mine on my desktop, but notice that my desktop file path will have a different username than yours.
Line34 is the speed at which you send lines of gcode. Setting this delay too low will send lines too quickly and your robot wont have time to finish its previous command before starting a new one. Fortunately I wrote the arduino code to take this into consideration and it calculates weather or nor a dotted line will be complete by the time a new command comes in, in which case the program makes the less accurate straight line drawing just to make sure it finishes.
Selecting a longer delay makes your drawing slow. Around 3000 milliseconds is a good balance. (Note: Eventually the arduino code will be smart enough to auto detect the line send rate and accommodate to whatever it is!)
![]()
![]()
Its a bit of a mouthful to describe but once you understand you can draw & edit gcode really quickly!
-
12Experiments & Expansions
It might surprise you but the Mug-O-Matic in drawing mode has a rectilinear coordinate system. Even though its X axis twists, the work piece is also round so it cancels out and the math is still easy. :)
You'll see in my examples that I like to draw line segments as a series of dots. This is because the motors I use are quite small and moving small distances under load can cause a stall. Dots solve the problem by lifting up the pen so the motors can move freely before poking down again. In this way it can make very small moves so the dots connect and the result appears continuous. The downside is that this takes more time and makes a poking noise! My current version of the code uses a hybrid method where I can set a threshold for line lengths for which to draw dots vs continuous lines so I can optimize speed vs detail. I think it may be that there is never a perfect one size fits all drawing setting, much like with 3D printing, you can always improve for a given situation with a bit of tuning.
Additionally, the gcode drawing program does some other cool things. It automatically breaks all line commands down into line segments of the minimum draw-able resolution. It also self detects direction changes to account for motor gear backlash.
A really cool thing about this toy is that you can rebuild it into completely different kinds of robots. All using the same tools and sometimes with adaptations of the same arduino code. For instance if you add a gripper and a couple joysticks you can make Mug-O-Matic into an RC claw. (and in this case you do end up with a cylindrical coordinate system.) The TinyCNC PCB is custom designed to allow for easy additions of electrical accessories you might want like an ultrasonic sensor, a built in buzzer, up to 2 joysticks, an IR remote, and bluetooth control from an android smartphone.
All parts in the Tiny CNC collection have the same mounting pattern and have proven designs which means this is a great tool for building whatever robots you might be imagining. At the moment I have built around 10 different useful combinations. The models & basic code for those are shared but the Mug-O-Matic is the primary robot that I will support. Also the STEP files have been shared which means that you can alter the 3d models as you wish. I hope others will find this collection to be fun & useful!
One further experiment of note is that I have found that the MG91 servo motor has the same mounting dimensions as the MG90s except it has more torque and better heat sinking...at 2.5 times the cost! In my opinion it is totally worth it!
Another further experiment i am playing with is the idea of drawing via dot matrix. Basically send the Mug-O-Matic an array of 1's and 0's for every deg of possible travel, and having it move in a typewriter-like path and making a single dot every time it gets to a one. See the final pic below and look closely for the EngineerDog.com Logo.
![]()
![]()
Mug-O-Matic: A Modular Tiny CNC
Open Source Reconfigurable Robot Arm for Learning STEM. Make It Your Way!


Discussions
Become a Hackaday.io Member
Create an account to leave a comment. Already have an account? Log In.