 kelvinA
As I (and Charachorder founder has) mentioned in the past, ease-of-learning is paramount for anything that requires a new skill. This is why I wanted to have an LED ring that acted as a peripheral-readable display for showing:
- which of the 9 states each well is in
- the lock states (eg. the CAPS lock LED)
I knew that I wanted the LED's to look like a (powerful) bulb:
- It turns to full brightness immediately
- Its brightness "decays" when turned off.
Bulbs heat up the filament quickly but take a fraction of a second to cool down again. LEDs turn off immediately unless they're connected to a capacitor (such as a capacitor inside a PSU):
The issue is that an immediate turn-off a) doesn't look as nice and b) will call attention because the LED was on and suddenly it's completely gone. At the same time, the decay profile needs to happen fast enough so that it's that it's turning off. As you can see in the above video, the capacitance is so large that it takes a few seconds to notice that the LED's brightness is decreasing. It's also why using a linear decay wouldn't look as good as an exponential one (like a capacitor).
I wanted to feed constant ambient light data from the TEMT6000, so the brightness value of the LEDs would also have to constantly change. Furthermore, I wanted the LED ring to have a standby white value so that all 16 LED positions are always visible when Tetizmol is on so that it's still visibly a circle even if nothing is pressed. All in all, this whole idea is a "live animation", and the KMK RGB extension isn't; it doesn't take into account things like key presses the way my Z88 Typewriter-style keyboard does. So while I started from rgb.py, almost none of it remains.
Pog.py
As expected, when I started modifying KMK's RGB extension to become a new thing called DecayRing, I hit the dreaded MemoryError.
I noticed that I had more memory free when I removed a layer in pog.json. So I started reading into pog.py and memory reduction strategies and added the lines with the comments:
config = {}
configbuffer = bytearray()
configbufferlen = 0
try:
    with open("/pog.json", "r") as fp:
        x = fp.read()
        fp.close()          # prevent Windows thinking CIRCUITPY is corrupt
        # parse x:
        config = json.loads(x)
        configbuffer = json.dumps(config)
        configbufferlen = len(configbuffer)
except OSError as e:
    microcontroller.nvm[0] = 1
    raise Exception("Could not read pog.json file. mounting drive")
                            ## Free up memory ##
del x, configbuffer         # temps to store / validate json
config['keys'] = ()         # only the desktop app uses this
config['directPins'] = ()   # not being used for anything on Tetizmol
Variable 'x' was the largest, coming in at 24KB of memory usage. All the other stuff saved around 7-9KB each, with fp.close() saving 300 bytes. Saving as an empty tuple '( )' was smaller than an empty list '[ ]'.
I assume that the garbage collector is supposed to at least deal with the unused variables, but I hypothesise that KMK tries to load in the extensions so fast that it believes they're still being used. It doesn't help that there's a few 'import pog' lines in many places, potentially enforcing the belief that something somewhere is going to want to use 'x' and 'configbuffer' down the line.
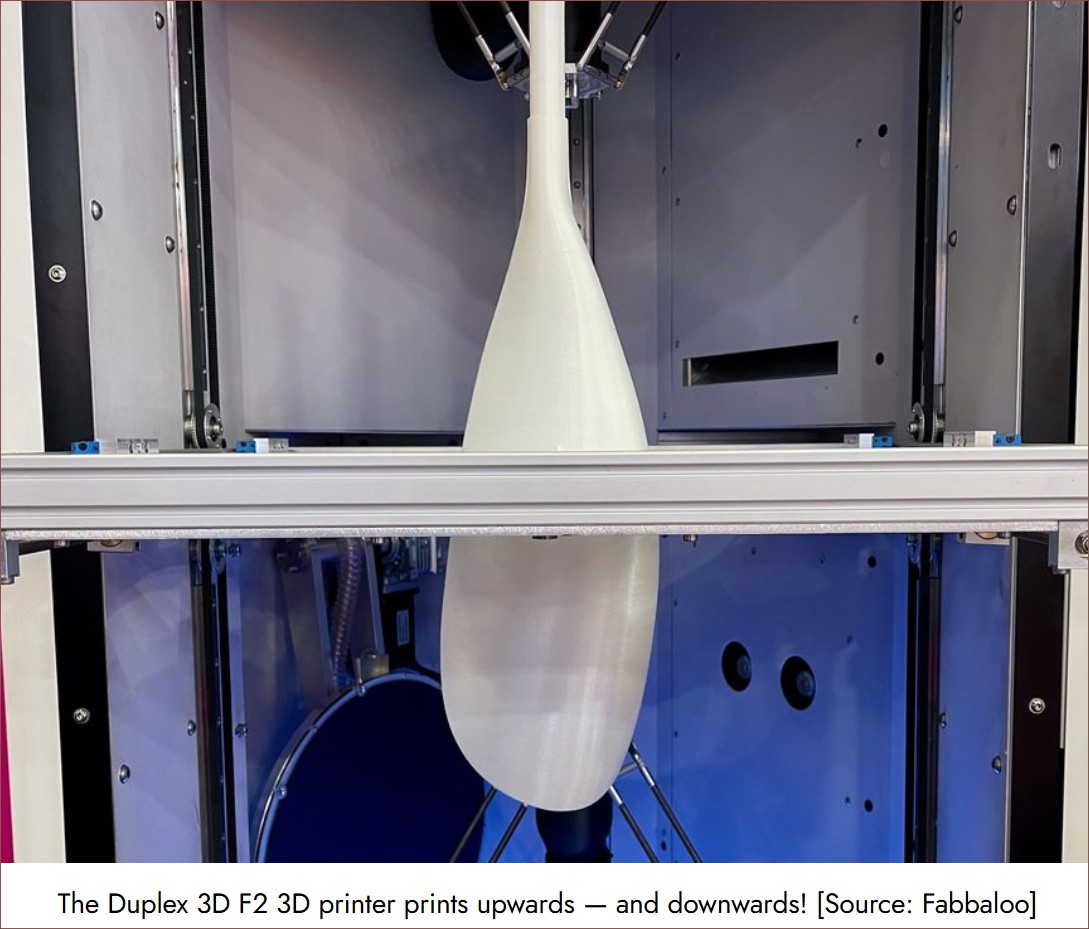
I saved upwards of 40KB of memory by doing this, meaning that I didn't have to sacrifice one of my extra layers. I've now renamed them "TileLayer" and "TopLayer" because I've moved them to Well4: 3 and 9 respectively. Because KC.TRANSPARENT uses the "TrueLayer", I like to think of these 3 layers like the Duplex 3D printer: TileLayer is the floor-side and TopLayer is the ceiling-side of the TrueLayer print-bed:
I guess another way to think of it is like the silkscreen on a double-sided PCB.
[Mar 08] - While much RAM has been saved, it's not enough for the ESP32-S2. Upon further inspection, Circuitpython only sees 97KB of total memory free, meaning that there's only 14KB when it arrives at the start of my code. In contrast, the RP2040 has 163KB of contiguous memory, there's 62KB available at the start of my code and 39KB available when everything is loaded.
DecayRing and DecayPixel
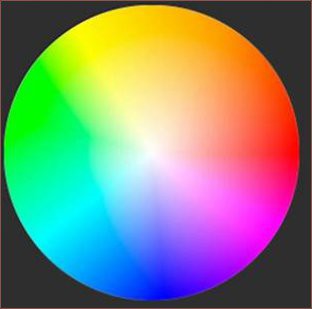
With the aid of Gemini, I was able to code some helper functions and learn more about Python. The main helper function was to blend a foreground+alpha with the background (which is that standby white I was talking about earlier). Another was to convert a hex code to a byte array of hue and saturation. You might be wondering "what happened to value/brightness or luminance?". Well, unlike a screen, a singular LED "pixel" doesn't really look like it produces "grey", just "a less-bright white". Hence, the "colours" available is those in this circle:
I am considering adding a feature where I can specify something else like "=00FF" in the Pog App to specify red directly, because then it makes it easier to adjust the hue without having to use a colourpicker.
During implementation, I was stuck at around 15 - 25FPS. Now, KMK doesn't have a concept of "dropped frames", so what really happens is that the latency quickly increases into the seconds as it calculates every frame. Like, I'd turn on the caps lock and it would only show 6 seconds later!
What I did in attempts to improve this were:
- Make sure I'm only using integer arithmetic
- Using a property to recalculate a single lookup table when the "duration" variable is changed, instead of having to calculate the exponential on each and every frame.
- Create a KMK task for each pixel, instead of a single render task.
- I'm assuming that the KMK scheduler takes advantage of the dual RP2040 cores.
- It's not like each pixel needs to be rendered sequentially, just once every time period.
- Only render a new frame if it would be different from the one currently stored in the buffer.
- That means if an ambient light sensor either isn't used or its value doesn't change enough, a new pixel brightness doesn't need to be calculated.
- This gave the most speed up, as now it only really needs to calculate pixels during their decay.
I've currently got the defaults set at 100FPS and 0.5s duration. Turns out peripheral vision is more sensitive to luminance quantization than I hoped.
A bit about brightness
Because the pixels are so bright, I had to clamp the RGB values to be at least 1, 1, 1 during the decay or else the pixel might turn off completely for 1 second and then brighten to standby again when at 0 brightness. This is most likely due to the integer arithmetic, rounding something like...
255/16/16 = 0.99609
...down to 0, since it's all floor division:
255 // 16 = 15
15 // 16 = 0
The standby brightness is round(sqrt(255)) so that when it divides again at the lowest brightness, RGB = 1, 1, 1 is output to the ring.
The brightness curve lookup table is then 16 - 255 for all 256 possible values.
# Precompute LUT for the brightness curve
bg_val = 16 # background V in HSV (sqrt255 so min brightness outputs 1,1,1)
brightcurve = bytearray(
    int(pow(i / 255.0, 2.0) * (255 - bg_val) + bg_val)
    for i in range(256))
So 0 brightness setting is curve[0] which = 16. This is the "brightness numerator" which is what scales the brightness down during pixel render.
The TEMT6000 output acts as an auto brightness within the range of the max brightness set by the user:
user_brightness * normalised_TEMT = auto_brightness
brightness_curve[auto_brightness] = brightness_numerator

# Where everything except normalised_TEMT is 0 - 255
# and normalised_TEMT is 0.0 - 1.0.
Hopefully, the curve can be tuned well enough that the user_brightness can be at 255 all the time. Obviously, I'll have to do some moving averaging so that the auto_brightness isn't constantly jittering.
Discussions
Become a Hackaday.io Member
Create an account to leave a comment. Already have an account? Log In.