 Thomas Büngener
What it does
- Receives Art-Net (UDP/6454) and sACN/E1.31 (multicast/5568) from any lighting controller — QLC+, MagicQ, GrandMA, Resolume, TouchDesigner, Chamsys, anything Art-Net compliant.
- Outputs full 512-channel DMX512 over isolated RS485 to your fixtures.
- Runs both protocols simultaneously with conflict detection when multiple senders are active.
- Exposes a live web UI that shows all 512 channels at 25 fps via binary WebSocket frames — no polling, no lag.
- Lets you take manual control from the browser: click any channel, drag the slider, see fixtures respond instantly. Blackout button kills all channels in one click.
- OTA updates via three paths: browser upload, ArduinoOTA from your IDE, or one-click "update from latest GitHub release" — no USB cable needed after the first flash.
Why I built it
Commercial Art-Net nodes cost €150–€400 and ship with web UIs that haven't been redesigned since 2010. Open-source firmware exists but usually targets a single protocol, lacks live visualization, or assumes you're already a DMX expert. I wanted something that:
- Works out of the box on any €8 ESP32 DevKit + €5 isolated RS485 module
- Shows you exactly what's coming in on the wire, in real time
- Catches conflicts (two senders fighting for the same universe) before they ruin a show
- Updates itself from the internet, because climbing back behind a rigging truss to re-flash is not fun
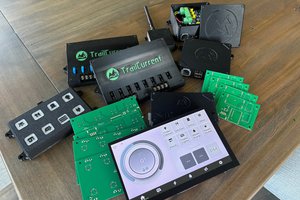
Hardware
- ESP32 DevKit v1 (or ESP32-S3 DevKitC-1 — both targets are built by CI)
- Waveshare TTL-to-RS485 (C) — galvanically isolated, auto-direction, no DE/RE pin to manage
- XLR-3 or XLR-5 panel socket
- Total BOM cost: ~€20
Full BOM with Amazon links, wiring diagram, pinout tables, and assembly instructions are in the GitHub README.
Software stack
ESP32 firmware in C++ with PlatformIO. Custom build pipeline that converts HTML pages and PNG assets into PROGMEM arrays so the entire web UI ships inside the firmware binary — no SPIFFS, no LittleFS, no separate filesystem image to flash. Web UI is Bootstrap 5 dark theme + vanilla JS. WebSocket pushes a packed 528-byte binary frame containing fps, RSSI, heap, uptime, jitter, conflict flag, and all 512 DMX values.
Persistent config (universe, protocol, hostname, OTA password, LED type/pin) is stored in NVS and survives reboots. First-boot WiFi setup runs a captive portal AP via WiFiManager. mDNS makes the device reachable as dmx-gateway.local so you don't need to look up its IP.
GitHub Actions builds release firmware on every push to master — bootloader, partition table, boot_app0, and firmware binaries are all attached to the latest release tag for download.
Tested with
- QLC+ (open-source lighting console) — Art-Net Universe 0, "Full" transmission mode
- sACN senders on the same LAN running in parallel
- DMX fixtures: LED PARs, moving heads, fog machines, generic dimmer packs
Status
Working, stable, in active use. Firmware version 1.x with OTA. Roadmap (in the GitHub repo) includes scene presets, fade engine, MQTT/Home Assistant integration, RDM support, and multi-universe via additional RS485 ports.
Get it
- Source + docs: https://github.com/tombueng/LumiGate
- Pre-built firmware: https://github.com/tombueng/LumiGate/releases/tag/latest
- One-line Windows flasher: PowerShell command in the README — auto-installs Python + esptool, downloads firmware, walks you through boot mode.
Issues, ideas, and PRs welcome.
 Dave Floyd
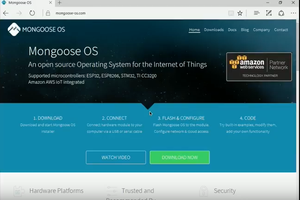
 MongooseOS
 rmingon
 Eugene Andruszczenko