 Maulik
-
1Step 1: Wiring the Sensor Node
![]()
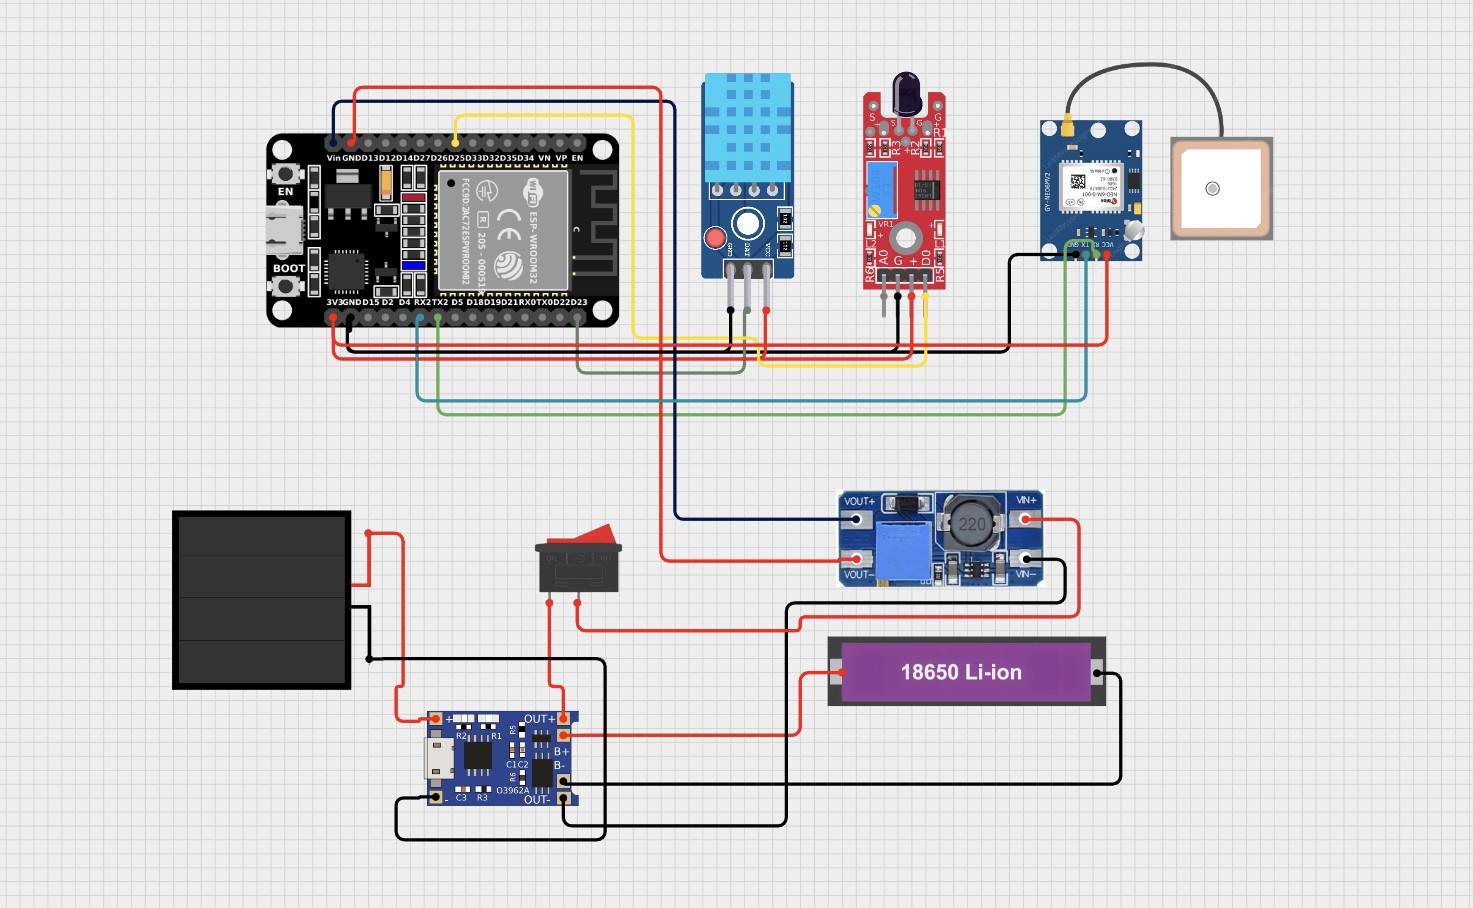
Follow the system connection matrix to wire your sensory peripherals directly to a 30-pin ESP32 DevKit v1. All peripherals operate natively at 3.3V logic levels:
DHT11 VCC connects directly to the ESP32 3V3 power rail.
DHT11 DATA connects to GPIO 23.
DHT11 GND connects to the common system GND plane.
IR Flame Sensor VCC connects directly to the ESP32 3V3 power rail.
IR Flame Sensor DO connects to GPIO 25. This digital signaling output pin drops to an active LOW state whenever infrared radiation from an open flame is verified.
IR Flame Sensor GND connects to the common system GND plane.
Neo-6M GPS VCC connects to 3V3.
Neo-6M GPS TX connects directly to GPIO 16 (mapped to hardware Serial2 RX).
Neo-6M GPS RX connects directly to GPIO 17 (mapped to hardware Serial2 TX).
Neo-6M GPS GND connects to the common system GND plane.
Note: The primary Ground Control Station (GCS) base unit requires no sensor wiring layouts; it operates as a standalone bare ESP32 linked directly to a laptop via its USB interface connection.
-
2Step 2: Setting Up the IDE Environment & Libraries
- Open your Arduino IDE application interface.
- Navigate directly to File > Preferences and add the official Espressif development link to your Additional Boards Manager URLs field:
https://raw.githubusercontent.com/espressif/arduino-esp32/gh-pages/package_esp32_index.json
3. Open Tools > Board > Boards Manager, run a targeted search for esp32 by Espressif Systems, and initialize the download. This framework provides native, underlying libraries for both WiFi.h and esp_now.h.
4. Access Sketch > Include Library > Manage Libraries and install the following toolkits:
- DHT sensor library (distributed by Adafruit)
- Adafruit Unified Sensor (underlying dependency layer)
- TinyGPS++ (distributed by Mikal Hart)
5. Connect your device to a data port, select Tools > Board > ESP32 Dev Module, and establish the mapped active COM Port link.
-
3Step 3: Configuring & Flashing Firmware Nodes
Download the complete core codebase files directly from the repository index. For every independent sensor node deployed into your canopy grid, you must manually iterate the variables inside the configuration block at the top of the AranyaLink_Node.ino file before hitting upload.
// Change these parameters sequentially for every individual hardware node deployed #define NODE_ID 1 // Unique integer tracking index per node: 1, 2, 3, 4... #define NODE_LAT_FALLBACK 12.345678 // Default deployment latitude coordinate quadrant #define NODE_LON_FALLBACK 98.765432 // Default deployment longitude coordinate quadrant #define TEMP_THRESHOLD 50.0f // Trigger target in °C (raise to 55.0f-60.0f in extreme summer environments) #define FLAME_ACTIVE LOW // Low setting matches standard KY-026 active outputs- NODE_ID: Every independent field module must carry its own standalone sequence integer to map verification traces accurately across data packets .
- Fallback Coordinates: These values function as geometric placeholders during initialization loops until the active Neo-6M module gains a satellite fix, which automatically overrides fallback telemetry with live streaming coordinate flags.
To prepare your receiver base station, open AranyaLink_GCS.ino and upload the firmware directly to your baseline ESP32 module with zero software parameter alterations required.
-
4Step 4: Desk Verification & Validation Tests
![]()
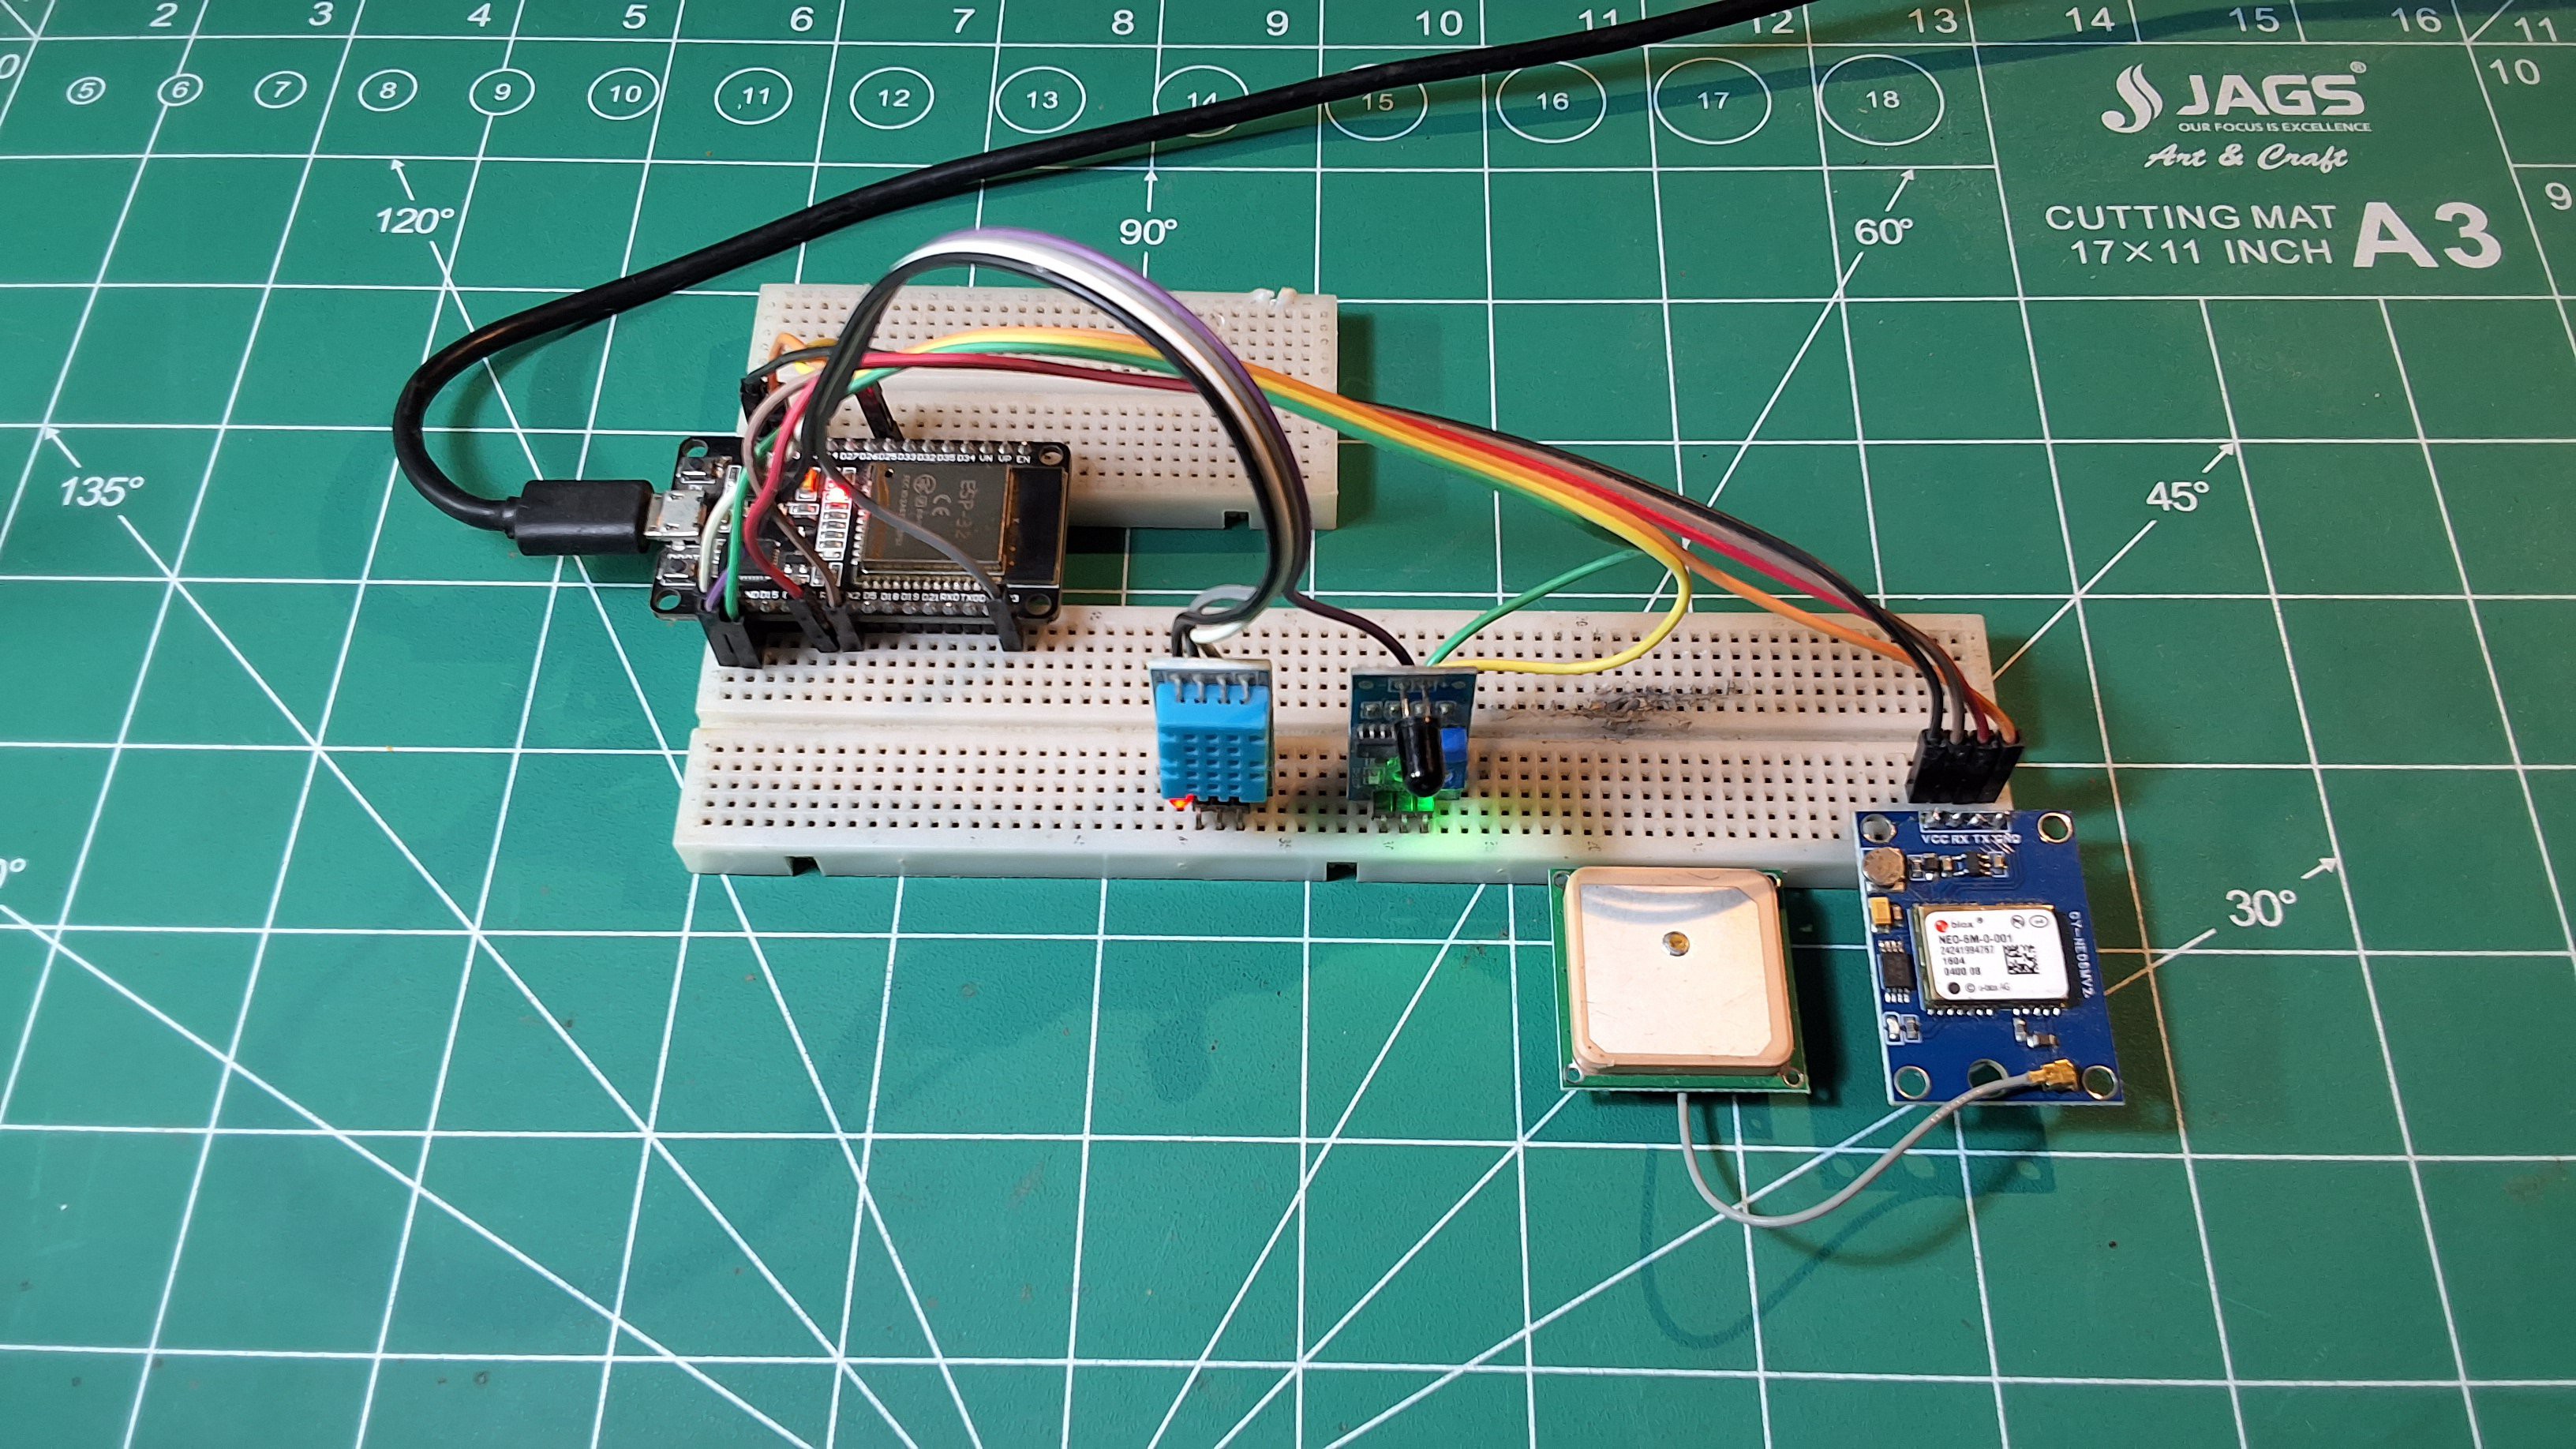
With both modules powered up, connect your GCS receiver board to your workstation, open the Arduino IDE Serial Monitor, and initialize the tracking baud rate parameter to 115200. You can simulate a live fire warning trace directly on your workbench:
1. Bring a localized heat source (like a lighter or candle) within close proximity of the blue DHT11 shell until thermal logs cross beyond your specified TEMP_THRESHOLD value.
2. Simultaneously project the open flame signature towards the optical photodiode window to clear the infrared threshold target.
3. When both constraints register matches within a shared 2-second checking interval, the local node logs an active [ALERT] FIRE DETECTED! sequence and maps a binary packet broadcast. Within 1–2 seconds, the receiving base monitor outputs a fully formatted diagnostic printout listing raw telemetry, verification counts, and an active Google Maps location hyperlink.
-
5Step 5: Debugging Common Assembly Failures
- Garbled or Missing Console Boot Text: Verify the target Serial Monitor communication profile is set explicitly to 115200 baud.
- Fatal ESP-NOW Initialization Faults: The internal radio stack failed to clear memory parameters on startup. Click the physical onboard EN (Reset) button to power-cycle the module loop.
- Nodes Fire Locally But GCS Receives Zero Frames: Confirm that your devices are operating on matching radio frequencies. By default, the firmware binds directly to standard WiFi channel 1.
- Indefinite Satellite Search Status Loops (GPS:SRCH): Ceramic patch antennas cannot pierce dense steel or concrete interior structures. [cite_start]Relocate your module near a window pane or step outside under an unobstructed sky view for 60–120 seconds to achieve a valid satellite lock configuration (GPS:FIX)
-
6Constructing the Democratic Enclosure (Waxed Cardboard)
![]()
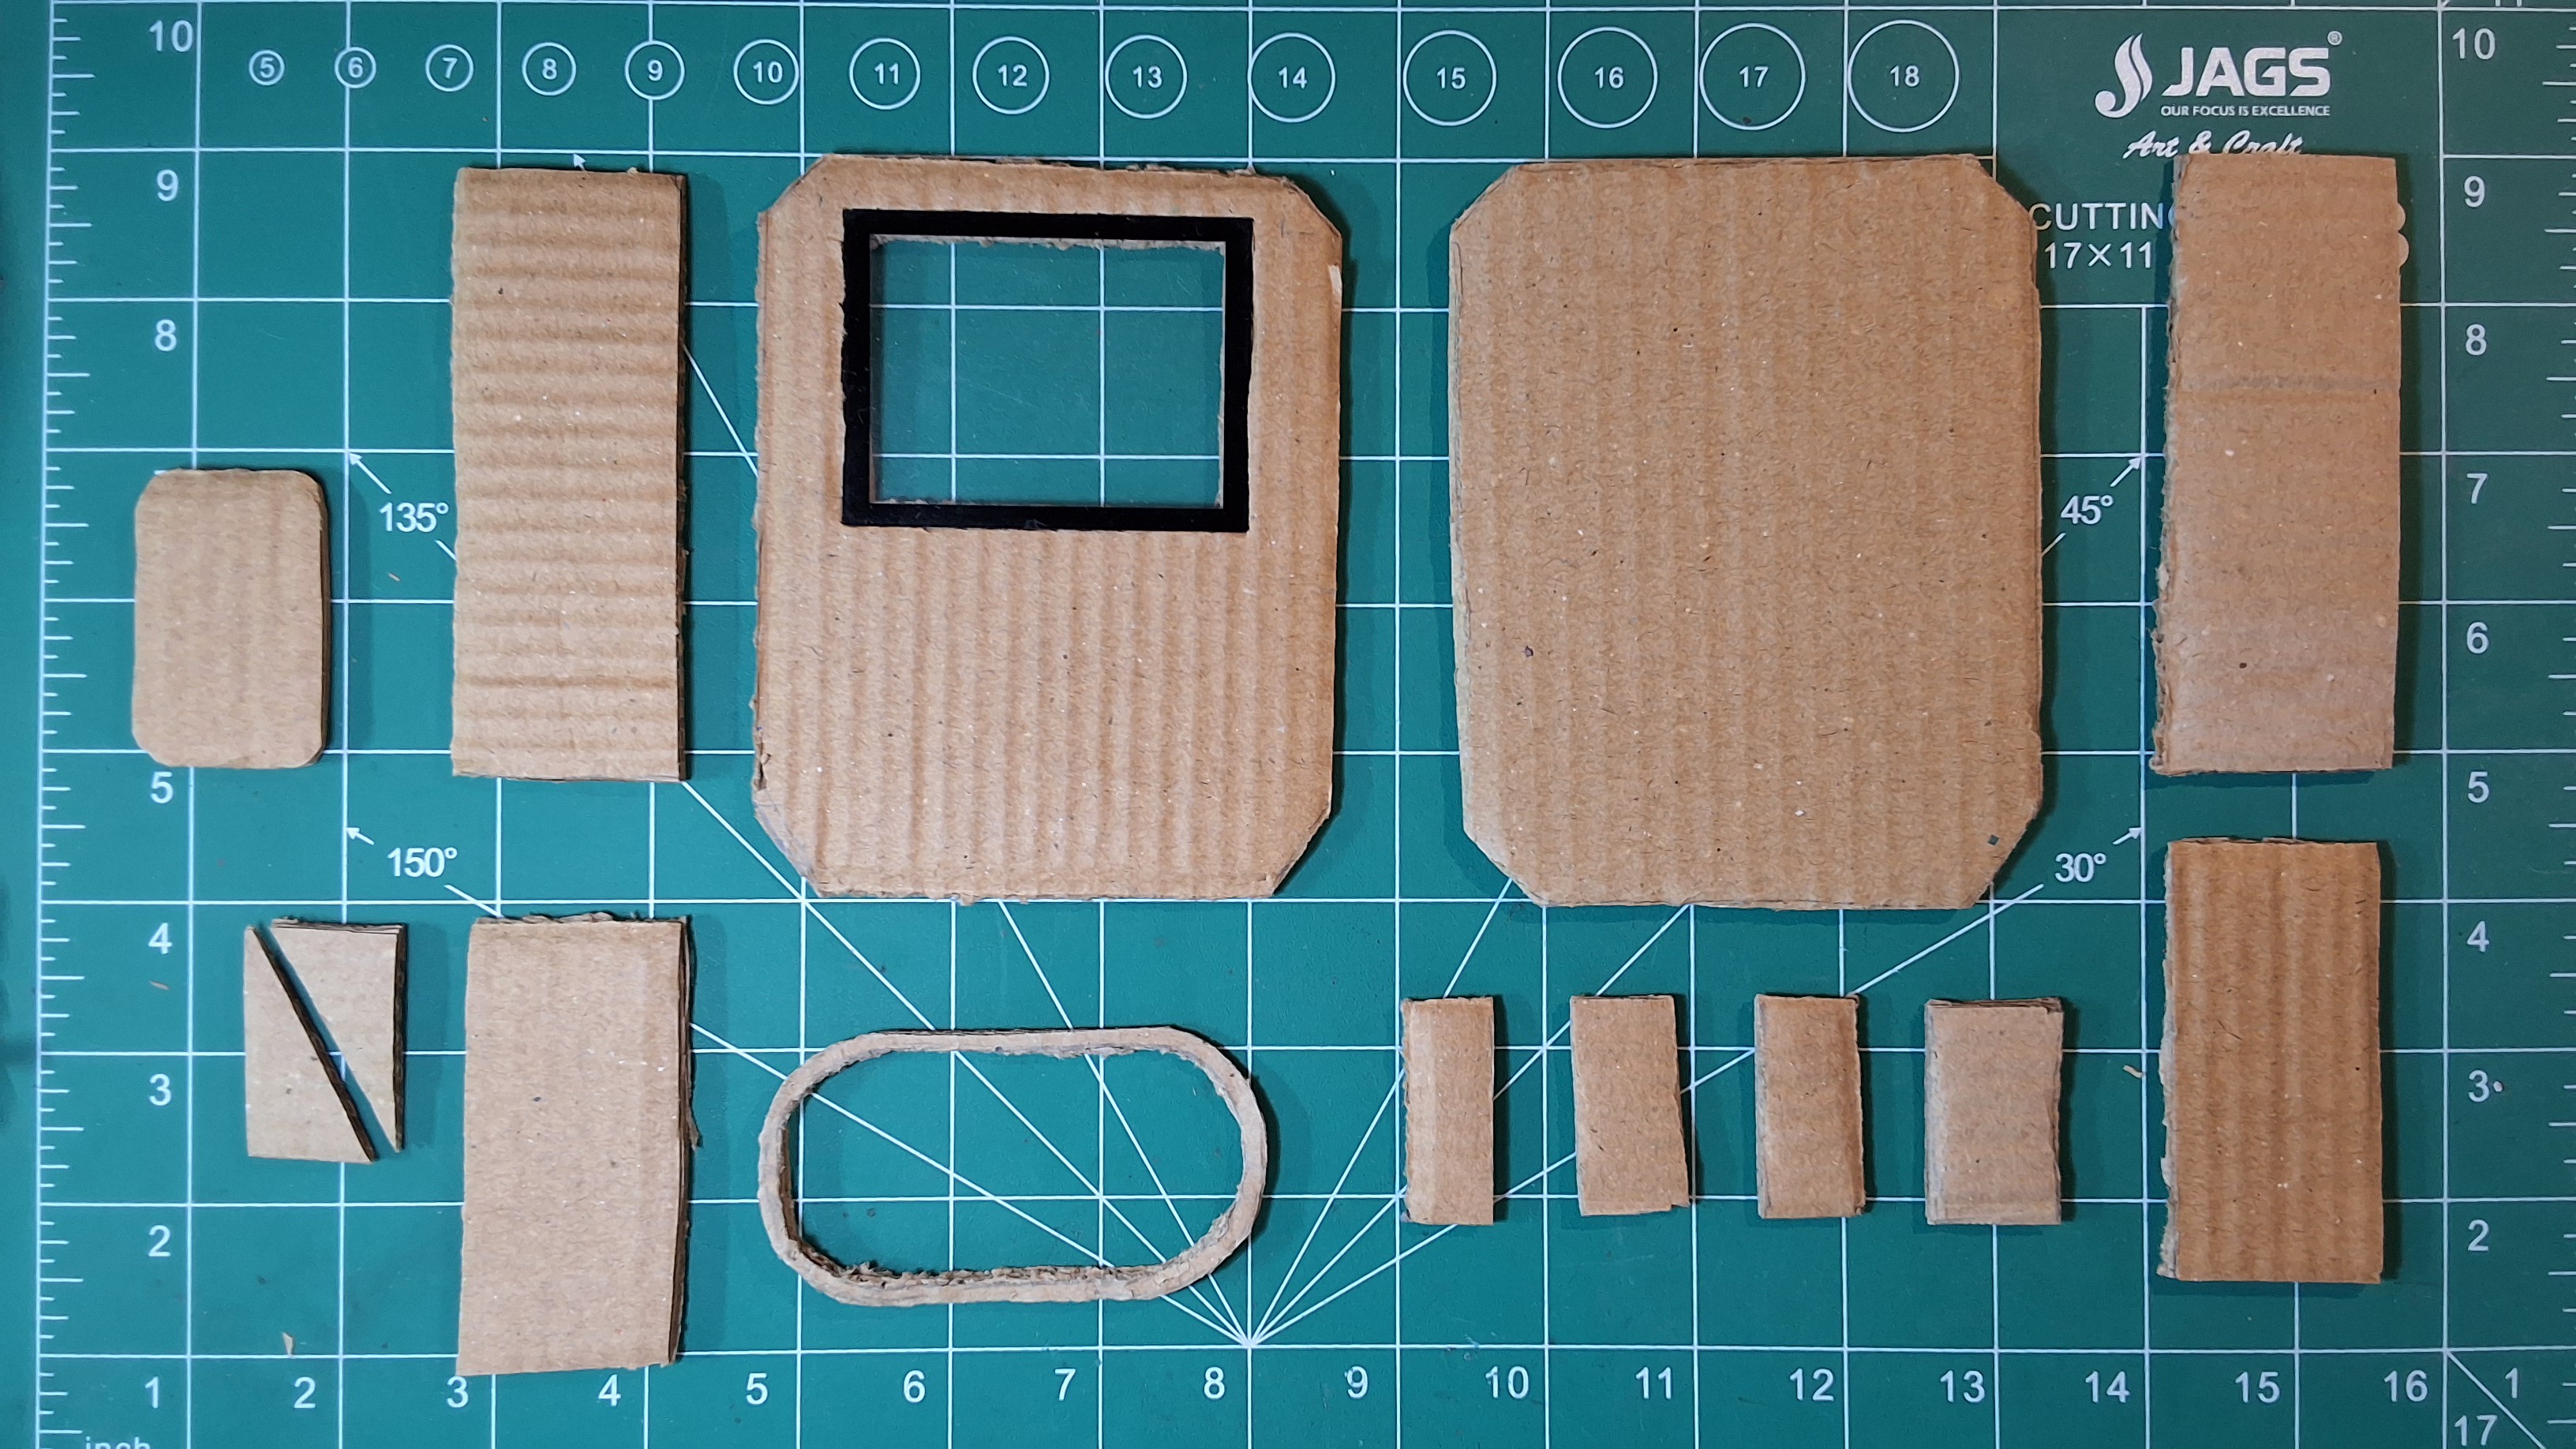
To match the open-source ethos of global accessibility, the baseline protective housing is engineered using recycled cardboard material, a hot glue gun, and packing tape:
- Structural Rigidity: Double-wall the cardboard across all six primary faces using a protective box-within-a-box configuration . Ensure an internal 5mm air insulation gap layer remains intact between the structural walls to significantly increase enclosure durability compared to standard single-layer card alternatives.
- Seam Weatherproofing: Seal all outer joints and physical framework seams using two independent layers of heavy-duty packing tape. Enforce a minimum 10mm overlapping boundary on each strip, running the tape lines continuously across the natural grain orientation of the cardboard matrix as well as directly parallel to it.
- Paraffin Fusion Waxing: Thoroughly rub a standard household wax candle firmly across every exposed exterior paper face. Pass a localized heat gun or high-temperature hair dryer smoothly over the cardboard until the wax melts completely, infusing deep into the cellulose fibers to construct a durable, water-repellent skin barrier.
- Sensor Interface Layout: Pierce targeted operational cutouts through the front panel tracking face. Position the primary DHT11 thermal head and the optical photodiode window of the IR flame module facing directly outward to poll the ambient forest environment, meticulously sealing every surrounding edge clearance using hot glue.
- Critical Cable Seals: Drill or carefully pierce a minimal entry port hole to pass the ceramic GPS patch antenna wire through the shell frame. Once routed, fill the remaining structural cavity completely with hot glue to insulate this highly weather-critical enclosure point from potential moisture intrusion.
Note: While a waxed and taped cardboard chassis will survive light rain elements for several weeks of localized field evaluation, long-term operational deployments passing through extreme monsoon or winter cycles should upgrade directly to a standard $2–3 IP65 ABS plastic junction box sourced from a hardware store—retaining identical core wiring and node configurations.
AranyaLink
An open-source, $10 forest fire detection mesh network using ESP32 & ESP-NOW. Autonomous, infrastructure-free, and self-healing.
Discussions
Become a Hackaday.io Member
Create an account to leave a comment. Already have an account? Log In.
I engineered AranyaLink at 15 on my bedroom desk with a $10 component budget. It is an open-source proof-of-concept and a modular foundation designed for the community to expand.
The platform is built to be a starting baseline. You can easily upgrade it by swapping the ESP-NOW protocol for LoRa to achieve kilometer-range hops, drop in a high-accuracy SHT31 temperature sensor, or add an SD card shield for local data logging.
I would love to hear your feedback, firmware optimization tips, or hardware expansion ideas in the discussion below. Let's build a more accessible layer of environmental protection together!
Are you sure? yes | no