 Peter G
I needed to fit some laser cut busbars with sharp corners into tight fitting rectangular holes of a 3d printed part. 3d printers don't really make square holes, they tend to have rounded corners. This gets worse the smaller the hole is as the hole dimensions approach the extruder diameter.
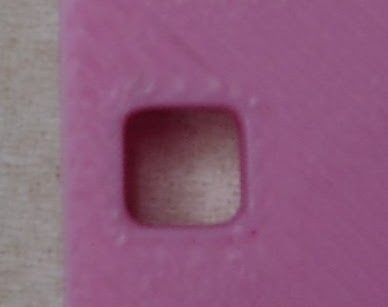
Not square!
I googled it for a bit and found answers like "it's impossible", "use a smaller nozzle", "just file it out after" and "use a rounded peg you dummy".
I'm lazy, my pegs are not round and I'd rather minimize post processing and nozzle changes.
In milling this problem is usually solved by exceeding the dimensions of the hole by half the bit diameter. That way the corner radius is outside the square hole and a square peg will fit like so:

I figured something similar should be possible with 3d printing.
The reason 3d printers get rounded corners is because the head has to come to a complete stop before changing direction. Since some pressure is left in the nozzle there is still some extruding going on and you end up with a blob in the corner. Pressure advance help but does not eliminate it completely. I also suspect that as the head goes around the corner it also drags some melted filament diagonally across the corner.
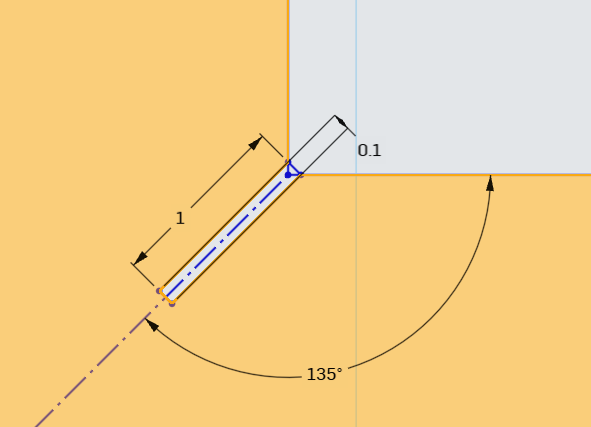
The solution I came up with was to add a small slot to the inside corners so the print head does not stop in the corner but instead inside the wall.
I created a test part with a range of slot dimension in order to figure out which is best. Slicing the part reveal a benefit I had not thought about. The seam ended up inside the slot in almost all cases, this should help with tolerances.
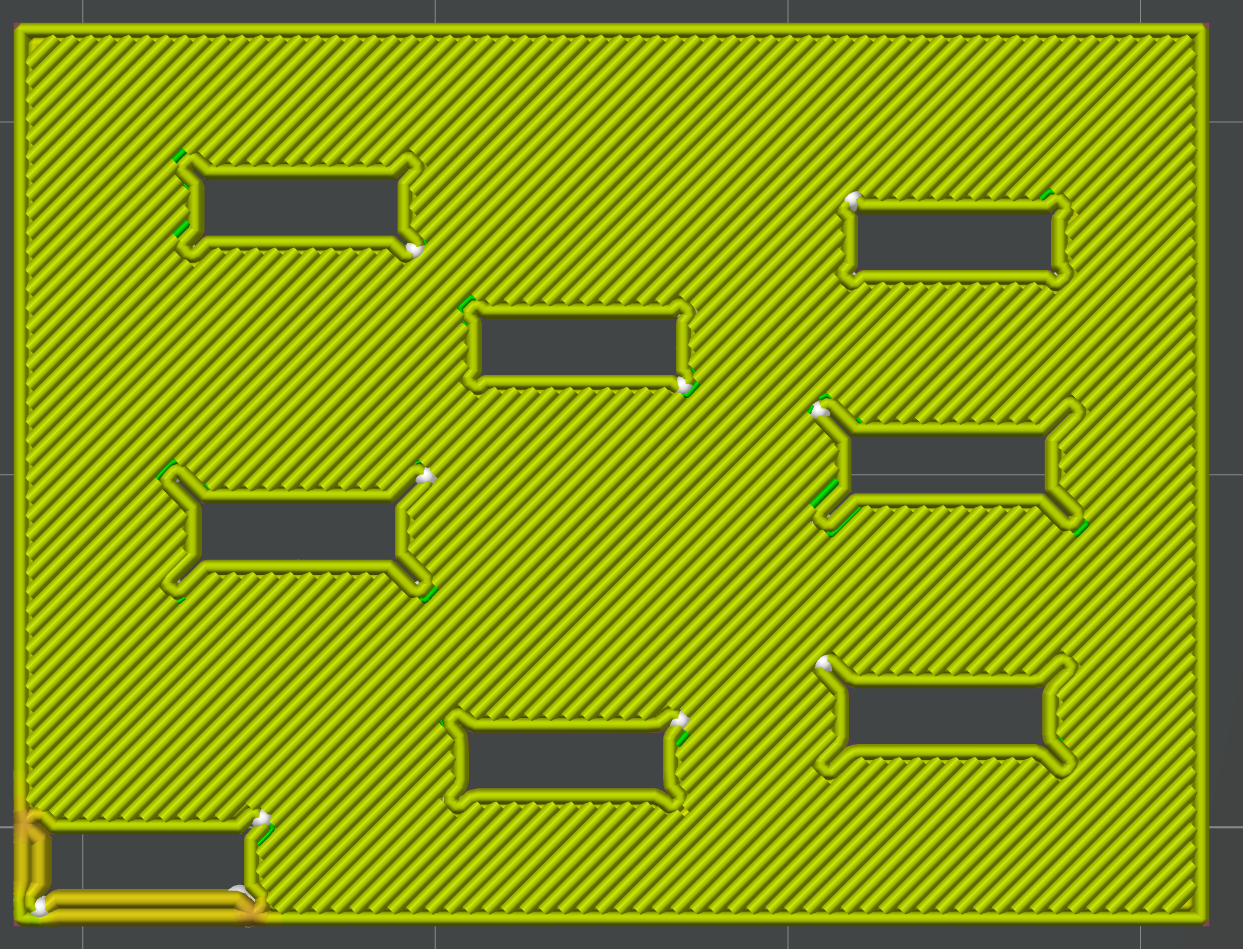
I should mention here that most slicers have a feature that will eliminate small gaps. In Bambu studio it's called "slice gap closing radius" under precision/quality. Reduce that variable if the gaps don't show up in the preview.
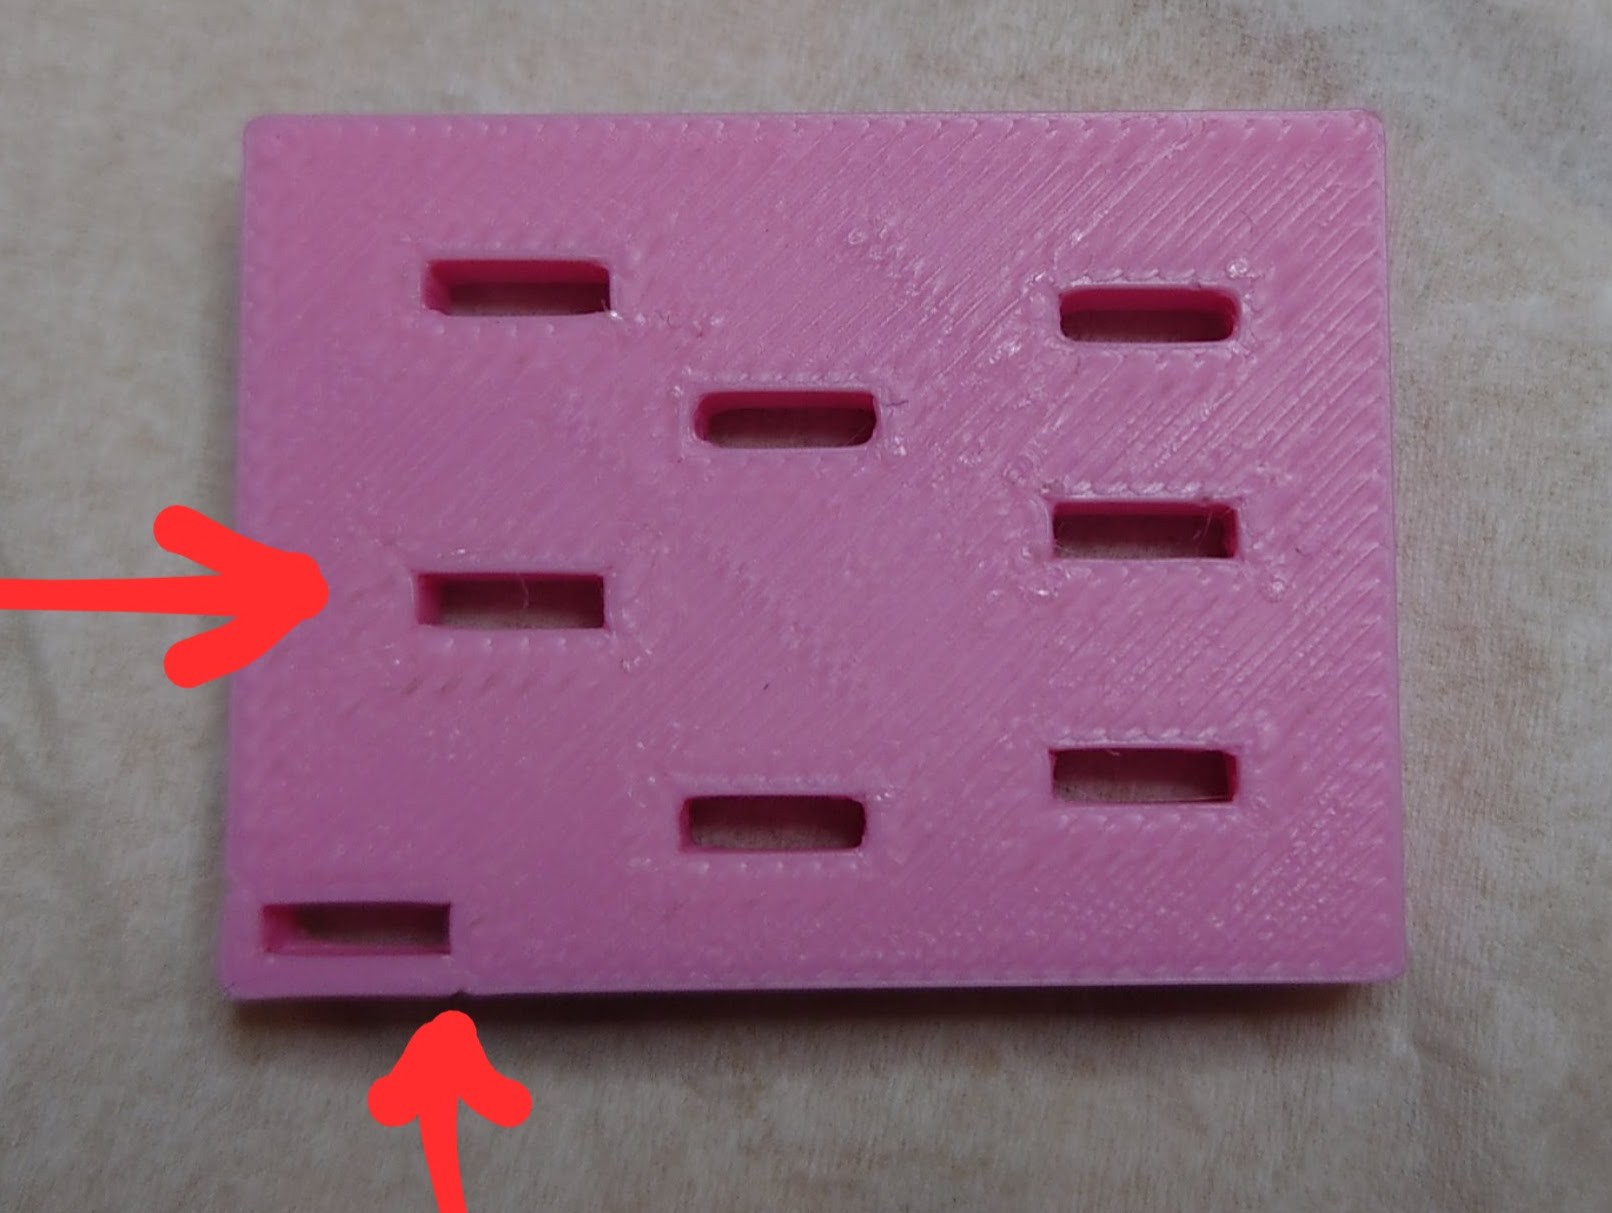
The resulting part reveals that deeper and wider slots are better. The winner is 1mm deep x 0.1mm wide and has really nice and sharp corners
0.5mm deep x 0.1mm also worked ok if there isn't room for more like in the bottom left corner. Surface defects showed up on the outside wall though.
Thinner and shorter slots don't seem to leave enough room for the blobbing to be fully hidden, especially in the corner where the seam ended up.
Now modeling these slots into each hole in your part is a pain in the behind. It would be much better if the slicer could add them automatically. Hint hint.
Discussions
Become a Hackaday.io Member
Create an account to leave a comment. Already have an account? Log In.