-
1Step 1
Plug your devices into your Pi, image your SD card with the latest Rasbian, set it up on WiFi, and get it's IP address, we'll need this in a bit. There are many good guides on how to do this including; https://www.raspberrypi.org/help/noobs-setup/ and https://learn.adafruit.com/adafruits-raspberry-pi-lesson-3-network-setup/finding-your-pis-ip-address.
-
2Step 2
Now that you have your IP we will connect to your PI so we can download Novaspirit's GitHub repository. There are a few options so pick one that works for you. Either through Putty and SSH to your IP https://www.raspberrypi.org/documentation/remote-access/ssh/windows.md, console cable https://learn.adafruit.com/adafruits-raspberry-pi-lesson-5-using-a-console-cable/overview, or by plugging in a mouse, keyboard, and monitor.
-
3Step 3
Once connected install Git through apt-get with;
sudo apt-get install git
Follow any prompts and you should have git installed. -
4Step 4
With git installed we'll clone Novaspirit's repository to our Downloads folder and go into it with;
cd Downloads
git clone https://github.com/novaspirit/AlexaPi
cd Downloads/AlexaPi
You should now have an AlexaPi folder inside /home/pi/Downloads. -
5Step 5
We'll move from the Pi to your browser for a bit and sign-up for an Amazon Developer Account here https://developer.amazon.com/login.html. Congratulations, you are now an Amazon developer.
-
6Step 6
Follow Get Started with the Alexa Voice Service here, https://developer.amazon.com/edw/home.html.
-
7Step 7
We want to Register a Product Type, and select Device.
![]()
-
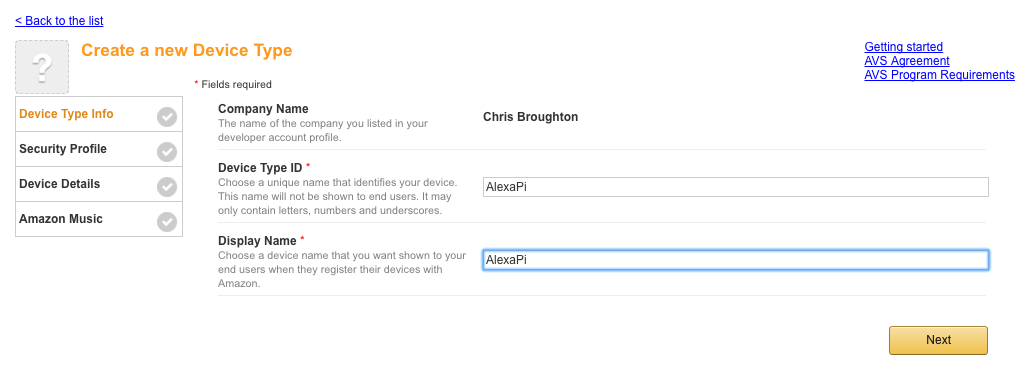
8Step 8
Fill out the Device Type Info section. Just select the same name for both fields and remember the capitalization, we'll need this later. Click Next.
![]()
-
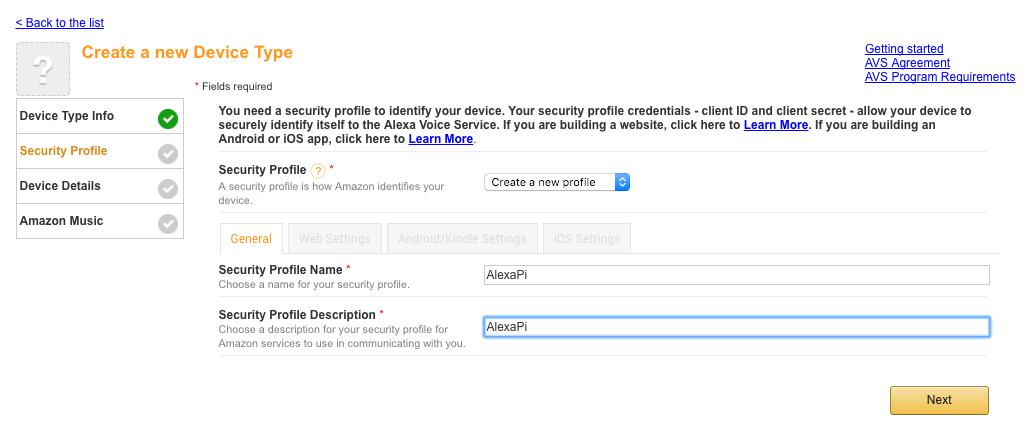
9Step 9
Fill out the Security Profile section. Select Create a new profile from the drop down and enter your device name again to keep things strait. Click Next. We'll be given a number of security tokens that we'll need later.
![]()
-
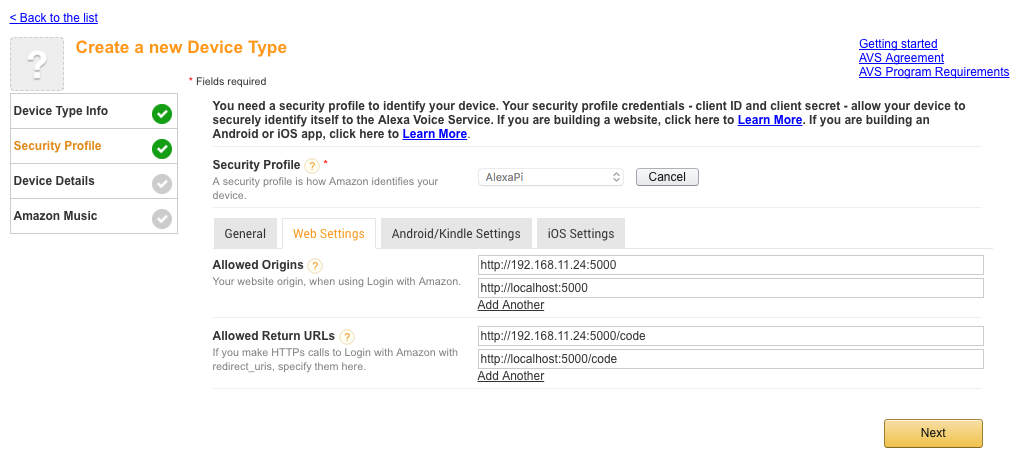
10Step 10
Click Edit because we'll need to edit some security info. Select the Web Settings tab. Add 4 new URLs like shown. We'll want an Allowed Origins for your devices IP address with port 5000, and one for localhost port 5000. Also add an Allowed Return URL for your devices IP address port 5000 folder code, and again localhost port 5000 folder code. We don't need to edit any other Secutity tabs.
Allowed Origins
  x.x.x.x:5000
  localhost:5000
Allowed Return
  x.x.x.x:5000/code
  localhost:5000/code
![]()
Retro Echo - Pi Zero Assistant
This is Amazon's Alexa running on a Raspberry Pi Zero built into a mid-century modern intercom for your desk.

Discussions
Become a Hackaday.io Member
Create an account to leave a comment. Already have an account? Log In.