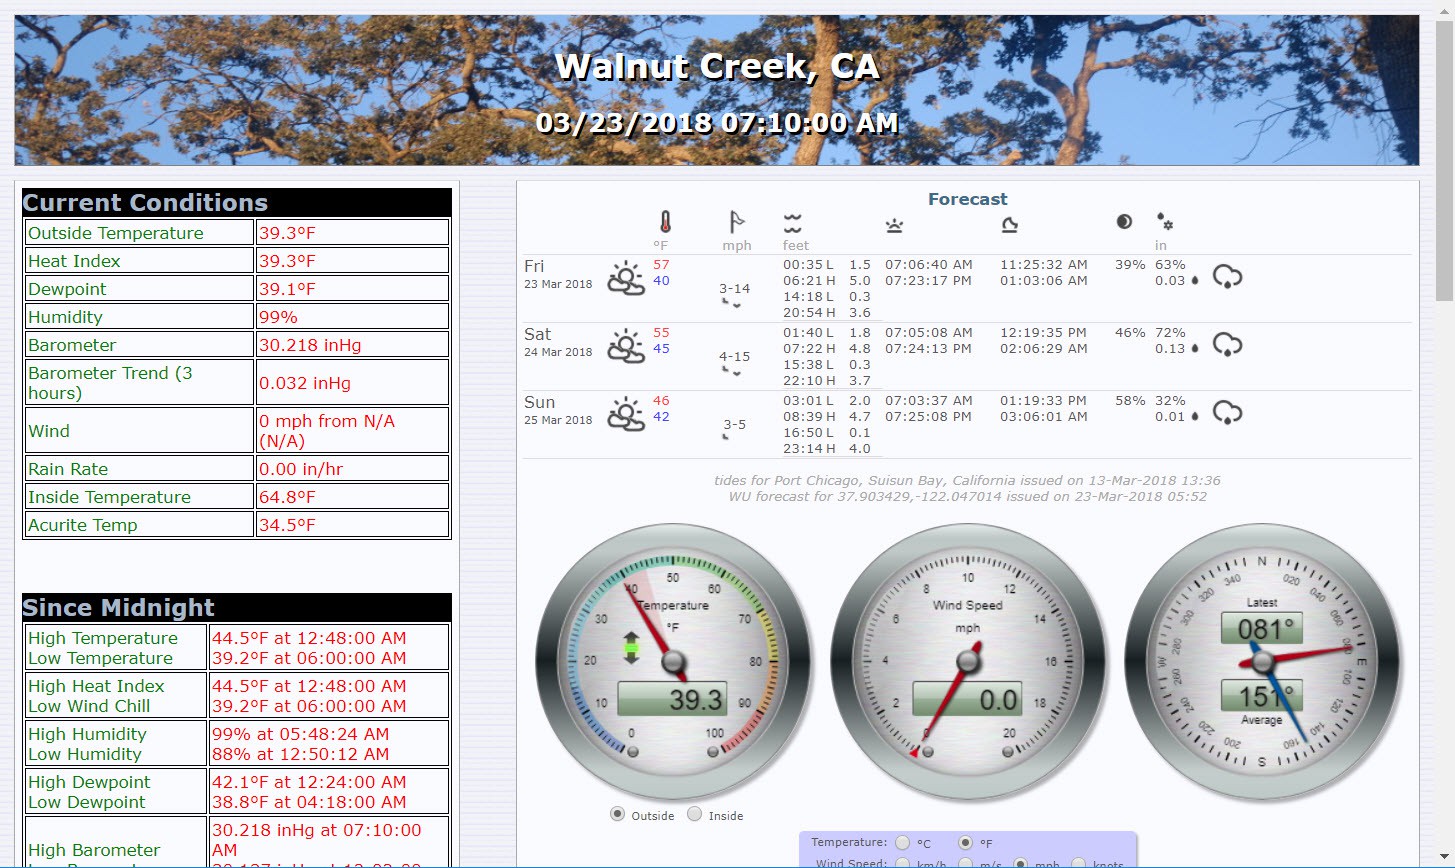
I have an Accurite weather station that I bought at Costco. I wanted to record the data and visualize it differently, so I installed an open source weather station (weewx http://weewx.com) on a Raspberry Pi 2B that I had. I was inspired by the guy at Desert Home (http://www.desert-home.com/2014/11/acurite-weather-station-raspberry-pi.html).
All was good. Some customization of the skins to my liking and I was in business.*

*I don’t have a static IP or public URL, but you can see the published data here: https://www.wunderground.com/weather/us/ca/walnut-creek/KCAWALNU35
I used Steelseries for the gauges. https://github.com/mcrossley/SteelSeries-Weather-Gauges
I had mounted the sensor on a 6’ piece of steel conduit on the edge of my roof where it the rain and wind gauges would operate properly. Unfortunately, I have a white foam roof that reflects heat like crazy in the summer. Well, fortunately for comfort in the house, but bad for recording temps. In the summer, I was recording >20 degF (about 10 degC) higher than actual. I got temps that were too low on winter nights too (probably due to radiative cooling).
I couldn’t find a spot that would work well for all three sensors. I could put it in the shade under a tree, but then the rain and wind gauges wouldn’t work well. I tried several spots with a clear view of the sky, but I always got excessive temps (not as bad as being on the roof, but not accurate). Mounting near ground level lead to virtually no wind readings.
My solution was to mount the sensor where it got good wind and rain data and build a new thermometer. It had to be wireless and preferably solar powered so I could find a good spot outside for it.
The overall plan:
- Get the temperature with a low power device once every couple of minutes, connect to wifi and via UDP push the data to a port on the Raspberry Pi.
- While idle, the device would shut itself down to save power.
- There is a daemon running on the Pi that would look for data on the port and write it to a file.
- The Weewx driver that reads the sensors would grab the temperature from the file instead of the standard sensor. (with some error checking)
Hardware
I decided on an ESP8266 as the main chip as it has wifi, can run at low power, and works with the Arduino tool set. I bought a Adafruit Feather HUZZAH with ESP8266. Also bought a Lithium Ion Battery and Digital Temperature Sensor Breakout - TMP102 from Sparkfun. To charge the battery, I found a USB solar panel on Amazon that’s meant for charging phones Docooler Solar Charger 10W Portable Ultra Thin Monocrystalline Silicon Solar Panel 5V USB. Last piece of the puzzle was a waterproof case. I found a ABS box at Frys. I’m not sure it was exactly this one, but close.

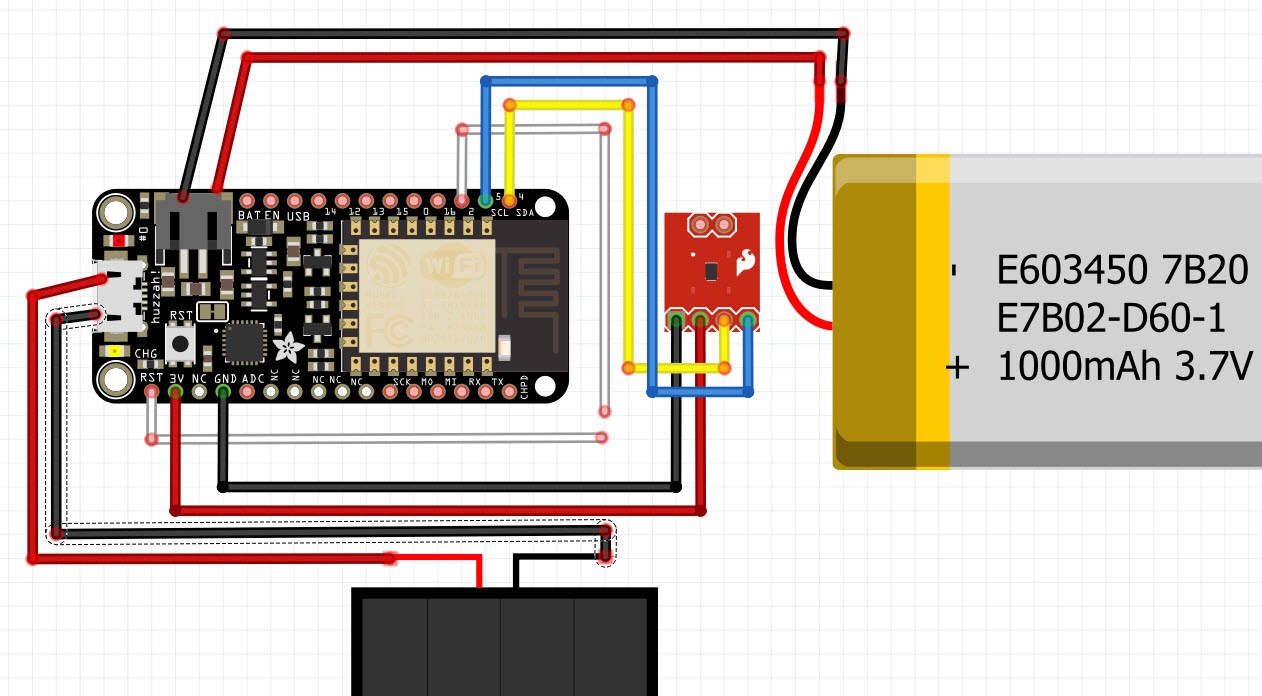
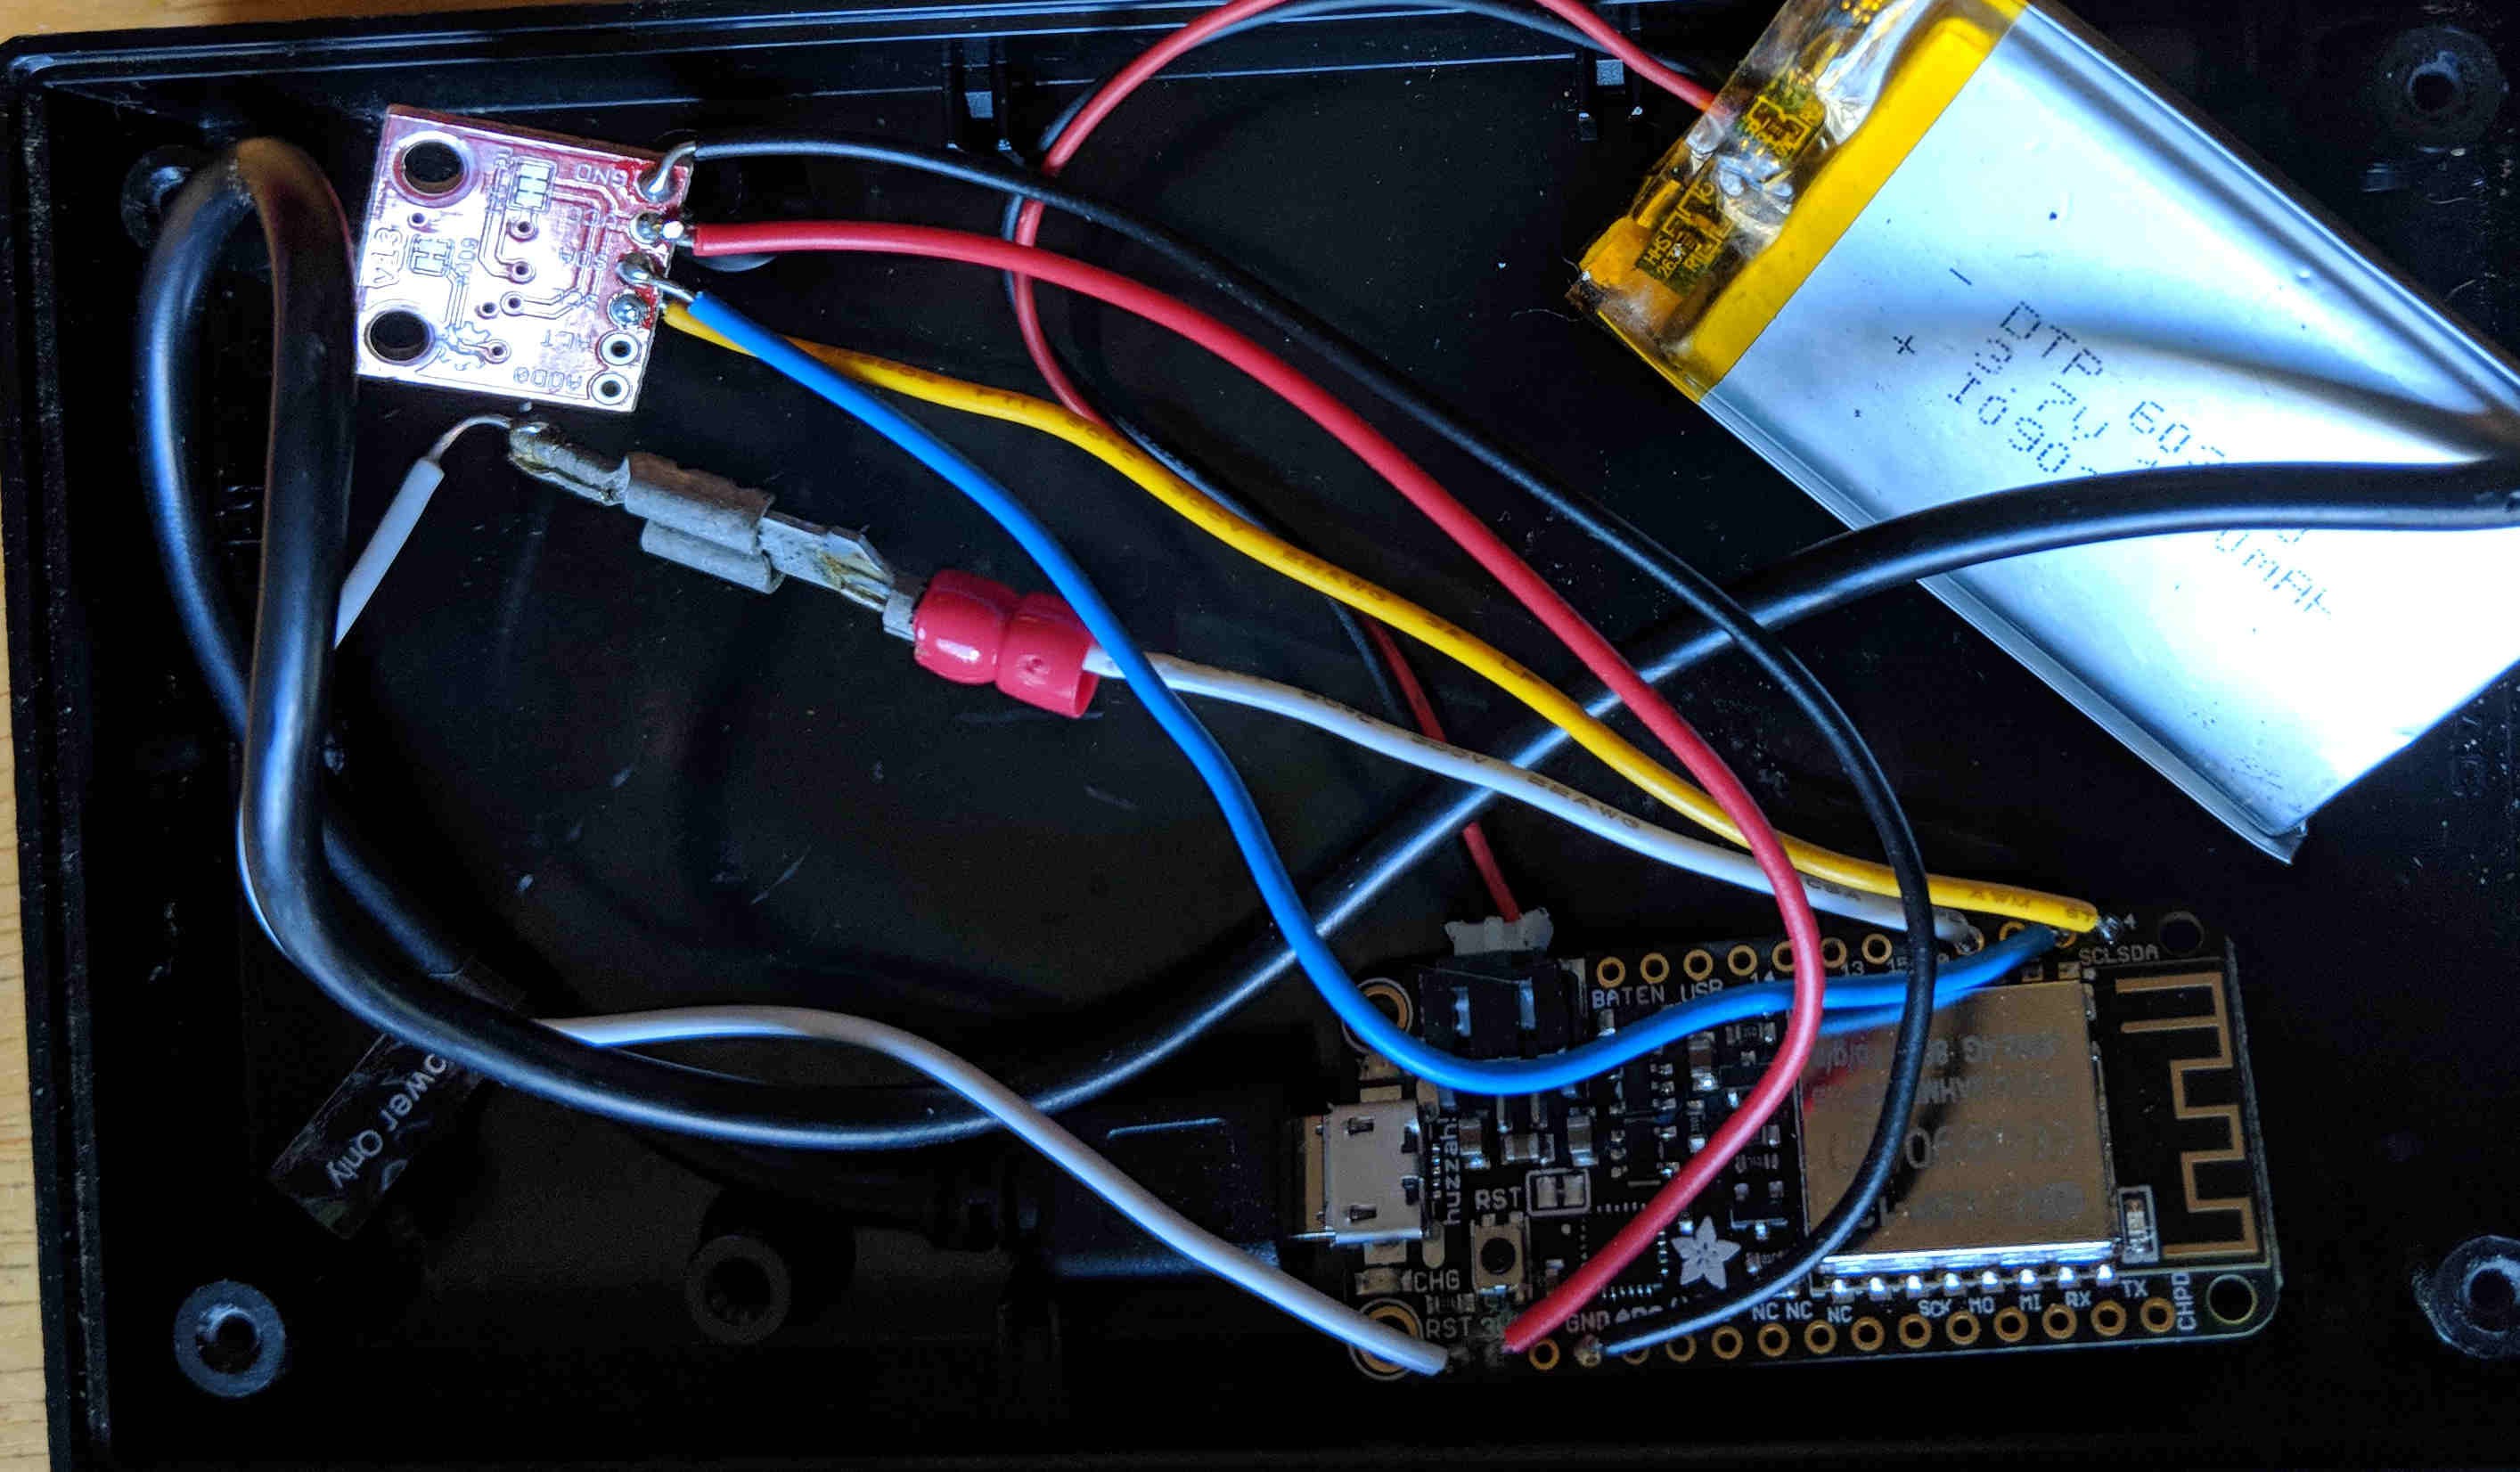
The black thing at the bottom is the solar panel. It’s plugged into a USB mini connector via a standard USB cable. The battery is plugged into the battery connector. When the sun shines, the battery charges. When it’s dark, the system operates off the battery.
The white wires are important. These two pins must be connected to enable deep sleep on the ESP8266. But they must be disconnected when programming. I used a spade connector to make a solid connection that was easy to open to debug.

Not shown - I cut a small slit in the plastic case with a dremel tool to get the USB cable out to the solar panel.
ESP8266 Programming
I used the Arduino tool set. You don’t have to use it, but I was used to working with it, so I continued. There are instructions for doing so here: https://learn.adafruit.com/adafruit-feather-huzzah-esp8266/using-arduino-ide
The code itself is really simple.
- Connect to the Wifi
- Read the data from the temp sensor.
- Convert from Byte to Float. Convert from DegC to DegF and finally to a character array that UDP likes
- Send to string to port 1025
- Go to deep sleep for 120 seconds (note that the deepsleep uses microseconds) and start from the top.
/*you must disconnect the white jumper between RST and GPIO to program and reconnect for it to sleep
*/

#include <ESP8266WiFi.h>
#include <WiFiUdp.h>
#include <Wire.h>
int tmp102Address = 0x48;
// Time to sleep (in seconds):
const int sleepTimeS = 120;

const char* ssid     = "yourWifinamehere";
const char* password = "yourWifiPasswordHere";

const char* streamId   = "tempdata.txt";
char  replyPacket[] = "whohoo!";

WiFiUDP Udp;
unsigned int localPort = 1025;
unsigned int localUDPPort = 1025;

void setup() {
  Serial.begin(115200);
  Wire.begin (5, 4); // setting up the SDA(5) and SCL(4) pins
  delay(10);

  // We start by connecting to a WiFi network

  Serial.println();
  Serial.println();
  Serial.print("Connecting to ");
  Serial.println(ssid);

  WiFi.begin(ssid, password);

  while (WiFi.status() != WL_CONNECTED) {
    delay(500);
    Serial.print(".");
  }

  Serial.println("");
  Serial.println("WiFi connected");
  Serial.println("IP address: ");
  Serial.println(WiFi.localIP());
  Serial.println("Starting UDP");
  Udp.begin(localPort);
  Serial.print("Local port: ");
  Serial.println(Udp.localPort());

  Wire.requestFrom(tmp102Address, 2);
  byte MSB = Wire.read();
  byte LSB = Wire.read();

  //it's a 12bit int, using two's compliment for negative
  int TemperatureSum = ((MSB << 8) | LSB) >> 4;

  float TempC = TemperatureSum * 0.0625;
  if (TempC > 128)
  {
    TempC = TempC - 256; // for negative temperatures
  }
  float TempF = 32 + TempC * 1.8;
  Serial.print("Temp  = ");
  Serial.println(TempF);
  //sprintf(replyPacekt,100, "%f", TempF);
  dtostrf(TempF, 4, 6, replyPacket);

  Serial.print("connecting to ");
  IPAddress ip(10, 0, 0, 20);

  Udp.beginPacket(ip, 1025);
  Udp.write(replyPacket);
  Udp.endPacket();
  delay(100);
  // Sleep
  Serial.println("ESP8266 in sleep mode");
  ESP.deepSleep(sleepTimeS * 1000000, WAKE_RF_DEFAULT);
  delay(100);
}

void loop() {
}
Capturing the data on the Raspberry Pi
The code to write the temperature data to a file is very simple. I wrote a python script to do it.
#!/usr/bin/env python
import socket
from shutil import copyfile

UDP_IP = "10.0.0.20"
UDP_PORT = 1025
fname = "/var/tmp/extra_temp.txt"

sock = socket.socket(socket.AF_INET, # Internet
                     socket.SOCK_DGRAM) # UDP
sock.bind((UDP_IP, UDP_PORT))


while True:
    data, addr = sock.recvfrom(1024) # buffer size is 1024 bytes
    print "received message:", data
    f = open(fname,'w')
    f.write(data)
    f.write('\n')
    f.close()
You’ll need to do
chmod +x script_name.py
in order to make it executable. To make it a daemon that runs at boot time, I followed the instructions here: http://blog.scphillips.com/posts/2013/07/getting-a-python-script-to-run-in-the-background-as-a-service-on-boot/
I don’t see any reason to reproduce those instructions here. It was easy enough to follow.
Customizing Weewx to use the data
I initially put the new temperature data in the ExtraTemp1 field. Once I was happier with the resulting data than the regular sensor, I changed it so my sensor went into the standard OutTemp (outside temperature) field and the sensor from the weather station went into the ExtraTemp1 field. In the custom skin I output the Accurite (ExtraTemp1) temperature in the chart. To do this, I did two things. I first created a weewx daemon to read from the file. The instructions in the documentation are good. This goes in /usr/share/weewx/user/
import syslog
import weewx
import time
import os

from weewx.wxengine import StdService

class extraTService(StdService):
    def __init__(self, engine, config_dict):
        super(extraTService, self).__init__(engine, config_dict)
        d = config_dict.get('extraTService', {})
        self.filename = d.get('filename', '/var/tmp/extra_temp.txt')
        syslog.syslog(syslog.LOG_INFO, "extratemp: using %s" % self.filename)
        self.bind(weewx.NEW_ARCHIVE_RECORD, self.read_file)

    def read_file(self, event):
        try:
            with open(self.filename) as f:
                value = f.read()
            syslog.syslog(syslog.LOG_DEBUG, "extratemp: found value of %s" % value)
            #skip it if it's stale. Acurite Driver will be used instead
            if time.time() - os.path.getmtime("/var/tmp/extra_temp.txt") < 1200: #20minutes
               event.record['outTemp'] = float(value)
        except Exception, e:
            syslog.syslog(syslog.LOG_ERR, "extratemp: cannot read value: %s" % e)
The only other change is to keep the regular temperature readings from overwriting this data and instead put it in the ExtraTemp1 variable. To do this, modify the acurite driver (/usr/share/weewx/weewx/drivers/acurite.py). Change places where it writes to OutTemp to ExtraTemp1. I added a bit of code to check to see if the new temperature service is stalled. In the case where the temperature file timestamp does not change for >16 minutes, stop and start the service. If it hasn’t changed in 20 minutes use the Accurite temp instead.
##<snip many lines of code>
        else:
           #changed outTemp to extraTemp1
           data['extraTemp1'] = Station.decode_outtemp(raw)
           data['outHumidity'] = Station.decode_outhumid(raw)
           ## determine if the wifi temp service is stalled. if it's stalled, then use Acurite data for outTemp
           ## first try to restart service
           if time.time() - os.path.getmtime("/var/tmp/extra_temp.txt") > 960: #16 minutes old
              subprocess.call(['/etc/init.d/extra_temp','stop'])
              subprocess.call(['/etc/init.d/extra_temp','start'])
           if time.time() - os.path.getmtime("/var/tmp/extra_temp.txt") > 1200: #20 minutes old
              data['outTemp'] = data['extraTemp1']
              syslog.syslog(syslog.LOG_ERR, "wifi device is stalled. switching to Acurite")
(note - import os, import subprocess in the header)
In Operation
I’ve had this thermometer running for more than six months now. I have it mounted on a downspout where it’s mostly out of the rain and in the shade on the north west side of my house. It gets enough reflected sunlight to charge the batteries, except a few weeks in December. I had to charge the battery with a USB charger two or three times over the winter. It’s mostly not in direct sun, but there are a few minutes around 5pm where it is in the sun. I get temperature spikes of 10 degrees when this happens. I’ve wrapped it in aluminum foil like a baked potato to minimize the heating. It seems to have helped, but not entirely. I’m looking into better solutions for a sun shade. Next steps? I’m thinking of building a similar sensor to capture my swimming pool temperature. And then maybe pH and chlorine concentration.