Ok. So let start:
I'm not a linux guru. There are many favors of linux distribution, but I've just some experience with Ubuntu and Debian. In addition I usually not using any linux GUI.
So when I start a linux based project, it means to install an Ubuntu.
As I decided, this project will be based on a Beaglebone Green. Let start to install a 14.04 LTS to it.
The basic information reside here: http://elinux.org/BeagleBoardUbuntu
1. You need to download the image from here: https://rcn-ee.com/rootfs/2016-02-11/flasher/BBB-eMMC-flasher-ubuntu-14.04.3-console-armhf-2016-02-11-2gb.img.xz
(today the 16.04 image already exists, but I stick to the older as it seems more stable), download the image writing tool (Win32DiskImager): https://sourceforge.net/projects/win32diskimager/files/latest/download
And you need an empty minimum 2GB uSD card.
2. Expand the image to a folder in you machine. For example the 7-Zip will do it. Install the Win32DiskImager.
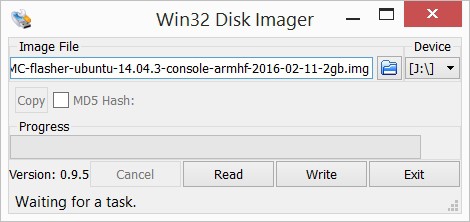
3. Write the image to a uSD card with the Win32DiskImager

4. When the writing is finished, insert the uSD card into the Beaglebone. Press and hold the boot select button (the one close to the uSD slot) while powering up the board. After short booting sequence you will see the "knight rider pattern" on the LEDs. Wait until it finish and the leds turn on.
5. Connect the board to the ethernet network. If you can figure out the address get by DHCP the steps from 6-8 are optional. Just reboot the board by power cycling it.
6. Install the PC driver for the board (if you have a BeagleBone Green, this is absolutelly necessary as you don't have HDMI connector to connect monitor). The windows driver can be downloaded from here:
64 bit: http://beagleboard.org/static/beaglebone/latest/Drivers/Windows/BONE_D64.exe
32 bit: http://beagleboard.org/static/beaglebone/latest/Drivers/Windows/BONE_DRV.exe
This is NOT a serial driver as you expect, but a virtual ethernet driver. You will need an SSH terminal to connect to Beaglebone.
7. Connect the Beaglebone to your PC. If it is was connected already, just cycle the power on it with removing and reconnecting the USB cable, when you disconnect the cable you can remove the uSD card, as you don't need it anymore.
8. If you run ipconfig on your machine a new ethernet interface will appear:

9. If you didn't used the USB/Ethernet to log in, just login via the DHCP provided IP address. If you need static IP address edit the /etc/network/interfaces file and setup the address.
10. If you check the DNS settings of the system it is probably not working. Just by editing the /etc/resolv.conf will not resolve the problem, as it gets overwriten on the next reboot.
Edit the /etc/resolvconf/interface-order file and put eth* to the first on the list. This will give you the correct DNS settings.
11. Reboot the board.
12. Install the updates with:
apt-get update
apt-get upgrade
 SUF
SUF
Discussions
Become a Hackaday.io Member
Create an account to leave a comment. Already have an account? Log In.