 Rieul Techer
This second DAISEECamp (#2) is, at first, part of two camps :
- A multi-sites SummerCamp initiated by friends from Le Biome
- A design purpose camp call DozeCamp in the context of the comingInternational Biennale du Design 2017
Documentation of the DAISEECamp#2 can be found HERE (still really sorry, it's mostly in french we are working on the translation).

Explanation of what is CitizenWatt by Olivier Blondeau from Citoyens Capteurs (in french not yet translated):
3 main purposes for this camp
- Consolidate the documentation process by slightly switching toward full GitHub support and link with Multibao
- Debug issues with the CitizenWatt sensor and make them work
- Make it possible for Raspberry Pi or any Ethereum node support to mine at least a block
1st goal : to have the prototypes of each of the necessary bricks that work to focus during the next month on the articulation of each bricks in order to have a functional prototype within a month.
2nd goal : answer to the Automation challenge since the core of our work since le last 4 logs are about how to automate the peer-to-peer transaction process with the blockchain (please see : last Log for instance)
CitizenWatt Sensor : make it work
For the purpose of this session, @Olivier Blondeau came at our local hackerspace (La MYNE) to help us solve the issues we had with the CitizenWatt sensors.

The first step was to compare the hardware part to make sure there were no issues compared to a CitizenWatt sensor that works:


No issues were found. It appears that the trouble came from the software and more particularly the way we flashed the ATMEGA. (Update of the instruction are to come concerning the CitizenWatt sensors then).
Indeed, after following the flashing process using a FTDI programmer (

e ended up with 5 CitizenWatt sensors working:

Once the CitizenWatt sensor are working it is necessary to couple the sensor to a Raspberry PI in order for the sensor to communicate the data it senses (through RF in this v1 version of the board and through Low Energy Bluetooth in the coming v2 version of the board). This means that it is necessary to install the CitizenWatt disk image and interface on the Raspberry Pi.

It turns out that it works well with the Raspberry Pi 1 but not with the more recent ones since this is not the same architecture. This leads us to another issue then : we need to build the CitizenWatt UX image and boot for a Raspberry PI 3 (that is more powerfull than a Raspberry 1 and might be right to mine as an ethereum node). Clement D., one of the core developer of CitizenWatt thus took some with us to build and test. Exchange and procedure are HERE (instructions on this part are to come ASAP).
However, we did test the good functioning of the CitizenWatt on site with a Raspberry Pi 1 install... and it worked well. However, it turned out that RF is not powerful enough to push data from a floor to the other.
Testing has been carried out with a electricity consuming device:

Plugging the Amp plier to the brown cable (the one that get electricity into the device basically)

Enables you, through the local interface, to follow the consumption (yep... do not bother with the guy taking the photo instead of sreen-printing :-) ):

At the end of the day, we still have some trouble to boot the CitizenWatt disk image on a Raspberry Pi 3. Moreover, architecture of the v2 PCB of the CitizenWatt sensor is to come and should be more interesting for our need. However, for the sake of experimentation we carry on with the v1 for the moment. You'll find all the necessary information about the PCB plans and codes of the CitizenWatt sensor AT THIS LINK (GitHub repo).
Moreover, we still carry on installation and work on Open Energy Monitor.
Ethereum mining nodes on Raspberry PI 3 or any other support
As stated on the previous LOGs we do not have so much trouble to make raspberry pi as ethereum node of a common private blockchain. Our issues come from the fact that in order for the nodes to participate to the validation and transmission of blocks to the common private blockchain, it is necessary for this node to have mined at least once to generate the DAG file (necessary for the propagation of the blocks in the blockchain). The fact is that for the moment raspberry pi (1, 2 or 3) does not have enough power to mine.
Here are some of the trials made to overcome this issue:
- Increase the swap memory of the card
- Generate the DAG file without mining (meaning to generate the DAG file on a computer and copy it onto the Raspberry card)
None of those tests are conclusive. As a result, we've decided that it could interesting and more relevant to change the ethereum node support : from a Raspberry to a PINE64+. This choice was made because @Sam got one and because it is more powerful than a Raspberry.
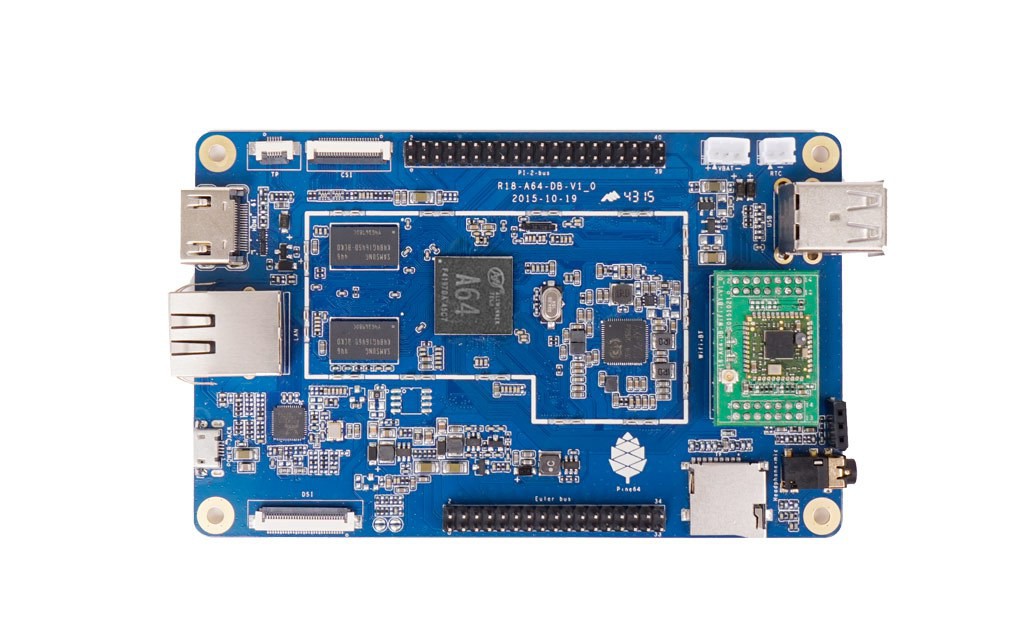
After installing an Ethereum Node onto the PINE64+ it turns out that... MINING WORKS and PROPAGATION of the the blockchain also WORKS with this card. Documentation is HERE.
Conclusion
- CitizenWatt sensors are working well however we still have issues on the installation of the CitizenWatt disk image on a Raspberry PI
- Mining does not work on a Raspberry PI ethereum node but works on a PINE64+ as well as block propagation on the chain
We are approaching the possibility for full automation from the data captation to its transmission and processing (using it for automated transactions between peers) to end up at the end of the chain with the DApp interface to manage peer-to-peer energy transaction.
What's remaining to be done ?
- Install the CitizenWatt image on the PINE64+ to have a full Ethereum node running on a Energy Monitor IoT
- Make the articulation between the collected data from consumption and production (CitizenWatt and OEM) with the Blockchain
- Investigate and practice IPFS and BidChainDB
Discussions
Become a Hackaday.io Member
Create an account to leave a comment. Already have an account? Log In.