Close
0%
0%

DeePicBot

Fully autonomous deep sea photography vehicle

Similar projects worth following
This fully autonomous low cost DIY underwater vehicle is intended to record pictures and video from the deepest places on the planet. It could be dropped from the ship, than it reaches the bottom using motors, makes pictures and video with on-board camera through transparent caps and float to the surface. With the first iteration we are targeting the under 1km deep. Our ultimate goal however is Mariana trench!

Motivation

"The future of drones isn't in the skies. It's in the ocean." This is what Gizmodo said in their article about OpenROV project. And we totally agree. Sometimes it feels like we know more about deep space than about deep sea in our planet. Our explorer mind led us to the idea to build a simple underwater vehicle to take photos and videos from very deep places on our planet. We want to see what is going on in Challenger Deep!

Propulsion

To avoid the dust from the sea bottom which can prevent us from taking good pictures, we decide to make the vehicle with slightly positive buoyancy. That is why, motors are necessary to drive the vehicle into the deep and prevent it from being carrying away by currents during ascent.

We are using complete self-made, mostly 3D-printed, out-runner BLDC motors. They are completely flooded. There are no metal parts except of magnets, wires and stator teeth. Such design eliminates pressure and corrosion related issues.

Main compartment

The main compartment could be made either of aluminum or of PVC pipe depending on the target deep. At leas on one side it is covered with transparent lid for the camera. For the first project iteration we decide to target several hundreds meters deep and go with PVC pipe. Lightweight parts could be attached if necessary to reach optimal buoyancy.

All CAD work is done with Autocad Fusion360 and could be viewed online here. The following video represents the "explosion view" of the main parts.


Electronics

Raspberry Pi with attached camera are used to take pictures and videos. Required illumination is achieved with power LEDs. We are using standard BLDC motor controllers connected to the Raspberry Pi over I2C. Everything is powered with LiPo battery pack.

Software

For the first iteration of the project the software is really simple. We are recording video during the whole descent and ascent using Gstreamer. Motors are controlled with simple Python script which sends corresponding commands to motor controllers over I2C bus.

In addition, we are planning to install spherical mirror outside of the main compartment to take panoramic pictures. There is also python script which unwraps the video on the fly. It is based on this example.

  • 1 × Raspberry Pi 2
  • 1 × Camera module for Raspberry Pi
  • 2 × BL-Ctrl V1.2 BLDC motor controller
  • 6 × Power LEDs
  • 2 × Propellers

View all 6 components

  • Experiment with panoramic photos

    andreynech04/24/2016 at 19:03 0 comments

    It would be better to have the panoramic image for our vehicle. Fortunately, it is not that difficult to install reflective half-sphere outside of the main compartment in front of the camera and get 360 degree picture. Applying so-called unwarping algorithm will convert (unwarp) distorted picture (mapped on the sphere) back to the planar form. Adding some simple mirror system could lead to the frame split in two parts as if it has being seeing with two different cameras (eyes). Looking with such system on the reflective half-sphere would result in 360 degree stereo image. Exactly what we need for our deep sea photos and videos! :-)

    These ideas and algorithms are not ours. You can take a look at the great project by kscottz for more details on unwarping. And for the idea about simple mirror system to split camera image, you can for example take a look at this article.

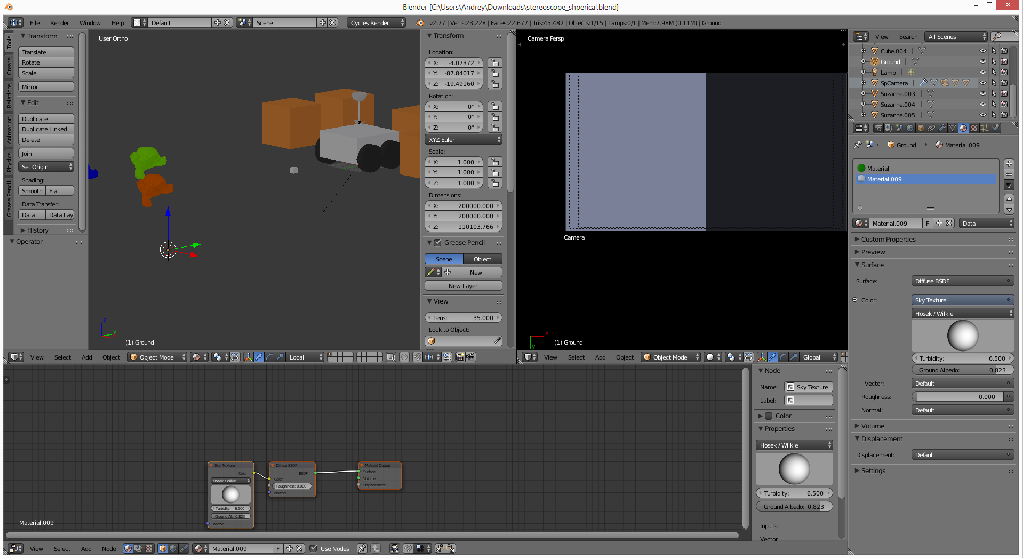
    So somehow we believe that it should be doable without huge efforts. To test the concept, we create the model of such setup in Blender:

    capture rendered image as seeing by the camera

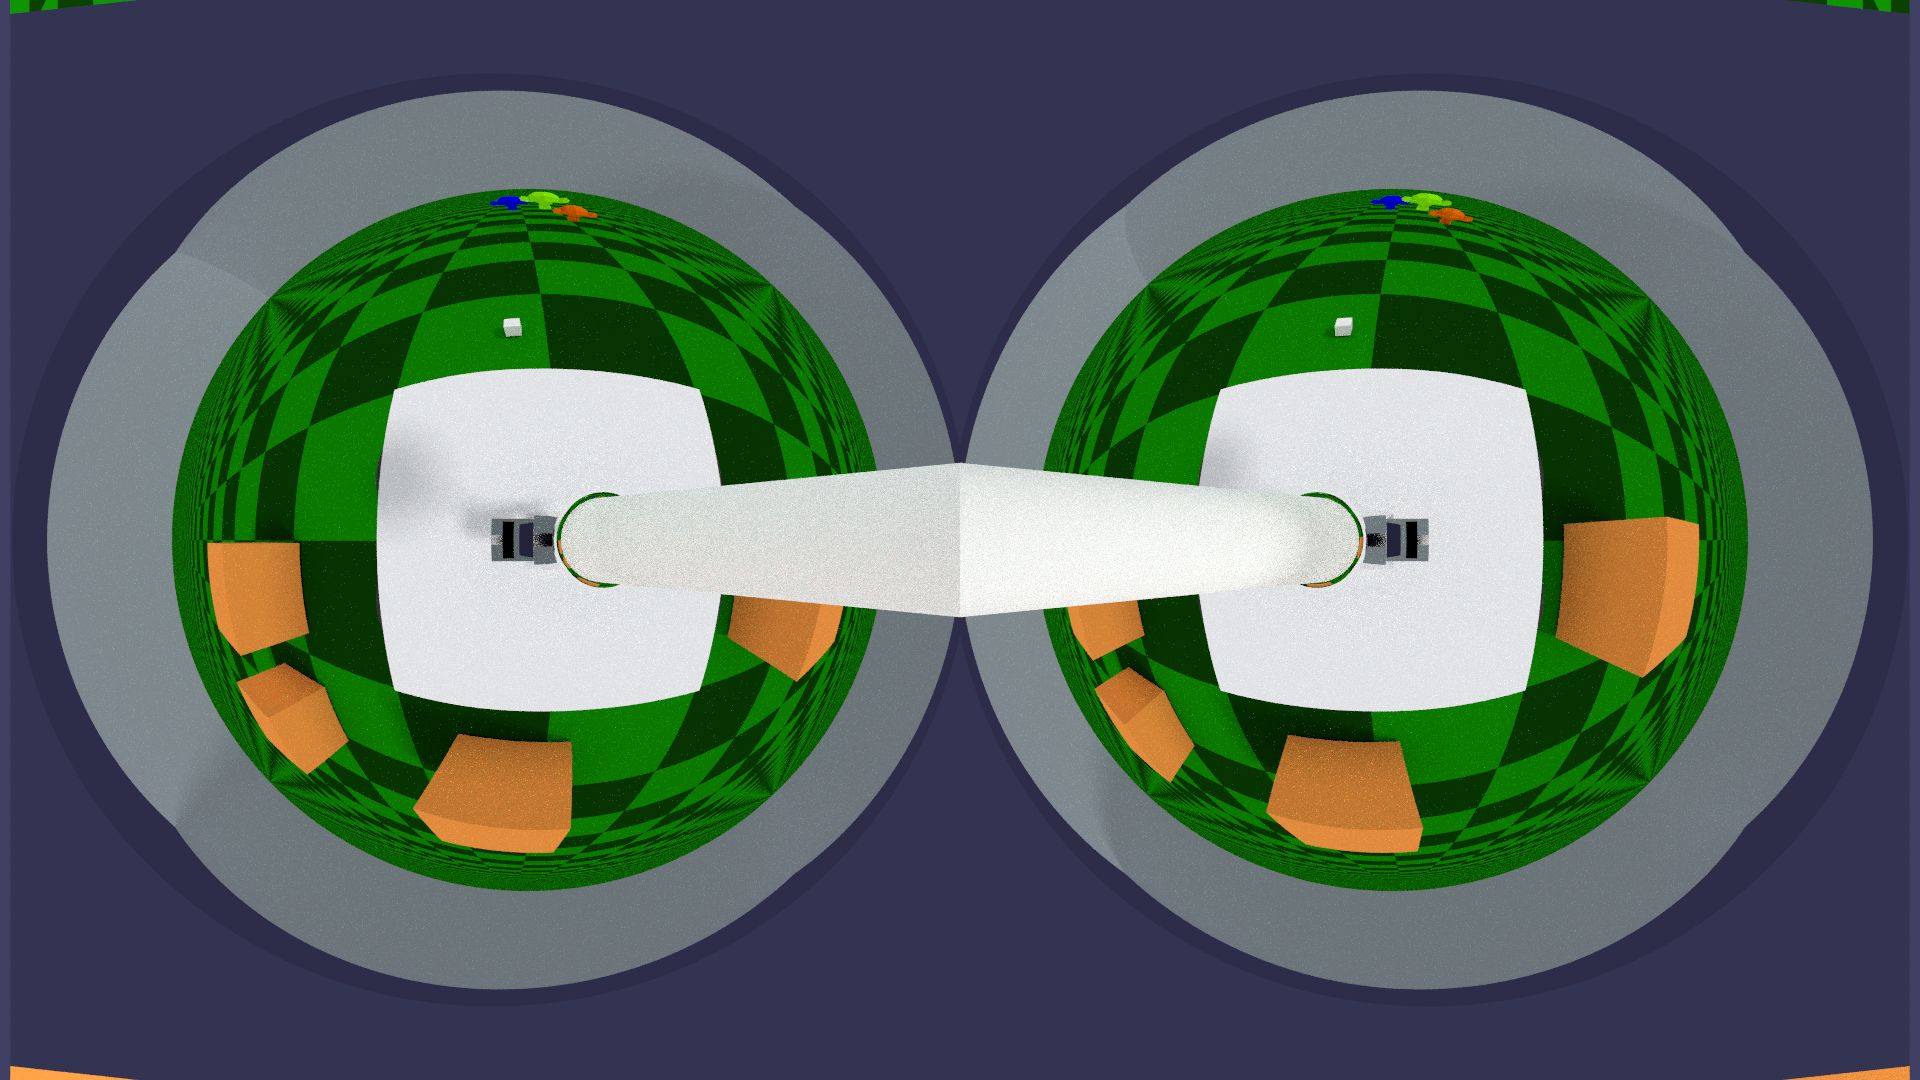
    and run our python script (which is slightly optimized version of the kscottz's code) to unwarp two 360 degree images. Left:

    and right:

    The white stripe in the middle is the stick on which the reflective sphere is mounted.

    So now it is possible to make anaglyph image out of them, build depth map, etc. Quite happy with results sofar! :-)

  • Upload STL files for 3D-printing to GitHub

    andreynech04/24/2016 at 18:11 0 comments

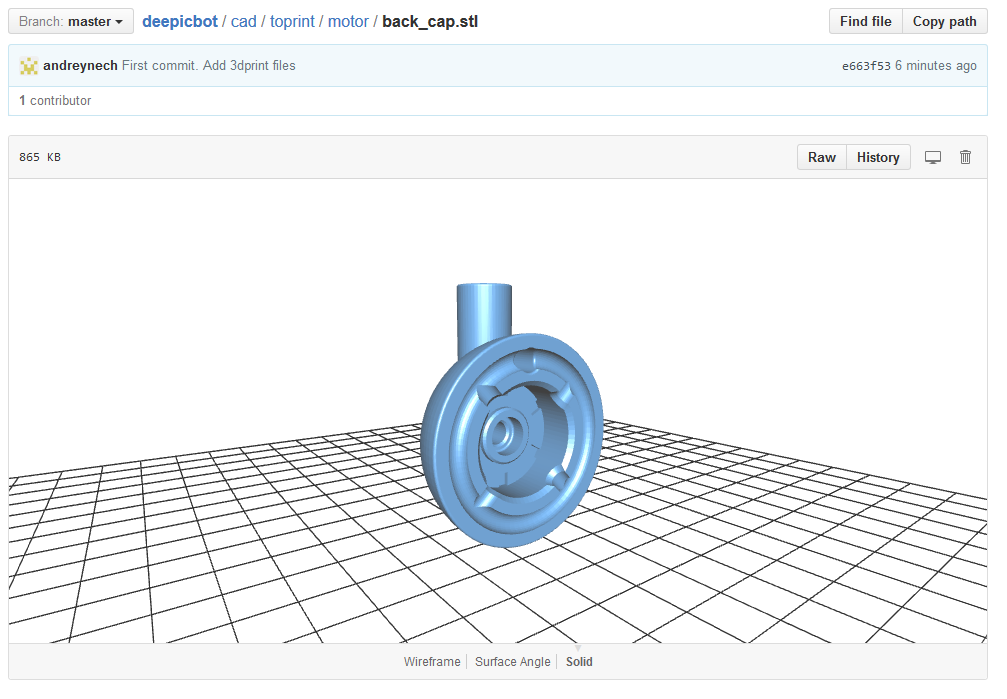
    GitHub offers nice 3D viewer for STL files which works in browser. You can take a look on generated STL files by visiting our repository.

    Simply click on STL files and the view should run.

  • Start build assembly CAD model

    andreynech04/24/2016 at 17:37 0 comments

    For my previous projects I was using OpenSCAD or FreeCAD. But for this project we decide to give Autocad Fusion 360 a try. Really happy with it sofar. Just learned how to make cross-drawing references to build final assembly model.

    I am not really experienced wit CAD and absolute novice with Fusion360. So just tried their "explosion view" feature. As someone pointed in YouTube comments, it is to short and fast, but this is what came out after the first try :-)

  • 3D-print the first version of the motor

    andreynech04/24/2016 at 15:57 0 comments

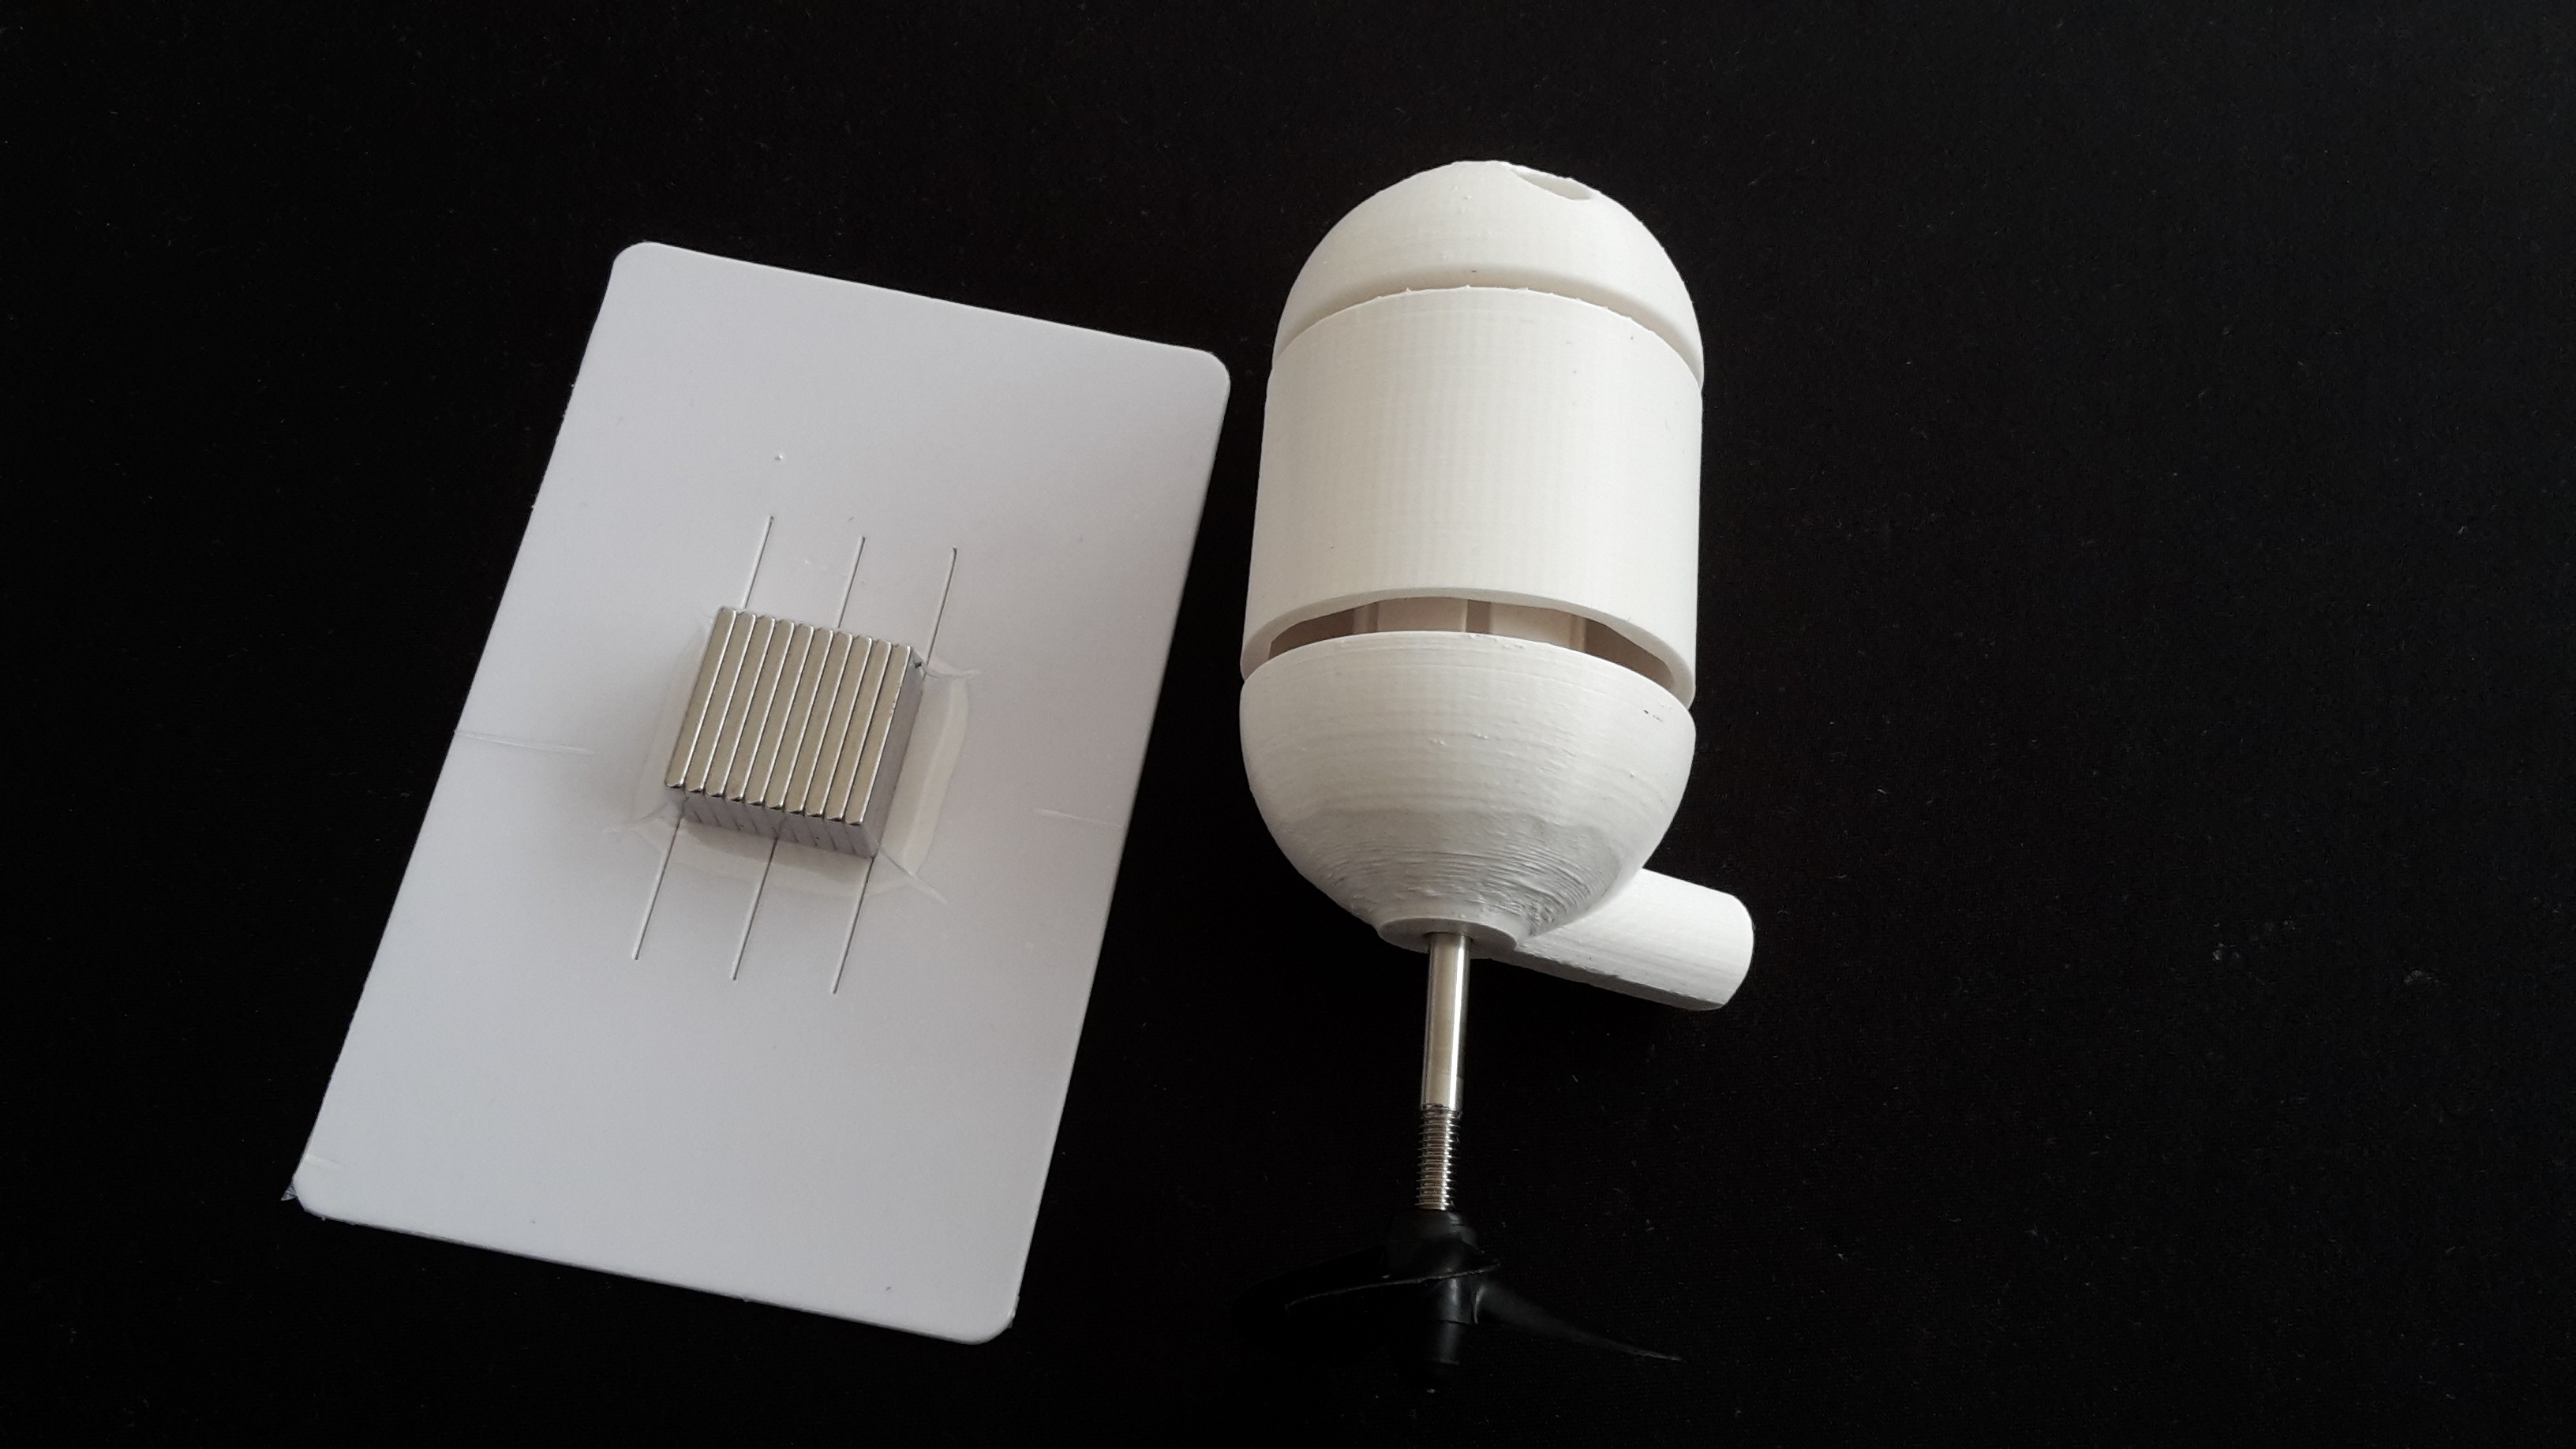
    First print attempt. Was trying to avoid using support as much as possible. As a result, the overhangs in the bottom part are not perfect. But it is OK for the beginning.

    Now ready to glue neodymium magnets on the rotor and they are also just arrived.

View all 4 project logs

Enjoy this project?

Share

Discussions

DeepSOIC wrote 04/24/2016 at 16:50 point

Interesting...

Are you going to protect the electronics from pressure, or you will let the pressure in by filling the thing with some kind of liquid or rubber? My natural choice would be to let the pressure in.

Makes me wonder, how will li-po cells behave at these pressures (1km = 100 atm, roughly). Intuition says they will probably be all right...

Next challenge - camera. Will camera be flooded by liquid, and if yes, you are going to have to design your own camera... or seriously hack an existing one.

  Are you sure? yes | no

andreynech wrote 04/24/2016 at 17:07 point

Thank you for the positive feedback! 

For now I decide to not let the liquid in. The main reason for it, as you also mentioned, is the camera. I have no idea how to protect it and probably other electronic parts like electrolyte capacitors. 

I believe, that aluminium body with really thick glass lids would be able to withstand rather high pressure. The only remaining holes will be for three wires per motor. Honestly, I have no experience yet how deep I would be able to go with wire going through let's say 1 mm hole sealed with for example epoxied  and covered with the kind of carbon ring. Need to test it.

If you or other fellow hackers have suggestions regarding sealing - I would highly appreciate it!

  Are you sure? yes | no

DeepSOIC wrote 04/24/2016 at 17:57 point

I have no experience, but regular stranded wire won't do. I expect it to leak right through the wire, in voids between strands.

I would try something simple, like screwing a countersunk screw into a hole and using the screw itself as the conductor. Or melt-piercing the wall with a solid wire.

Well, that's assuming you have a plastic wall. As for metal walls, it becomes even trickier.

  Are you sure? yes | no

Similar Projects

Does this project spark your interest?

Become a member to follow this project and never miss any updates