When you’re demoing a tampon monitor, it really helps to have tampons. And when tampons aren’t reusable (which is always), it helps to have a lot. So, in the aftermath of the insanity leading up to our May 6th China Demo Day, Amanda and I found ourselves with no shortage of work on our hands. And, with Amanda leaving for our press tour on May 9th, we found ourselves with not much time to do it in.
As any computer scientist worth their salt knows, if you have to do anything more than once, it’s best to just write a program to handle it. By the same token, we elected to skip the arduous process of hand-making the many tampons that we needed in favor of building a jig that would do it quickly.
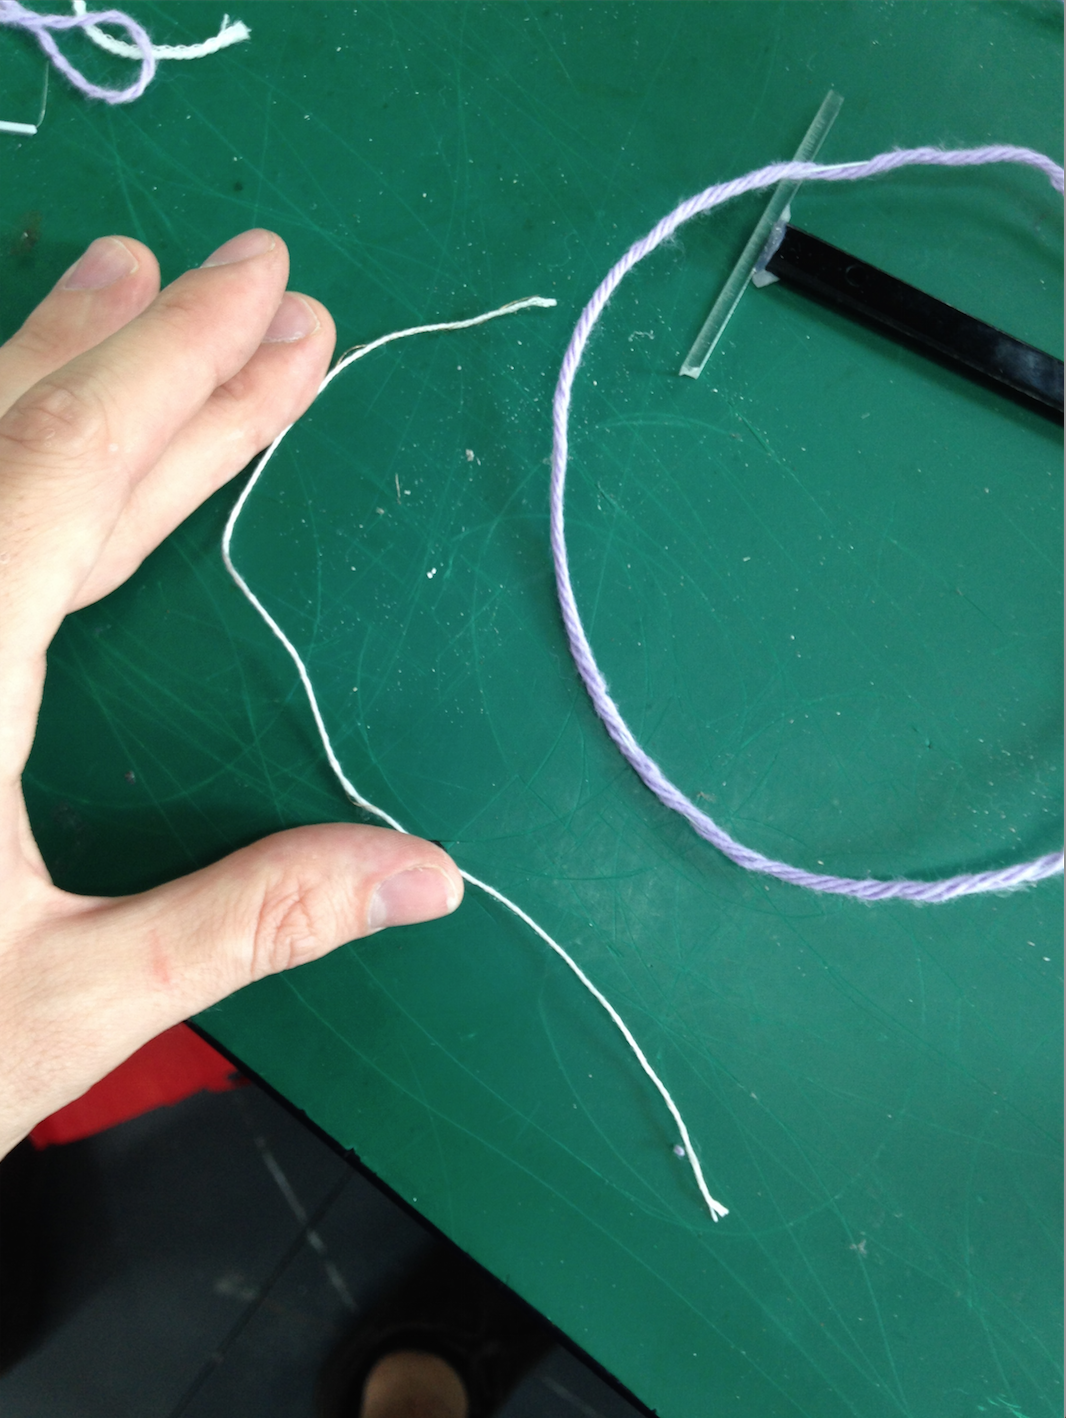
Using wire as we were, instead of conductive thread, there were three parts to the process of creating a tampon. First: strip the wires and trim off any excess cores, leaving only enough to thread the tampon as we desired. Simple enough. Second: sew these wires through the tampons that we had bought. Easy. Third: wrap the wire cords in string so that the tampons wouldn’t look like clunky, electronic monstrosities. This last step had absolutely nothing to do with the functionality of our demo tampons, but was an aesthetic imperative; even those who don’t normally use feminine hygiene products would be put off by seeing one with a bare electric cord trailing out. These first two tasks were easy enough to do by hand. The third, while simple, took far too much time for our needs; thoroughly wrapping one tampon cord could take anywhere between ten or fifteen minutes, not to mention a hefty chunk of both Amanda and my sanity. In order to solve this problem, I got to dip my toe back into mechanical engineering, and put together a neat little jig.

After brainstorming for an hour, talking the matter over with some friends at Kniterate (thanks, guys!), and watching more than a few youtube videos on modern and medieval methods for spinning rope, we had our first prototype: a simple metal frame on which we could clamp down the section of wire we would be wrapping. Before affixing this wire, we threaded it through a hole in the center of a small acrylic I-beam. Fixing the ends of two strings to the wire’s end, we wrapped the other ends around the different sides of the acrylic beam. Thus, by spinning the beam and moving it across the wire, all while applying trace amounts of glue, we could encircle our wire in white thread.
The flaws with this design quickly became apparent: the thread lay too slackly across the wire, and was spaced too widely. Due to the hand-operated and imprecise nature of the mechanism, the spacing was also irregular enough as to be unattractive. For the next iteration, we needed more precision, speed, and force. Not to mention at least one more line of thread. Thankfully, it’s pretty easy to find something that rotates quickly and precisely in your average machine shop.
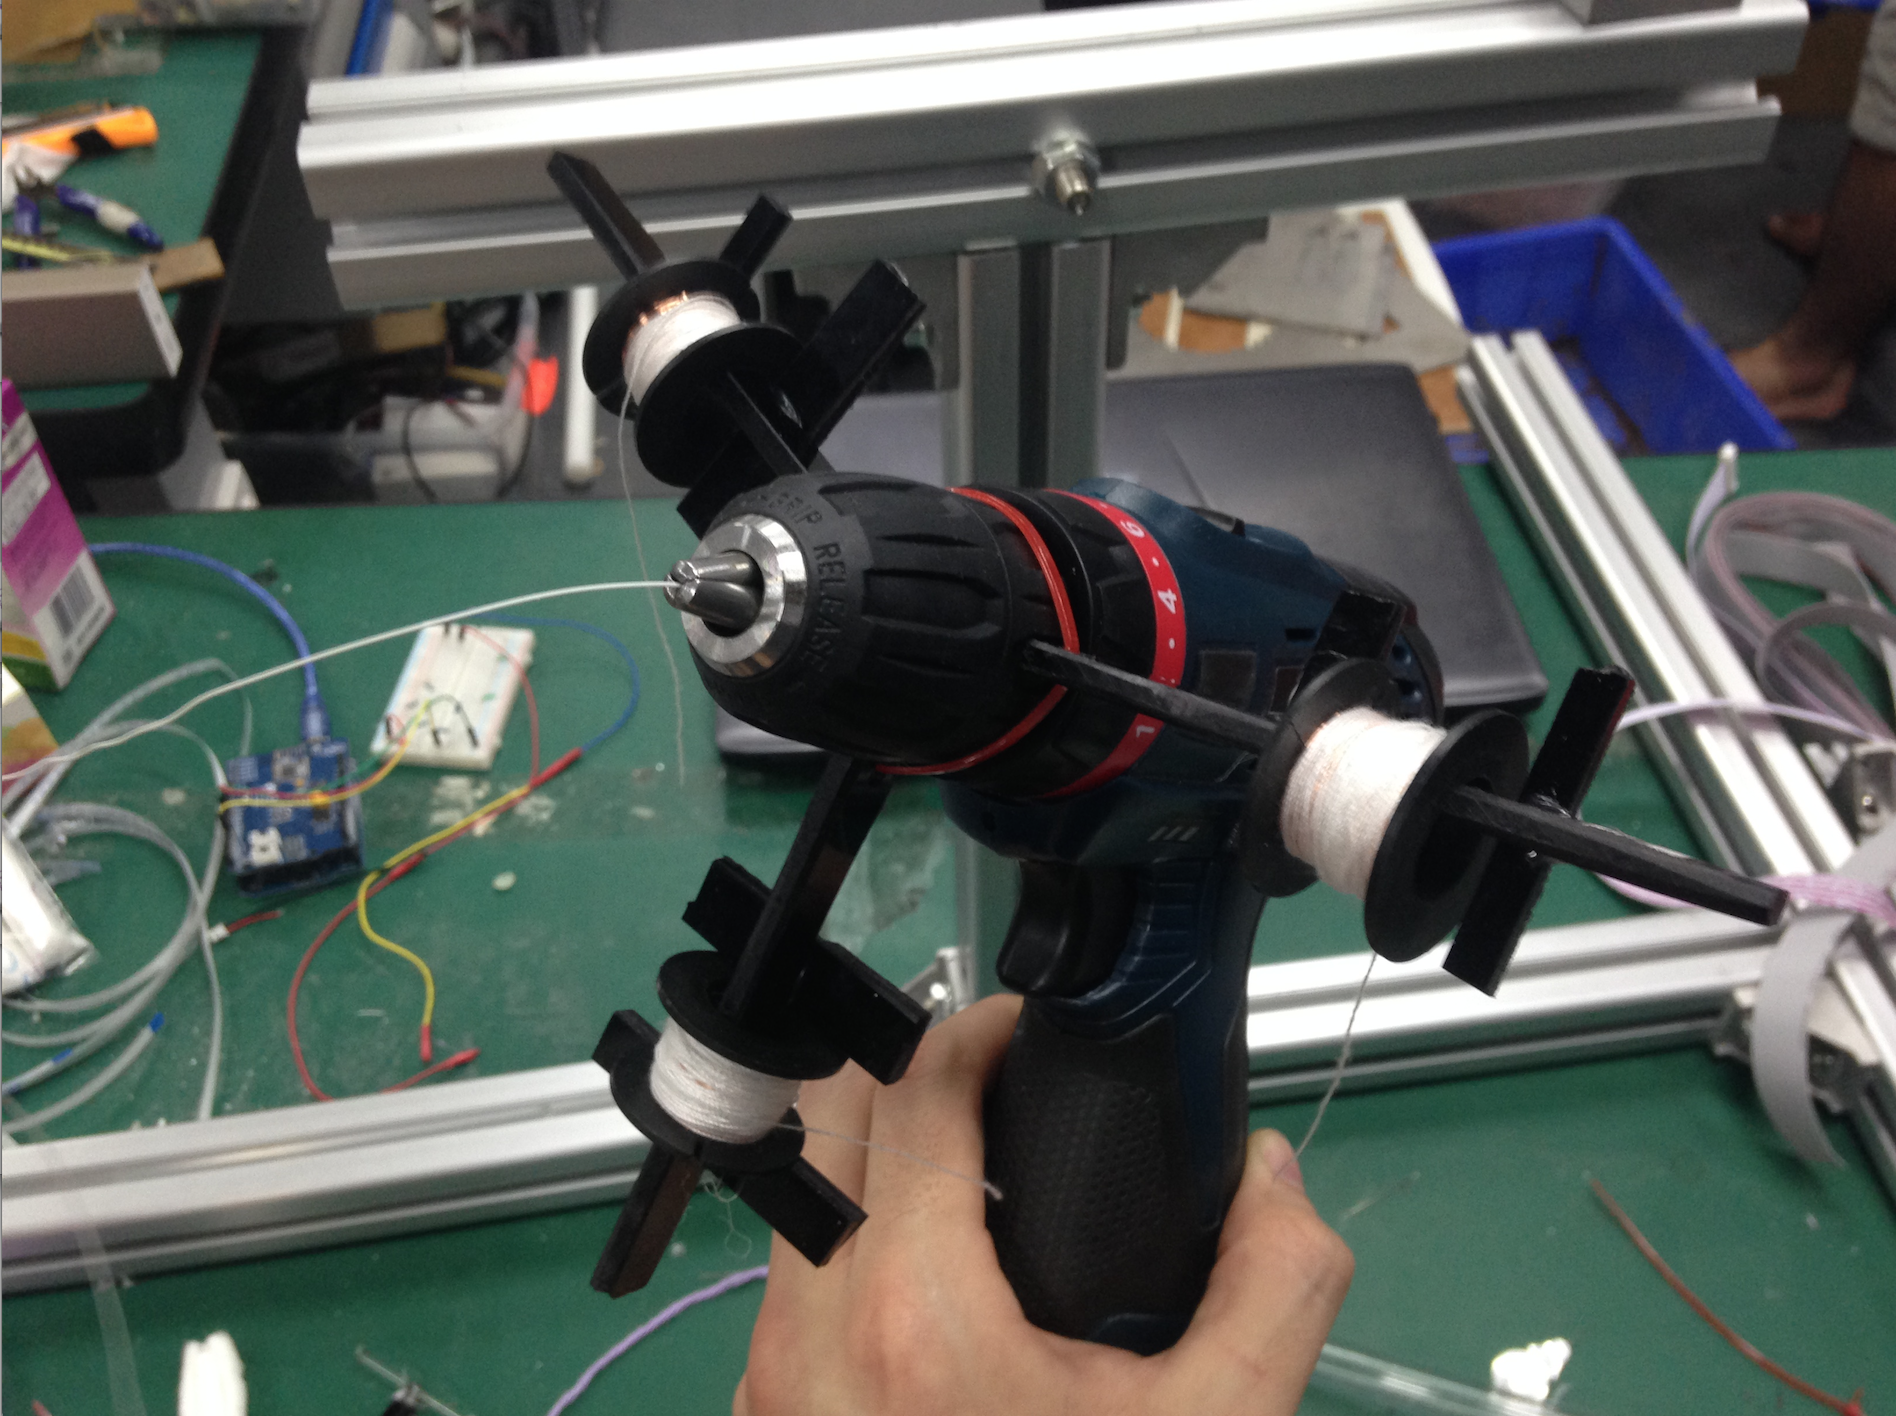
We decided to cut the I-beam into halves, and affix each to the outside of a cordless drill’s chuck, running the wire into the chuck itself. This way we could, by pulling gently backward on the drill, maintain the same tension in the string, but wrap at a much greater rate. We also added a third line for good measure. After one trial run, we ran into another problem: now that the string applicator was rotating quickly, it tangled up the strings in each other and in the drill shaft. We needed a way to make the thread come off smoothly and cleanly.
So we added one final change to our design: keeping the thread on the spools it originally came in, and adding a second bar to our I-beams to keep the spools in place. Once they were all placed on it ran very well: laying down string tightly, quickly, and cleanly.

So we managed to crank out quite a few tampons in time for Amanda’s flight back to the USA. After several months of hardcore electrical engineering and managerial work, it felt good to get my hands dirty with some mechanical engineering. And the fact that I got to make what looks like a ray gun from an old B scifi movie really doesn’t hurt.
 Jacob
Jacob
Discussions
Become a Hackaday.io Member
Create an account to leave a comment. Already have an account? Log In.