Swaleh Owais
-
Using Conveyor Belt as Y-Axis
04/13/2018 at 06:53 • 0 commentsI am now focused on simplifyng the design of the printer.
I have moved from a Delta Design to a Cartesian Design. I am using the motion of the conveyor belt as the y axis. This design change reduces the number of motors needed for the mechanism.
[Figure 1: Integrating Conveyor Belt Demo]
-
Revisions and Improvements for WorkHorse 3D Printer Mk. 2
04/08/2018 at 02:09 • 0 commentsI am now working on the second iteration of the WorkHorse 3D Printer. The new prototype will have several fundamental changes that should greatly improve the effectiveness of the design.
I will be switching from a Delta design to a Cartesian design. I will replace the y axis linear actuator with a conveyor belt. The conveyor belt will be controlled by stepper motors that will provide y movement. This modification will simplify the design and reduce the number of separate mechanisms.
Additionally, I will improve the software application and provide a G-code tool path viewer to users. I will also add a widget that allows users to send single lines of G-code through the interface.
-
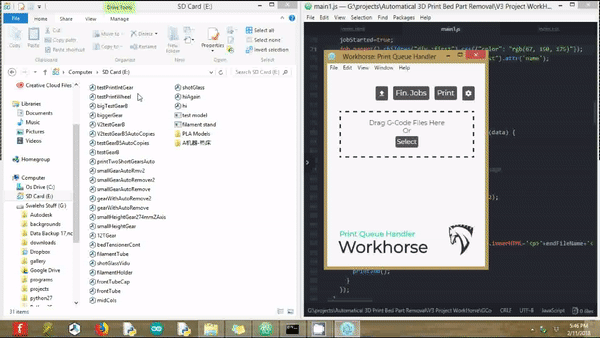
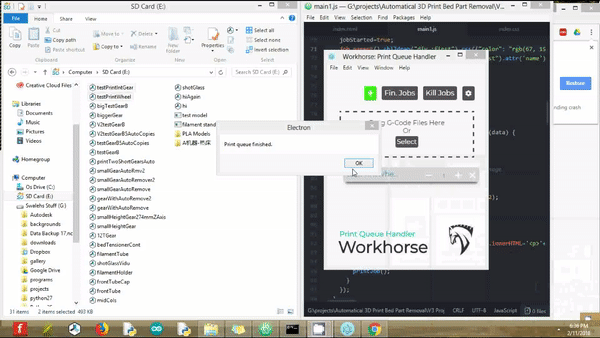
Print Test with Software Application
04/08/2018 at 02:01 • 0 commentsI have ran my first test prints with the software application. The application successfully completed several print jobs autonomously.
[Figure 1: Print Queue Test with Software Application]
-
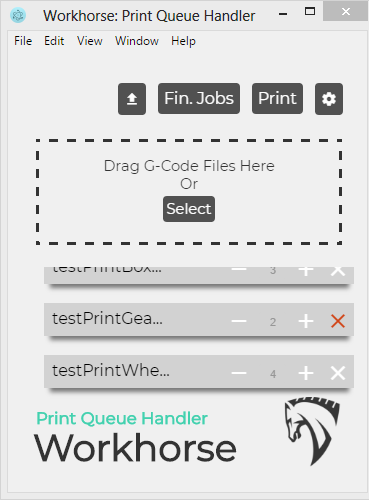
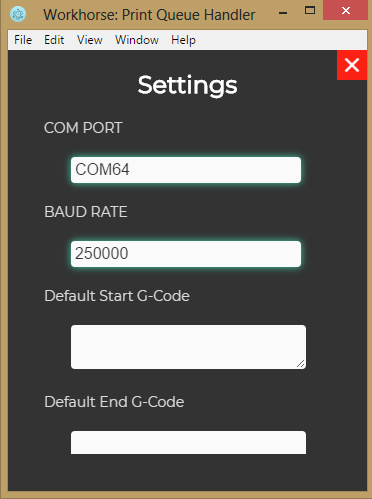
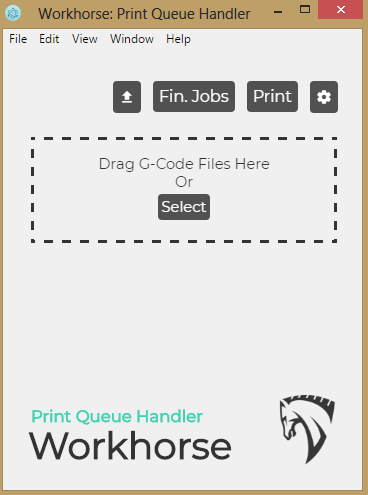
WorkHorse 3D Printer Queue Handling Software
04/08/2018 at 01:58 • 6 commentsI have finished the first draft of the software application.
The software application has an intuitive UI that allows users to add/edit/delete print jobs from a queue. The queue can be sent to the 3D printer via USB communication.
The front end is a simple desktop app made with Electron.
![]()
[Figure 1: UI Interface Main Menu with Print Jobs]
![]()
[Figure 2: UI Interface Settings Menu]
![]()
[Figure 3: UI Interface Main Menu]
![]()
[Figure 4: Using Software Interface - Sending Print Jobs]
![]()
[Figure 5: Using Software Interface - Finished Print Jobs]
The back end is a python module that provides serial communication.
-
Sending G-code to 3D Printer with Python
04/08/2018 at 01:39 • 0 commentsI have wrote a simple python script that runs 3D print jobs.
The code is quite simple. First, it establishes a serial connection to the 3D printer, with the Serial library. The program then sends the G-code file line by line to the 3D printer.
The program has callbacks to check for sending errors.
-
Serial Communication with 3D Printers
04/08/2018 at 01:35 • 0 commentsIt turns out 3D printers are configured to accept raw G-code.
After connecting to a 3D printer via serial port, you literally send the exact G-code that you want the printer to follow. No additional parsing is required.
This means I can literally just send the G-code of a file line by line to a 3D printer.
-
Building Software Application For WorkHorse 3D Printer
04/08/2018 at 00:31 • 0 commentsI am now developing a software application that will allow users to make a queue of print jobs for the WorkHorse 3D Printer.
The software application should have an intuitive interface that allows users to add/edit/delete jobs from the print queue.
The software should provide helpful real time metrics on the print jobs, such as print time, material usage, and G-code position.
The project has three main components.
- I need a software module that will parse the G-code file. The module will read the G-code line by line and send the code to the 3D printer.
- I need some means of communicating with the 3D printer. Most likely, I will have a USB connection that allows a computer to communicate via serial port.
- I need an easy to use UI that has a sleek modern design.
-
Autonomous Print Queue Improvements
04/07/2018 at 21:39 • 0 commentsI have added the shear to the front of the conveyor to ensure all parts are successfully removed. Additionally, I have cutout unnecessary lines from the G-code.
[Figure 1: WorkHorse 3D Printer Part Ejection]
The WorkHorse 3D Printer has successfully printed over 100 parts at this point
-
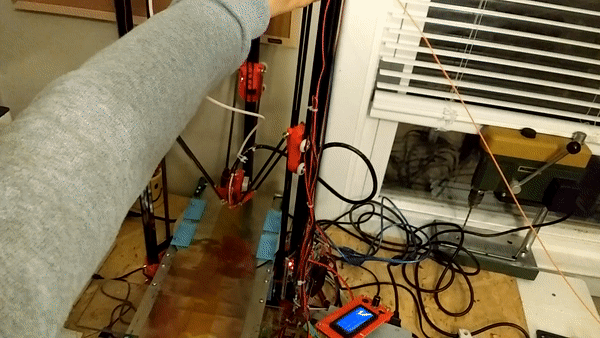
First Autonomous Print Queue Test
04/07/2018 at 21:35 • 0 commentsI finally was able to use the machine to autonomously print a series of jobs.
I manually stitched together the G-code of different 3D parts as one file. Before the printer starts a new print, the print head homes itself by hitting all of the end stops. This turns the conveyor motor on and ejects the previous part.
[Figure 1: Autonomously Printing Series of Parts]
I uploaded the collated file to the 3D printer and successfully printed a series of parts.
Two things should be improved with the system.
- A person should be able to print a series of jobs without manually stitching the G-code files together. There should be some software application that allows users to make a queue of files to print. The software application should allow users to still edit/add/delete files from the queue after the queue has been sent to the printer.
- The G-code should be optimized for mass production printing. Right now the G-code forces the printer to cool down after every part is finished and then reheat for the next job. This drastically increases the total print time.
-
Building Conveyor Pt. 3: Adding Limit Switch
04/07/2018 at 21:21 • 0 commentsInstead of me pressing a button to turn the motor on, the motor needs to turn on autonomously. I decided to add a limit switch to the end stop of the printer. Whenever the limit switch is pressed, the motor runs for a period of time. The logic is implemented with a separate Arduino Uno. Both the limit switch and motor are connected to the Arduino. The motor is connected to an H-Bridge first.
![]()
[Figure 1: Pressing Limit Switch Turns Motor on For Period of Time]
This was a quick solution, but it is also inefficient. I added another limit switch to the top of the 3D printer even though there are already three in that location. It would have been better to multipurpose one of the existing limit switches instead. Additionally, I used a separate Arduino when a microcontroller is already controlling the other motors of the 3D printer. Instead of adding an entirely separate cortex, I should just edit the firmware of the original microcontroller. These lazy decisions over complicate the mechanism and make it difficult to change design later on.
Right now, my goal is to prove that conveyor belts are an effective method for part ejection. Eventually, I plan on scrapping the Delta system altogether and using a Cartesian system instead.
Automatic Infinite 3D Printer
The Automatic Infinite 3D Printer (i3D) gives anyone the power of a factory.