 Johnny
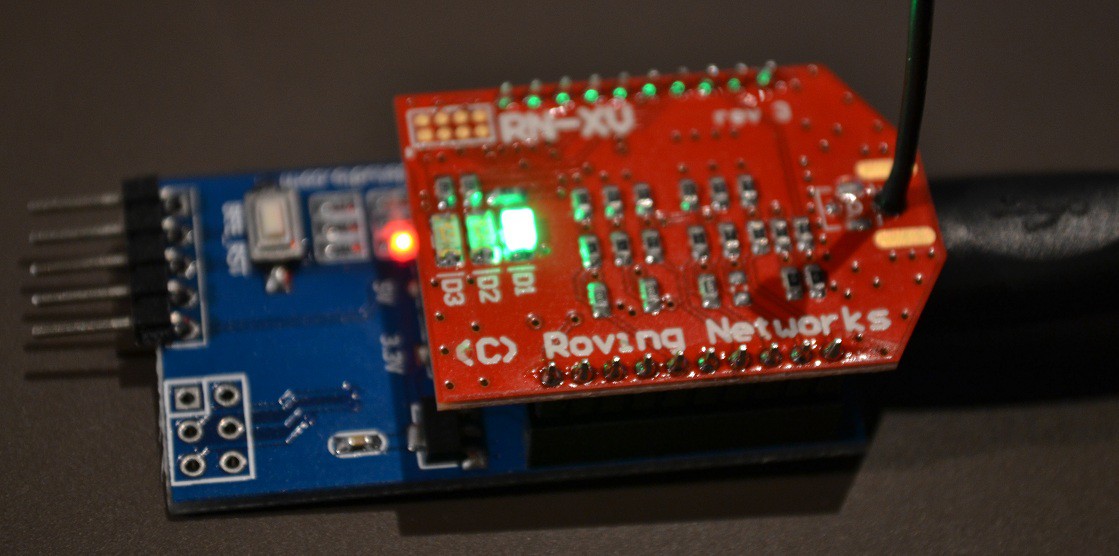
In this project log, I'm going to explain how to setup a WiFly module using an XBee explorer, so you can start using it with a microcontroller on your home network.
Required Parts:
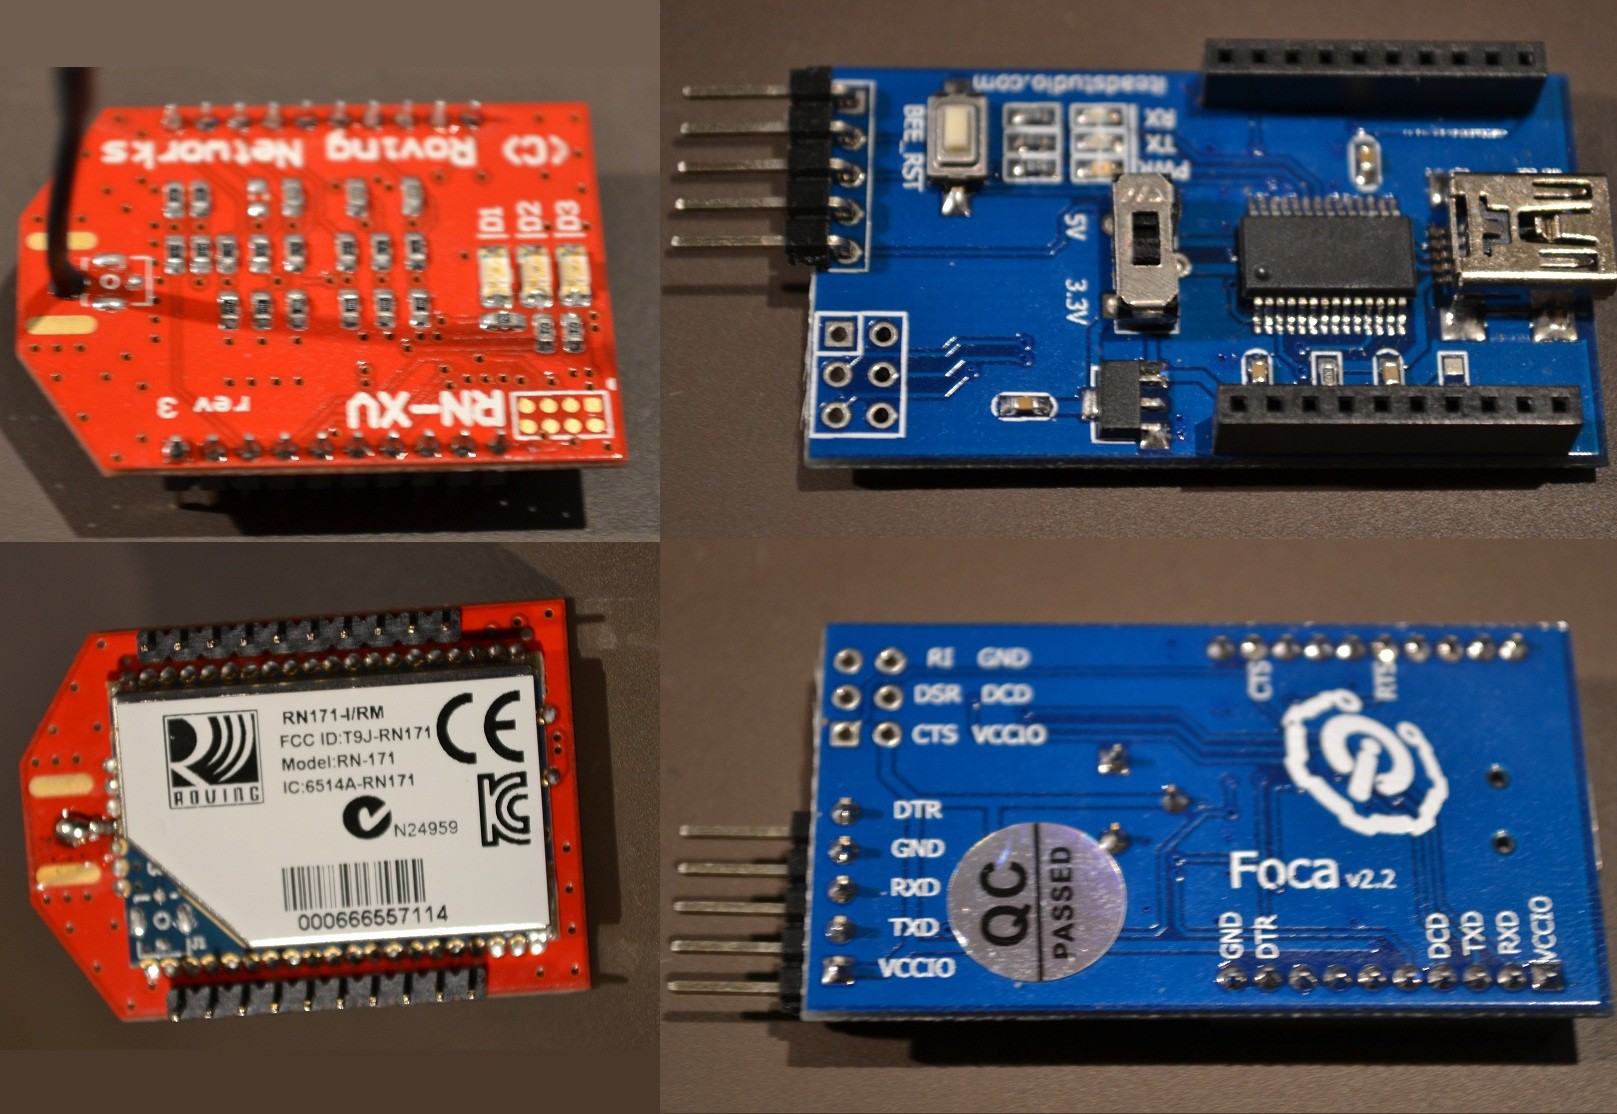
- WiFly RN-XV - https://www.sparkfun.com/products/10822
- Xbee Explorer (I use the FOCA v2.2 by Itead Studio) - http://imall.iteadstudio.com/im120525005.html
- USB cable
Required Software:
- PuTTY or Tera Term - http://www.chiark.greenend.org.uk/~sgtatham/putty/download.html
- WiFly User Guide - http://ww1.microchip.com/downloads/en/DeviceDoc/50002230A.pdf
*NOTE* - Make sure you use the switch on explorer to supply 3.3V! Don't worry about the UART RX pin though, it's 5V tolerant.
Getting Started:
- Step One - Plug the WiFly module into the XBee explorer, and plug the USB cable into the computer. Depending on the explorer you use, you may need to download the drivers. Mine requires a driver for the FT232RL chip. Found here: http://www.ftdichip.com/Drivers/VCP.htm
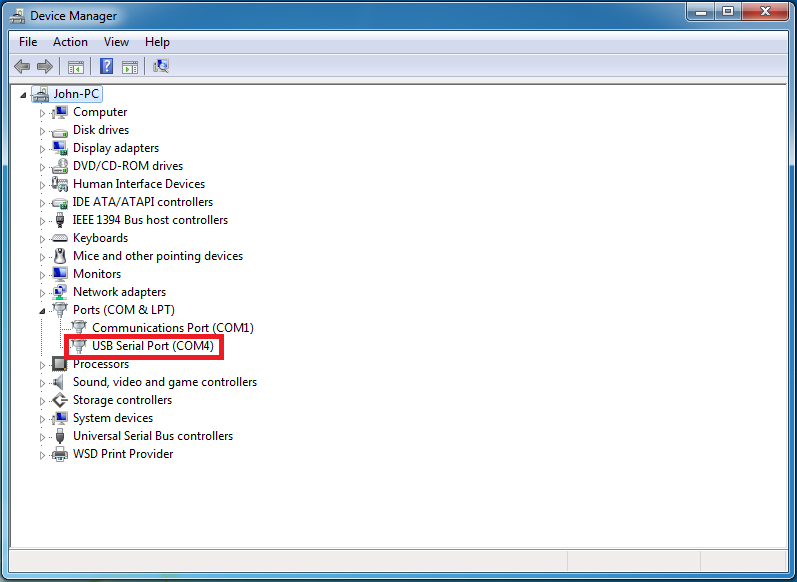
- Step Two - After your drivers are installed, Open "Device Manager" and under "Ports (COM & LPT)" you should see your device and port number. Jot that down.
![]()
- Step Three - Open "PuTTY". Under "Connection type:" select serial. Under "Serial line", type the COM port for your explorer. e.g. "COM1". Under "Speed", you can leave "9600". This is the correct baud rate for the WiFly from factory.
![]()
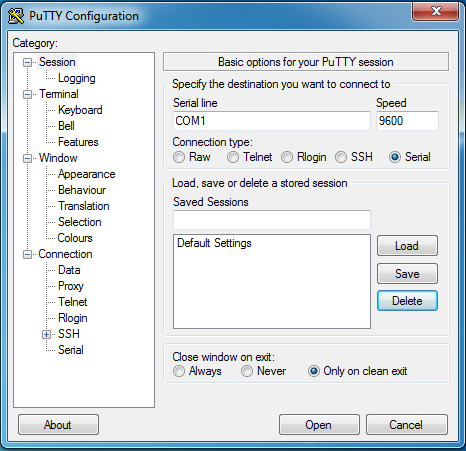
Step Four
- Now just click "Open".
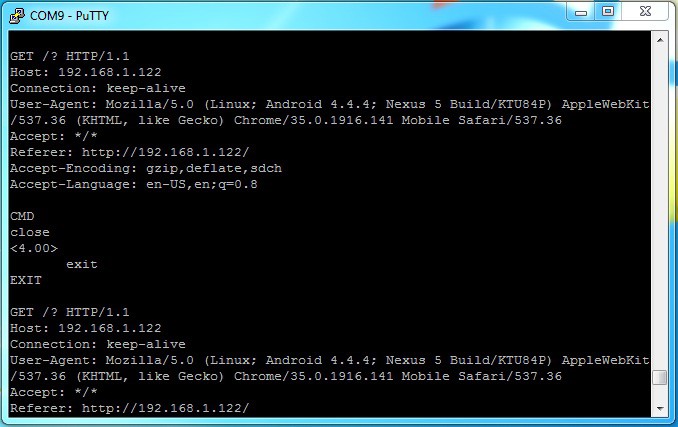
Command Mode
Command mode is the mode in which your WiFly module will accept commands via UART to change settings and perform actions. When powered up, by default the module is not in command mode. We need to enter command mode so we can start configuring the device. To enter command mode, make sure nothing is transmitted to the module for 250ms or more, then you must send "$$" and wait another 250ms or more afterwards.
What You Type:
$$
Response:
CMD
The "CMD" response from the module let's you know you're now in command mode.
Connecting to Your Network
Now that you are in command mode, lets tell the WyFly module what type of security our WiFi network has. I have WPA2-PSK. Yours may be different. Check your router settings.
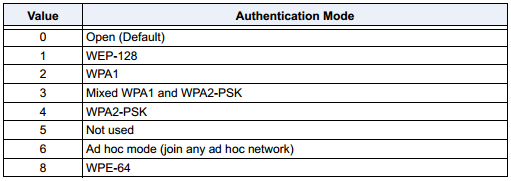
Based on the table above, I enter the following command and press enter:
set wlan auth 4
because the module will echo back to you in command mode, you will see:
set wlan auth 4
AOK
<4.00>
The "AOK" is a response from the module verifying that the module understands and has performed the command successfully. The "<4.00>" response is the firmware version of the module. From now on I'll just show the responses.
Next I want to set my WiFi's SSID. My command is:
set wlan ssid TP_LINK_B3DFFE
AOK
<4.00>
Next give it your password:
set wlan phrase password
AOK
<4.00>
I want my module to auto-connect to the network when it is powered on, so:
set wlan join 1
AOK
<4.00>
When the module is working as a HTTP server, I don't want certain command responses to get through to the client. So I turn them off.
set comm remote 0
AOK
<4.00>
set comm open 0
AOK
<4.00>
set comm close 0
AOK
<4.00>
Next I set the port I wish to work on. Because I want to use this as a HTTP server, I set my port to 80:
set ip localport 80
AOK
<4.00>
And finally I need to save my settings and reboot so they take effect:
save
Storing in config
<4.00> reboot
*Reboot*
Now my WyFly module is ready to use! I recommend setting your baud rate higher then 9600, I use 38400 makes pages load faster.
For more information and commands, go to: http://ww1.microchip.com/downloads/en/DeviceDoc/50002230A.pdf
All the best.
Discussions
Become a Hackaday.io Member
Create an account to leave a comment. Already have an account? Log In.