Pain points in the present model and ideation for next prototype:
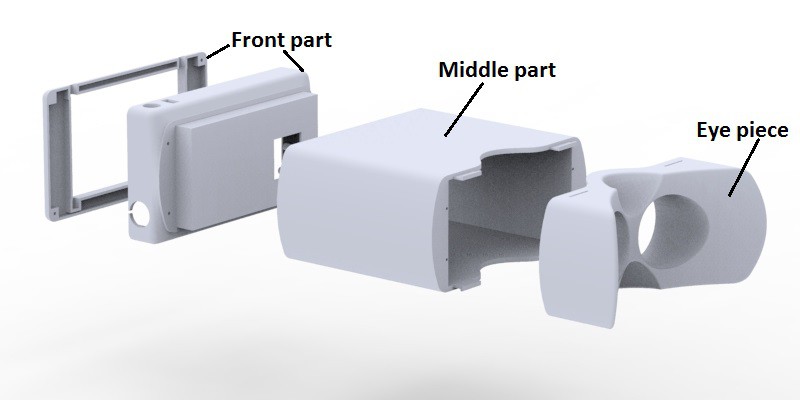
The earlier device housing was made in three part assembly which made it easy to assemble and disassemble during bugging. So the same method will be used in the coming prototype as well. The three parts are
- Eye piece (Through which the camera see's the eye)
- Middle part (This houses the optical setup with the camera)
- Front part (This contains screen, Rpi and PCB's)
![]()
Detailed description of pain points and ideation process.
The user interaction of the device:
- Eyepiece fitment on the examinee eye
![]()
- The present model doesn't have proper grip to hold it. This caused slipping of the prototype while testing . Proper gripping has to be given to hold the device while testing.. This can be solved by giving embosses with ergonomic hand detailing on the middle part of the device.
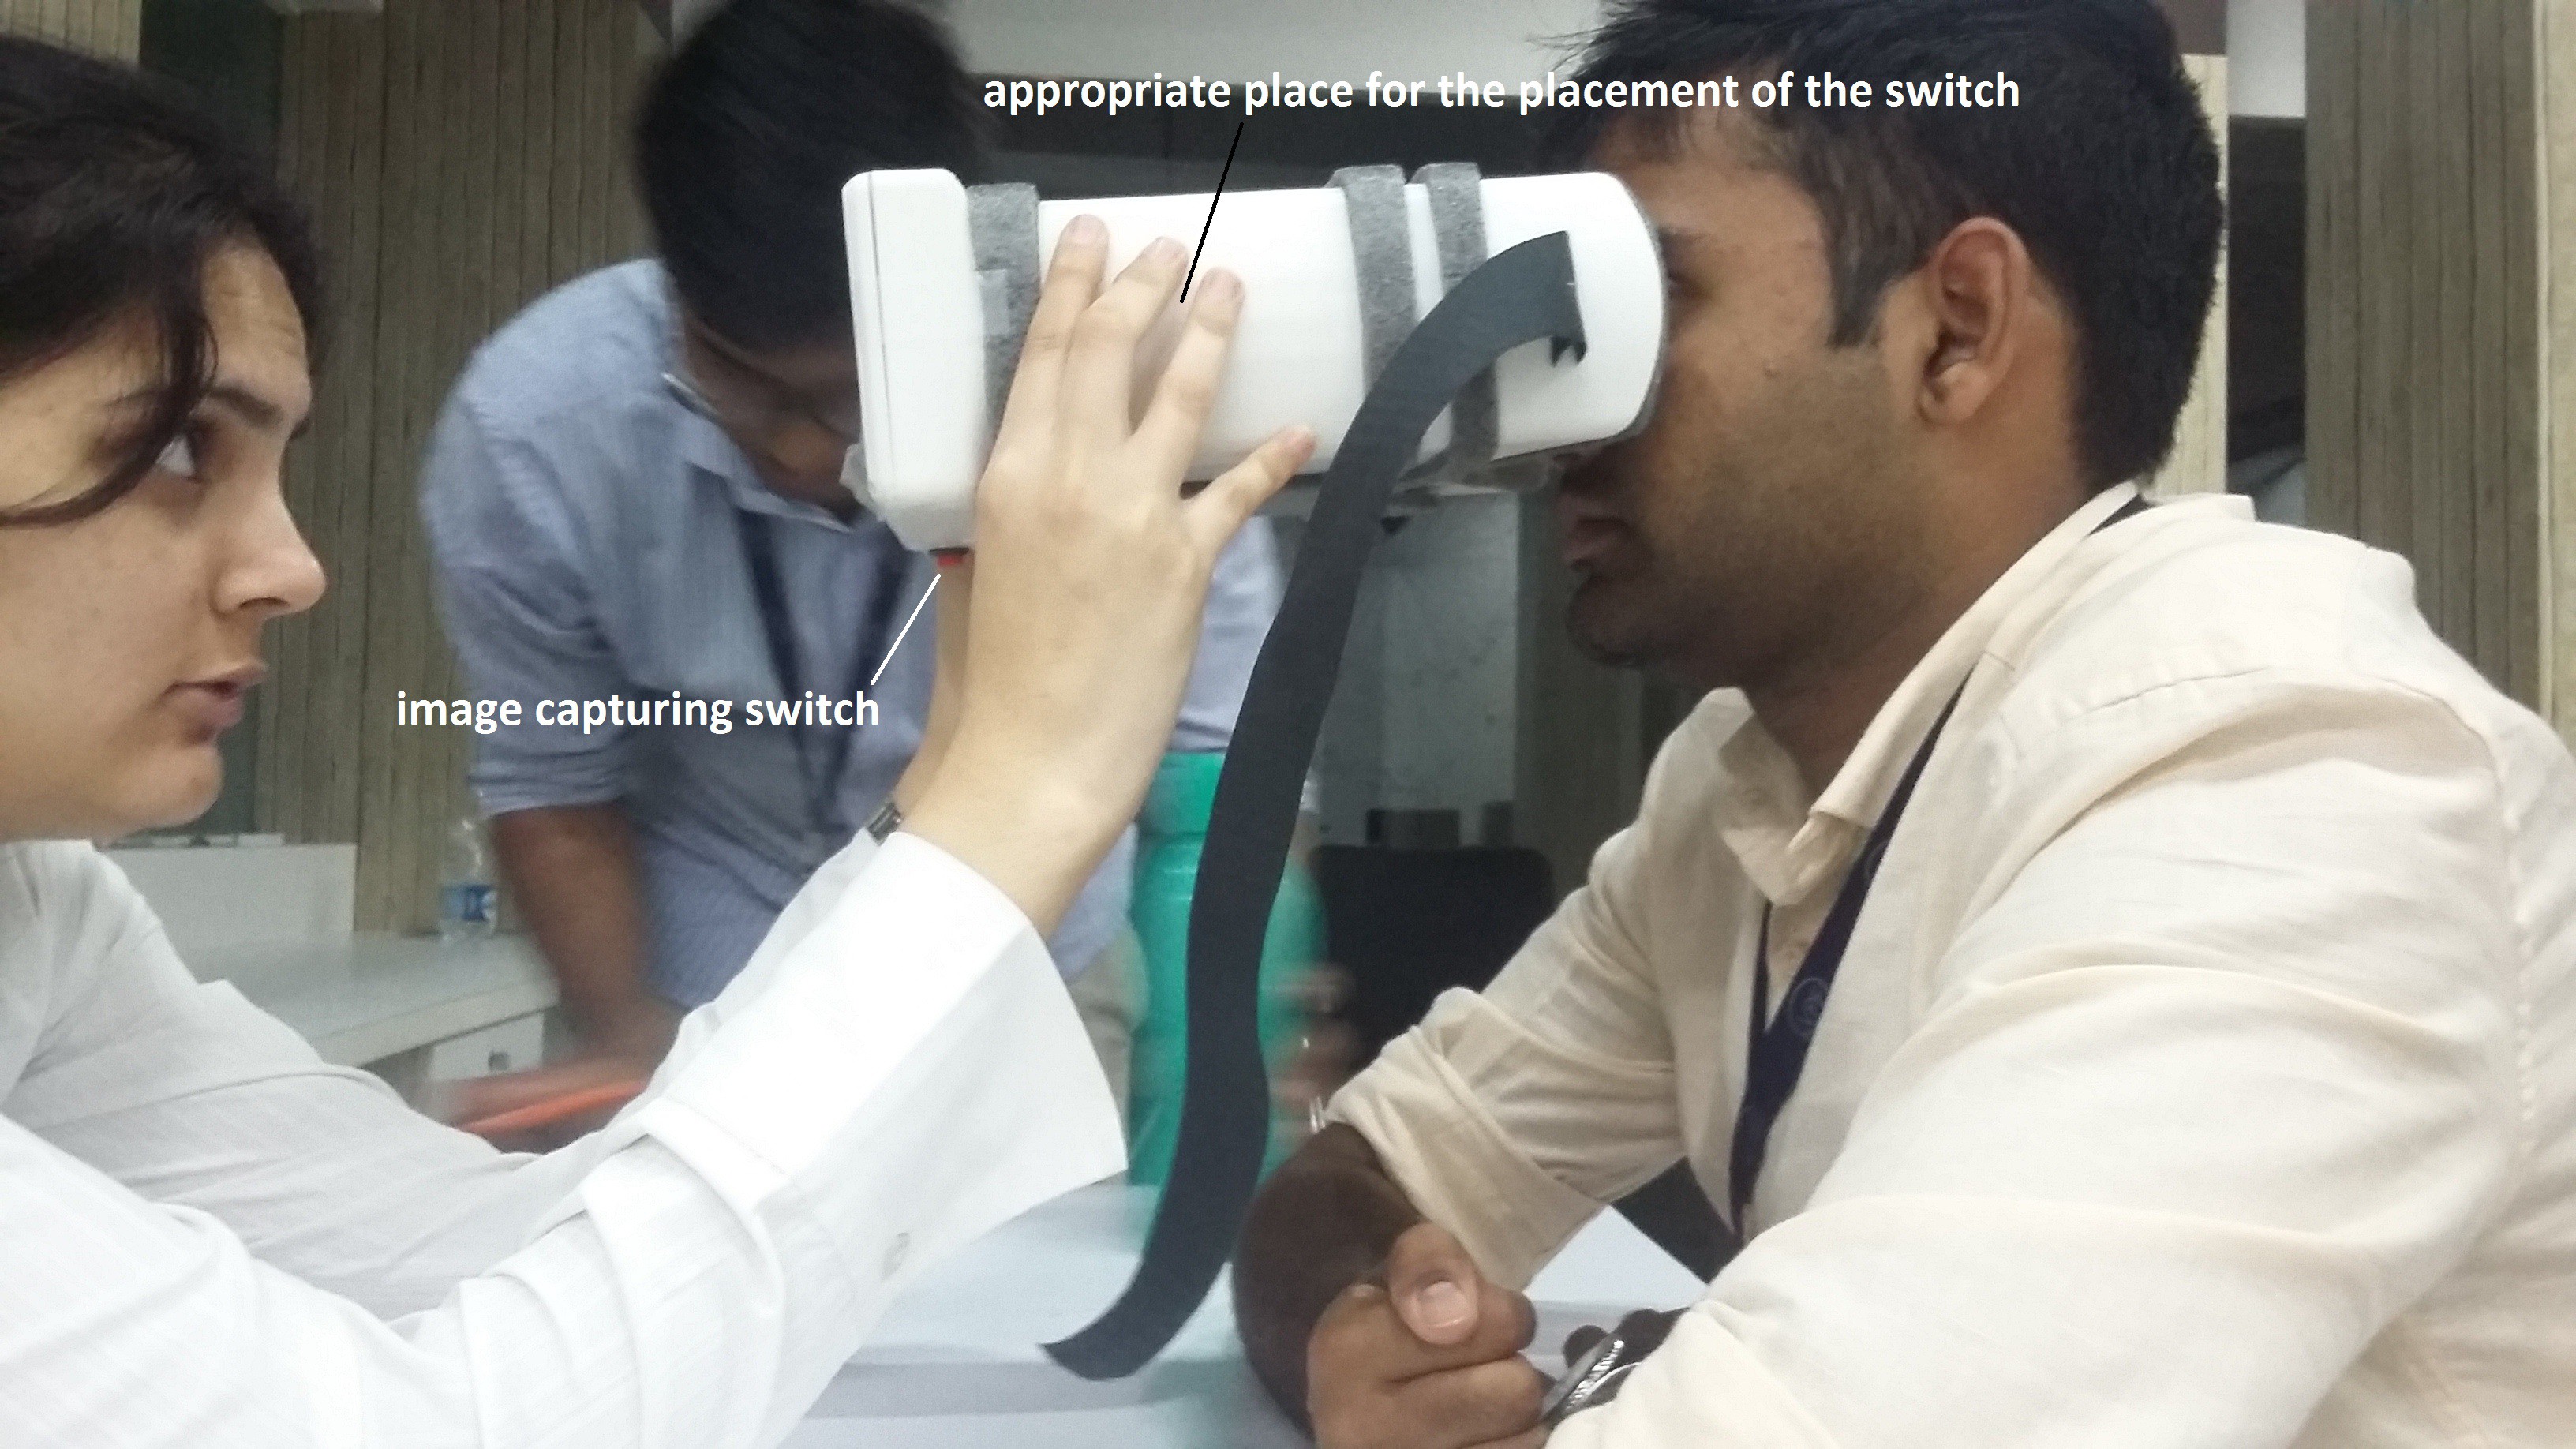
- Image capturing switch is too far from the screen and is not easily accessible
while taking the picture. The device front part is bulkier than the palm so
reaching for the touch screen is a bit difficult with simultaneously focusing the retina and taking the image.
![]()
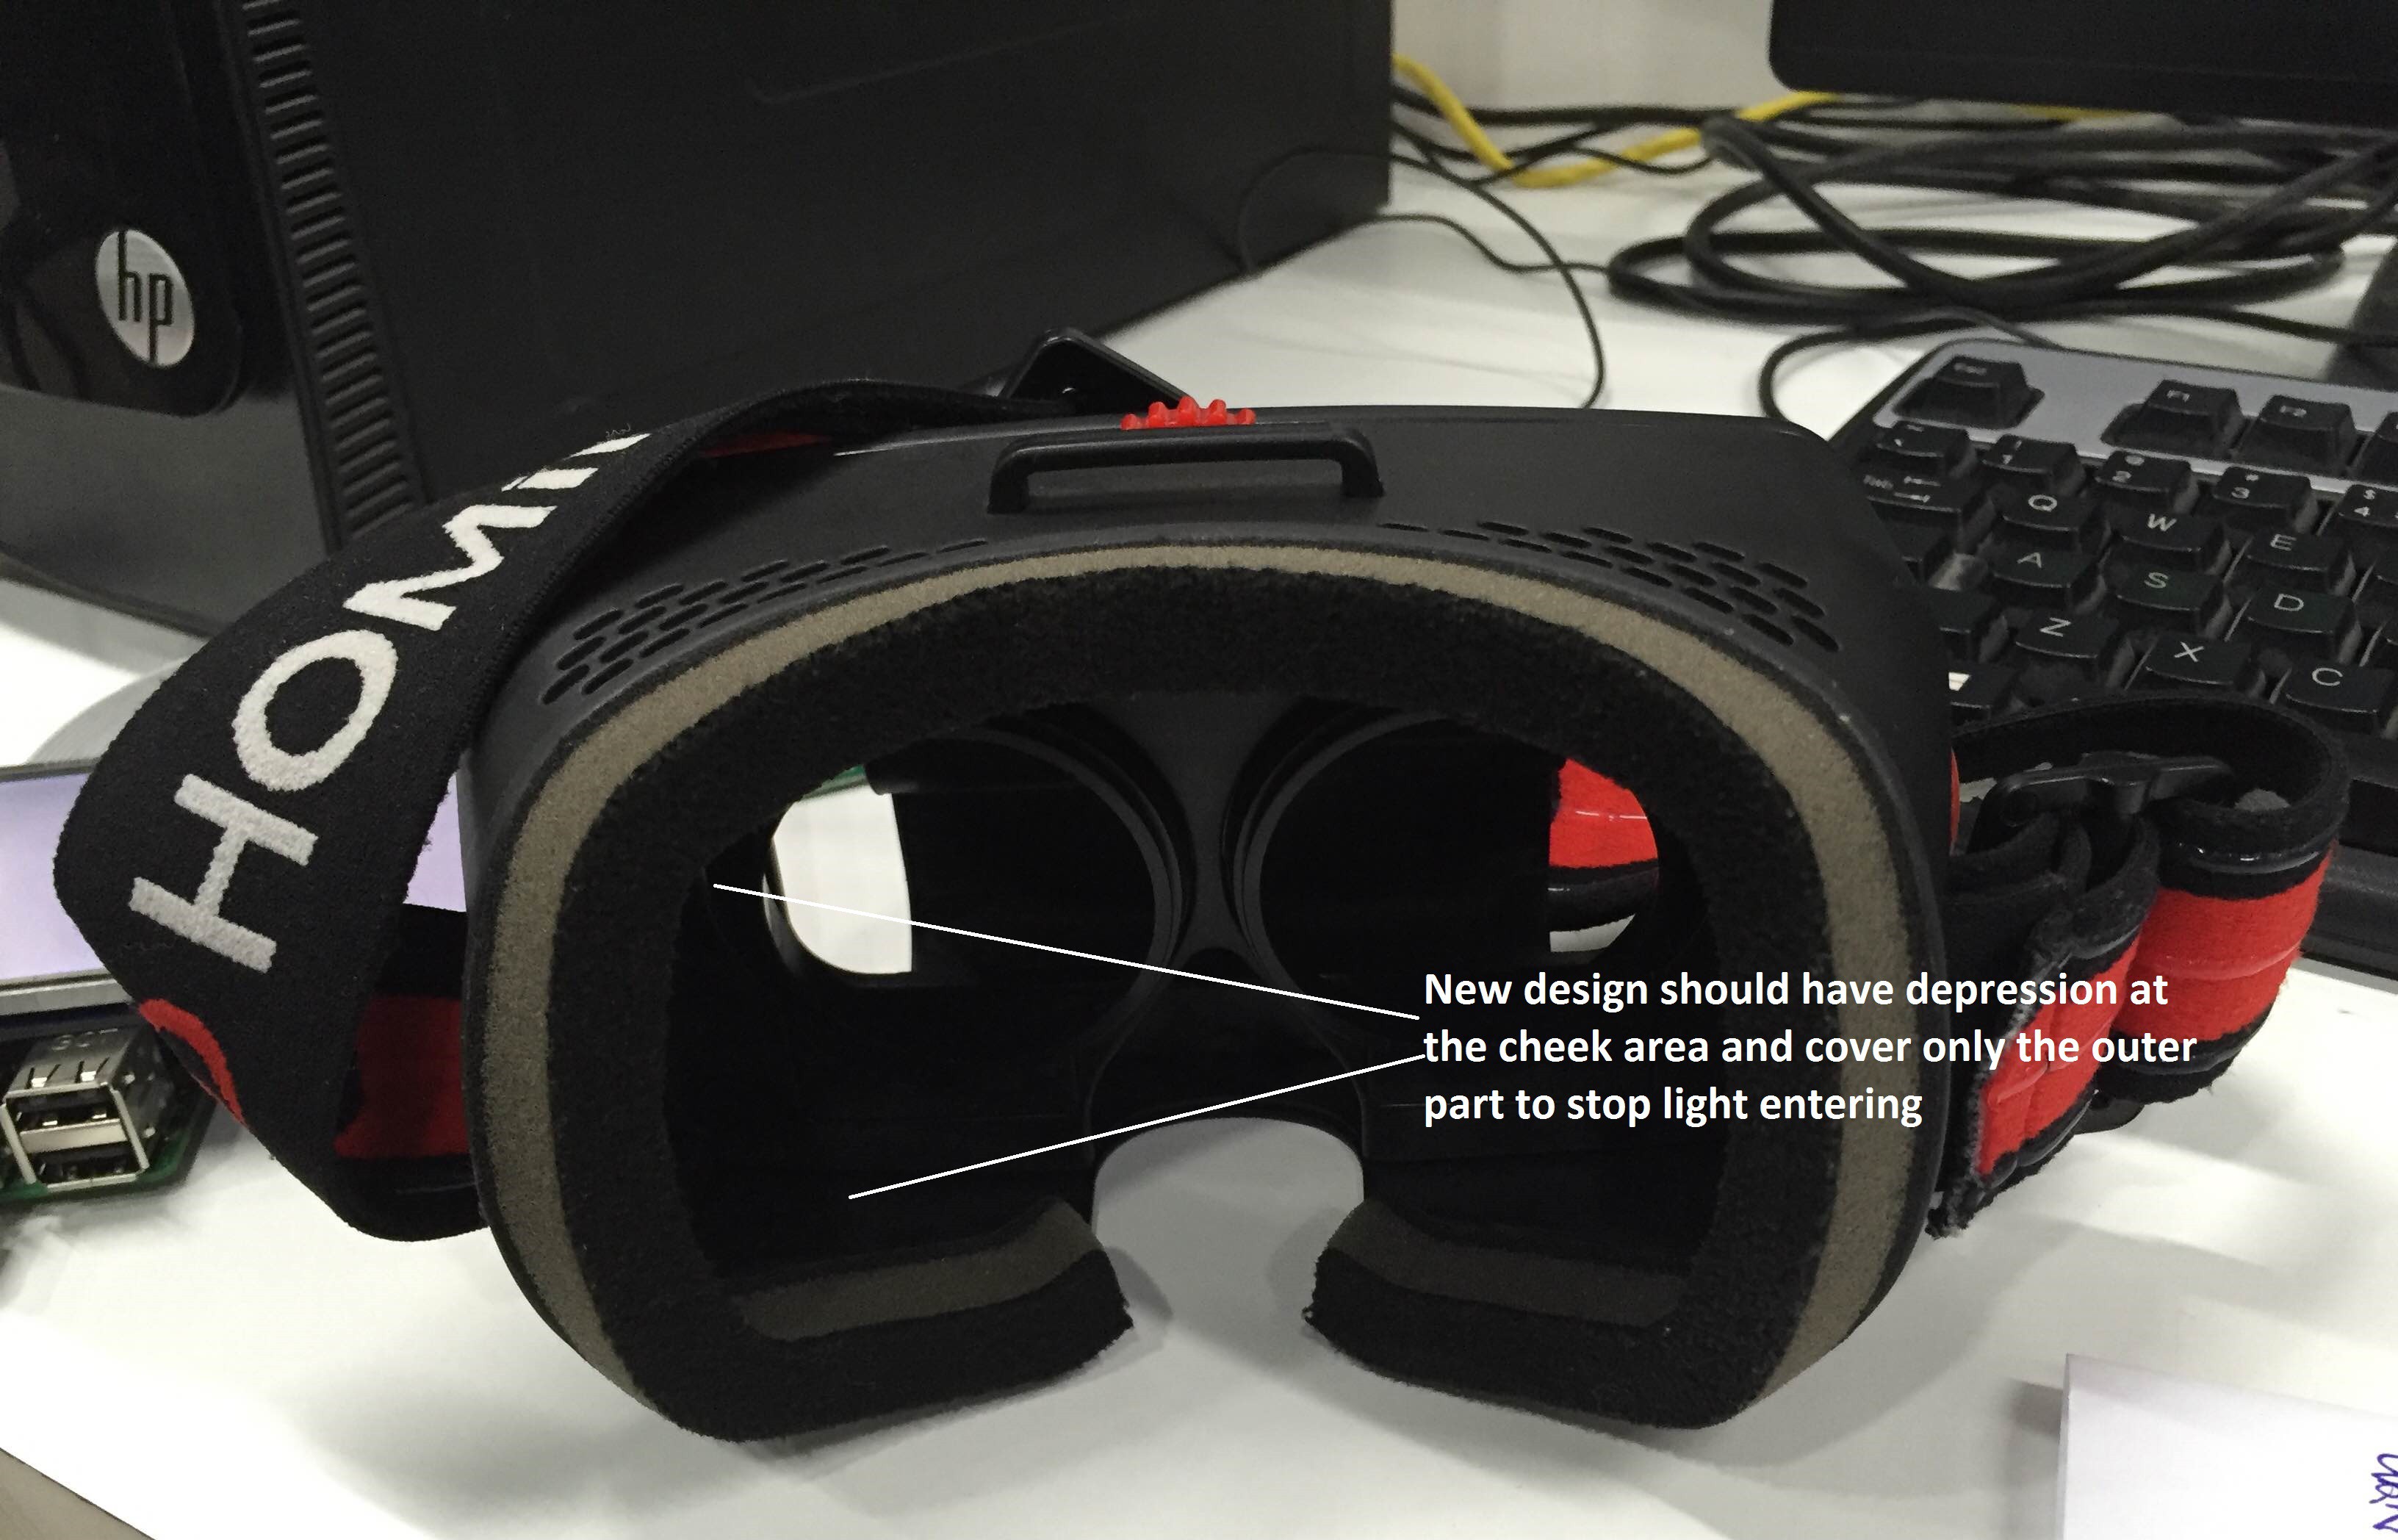
- Heat buildup due to processors running on camera and Rpi. So vents have to be provided on the outer surface for convective heat transfer through air.
The focusing issue:
- Same problem as in VR headgear, because of different refractive
errors the lens should be moved front and back to get the retina in camera's
focus. In our case the lens alone shouldn't be moved as it changes the field of view
of retina. The whole optics box has to be moved to compensate for the
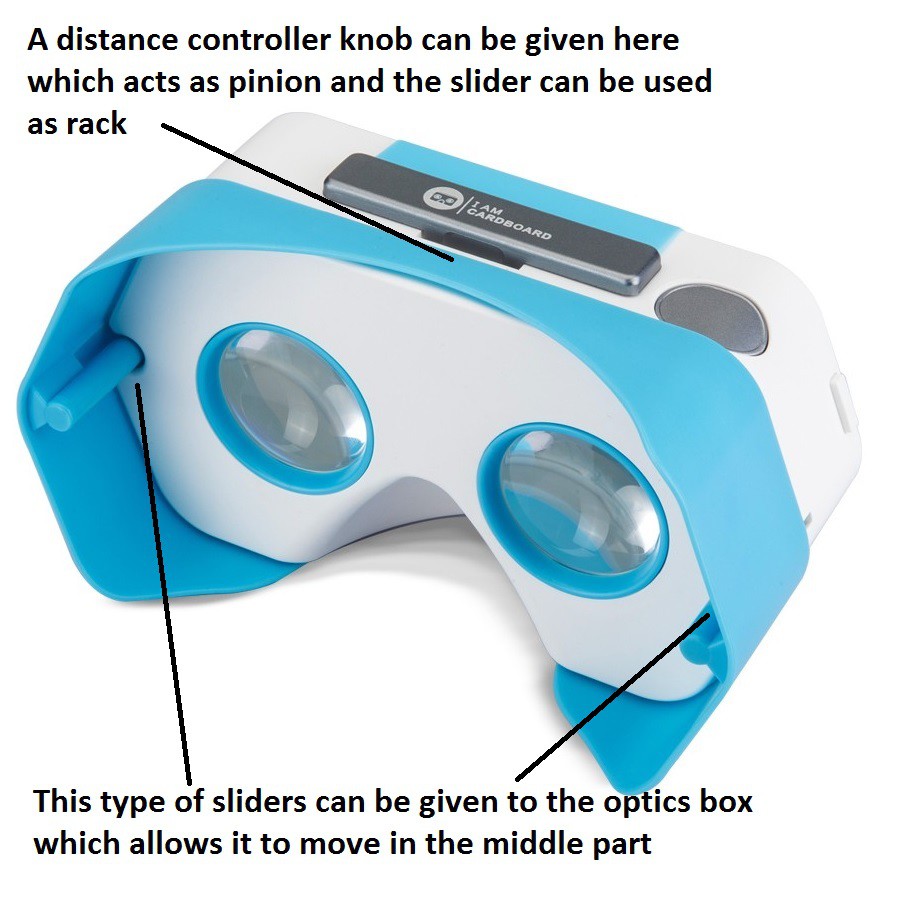
refractive error. This can be achieved by adding a sliding mechanism to the box
and a rack and pinion mechanism to control the distance between the eye and the
lens.
![]()
Device orthogonality with the examinee:
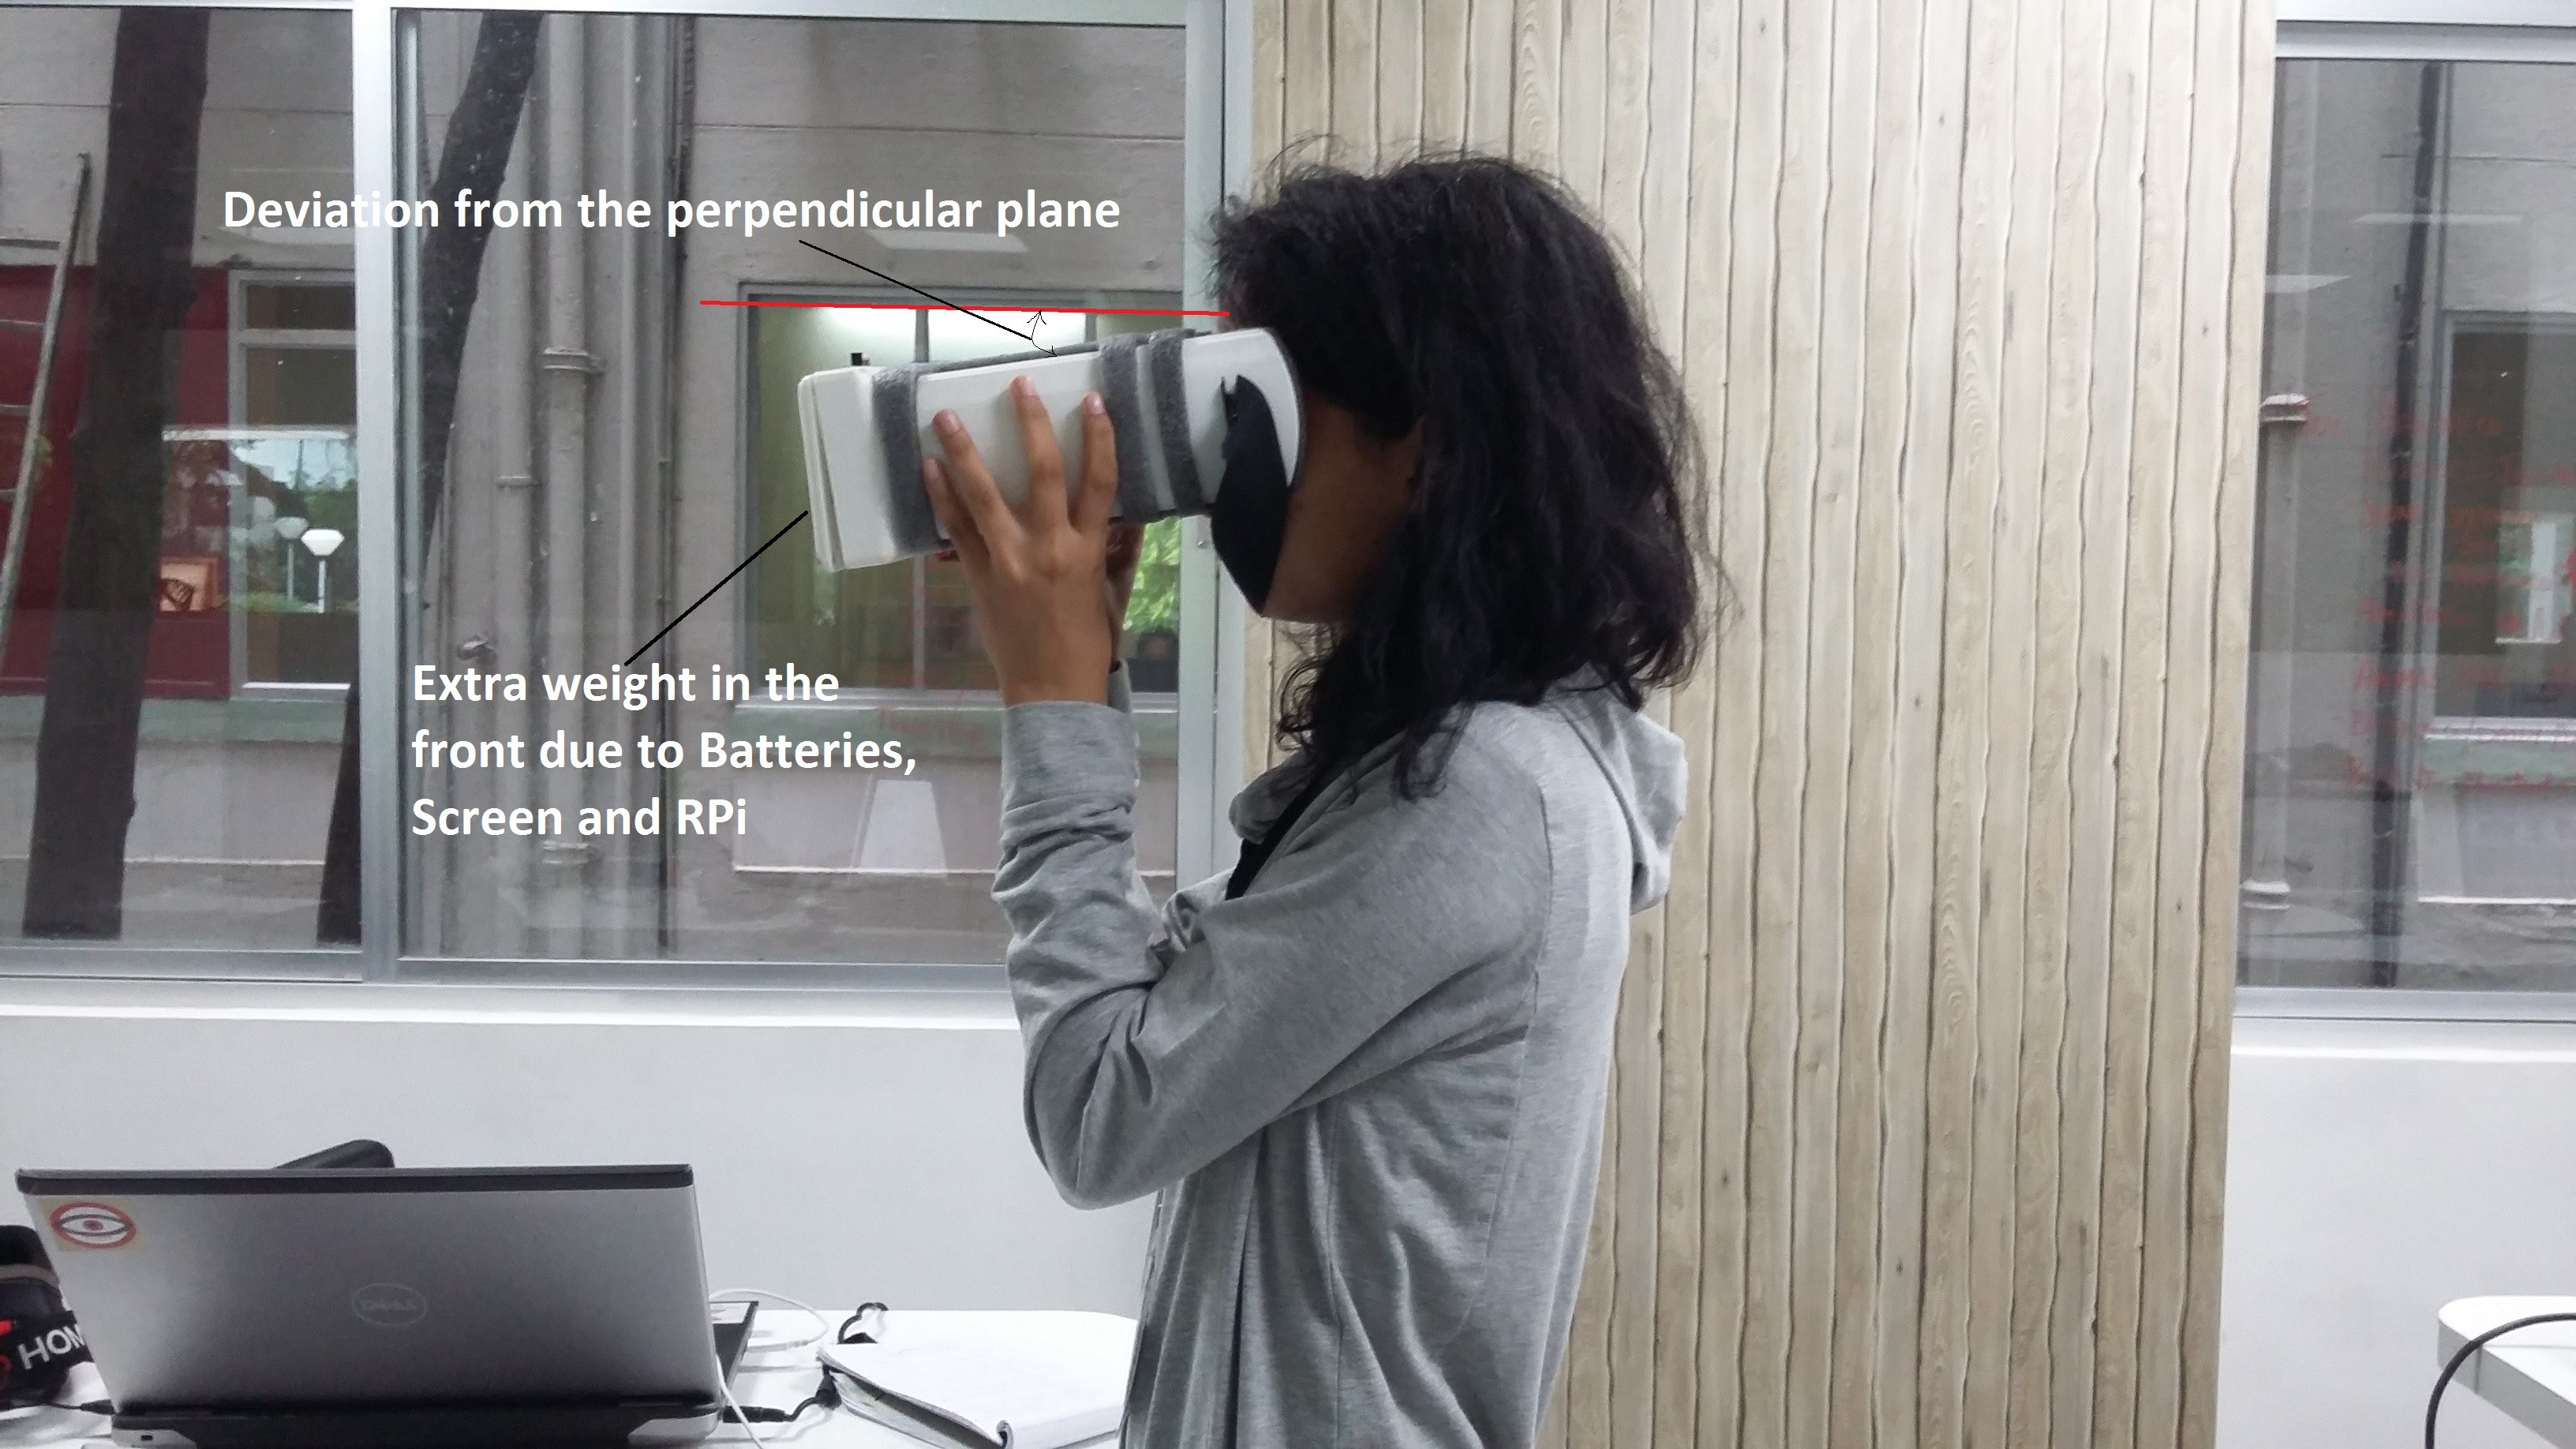
- While capturing the image the objective lens(20D) plane has to be
parallel to the subject's eye lens plane. In the present prototype this is not
happening because of uneven mass distribution towards the back.
![]() If not parallel we get distorted images of the retina as the camera and light won't focus the retina properly. By keeping the device orthogonal to the examinee we can ensure the planes of 20D lens and lens of the eye are parallel to each other.
If not parallel we get distorted images of the retina as the camera and light won't focus the retina properly. By keeping the device orthogonal to the examinee we can ensure the planes of 20D lens and lens of the eye are parallel to each other.![]() It can be done by two methods one by adding a headband as normally used in VR headgears. Other option would be arranging components in such a way it redistributes the whole weight and achieve orthogonality as keeping an head band with the device needs sterilization every time after use and feels little invasive for the patient.
It can be done by two methods one by adding a headband as normally used in VR headgears. Other option would be arranging components in such a way it redistributes the whole weight and achieve orthogonality as keeping an head band with the device needs sterilization every time after use and feels little invasive for the patient.
Selecting proper prototyping technique:
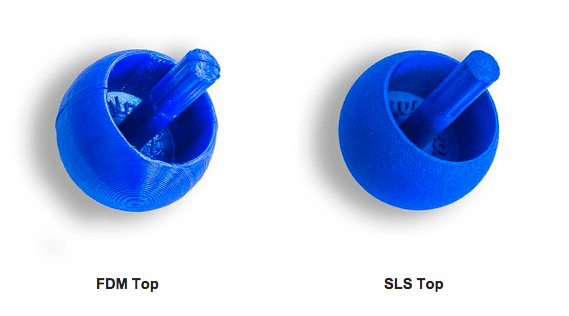
- Present prototype was made on an FDM 3D printer. After printing on an FDM printer we
need to remove supports and excess plastic either with cutting tools or
grinding tools. Lot of postprocessing has to be done in getting smoother
surface. This causes uneven dimensional tolerances. Once we add the sliding mechanism
and three piece assembly device the surface should be really smooth for movements and ease of assembly. This can be overcome by printing those parts
with an SLS printer.
![]()
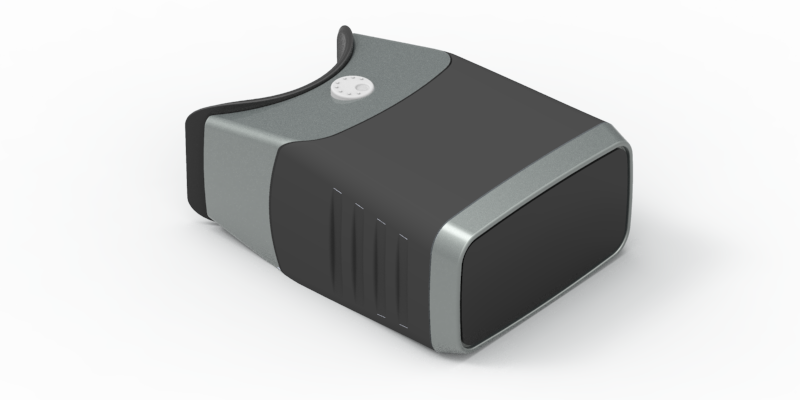
Mockup
 Sandeep

 If not parallel we get distorted images of the retina as the camera and light won't focus the retina properly. By keeping the device orthogonal to the examinee we can ensure the planes of 20D lens and lens of the eye are parallel to each other.
 It can be done by two methods one by adding a headband as normally used in VR headgears. Other option would be arranging components in such a way it redistributes the whole weight and achieve orthogonality as keeping an head band with the device needs sterilization every time after use and feels little invasive for the patient.
Discussions
Become a Hackaday.io Member
Create an account to leave a comment. Already have an account? Log In.