 Maksim Surguy
I am working on a better version of the user interface that is displayed on the FPV receiver.
Looking at the PiCamera Python package documentation, I found that I can create multiple overlays and control their precise dimensions and positioning. Not making overlays fullscreen allows to have clear central frame and information above and below the frame: http://picamera.readthedocs.io/en/release-1.10/api_renderers.html#picamera.renderers.PiRenderer
Using this, and also using a crosshair image, you can create a better looking UI for the display. Here's the code that I used to create display in the image below:
#!/usr/bin/python

import picamera
import time
import numpy as np
import string
import random
import os

from PIL import Image, ImageDraw, ImageFont

# Video Resolution for recording
VIDEO_HEIGHT = 940
VIDEO_WIDTH = 1280

baseDir='/home/pi/osd/' # directory where the video will be recorded

os.system('clear') # clear the terminal from any other text

# Create empty images to store text overlays
textOverlayCanvas = Image.new("RGB", (704, 60))
textOverlayPixels = textOverlayCanvas.load()

# Use Roboto font (must be downloaded first)
font = ImageFont.truetype("/usr/share/fonts/truetype/roboto/Roboto-Regular.ttf", 20)

with picamera.PiCamera() as camera:
   camera.resolution = (VIDEO_WIDTH, VIDEO_HEIGHT)
   camera.framerate = 60
   camera.led = False
   camera.start_preview()

   topText = "Alt: 310m       Spd: 45km/h         Dir: N"
   bottomText = "47.6062 N, 122.3321 W   Home: 322m    Rec: 3:22"

   topOverlayImage = textOverlayCanvas.copy()
   bottomOverlayImage = textOverlayCanvas.copy()

   # Load the crosshair image
   crosshairImg = Image.open('crosshair.png')

   # Create an image padded to the required size with
   crosshairPad = Image.new('RGB', (((crosshairImg.size[0] + 31) // 32) * 32, ((crosshairImg.size[1] + 15) // 16) * 16))
   crosshairPad.paste(crosshairImg, (0, 0))

   # Attach overlays
   topOverlay = camera.add_overlay(topOverlayImage.tostring(), size=(704,60), layer=3, alpha=128, fullscreen=False, window=(0,20,704,60))
   bottomOverlay = camera.add_overlay(bottomOverlayImage.tostring(), size=(704,60), layer=4, alpha=128, fullscreen=False, window=(0,500,704,60))
   crosshairOverlay = camera.add_overlay(crosshairPad.tostring(), size=(704,512), layer=5, alpha=10, fullscreen=False, window=(20,30,704,512))

   try:
      while True:
         topOverlayImage = textOverlayCanvas.copy()
         bottomOverlayImage = textOverlayCanvas.copy()

         drawTopOverlay = ImageDraw.Draw(topOverlayImage)
         drawTopOverlay.text((200, 15), topText, font=font, fill=(255, 0, 255))

         topOverlay.update(topOverlayImage.tostring())

         drawBottomOverlay = ImageDraw.Draw(bottomOverlayImage)
         drawBottomOverlay.text((150, 20), bottomText, font=font, fill=(255, 255, 255))

         bottomOverlay.update(bottomOverlayImage.tostring())

         time.sleep(1)

   except KeyboardInterrupt:
      camera.remove_overlay(topOverlay)
      camera.remove_overlay(bottomOverlay)
      camera.remove_overlay(crosshairOverlay)

      print "Cancelled"

   finally:
      camera.remove_overlay(topOverlay)
      camera.remove_overlay(bottomOverlay)
      camera.remove_overlay(crosshairOverlay)
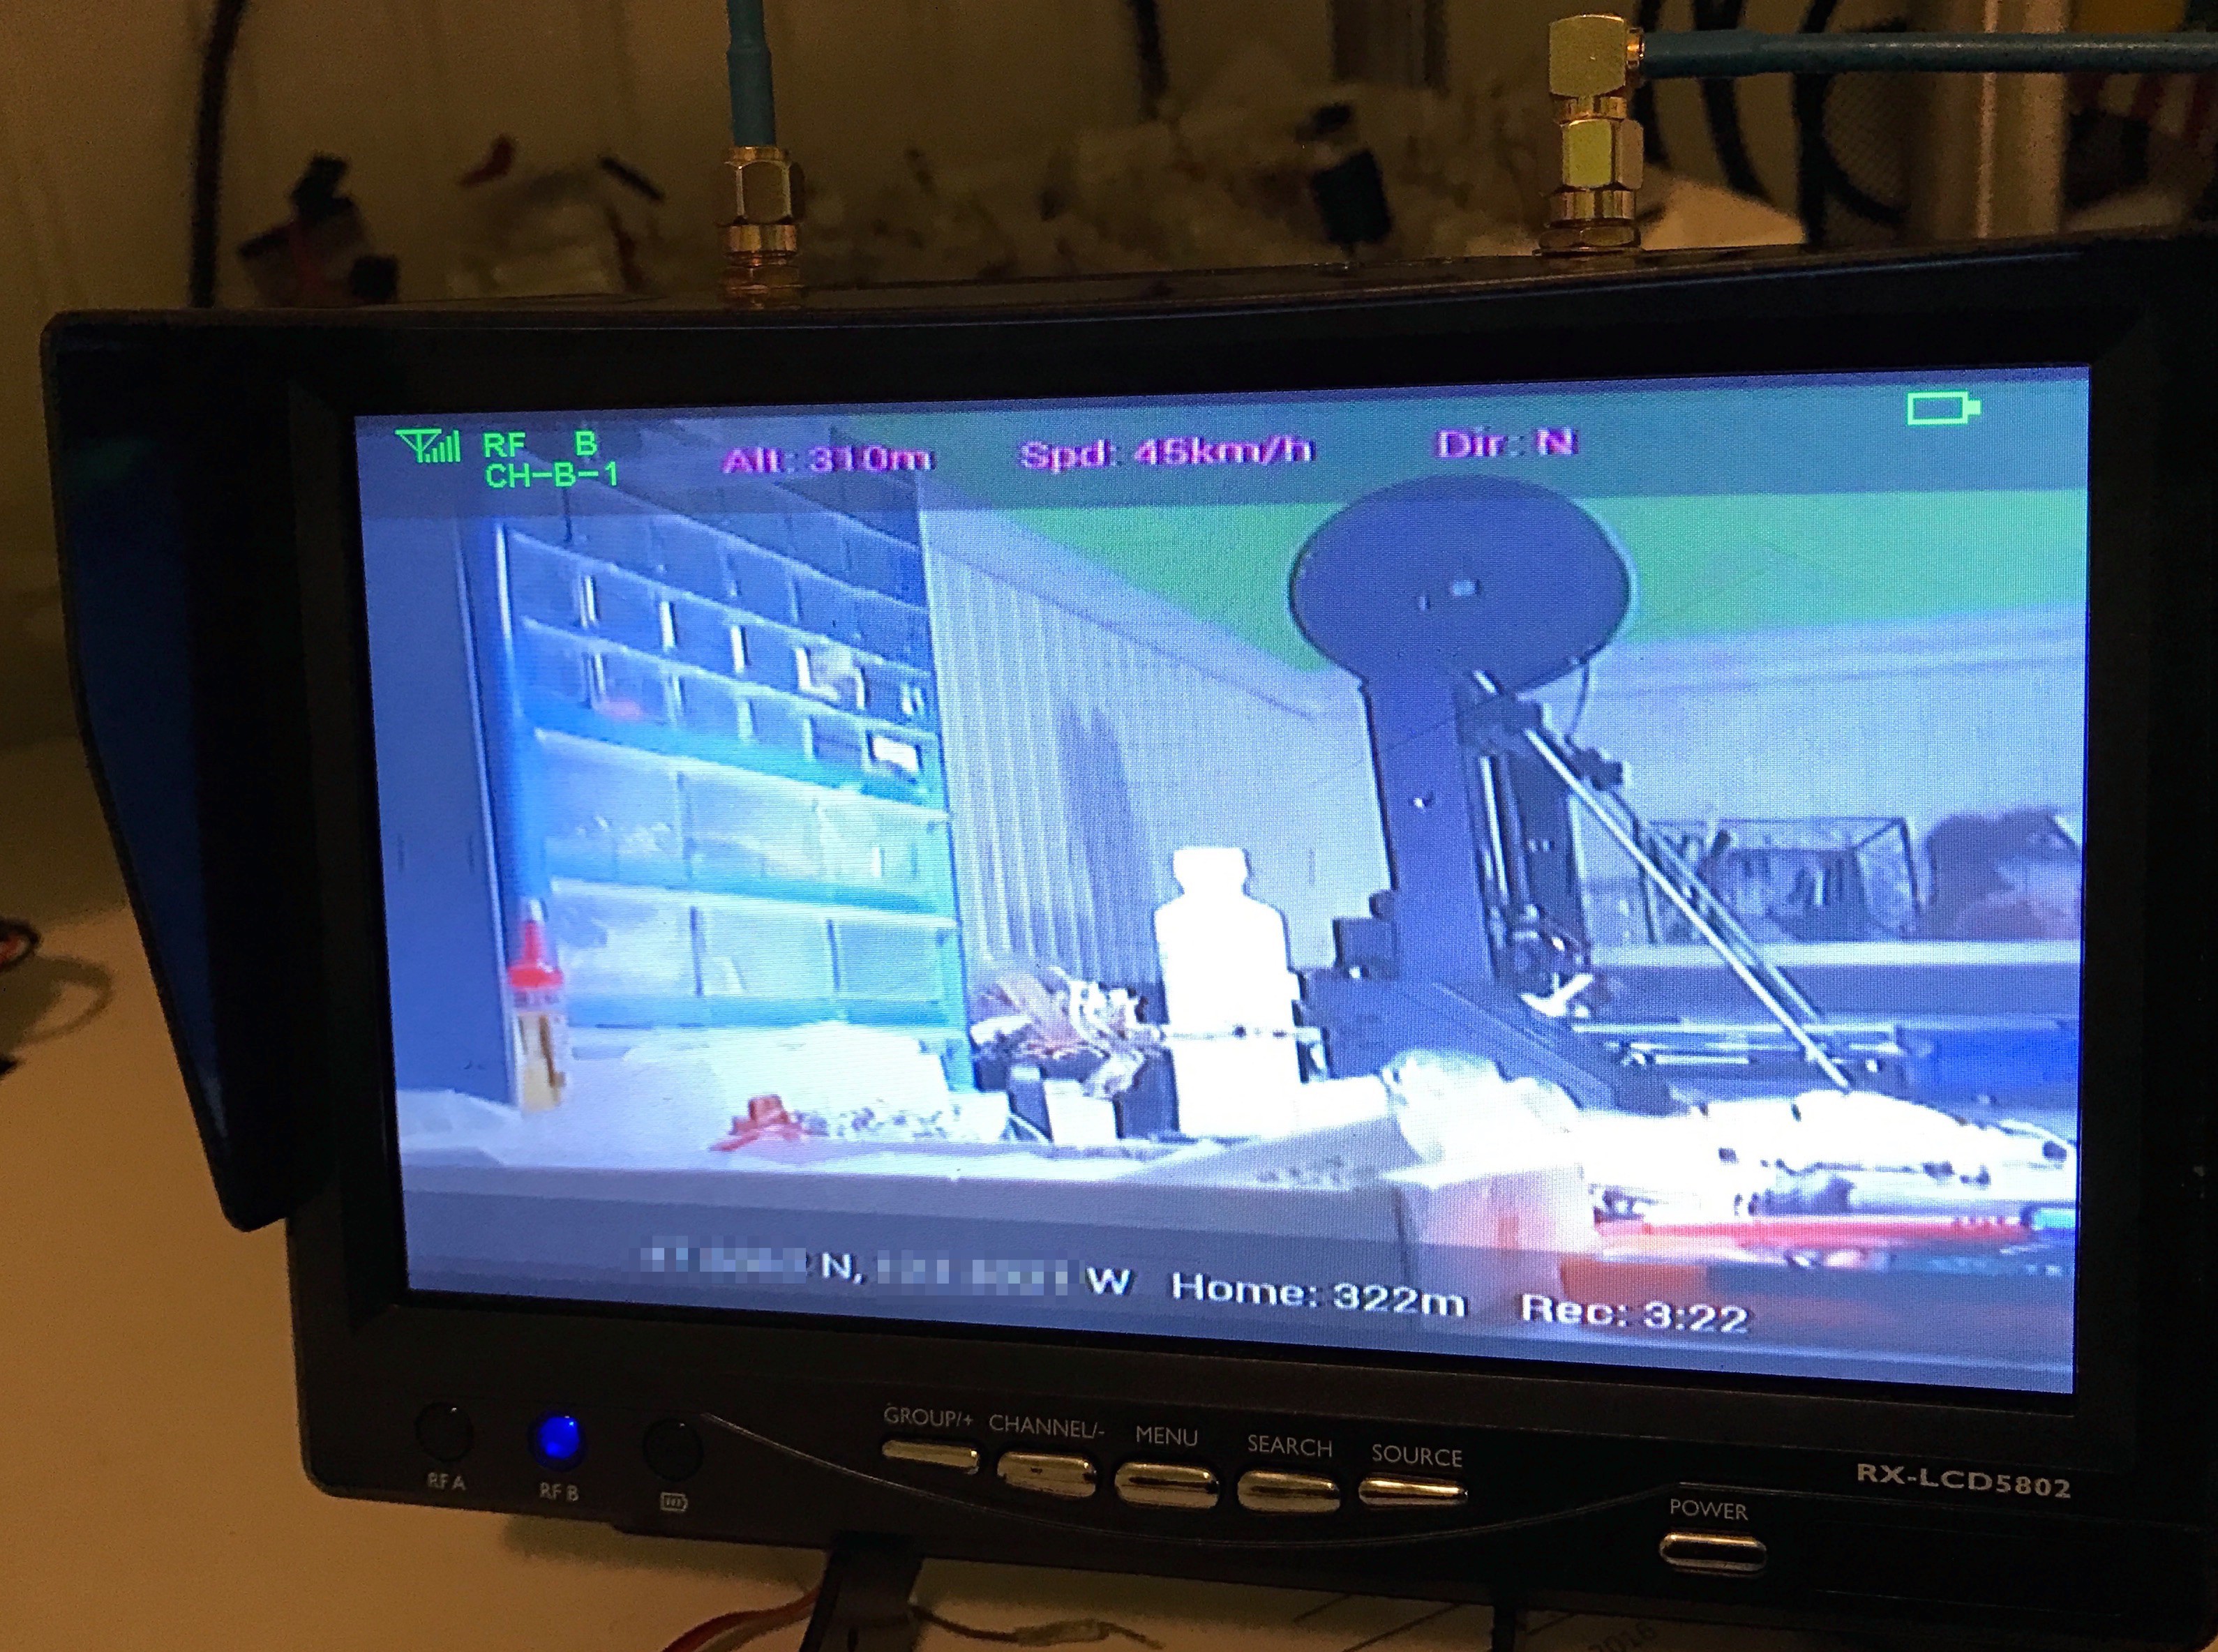
Next steps would be to display information from the GPS sensor attached to the Raspberry Pi via serial interface.
Discussions
Become a Hackaday.io Member
Create an account to leave a comment. Already have an account? Log In.