Close
0%
0%

Solar lawn sheep

Solar powered robot that continuously, quietly and autonomously grazes the lawn

Similar projects worth following
Human operated lawn mowers are loud, dangerous and high powered. They are designed this way to minimise the time the operator spends cutting the lawn. While not as powerful, robot mowers seem to copy this approach, meaning they cut occasionally but intensively using relatively high power and need to charge from the mains afterwards.

What if instead of occasional intensive mowing, our robot grazes continuously at a much more relaxed pace?

My concept for a solar sheep is a self sufficient robot roaming free around my lawn, munching on any grass leaves daring to grow tall enough for it to reach. Think low power and slow, tortoise not hare. I also want to ensure it is safe for any passing cats, hedgehogs or 3 year olds.

Over the next few weeks I am hoping to build my solar sheep as part of the Automation Hackaday Prize. Given I haven't got an inkling of a design yet this is going to be a tight timescale but hopefully will result in something awesome. Wish me luck!

I'm nearing a week in and so far I have made...

...a plan!

For me to complete the design and build the electric sheep of my (and androids') dreams in the competition timescales I need to bite off the right challenges early.

I have broken the proposed system into manageable chunks:

  • The 'Munching engine'. This is the business end that needs to slowly, efficiently and safely eat the grass.
  • Locomotion. Not the Kylie track, this is all about letting the sheep move as well as controlling its motion.
  • Decision engine. Sheep aren't renowned for their intelligence, but this one will need to decide where to go to graze or to charge and when to do each.

Lets start with the 'Munching engine'

I have a 5 phase plan:

  1. Concepts. Identify possible approaches to mechanical grazing.
  2. Proof of principle. Test one or more approaches against real grass.
  3. Low power. Upgrade 'Munching engine' to efficiently run on low power.
  4. Self clean. Upgrade the design to avoid gunking up over time.
  5. Grass processing. Work out how to handle the grazed grass.

I'm currently working on concepts. Currently I have two thoughts on this. The most sheepy would be a wire-stripper-like mechanism where the front jaws grip the grass blade low down, and the sliding blade part grips and pulls the top of the blade off. The second thought I have is simpler; two silicone belts running between pinch rollers that grip the blades of grass, tear them off and then carry them away. This may pluck the grass blade at its base rather than at the cut height, which could be a problem, but the simplicity is very attractive and the cut grass can be collected easily rather than needing intervention to avoid scattering it on the lawn.

Any other thoughts, let me know in comments.

Until next time,

Jellmeister


Grazing assy.SLDASM

Solidworks assembly, seems temperamental so probably won't work.

sldasm - 891.50 kB - 08/22/2016 at 23:02

Download

Motor End Cap 3 No Wheel.STL

Bearing housing roller end cap. Top, driving motor side. Covers gears to enable same roller design for top assembly.

Standard Tesselated Geometry - 3.51 MB - 08/22/2016 at 23:02

Download

Motor End Cap 3 No Wheel.SLDPRT

Bearing housing roller end cap. Top, driving motor side. Covers gears to enable same roller design for top assembly.

sldprt - 1.34 MB - 08/22/2016 at 23:02

Download

Motor end cap 3 With wheel.STL

Large bearing housing roller end cap. Bottom, Driving motor side. Houses motor and covers gears. Also mounts motor and drive wheel.

Standard Tesselated Geometry - 4.32 MB - 08/22/2016 at 23:02

Download

Motor end cap 3 With Wheel.SLDPRT

Large bearing housing roller end cap. Bottom, Driving motor side. Houses motor and covers gears. Also mounts motor and drive wheel.

sldprt - 1.43 MB - 08/22/2016 at 23:02

Download

View all 19 files

  • Last minute update

    jellmeister08/22/2016 at 22:58 0 comments

    I was hoping to finish the build last night but no such luck...

    Since last time

    My shaft fix held for a while but just before I managed to video it the entire shaft broke off. The torque is clearly too much for a 10mm 3D printed shaft!


    Mechanical Progress

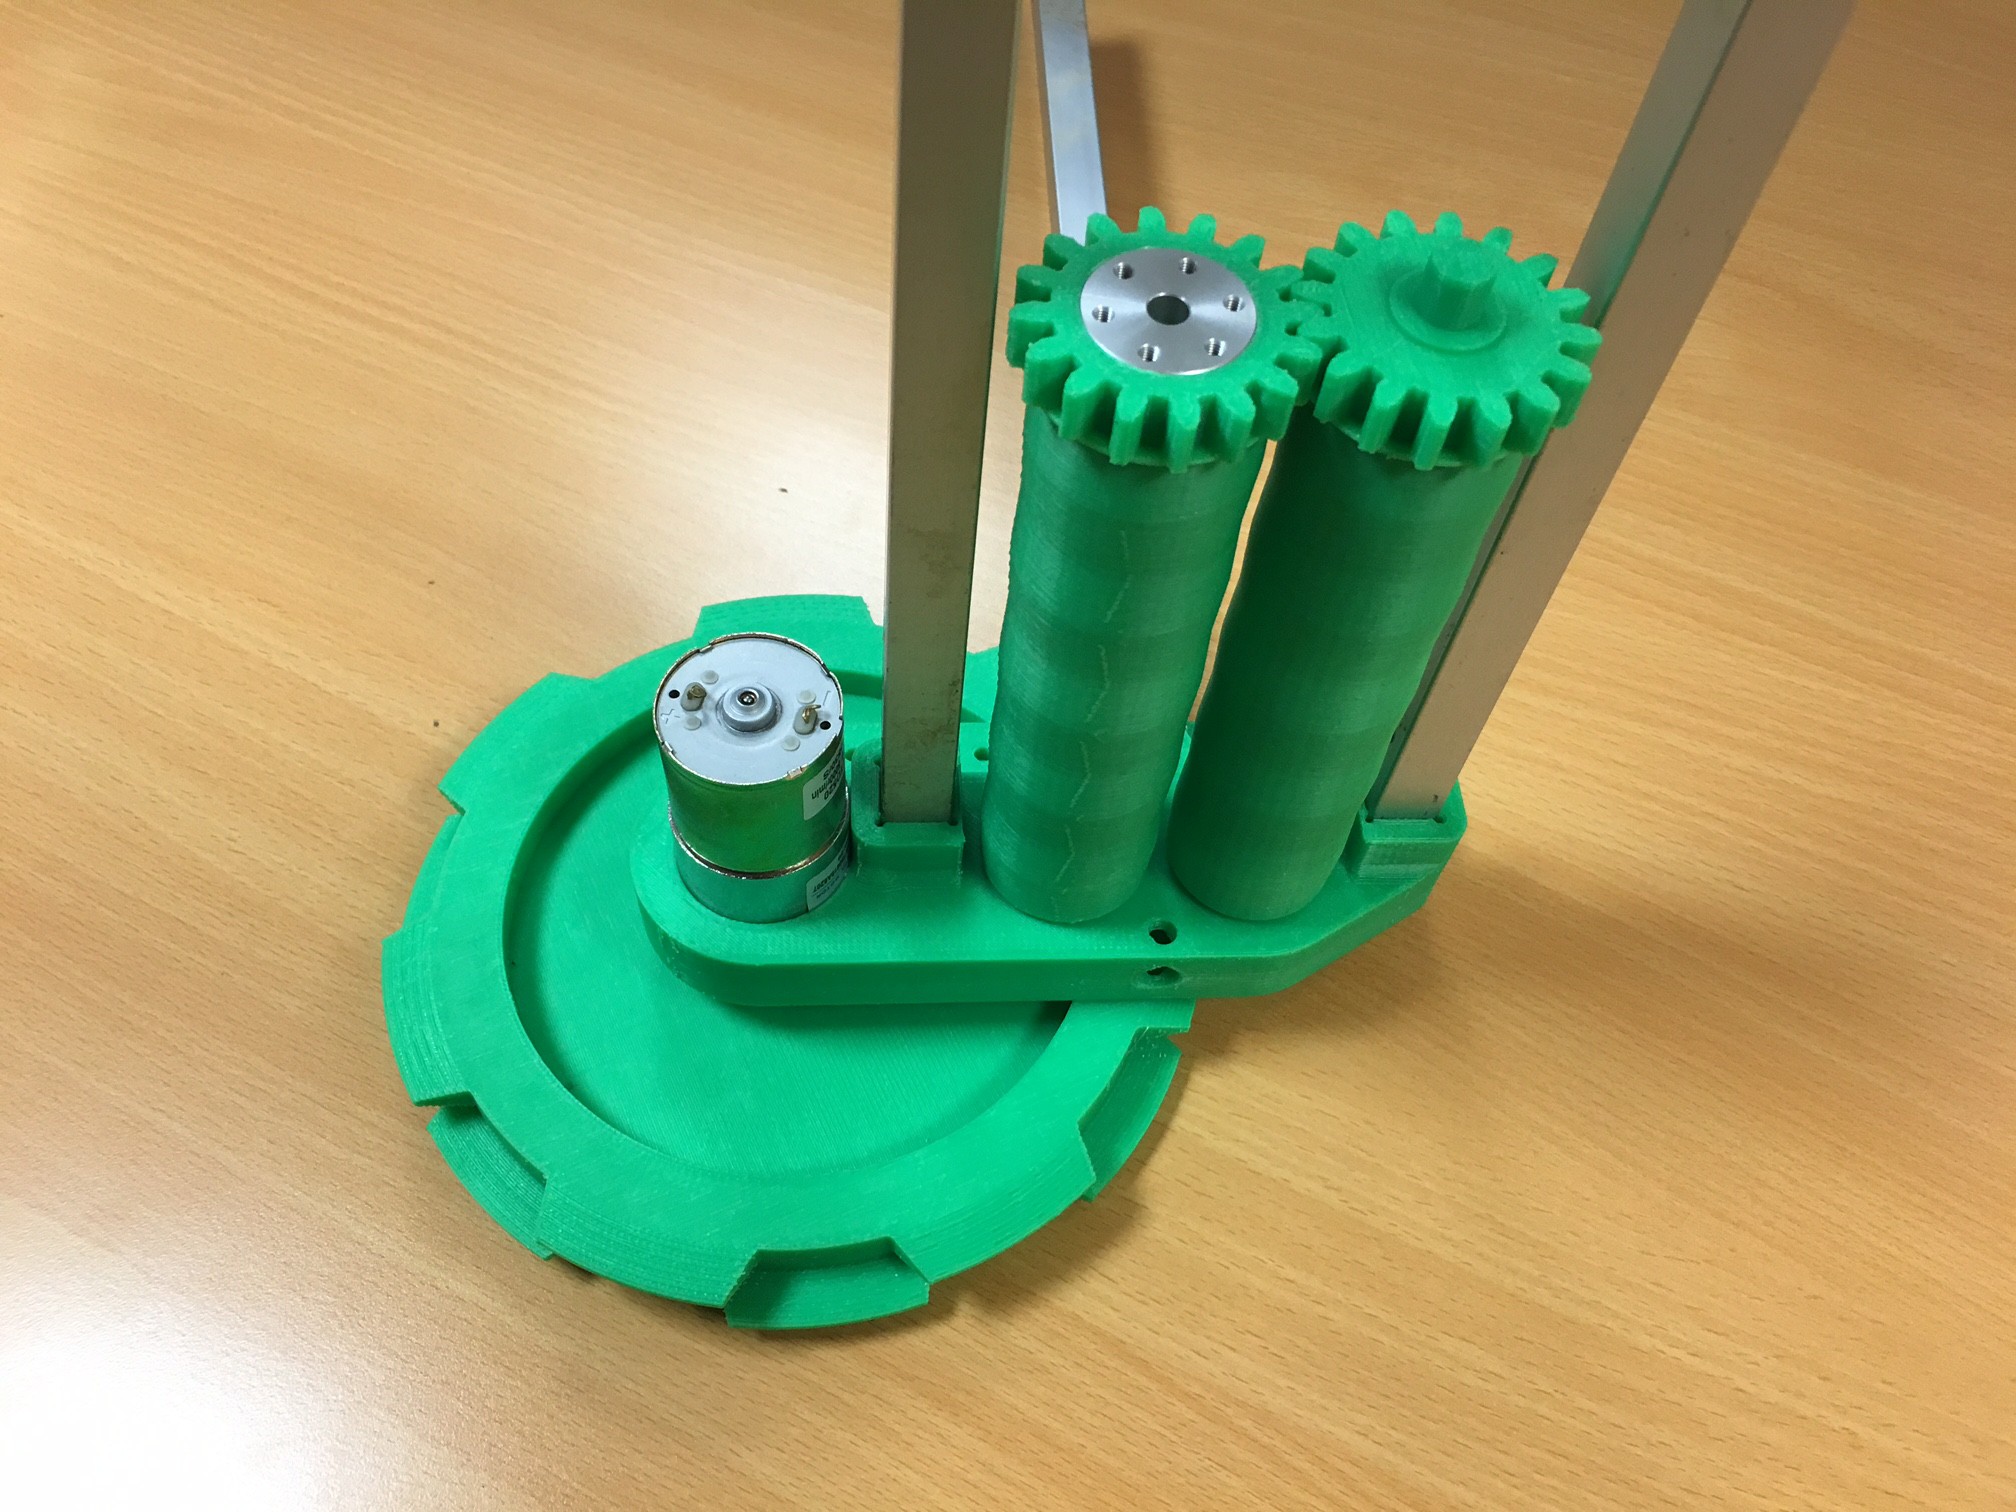
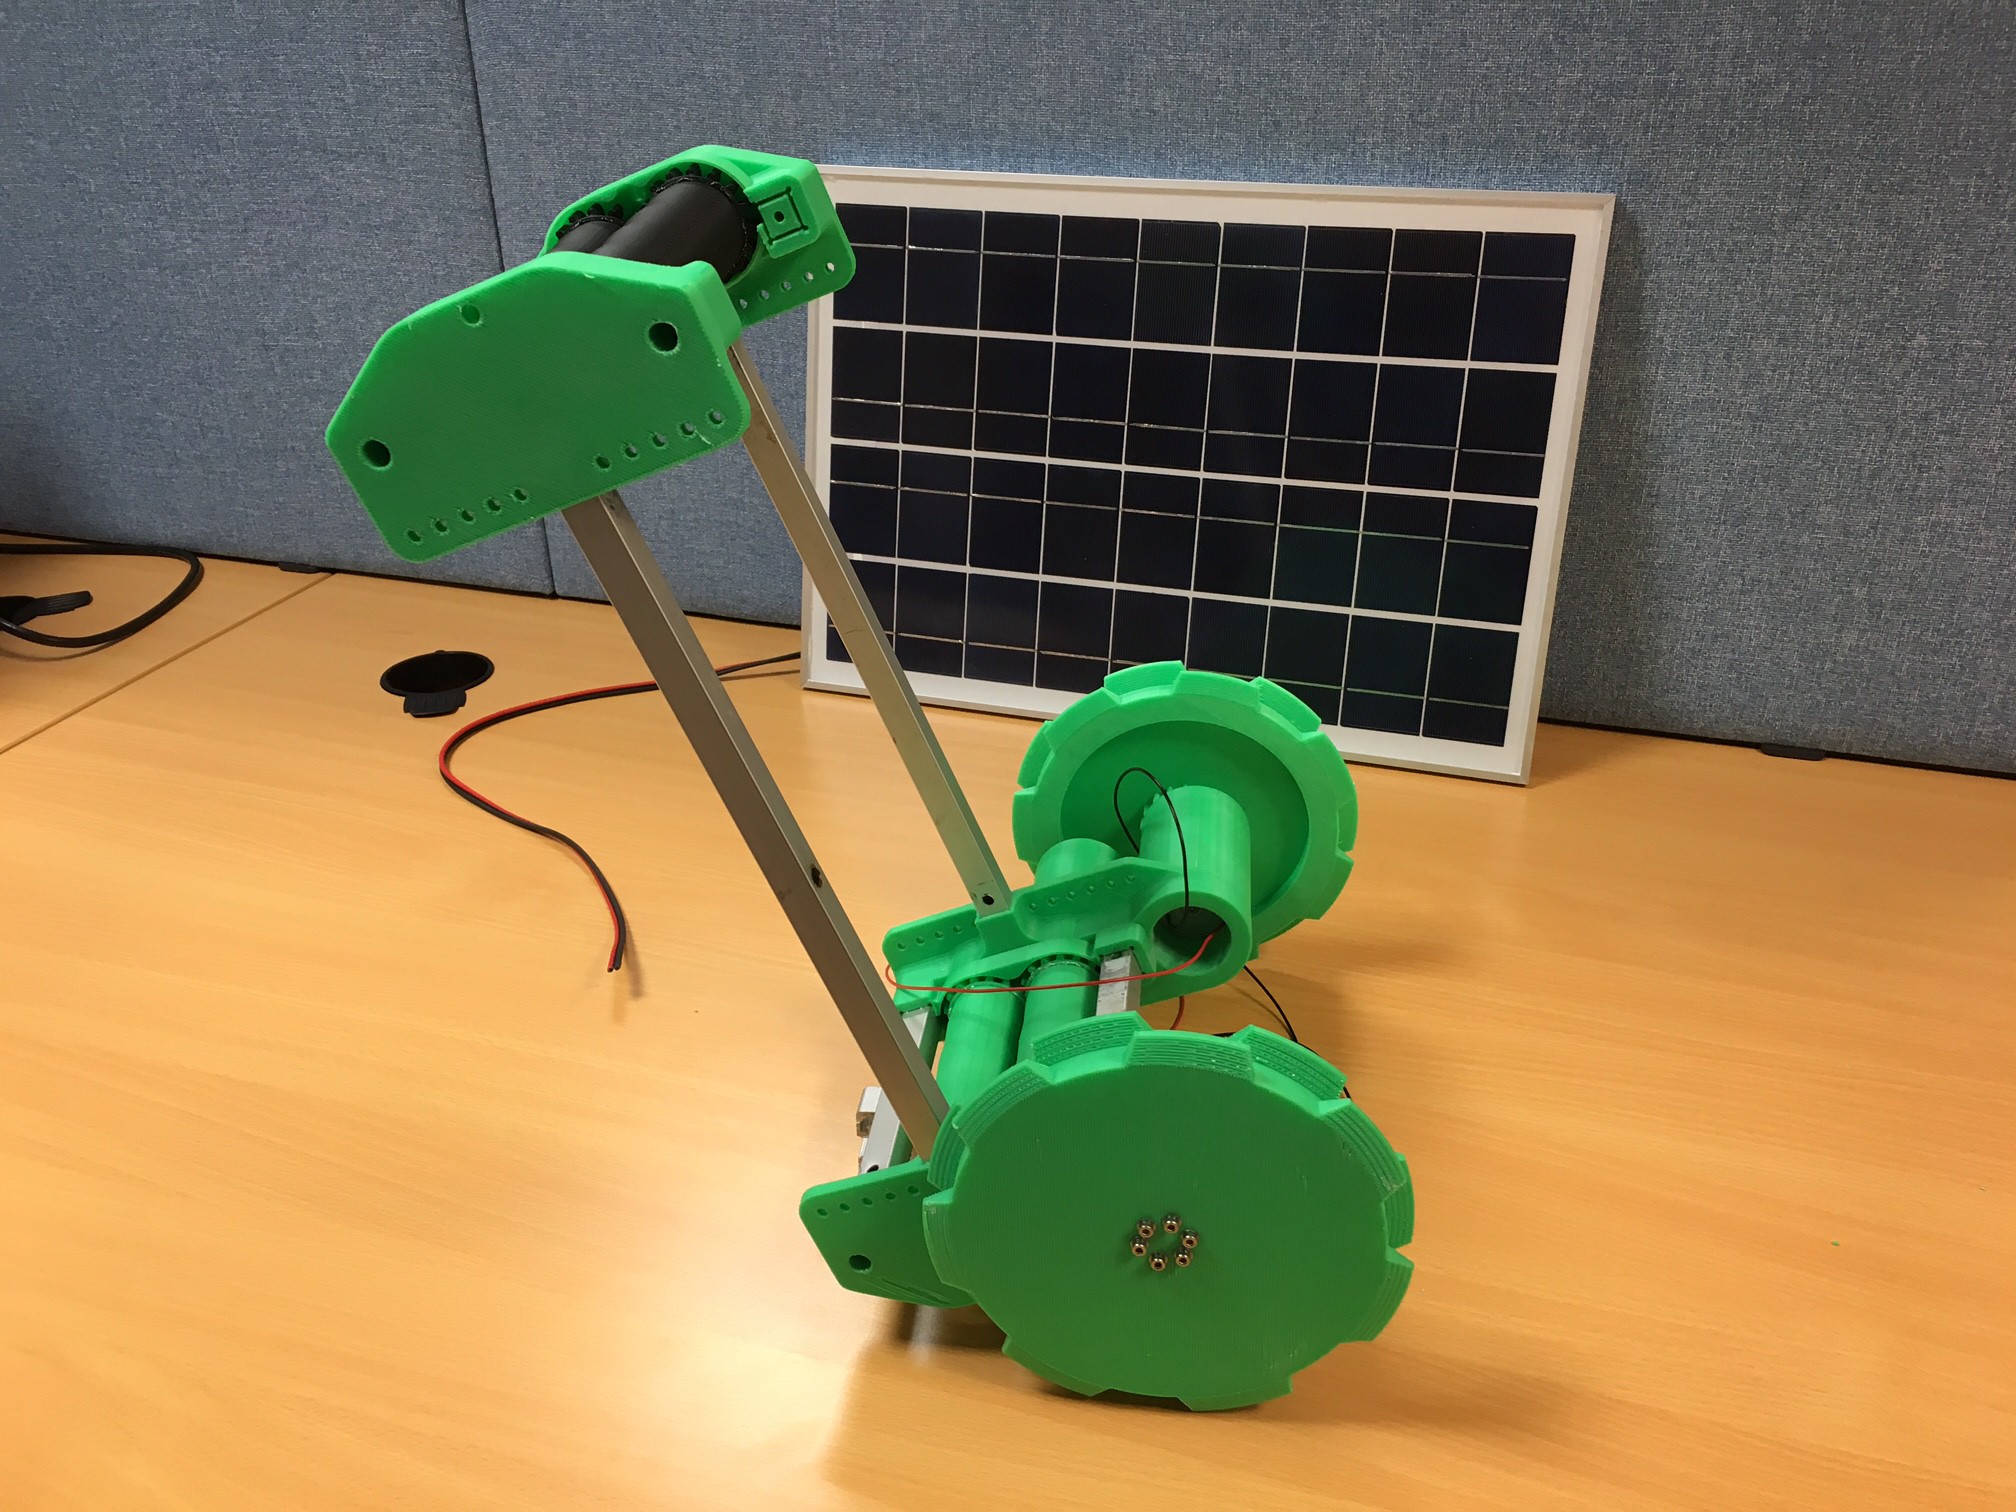
    I have resolved the shaft problem by using aluminium hubs to transmit the torque. Six screw holes distribute the stress into the body of the 3D print.

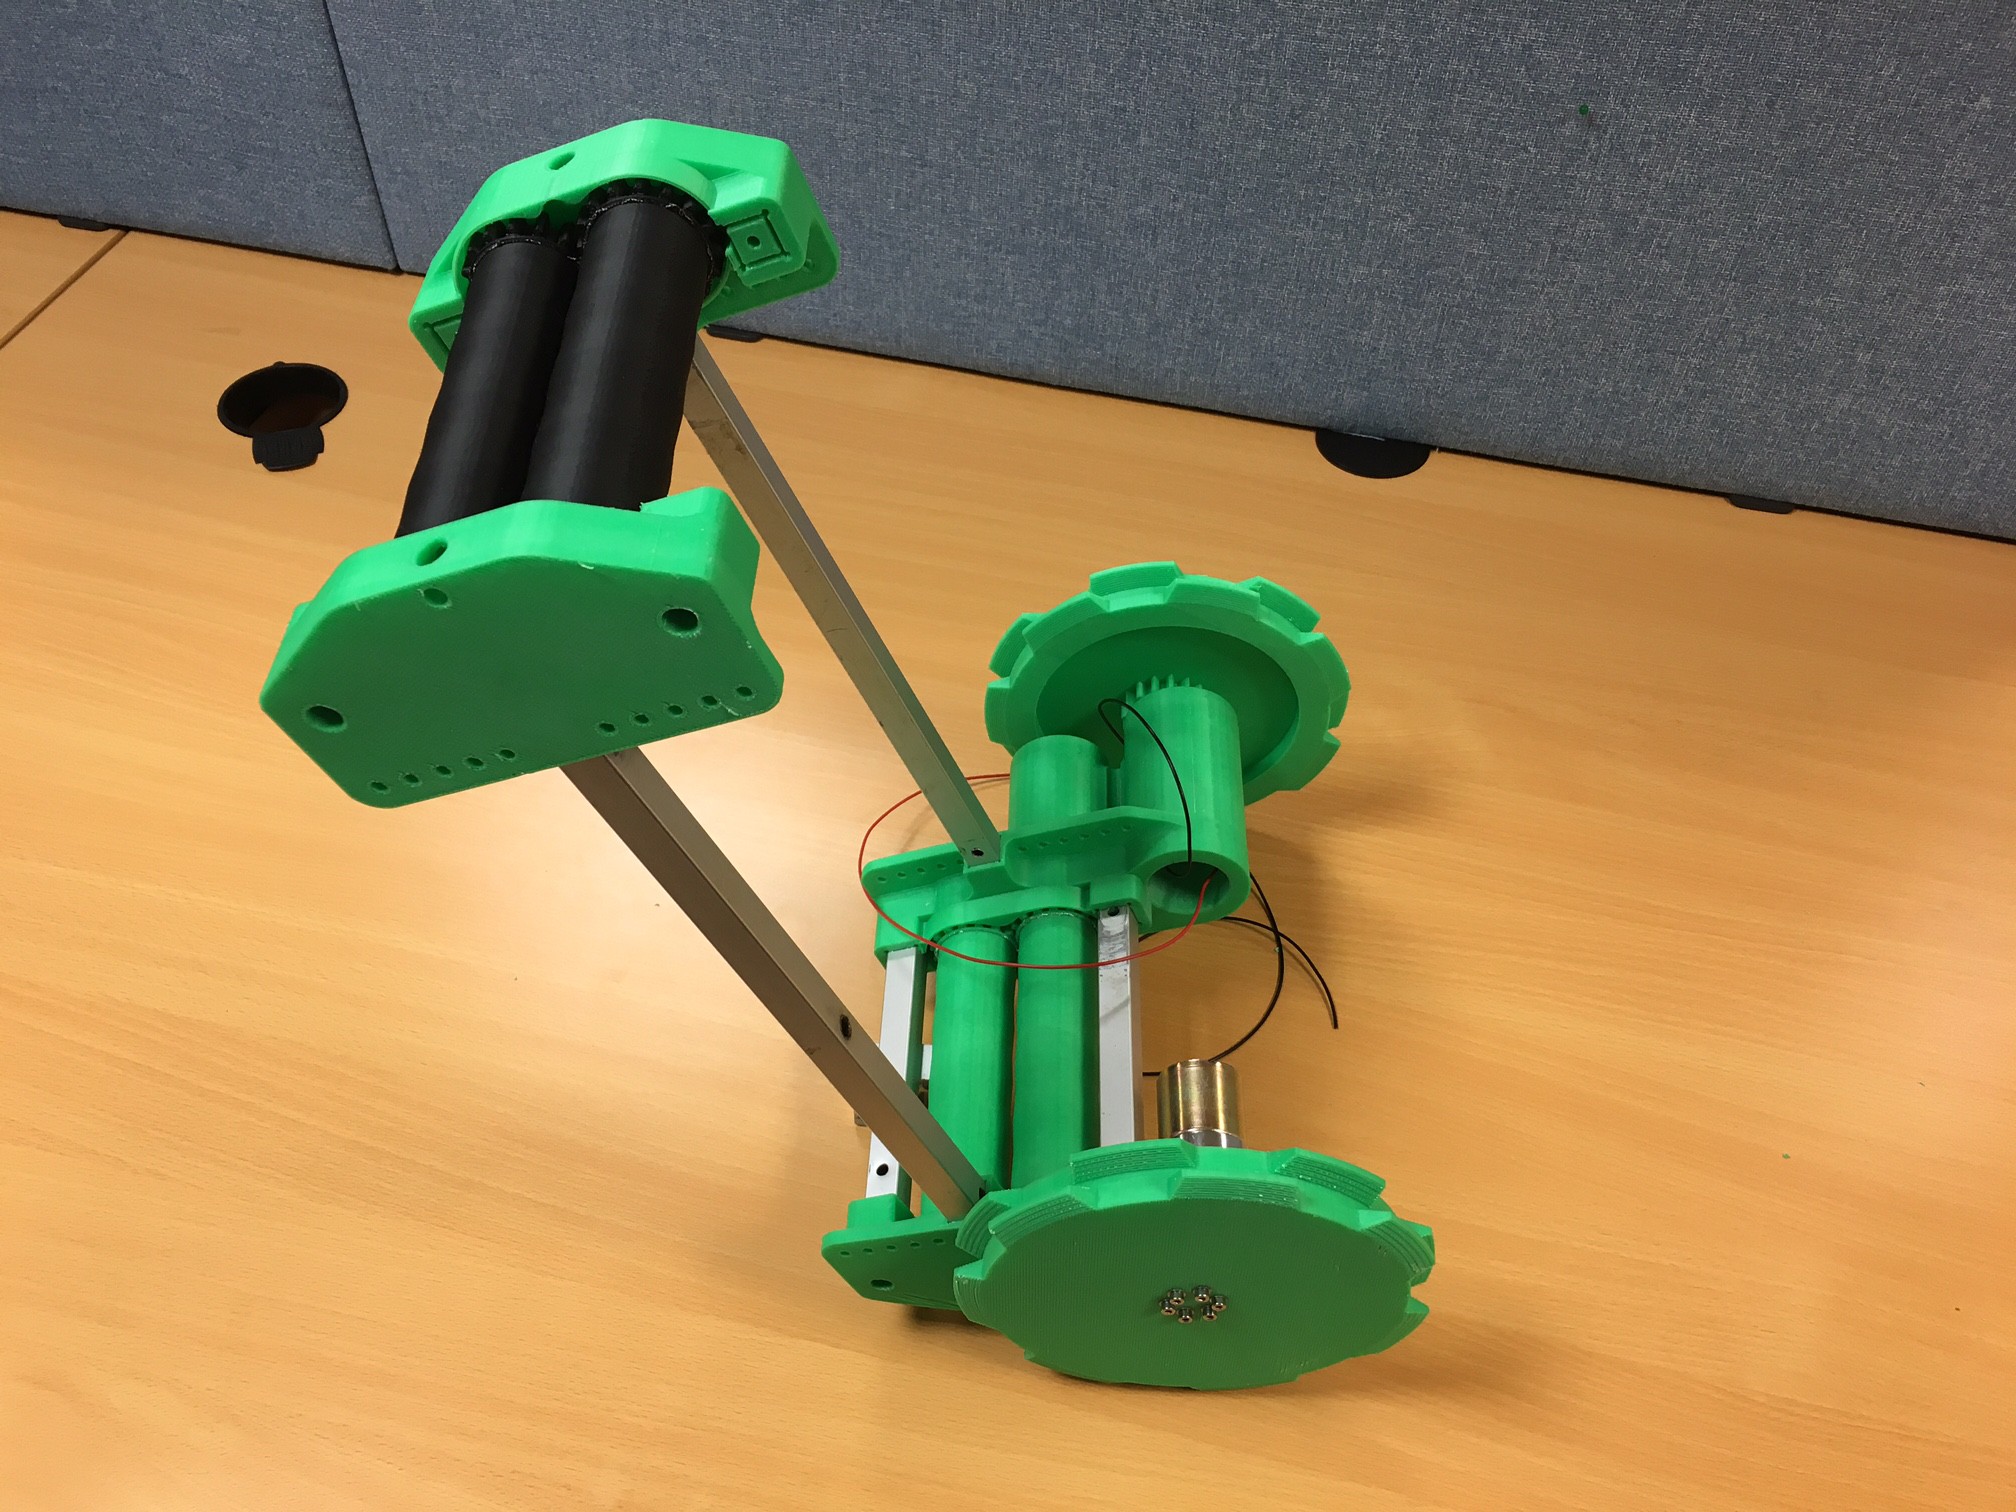
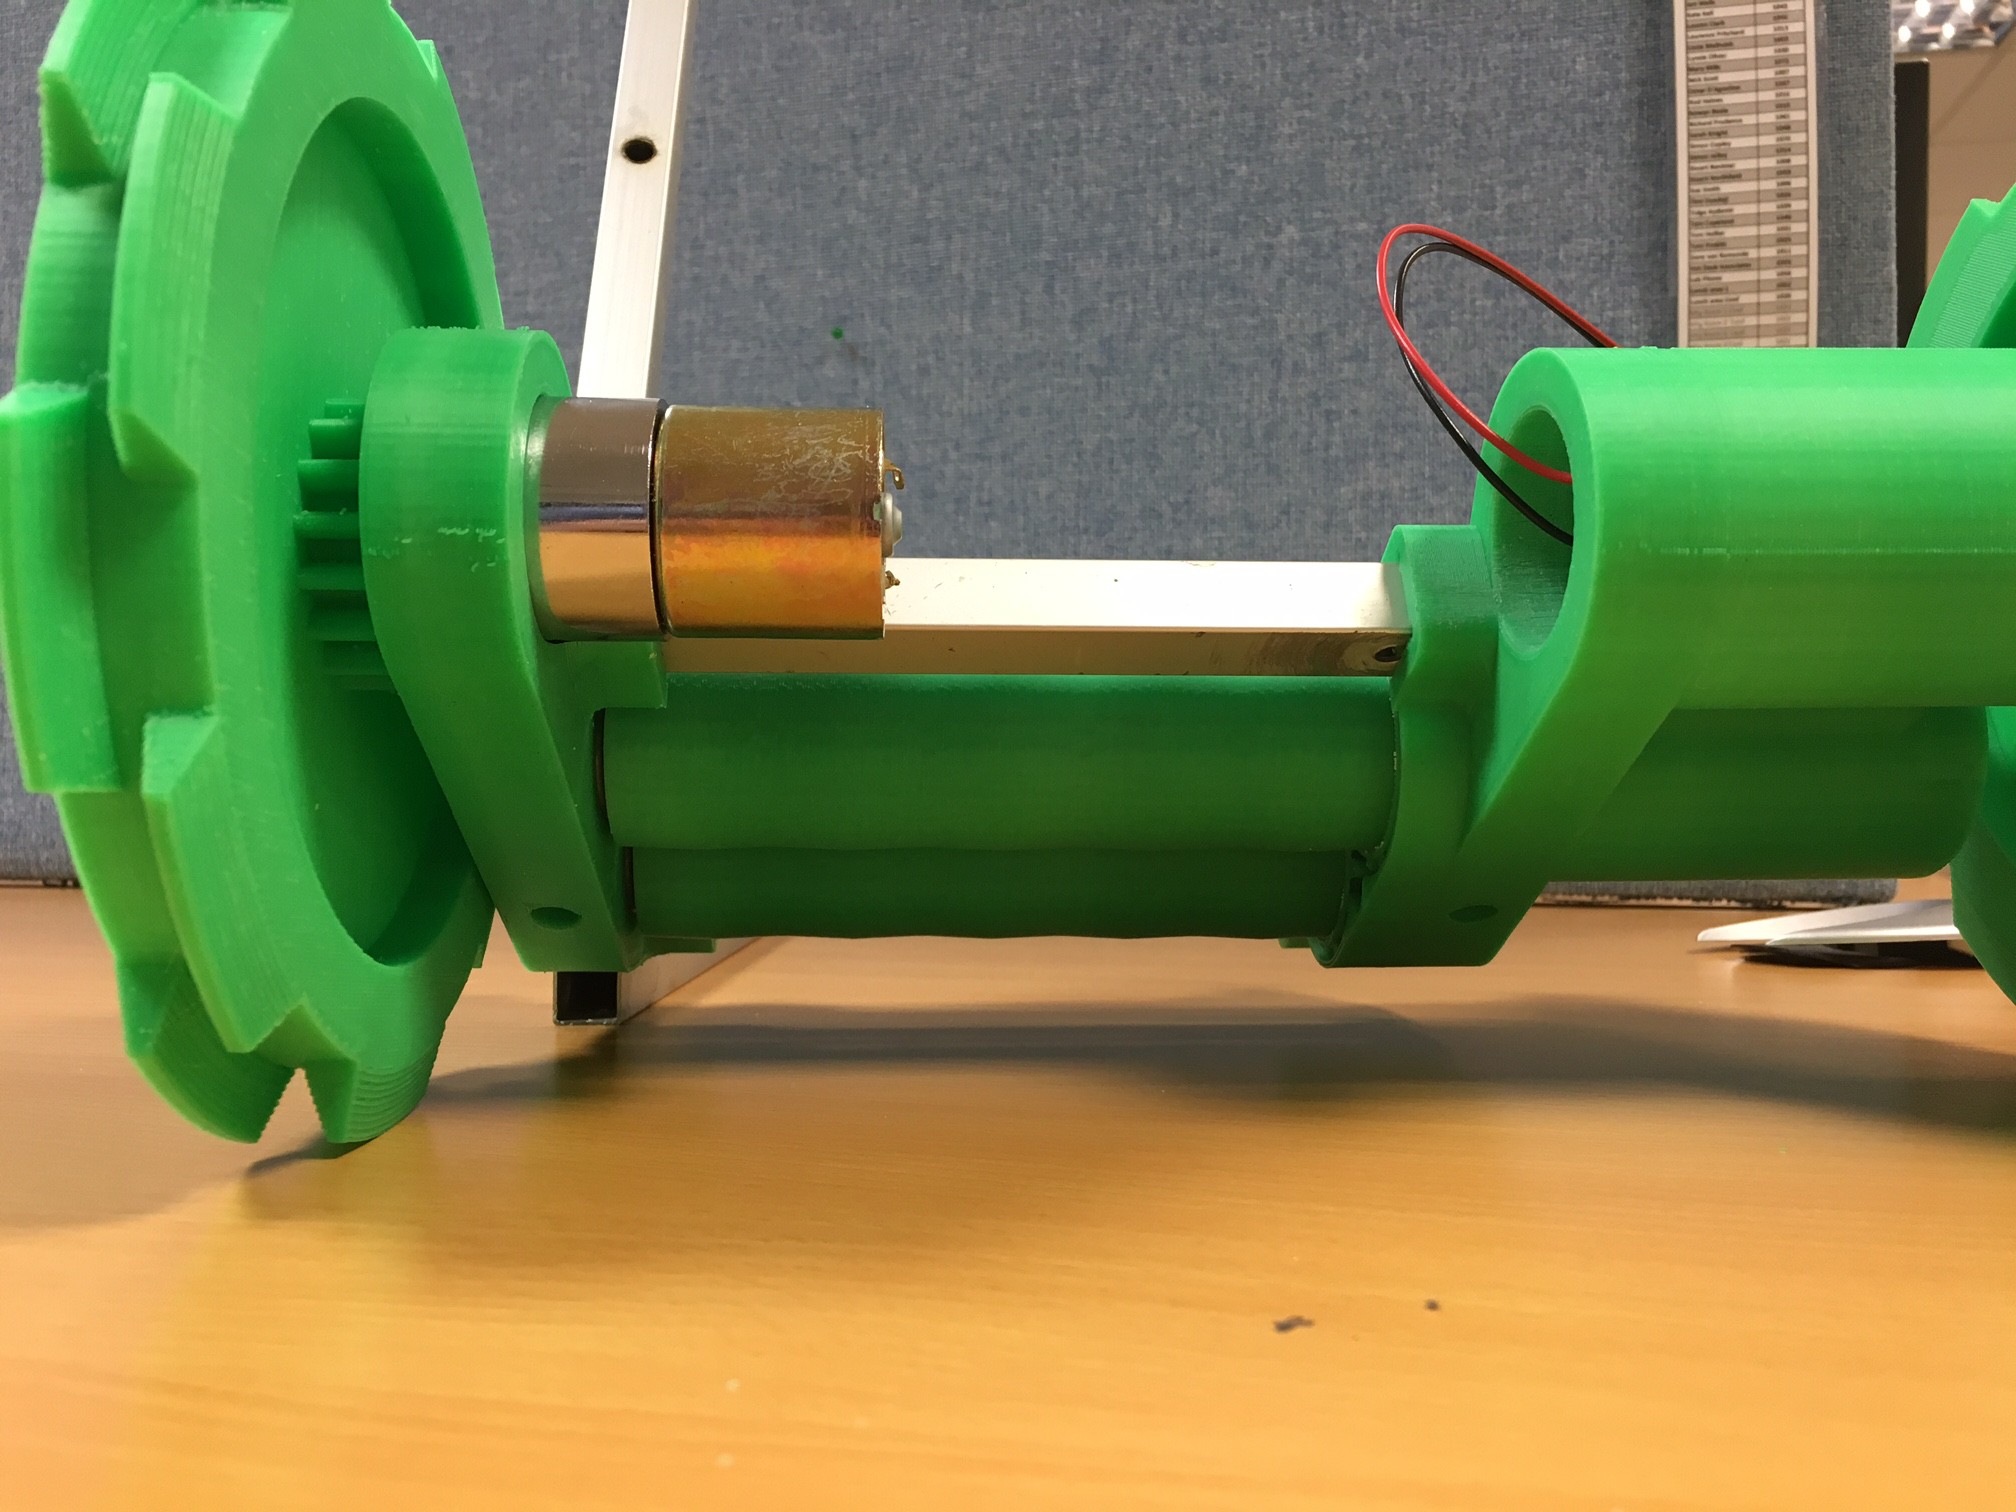
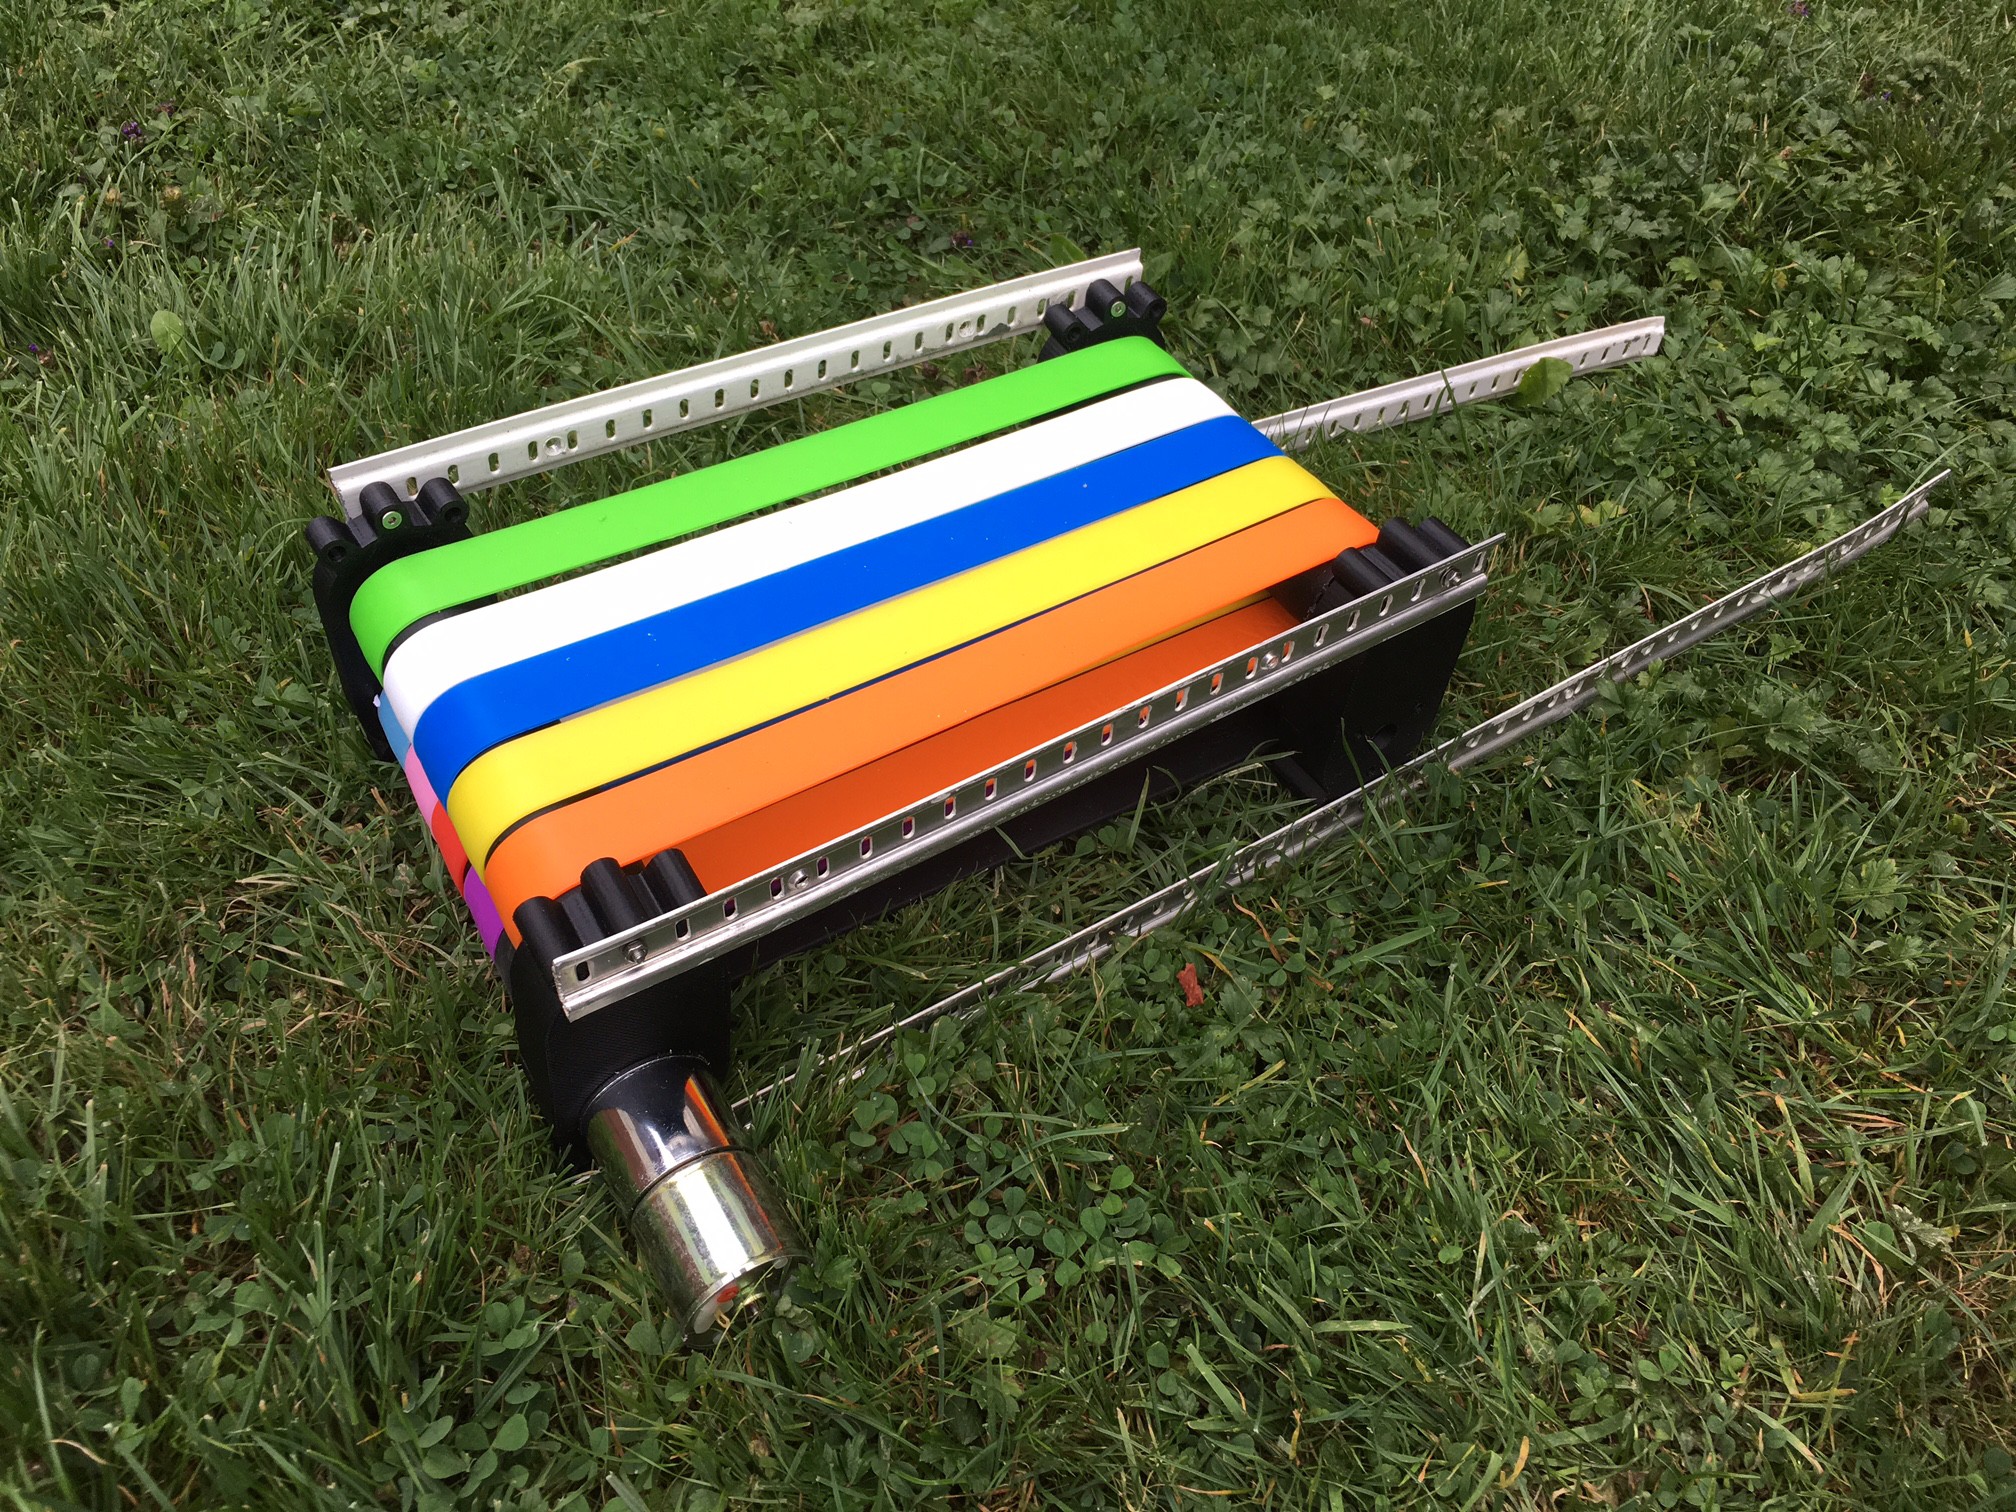
    I have also stiffened the entire assembly using aluminium square extrusion taken from a broken golf trolley. This should prevent an issue I was encountering where the pulleys would form a parallelogram and the belts would wander to exacerbate the issue.

    Above the verticals are over length as they still need cutting down, also the top roller assembly is missing its aluminium cross braces for the same reason.

    The munching end is now angled by design to minimise the amount of grass that is bent down out of the way rather than being munched. I plan to introduce height control by varying the height of the rear castor (yet to be fitted) which will adjust the angle between 15° and 30° and the cutting height from quite low to very high.

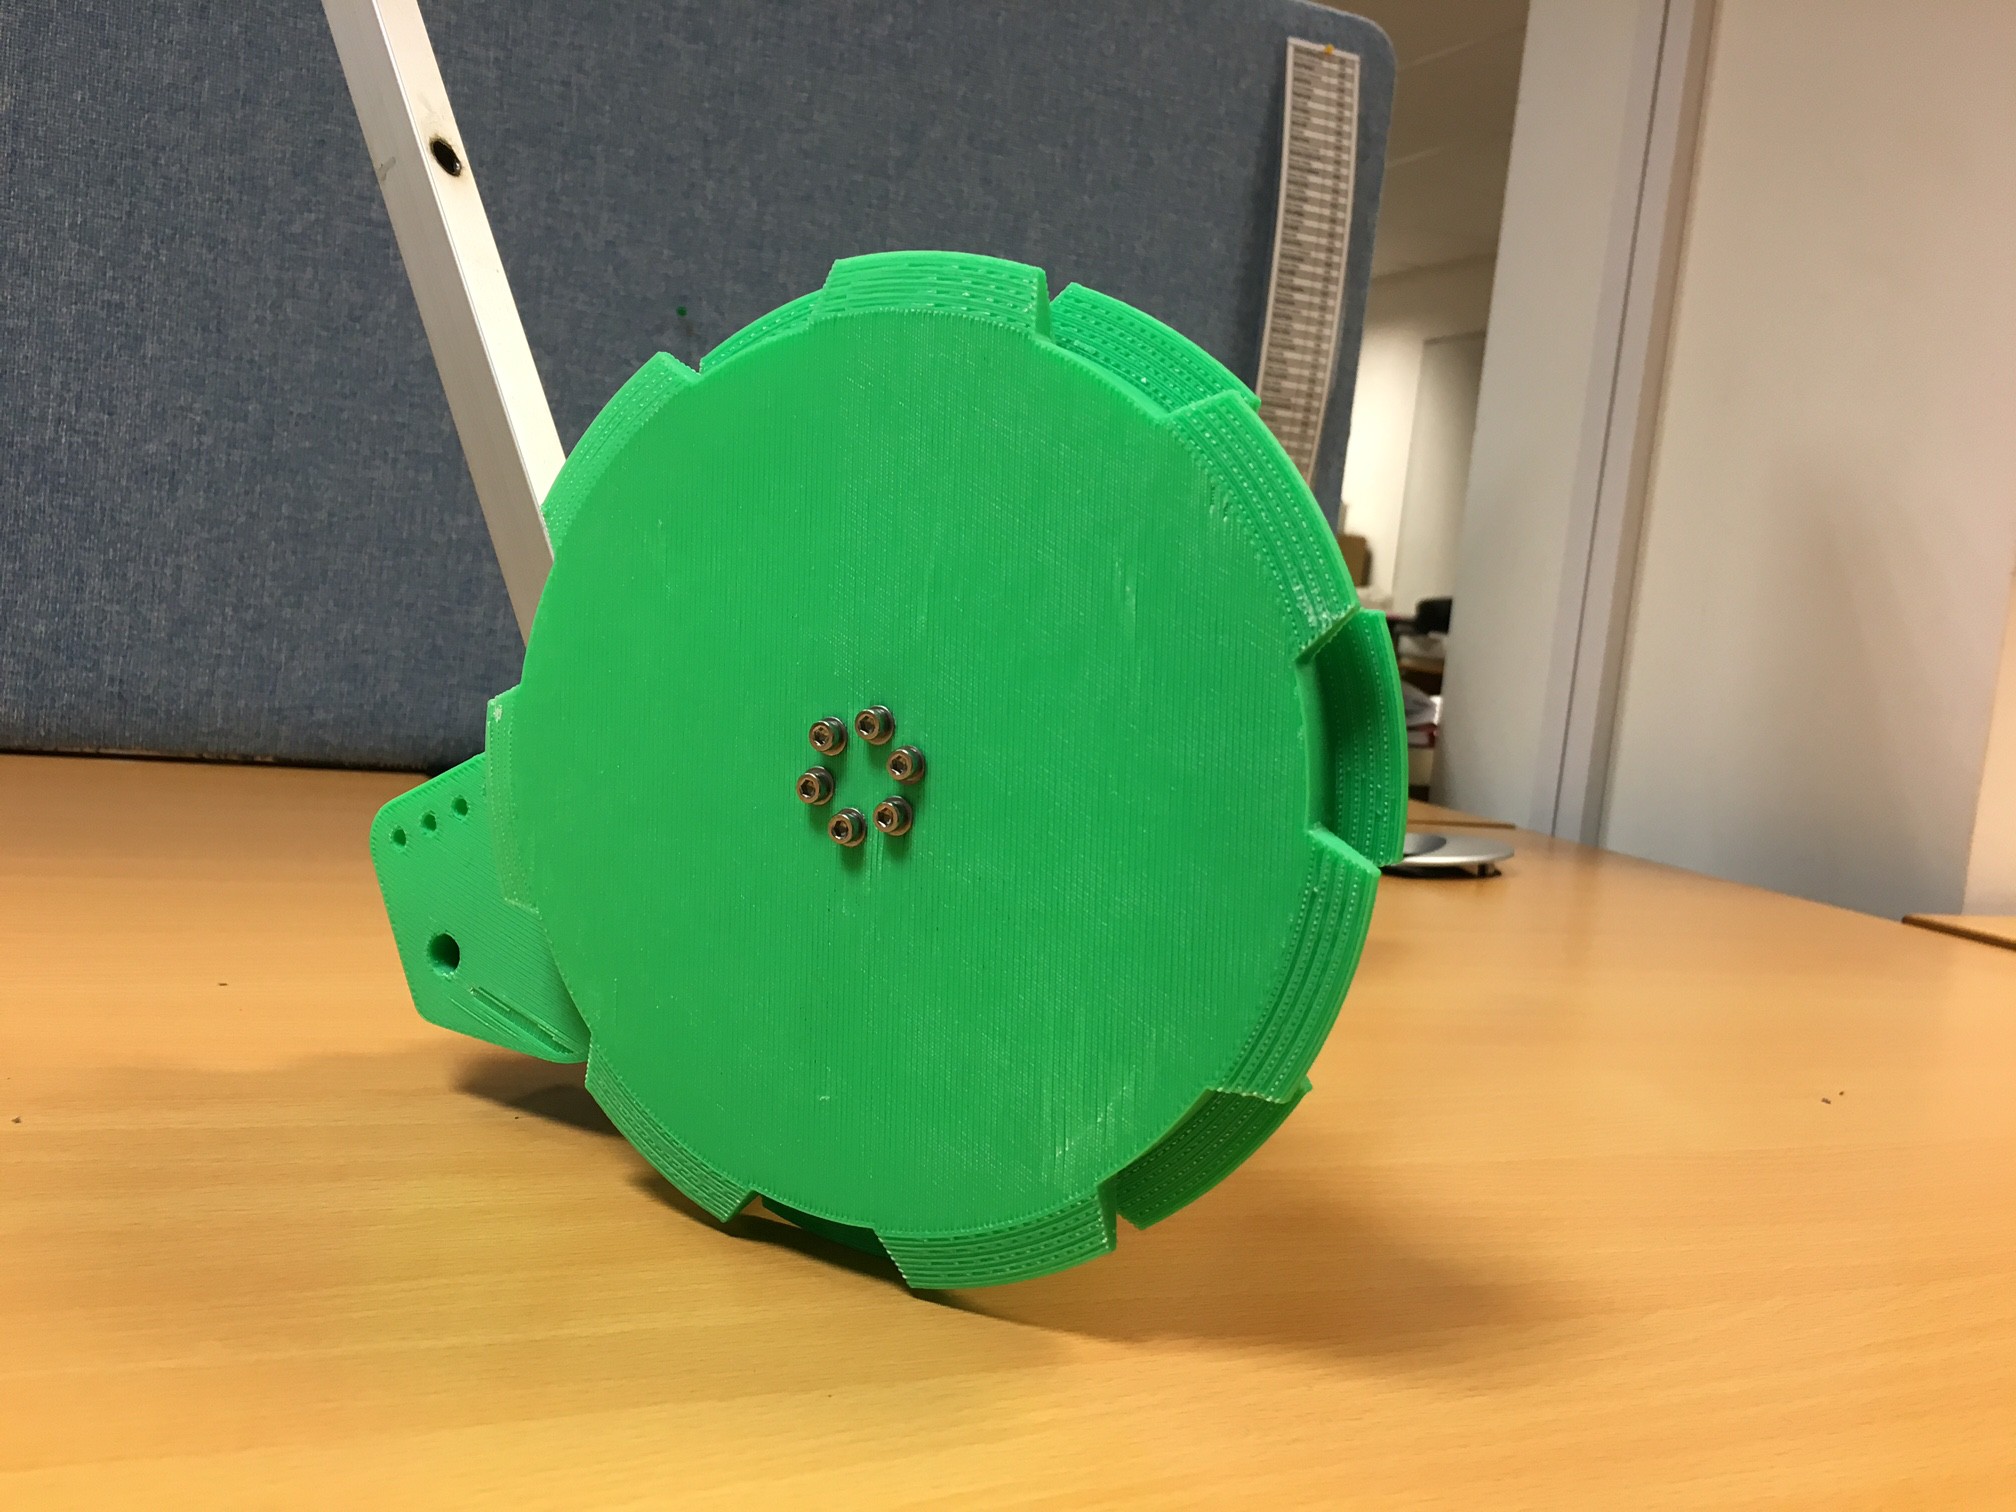
    The wheels have been designed both for grip on grass and to be circular for rolling on hard ground. When viewed from the side they form a continuous circle from 7 segments each side of the wheel.

    The wheels are 160mm diameter for good performance on grass.


    Power system

    I bought a 25 Watt solar panel with a PWM 12V lead acid charge controller. I had hoped to make a lithium battery system but couldn't find anything off the shelf that could charge at ~20W and was small enough to be mobile. Given that I am out of time I settled for a small 7Ah deep cycle lead acid battery. I am very impressed with the solar panel, it generates over a Watt when pointing at blue sky in the shade. Based on tests the system should only use about 2W on average so up to 50% duty cycle is achievable with no direct sun (especially important as I live in Britain!) Here is a picture to show the panel size:


    Thoughts on project so far

    Issues with my approach have been frustrating. 3D prints are on the limit strength-wise for some of the components, and the belts complicate things. I did distract myself with a simpler munching assembly made from the rollers in a laminator but didn't get enough grip. I still think this might be a way to go, but I have persevered with the more complicated belt to hopper idea for now.

    Setbacks, along with being busy with my day job and life in general, have meant I haven't got this finished for the Automation Hackaday prize deadline but I'm not going to be defeated, keep watching for updates.


    CAD

    All of my CAD will be uploaded shortly. It isn't done neatly because of the rush, but it might be of interest to someone.


    Still to do

    I need to reprint the far side lower roller bearing housing due to the motor not fitting properly. Once that is done I can assemble the system with the belts and cut and fit all the aluminium extrusion.

    I will be interested to see whether the crowning on the rollers is sufficient to keep the belts located, otherwise I will need to add a guide comb.

    I need to add the tail wheel (I have the castor from a broken wheel chair but I need to fit it)

    I need a cut grass hopper and guides/brushes to clear the belts.

    I need to mount and wire in the motor controllers, battery, charge controller, arduino, colour sensor, compass, and solar panel.

    I need to add a waterproof casework.

    I will need to check the colour sensing algorithm once assembled and test the software for the first time and go bug hunting.

    I then need to write it up properly, add bill of materials, design files and code.

    I then need to watch it do all the hard work while I laze in a hammock with a cold beer!

    Until next time...

  • First graze didn't go according to plan (still promising though!)

    jellmeister08/04/2016 at 23:49 0 comments

    Having built the Mk1 Munching Engine I couldn't wait to feed it its first taste of green green grass.

    At first it cut the grass well but then...

    About 8 seconds in you can hear the motor crack the D profile out of the 3D printed shaft. I was worried the print wouldn't be strong enough! However the good news is that prior to breaking the motor happily mowed grass using just a 9V PP3 battery. Also the area I cut looked cleanly mowed and undamaged, so really a few positives to take away.

    I wasn't about to stop there though! After all the prototype now has a taste for the green stuff.

    The shaft rounded its D profile so I would have to come up with a more positive engagement; I had an unlikely idea... a grub screw.

    Grub screws are a standard way of gripping a D shaft from circular metal parts but 'the 3D print would never be strong enough for the thread to hold' I hear you all cry. Don't worry I haven't gone mad. I realised that because the shaft is inside the inner race of the bearing where the D shaft from the motor drives it, I can use the bearing to reinforce things.

    I wedged two bits of scrap wood that happened to be the perfect length inside to keep the belt tension and slid the bearings off the rollers on the motor side. The right hand roller is the one that needed the repair (also note that I couldn't remove the grass while the motor was attached or while my wooden wedges were in place!)


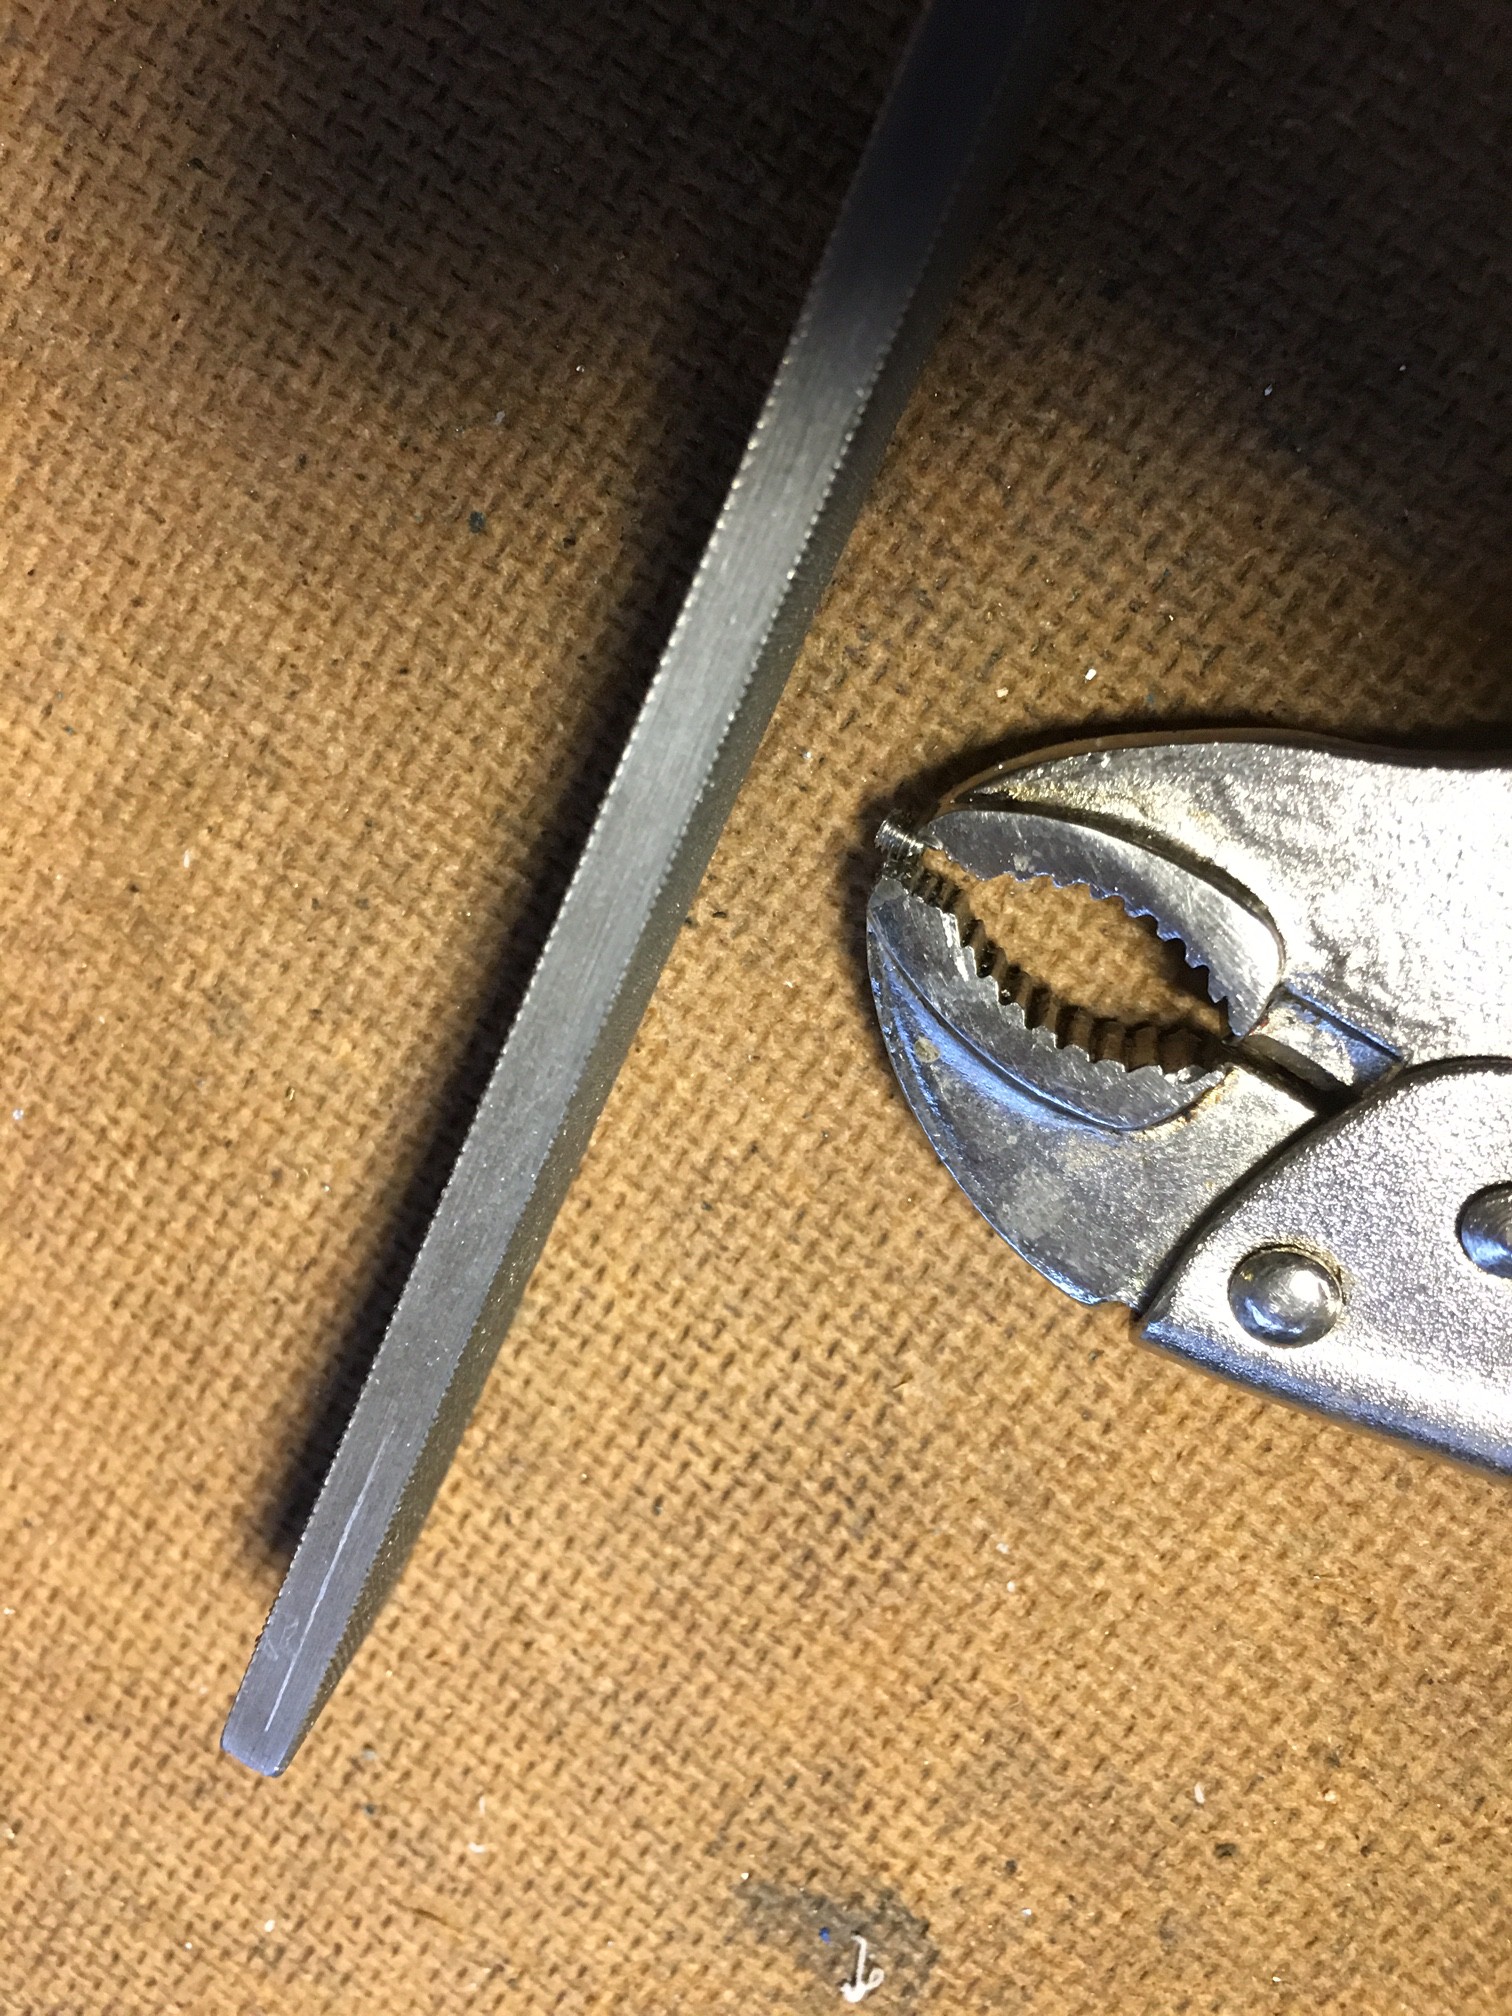
    I found an M3 grub screw that looked close and filed the end down (holding it clamped in mole grips) to make the length exactly fit between the flat of the D on the motor shaft and the inner race of the bearing.

    I drilled a 2.6mm hole in the 3D print and screwed the grub screw flush. I then spent a couple of minutes getting the alignment perfect and slid the rollers back into their bearings.

    Once reassembled I naturally went straight outside and slowly mowed 2-3 fistfulls of grass (alas I didn't have anyone to video this time but will be sure to get some footage soon).

    The next issue I encountered was that the bodged frame does not stay square, which causes the belts to move sideways, in turn adding more off centre loading to make the frame distort more.

    I have some aluminium extrusion from a scrap golf trolley that I plan to upgrade it with, but I will bring it as is to EMF, so anyone there who is interested, come find me!

    Until next time...

  • Mk1 Munching engine and some thoughts

    jellmeister08/04/2016 at 21:05 0 comments

    I have been beavering away at the munching engine since my last update.

    I have worked up the concept of using pinch belts mentioned previously and prototyped it with some success.

    Explanation of the concept:

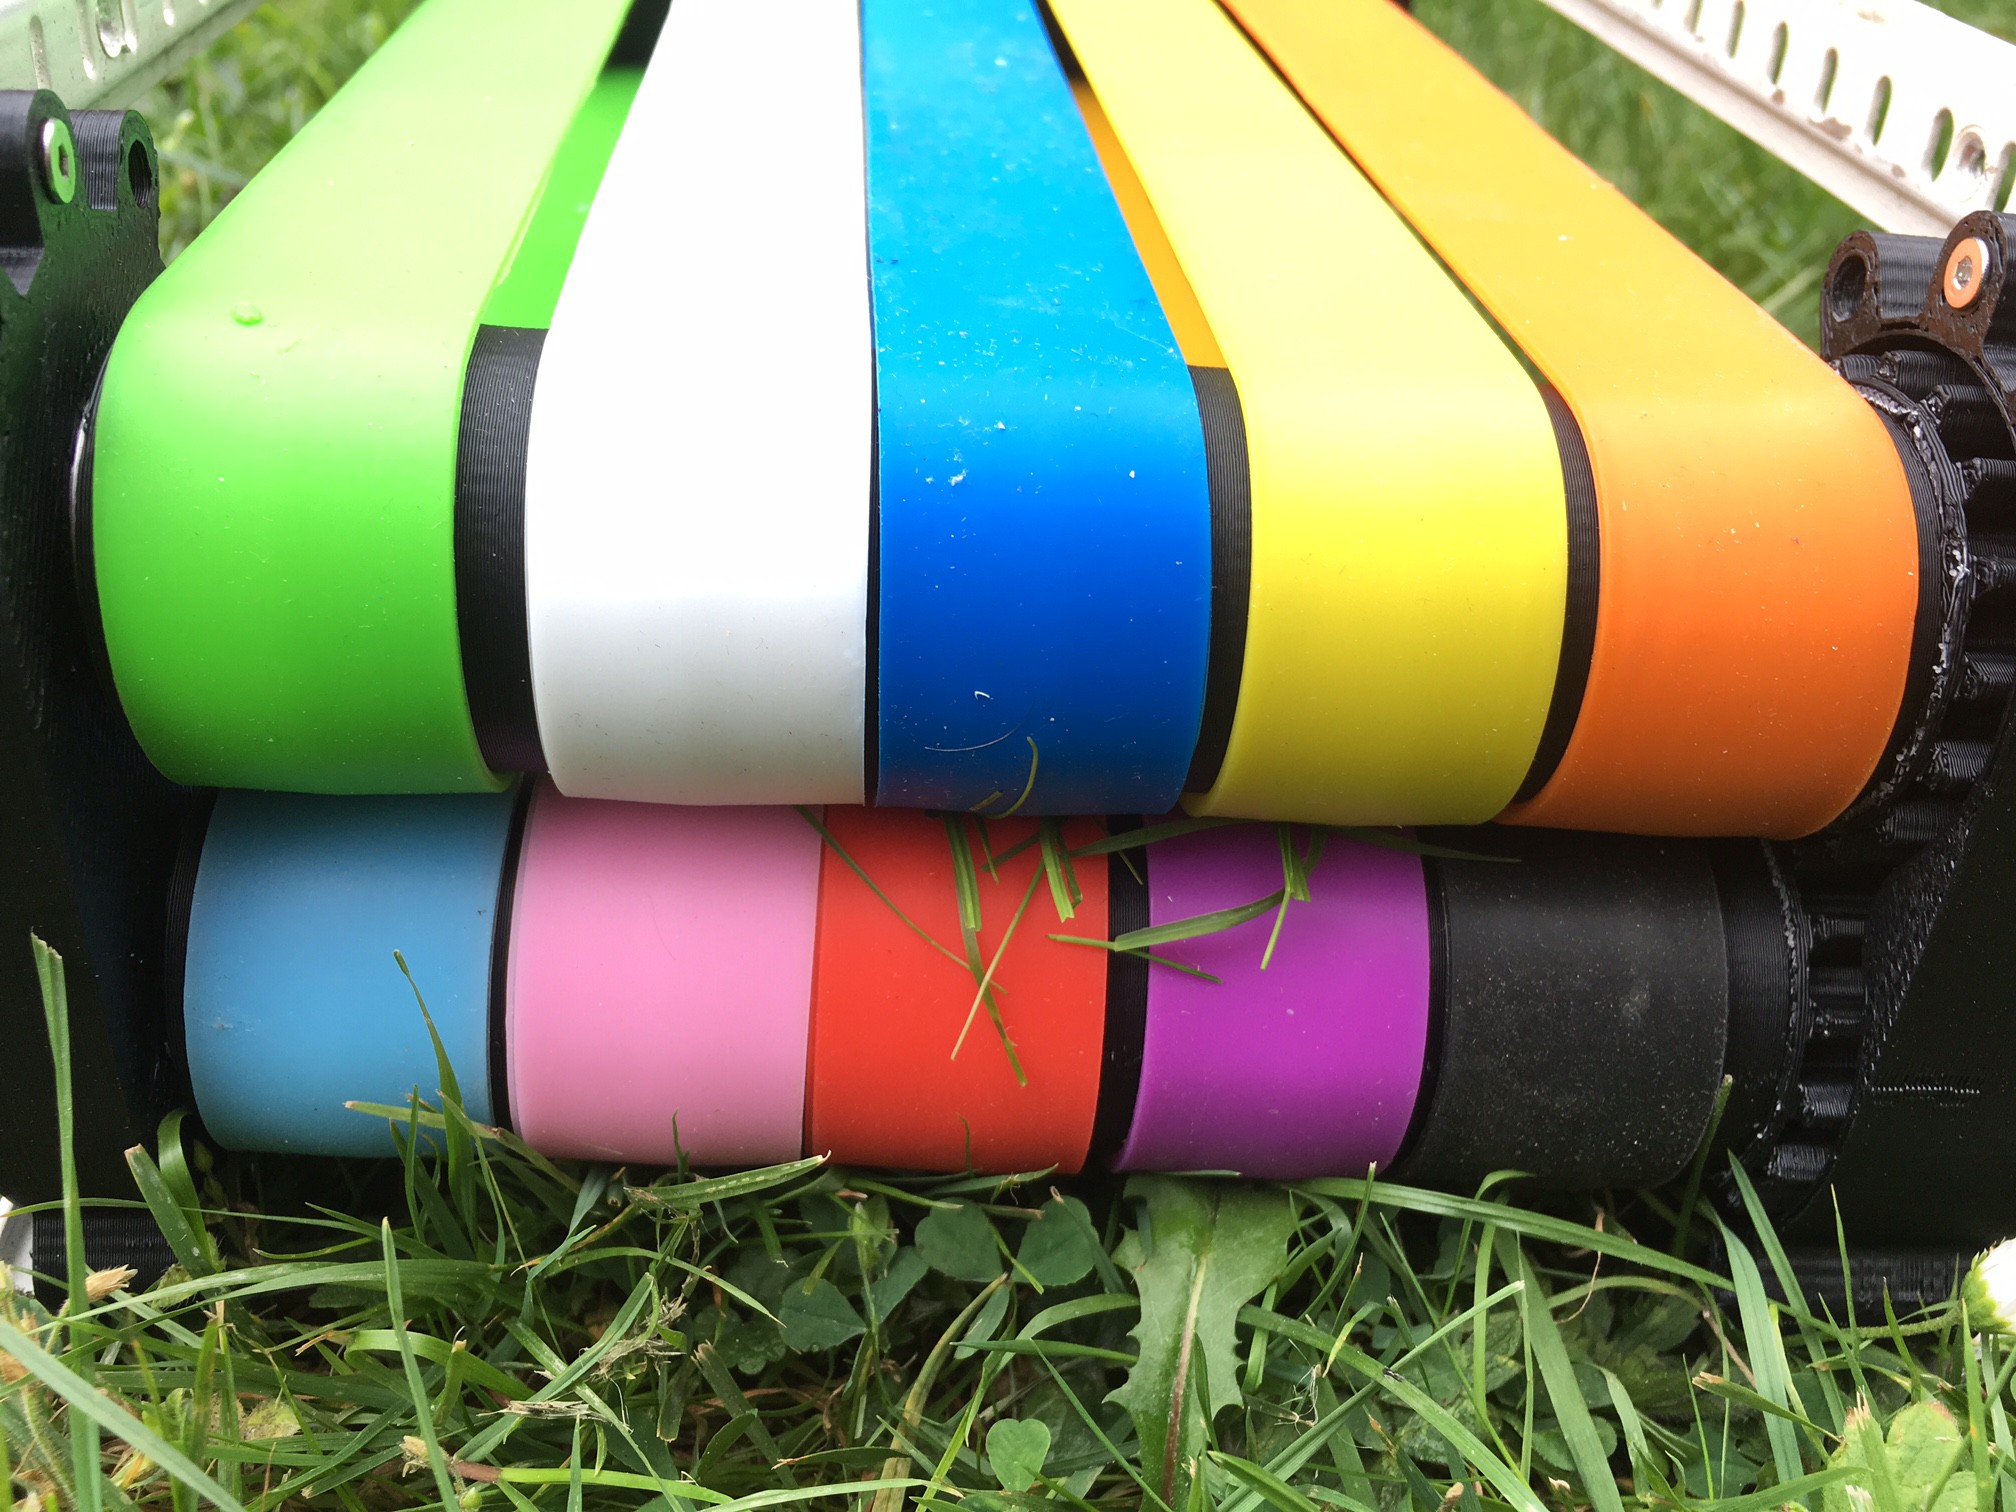
    The idea is pretty simple. Two grippy silicone belts running between two pairs of rollers. They are pinched together at the business end such that any grass long enough to reach the pinch point gets its top torn off, and then the top is conveyed up the belts to a hopper that collects the cuttings. I was worried that this might just uproot the plant rather than trimming the top but I did a quick test running a silicone band between two whiteboard markers and even on a damp day it didn't uproot any grass. I might supervise the robot for a few weekends though, just in case...

    Ordering and 3D printing parts for the prototype

    I looked around for silicone belts online and found amazon sell 1" wide bands that are 12" laid flat double (24" circumferential length) LINK. While these are narrower than I hoped, they £15 for 10 and next day free on prime. The downside is this is a multicolour pack so the prototype is COLOURFUL!!

    I also ordered some 26x10x8 bearings and a 5RPM 12V 1W motor, which also arrived next day.

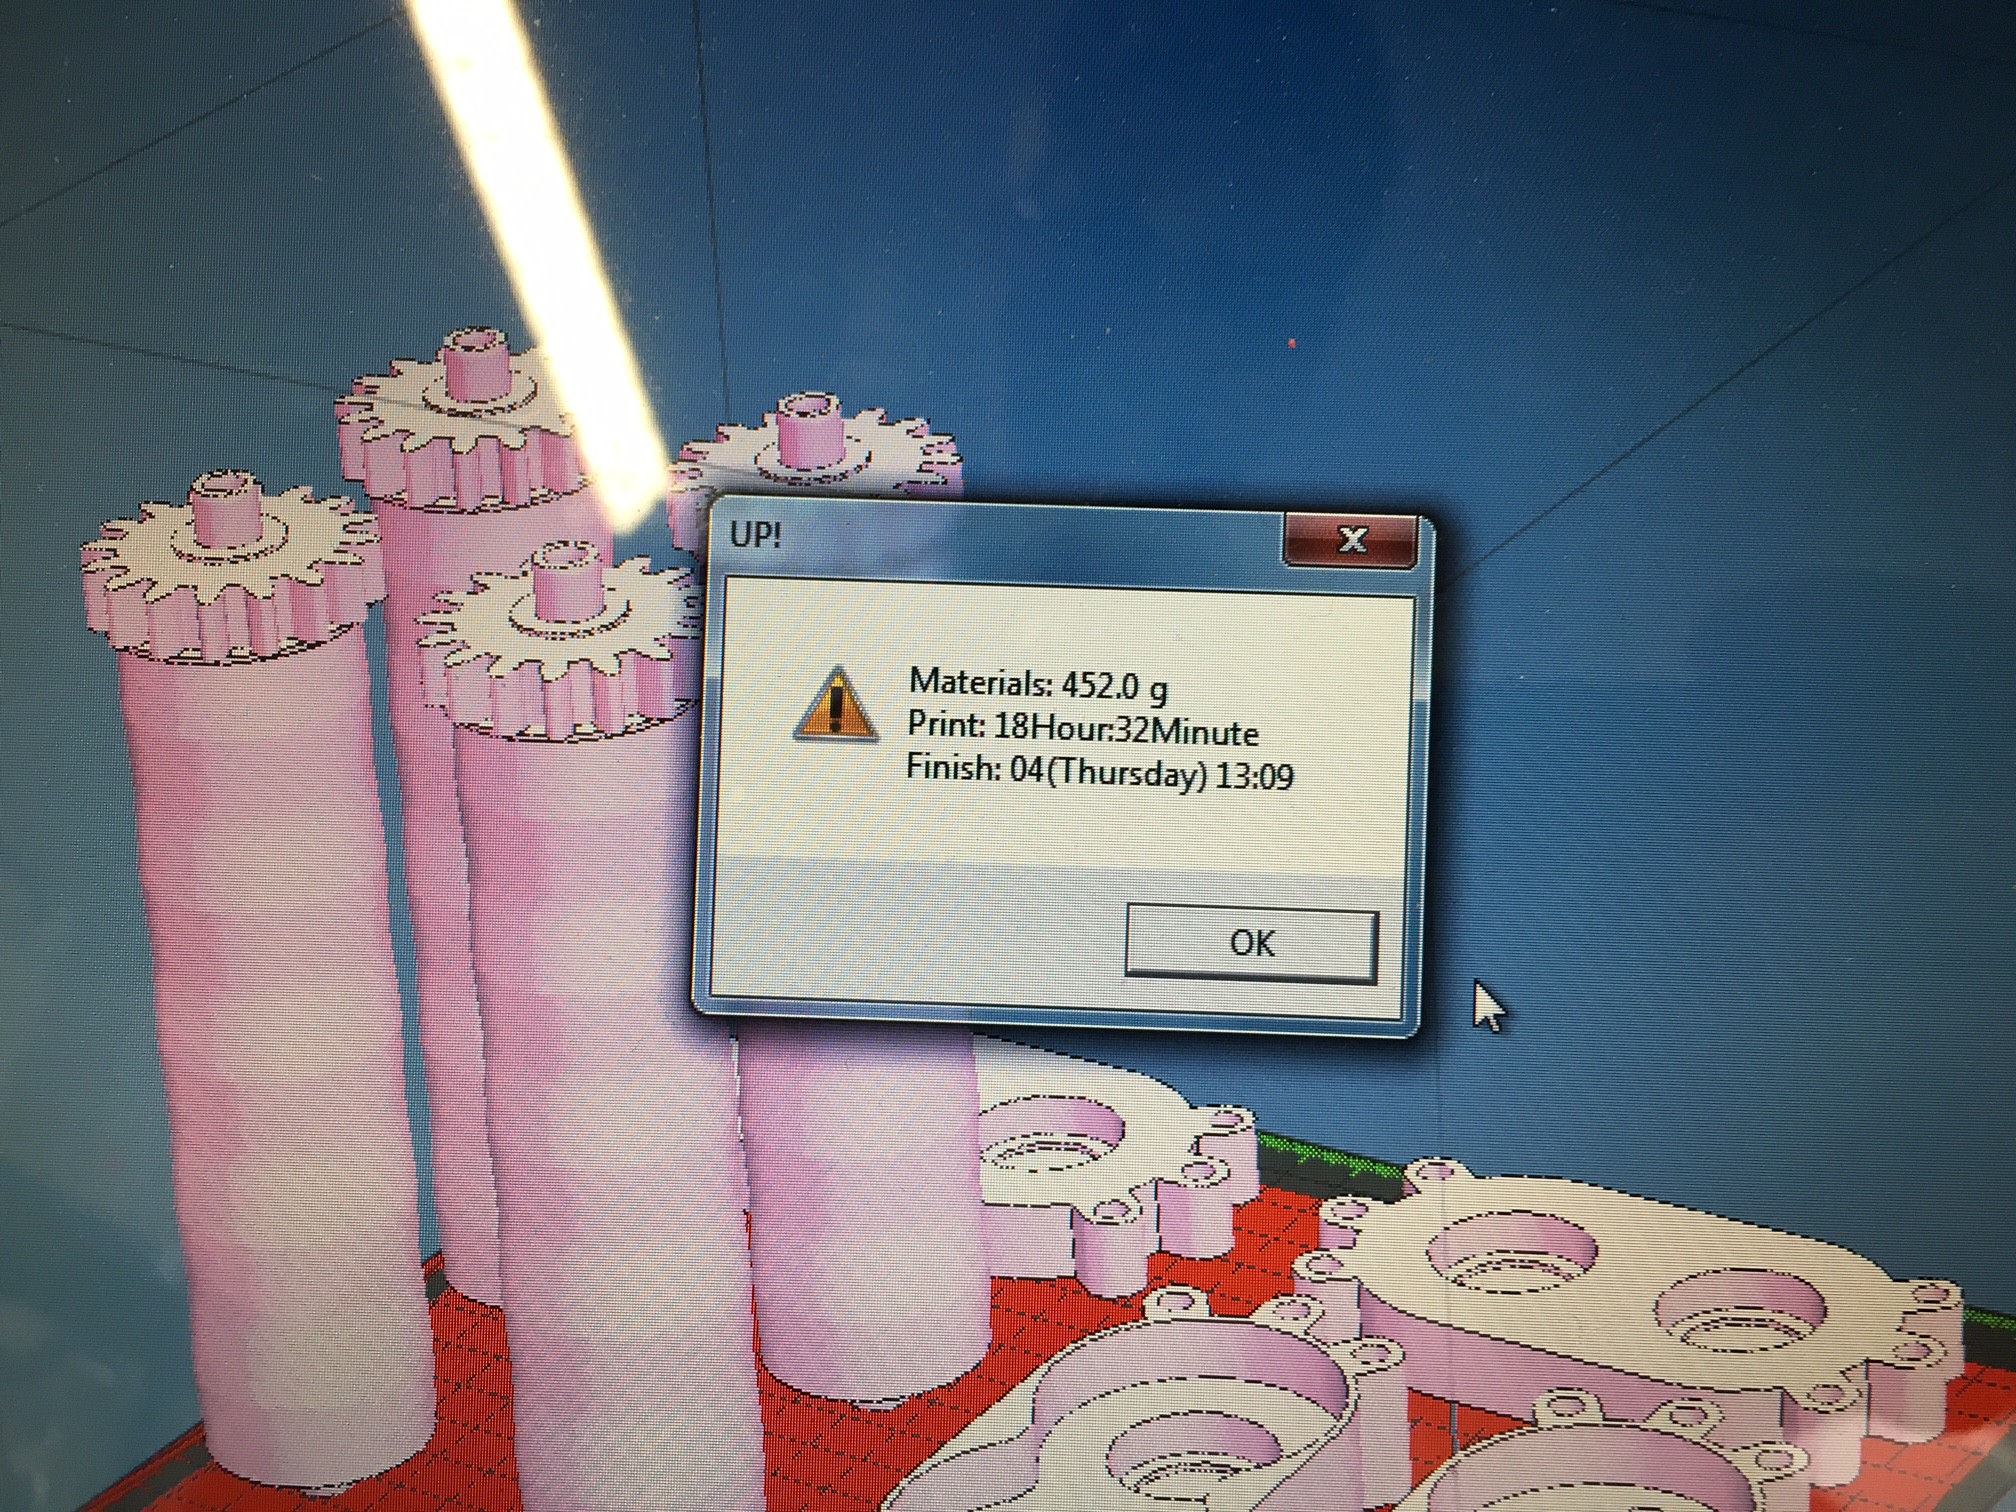
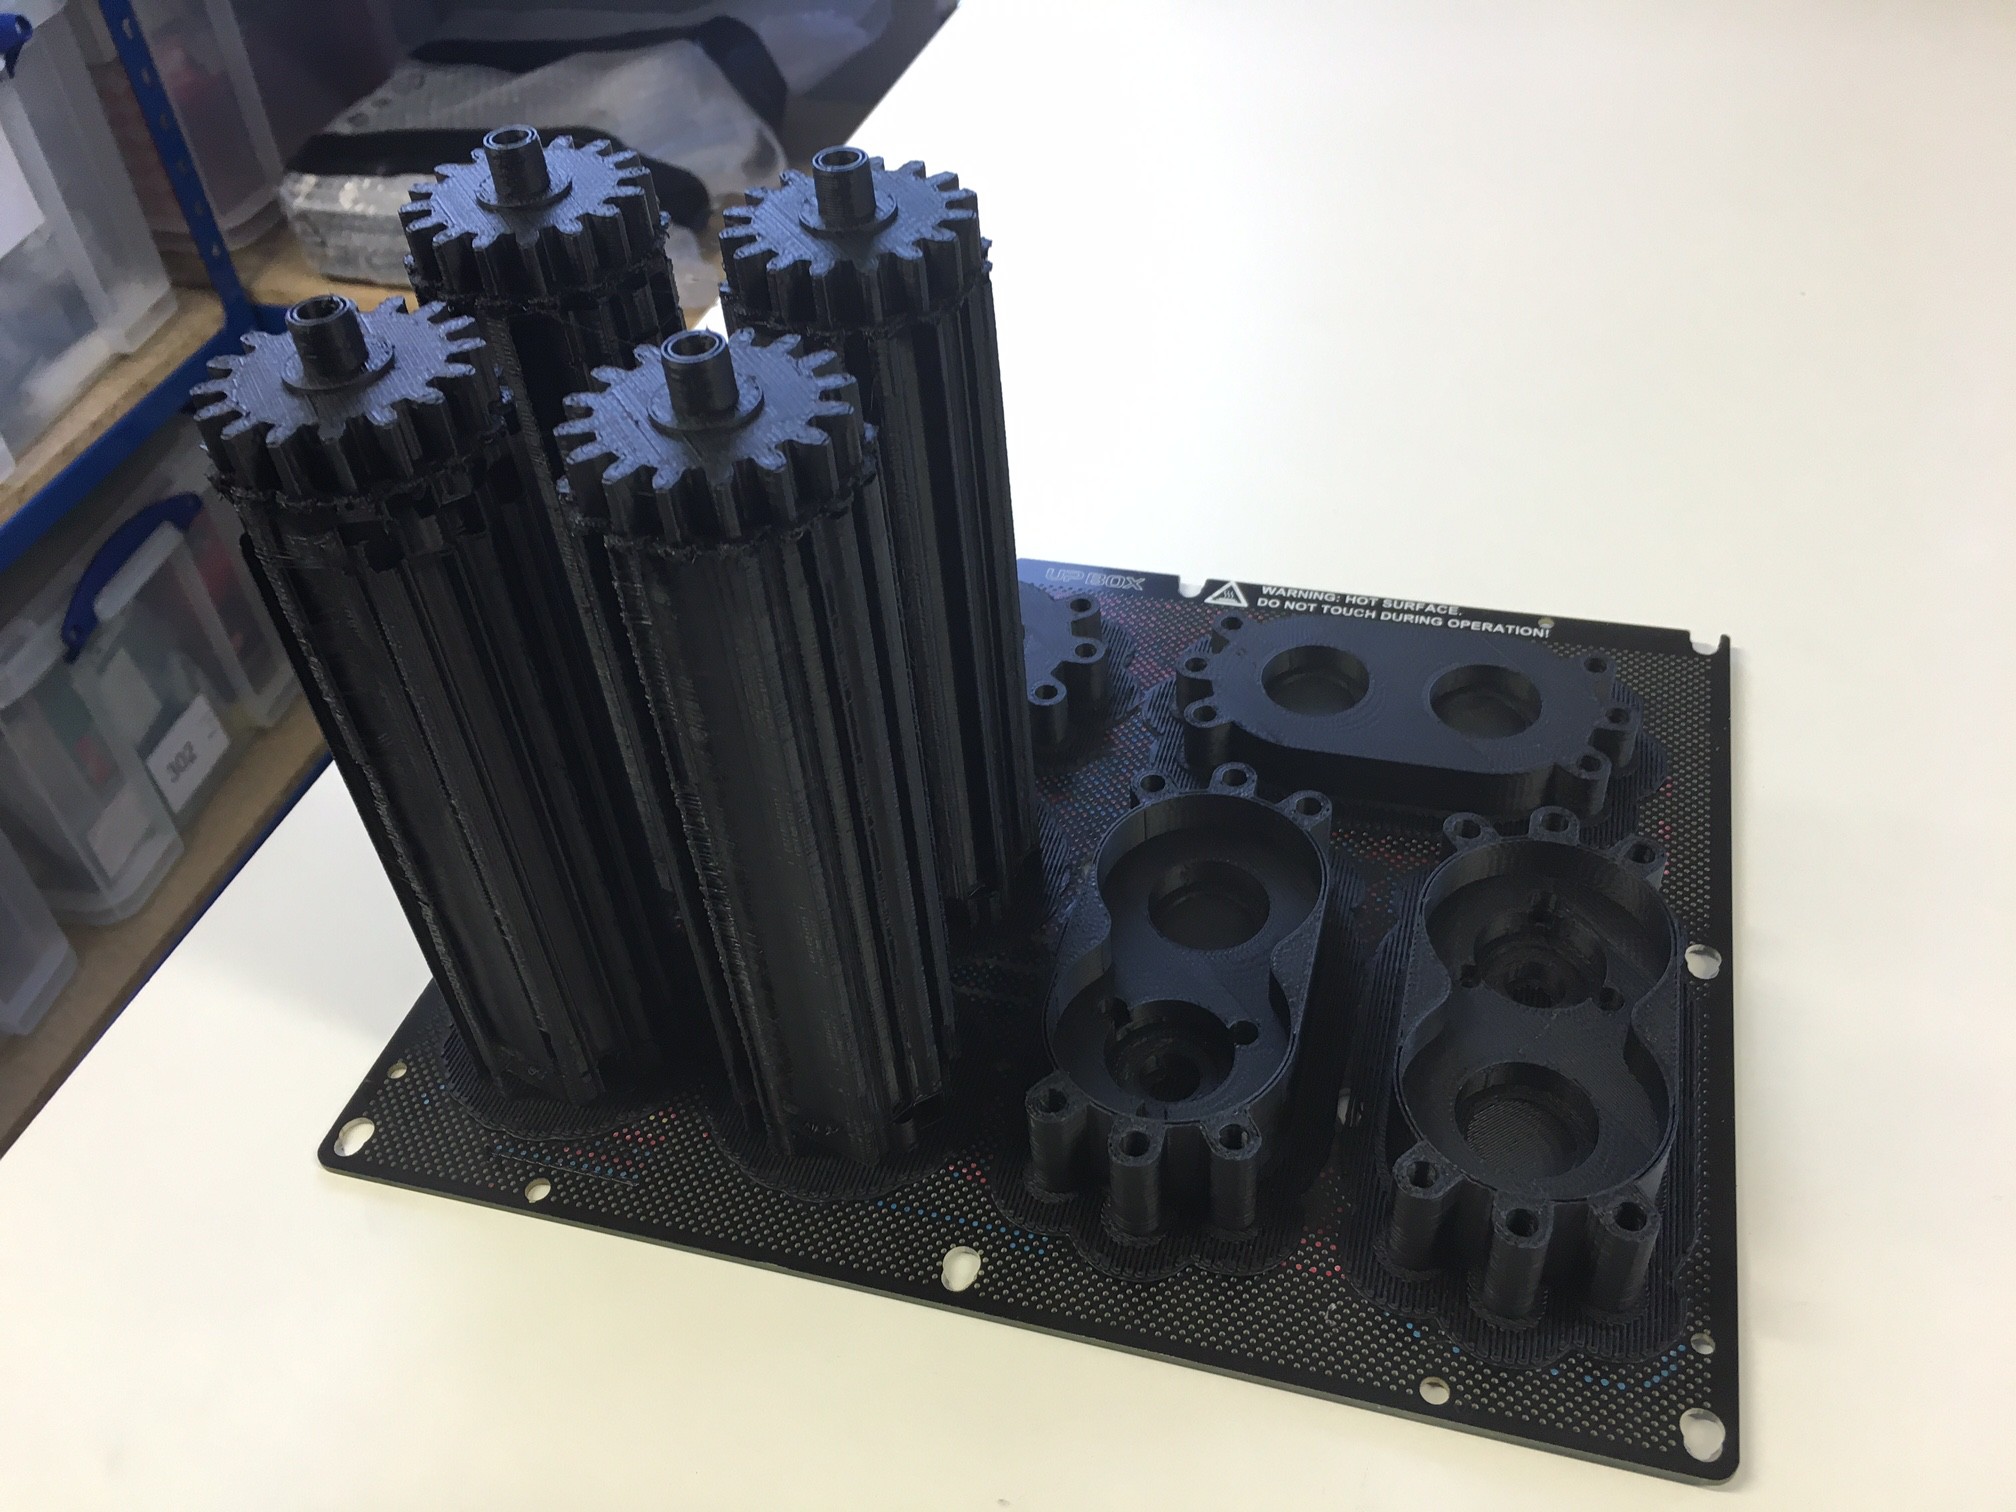
    I designed the front rollers and end caps to house the bearings and hold the rollers together as well as holding the motor. I 3D printed two copies of the set to save design time, although it emerged that the print was huge, using half a kilo of filament and taking 18 hours! Given the rear rollers will need redoing this was a little wasteful in hindsight, but at least I have a spare set now and I was keen to make progress.

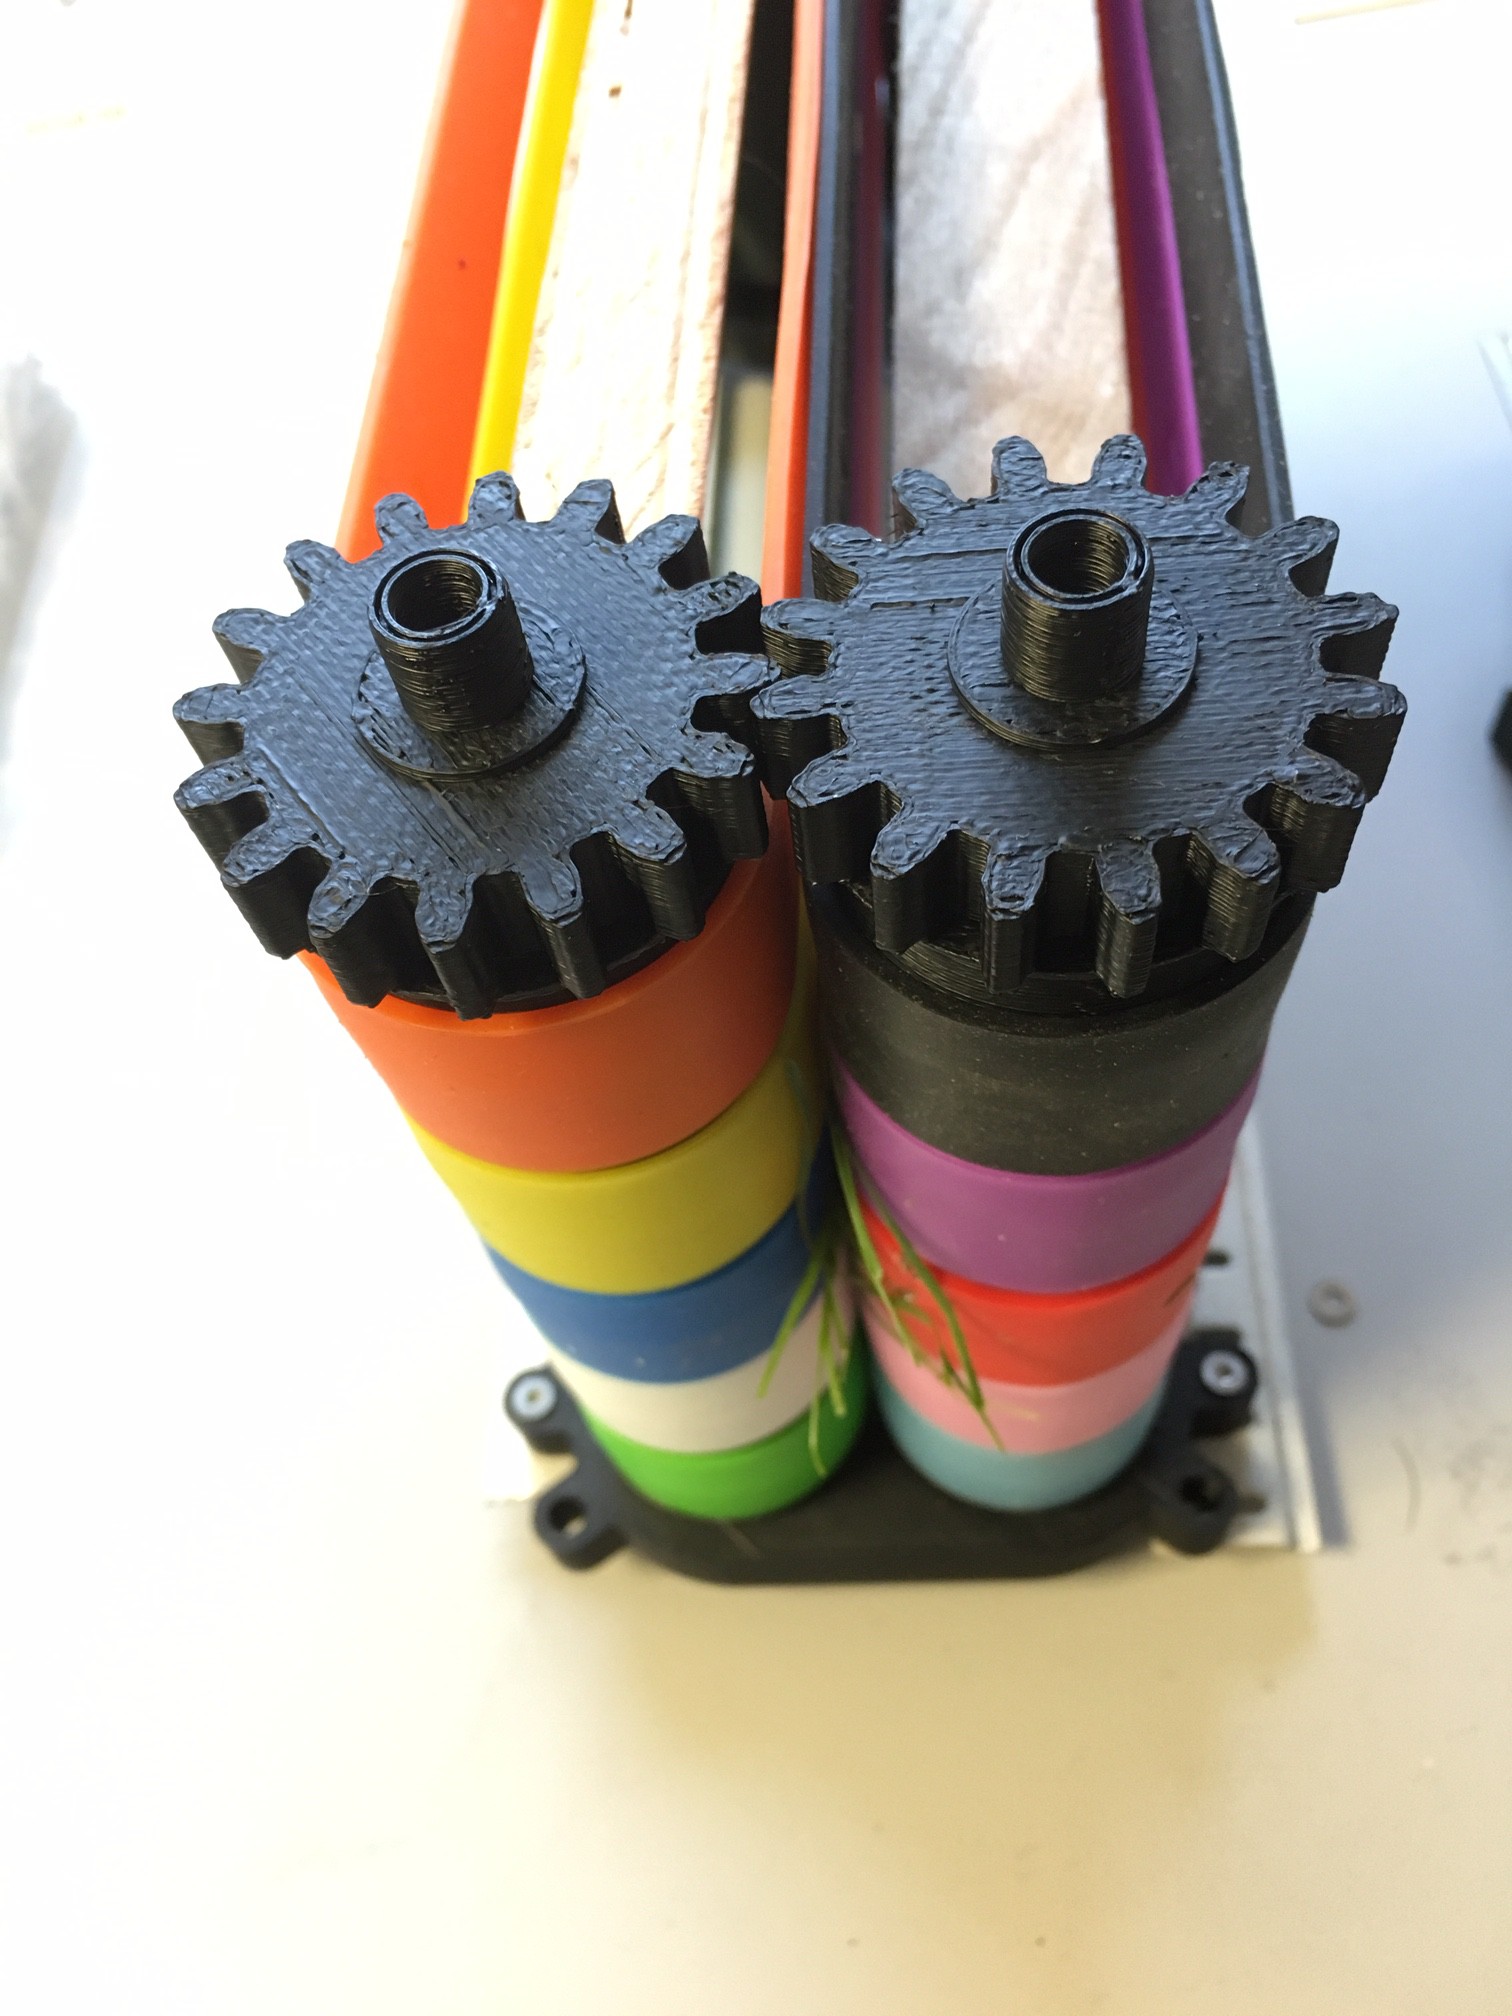
    From this view you can see the part designs. 4 rollers that fit into bearings both ends and gear together one end (the actual surface of the rollers is behind the support material but can be seen on the previous image in cad. Note the rollers taper in and out, this is to guide the belts as they will naturally centre on the widest parts (in theory anyway!). The gear end of the rollers has a hollow shaft that has a D profile internally to engage the motor shaft (more on this later).

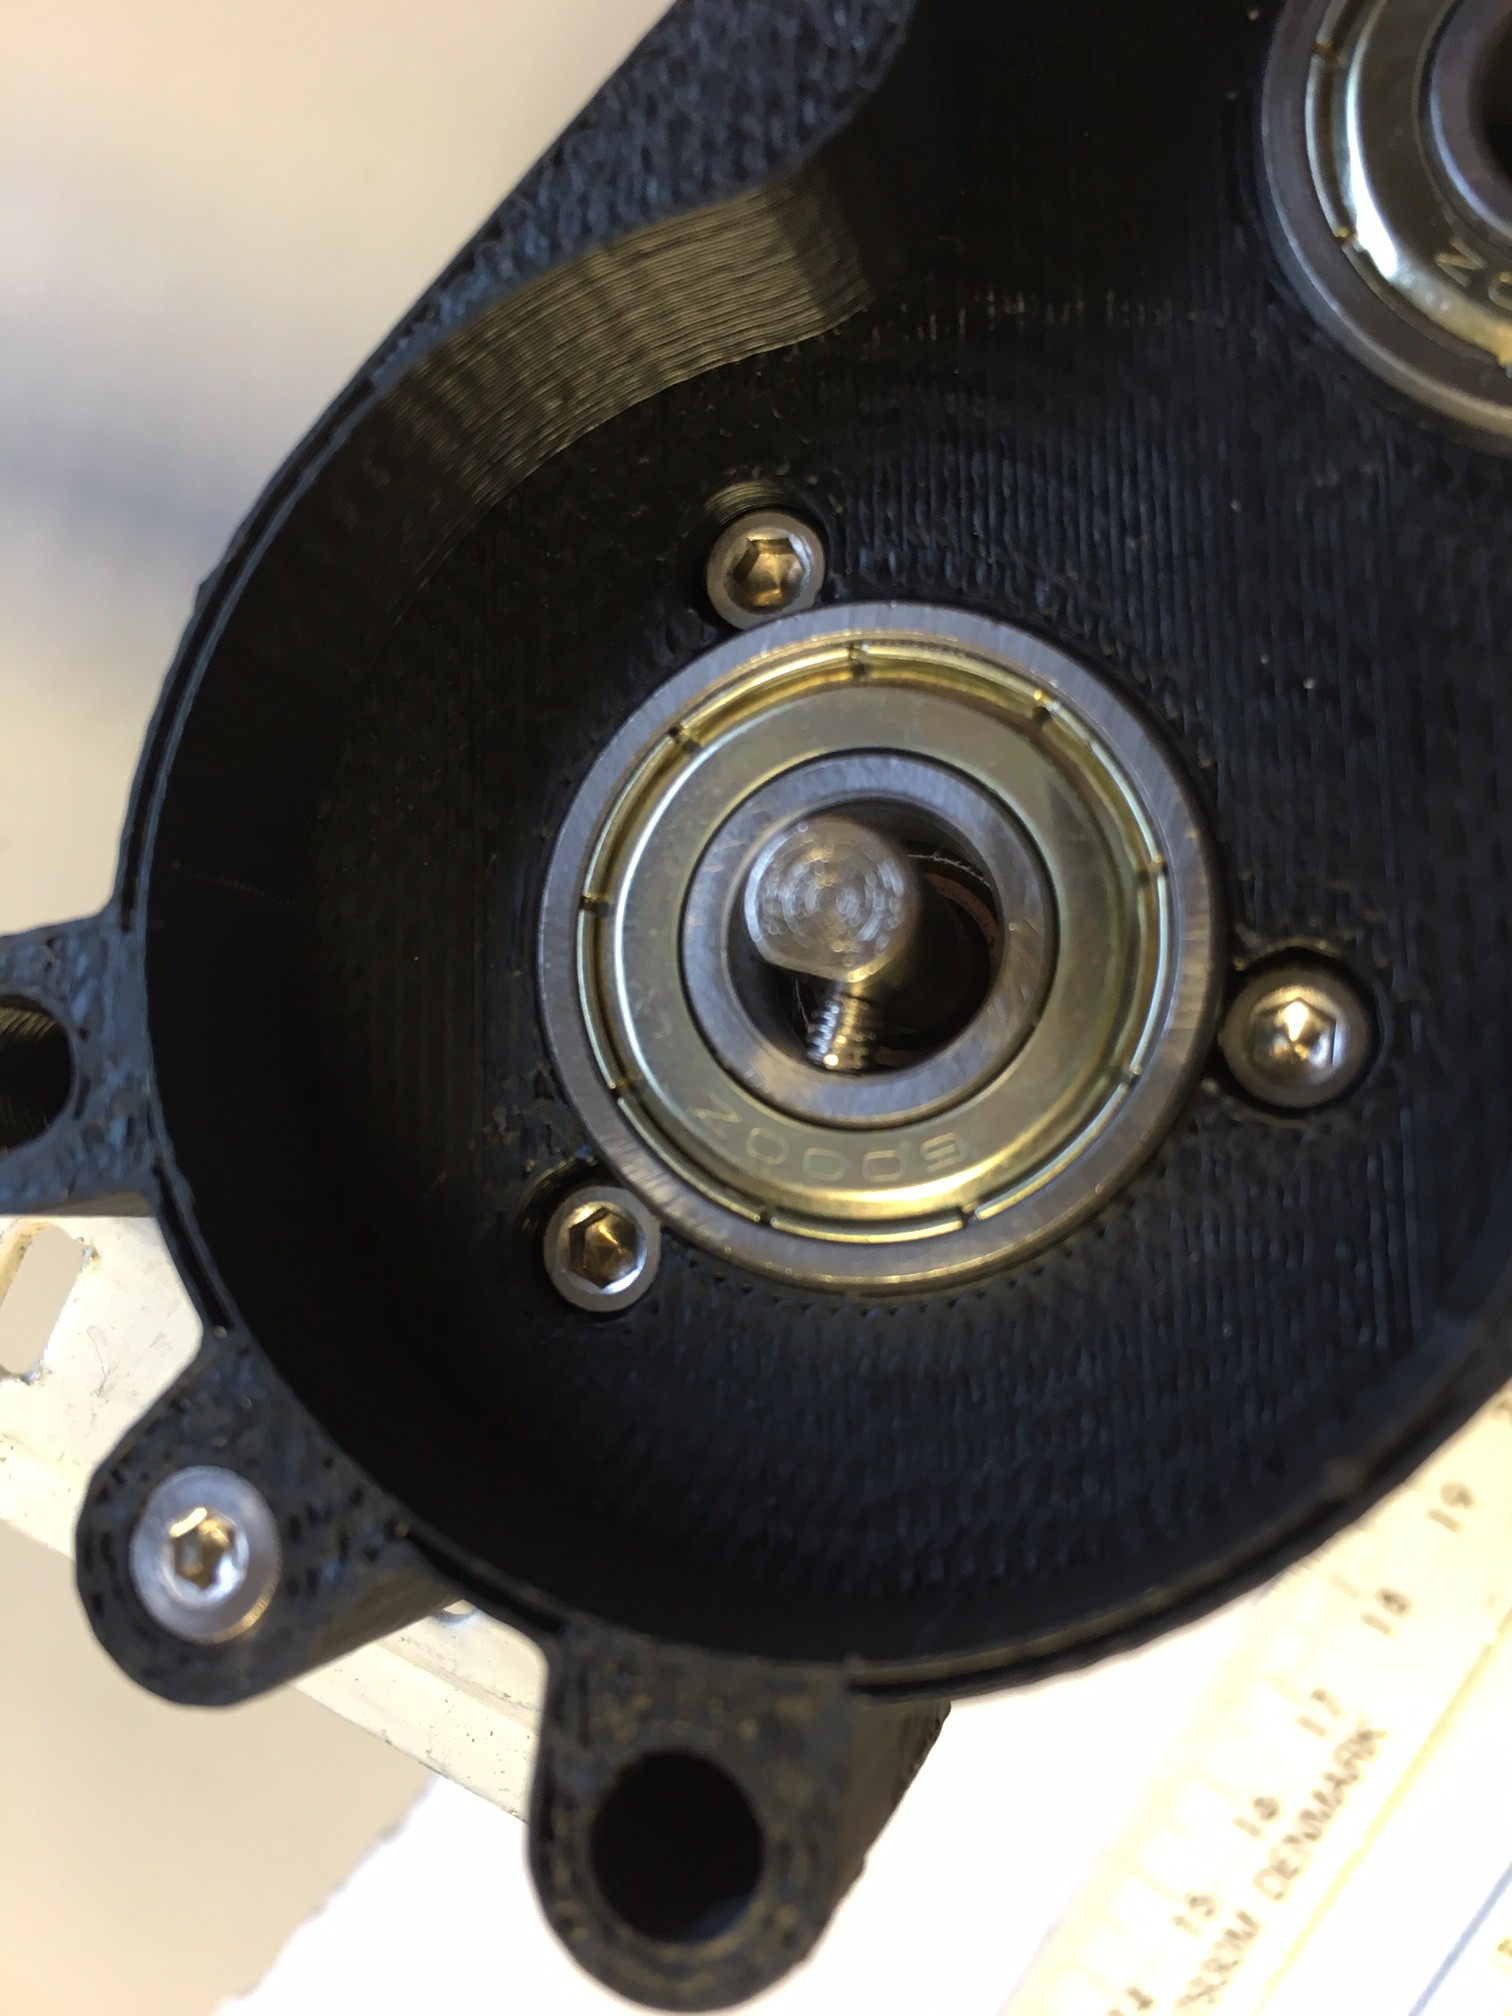
    The near right parts cover the gears around the edge, an house the two bearings as well as giving counterbored holes for screwing the motor on.

    The far parts just house two bearings. All bearings are a tight sliding/loose press fit engagement.

    When I designed the bearing housing end caps (both types) I hadn't thought anything through further so just added 3 bosses each end for later attachment.

    Assembling the prototype

    See what I mean about colourful?

    Like a numpty I forgot to photograph the assembly but it was pretty simple and is described below:

    Pressing the bearings into the housings was done by hand, using relatively high force but is only possible when they are in square so needed careful pushing evenly from both sides.

    The motor screw hole PCD was luckily exactly wide enough for the M3 screw heads to fit outside the bearing, really important as making the shaft of the roller longer at 10mm diameter to fit the motor behind the bearing would likely cause it to break. Screwing the motor on was easy enough.

    I then put 5 bands around each of the front rollers and pushed the into the bearings. I did the motor side first as the D shaft needed lining up. Inserting the other end required the shafts to be squeezed firmly together but wasn't two hard.

    I repeated the process for the back end, being careful not to cross any of the belts, and the lack of motor made the assembly much simpler.

    At this point I had two pinch roller assemblies attached by a number of belts. I wanted to quickly and simply align and separate these to tension the belts for initial testing so I raided my shed for some old shelf stripping. Screwing one end of the four lengths was easy enough, but I needed assistance from a friend to hold the rollers parallel as I tensioned the belts because when only one side is parted the belt tension applies excessive bending to where the...

    Read more »

  • Thoughts on locomotion

    jellmeister07/18/2016 at 22:11 0 comments

    While the focus of my efforts at the moment are on concepts for grazing, I thought I would also capture my thinking for locomotion...

    The development steps I'm expecting are:

    1. Move and steer on grassy terrain
    2. Detect what is and isn't lawn and stay on the grass
    3. Have a strategy for finding the sun to recharge when required
    4. Move in a way that covers every part of the lawn as evenly as possible

    So far I have had a few ideas:

    • Number 1 should just be some knobbly 3D printed wheels on gear motors. Differential drive to steering and some kind of castor is probably easiest.
    • For number 2 my lawn is surrounded by paving, sheds, raised beds and decking. I suspect that a combination of a downwards pointing colour sensor looking for green grass and some ultrasonic sensors may be enough.
    • On number 3 my preferred concept is to use a magnetometer and drive north until the edge of the lawn, which should mean the sunniest area. I need some way to randomise the stopping point a little to avoid a dead patch of grass under the charging spot. Or the sheep could sleep on the paving just north of my lawn if that turns out to be easier,
    • Number 4 is the most challenging. Many dumb algorithms would preferentially graze the edges or the middle, with corners likely to be least grazed. Hopefully a simple 'pong' bouncing algorithm should be good enough if the grazing is faster than the growing. If not I might have to put some intelligent navigation in the controller, but I don't want the complexity of SLAM and half baked algorithms are likely to be worse than random. Perhaps stripes using compass bearings and range finders might be a simpler alternative.

    Once again, if you have any bright ideas, let me know in the comments...

    Until next time,

    Jellmeister

View all 4 project logs

Enjoy this project?

Share

Discussions

rob storms wrote 05/29/2023 at 07:03 point

Love this !!! Have wanted one for myself. My thoughts are no battery ( mow only during the day and no charger). I would not need to collect clippings so cut with a pair of scissors. Bot would collect solar ( perhaps like a joule thief circuit), then lunge forward an inch or two as the scissors close. Repeat. Perhaps no rotary motion involved at all, one solenoid could lunge and snip. Actuator could be weak enough so it was unable to snip a finger. Lunge would slightly rotate one wheel or the other depending on the navigation system. Perhaps feel or look for grass, also thought of creating a perimeter by sinking nails at intervals and have a compass ( or something ) look for them. Hope no computer at all and about the size of a toaster. Thanks for your great inspiration!!

  Are you sure? yes | no

Dylan Brophy wrote 04/29/2017 at 05:27 point

Where is this project now? No logs for 8 months.... Really cool project and I want to see it complete and working!

  Are you sure? yes | no

jellmeister wrote 04/29/2017 at 07:10 point

Sorry for that. The end of last summer my car took over my projecting time, and then it wasn't summer which (in Britain) means no mowing and also greatly reduced solar! You are right I do need to get back on it

  Are you sure? yes | no

Dylan Brophy wrote 04/29/2017 at 07:25 point

Summer is coming soon.  I hope to see you making it again :D

  Are you sure? yes | no

suicidal.banana wrote 08/04/2016 at 21:45 point

Cool idea, and bonus points for the lovelly project thumbnail :P

  Are you sure? yes | no

jellmeister wrote 08/04/2016 at 22:44 point

Thanks:)

  Are you sure? yes | no

Kevin Meldrum wrote 07/19/2016 at 21:06 point

This is a great idea, I'd love to see how it turns out.  For the munching engine have you considered building something like a mini hedge trimmer blade set?  Two "comb shaped" blades pointing forward, mounted one on top of the other - one would remain fixed in place while the other slides back and forth on top of it, shearing off any grass caught between the blades. If it were mounted on the underside of the chassis it  would allow the "sheep" to trim a swath of lawn to a set height without ripping up the grass.  I'm not sure how much power that type of mechanism would require, but if you could find/make light-weight blades it could be more efficient than some spinning blade options.  Also, since it wouldn't need to spin-up to speed, you could use a laser "trip wire" in front of the blade assembly to turn the cutter on only when there's grass tall enough to contact the blades.

  Are you sure? yes | no

jellmeister wrote 07/19/2016 at 22:37 point

Good thought. It would need to be sharp and close fitting to avoid just bending the grass, and need to be mostly gaps to stop it pushing out of the way. I'm generally trying to avoid need for sharp blades, but a hair clippers comb might make it pretty safe...

I really love the idea of only 'biting' when there is grass there. Your comment also gave me a slightly wacky idea... Could a high power blue/violet laser diode actually laser cut my lawn?! It would be tricky to make safe and wouldn't collect clippings but seems somehow awesome:) Grass doesn't reflect blue/violet well (hence green look) so might actually work. Or maybe I should stop being so daft and go to bed!

  Are you sure? yes | no

Lastweek wrote 07/19/2016 at 20:32 point

This is great! But what if you saved some time, and just used an already built robot-lawn mower.  This way you get all the parts you need and the durability. Then you add a solar component, or just tear out the internals and fit your own.  You could also throw some LiDAR on it for children and animal avoidance.  This could also replace the 'track' thats needed for those mowers to run.

Here is a link I was looking at right before I saw yours http://www.instructables.com/id/YourDuino-Basic-Arduino-Compatible-Collision-Avoid/

https://www.sparkfun.com/products/retired/13680

Anyway you do it, it sounds fun and I'm excited to see what you come up with.

  Are you sure? yes | no

jellmeister wrote 07/19/2016 at 22:19 point

Hi, that would definitely make the job easier, but those things are expensive! I'll also need more efficient drive and cutting equipment so I'd only really get the shell. Good thoughts though I have borrowed a lidar lite from a friend to test outside though I am sceptical that it will see in bright sun (prime solar panel time) and also worried that the optics will need to be kept free from dirt, insects, rain and dew, which will be really challenging. 

  Are you sure? yes | no

Patrick Van Oosterwijck wrote 07/19/2016 at 20:15 point

Love this!  I've been mulling small, continuously grazing lawn robots for a while but have never done anything about it.  I hope this gets traction! :)
I think that to be more universally applicable, number 2 (detection of grass / knowing where to graze)  will be the most challenging!

  Are you sure? yes | no

jellmeister wrote 07/19/2016 at 22:09 point

Thanks, without the prize i still wouldn't have started the project! I agree the universal solution is a tricky one. I definitely won't have time to bite it off inside the hackaday prize timings, but deep learning vision system, SLAM or localisation in a taught area all seem promising but really involved. Using compass for bearing and range finders looking for fixed features to localise within a map is my best shout but I can still imagine plenty of gardens it wouldn't work for.

  Are you sure? yes | no

Similar Projects

Does this project spark your interest?

Become a member to follow this project and never miss any updates