fl@C@
fl@C@-
Updates
04/07/2015 at 02:54 • 0 commentsSo... I've been a little short on updating...there's a lot going on.. But I wan't to say that I'm still looking for some python developers, FPGA, even openSCAD... Below is a preliminary (incomplete) list of where the development is going...
If you'd like to be a developer, email us at dev at ramanpi dot org....and we'll set you up with a developer forum ID, etc.. or you can sign up yourself at dev.ramanPi.org and we'll get you started..
You can find this list, which will be update as often as possible here.. If you think you can contribute to any of these areas let us know!!
3D Printable:
- Spectrometer (just the spectrometer, separate from the raman system)
- Geometry and "self assembly"
- Beam Splitter Assembly
- Newer Optics to conform with kit specs ( meaning no eBay )
- Mirror Mount Assembly
- Newer Optics to conform with kit specs ( meaning no eBay )
- Objective Lens Assembly
- Newer Optics to conform with kit specs ( meaning no eBay )
- Laser Shutter Assembly
- Completion of shutter assembly
- servo needs more solid mount
- rotator needs to be longer and will divert beam to indicator
- Completion of shutter assembly
- Filter Selector Assembly
- Newer Optics to conform with kit specs ( meaning no eBay )
- Beam Dump
- Possibly add sensor to measure laser color and power
- Cuvette Tray Assembly
- Rework gearing and slide mechanism
- Include the cuvette peltier
Electronics:
- Spectrometer (just the spectrometer, separate from the raman system)
- Total circuit redesign using an FPGA
- Ocean Optics USB4000 compatibility
- protocol compatibility
- pin configuration compatibility
- Possibly integrate FPGA circuit on same board as CCD (or 90deg mount)
- Client software will accept input from spectrometer outside the system via usb
- controlBoard, interfaceBoard and raspberryPi integrated onto single board using the raspberryPi compute module.
- This will eliminate the stm32 development boards.. and reduce the PCB manufacturing costs significantly
- Outer case
- Elimination of the PC computer case and create a specialized box for the ramanPi specifically.
Software:
- Client Software
- Develop new client software based on a use case study
- raspberryPi backend software
- Complete server end software that controls the system and retrieves and processes the data transmitted to the clients.
Firmware:
- Spectrometer (imagingBoard)
- Develop firmware to establish full Ocean Optics USB4000 compatibility.
- controlBoard (will now be controlSection)
- Shouldn't need to be much change in direction, just completion of portions for PID control of cuvette and imaging peltier, etc..
- interfaceBoard (will now be interfaceSection)
- Also should not need to be much change in direction, just compltion of menuing system and touch panel interfaces, etc..
- Spectrometer (just the spectrometer, separate from the raman system)
-
DEVELOPERSDEVELOPERSDEVELOPERSDEVELOPERSDEVELOPERSDEVELOPERSDEVELOPERS!!!
03/12/2015 at 11:43 • 0 comments![]()
Hey, so it's that time!! I'm pushing forward as fast as possible... But there's still so much to do! I am putting out a call for developers to help me get ramanPi out to the masses! If you have Python(PyQt4, matplotlib, numpy, plot.ly, etc), or FPGA skills...or if you think you can just make a great part of the team let me know if you'd like to contribute!!!
![]()
Thanks to everyone who has expressed an interest, and especially to all of you who want kits!!
If you're interested in contributing, email me at ( dev at ramanpi dot org ) and help take ramanPi to the next level!!
I'll be bringing ramanPi.org up soon with a forum dedicated to development efforts, and ramanPi.com will be coming around with a store for kits, etc..!! I'll have more information as time goes on...but I wanted to get this out there asap!
Also, if you're at SXSW check out the hackaday booth! And while you're there, you can see some 3D printed parts from ramanPi...!!
Here's to a hopeful future for DIY raman spectroscopy! =D
![]()
-
PCB madness
01/24/2015 at 13:35 • 4 commentsSo, a quick update... Some of you may have noticed that I posted a couple other projects related to PCB production.. I've been on overtime trying to get a reliable and repeatable, yet simple and easy method down for making a number of boards.. I'm doing this for a few reasons.. I want to be able to make better boards, faster and cheaper for whatever project I'm working on...and I want to make them well enough that they match the quality I'm getting from paying a lot more money and waiting a lot more time for.. Ambitious...I know, but I like it that way..
So, I'm nearing a point where I want to start making regular updates both here and on the PCB projects I have.. Keep an eye out..! And as always, I'd love to hear feedback!
Also, for those who would like ramanPi kits.... would metal parts be of any interest? That is, the parts for the optical paths..out of cast aluminum, black anodized...and machined to fit perfectly..? I'd be interested to hear..!
-
embedded.fm podcast interview!
01/08/2015 at 01:13 • 0 comments![]() Hi, so Elecia White and Chris White over at embedded.fm did an interview with me on their podcast site.. Link here.. You all might remember Elecia was a judge in the hackadayPrize contest as well..! I want to thank her, Chris, and everyone with hackaday and the other judges for such a great experience!! I'm looking forward to getting the ramanPi finished up and possibly selling kits too!
Hi, so Elecia White and Chris White over at embedded.fm did an interview with me on their podcast site.. Link here.. You all might remember Elecia was a judge in the hackadayPrize contest as well..! I want to thank her, Chris, and everyone with hackaday and the other judges for such a great experience!! I'm looking forward to getting the ramanPi finished up and possibly selling kits too! Happy New Year to everyone, and keep on hacking..!
![]()
-
A quick update!
01/07/2015 at 07:28 • 0 comments![]()
Ok, I've been saying it for a bit now... But I really am working on this thing still.. Just to give an update on where my efforts are being directed right now... I'm trying to fill in some gaps on my side.. Mostly in the ability to make the PCBs.. I've always hand soldered and breadboarded 99% of my stuff since I never had a need to show it to anyone, or worry about reproduceability... So, I've been spending some time and money to give myself that ability.. and it's actually coming along nicely so far...I think..
I got myself a shapeoko, which is currently on its way... and those of you who might have glanced at my profile on here in the past day might have noticed that I am posting a couple new projects... One for making metal stencils, one for a UV exposure 'oven', and a couple more when I get the time.. I'll document every step of the process I am using, from designing the boards to having a finished board with solder mask and silkscreening...all done at home with easy to find parts of course.. Some things will be unique and designed by me, some will be pretty common probably but maybe with a twist to make it easier from my perspective.. :)
At any rate, a number of you have contacted me and are starting to build your own ramanPis, so I'd like to continue making it as easy as possible... and yes...I hope to be offering kits and parts as soon as possible too!
Here's to a great new year and thanks everyone!!
![]()
-
And so it begins......again..!
12/04/2014 at 04:20 • 0 comments![]()
Ok folks.. I have been taking a bit of a break from development....probably pretty obvious.. There has been a tremendous amount of interest...and I want to thank everybody for their support and interest in this... It has been great...!
So, in a week or two.......I will be starting up again and going full forward once more to get this thing shaped up better and finished up nicely..! I welcome anyone who has suggestions or questions to contact me and let me know of any ideas or whatever.. I plan on starting with re-writing the firmware for the imagingBoard... I want to get longer integration times, some data compression for the serial transfer, and a bunch of other stuff in there..
If anyone would like to contribute to the firmware efforts I welcome the help!!!
Here's to moving forward!!!! And thanks again to everyone!
![]()
-
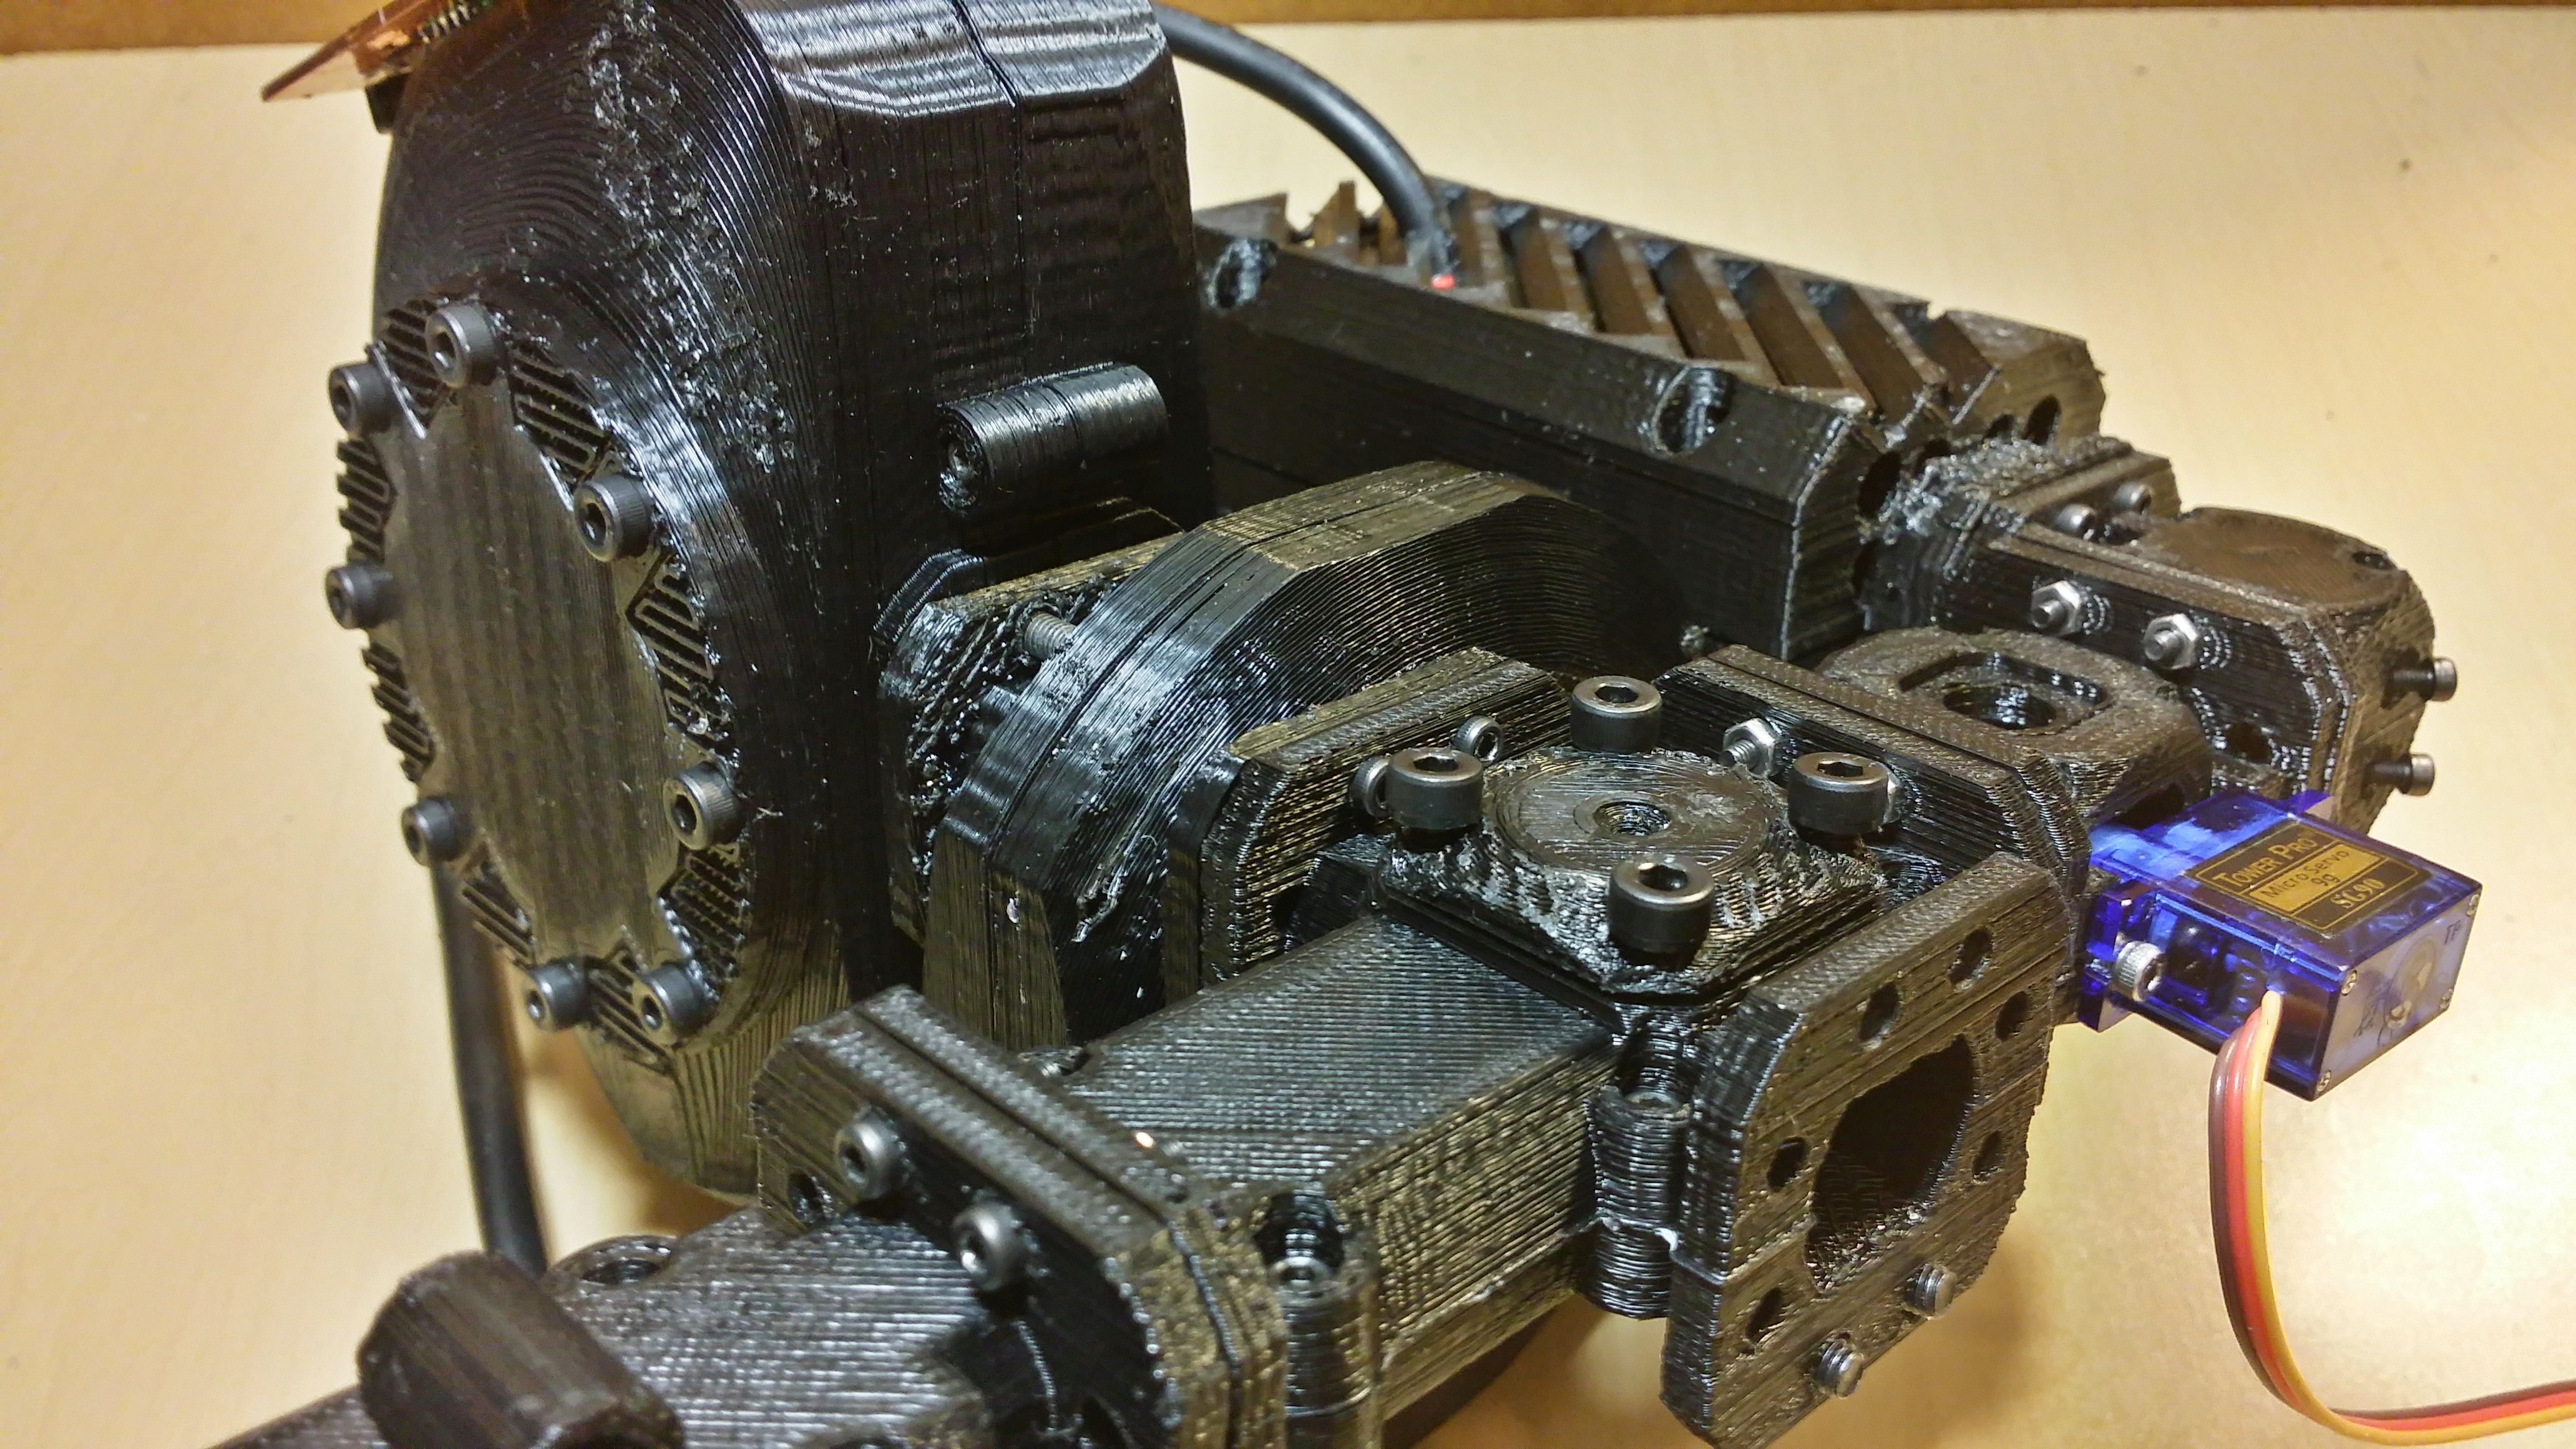
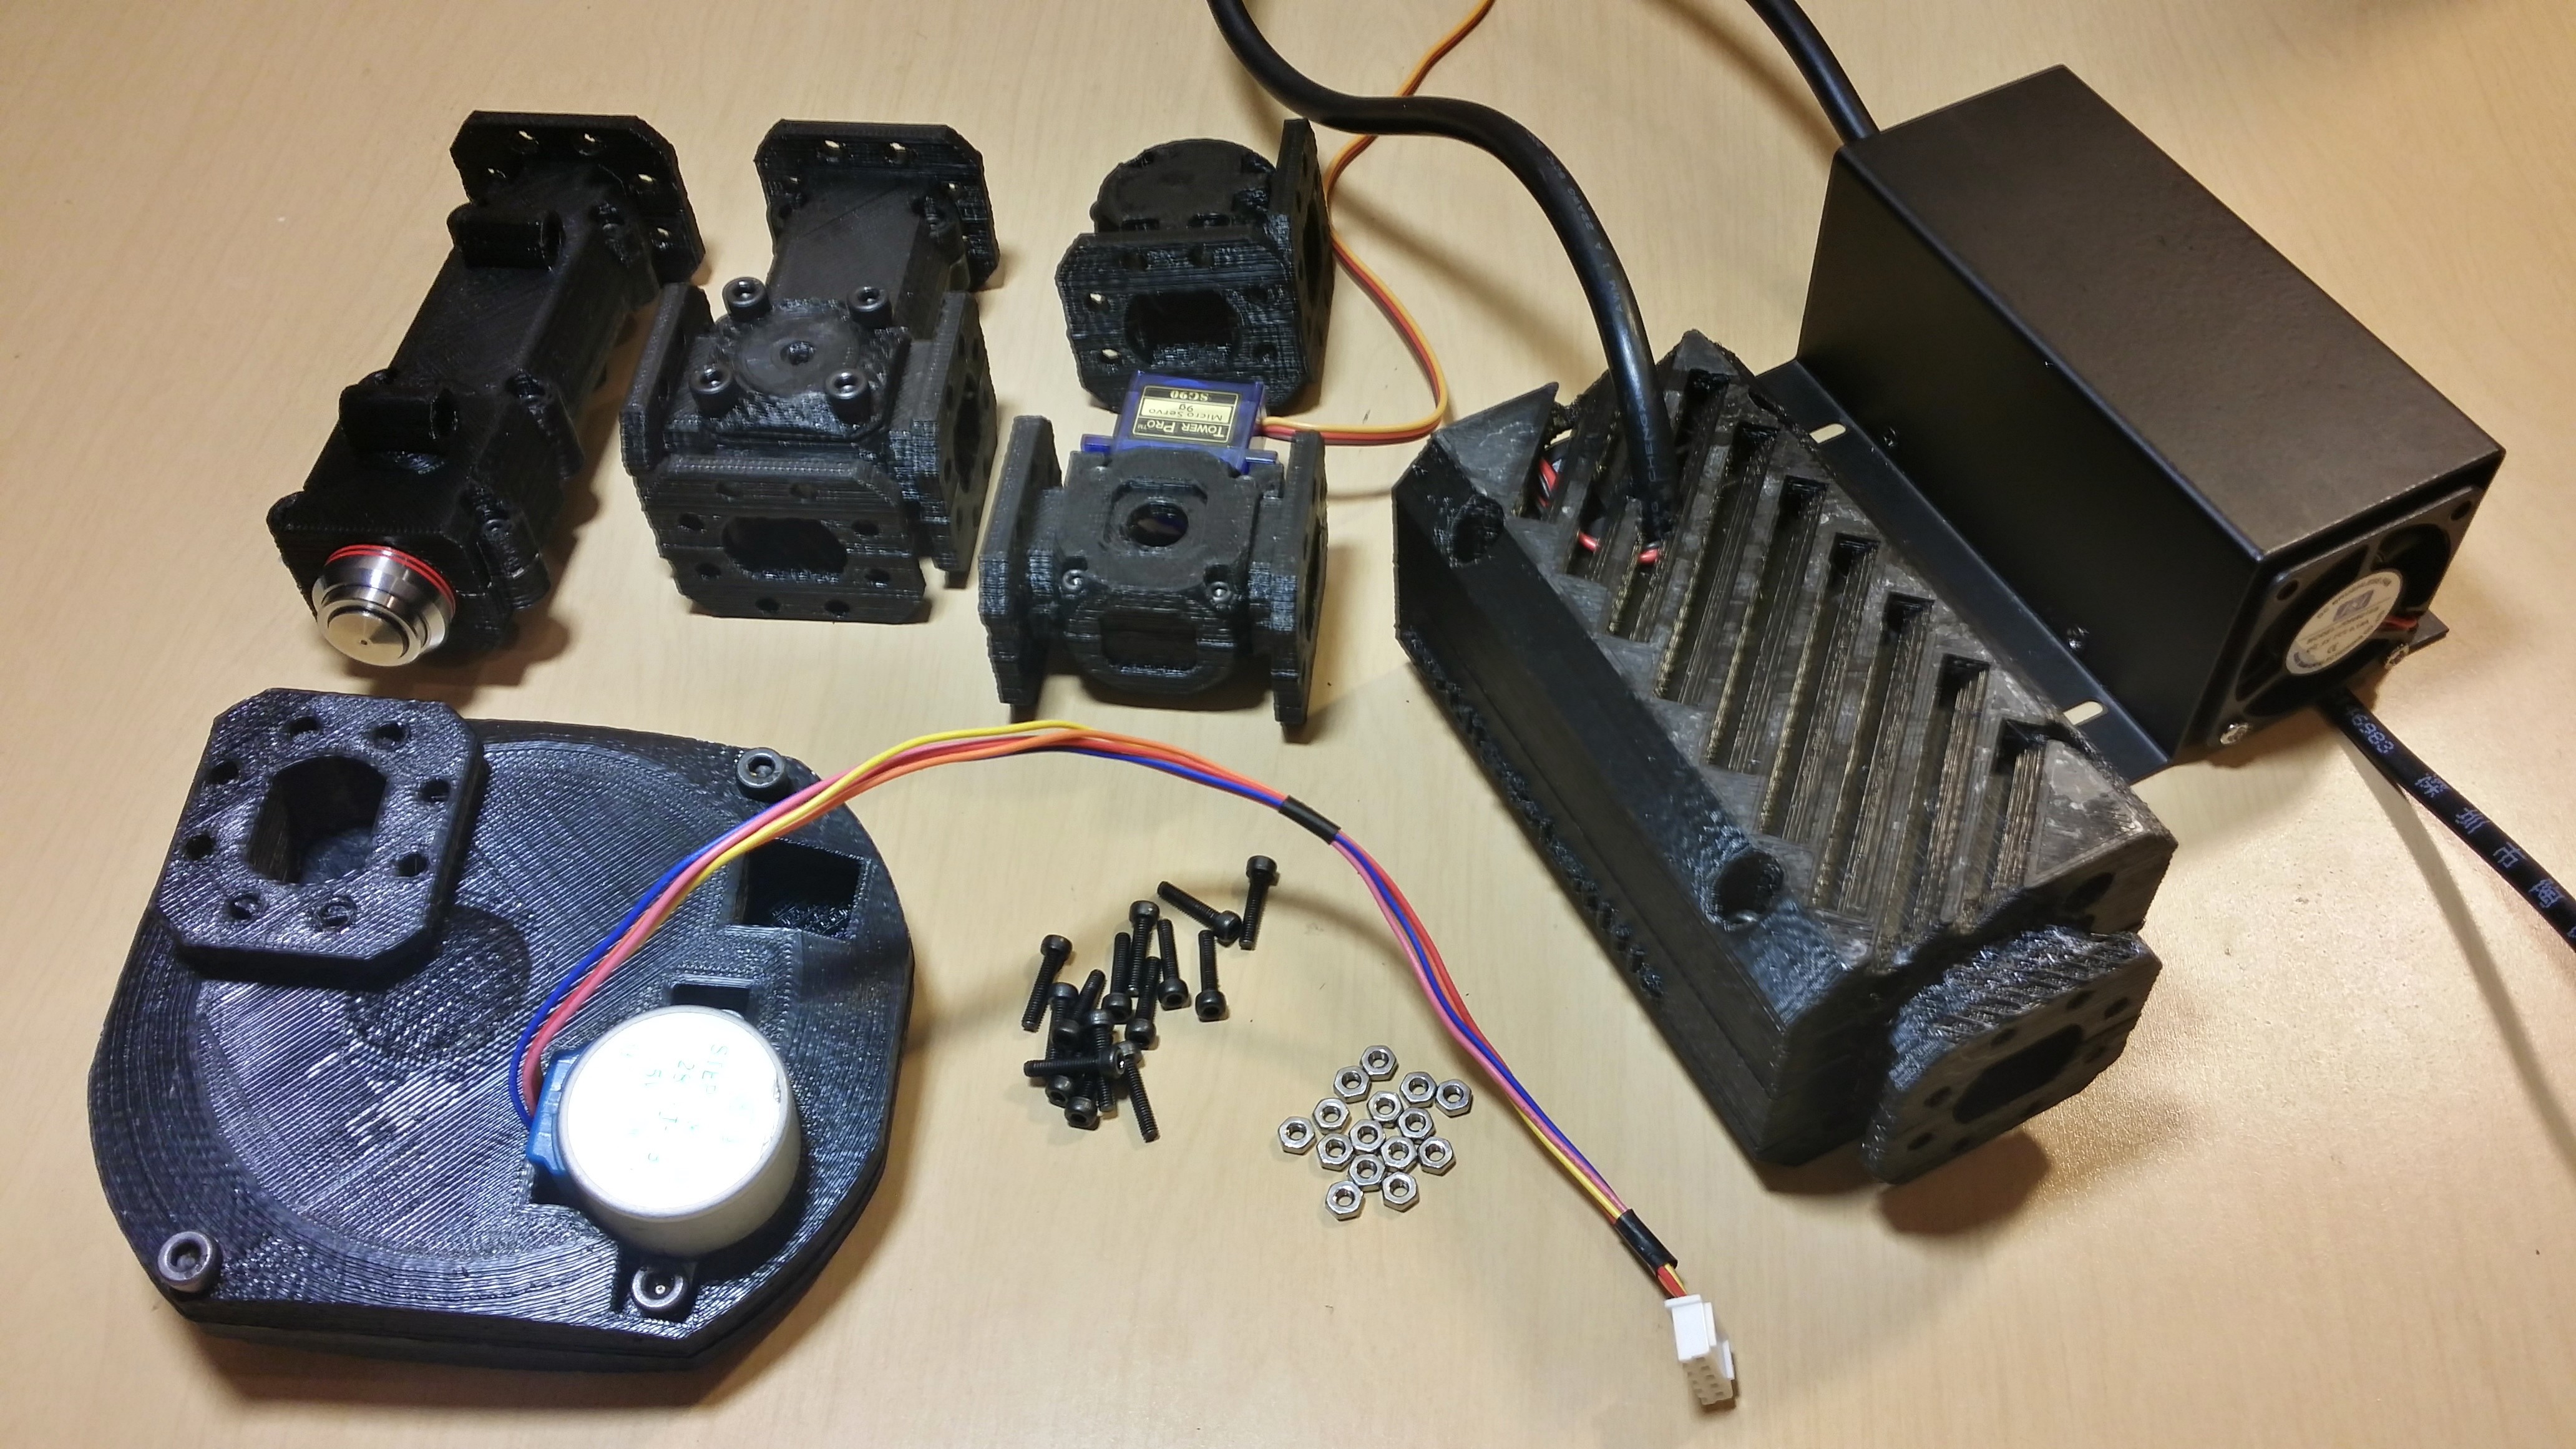
Some interior design
10/27/2014 at 19:08 • 0 comments![]()
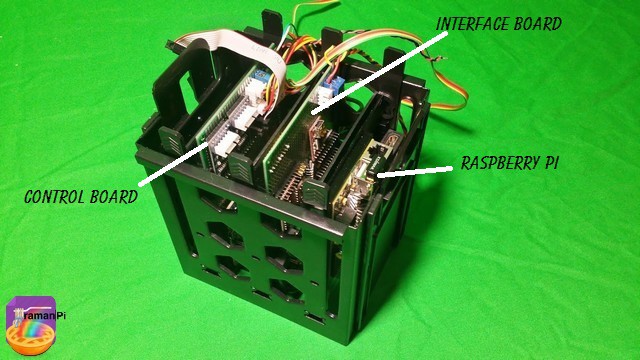
Here's a shot of the boards in the cage removed from the inside of ramanPi..
![]()
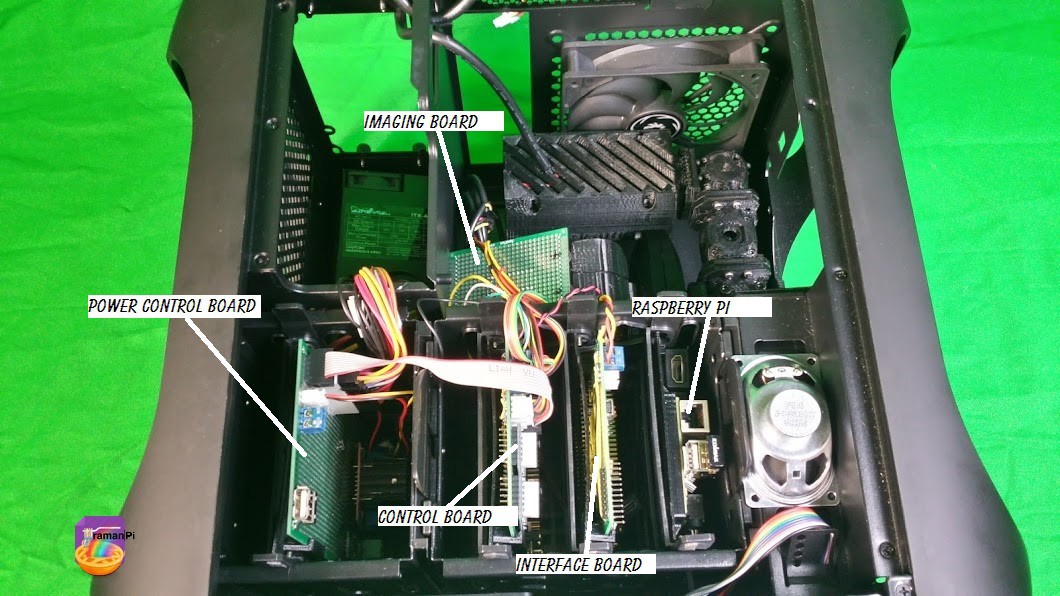
And one here with all of the boards nestled into place...
![]()
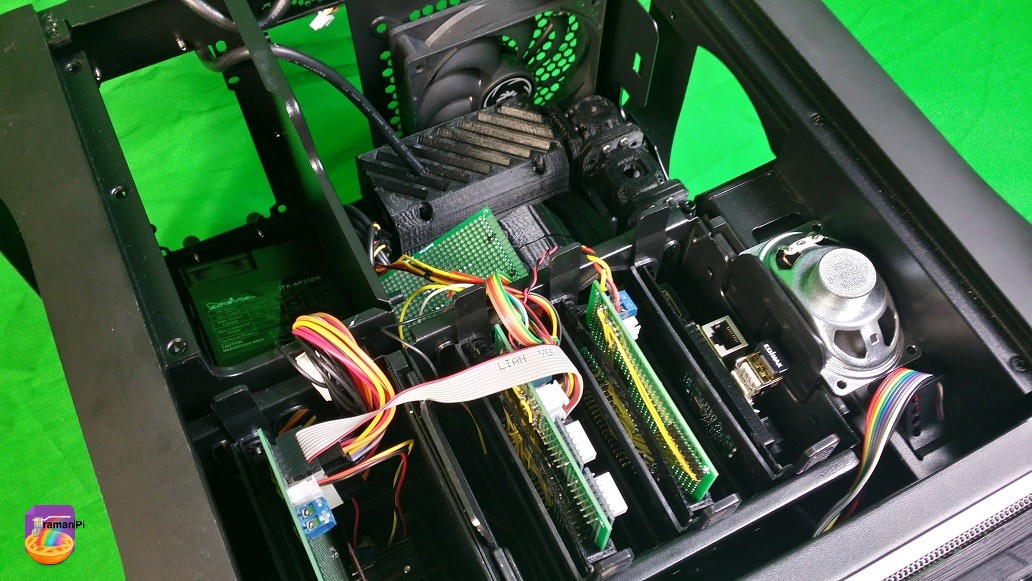
A broader top down view..
![]()
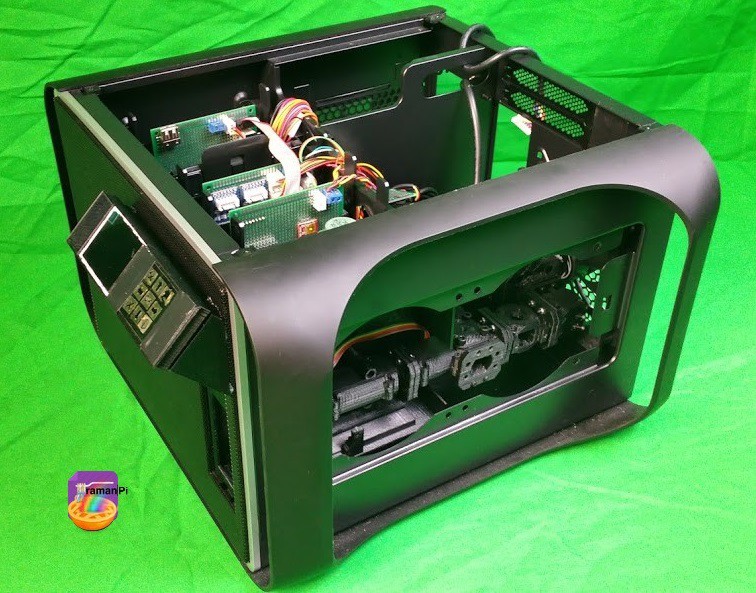
Angled view showing side panel removed..
![]()
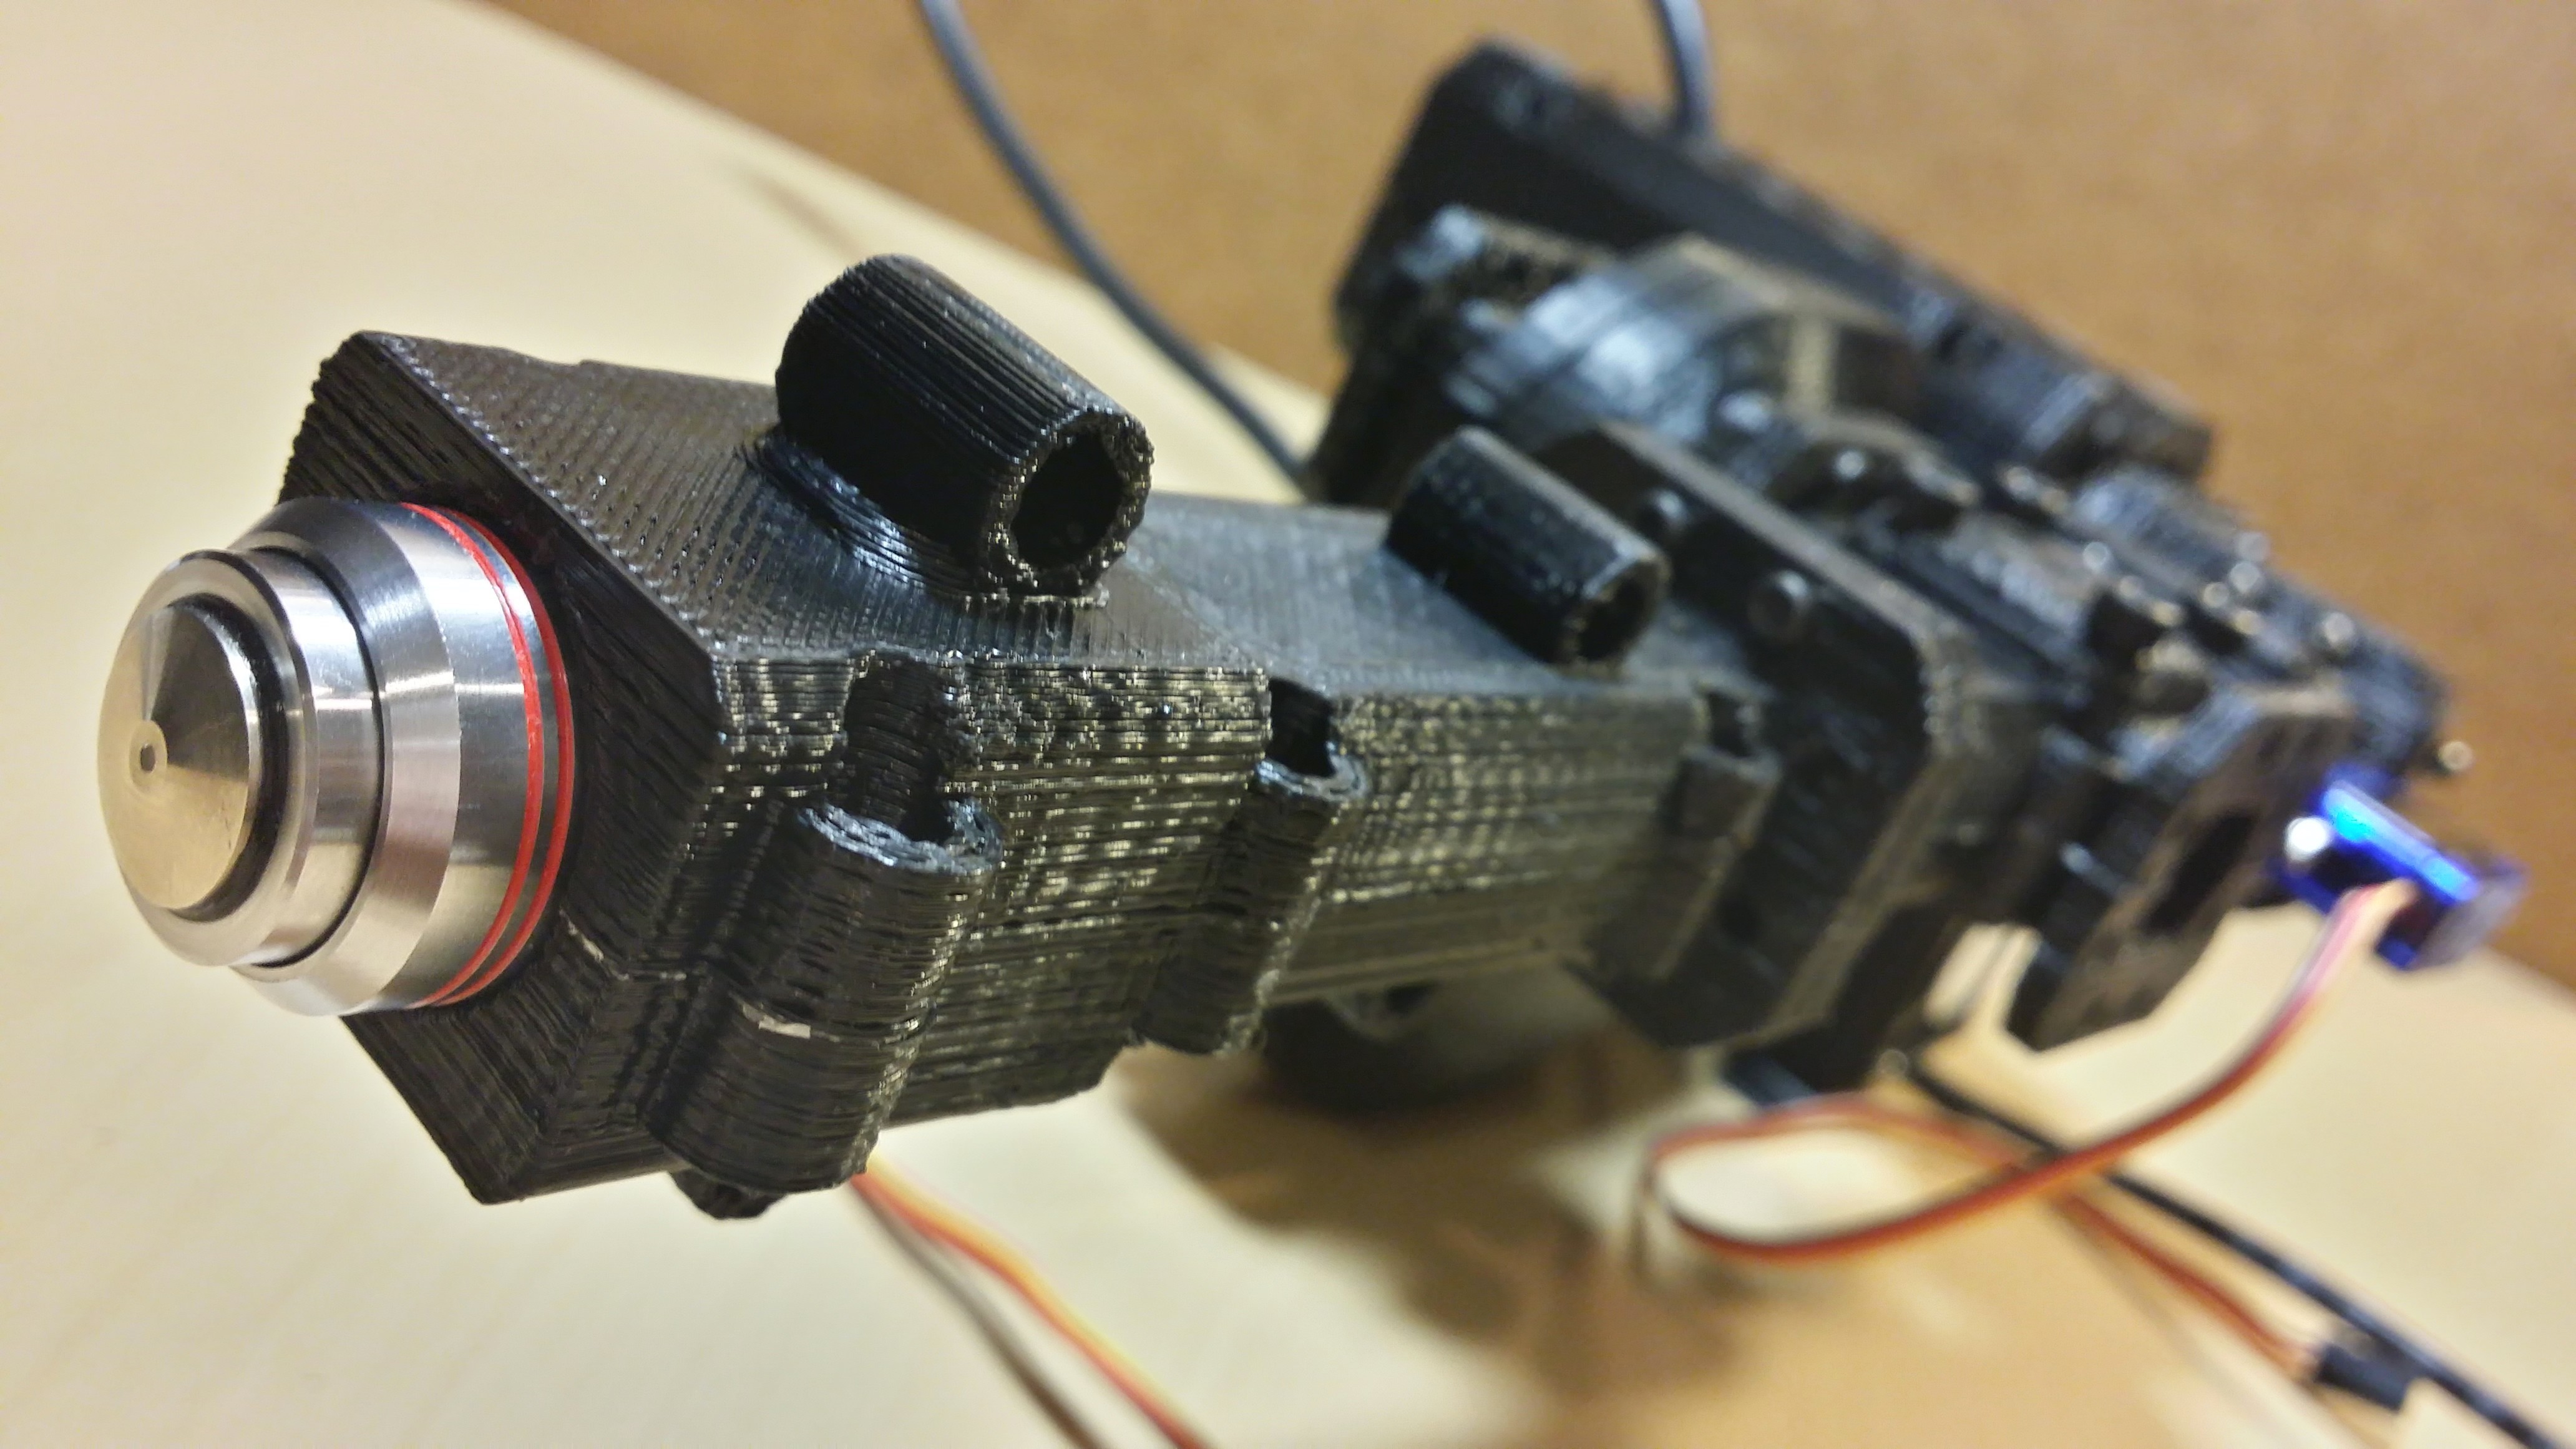
Some shots of the optical portion...
![]()
![]()
![]()
![]()
![]()
![]()
-
Yet more 3D Printer problems with the DaVinci
10/24/2014 at 22:22 • 3 comments![]()
![]()
Awesome.. XYZ again with the DRM cartridges.. I made the mistake of upgrading my software for the DaVinci recently.. Tried printing a new cuvette tray today.. Nope. It claims my cartridges are fake.. I bought a bunch ( A BUNCH ) of their overpriced cartridges from amazon for this project...
Ok, so in all fairness... $500 is cheap.. And it's done a reasonable job at printing most of the time...well, part of the time..there's a lot of frustration involved..and the cartridges are ridiculously overpriced..and there's quite a bit of filament completely wasted in each cartridge because it never lets you use it all...in addition to the pile of empty cartridges I have stacked up now...I probably have $60 worth of filament that I can't use because it's all in the last bit.. This trying to crack down on people using regular filament catches people like me in the crossfire.. I just hope enough people read this before thinking about buying one.. It doesn't turn out as cheap as it first seems...so price shouldn't be your reason to buy one...if there is a reason, it's because you don't have to build it..but as you've seen in previous posts....that doesn't get you out of troubleshooting and maintaining it...or the frustration of having it fail at the worse possible time..
Rant complete... So, I have a support question in through their website because they apparently don't answer the 855.999.3348 support number, instructing you to leave a message and they'll 'get back to you'....seriously..
So it doesn't look like you'll see a cuvette tray in the video for the finals... compliments of XYZ and their DRM...
![]()
-
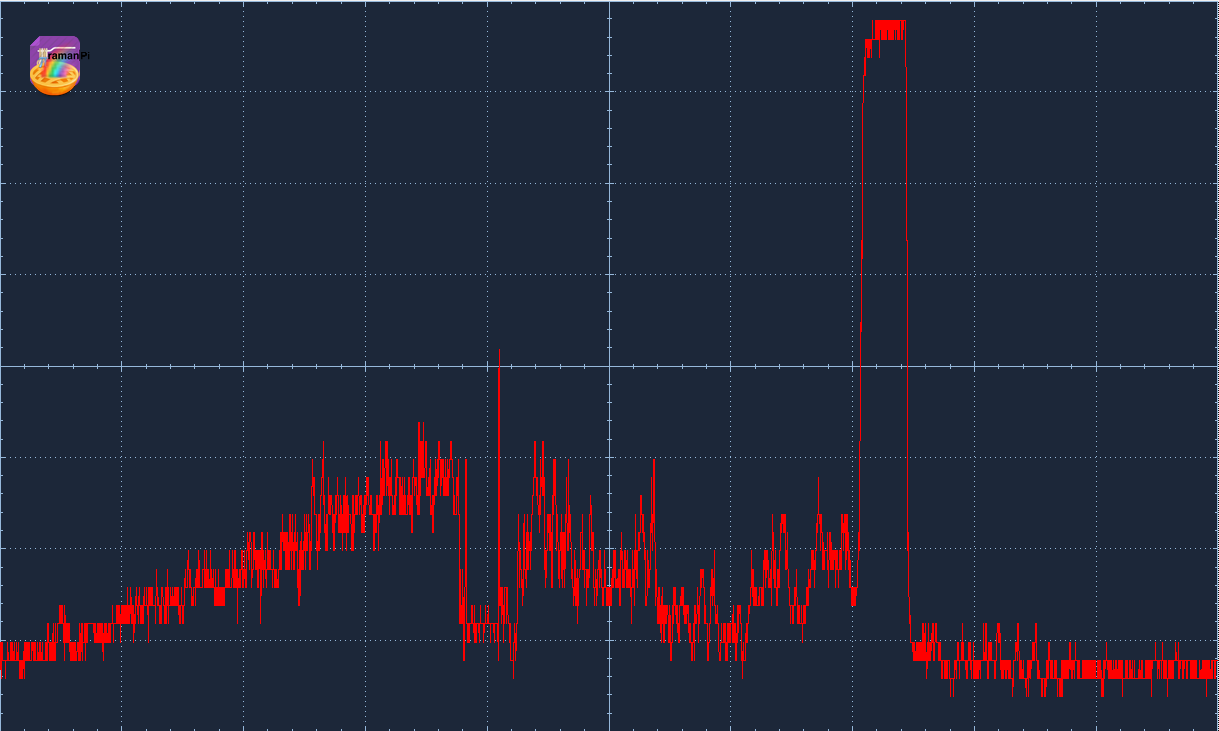
Raman
10/23/2014 at 18:02 • 4 comments![]()
Here it is... 1st raman... Not much to look at, and it's on the scope.. But, none the less it is a milestone.
I've spent the past week making leaps in getting the sensitivity required to read this signal.. The return is incredibly weak.. As you can see, there's still some distance to go.
![]()
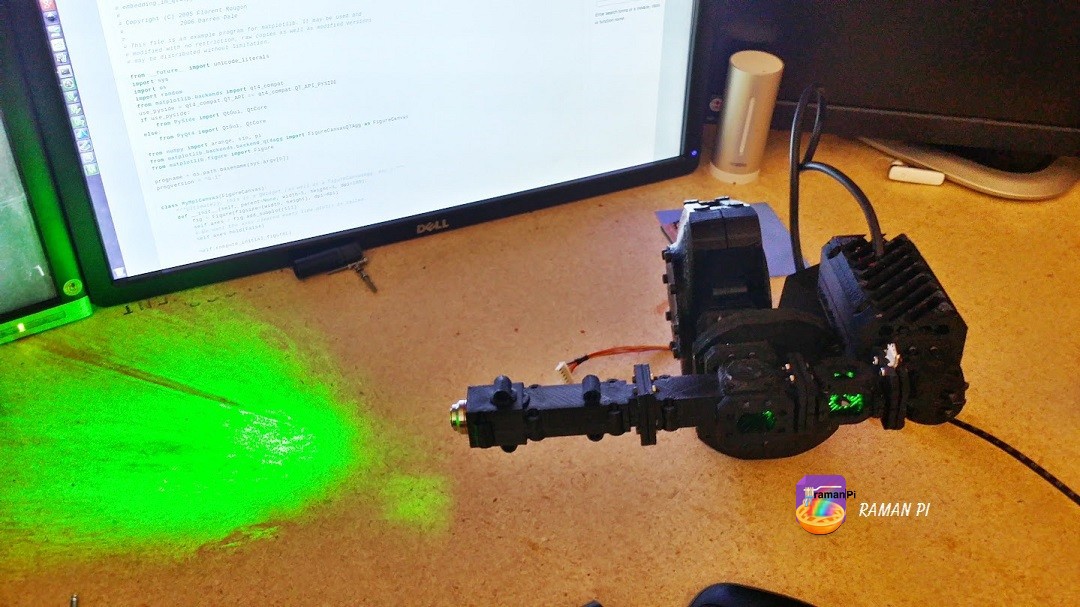
To obtain this spectra (of my hand near the objective), and save my sanity... I have the optics sitting on my bench outside the case where I can get my test probes and everything connected without frustration..
![]()
I had to completely re-write the code for the imagingBoard to do this as well.. Having never touched a CCD outside whatever cameras and phones I've owned... Driving one from a microcontroller is apparently an art...one that took some time to even understand how the timing really works sine the toshiba documentation is not terribly informative.. I'll do a nice write up on what I've learned about driving these things soon.. For now, let's just say that easy isn't how I'd describe it. I resorted to using the mBed RTOS to get the stm32 to read, capture and send data... I'm still playing around with the advantages/disadvantages to driving the clocks with PWM, vs using busOut and so on.. But for now...This is where it lies..
I'm very happy with where this is going... With my recent success in getting the software off the ground, and posting the spectra on plot.ly....I really think that makes collaborative 'crowd-science' possible.. There, I think I termed a new phrase while I'm at it.. :)
I should also mention, the firmware (which is still in development) is posted to the gitHub... So, if you're interested in where that's headed... You can take a look.!
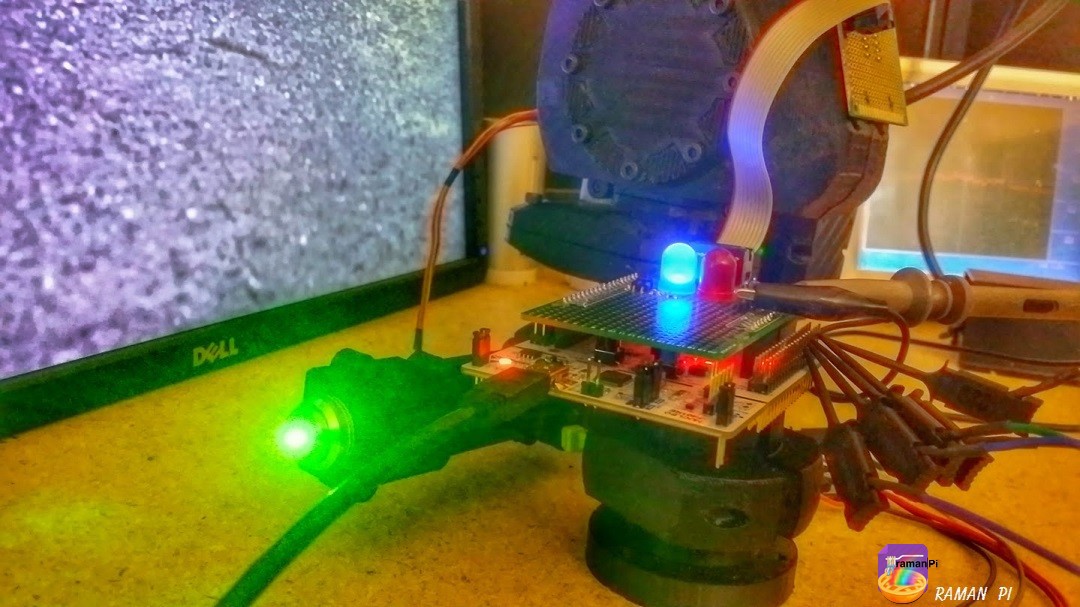
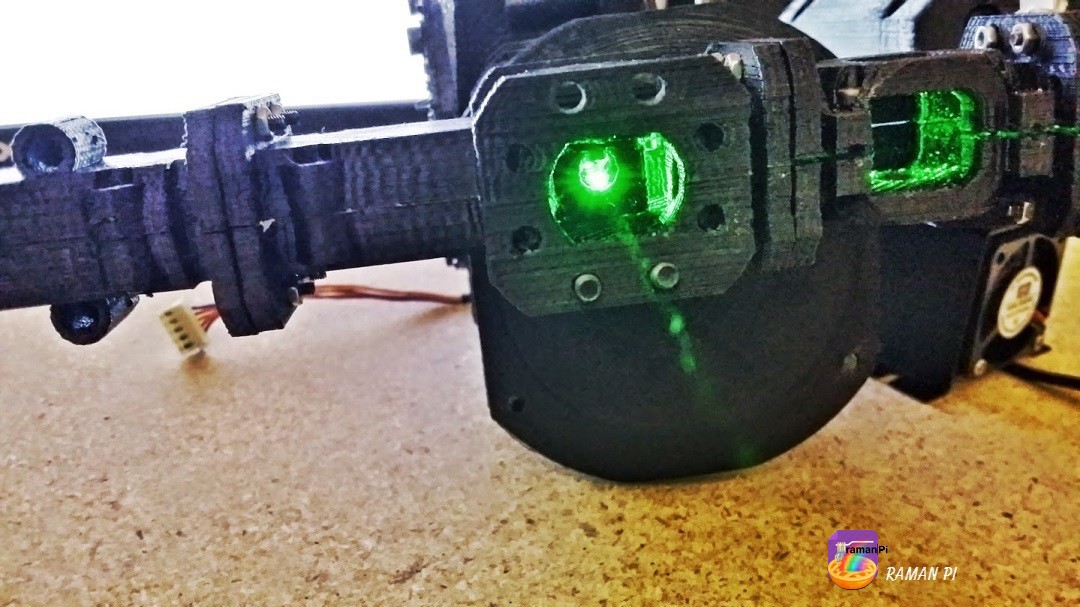
"No, really... Just look right in there....." Seriously.....here's good reason to wear eye protection while working with this.....this beam is not even half the original power...
![]()
This thing gives new meaning for me to the term Optical Radiation..... ;) Mind you, this is with the splitter in place...
![]()
Maybe not contest winning progress....but it is progress and this is a huge project.. I've kind of decided to not rush and just move at the right pace to do things right here... I really want to make this project useful for people, winning a prize is great...but I also want to open doors for education and amateur researchers..
![]()
-
spectraCide V0.1
10/17/2014 at 02:21 • 2 comments![]()
Well, here we go..! I'm getting some good progress on the python software for the remote terminal... So far it works in linux and windows both... The source is up in the gitHub...
Simple...just put your sample in, and click 'getSpectra'... once it's finished, it displays the spectra and you have the option of posting the data to plot.ly (soon others like phant).. You can also save the spectra to a file as .png (very near future .csv)... The dial allows you to set the exposure time... To the left are some boxes that allow you to choose which internet spectral database to pull spectra from for identification, and a list of compound types for identification...
Here's a screenshot of the user interface...
![]()
![]()
ramanPi - Raman Spectrometer
The open source 3D Printable Raman Spectrometer using a RaspberryPi and easy to find off the shelf components..


 Hi, so