I made up a Kelvin-style 4-wire test lead for 5mm LEDs. In a Kelvin measurement, two wires carry the current to the D.U.T., and two are used to measure the voltage. This prevents resistance of the wires themselves from interfering with the measurement. It's probably only important when measuring diodes at high currents to get a good estimate for the series resistance of the junction.
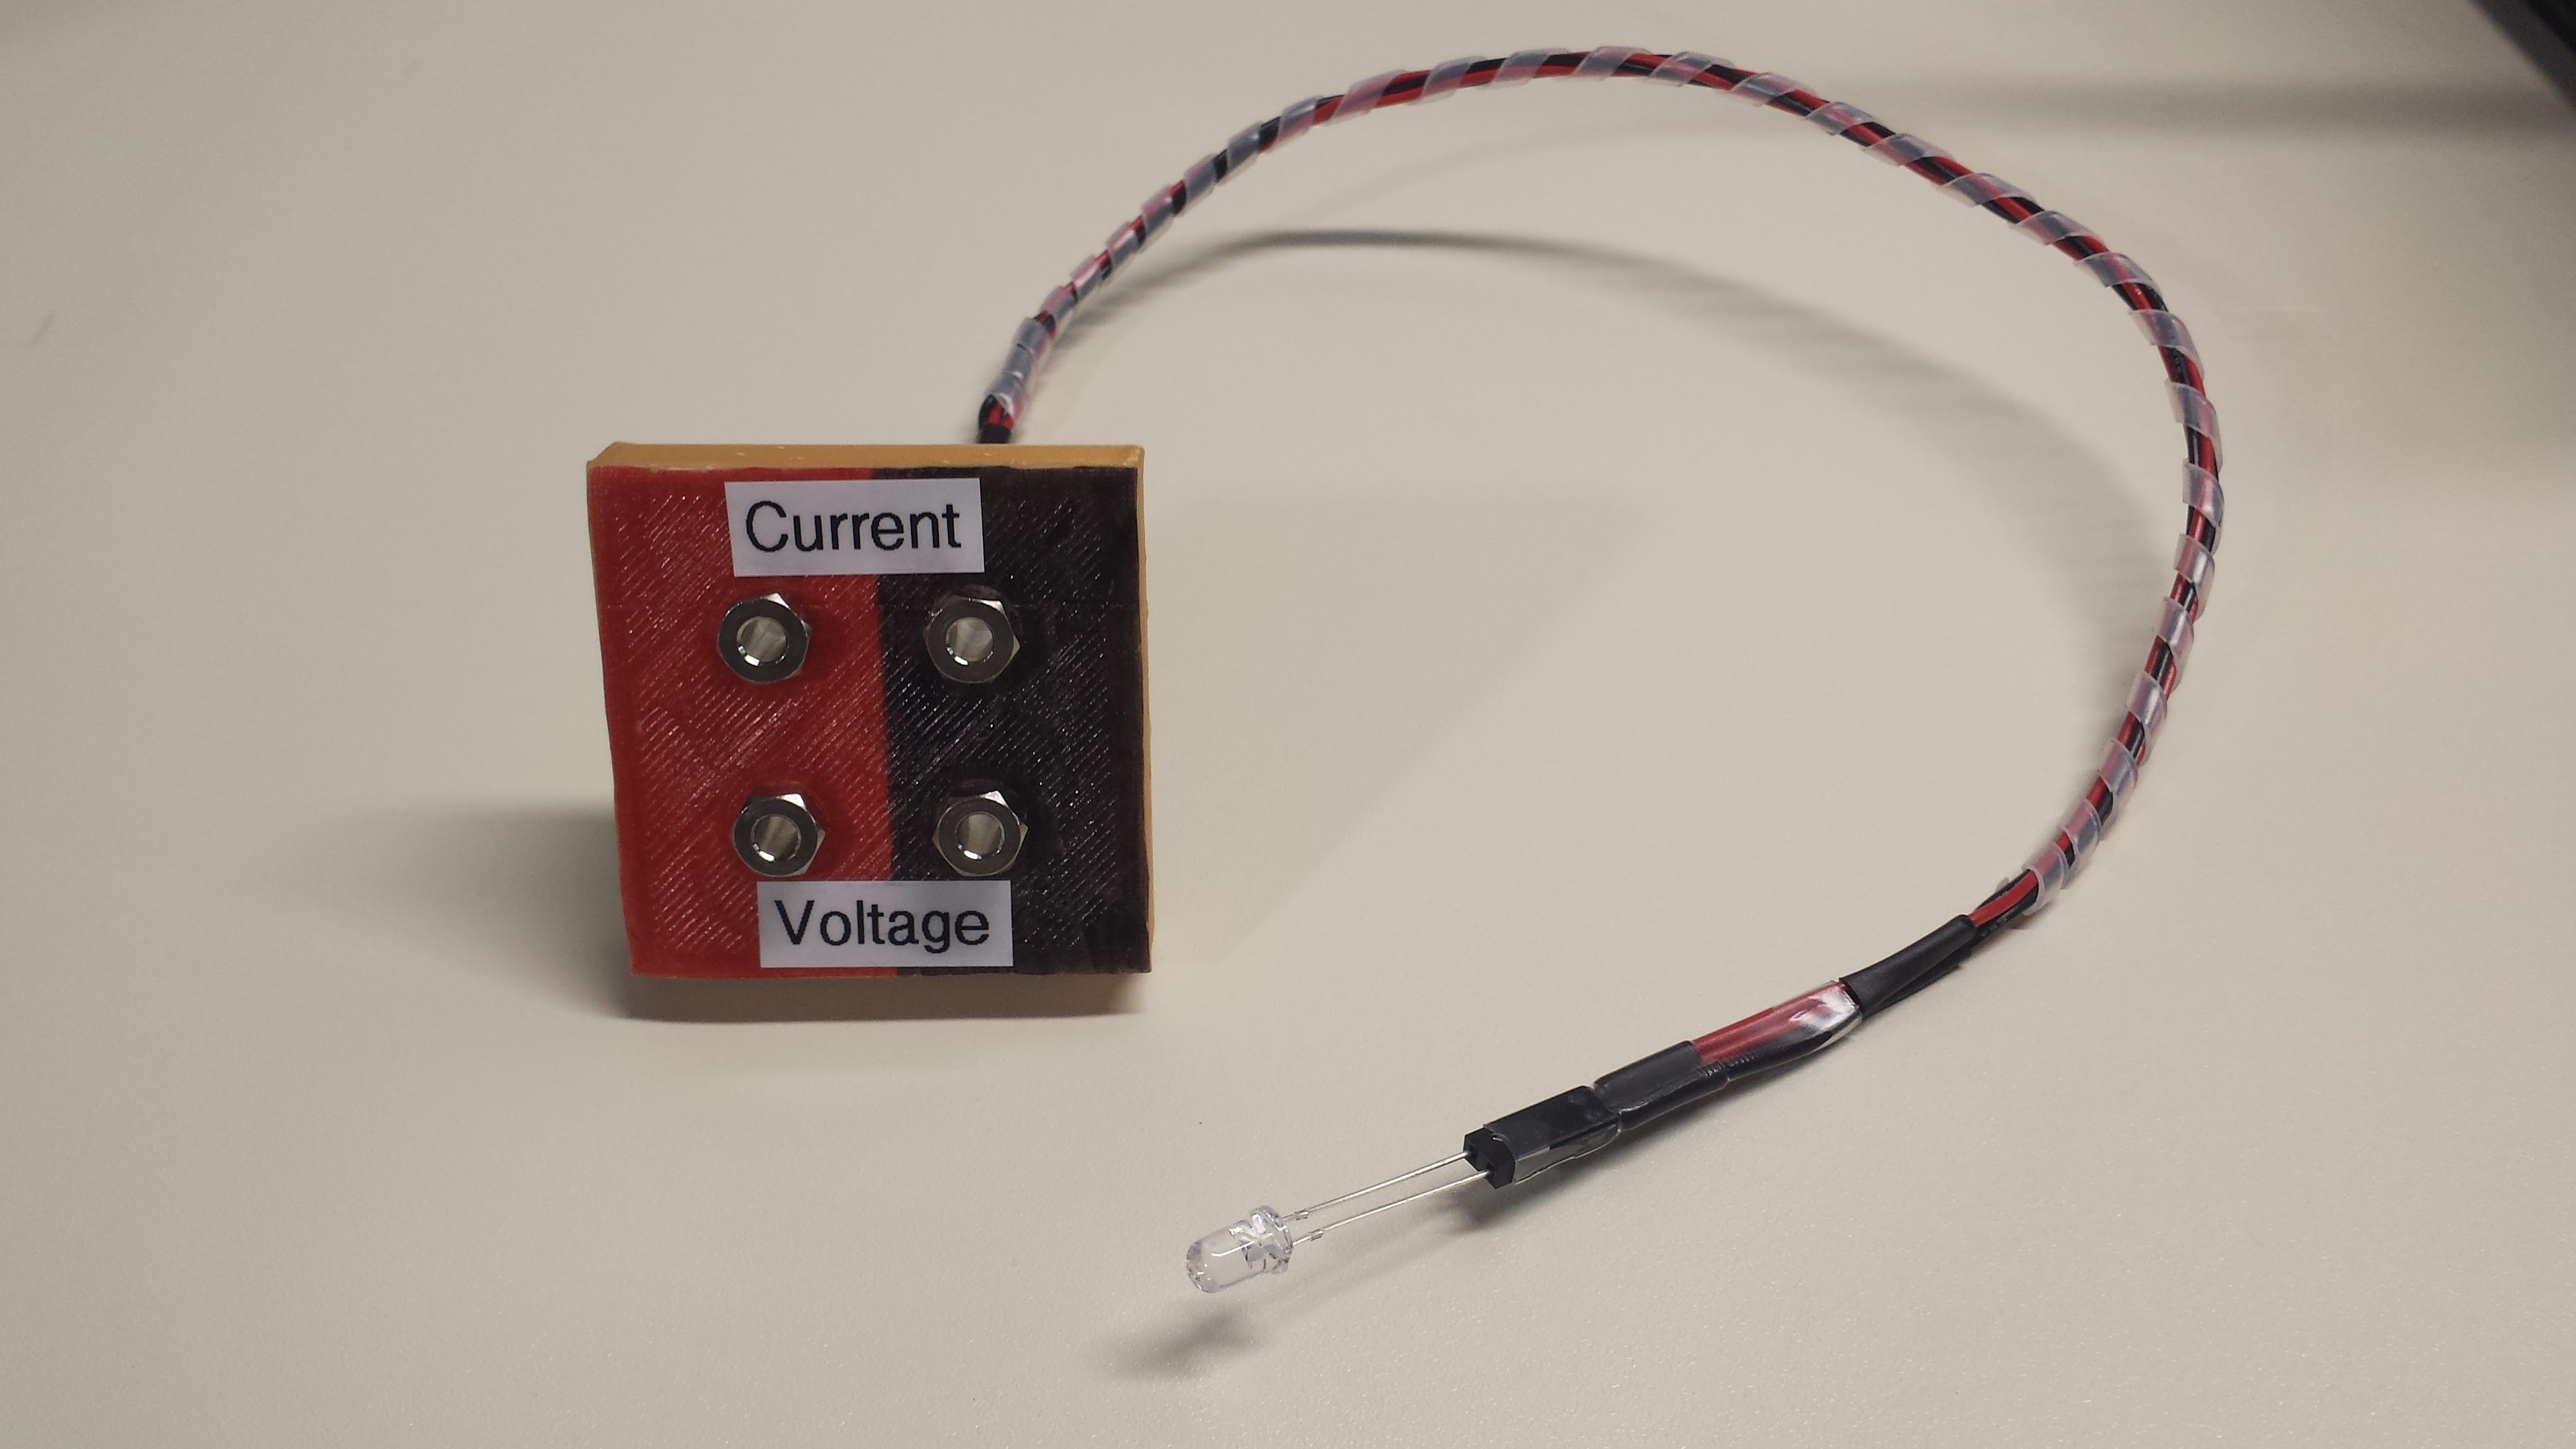
The cable is made from a 2-position socket with two wires crimped into each connector, then broken out into banana jacks at the other end. I picked up a large box full of chassis-grounding jacks several years ago on ebay - they were super cheap because some of them are missing a nut or solder lug. I rarely used them before, because they aren't insulated, and are only good for grounding metal chassis. Until I got a 3D printer, that is - now I just print an insulating mount for them, and indicate the polarity with Sharpie markers.
The SMD-LED test boards I designed also have Kelvin-like connections:
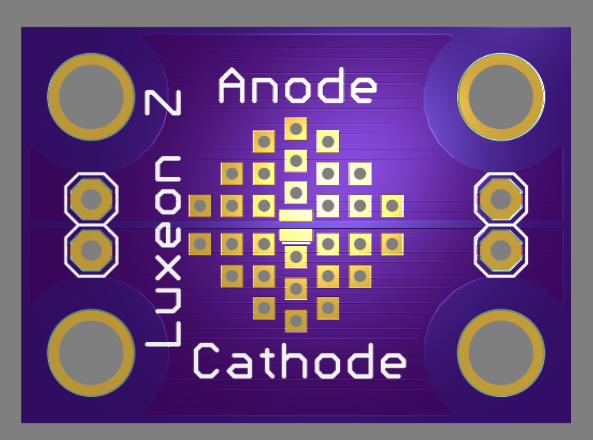 there are two sets of pin headers (left and right) for connections to the voltage and current ports of the analyzer. I'll need to make up another cable.
Minimum Voltage
I used an LM317 in the analyzer since I have handfuls of them, mostly because they're dirt cheap and come up on the surplus market often. The one real drawback with this part is that the minimum voltage you can get is 1.25V (unless you have a negative rail, which I don't). I thought about what this means for the measurement capabilities of the analyzer. Here's the situation:
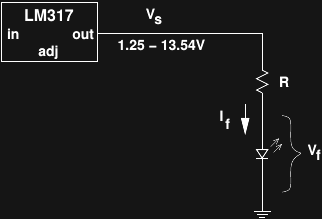
so, we have:
The minimum voltage of 1.25 affects the minimum current we can produce for any given diode. For any diodes with Vf greater than 1.25 (essentially any LED we might want to test), the minimum current extends down to zero. If we want to use the analyzer as a curve tracer for non-optical diodes, the minimum output voltage will place a limit on the minimum current that can be obtained with a given R.
To see how limiting a minimum current is, it's helpful to consider the ratio of max current to min current for a given diode forward voltage:
As a worst-case, consider a Schottky diode with maybe a minimum 0.1V drop at low currents. For this diode, the current ratio is (13.54 - 0.1) / (1.25 - 0.1) ~ 11.7 for any given R. Even in this case, using a single R will give a decade range of current in a single sweep. Having a set of decade-valued R's around to be able to test arbitrary diodes seems like a fair trade-off, especially since precision resistors aren't required.
Logarithmic Sweeps
Most of the interesting plots we can make use current as the independent variable (x-axis). Ideally, we could sample the diode characteristics at an equally-spaced set of currents both for linear and logarithmic scales. For linear sweeps, sweeping Vs linearly produces a decent approximation to linear current sweeps (left):
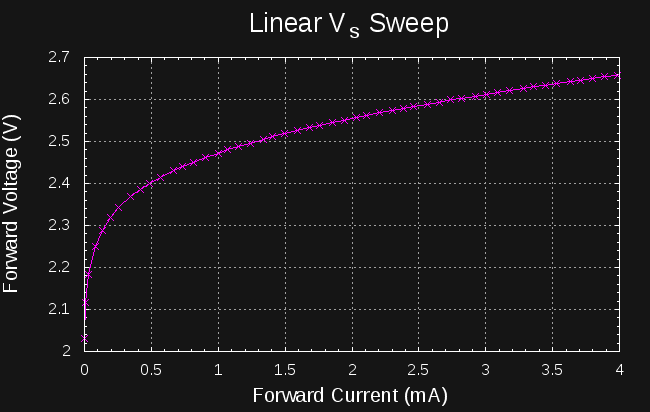
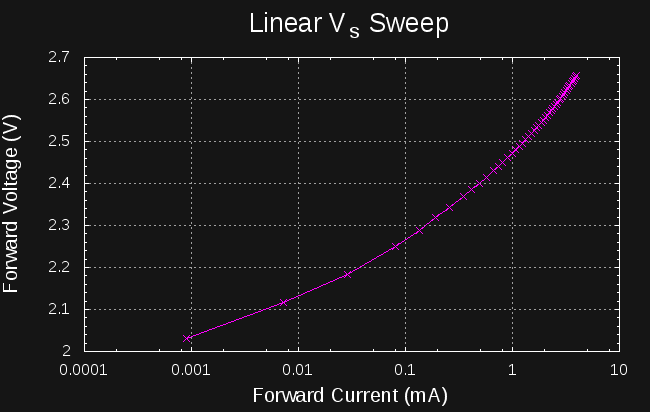
when plotted on a log scale (right), we see how these points don't give a good sampling at lower currents.
Log Voltage Sweeps
I've called the combination of the variable voltage and resistor a "pseudo" current source. Assuming the forward voltage of the diode is constant, this is a good approximation. As discussed above, the forward diode current is just:
so by varying the source voltage logarithmically, we should see the diode current vary approximately logarithmically. Assuming we want to step Vs from Vmin to Vmax with N logarithmic steps, we can set the kth source voltage to:
Where k ranges from 0 to N-1. See appendix for a derivation of this formula. Here's what an actual sweep looks like:
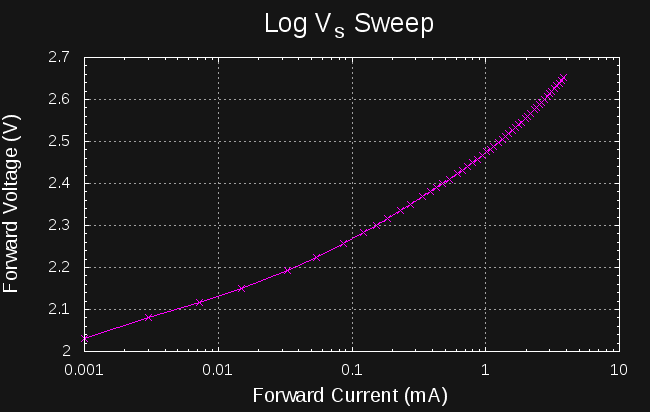
It's better than the linear Vs sweep, but the steps still don't end up equally spaced on the current axis. The problem is our original assumption that the forward voltage of the diode is constant. For small currents, the forward voltage changes rapidly with current, so the points don't fall evenly on a logarithmic scale.
Log Current Sweeps
So, in order to choose source voltage steps that produce equally-spaced logarithmic current sweeps, we need to know the forward voltage of the diode at each step - which is what we're trying to measure in the first place! This is the age-old problem of determining the operating point of a diode. One solution would be to run a log-voltage sweep like the one above, then interpolate values from the measured I-V curve to calculate source voltages for the "real" sweep. This would certainly work, but each sweep now takes twice as long - maybe this is a useful mode to include in the analyzer, but it doesn't feel right for the default.
Here's another possibility: for small current steps, we can approximate Vf at the next current step by the one we just measured, i.e.
Using this approximation, we can calculate the source voltage for the next current step:
Here's what you get:
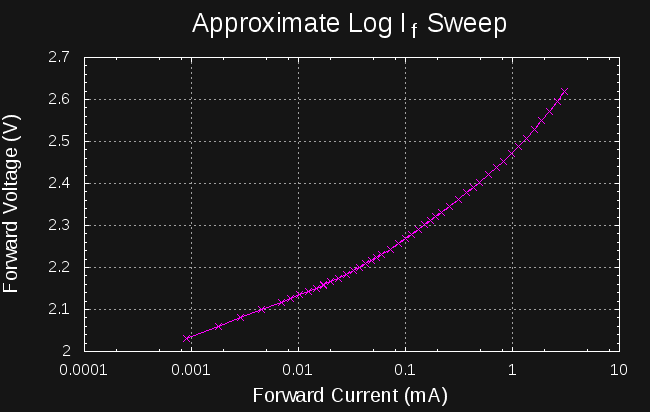
The current steps aren't perfectly equal, but it's not bad. If you really want equal-spacing, you could use this curve to estimate source voltages for a better sweep in an "accurate steps" software mode.
ADC Selection
I am seriously re-thinking the original plan to use a PIC with 10-bit ADCs for the voltage and current sensors. The 12-bit equivalent meters I have been using still require multiple ranges to get enough resolution, and even then, I wish measurement was more precise on the voltage scale. A quick look at DigiKey shows that 16-24 bit delta-sigma ADCs are cheap these days - they're looking pretty good at this point.
Appendix: Derivation of log voltage sweeps
To produce n evenly-spaced samples in a log sweep from Vmin to Vmax, we want:
for some constant alpha. To find alpha, take the log of both sides:
re-arranging and dividing by n, we get:
finally, taking exp() of both sides:
 Ted Yapo
Discussions
Become a Hackaday.io Member
Create an account to leave a comment. Already have an account? Log In.