 Dan Julio
Once the kitchen was done I wanted to control the chandelier in the dining room. I wasn't allowed to make any changes to it... so I needed to figure out how to control incandescent bulbs. Although expensive, the K8039 kit from Velleman proved to be a very good quick&dirty solution. It allows DMX control of a Triac dimmer and provided the full range of dimming (unlike some triac dimmers). I mounted the raw PCB from one of my QualColor DMX controllers with it in a custom 3D printed and painted enclosure and tried to tuck that inconspicuously away on the ceiling (how successful I was is still a matter in dispute...).
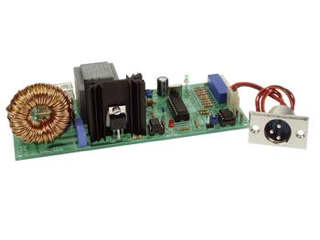

Over time I have experimented with another Velleman kit trying to convert the LED modulation signal to a voltage to drive the kit but that has not been particularly successful. I want to design my own triac driver but haven't yet figured out the one feature of the Velleman kits I really like, that is a detection of an inductive load to shut the dimmer down before anything is damaged.
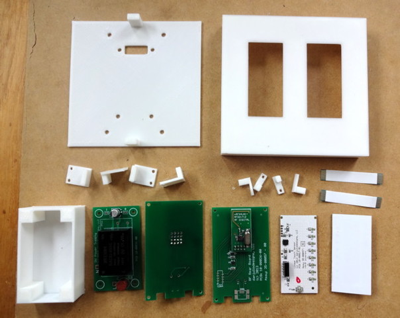
The original wall-mounted AC switches that controlled the main kitchen lighting as well as the dining room chandelier were replaced by a custom two-gang control using two touch dimmers, two RF boards and a small 5VDC power supply tucked in the gang-box behind the 3D-printed plastic enclosure. All the parts are shown here.
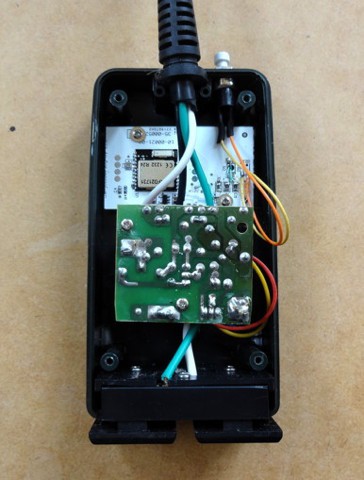
The existing LED controllers have a feature that allows them to control a simple on/off device. If the Intensity (Value part of the HSV color specification) is zero then the device is off. If the intensity is non-zero then the device is on. This, and the fact that after one Christmas a whole bunch of wireless Christmas light relays went on sale, let me build a relay control to turn things on or off with my system. These wireless relays normally use a simple 315- or 433-MHz transmitter/receiver pair and use a capacitor power supply to provide a non-isolated voltage to power the receiver and relay. They even have a 5 volt regulator! The receiver is separate from the "power board" which made it extremely easy for me to replace their receiver with my own Nordic NRF24LE1-based controller (it only took a little sawing of the PCBs...). I used an isolation transformer during testing. Eventually I'd like to roll my own and will probably include a small transformer to provide DC power isolation at more expense.
Currently three of these devices control various decorative lighting including strings of Christmas lights on the deck and a Mexican Jellyfish lamp in the bedroom.
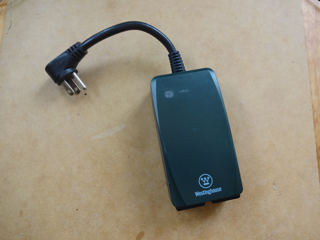
Super-cheap after Christmas!
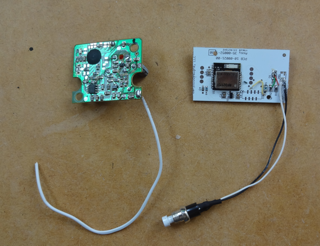
Replacing their receiver with my own.
Tucked in their enclosure.
Discussions
Become a Hackaday.io Member
Create an account to leave a comment. Already have an account? Log In.