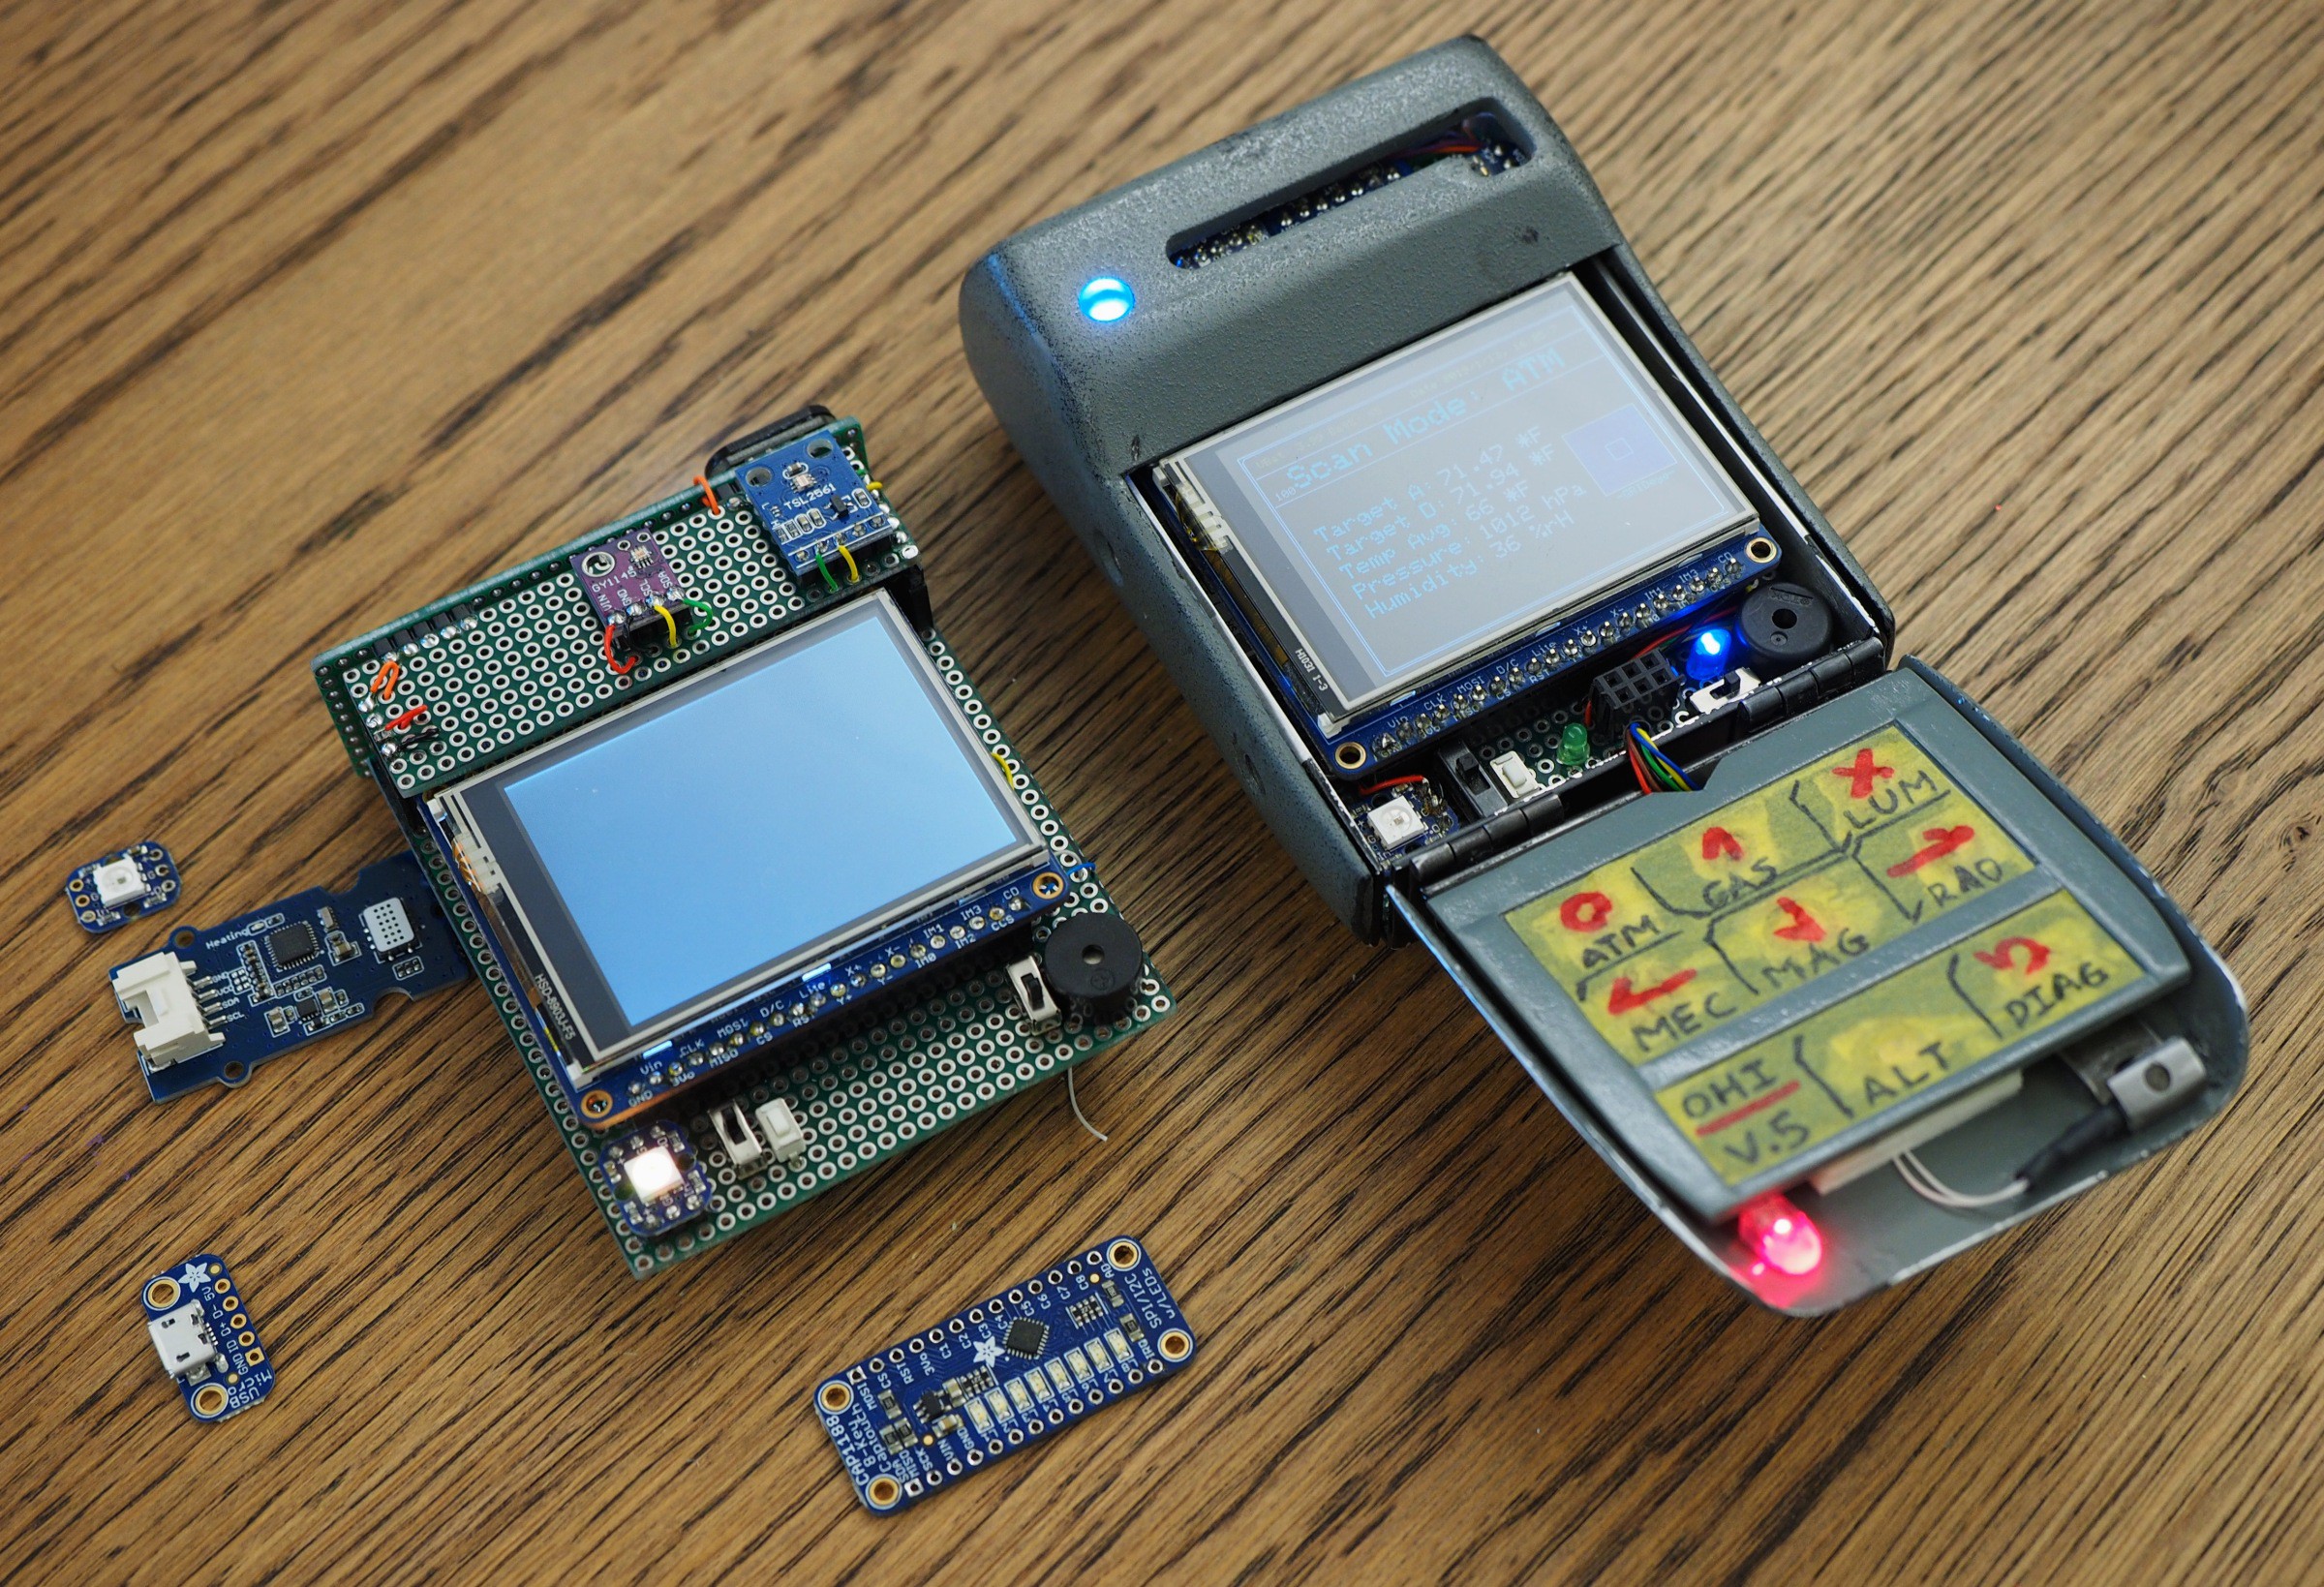
So, when the project paused a few years ago, I'd disassembled the old v5 Tricorder to begin building the first v6. That's where I stalled out. So for now I've reassembled the v5 with a couple different parts, gotten the code moved ahead a half-step and gotten almost everything working again. The new code's attached to the project "OHITricorder-4O.10d-forM4" and it's running with publicly up-to-date libraries.
Main hardware changes:
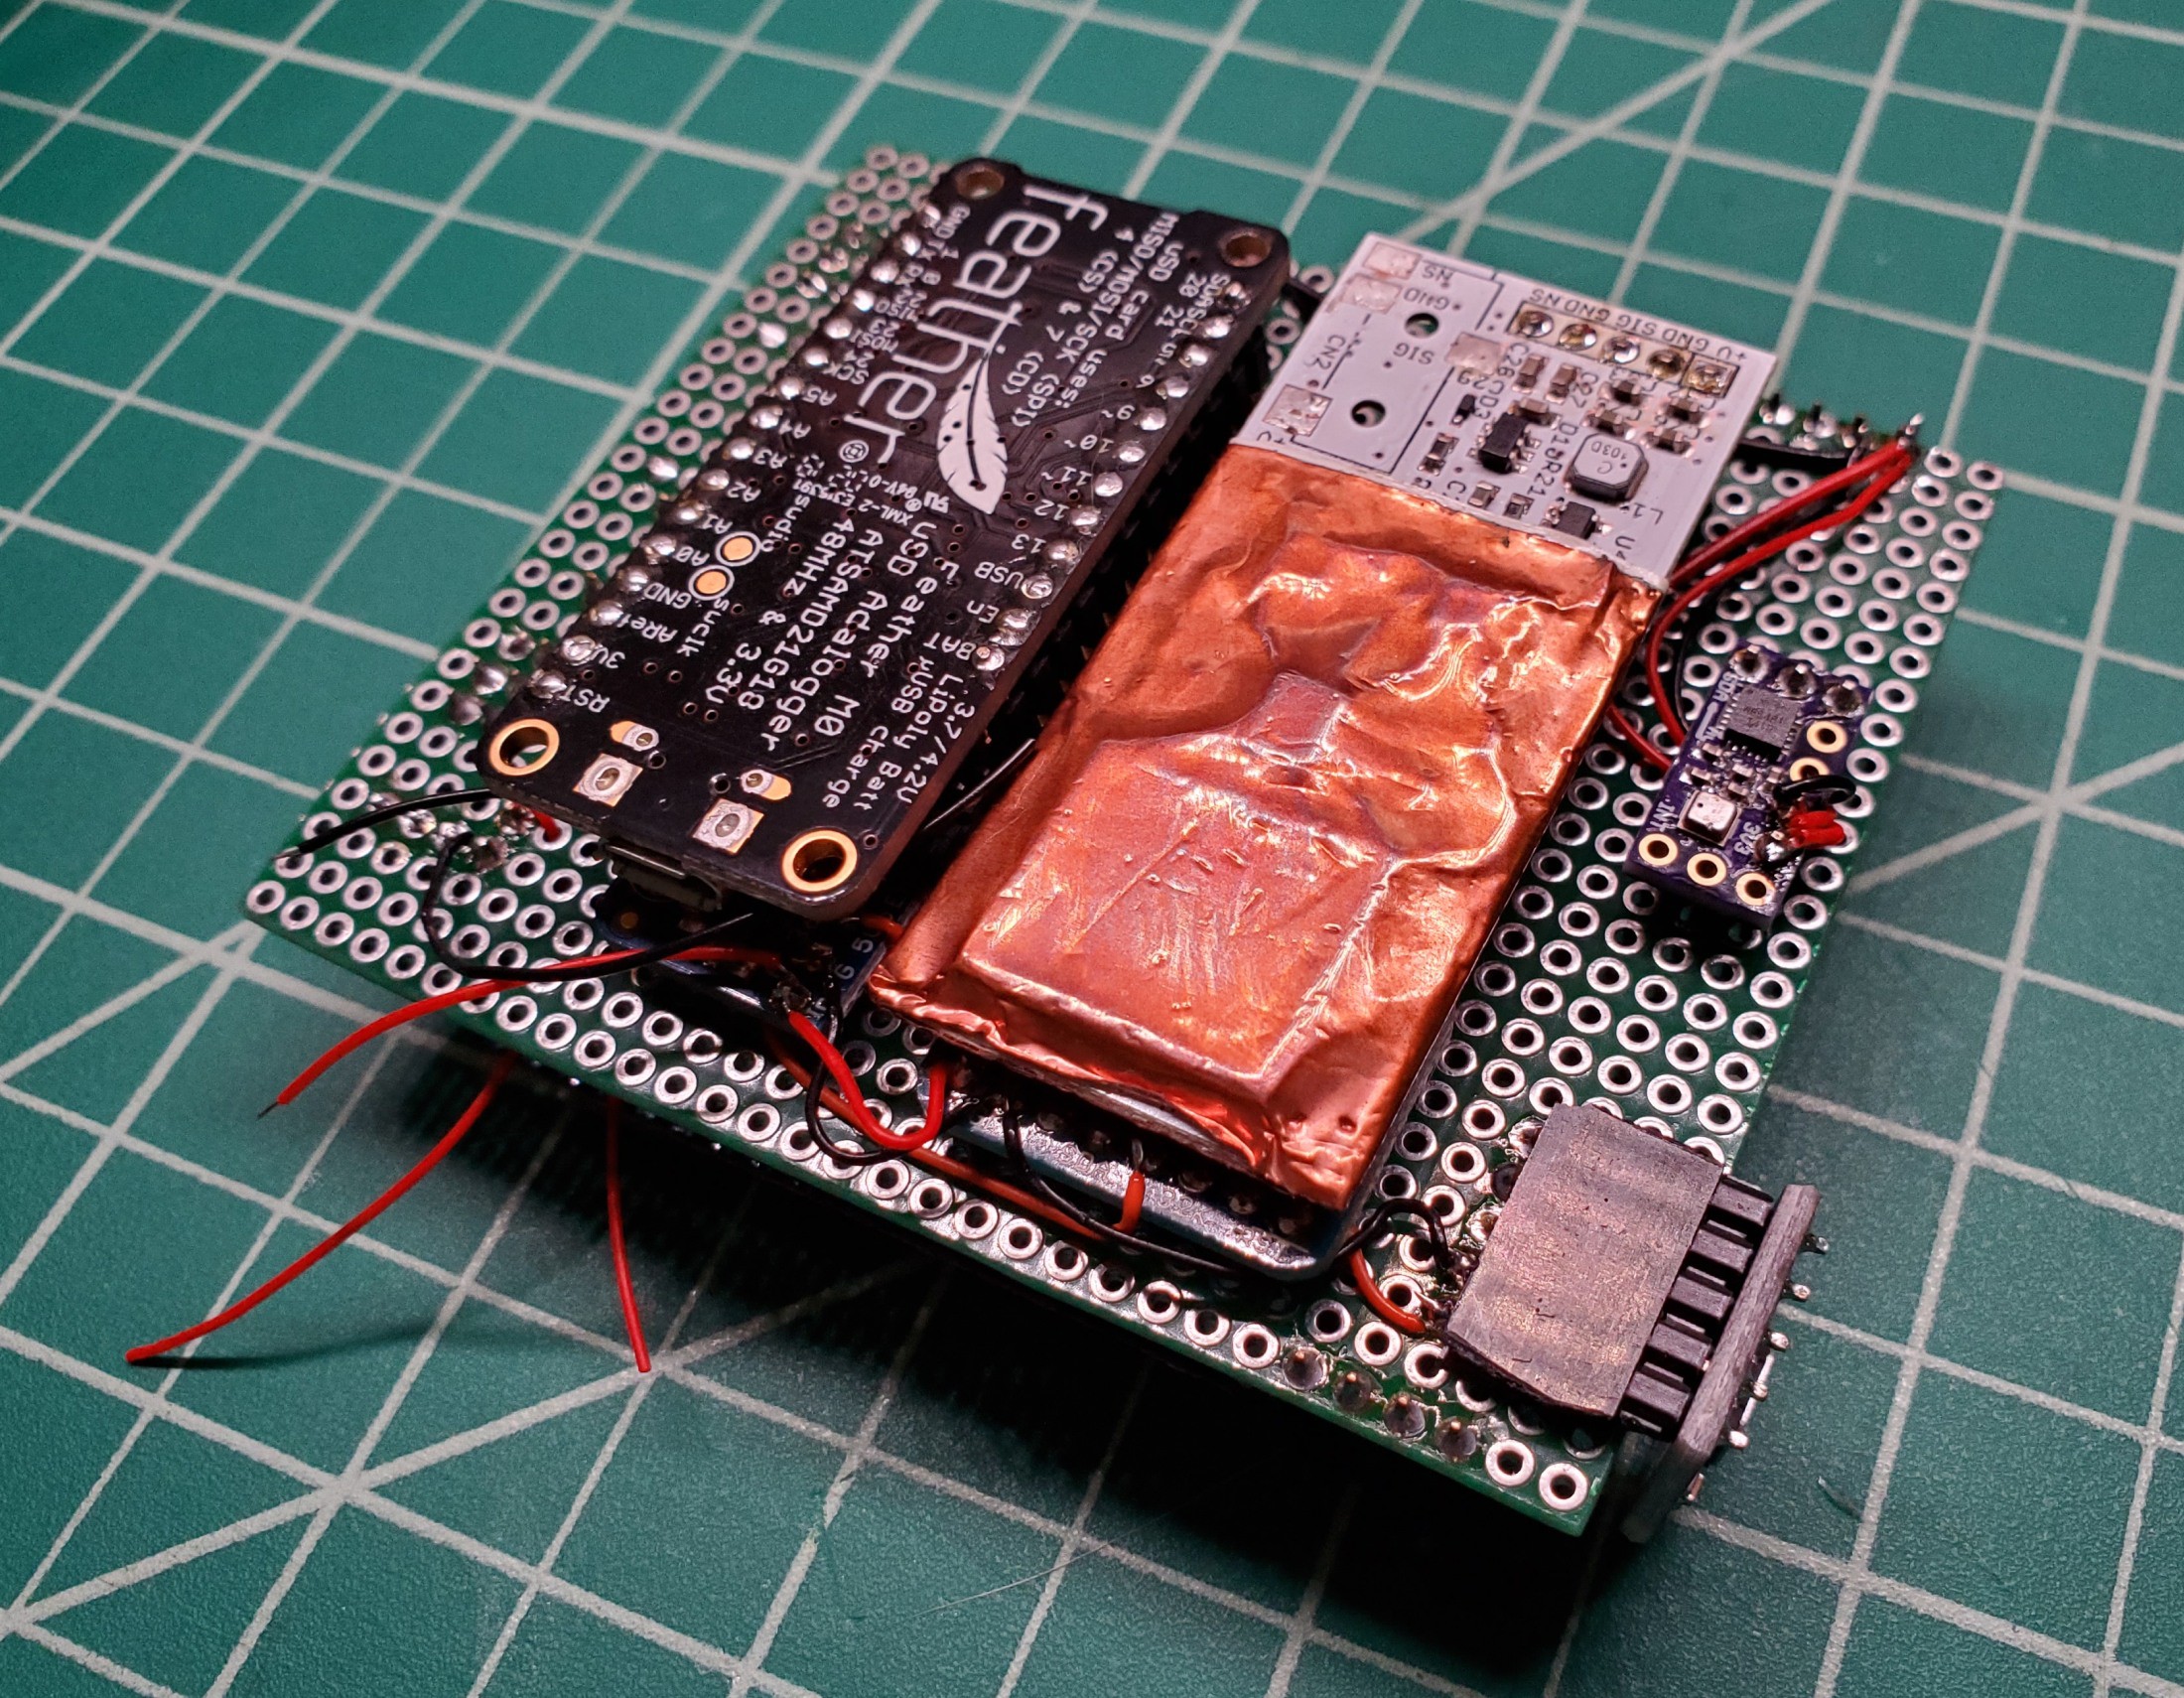
Moved from a Feather M0 to a Feather M4. This drastically changed how fast the unit ran and was nearly a drop-in replacement. The only code change needed was for the battery sense pin.
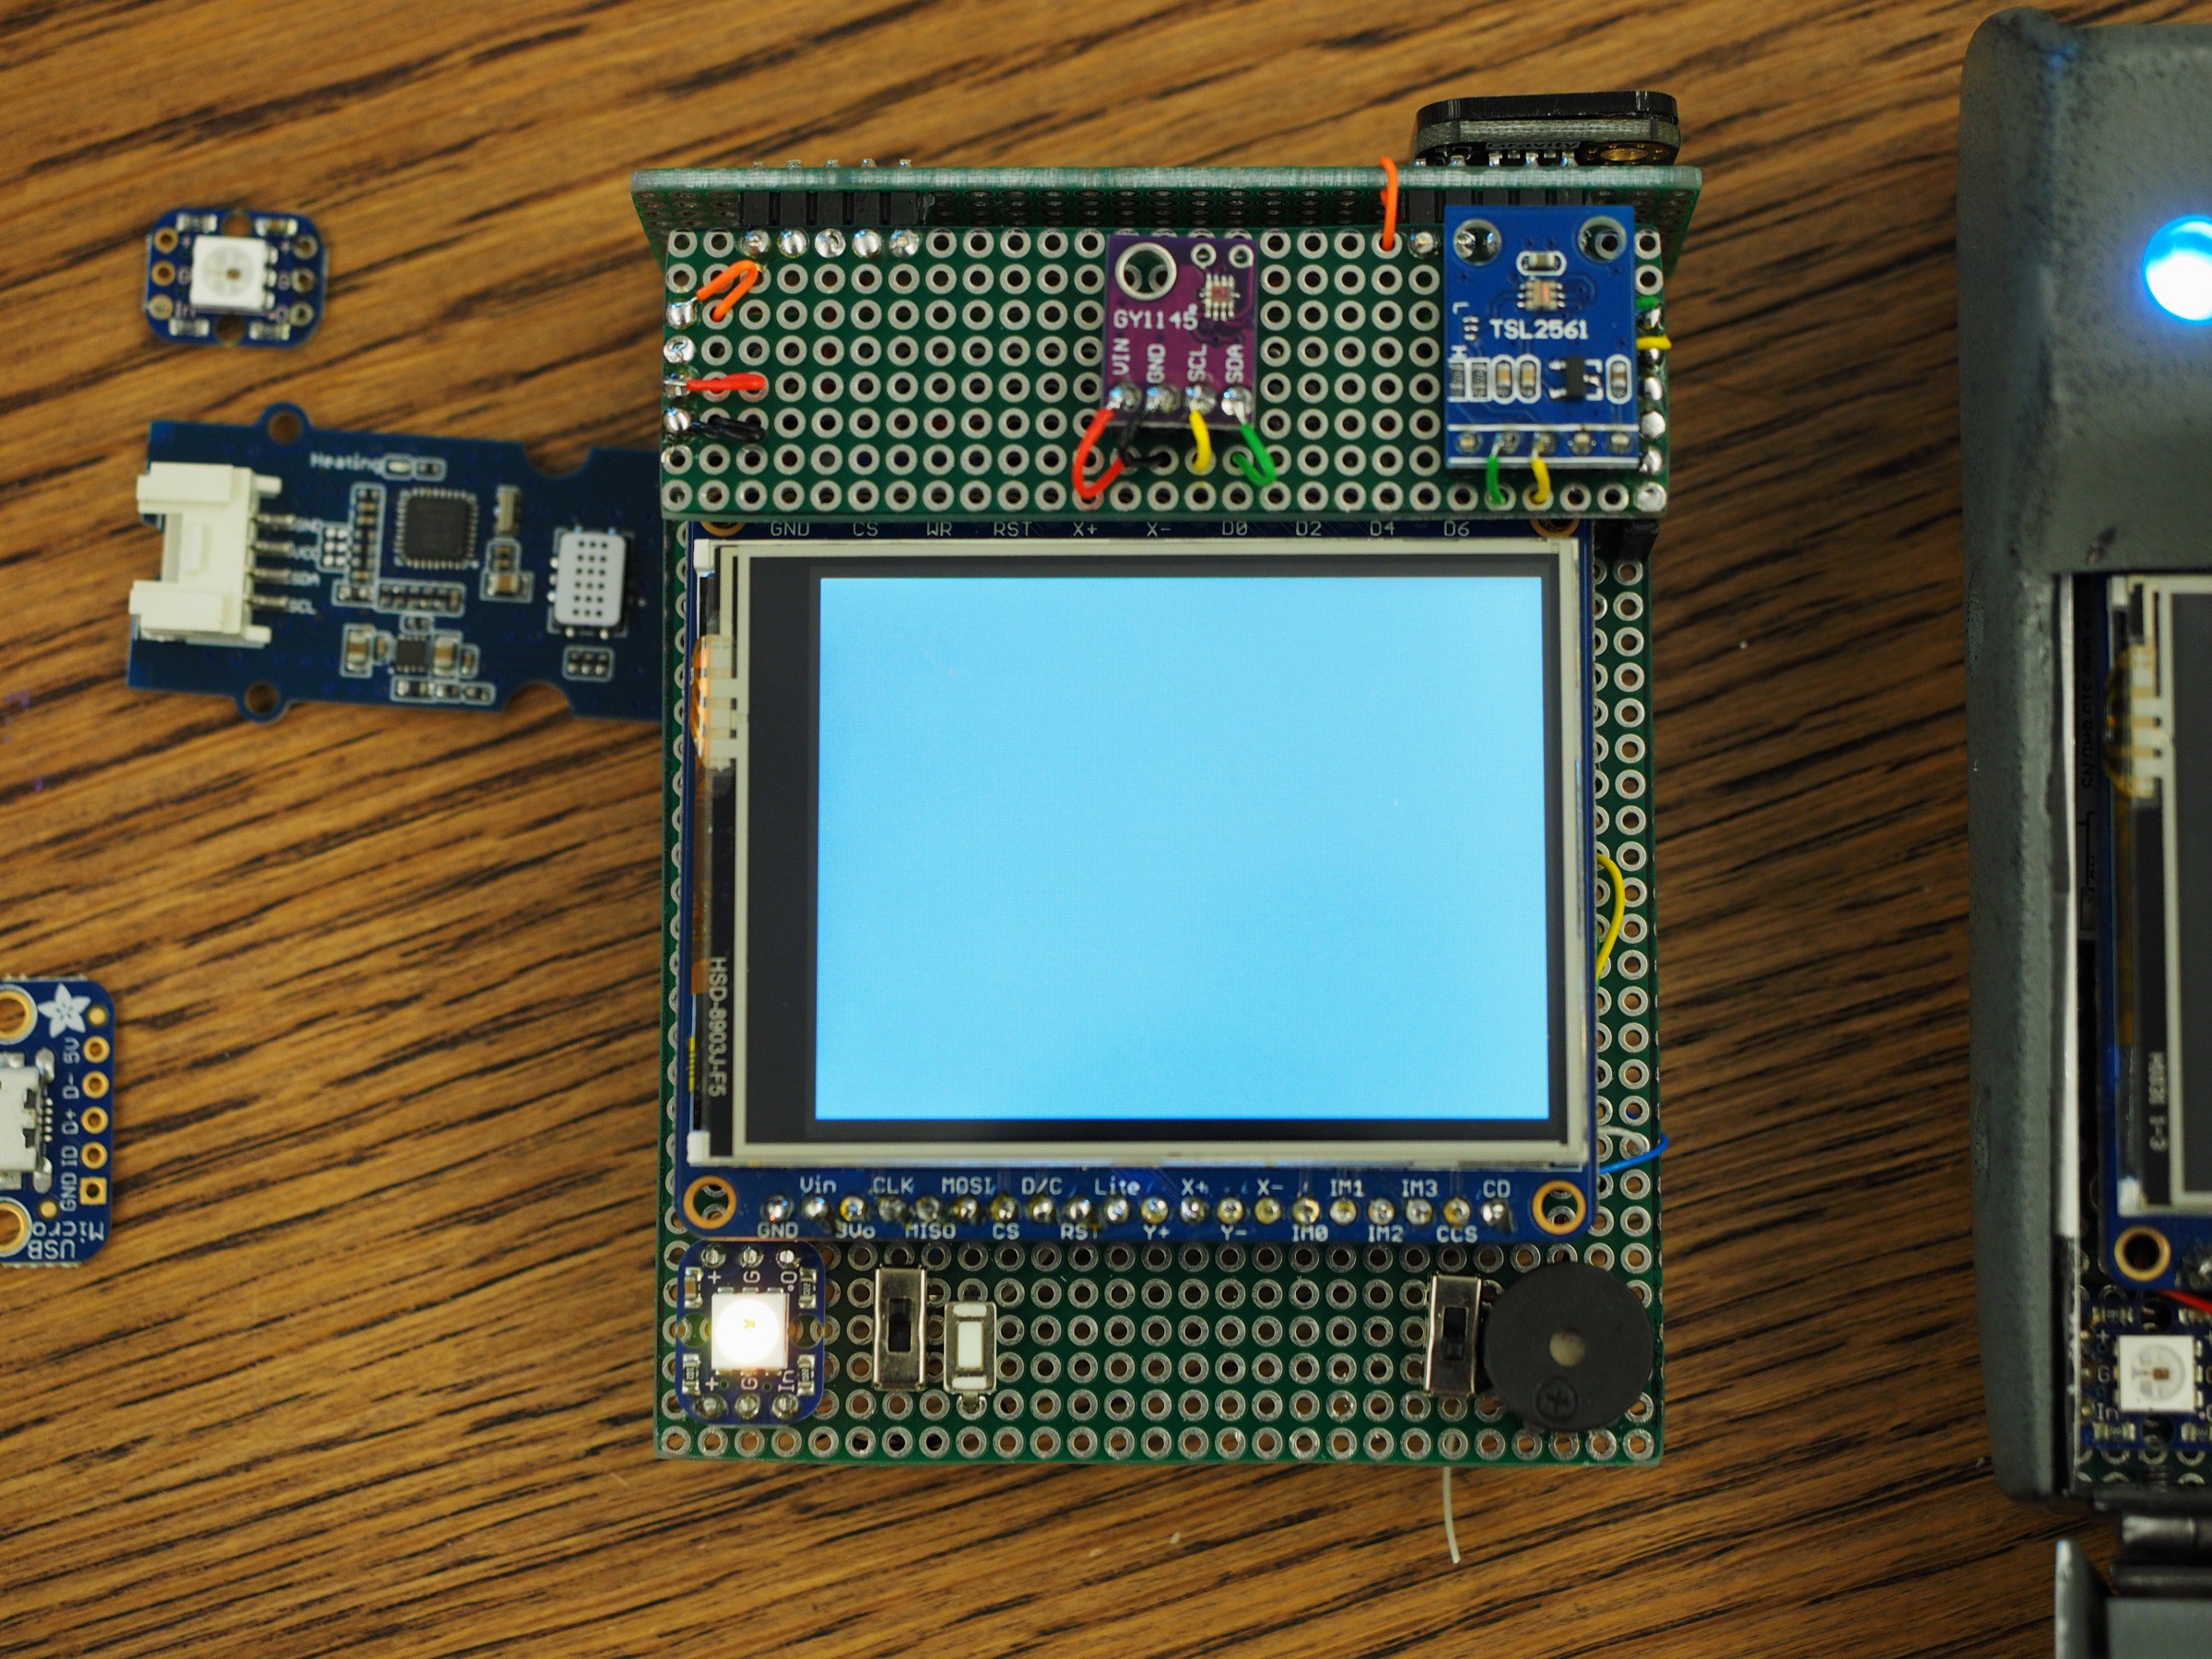
Changed out a few sensor breakout boards: BME280 to BMP280, other changes that are just replacement parts but the same part.
Main code changes are:
Updated to get almost all functions working again (component list will be updated to reflect this)
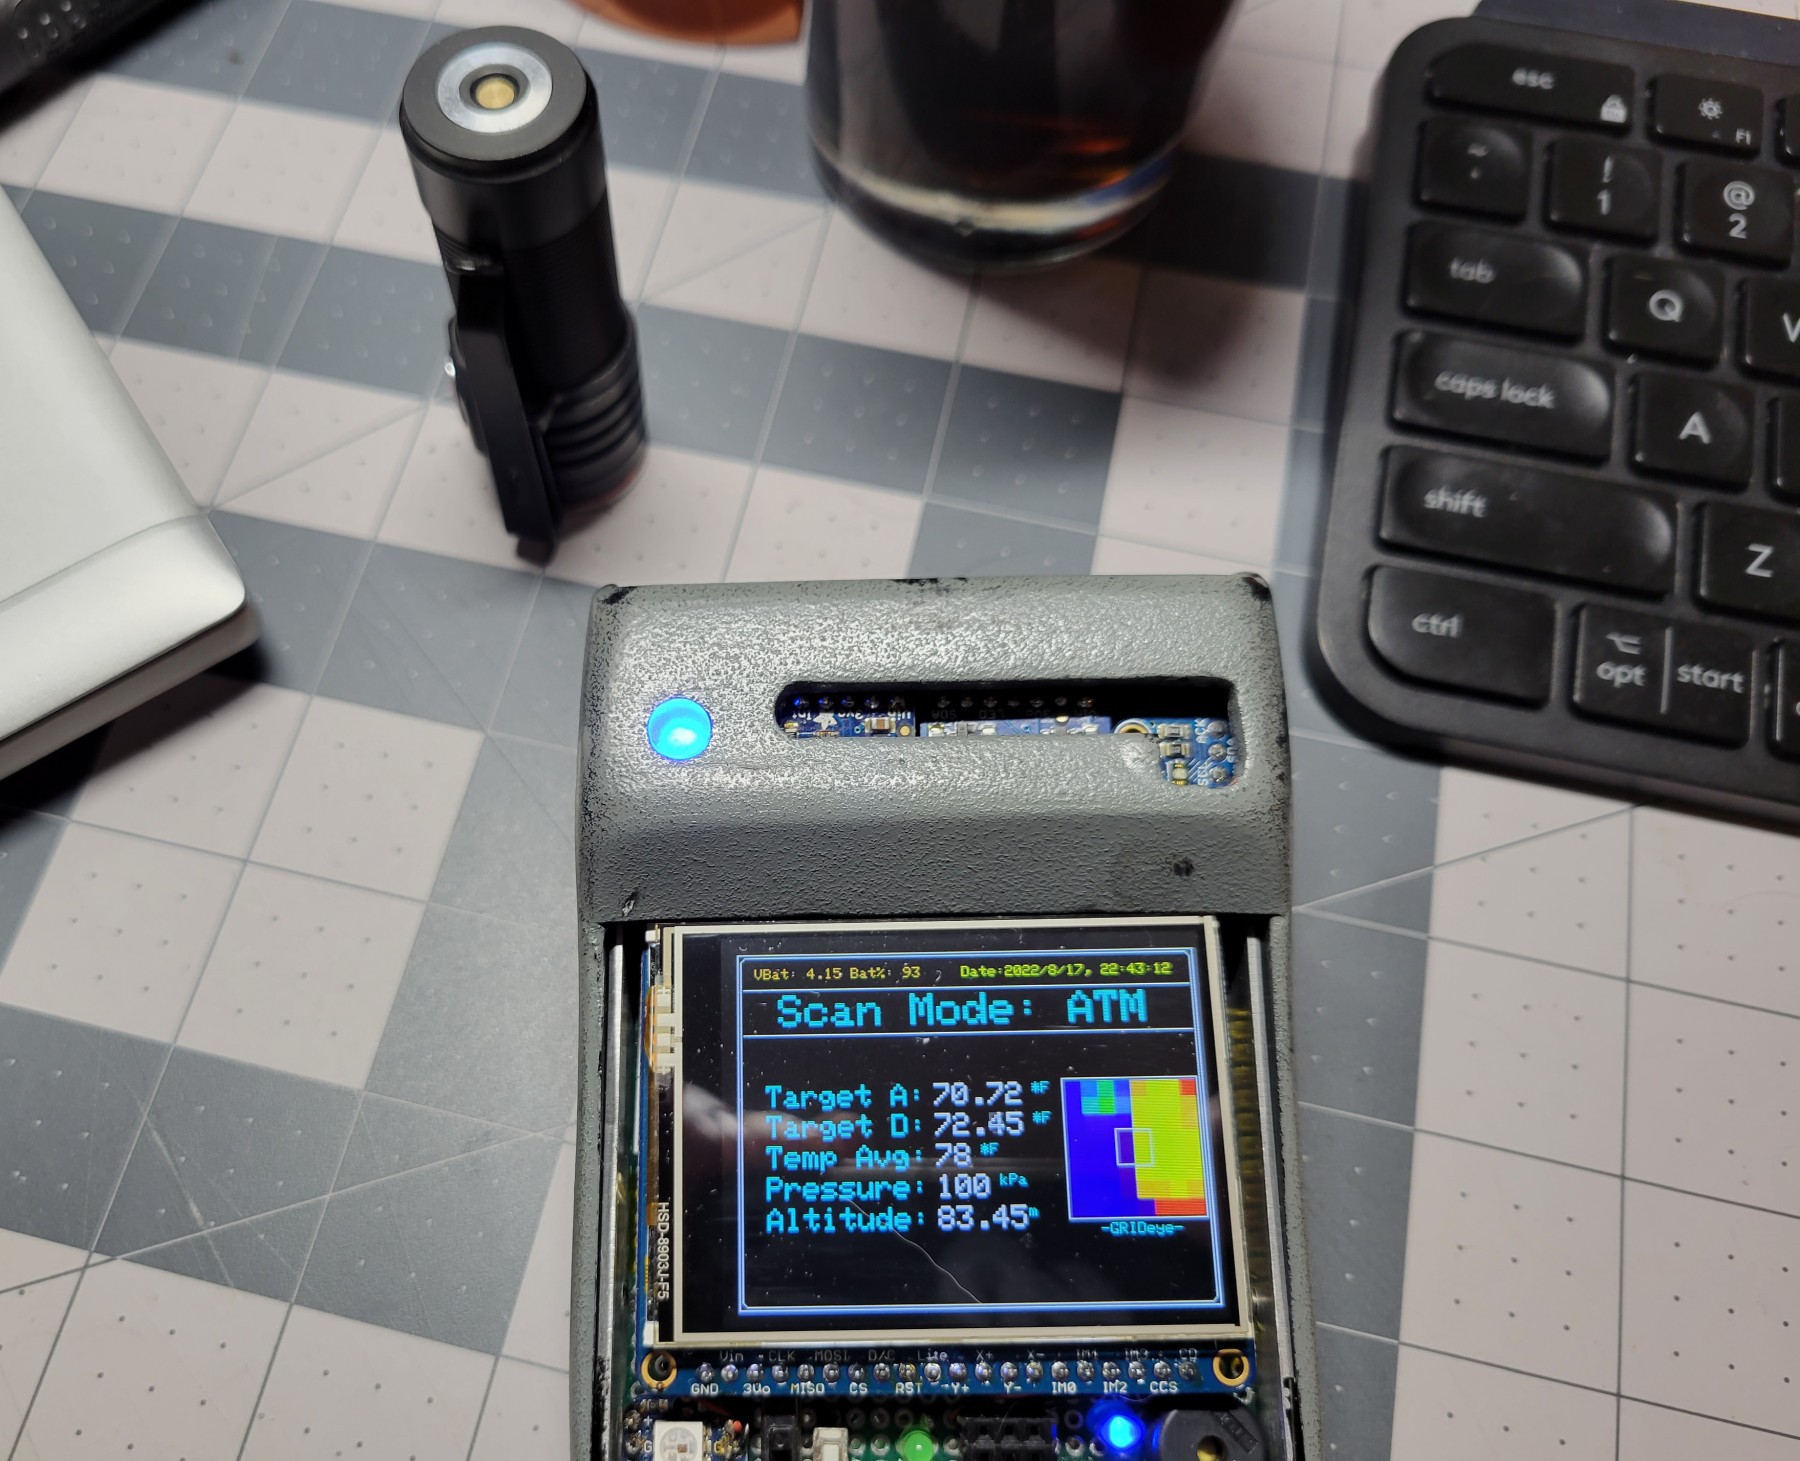
Beginning to refine UI, ATM, LUM, MEC and RAD have gotten some work. ATM in particular got some changes so the Grideye can be easily moved or resized if need be. MEC has max readings displayed now.
Removed SD card logging for now, since I changed to the Feather M4 Express from the M0 Adalogger there's no wired-up card slot. There's one on the TFT but it needs to be wired in, this is a likely future task.
I've also been messing with new sensors like the MLX90640 thermal camera (24x32 thermal pixels) and the M4 is plenty fast to run it but I'll need to give it it's own scan mode I think. That sensor waiting for the other ATM sensors kinda makes it a bit rough to use. I'm also looking at how to integrate a BME680 into it, replacing the BMP280. This would add humidity and basic air quality measurement. To do this it'll likely take splitting the current BMP280+MPU9250 breakout into two boards for ATM and 9DOF. Another thing to look at later on.
I am working on the v6 body still, started a new mainboard to work on but with the heat this summer in my region, and all others :< , so that's low priority. I also plan to make a manual for the v6 (and maybe v5) as well.
I'm not dead and have gotten to pick this project back up after a long time.
My current work isn't really ready to post, I'm still getting back into the swing of Arduino stuff again. Currently I'm looking at i2c-based IO expanders to consolidate some of the I/O pins on the Feather controller, maybe to allow 8-pin control of the TFT display.
The new Tricorder is still a to-be-built, I had to scrap the main board I was working on but the sensor array is still partly assembled.
It'll probably be a while before real updates happen but I still want to make progress on this.
Started to wire the mainboard together, even if slowly. I'm currently working on getting all of the power stuff connected up first, then I'll do the data connections. I plan on getting the mainboard working first, then working on the sensor array assembly. Slow going but it's progress!
Thanks to Mit Balkens (https://hackaday.io/MitBalkens) for pointing out the correct hinges, I've updated the Thingiverse page and the downloadable model pack here with the correct information.
I've got the files zipped up and uploaded as 'OHI Science Tricorder V6 Chassis - Release ver.7z'
It's pretty easy to assemble, you just need a small handful of hardware besides the internal electronics. Specific parts and notes are in the Readme file.
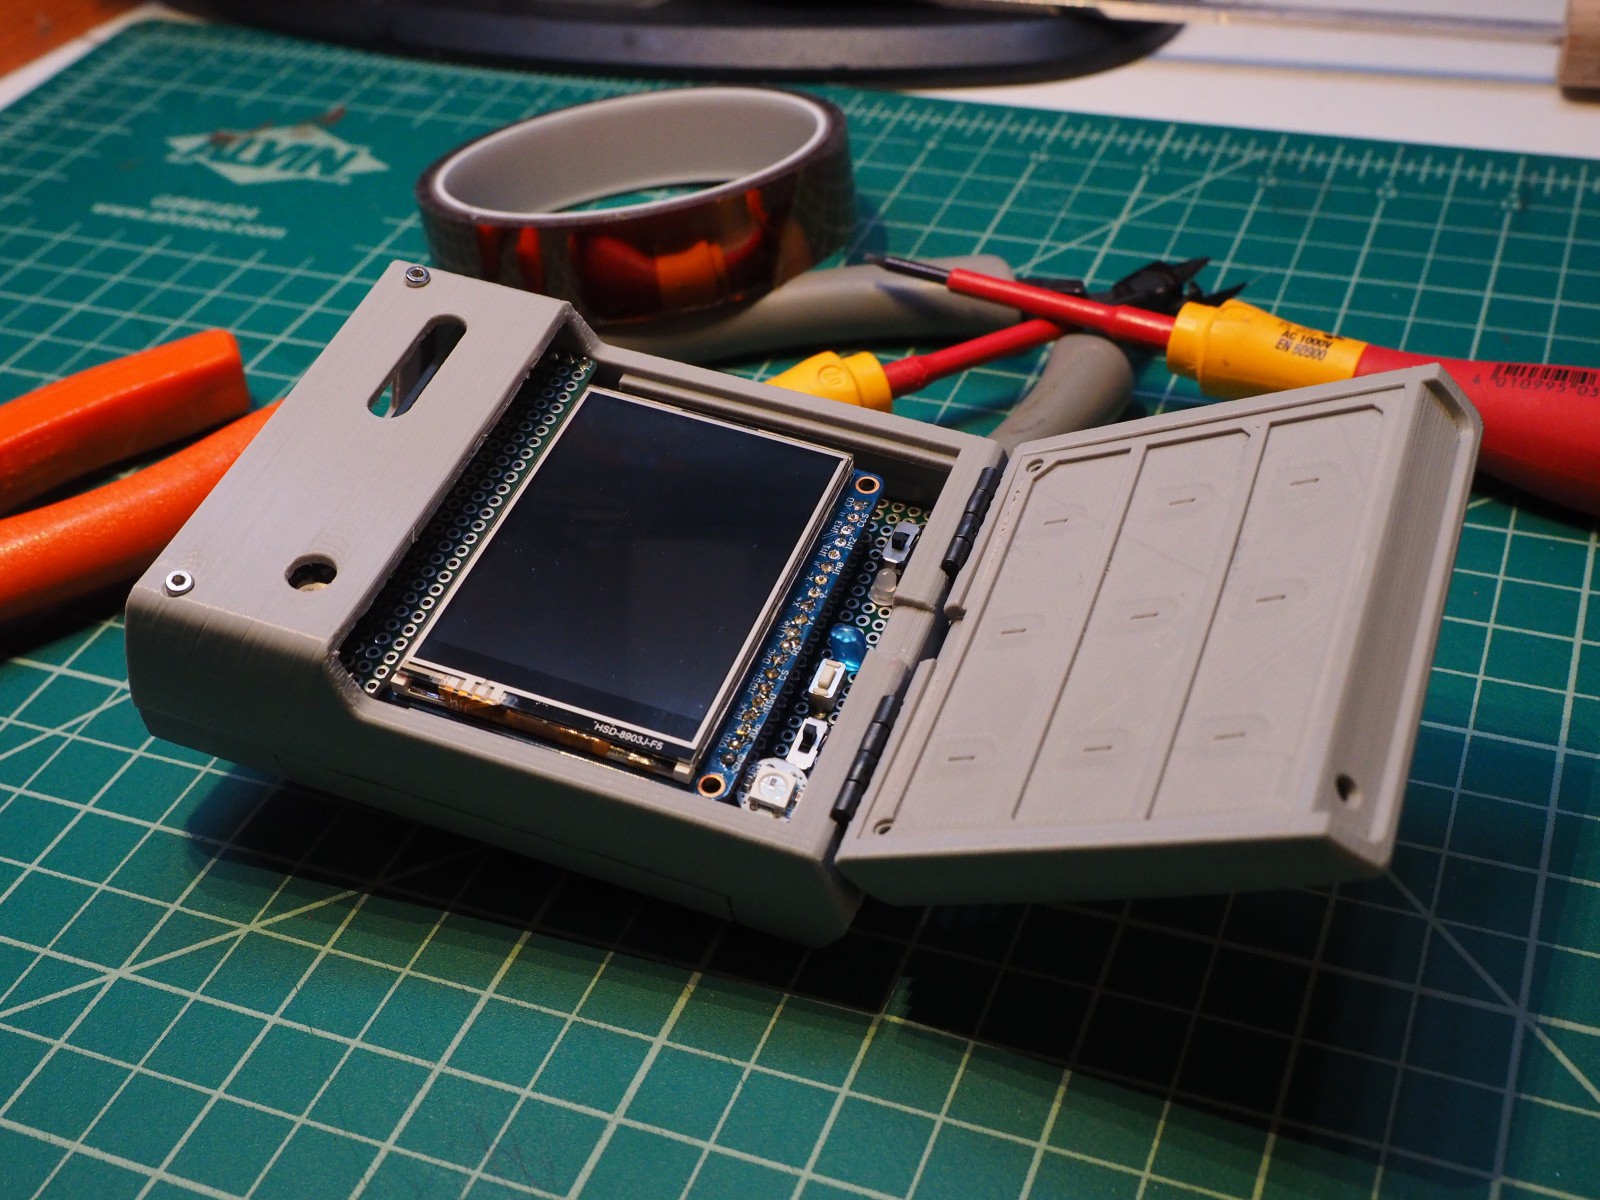
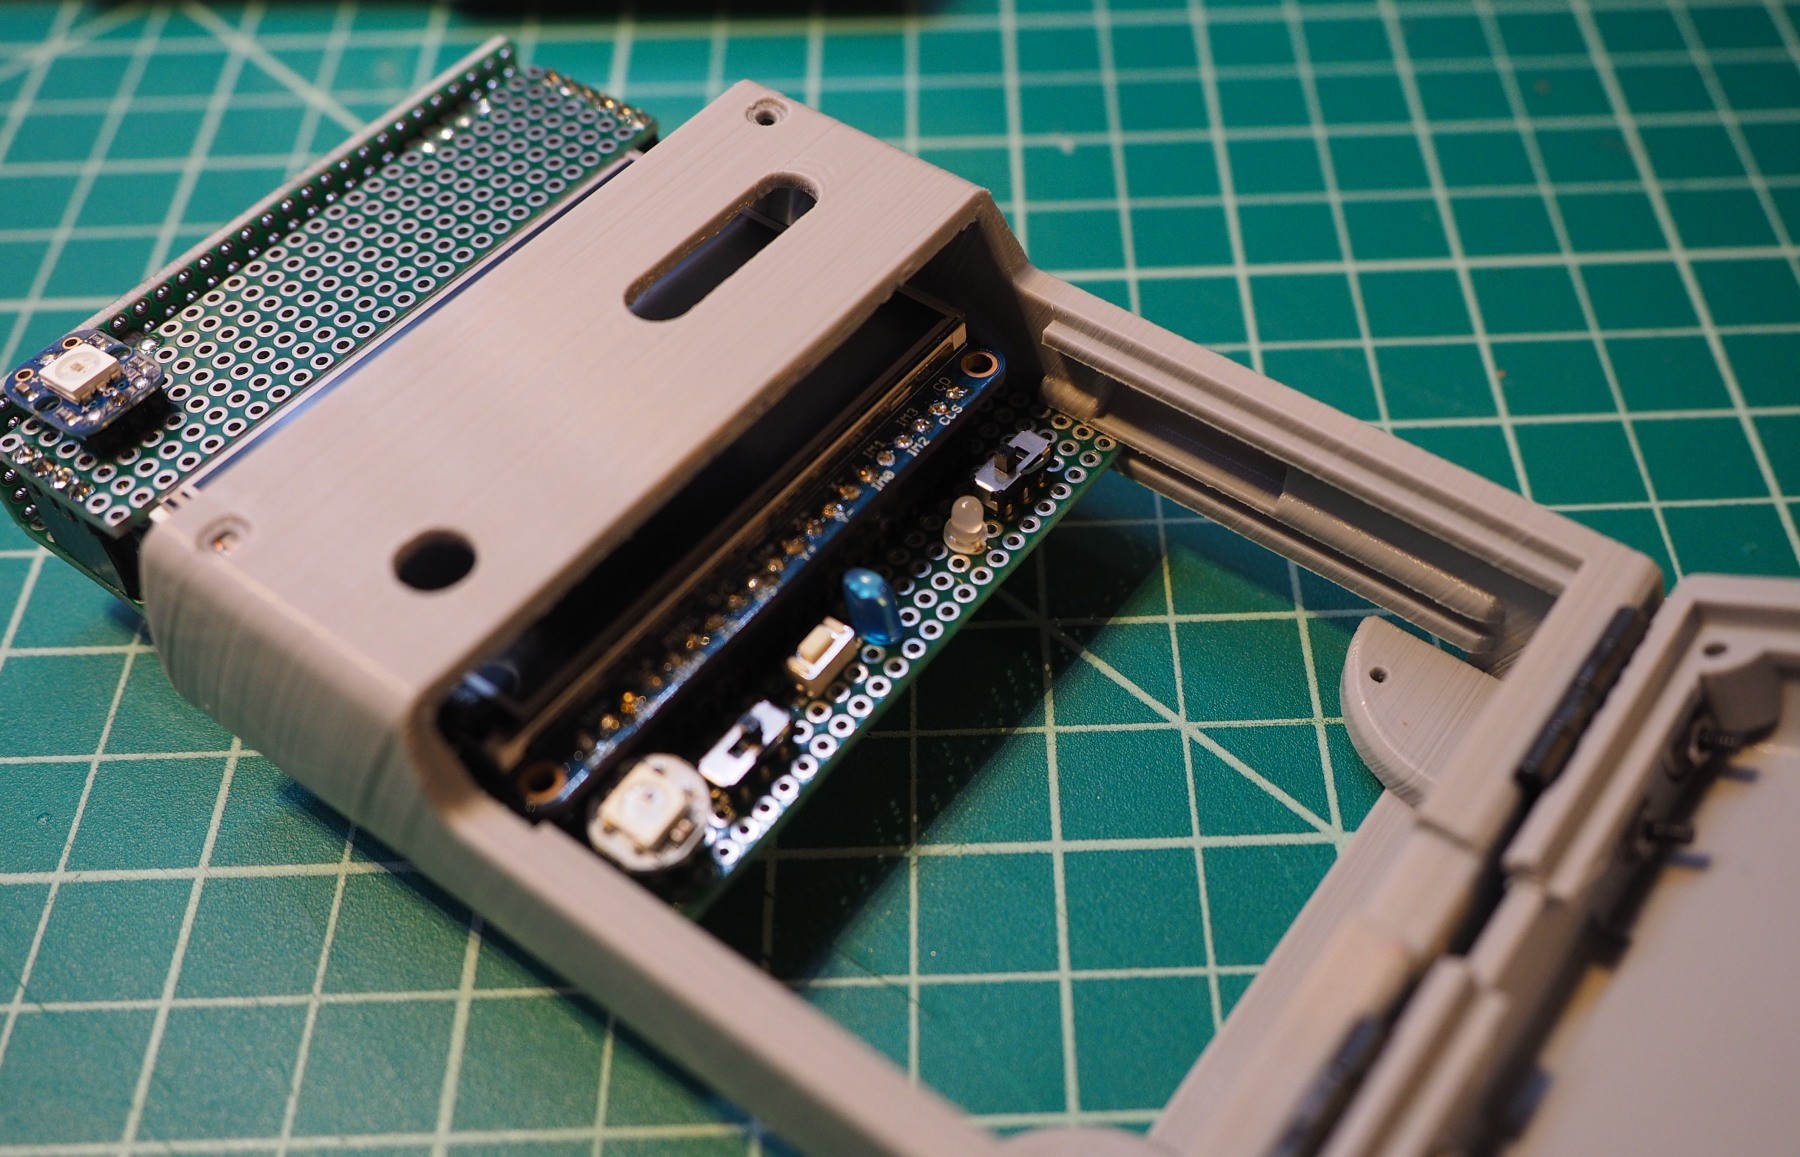
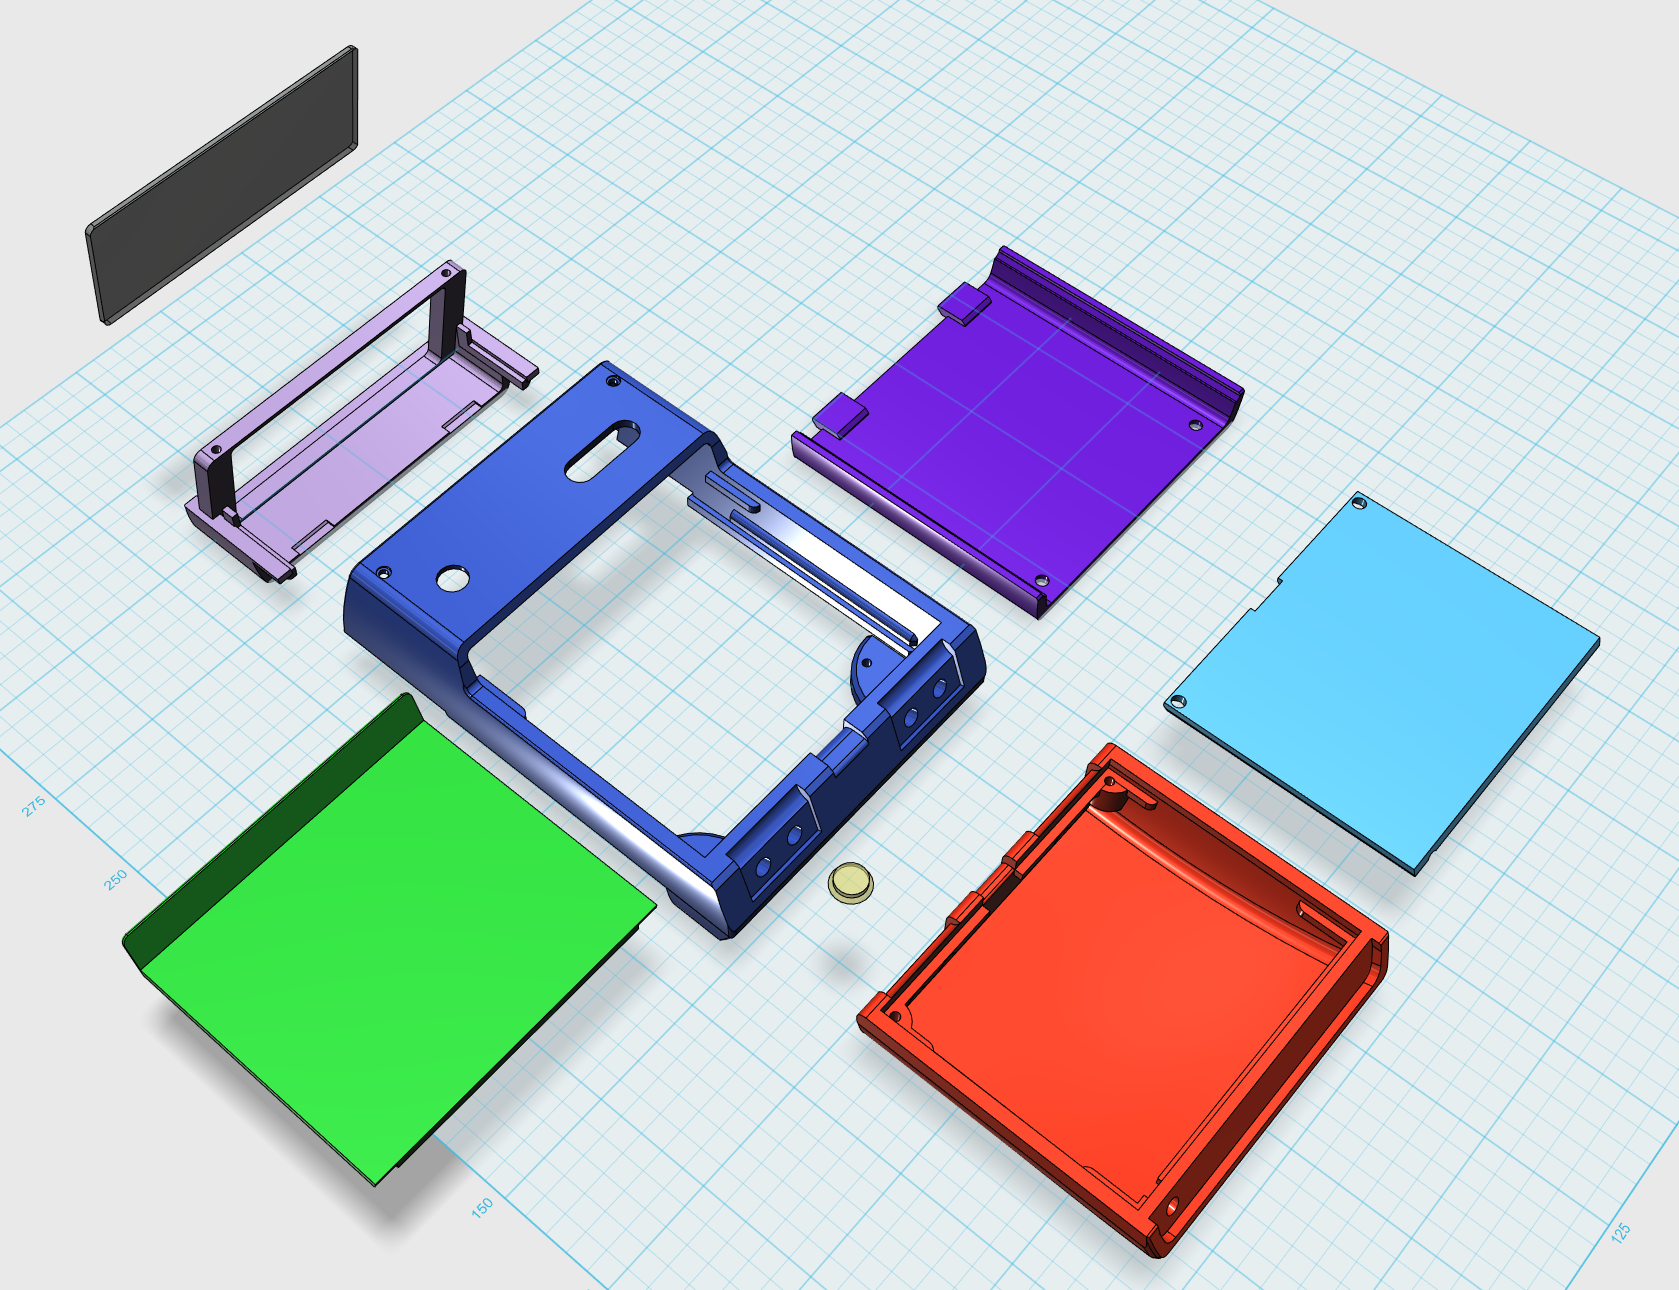
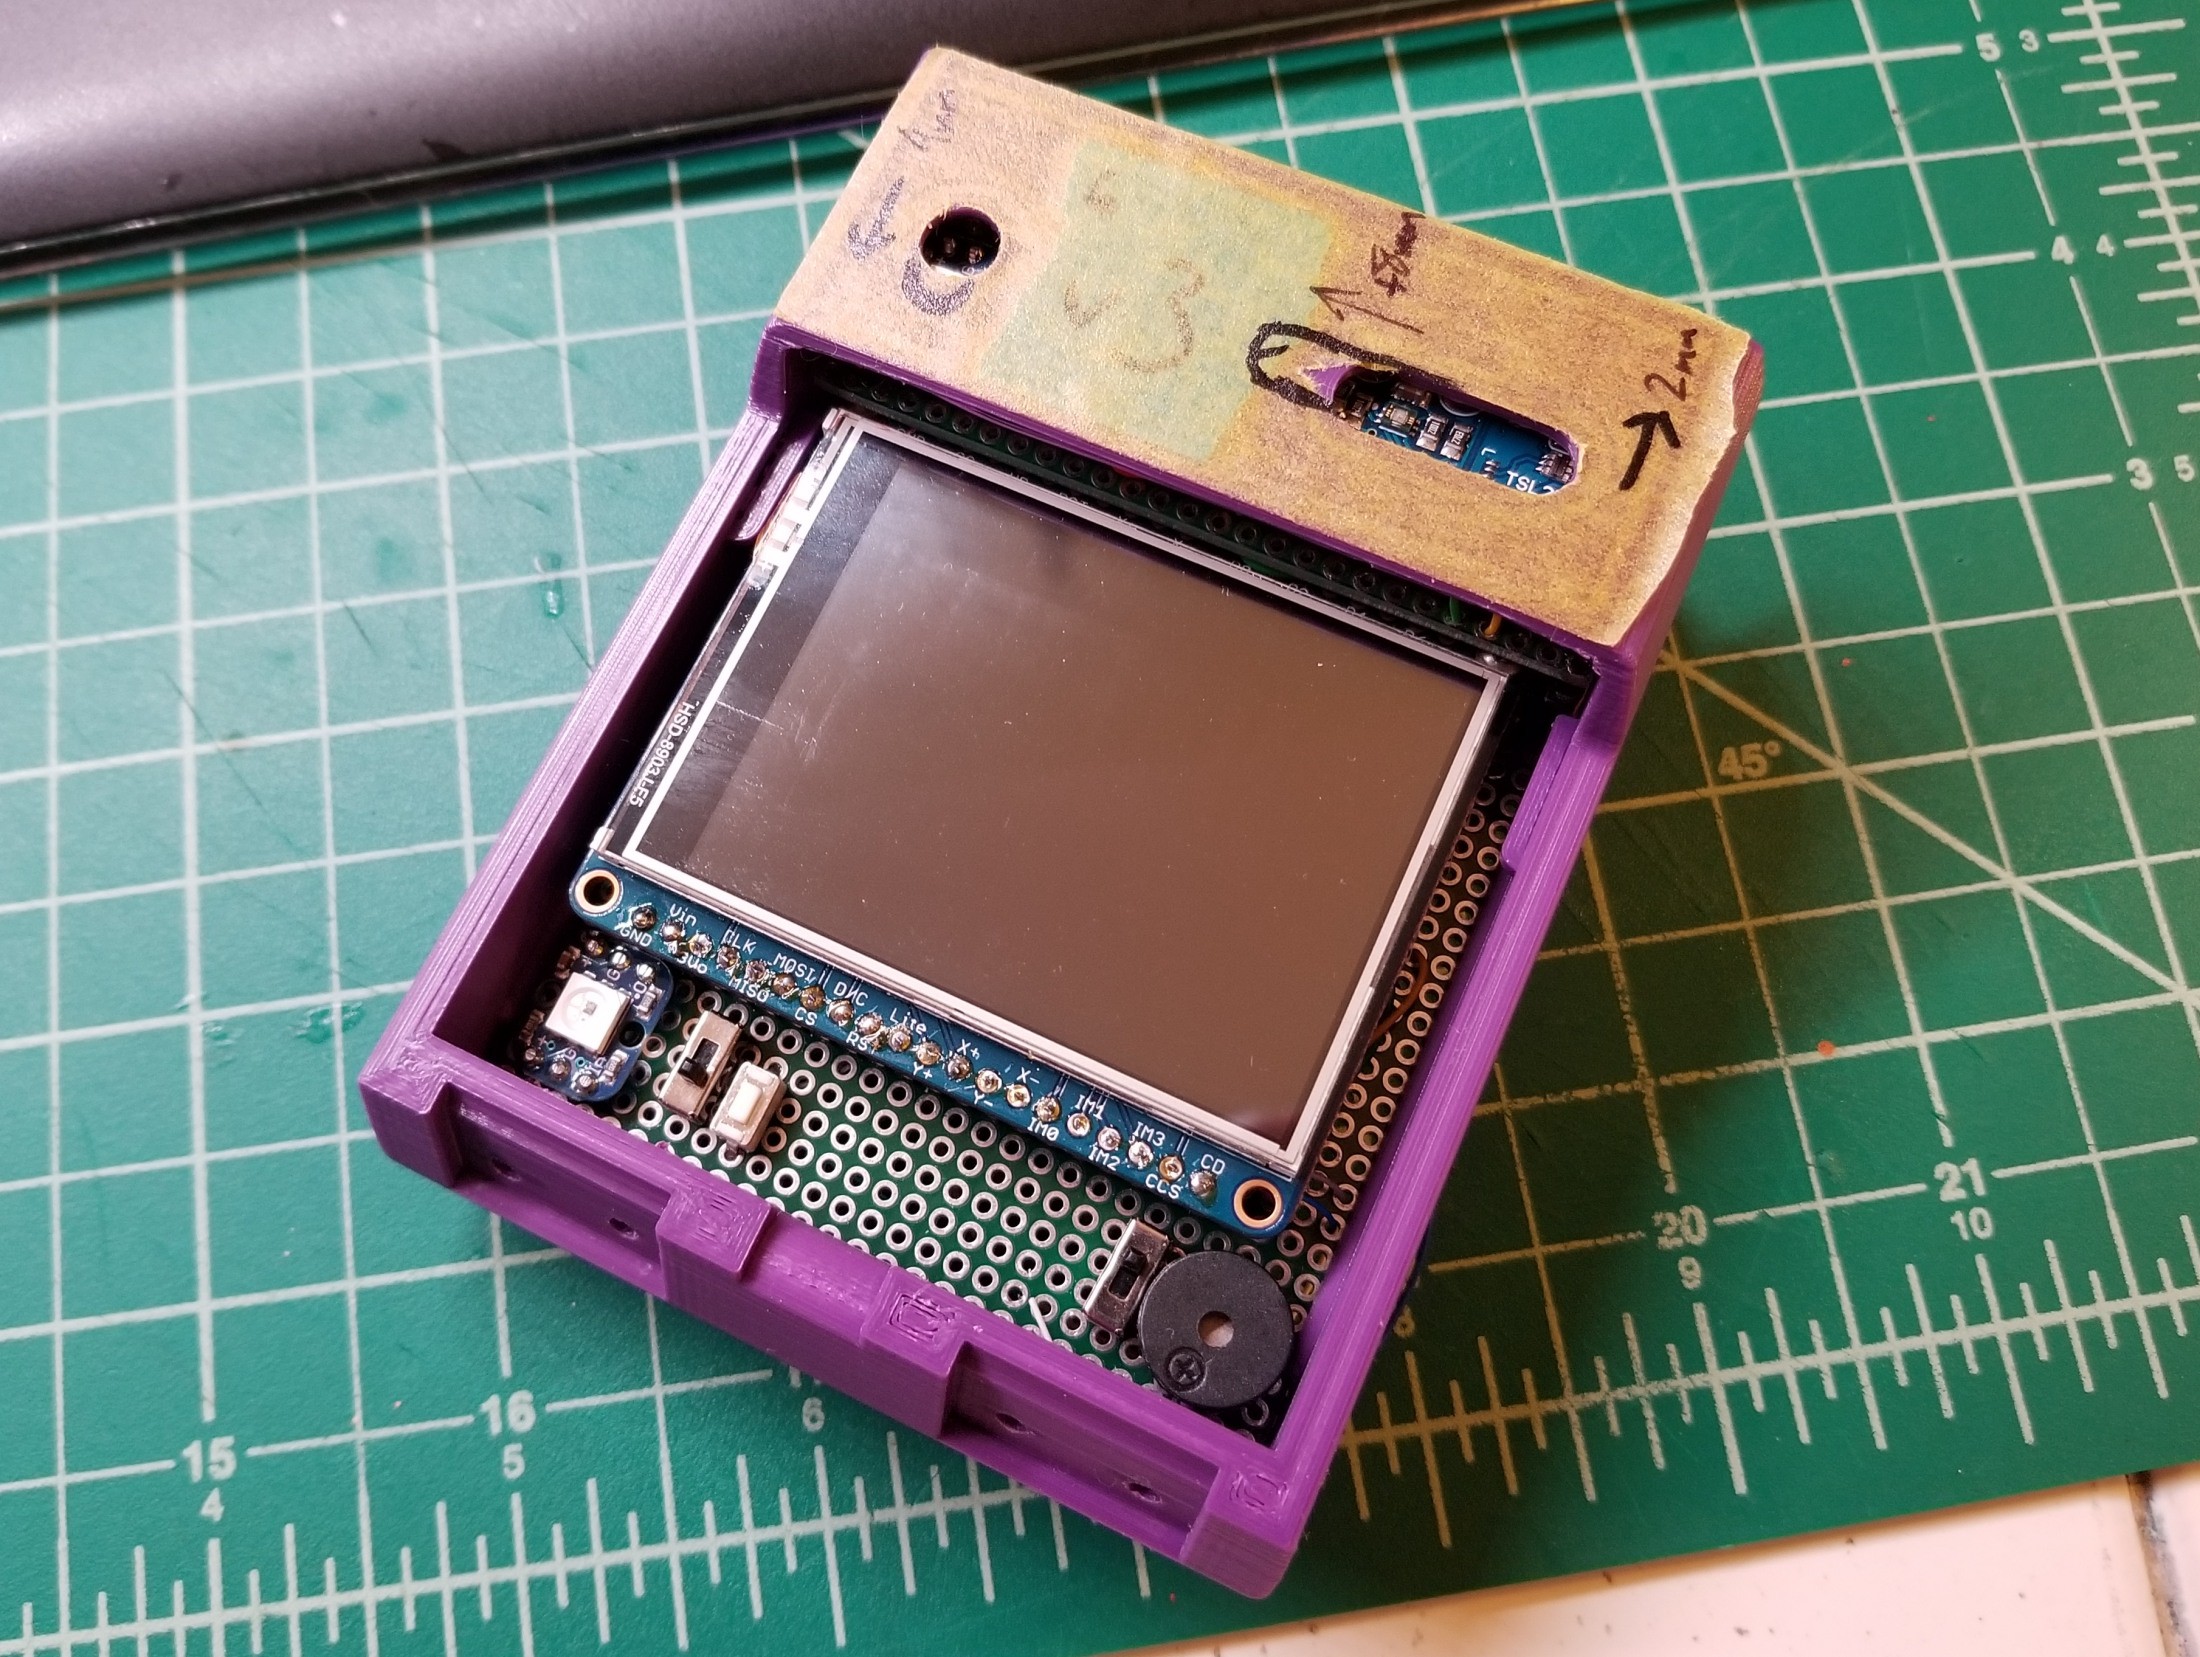
Gotten a lot further along with the 3d shell, the primary parts are at least mostly done and I'm working on test-printing and fine-tuning stuff now.
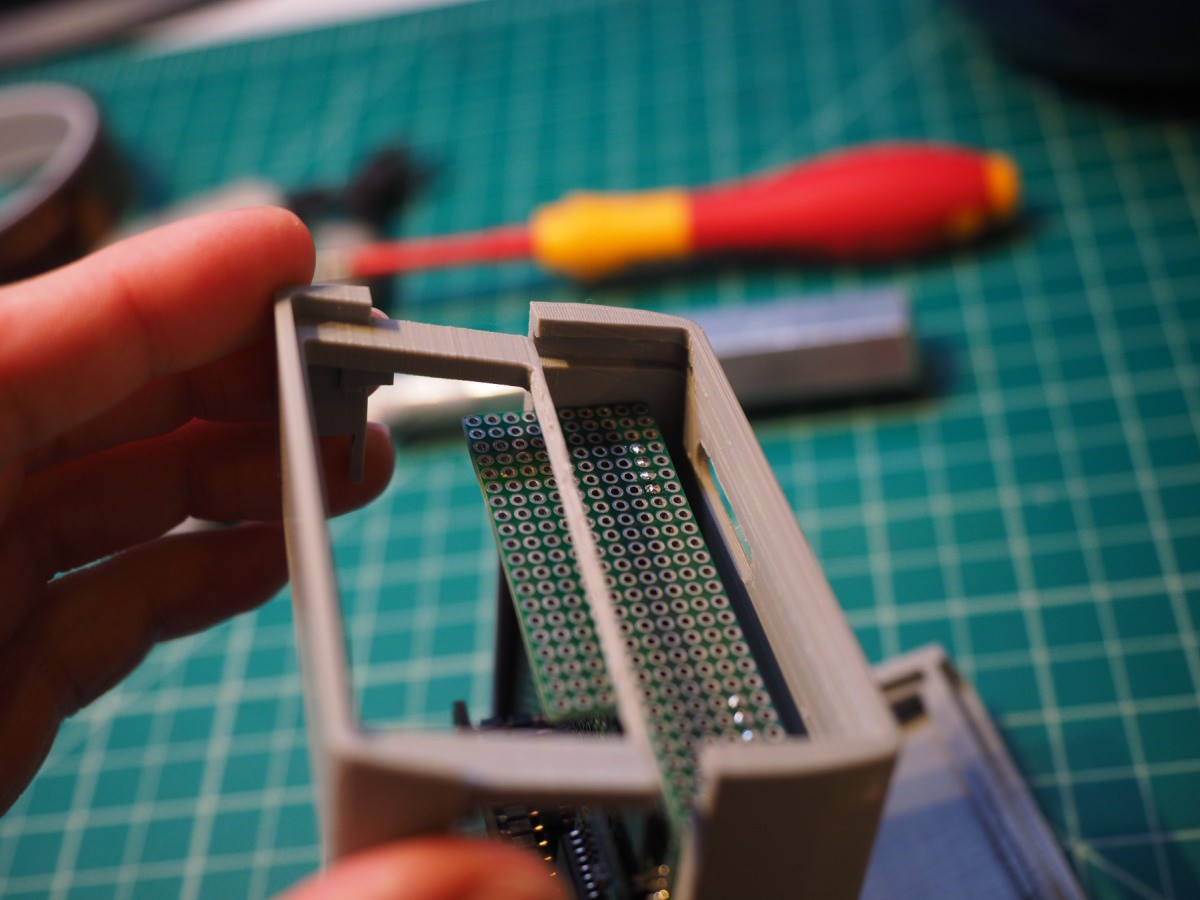
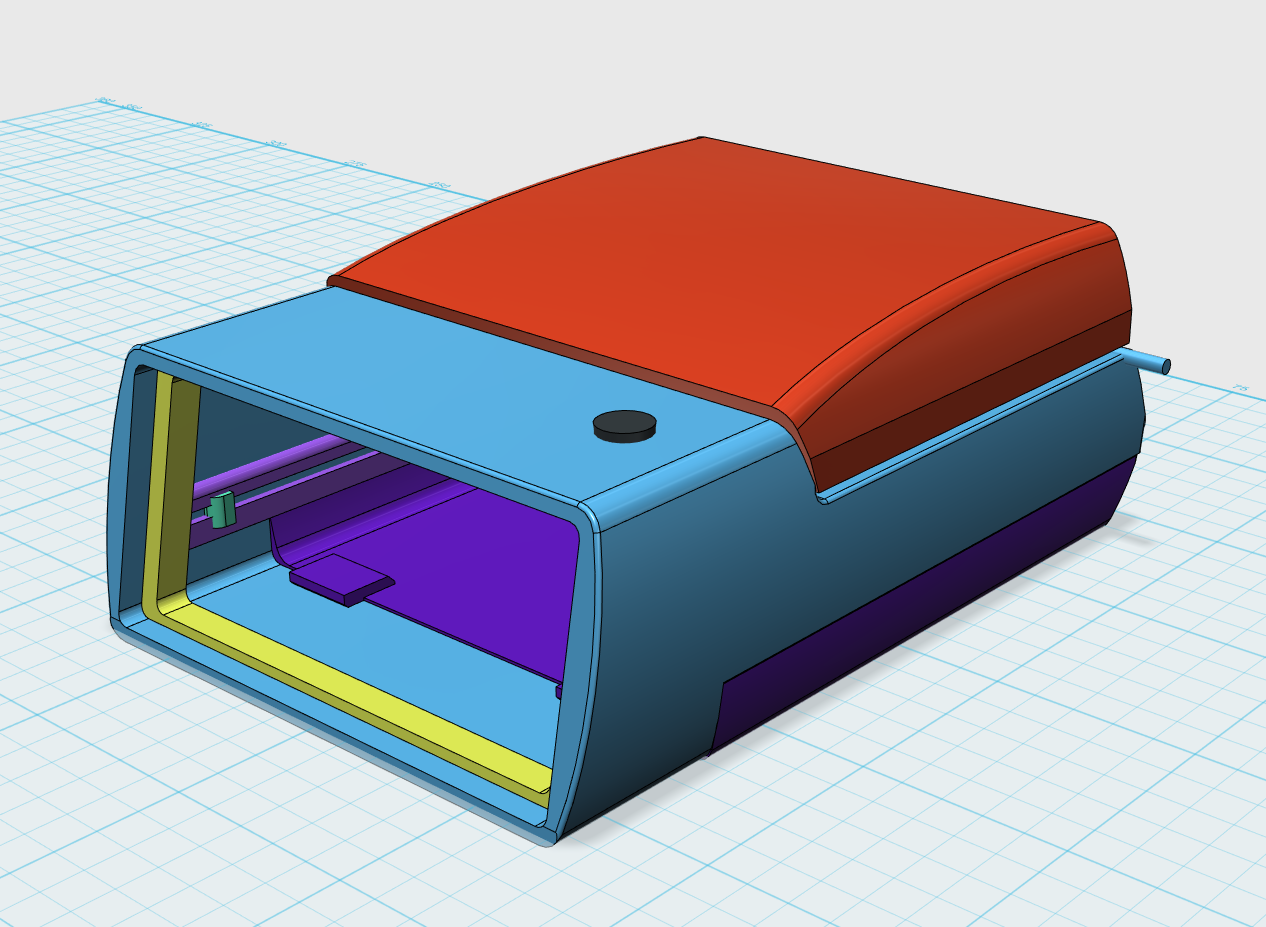
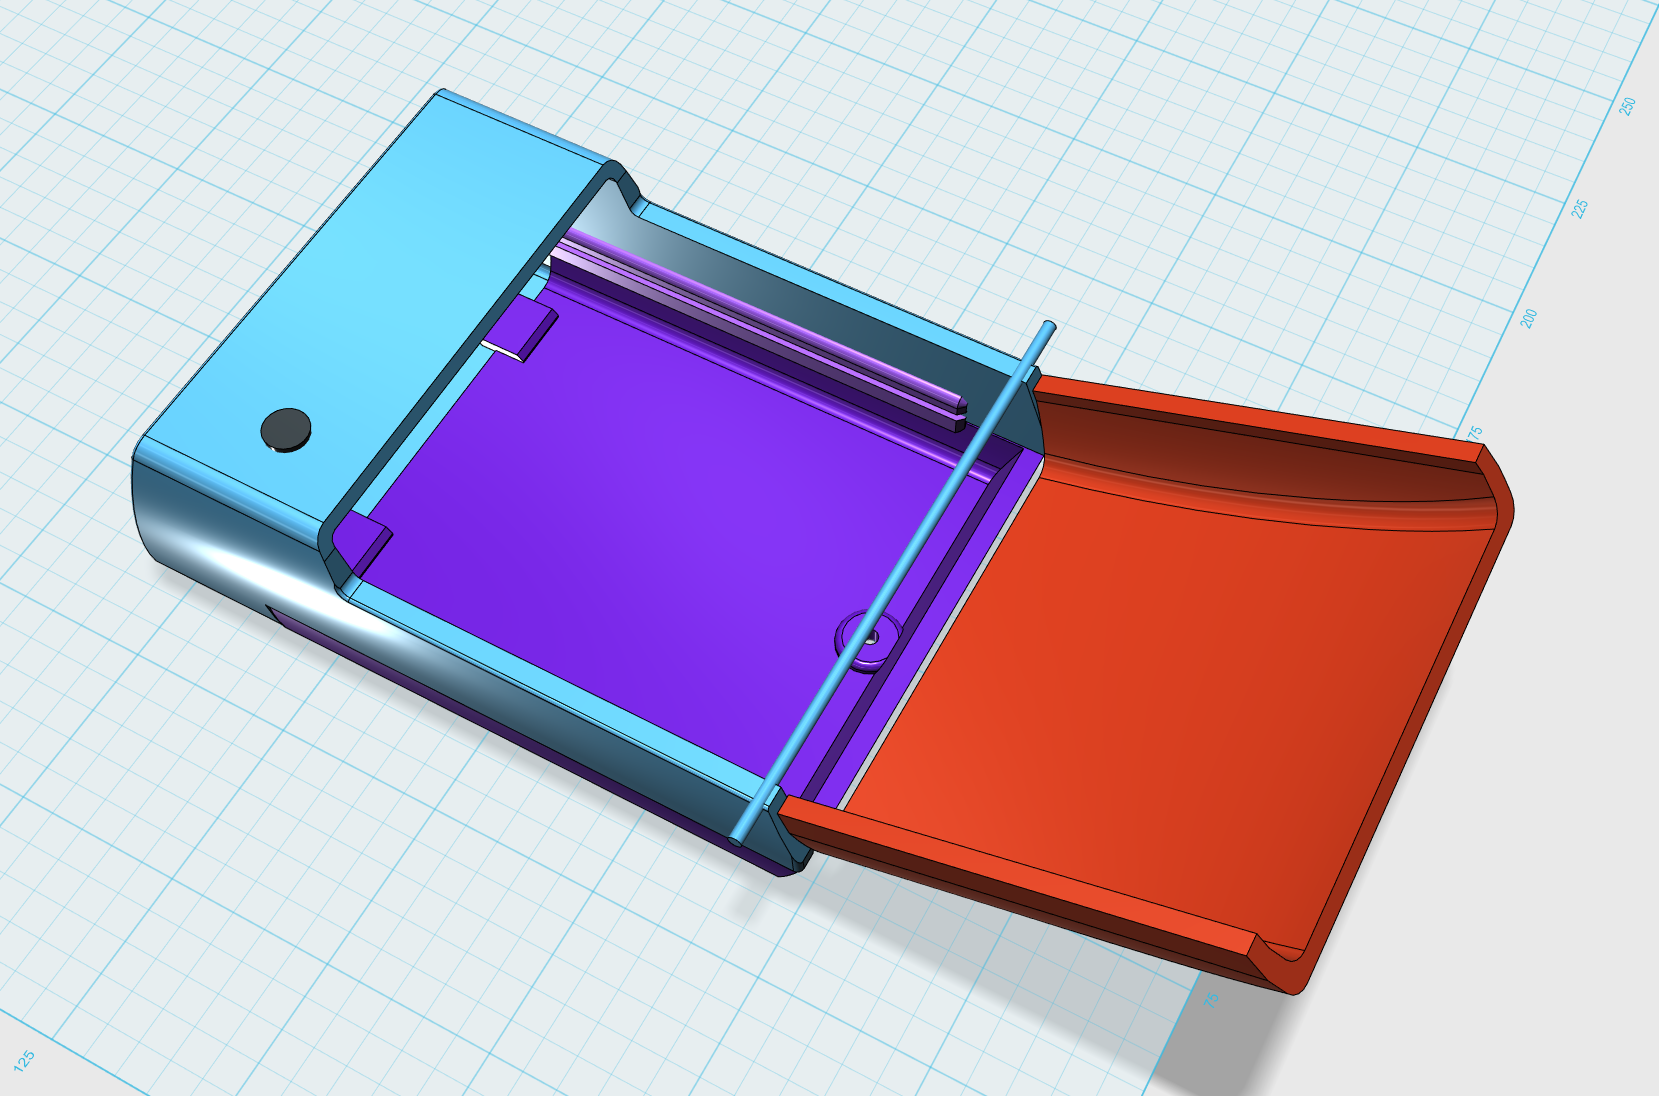
The big things left are getting the interface panels for the body and door further along. The main body panel needs cutouts for the TFT and controls, the door panel needs holes for the capacitive wire.
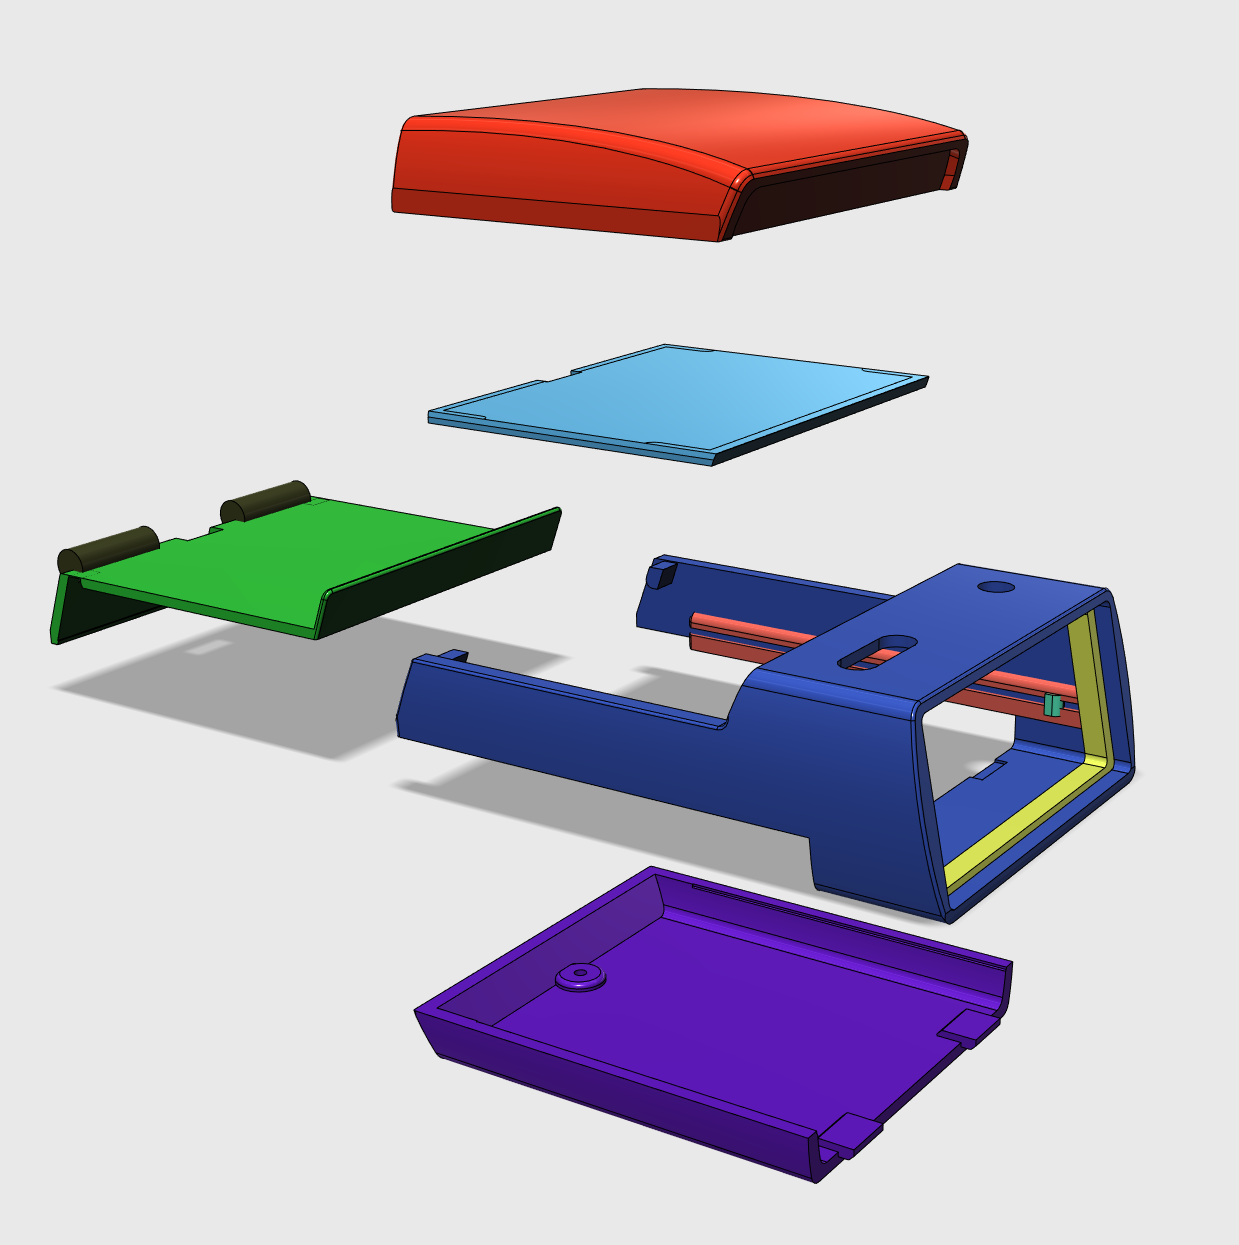
The mainboard simply slides into the body and the body's under part (violet-colored in the 3d model image) fixes it in place. The desing's working pretty well so far but it does need a lot of tweaking for ease of use and ease of printing.
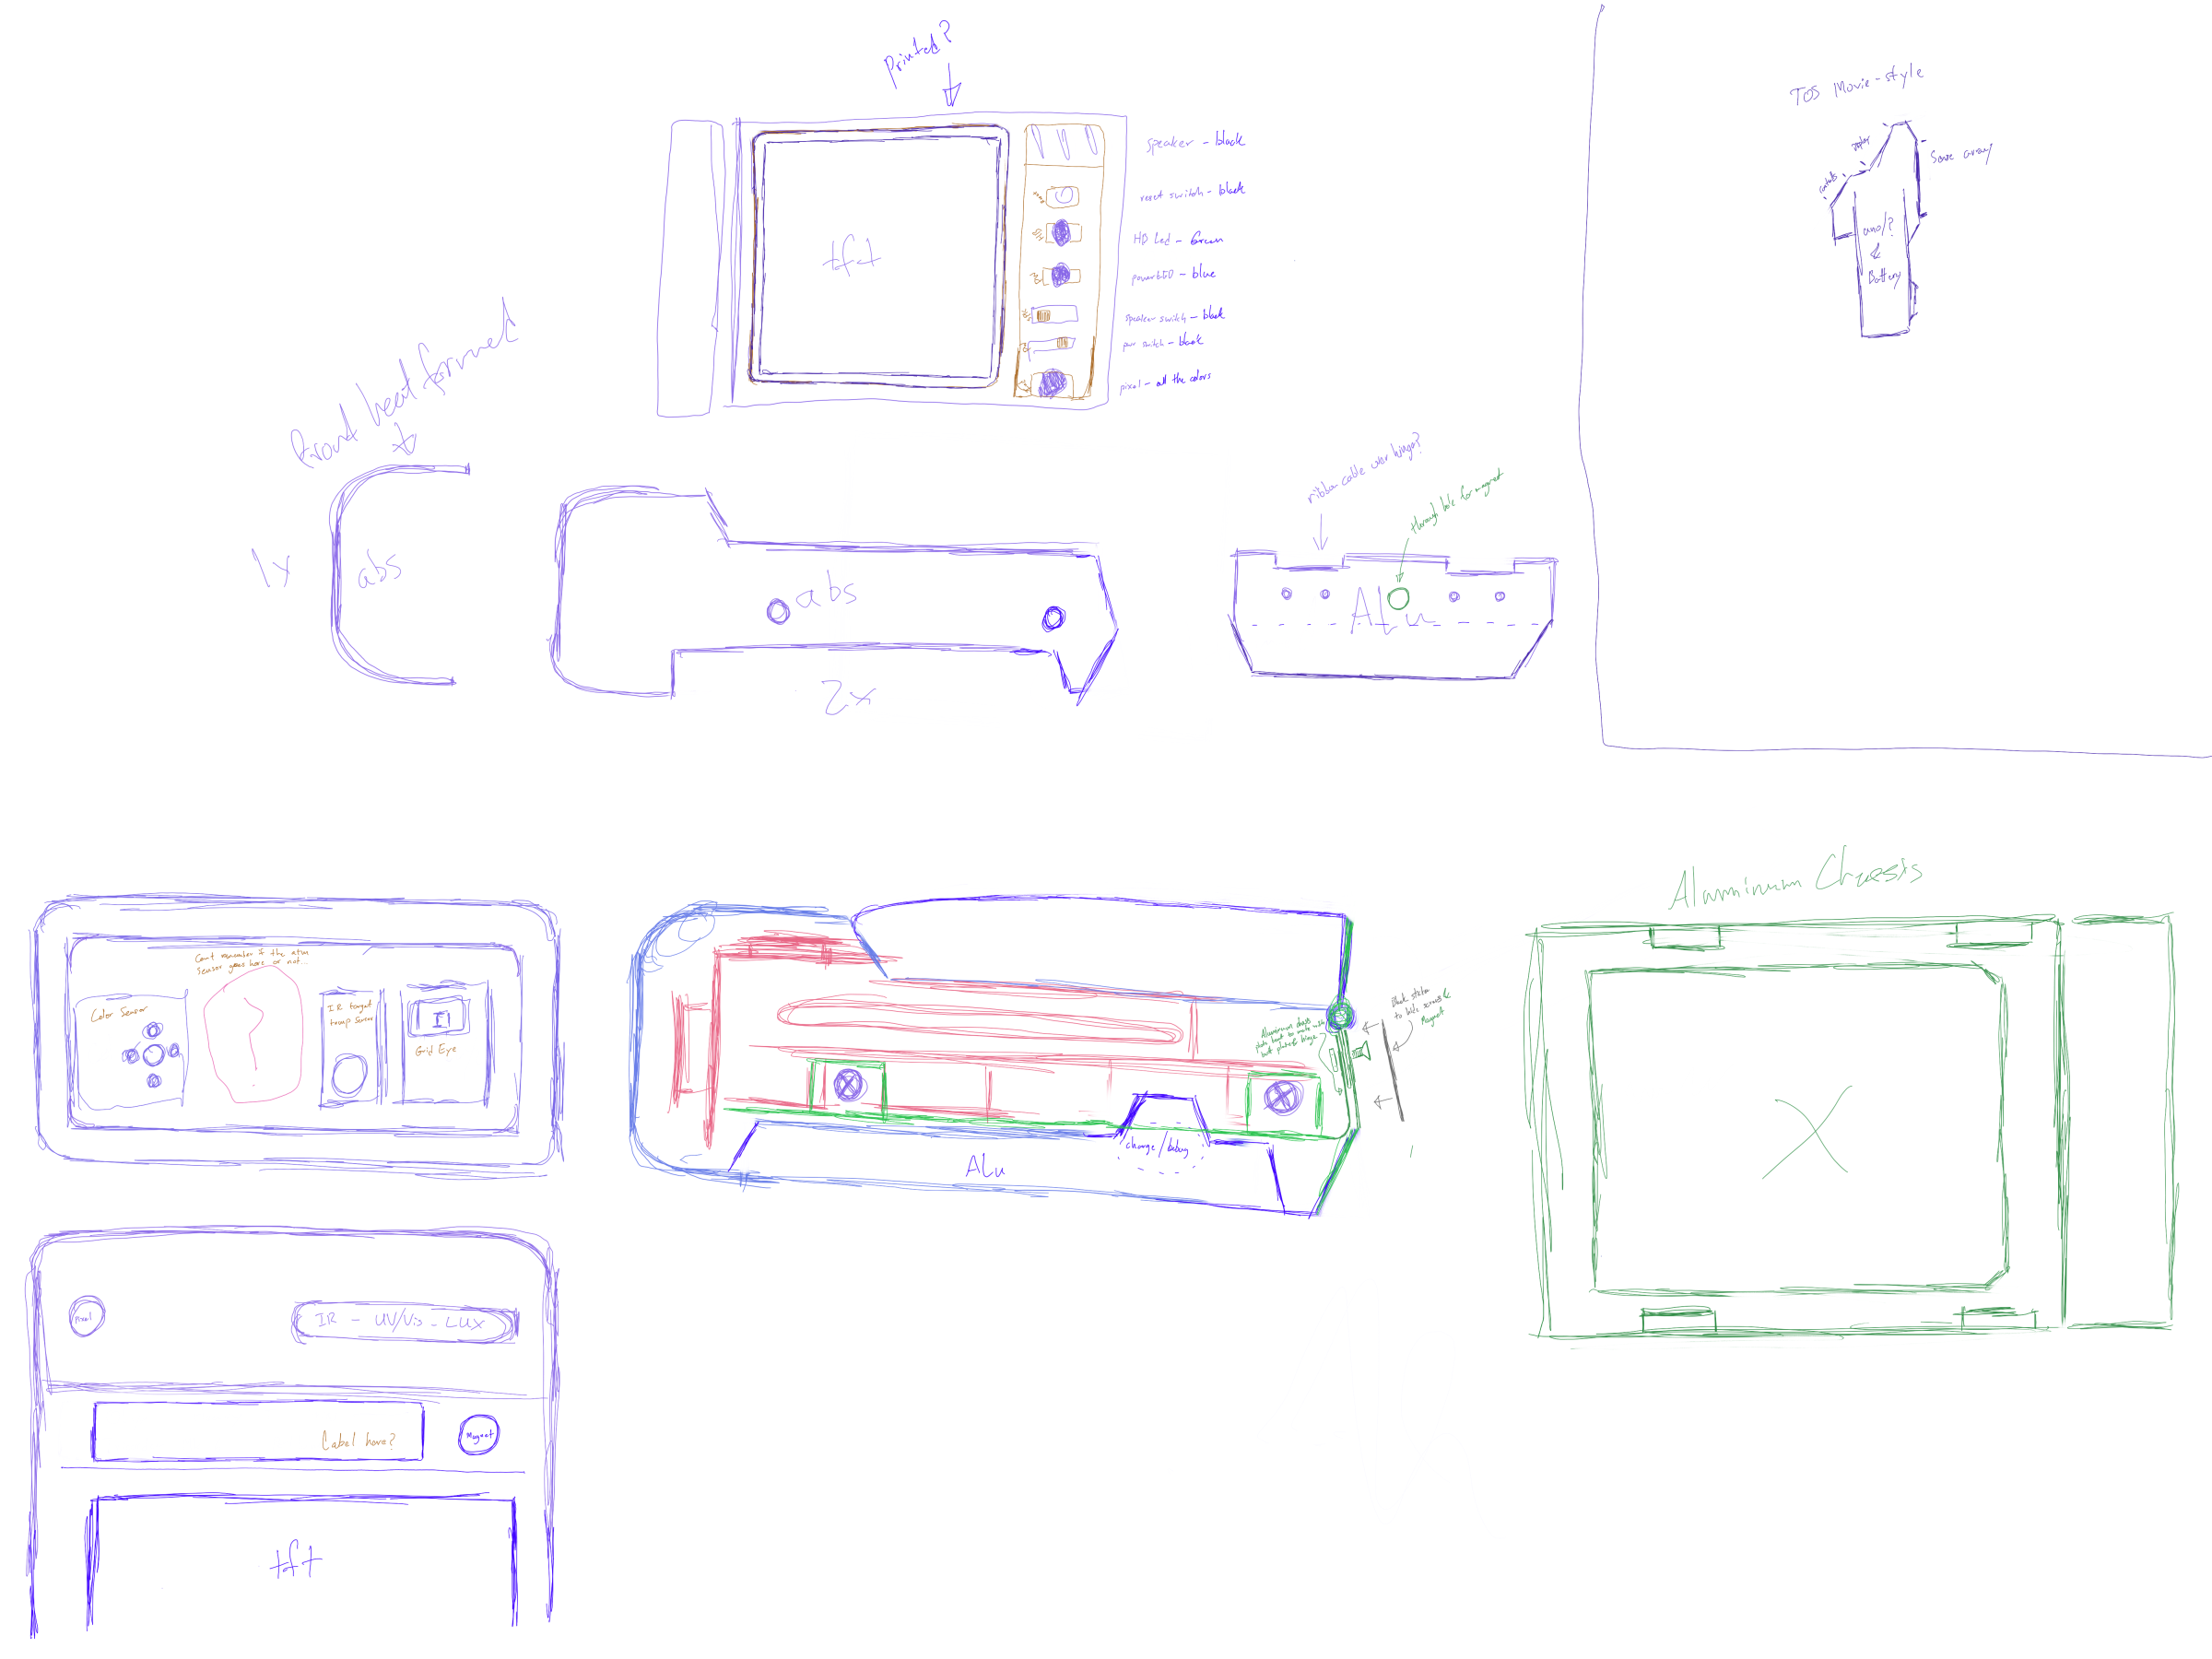
After quite a while I've started to work on the next version of the Tricorder! I've had the hardware partially built for a while now but I'm starting to get the casing worked out in 3d so I (and anyone that wants to) can print it. It's going to take a lot of work since it's my first 3d design like this. Once I test it out and can make some changes I'll upload an STL and the original 123dx files.
After a long lag I'm working on the hardware for the next version of the Tricorder!
It's not a huge change from the Version 5 to Version 6, more of cleaning up the current design that the Version 5 ended up with. The soldering work is about half done right now, I still need to finish up the sensor array, additional sensors and the door assembly.
The current Version 5 will have some of it's sensors moved to the V.6 (the GridEYE, 9-DOF/ATM, UV sensors) and everything else will be the same sensors in smaller breakout boards.
Changes with the Version 6:
Slightly re-designed, a bit wider and shorter to allow a touch more room
Different sensors for:
Gas sensing, got the newer version of the sensor board
LUX, IR sensors replaced with same IC but smaller breakout board
This Feather M0 has a Packet Radio for if I make any hand scanners in the future, still unsure of that
Ultimately I want to keep the older version working, likely remaking the casing so I can fit bulkier sensors into it (like the shape of the TNG Medical Tricorder). Since both will be using the same Feather M0 boards I also want to write one firmware that will work on both units if possible.
Right now I'm focusing on the hardware and will resume on the code afterwords.
Small update- Got a bit of work done on the code today, expanded the Radiation scan mode's functionality. Now it shows avg pulses/second, avg pulse strength (in uSv/h) along with the last pulse detected.
Part of this was making a timer based off of the RTC to count how long the scan mode has been on, this could be useful in other modes later on as well.
I also got a bit further on in building a framework to allow a more interactive UI. The ultimate goal is to have the ALT button switch the button pad's functionality to that of a D-PAD along with Confirm, Cancel and Back. This'll give me a lot more to work with, like highlighting scan elements or using a menu structure. A lot of work to do on this however...
The updated code has been attached to the project, v10.
 Queadlunn