This Project log shall bring you towards my personal reasoning behind why I pick this part and not that. Even before starting this project I already knew that this gonna cost me quite some bucks, where technically I can just spend it on high-end mechanical gaming keyboard. but meeh, what's the exciting part about that? I'm personally quite a believer in the saying:
"People who are really serious about software should make their own hardware." - Alan Kay
And even if you buy the best programmable keyboard exist, there will just always be a short in hardware feature that you desperately need. Therefore below I'll give you overview behind my personal taste in what keyboard should be like.
What's a good keyboard without a switch that you really enjoy typing?
Well yes, first thing first that I did was trying to find which mechanical switch I am going to use. First obvious choice is of course the family range of Cherry MX switches. But the more I dig, there are actually plenty more Cherry MX clones that claims to do the same with cheaper price; though quality wise just don't ask me. Eventually i just decided to go for Cherry MX original one.
Technically that only solve one question though, the next question is which Cherry MX I was gonna pick. There's several options that can be a personal preferences. I found this blog extremely useful in understanding the technical differences and help me in making the choice. The more I watch video like the one below, I decided to pick Cherry MX Blue. the tactile feedback and clicky sound just feel so addictive. I felt like my whole life has been a lie typing on standard membrane keyboard. Ohh did I mention the Cherry MX Blue is Linus Favorite as well? ;)
Worth mentioning too that getting a Cherry MX keyboard in small quantity is often very difficult. They run out of stock extremely fast and even are simply not available in stock as well. I was planning just to get it from Sparkfun until I discovered slightly cheaper price Cherry MX Blue from Mouser. Just make sure you pick the right one that just suit you in case you are planning to build one as well.
What about the keycap? Aren't they come in pair with the switches?
Hell no! That's kinda the beauty of Mechanical Switches, it is so customize-able up to the point where you can put different keycaps; either buy it or 3D print it. This was actually one of the difficult choice I had to make because there's simply too many choices either on Ebay or (my favorite) Aliexpress. Though first main thing that I kept in mind was that I will put underneath the switches some nice LEDs. So pretty much my choice are limited to those transparent keycaps. I discover one quite impressive Aliexpress store where it sells transparant keycaps on different colors. Price-wise they are also one of the cheapest on the internet (trust me) and I received it from China to Netherlands in less than 10 days in very nice and safe packaging.
Having said that, the actual and primary reason I decided to purchase the keycaps from them is because they provide exactly the size of the keycaps relative to the standard keycap size. So it was extremely useful in getting the PCB layout first time right. Who would've known that the Enter-keycap is 2.25x the size of a standard keycaps, right?

And at the end I decided to order the white transparent color keycap. The reason is simple, I just don't want a color shift between the RGB Color I set and the color i see through the Keycap. And it doesn't look bad at all after all.
Which keyboard layout you need?
That is quite dilemma-tic question to be honest. The more the keys on the keyboard doesn't necessary better in my opinion. The more key you have, the bigger the size of PCB it requires, the more complicated your hardware is going to be, the more pins you need for scanning, and well of course the more expensive it get (PCB and Keycaps). So I decided to go for quite simplistic layout; no keypad no F-Keys, no other keys except the ones inside the red rectangle on picture above. I can easily tackle the missing key by having several different interchangeable mode adjustable in a software. That's the whole point of making your own keyboard I guess.
Except, I did feel the need to add some arrow keys as well as possible on-board mouse. First obvious choice for me was the analog-thumb-joystick you found in Playstation controller. Doesn't cost much, easy to handle, and I have the space for it. The only downside is that, the analog potentiometer is not that linear by default, just with a slight movement the reading go to the roof. Though I bet some software magic could easily solve that. And I was planning to use two, not just one. Apart from avoiding an asymmetry on a keyboard that I hate, the second one can be used for some mouse movements.
Give me some light please.
Sure enough. Who doesn't like RGB color on a keyboard? The obvious options is of course just to use WS2812B addressable RGB LED. I had no doubt and the Super fantastic FastLED library came into existence exactly for the moment like this. But for this time, for the first time I decided to purchase the black version of the LED just so that it can blend more nicely with black soldermask of the PCB I was planning to order. FYI: it cost only $13 for 100pcs. nothing at all.
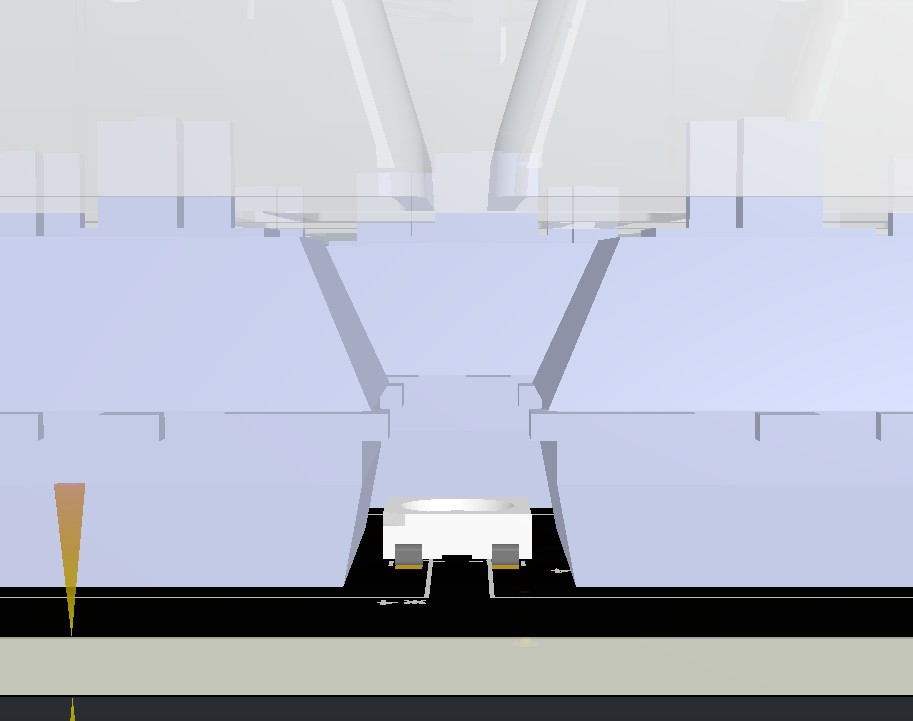
I was also a bit fortunate that the Shape of Cherry MX switches is not entirely rectangular, but rather making a V-shape if you look at it vertically, there is just enough room for the WS2812B to fit in and emits good enough light to the keycap to be diffused. More details about this check on the next Log post.
Which microcontroller you'll pick?
I was initially planning to use SAMD21, get some arm running on it, but then I might easily get short in a pin count. I need at least 19 GPIO to get and the keypad matrix properly hooked-up without a external IC bridge. I just didn't have much time to dig a bit more research on this, so I just decided to use my 'old-fellow' that I've known inside out for a long time; yups, ATMEGA2560. It plenty of GPIOs, 4 hardware Serial UART, and more importantly quite some flash memory.
Though then afterwards, I wonder I might easily running out of clock if I want to run the RGB Led and do scanning keyboard etc just with ATMEGA2560. The more and more I think I then decided to add a co-processor ATMEGA328p primarily just for handling the WS2812b. It cost 1$ anyway already from ebay, so didn't bother me too much. In the next iteration I will surely switch so more powerful ARM where I can remove the second Microcontroller.
How are you gonna talk in HID language without a wire?
This was a tough one, I was planning in the beginning to make 2nd board which pretty much acts as a dongle and have some sort of teensy of arduino Leunardo thingy. That actually might turns out to be quire complicated and not that practical unless you can make the dongle as small as the tiny we often see nowadays. At the same time I just didn't want to add any cable to it, wireless or no keyboard as well.
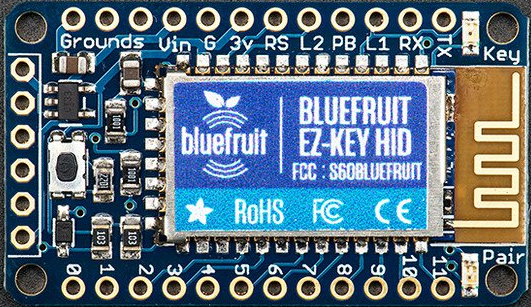
Well until one night I discovered Adafruit Bluefruit key . It is amazingly pre-program out of the box with bluetooth HID firmware and talks seamlessly via bluetooth to the PC as a keyboard or a mouse. Luckily enough I have embedded bluetooth 4.0 in my Laptop, so simply there was no better option. Just dedicate one Serial pin from the main controller to the Bluefruit and bob's your uncle.
What about security features?
FYI I've been wearing NFC ring for almost two years now. I've used it to activate almost anything I've touch electronically. Adding RFID/NFC to activate some sort of admin/master mode would tremendously be handy. And again, those cheapo RFID reader are now everywhere and cost virtually nothing. From logging working time, enabling password generator up to initiating some mode are just few things that is planned for this.
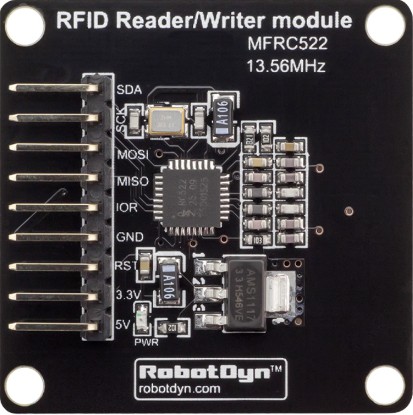
There are so many RFID reader based on MFRC522, but I discovered one that is small enough and should camouflage with the keyboard with no issue. It talks SPI, shouldn't be an issue.
How can it communicate to the outside world?
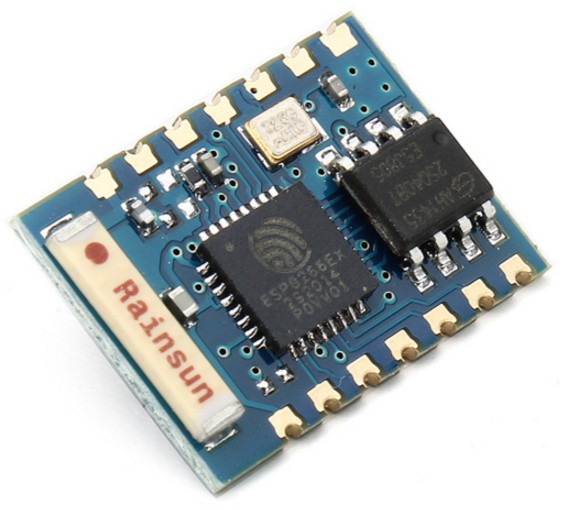
Easy, add some wireless stuff on board, and of course, several of them. The idea of having several wireless modules on board is simply to talk with your surrounding. So the keyboard is figuratively-speaking would become the key to control your world. I really like the idea of the key in having an ability to manipulate the surrounding is underneath the palm of your hands. So In the first iteration of the design, I added three commonly used wireless modules; WIFI, Bluetooth 4.0 and growingly popular LORA module. For WIFI I picked eoples favorite ESP8266-03 for obvious reason, then for Bluetooth 4.0 is HM-11 because I've used it before and quite cheap, and the LORA I decided to use DRF1278F which based on SX1278.
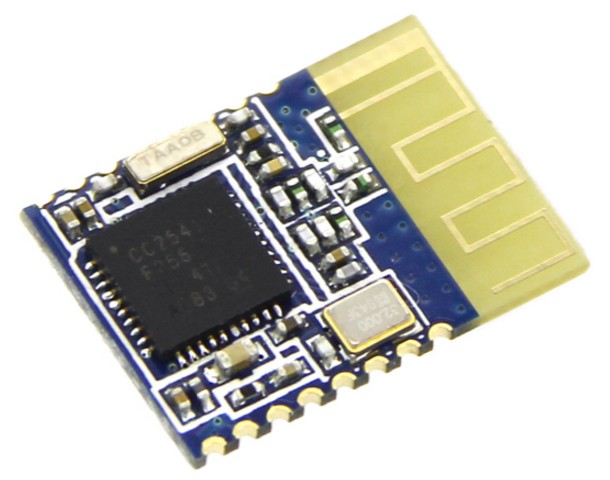
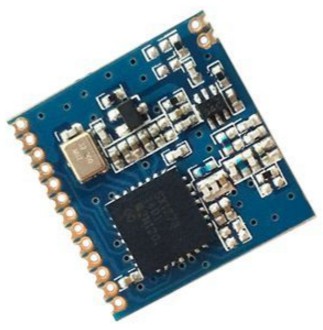
Some sort of display can come handy right?
That's actually the last thing that I decided to add in this design actually. By default, it can actually indicates some status through the array of WS2812b LED, but well it might be difficult if you want to display some texts on board. Commonly available 128x32 OLED display I then added to the design. the fact the it can be elevated allows some space underneath for a module if required.
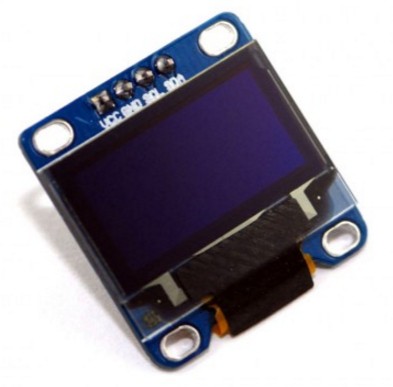
Having all that in mind, I was quite confident to start making a PCB library for all of those and start sketching the Schematic and PCB layout. And lastly you might have wondered, why I decided to use too many modules instead of buying the bare chip as I am going to design the PCB anyway? The reason is simple, development time and cost. Using modules you mostly only care about the input and output, though the downside if often the cost if you produce in high volume. But actually for making proof-of-concept for couple of units or so, buying modules is cheaper, lot less development time and is proven to work. Might be in the next iteration I will demodulate all the module based components and use bare chip instead to save some space or to allow some more design flexibility. We'll see.
 Pamungkas Sumasta
Discussions
Become a Hackaday.io Member
Create an account to leave a comment. Already have an account? Log In.