 kodera2t
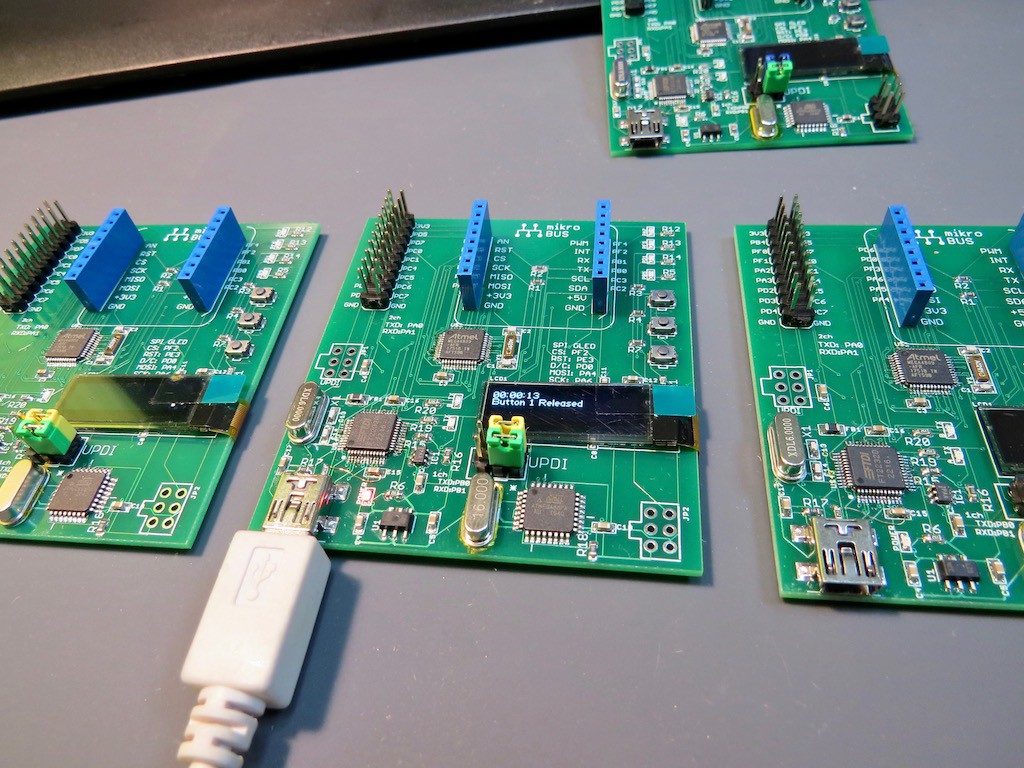
As presented, now the ULTRA 4809 Explorer is available at tindie. By the UART-UPDI function with avrdude, LED blinky test is super-easy! Here I would explain how to.
Before starting, you will need to install
- Atmel Studio (latest one)
and
- Arduino IDE
Arduino IDE should be installed in order to get avrdude.
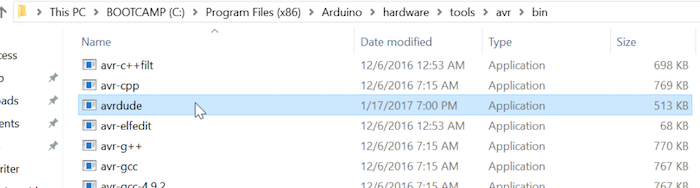
First of all, please find "avrdude" in Arduino IDE and copy it (not move it, otherwise Arduino IDE will not work anymore) to some working directory. (in this case, I made it on desktop named "4809writer".

In the working directory, we also need "avrdude.conf", which is available at ELTangas's jtag2updi repository.

Now let's start new project at Atmel Studio..!
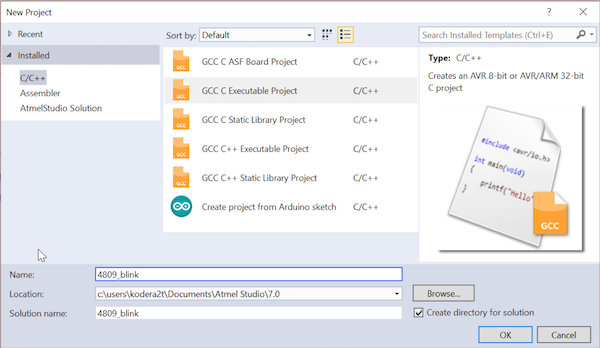
And simply select GCC C executable and name it some wonderful name (in this case, simply 4809_blink..)
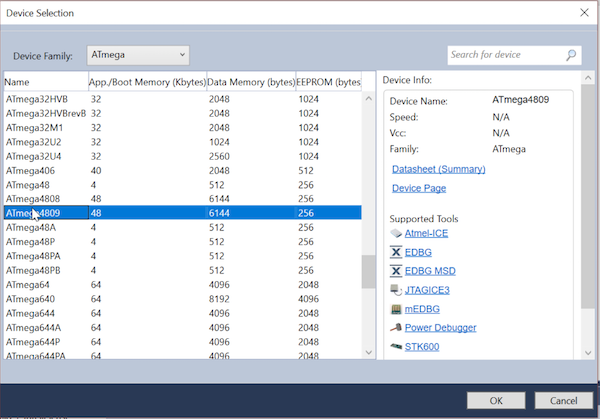
, and select proper device, YES ATmega4809 !! (if not appears, your Atmel Studio is older version. Please update to the latest one.)
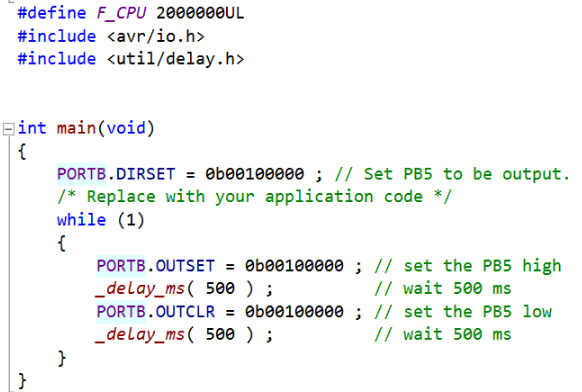
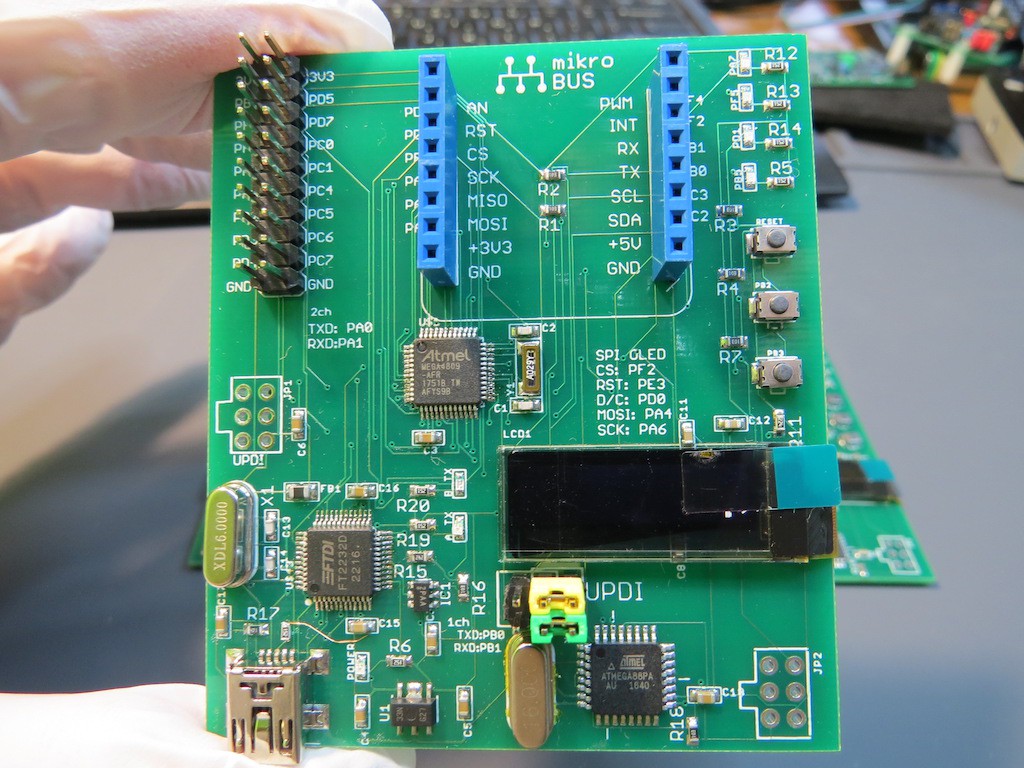
And Let's write short program for PB5 LED blink. The notation is the same as Xmega.
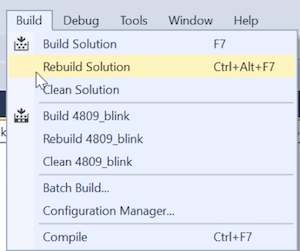
And select "Rebuild Solution"
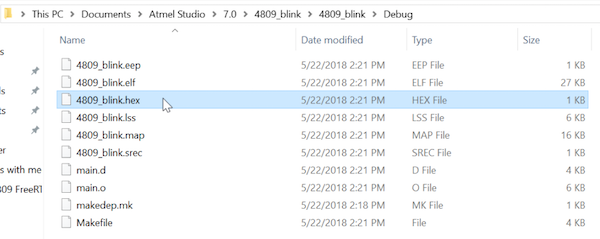
If compile and link are succeeded, .hex file will be produced in the project/Debug directory. Just copy the hex file to your working directory (containing avrdude).
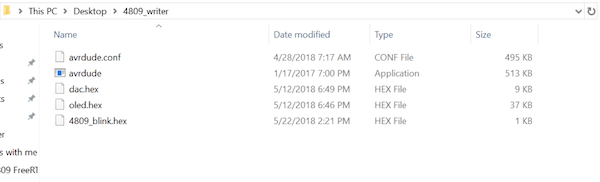
As you see, please put your hex file init (where dac.hex and oled.hex are different project ones, please ignore it.)
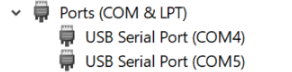
Now please connect USB cable between your ULTRA 4809 Explorer board and computer, then check system recognition at device manager. This special board has 2ch UART and smaller number port (in this case, COM4) is connected to UPDI converter.

Now the time to binary uploading. Just command it, the LED connected to PB5 will blink as you wish
Discussions
Become a Hackaday.io Member
Create an account to leave a comment. Already have an account? Log In.