I'm not a big fan of having the cooling fan for my hot end running all the time, or having the LEDs on my hot end running all the time, I also wanted to add a cooling fan to my control board inside the printer, but I did not want to have that fan running all the time either. Other printers solve these issues by using software controlled outputs to turn these various peripheral devices on and off only when the printer is printing. I wanted to do something similar, but because the firmware of the printer is closed source and there are no extra outputs on the board to use for this purpose, I had to add this function the old fashioned way: with a circuit hack.
The general principle for this hack is to tap into the heater power and use the operation of the heater in the hot end to turn on and off the fans and LEDs. This is not nearly as simple as tapping into the heater power and using it to operate everything, since the heater is controlled by the software and it is pulsed on and off for various time periods to simulate an analog signal. By varying the amount of time the heater is on over a specific time period, a more precisely controlled temperature is achieved. For example, if you turn the heater on for 1 second out of every 10 seconds of elapsed time, the heater would be getting 10% of the energy it would get if it was on constantly. Therefore, the heater would be about 10% as hot. This pulsing of a digital value to simulate an analog value is called "Pulse Width Modulation" or PWM for short. This prevents us from using the heater control directly to control our fans and LEDs because they would be pulsing on and off as the controller tries to regulate the temperature of the hot end.
The solution to this issue is to create a circuit that is essentially a delay timer that will start counting when the heater is pulsed, and stops counting when some time has elapsed without activity on the heater. This is certainly a trivial thing to do with an Arduino, but we're going to do this the old fashioned way, with whatever scrap parts we have in the lab. Here is our circuit:
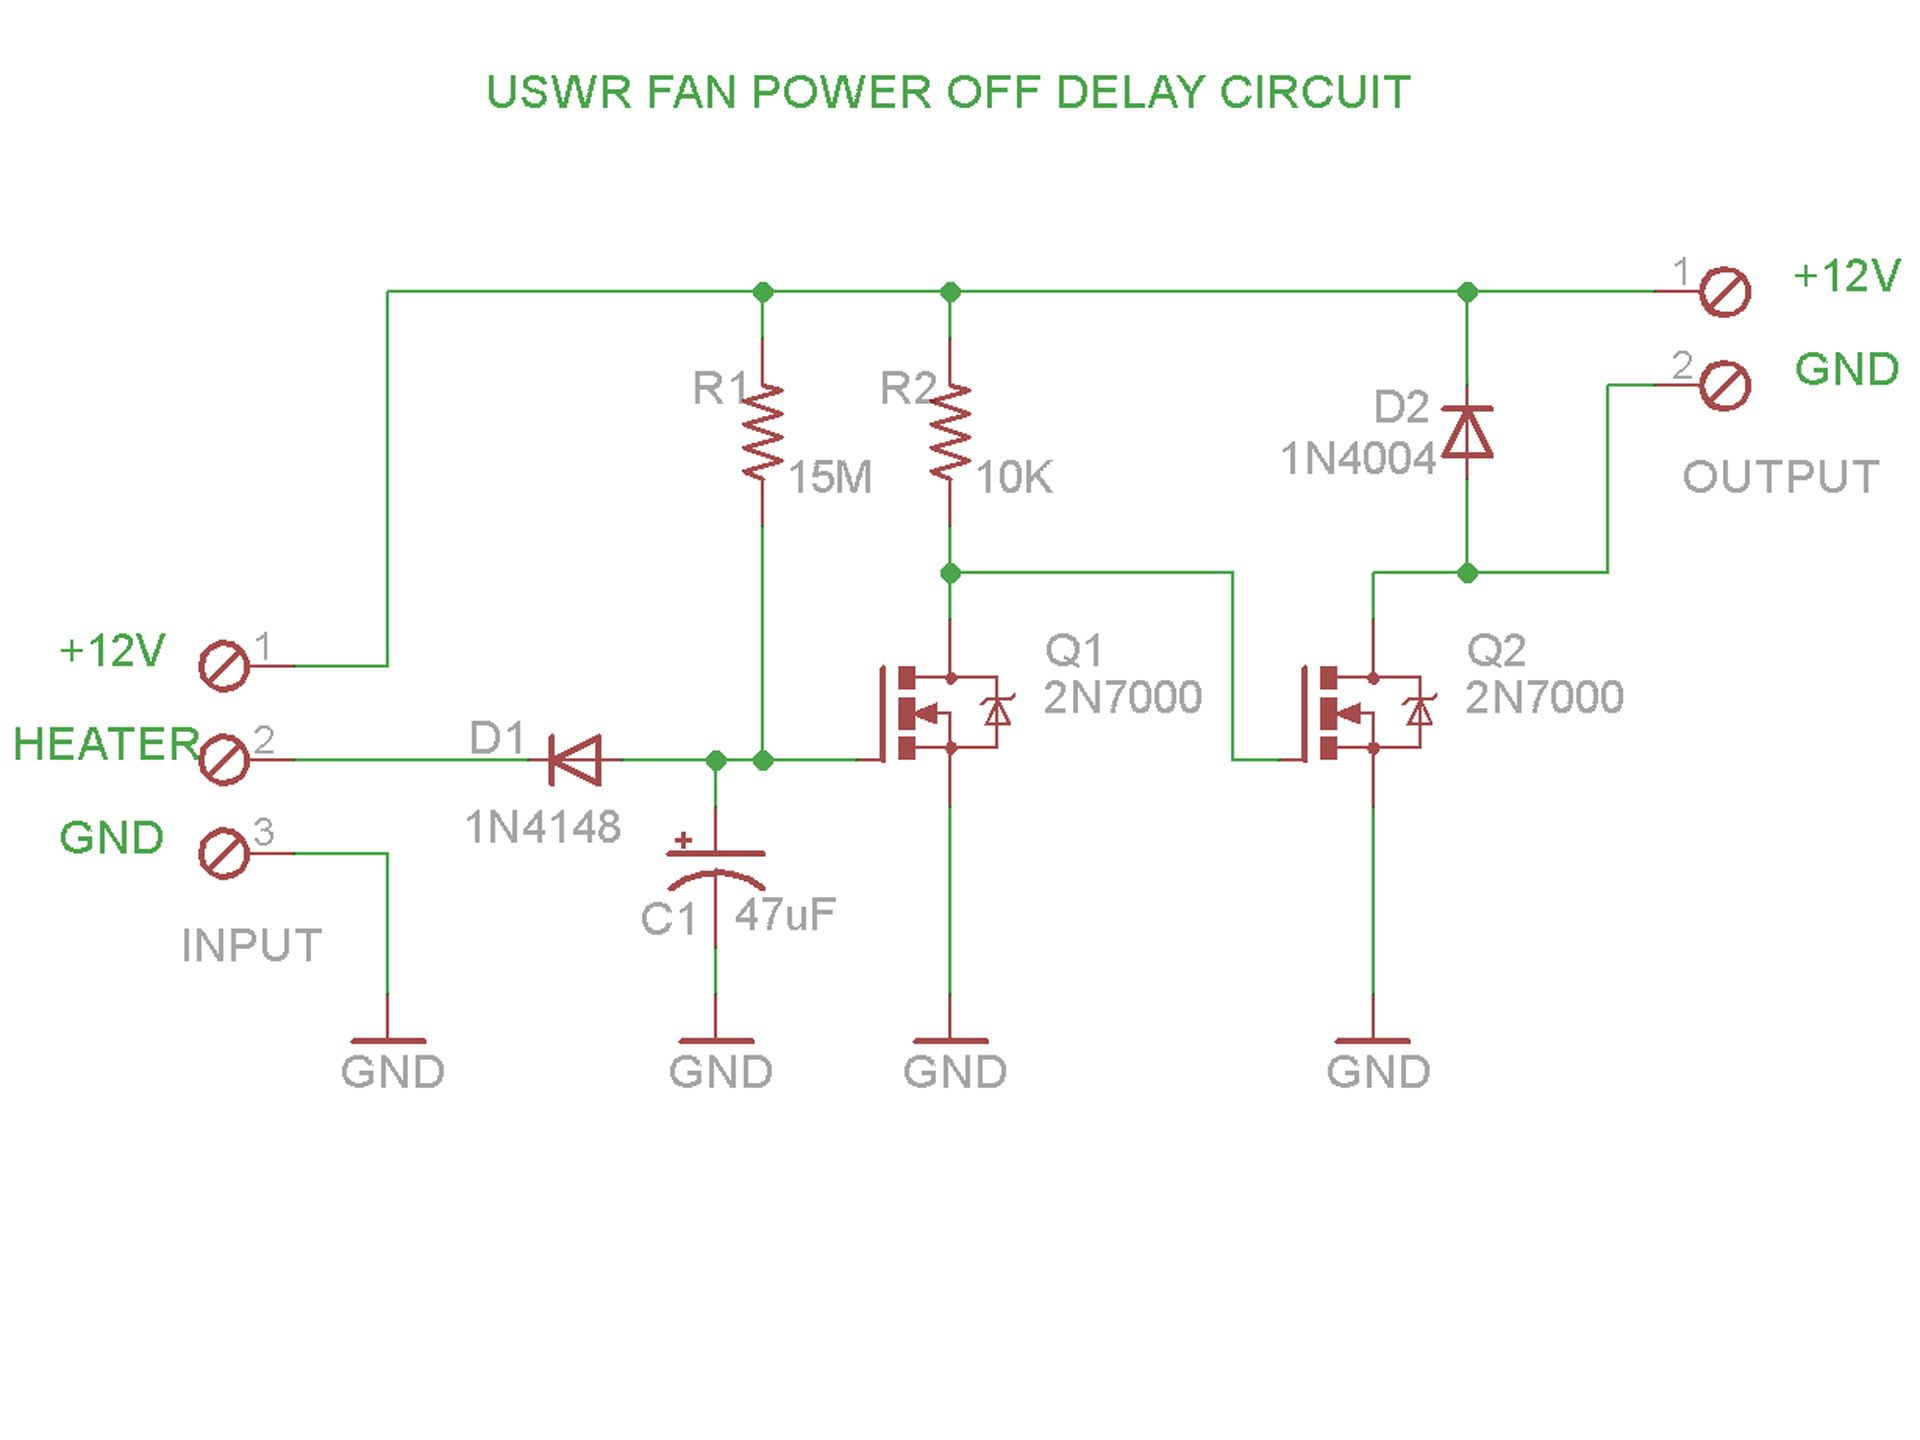 The operation of the circuit is quite simple: 12V is provided to the heater and the ground for the heater is connected by a FET on the control board, when the heater is turned on. We use this signal to monitor for the heater activity.
When the HEATER signal is grounded (heater is ON), Capacitor C1 is discharged through Diode D1. This causes FET Q1 to turn OFF. This FET will stay off as long as HEATER is grounded. If HEATER is not grounded (the heater is pulsed OFF or shut down) then Capacitor C1 is charged very slowly through 15M resistor R1. Eventually, C1 reaches a point where it has charged enough to turn on FET Q1.
What we have in the circuit right now is that Q1 turns off when the heater is pulsed by the control board at least one time, and it stays off for about 2.5 minutes if the heater does not get pulsed again for that time. This is almost what we want. We really want the opposite logic. To fix this, we add a second FET connected to the drain of Q1 and configured as an inverter. 10K resistor R2 is connected to the gate of FET Q2 so when Q1 is on, it is pulling the gate of Q2 low and turning Q2 off. When Q1 is off, R2 pulls the gate of Q2 high, and turns it on.
Diode D1 is present to prevent leakage from the control board from charging C1 faster than we want, and diode D2 is present as a snubbing diode in case we power an inductive load with this circuit. D2 prevents the backflow of current when and load is shut off from damaging our circuit.
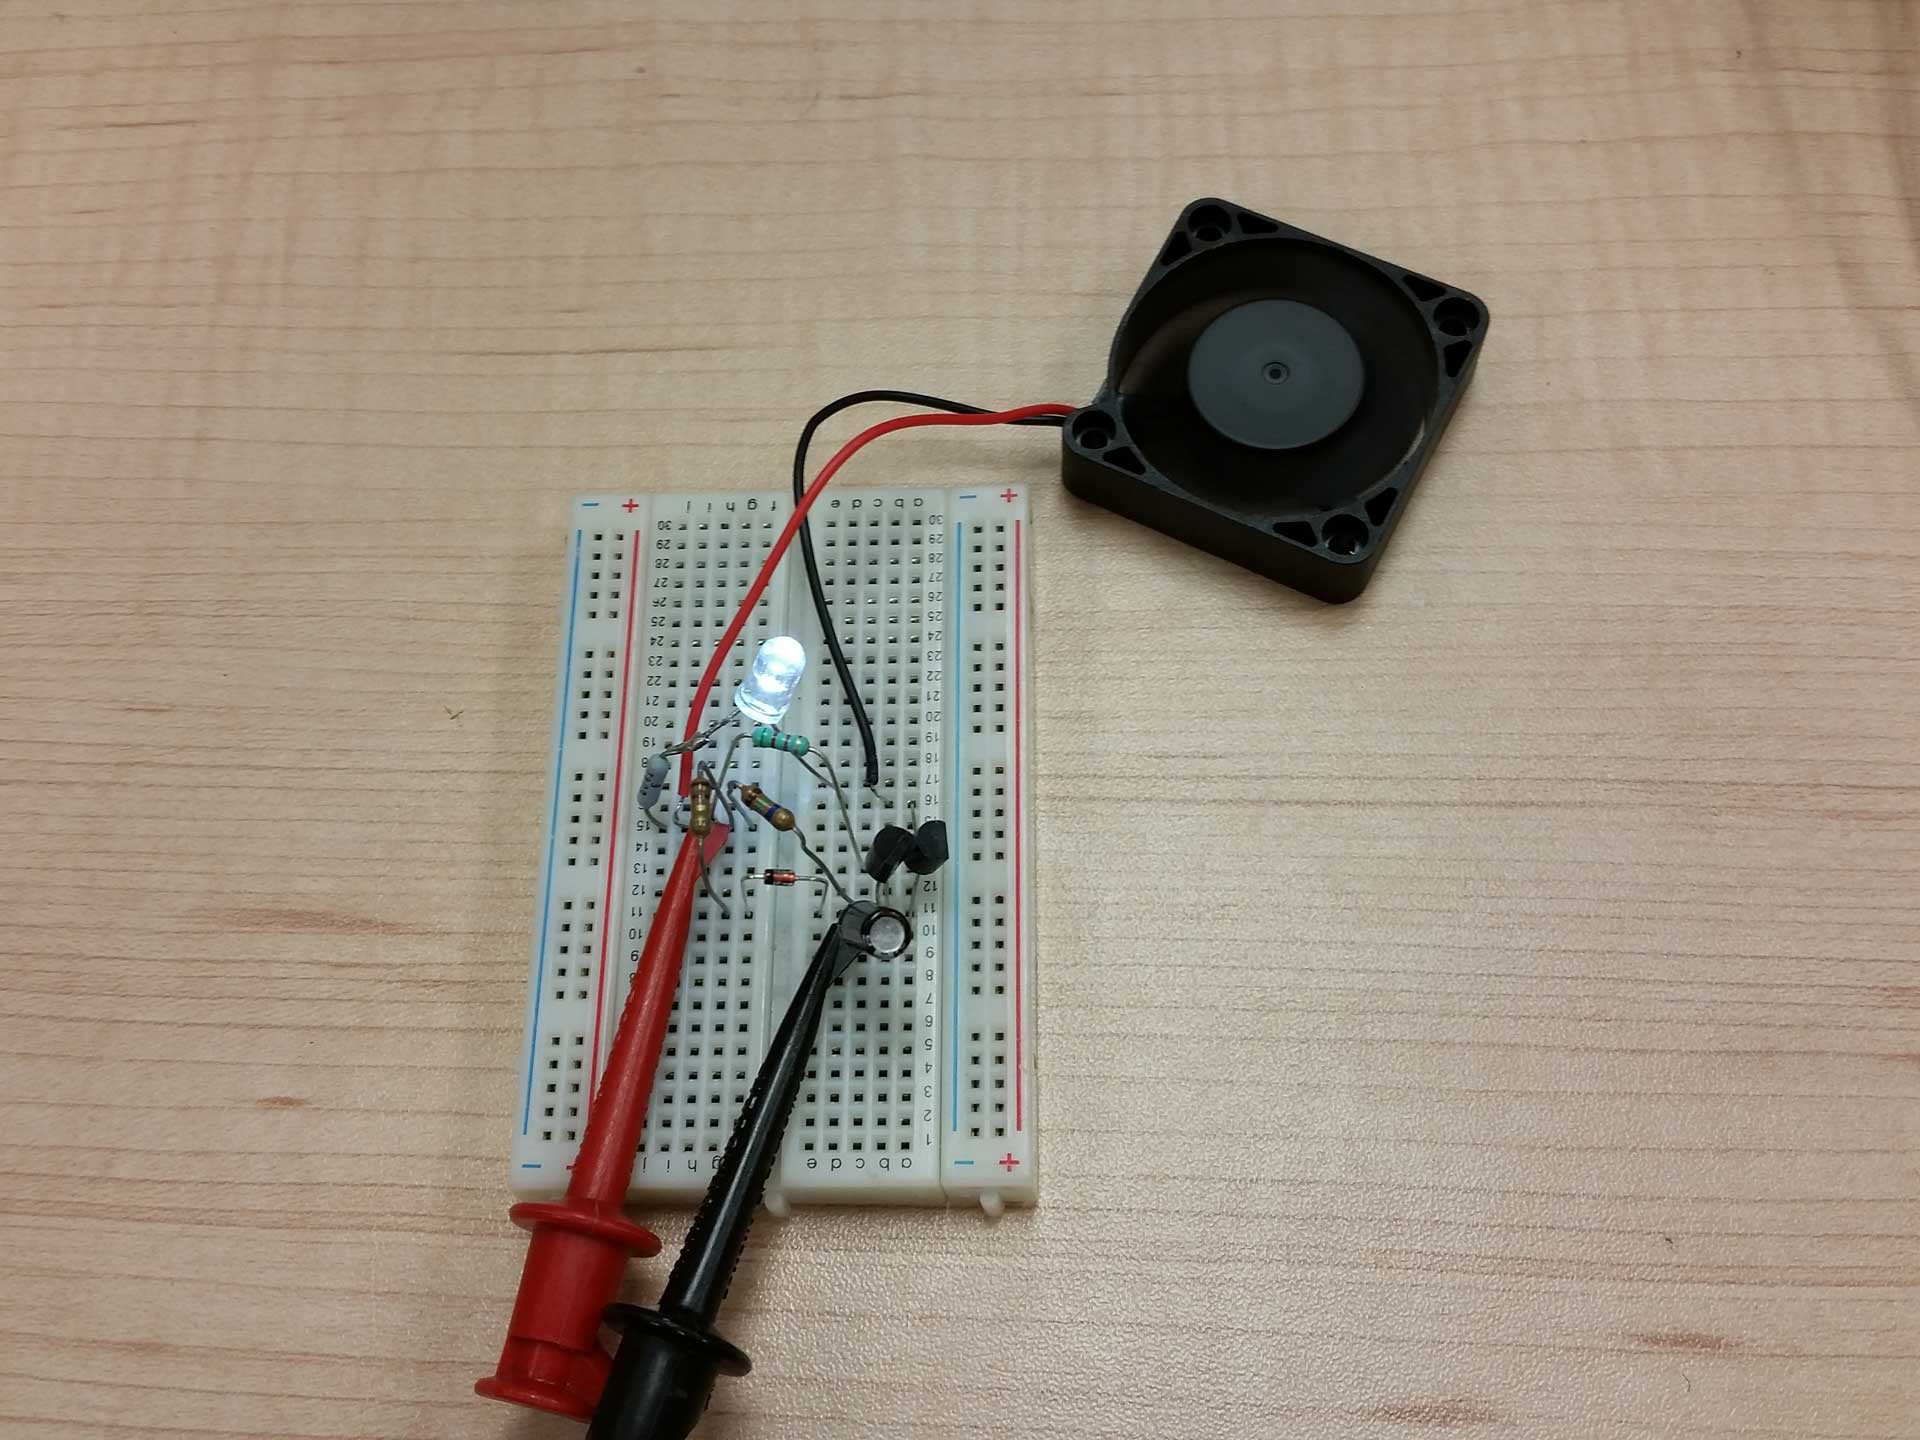 The circuit was mocked up and tested on a breadboard kit, using through-hole parts I had not touched in a few years. It was fun going back and doing this for a change.
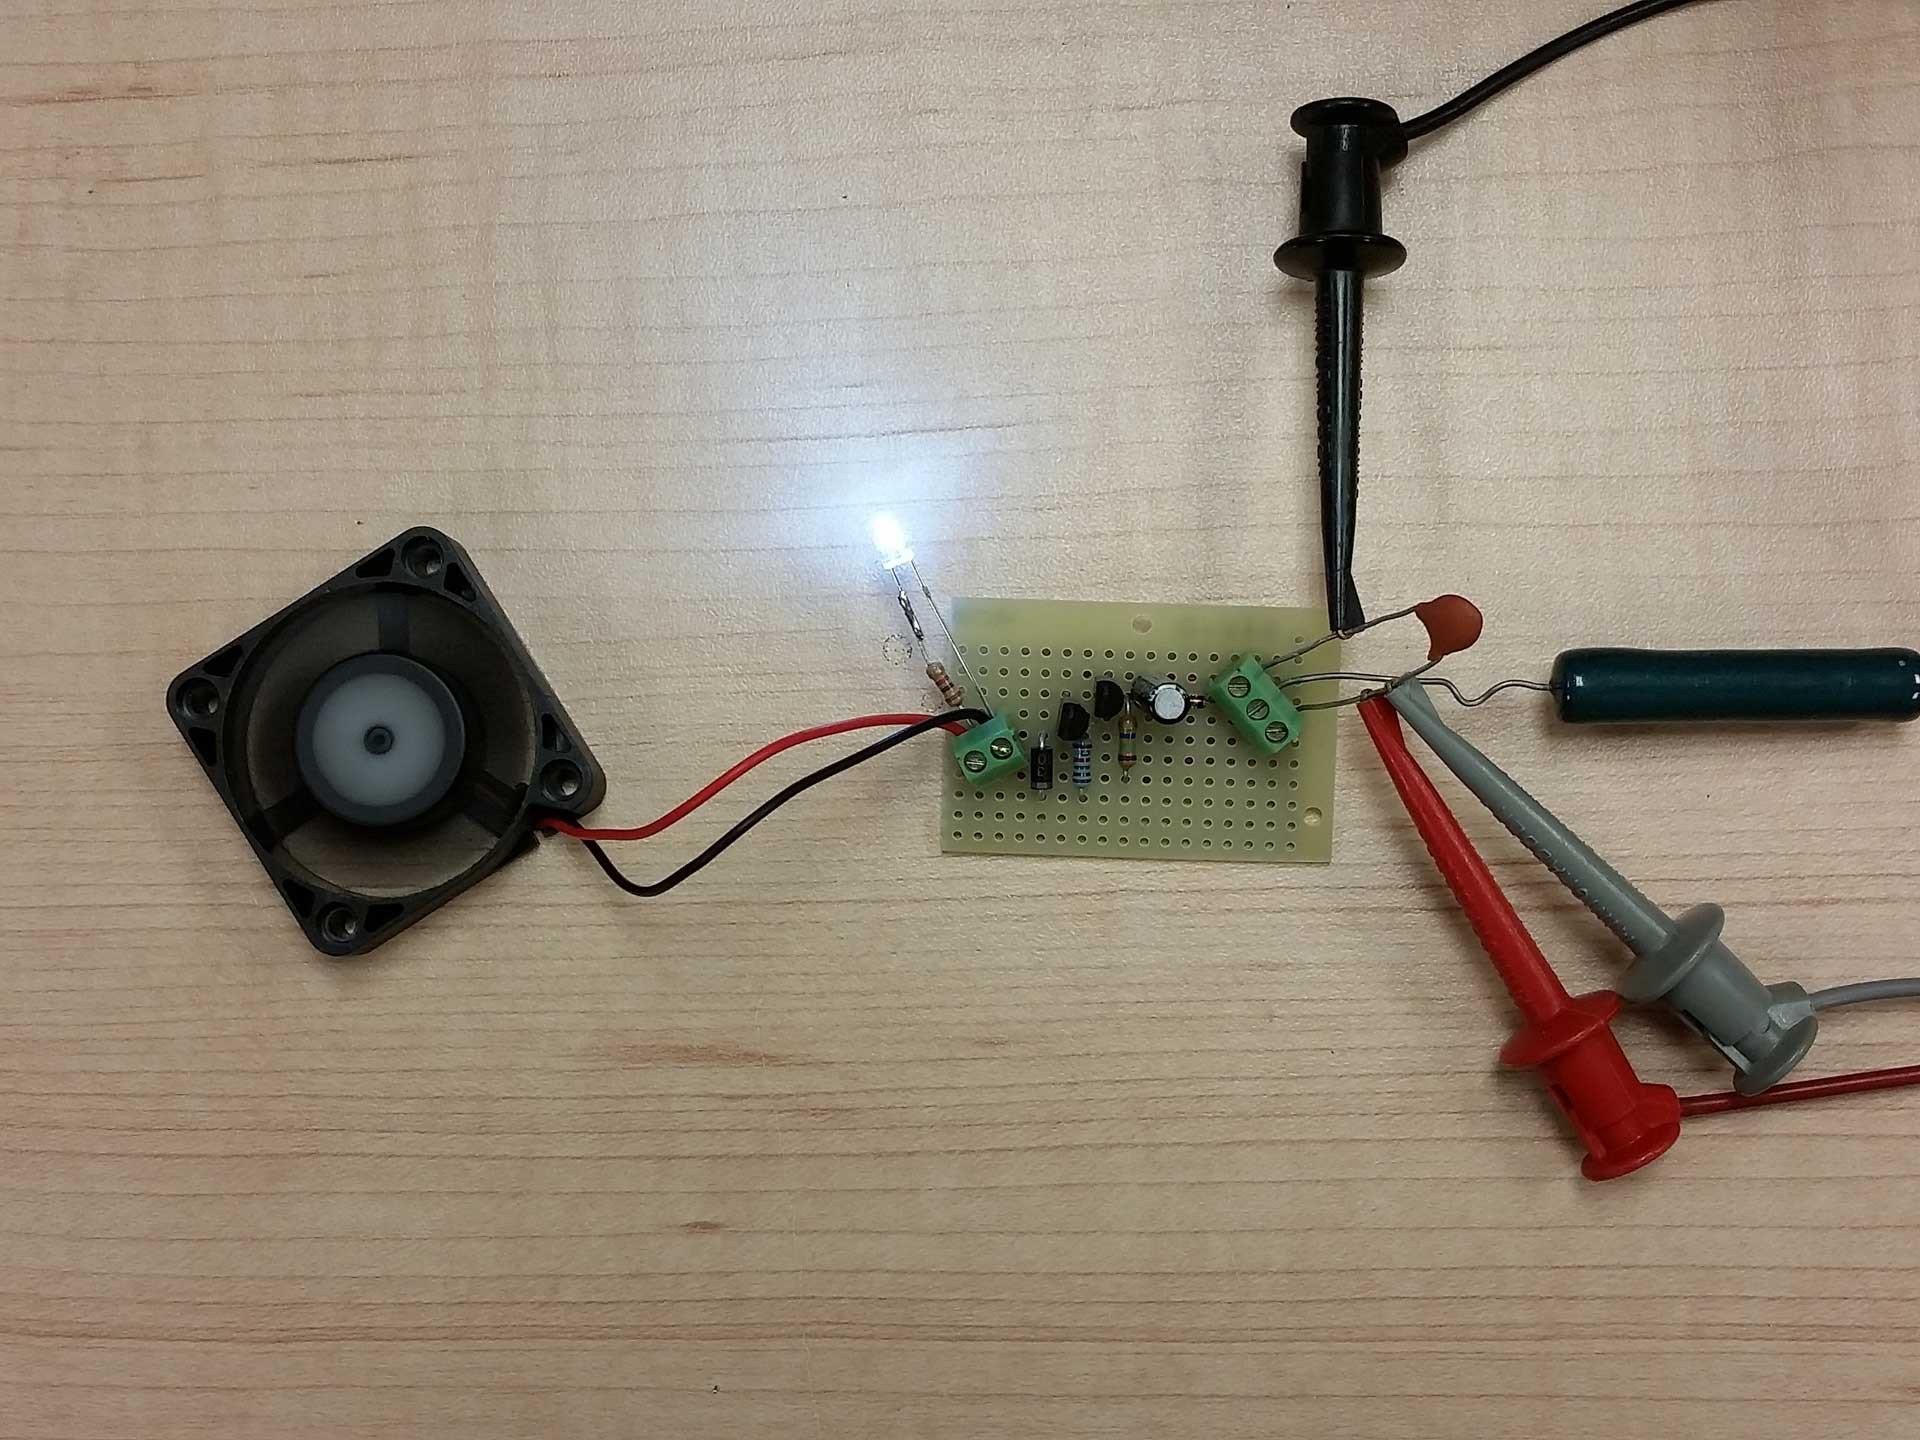 The circuit was then transplanted to some perf board for installation in my Select Mini. Above you can see where I used an old wire wound 10 ohm resistor to simulate the heater. Grounding the center terminal on the right simulates the pulsing of the heater ground on the Mini. Another thing you may notice is the small capacitor on the + and - power terminals. This has nothing to do with the circuit itself. It's just a neat trick that a very smart guy told me many years ago. The purpose of the capacitor is to provide a place to clip test leads on the power screw terminals. Instead of sticking paper clips or wires into the screw terminals, you insert a capacitor (of sufficient voltage rating for the supply). The trick is that the capacitor doesn't affect the circuit but provides a good place to clip the test leads and the body of the capacitor prevents the leads from moving around and shorting together as you handle the circuit. I always loved this trick.
In the video clip below, you can see the circuit in operation.
If you view the video, you can see where I simulate a single pulse on the heater, and the LED and fan run for 2.5 minutes and then shut off. I chose the lengthy delay because I wanted to insure that when the printer finished a print, the cooling fan would continue to run for a long enough time period to allow the nozzle to cool off. I chose 2,5 minutes based on how fast the stock hot end cooled.
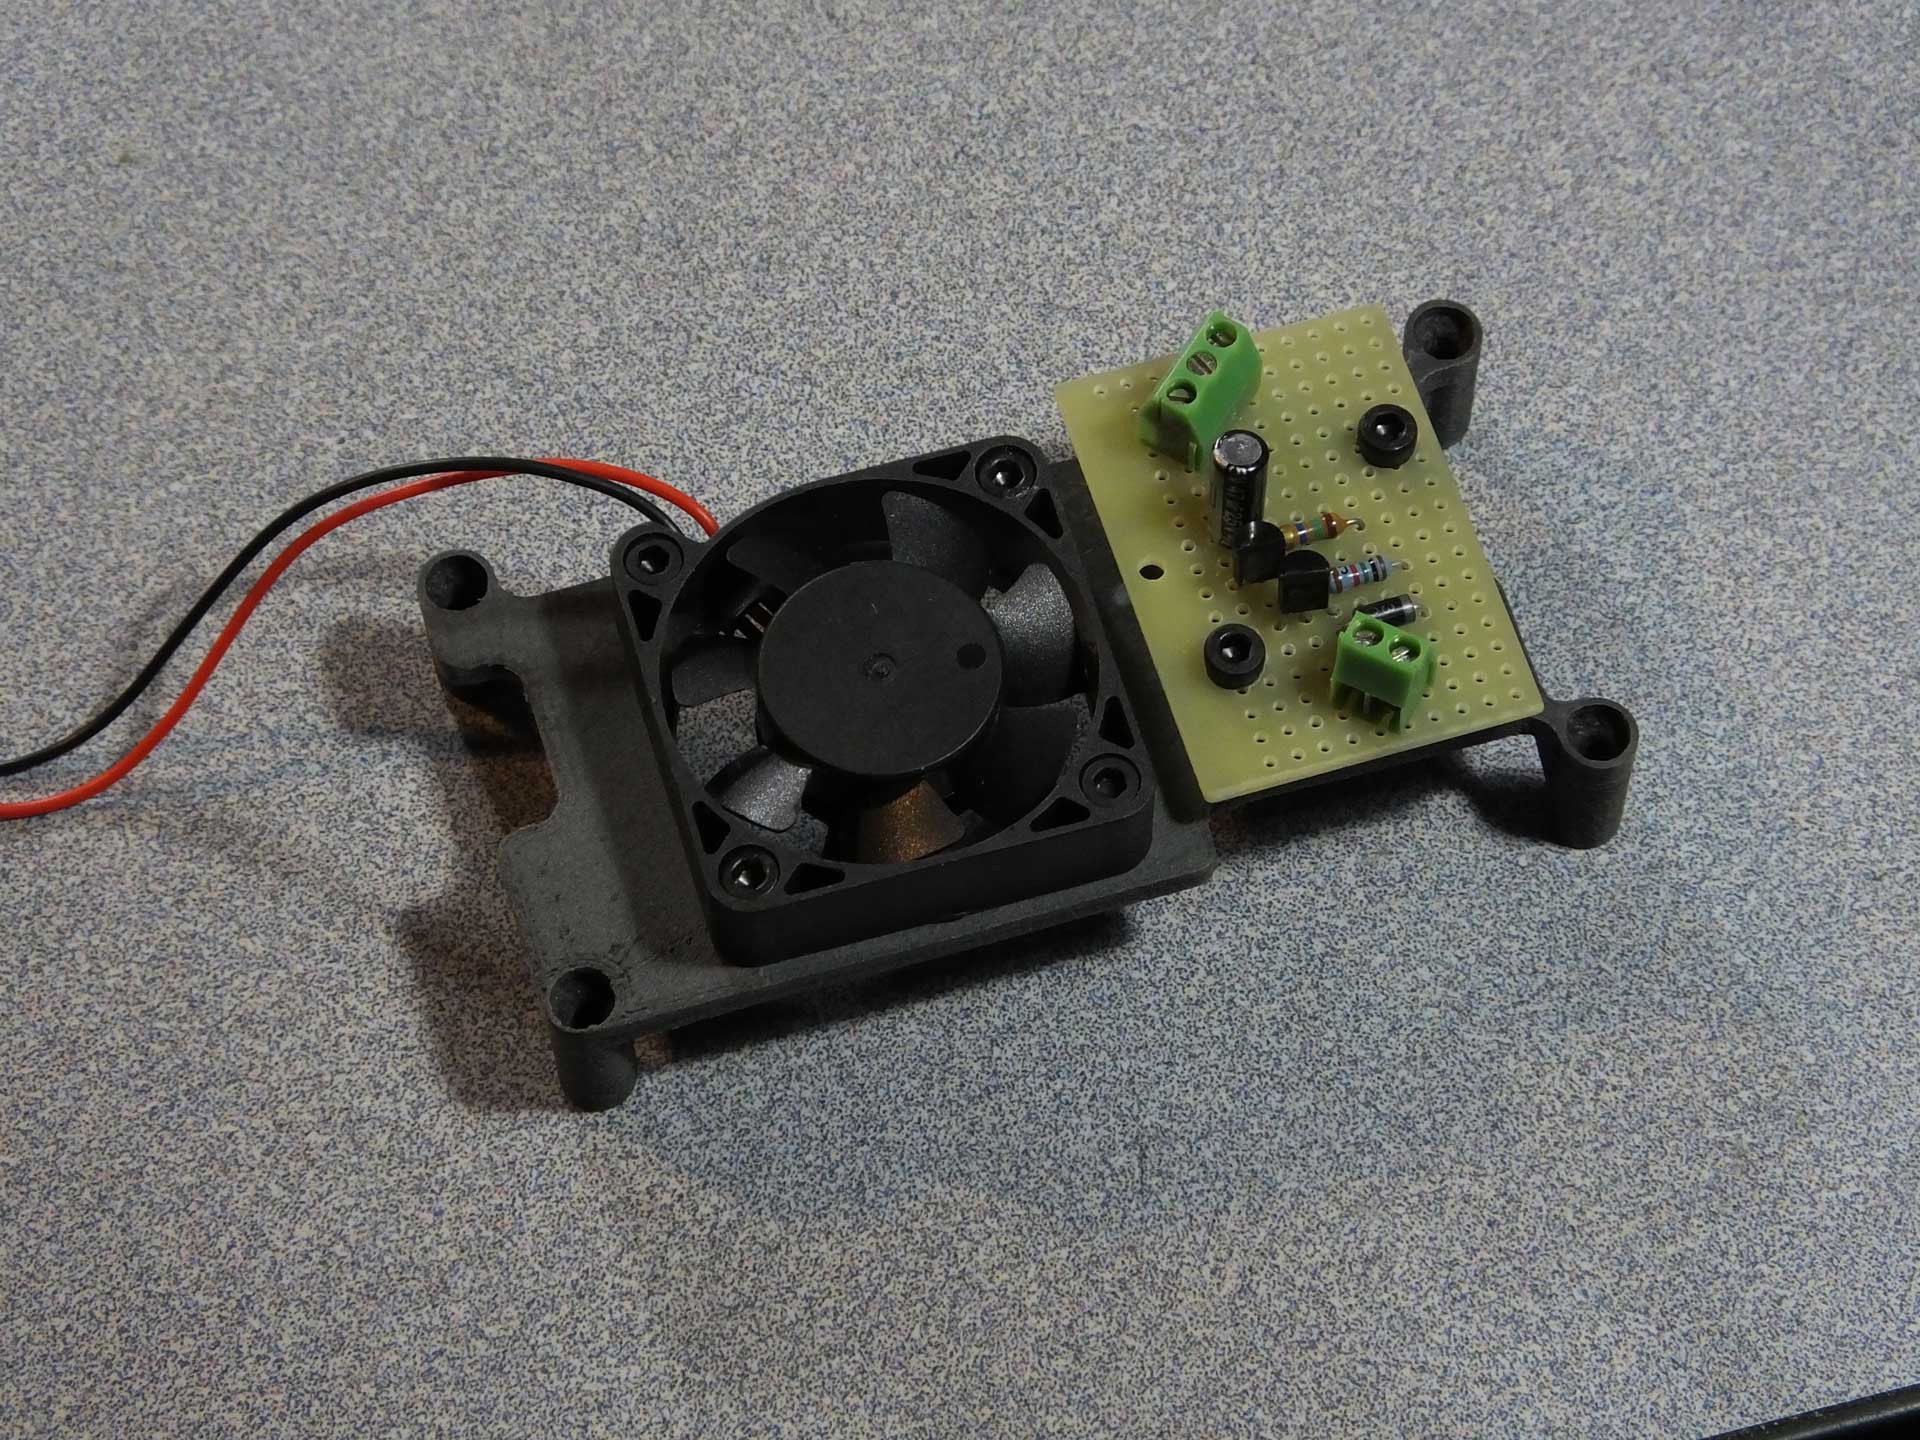
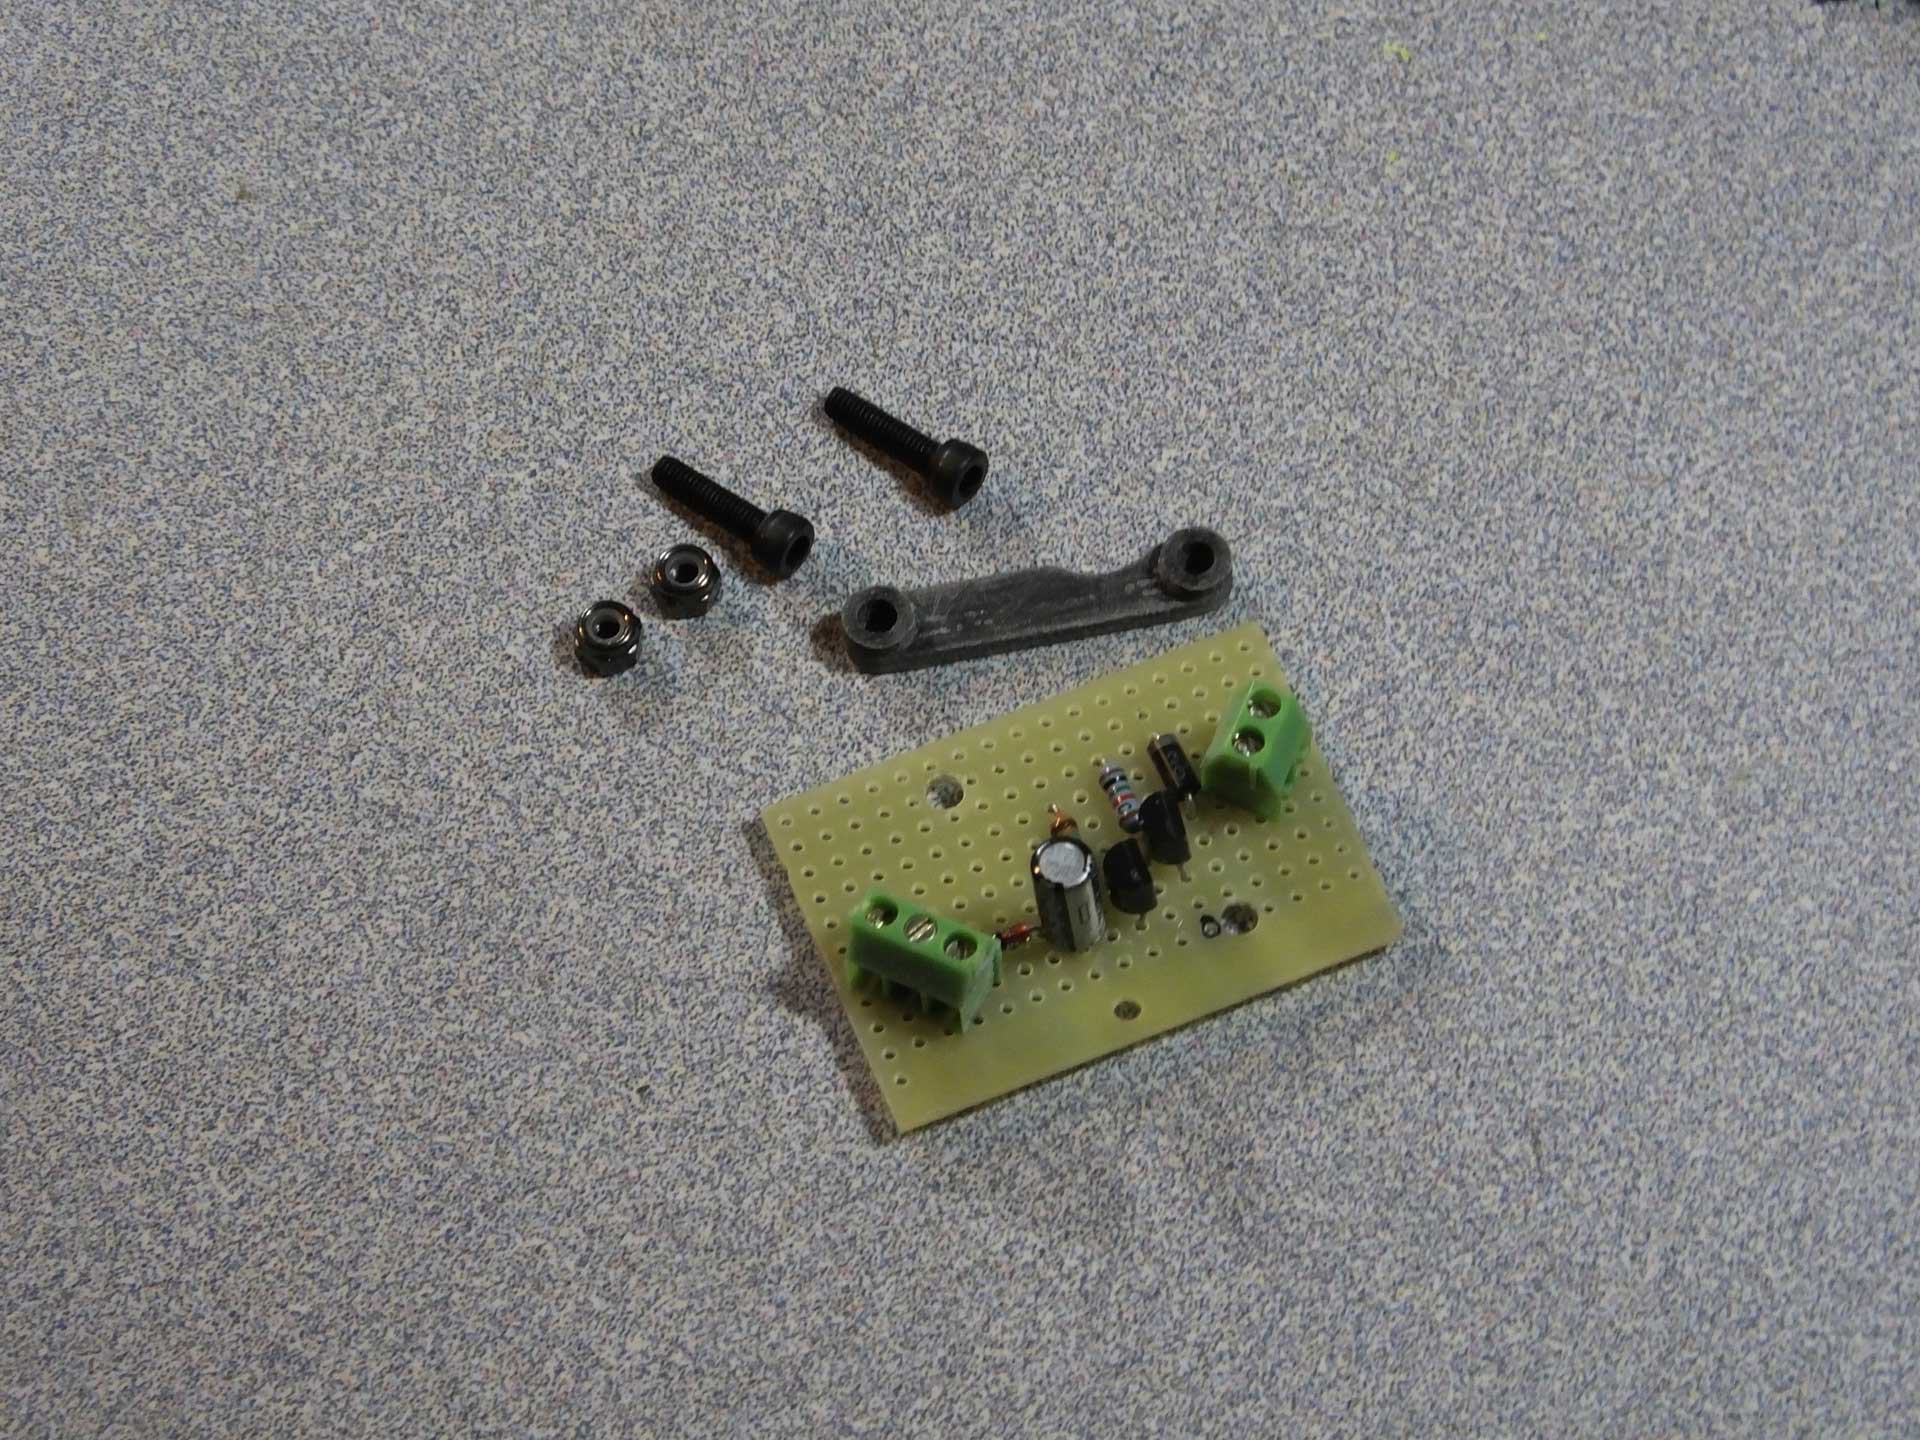 I printed a small support bracket for the PCB I made, which was designed to fit on the top of the 40mm cooling fan bracket which I designed for the control board inside the printer. The object files for these printed parts is located on our Thingiverse page. You can get them here: http://www.thingiverse.com/thing:1867169
The cooling fan bracket can be used without the additional circuit, if all you want to do is add an internal fan to your Mini. You can see the completed cooling fan and circuit board assembly in the image below.
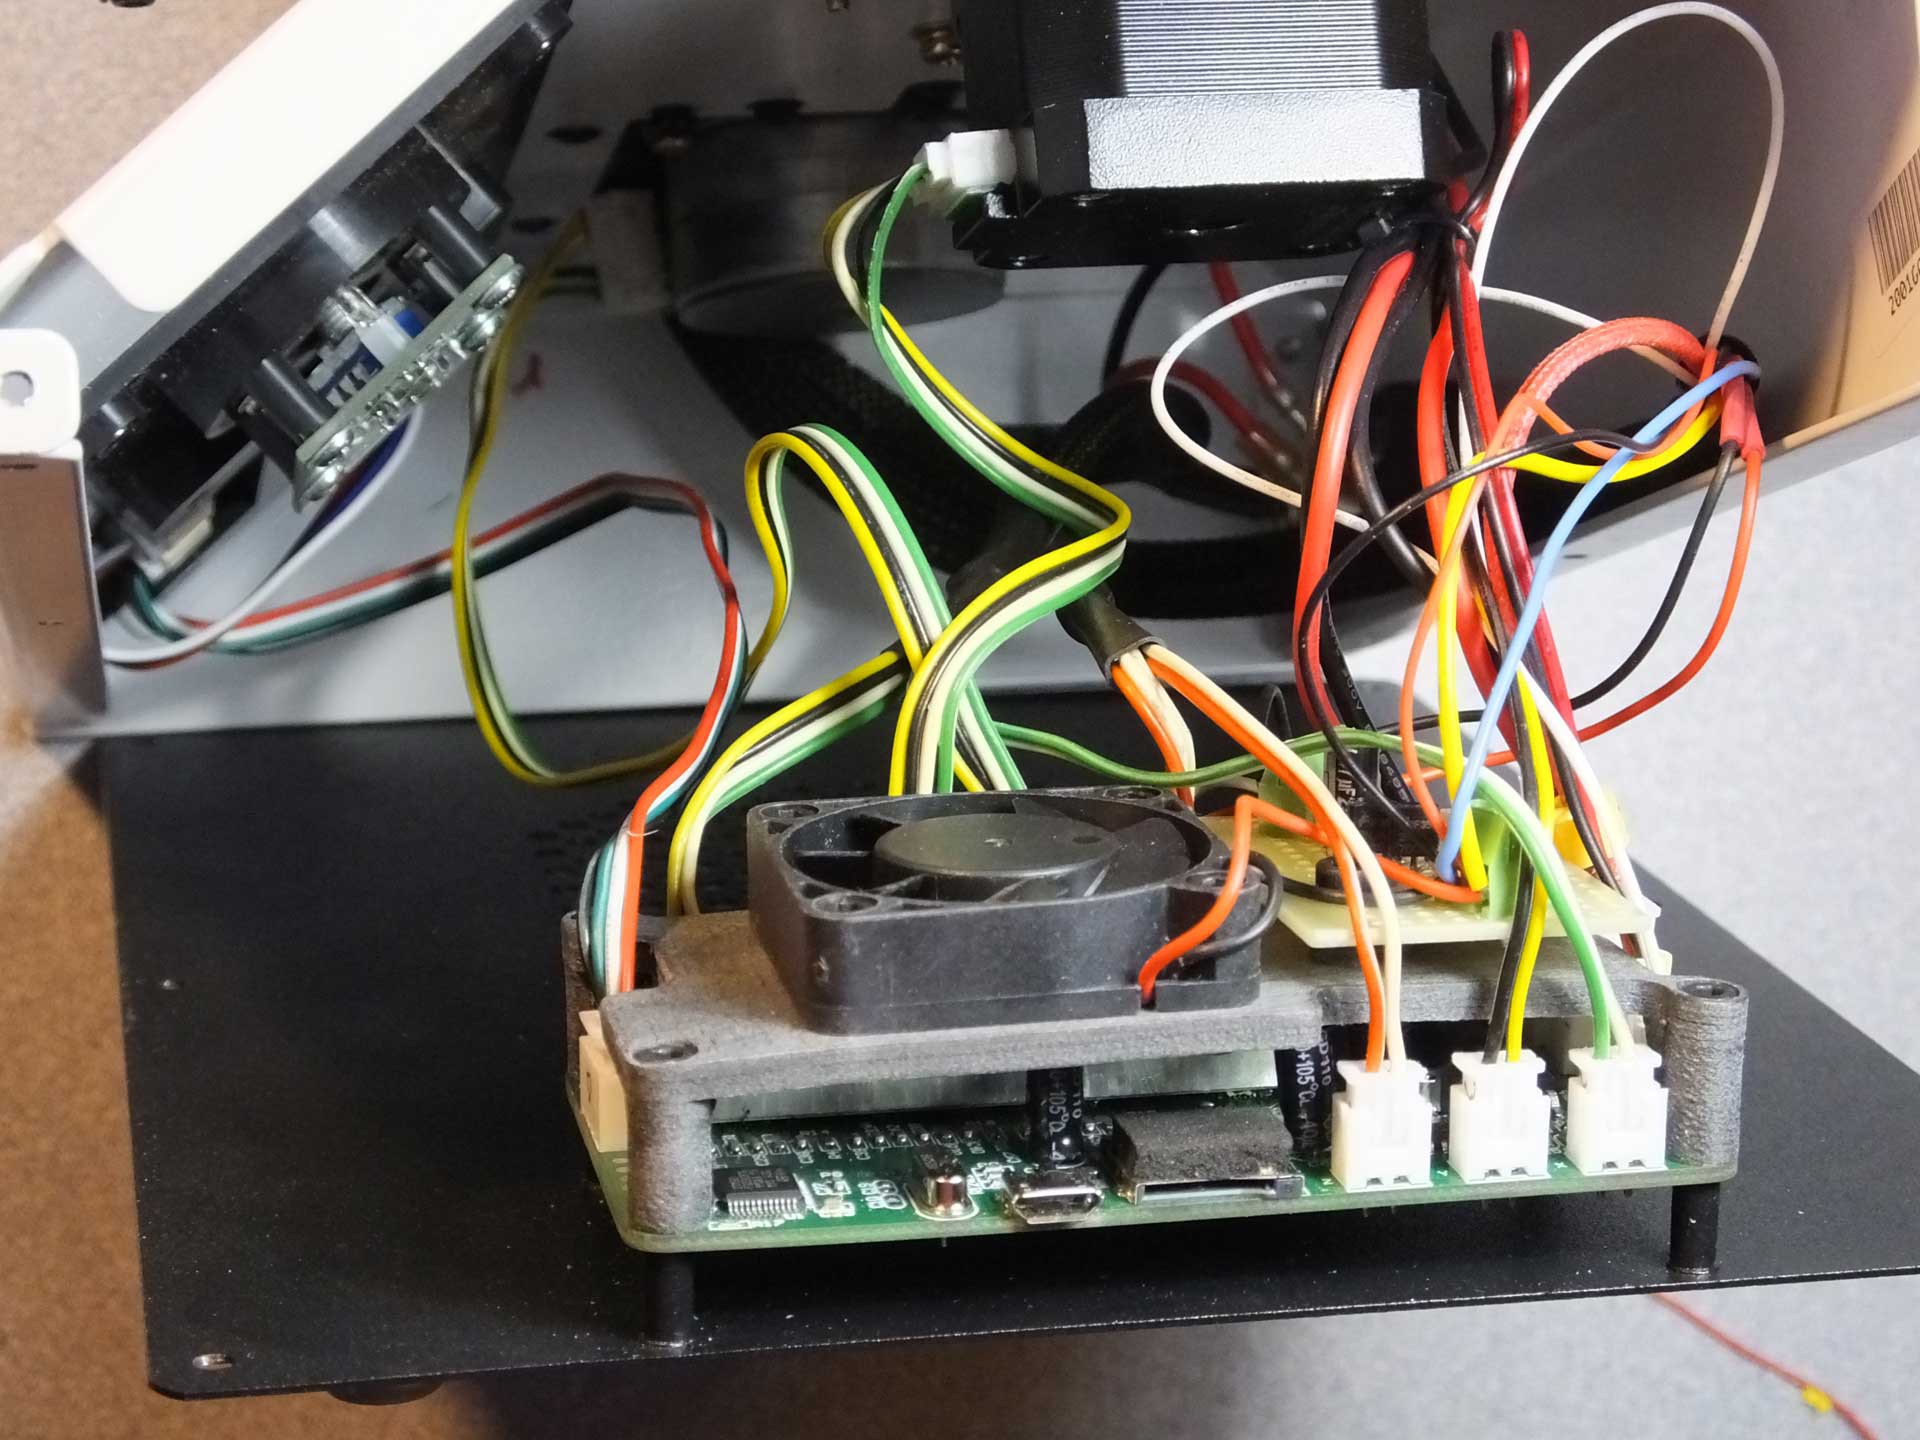 I did have to tap into the 12V power and the HEATER control signal coming from the control board, but I accomplished this by soldering some short wires to the underside of the control board to pick up the signals.
So far the board has worked flawlessly for over 100 hours of printing. I'm very pleased with the way it turned out. This mod literally cost me nothing because I had everything laying around, but as far as I can tell, the whole thing could be made for $3 or $4, depending on how much you want to spend on the fan.
Of course, you can just use the fan bracket to hold a fan that runs when the printer is on and not worry about the timing circuit. I just happen to have a thing for constantly running cooling fans, and took this design as a challenge.
Enjoy!
 U.S. Water Rockets
Discussions
Become a Hackaday.io Member
Create an account to leave a comment. Already have an account? Log In.
Elegantly simple, I love it. I've been trying, unsuccessfully to turn the fan off after cooling using gcode. This looks like a fail-safe method
Are you sure? yes | no
It's been noted that if you turn the fan off completely that it'll turn back on, but if you set it to 1%, or say 1 of 255, that it'll still turn off but since the firmware still thinks its on, it will not turn it back to 100%
Are you sure? yes | no
Very nice. Granted a fixed timeframe you did thought the RC combo, but if you use a PTC thermistor in place of R1 and run R1 to the hotend, you could have this turn off everything once the hotend has cooled down, no? And if you wired 2 PTCs in series, one for the hotend and the other for then bed, it wouldn't turn the lights or fans off until both are cooled, theoretically.
Are you sure? yes | no