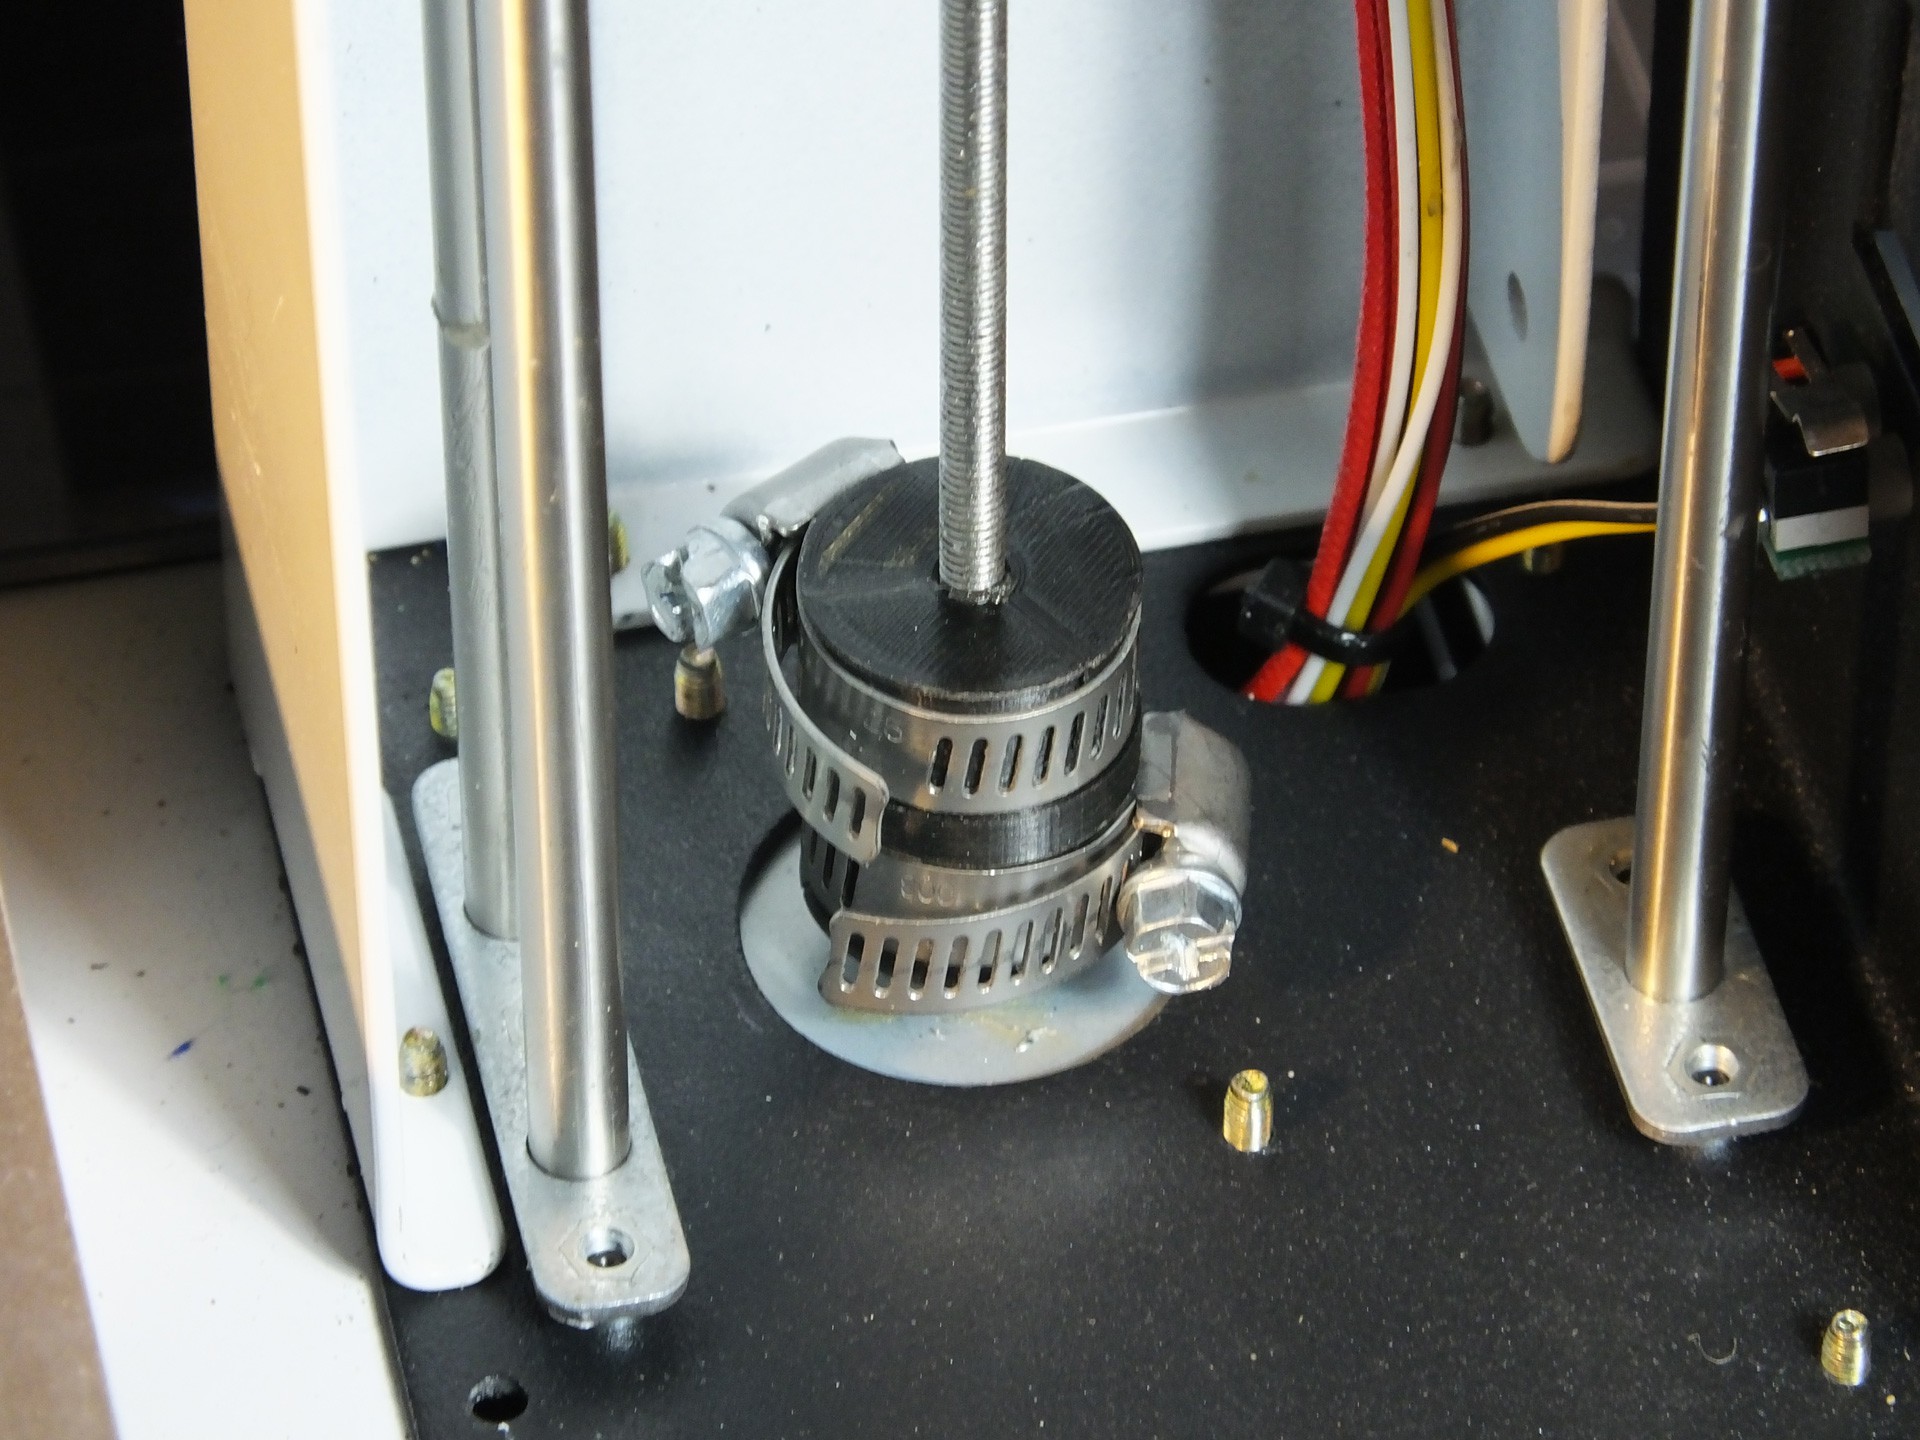
 Several people in the Facebook Group for the Monoprice Select Mini have experienced severe issues with wobble in their Z-axis that is not cured by stabilizing the rails. I have seen several people who have observed that their print quality suffers because the stock coupler between the Z-Axis Stepper Motor and the Threaded Rod is not aligning the two shafts properly, or the grub screw is shifting the rod to one side. I decided to make a replacement for the coupler that forces the threaded rod into perfect alignment with the motor shaft. Get the file on my Thingiverse page: http://www.thingiverse.com/thing:2038369
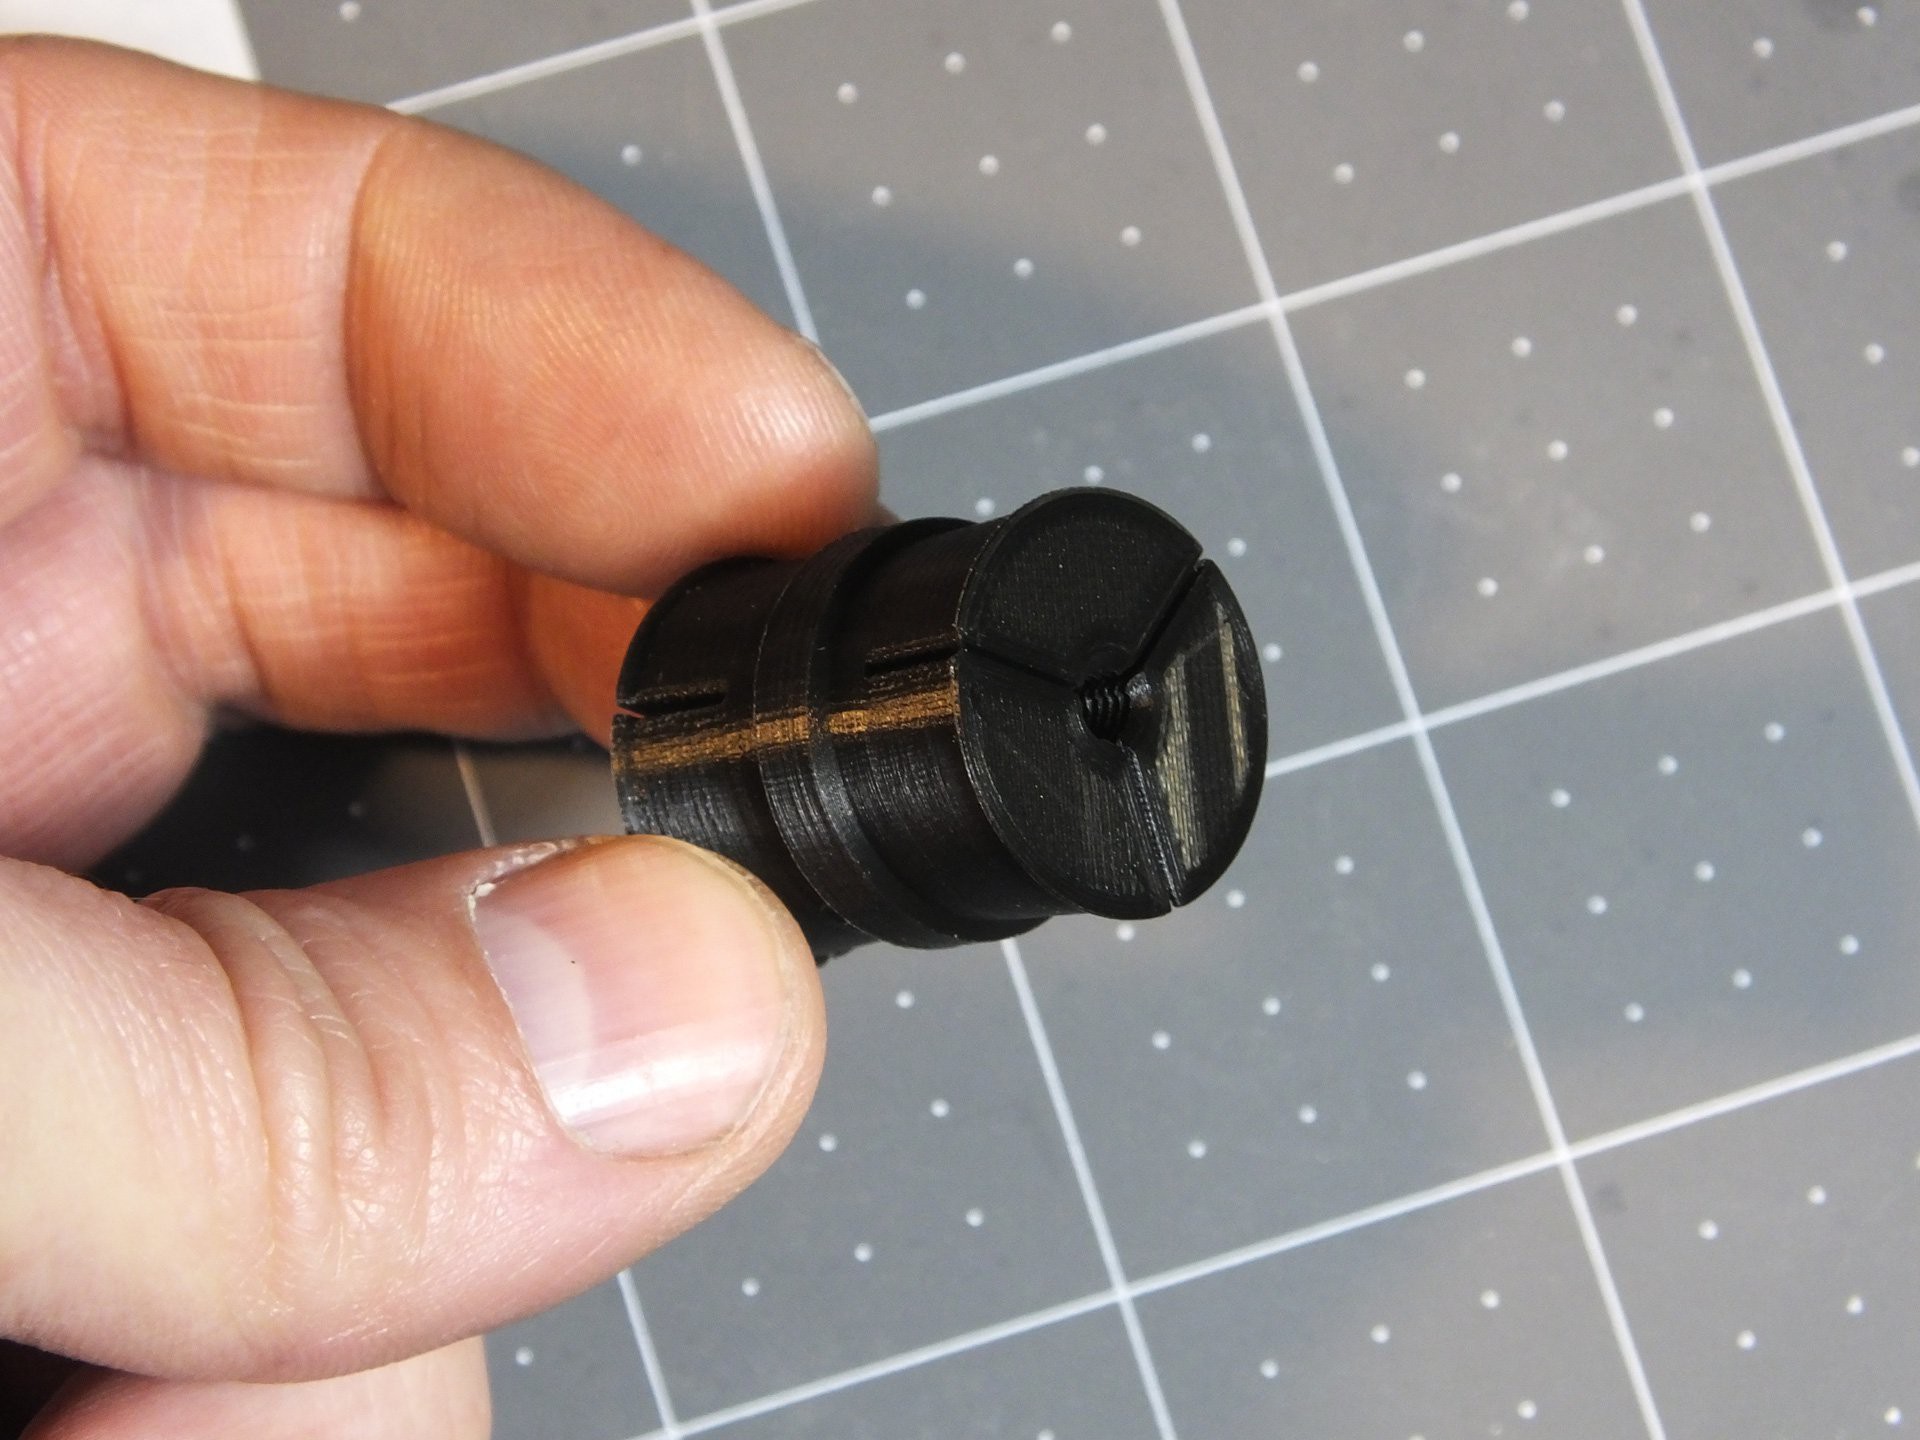 Here is the coupler which I designed. On one side it has threads for the 4mmx0.7 Threaded Rod, and the other side has a hole to accept the 3mm Motor Shaft. Three clamping surfaces per side will be used to hold the coupler firmly in place and force the two shafts into perfect alignment.
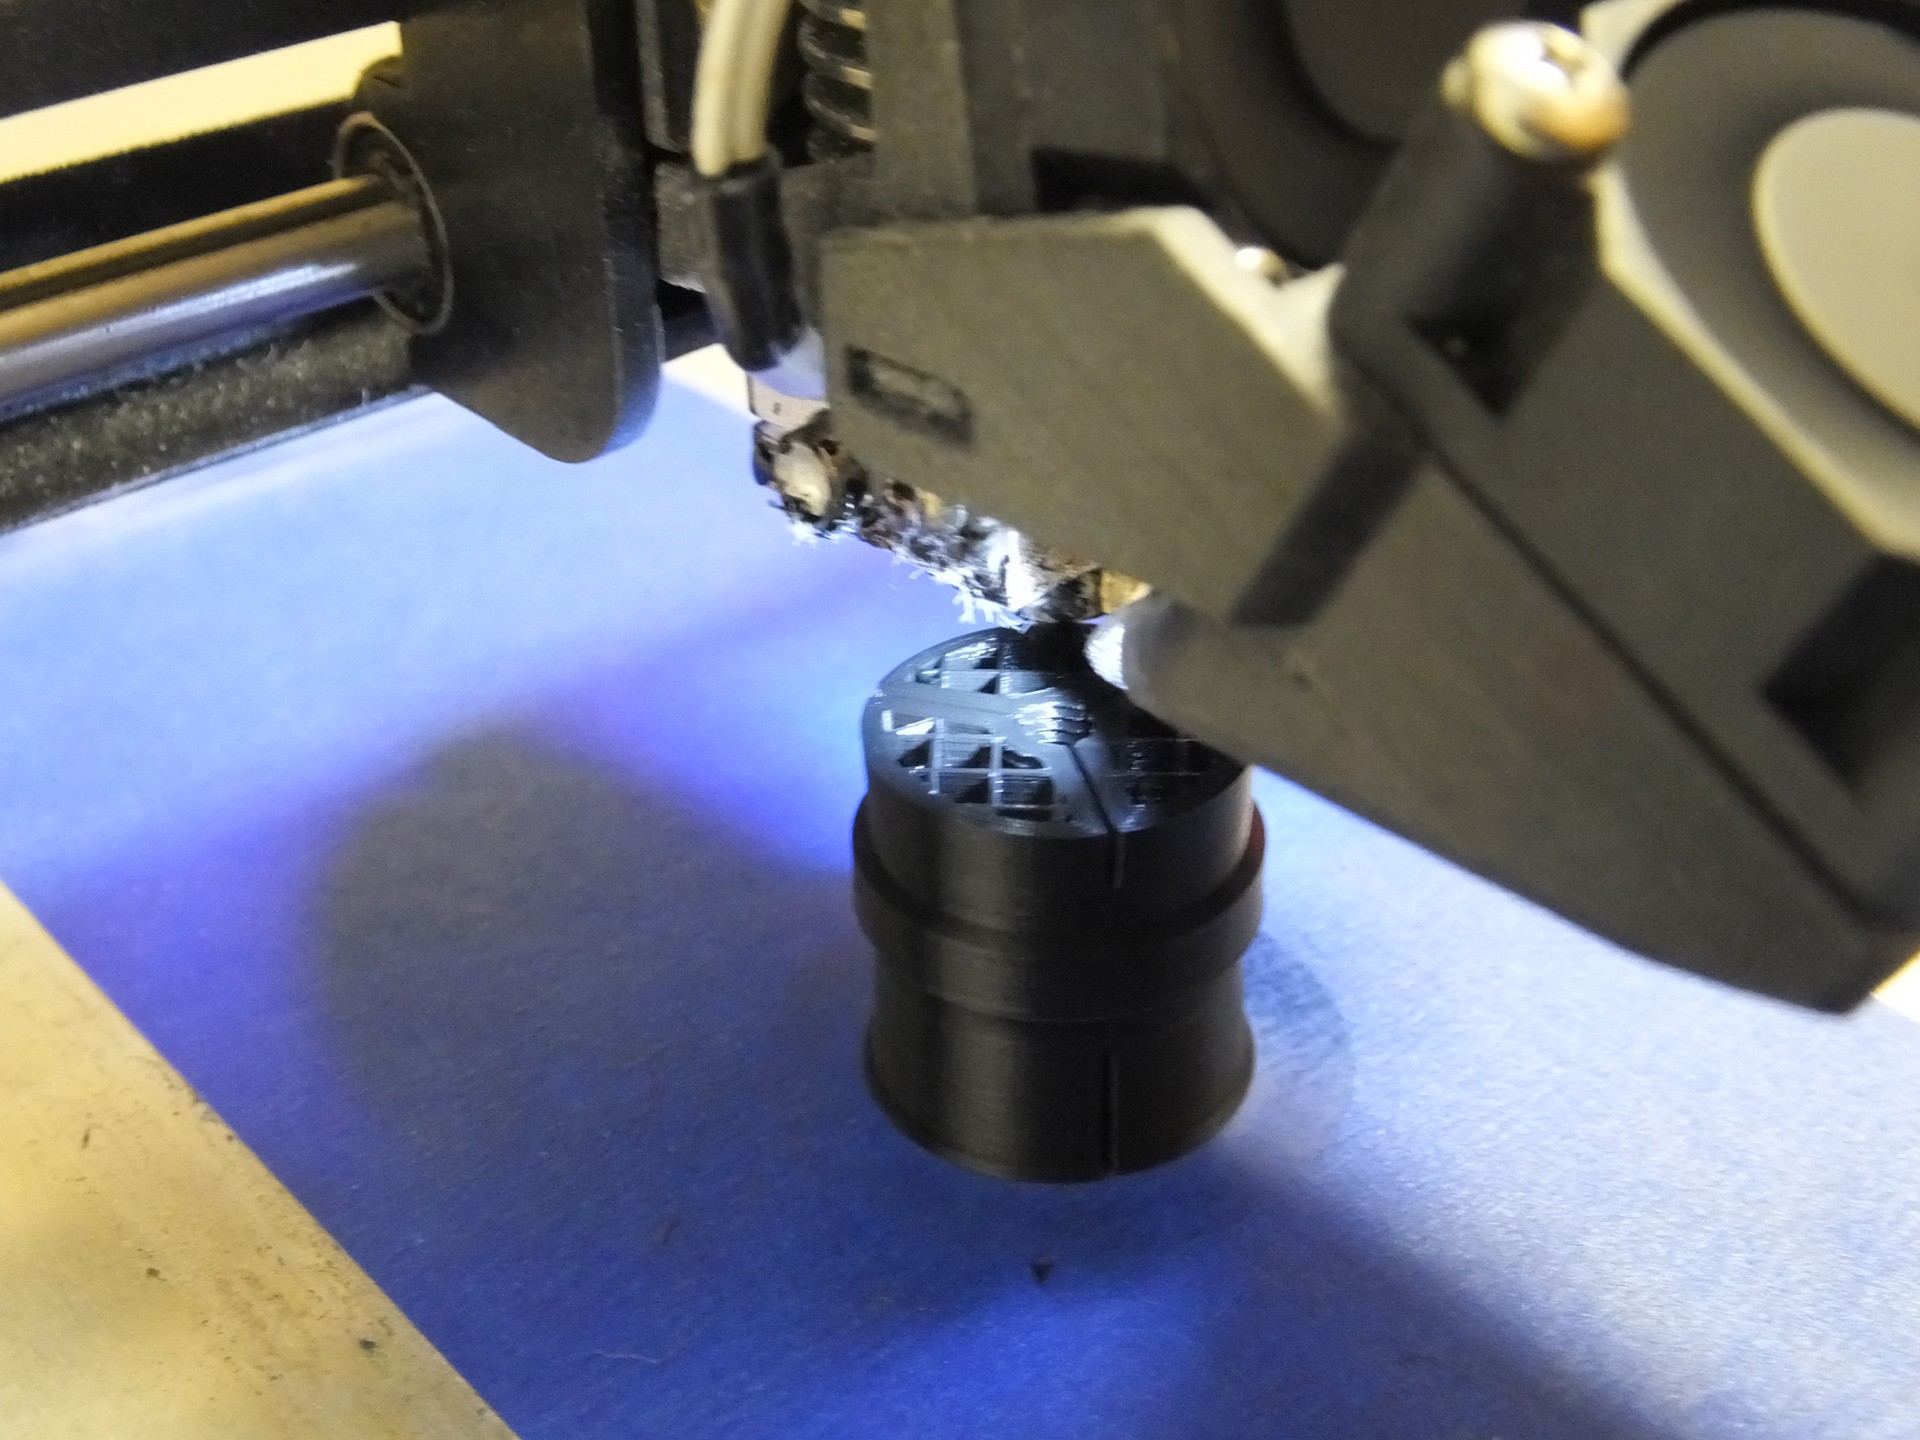 This piece will print perfectly fine with no supports and oriented so that the threaded hole is facing up. Please print with thick walls and a decent fill. I used 4 perimeters and 20% infill for this one. I do not think the plastic type is important because this part is not subjected to heat.
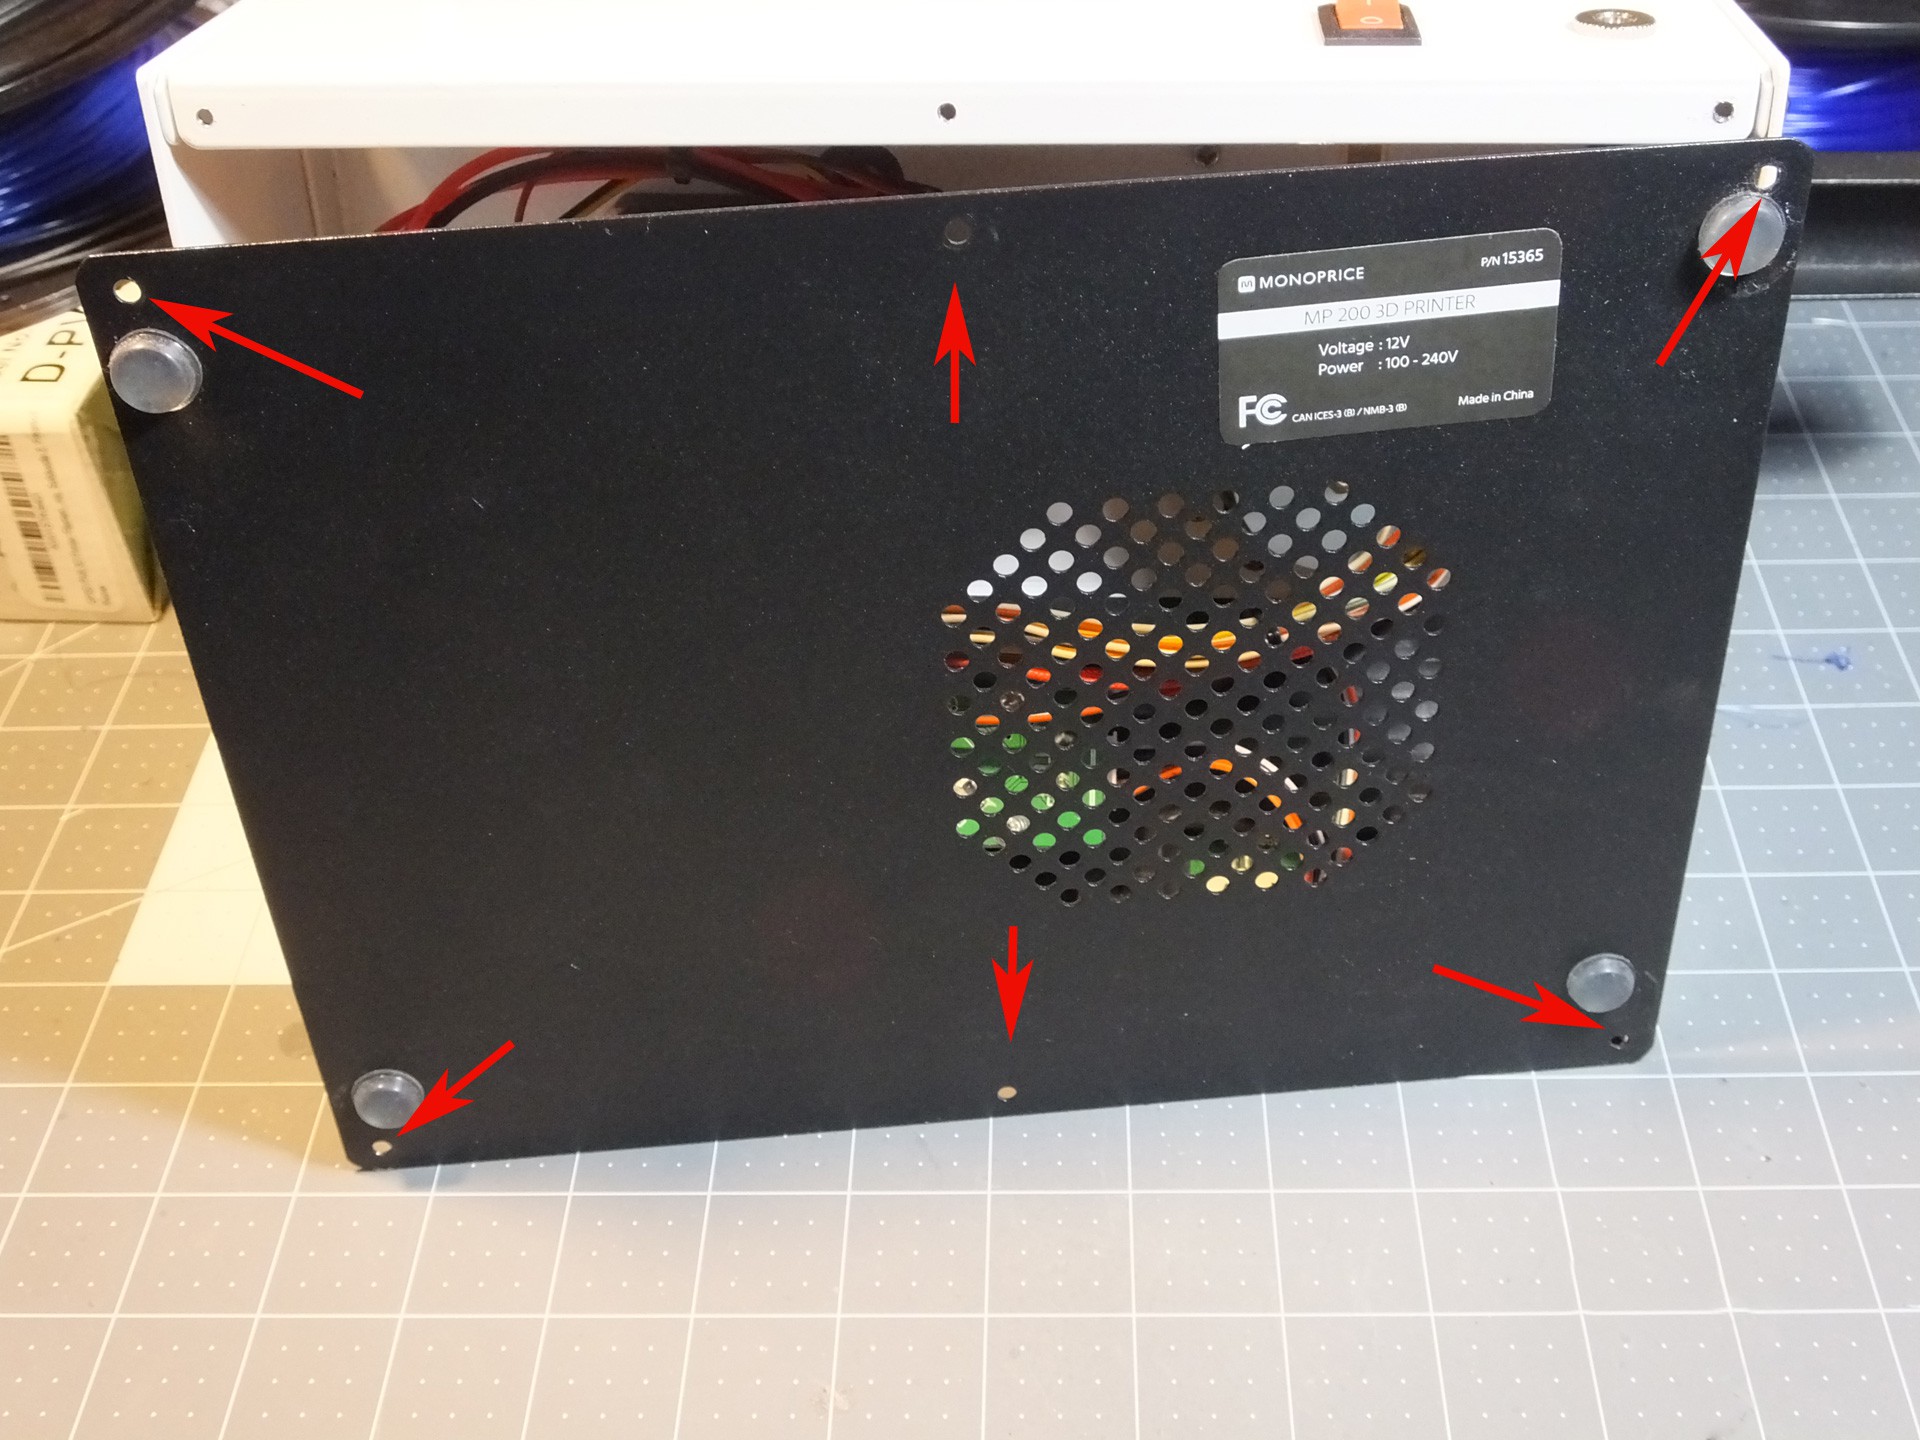 Installation is very simple: Begin by removing the six screws that hold the black metal bottom to the mini and pull the bottom off the printer.
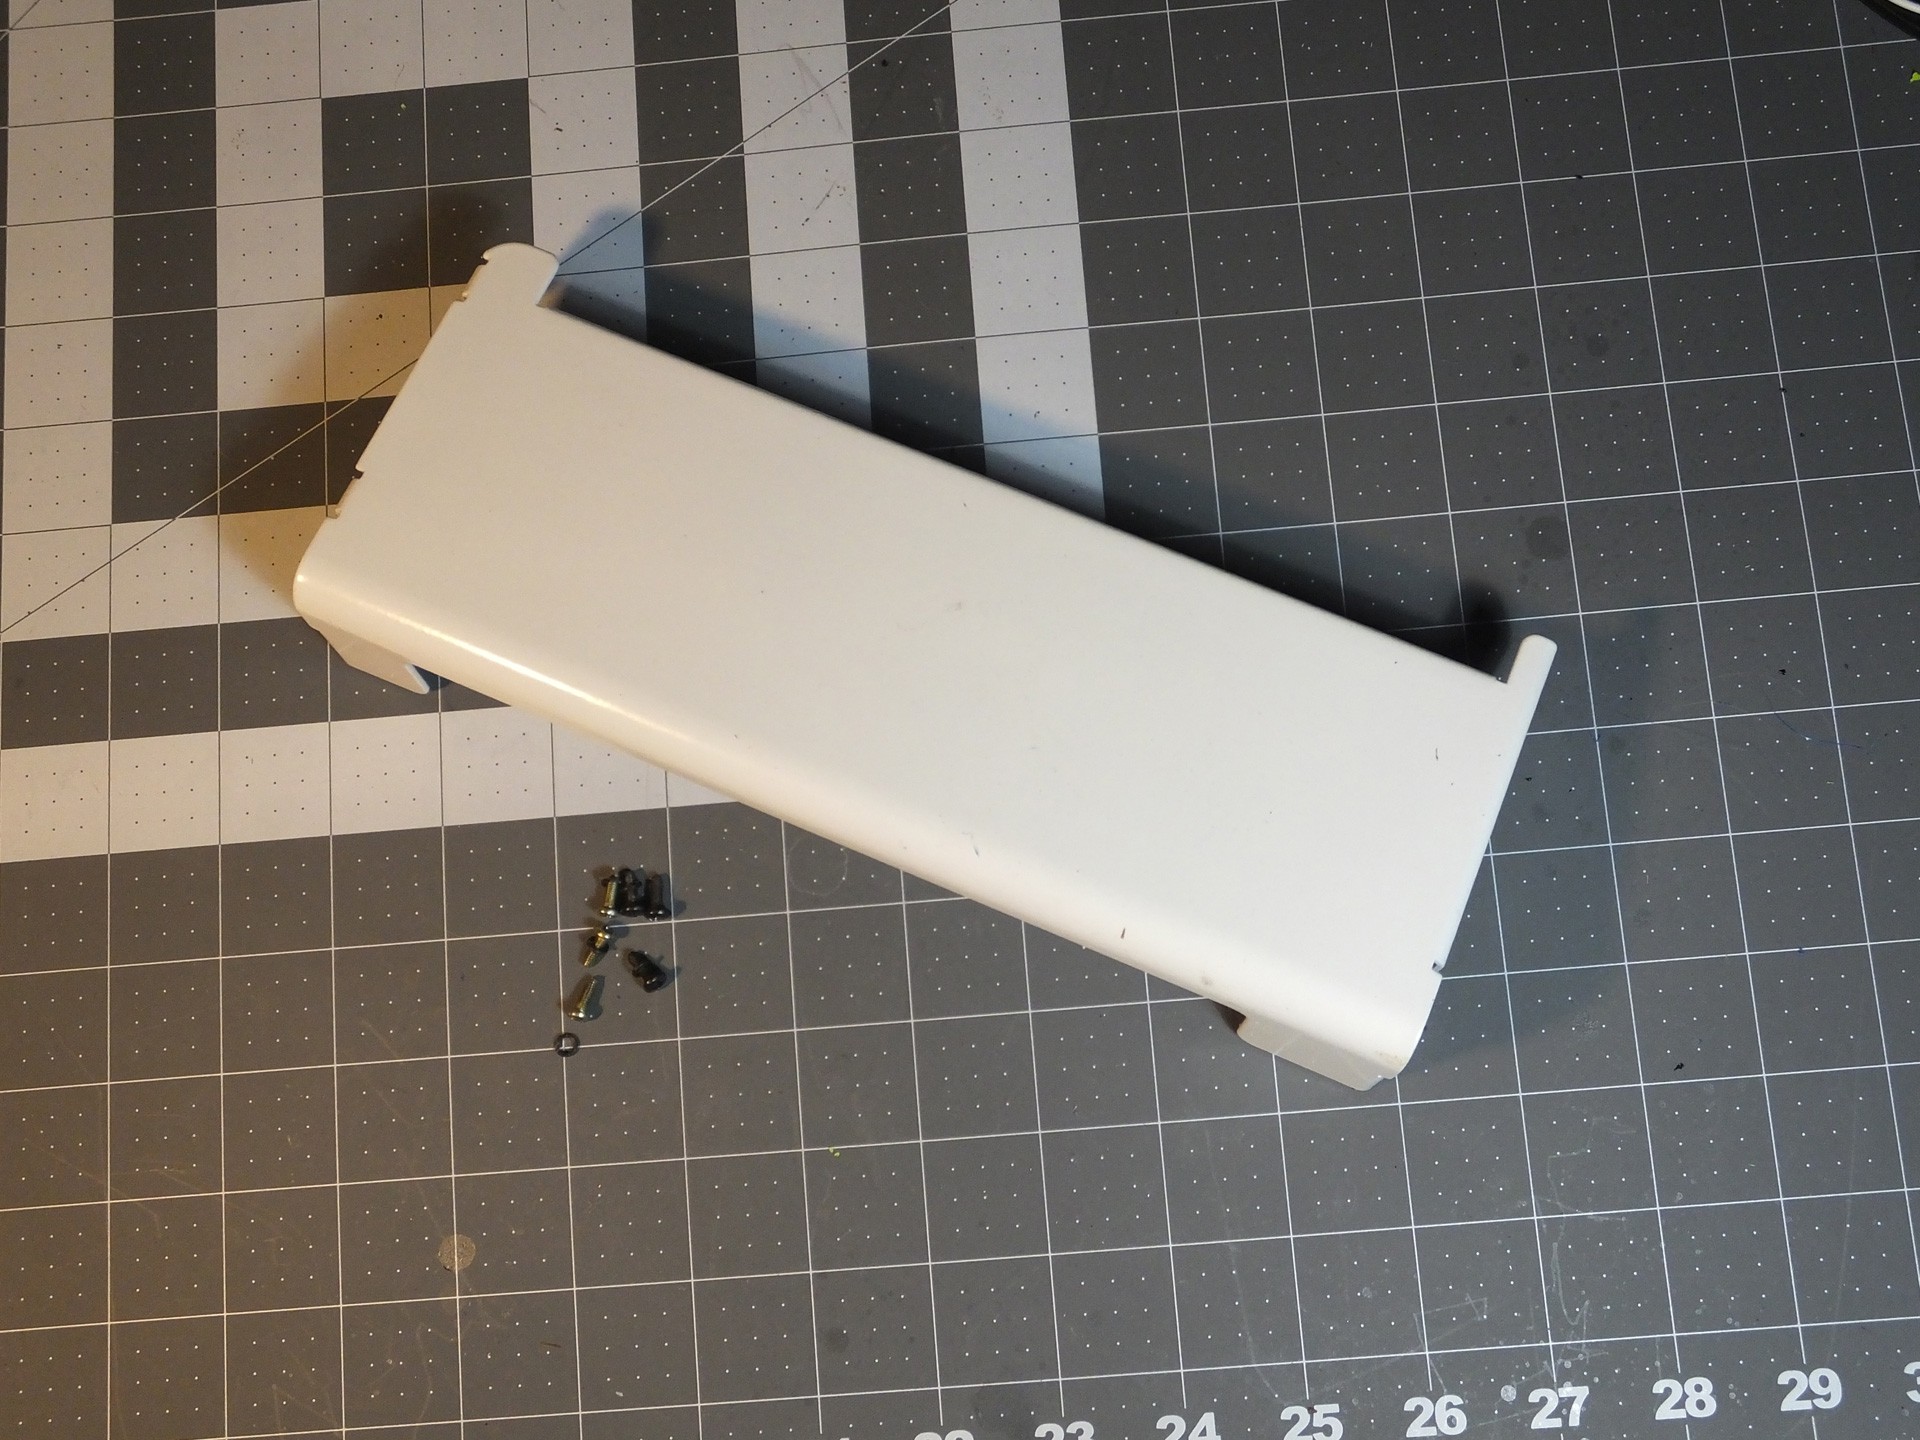
Six more screws hold the metal cover to the back of the tower, three on top and three inside the base of the Mini. These screws may have small washers on them, so keep track of the screws with washers and where they were located.
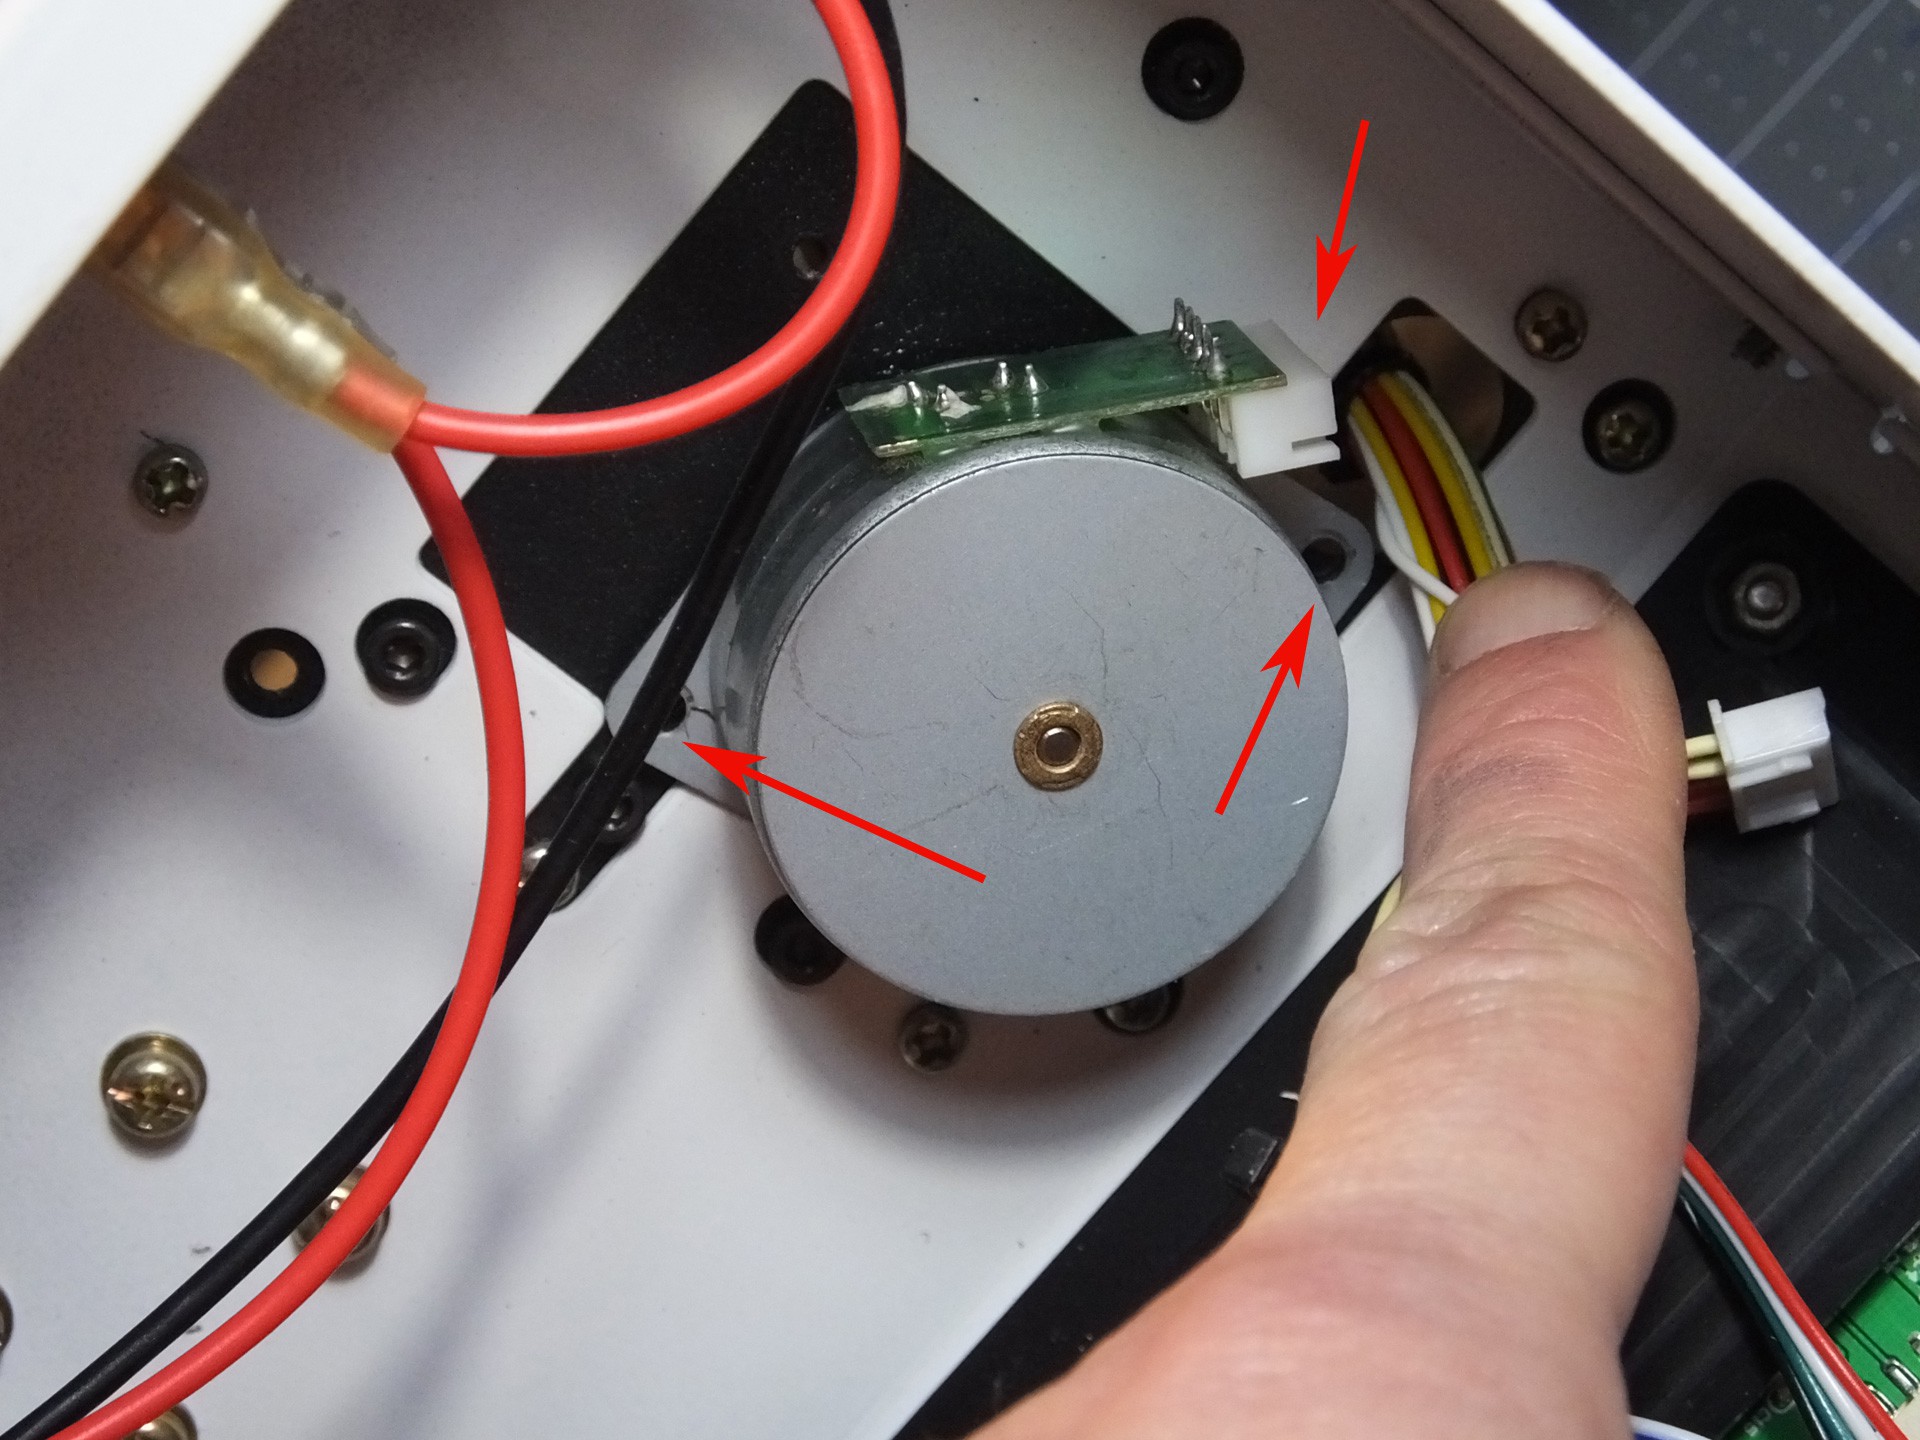 Remove the two screws holding the Z-Axis Stepper Motor to the underside of the tower. Also unplug the cable while you're in there. Note the position of the connector on the motor where the wires were plugged in. When you put the printer back together, you have a 50% chance of facing this in the wrong direction, unless you make a note this position now.
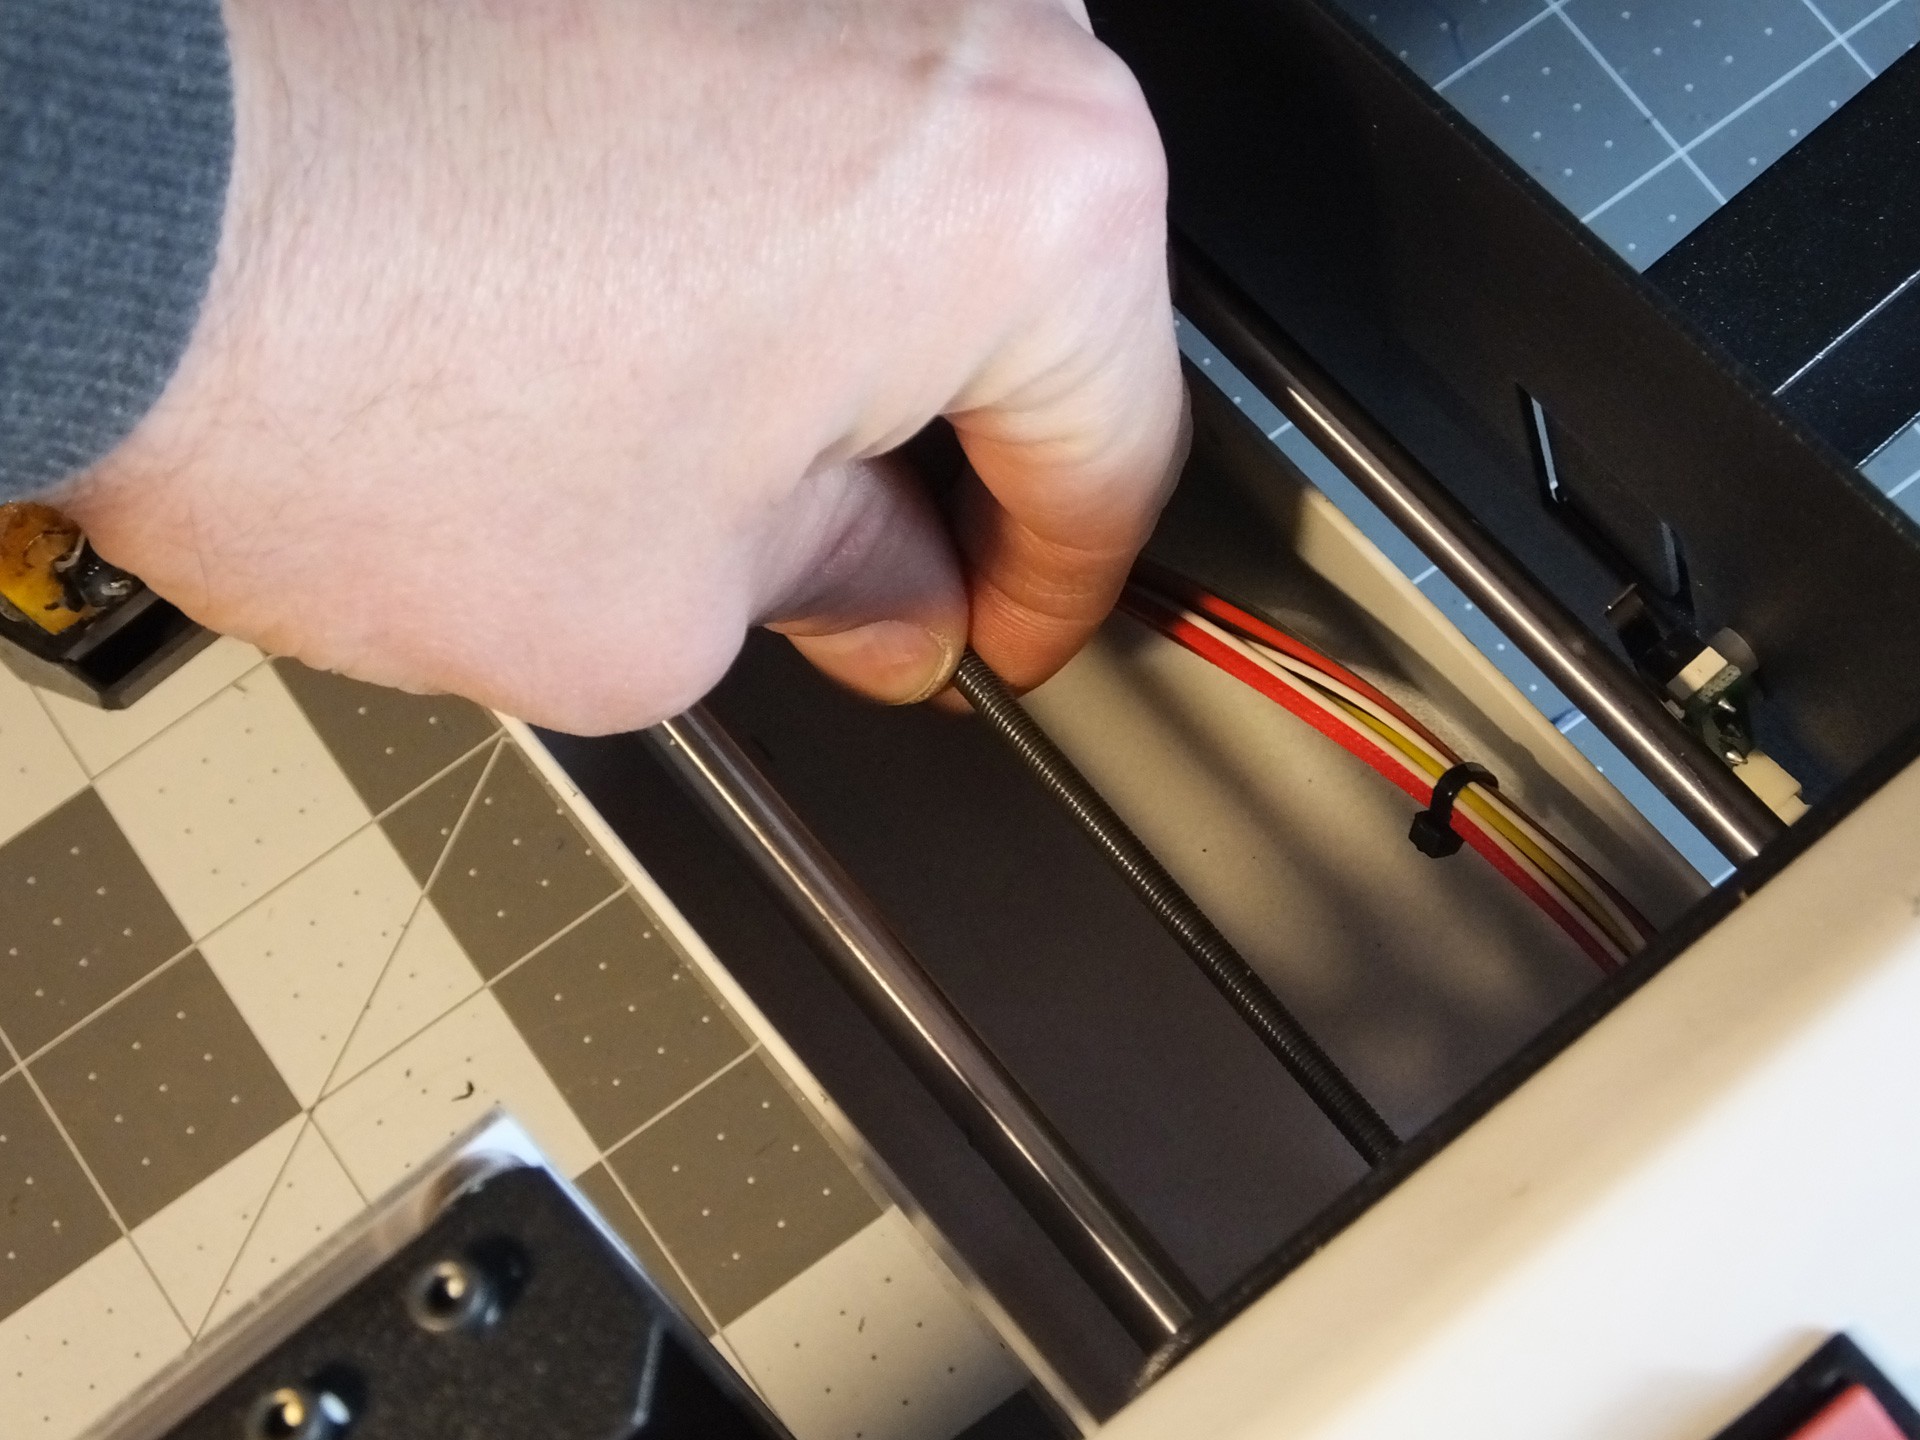 Spin the Threaded Rod to unscrew it from the Gantry. If you are reading these instructions before you began working then you get a bonus! When you begin work use the move menu to raise the Gantry all the way to the top before tearing down the printer. It will save you a lot of spinning of the Threaded Rod in this step here.

When you've unscrewed the Threaded Rod from the Gantry, it will come right off with the Stepper Motor. You need to remove the factory coupler from the Threaded Rod and the Stepper Motor, by loosening the grub screw or screws in the side of the coupler. There are often locked in place with a threadlocker, so use a flame from a lighter to heat the coupler very hot and the threads should come loose. Just be careful not to touch the hot metal. The coupler and the locking nut on top should come right off with a couple of wrenches now.
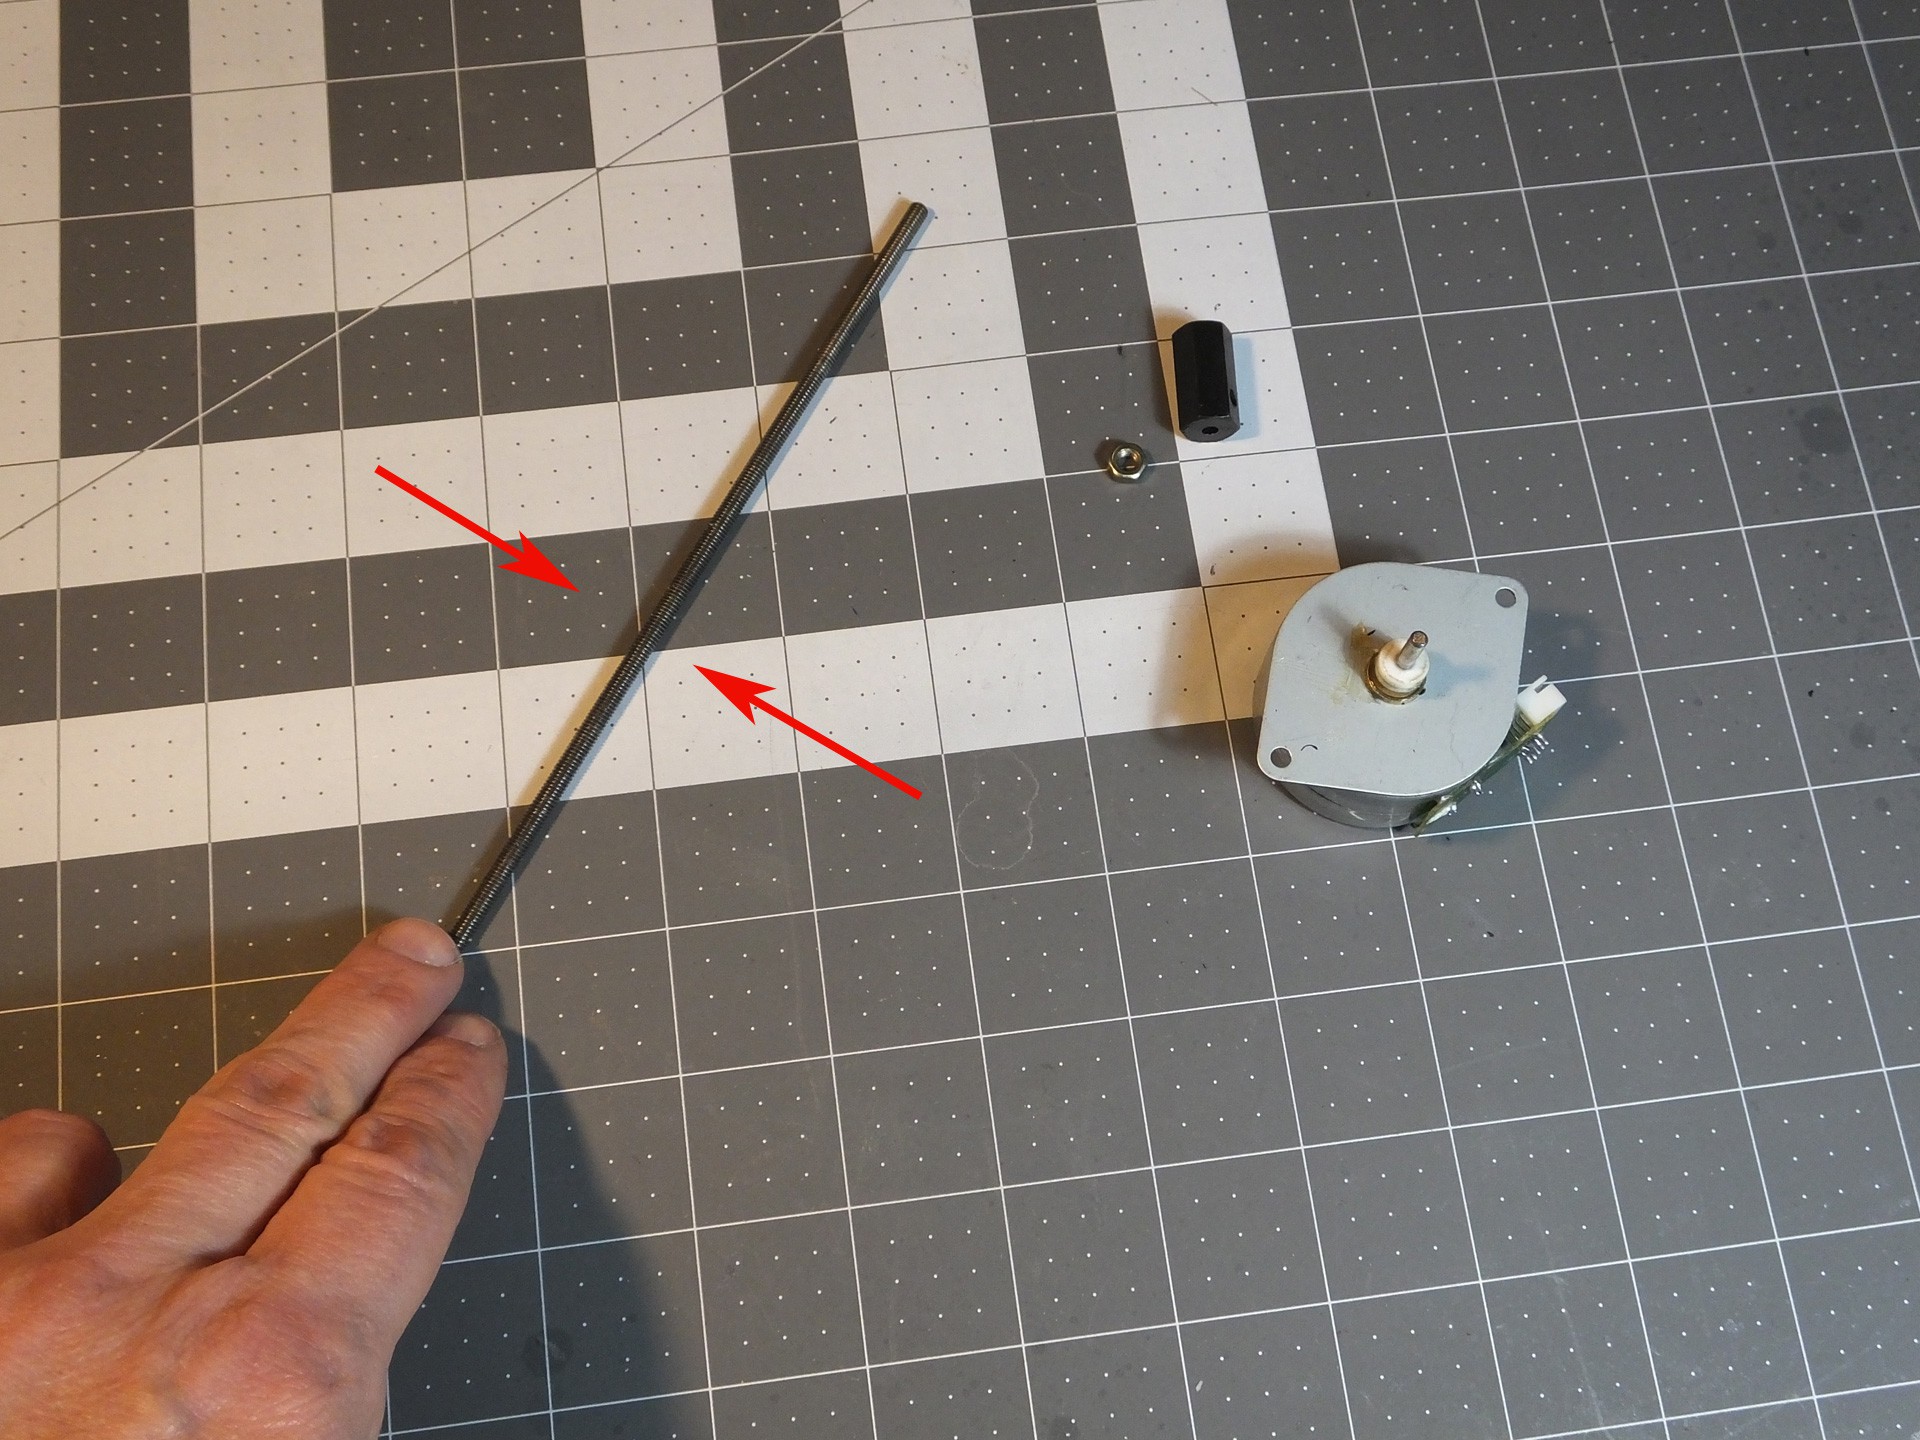
Roll the Threaded Rod on a perfectly flat surface and look to see if it is warped or bent. If it is, you can try to straighten it by hand until it rolls perfectly, or obtain a replacement part.
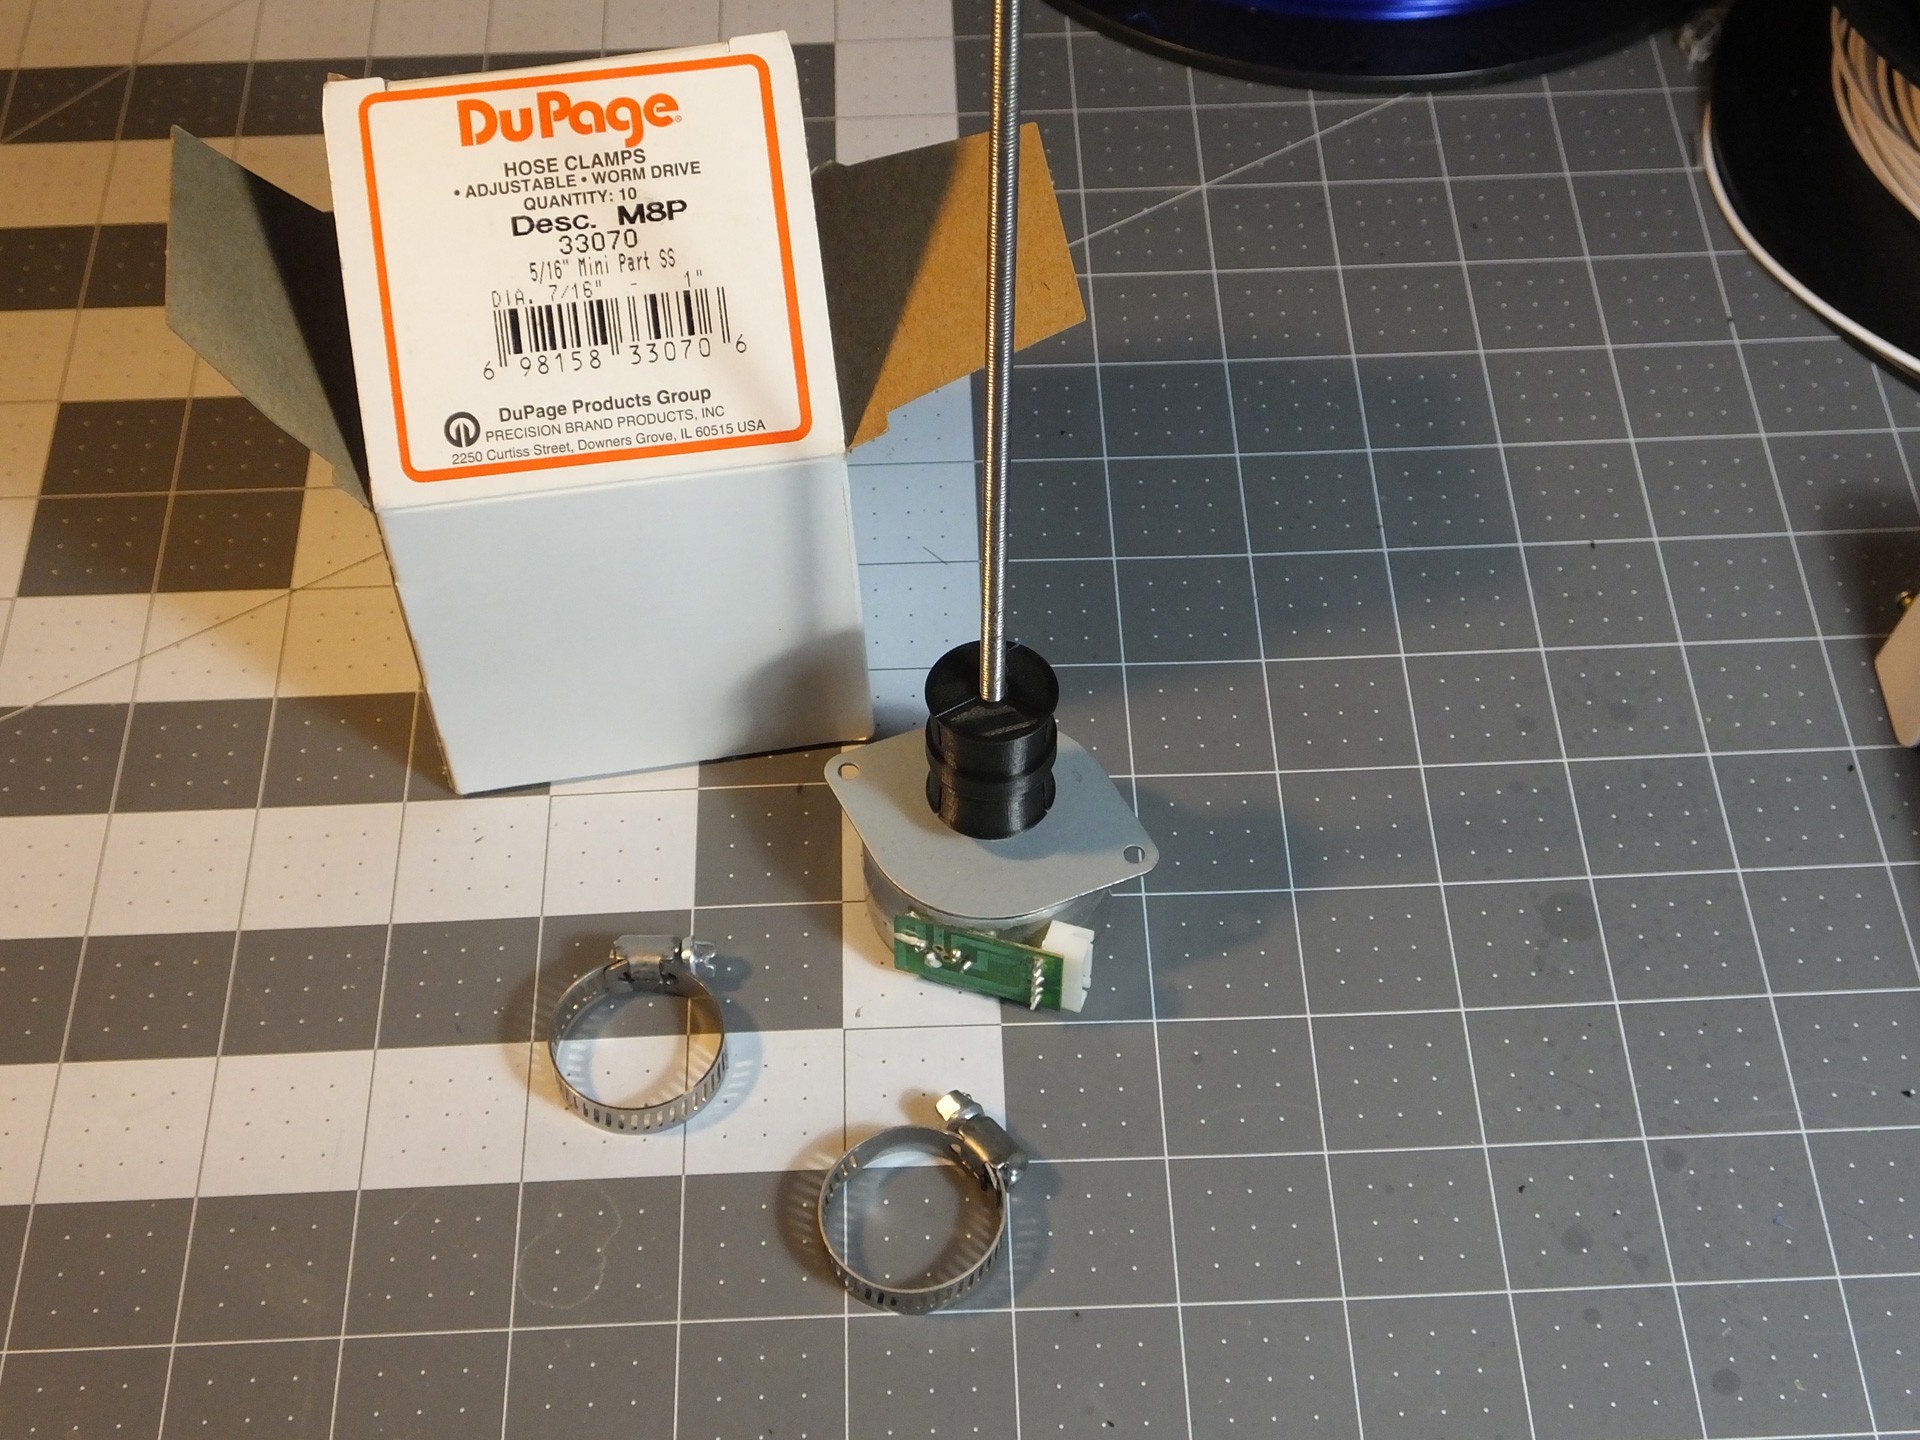 Push the unthreaded side of the New Coupler on the Motor Shaft until it just touches the spacers on the shaft. If you don't have spacers, don't go any closer to the motor than about 5mm. Then, thread the Threaded Rod into the threaded side of the New Coupler, and tighten it until it reaches the bottom of the hole. At this point you want to get a pair of Hose Clamps ready. The Hose Clamps should fit a 1" pipe and have a 5/16" wide band. Slightly smaller clamps should fit as well. Just prepare them by opening them up wide enough to fit over the New Coupler easily. DO NOT INSTALL THEM YET. If you do, you won't get the Stepper Motor back on.
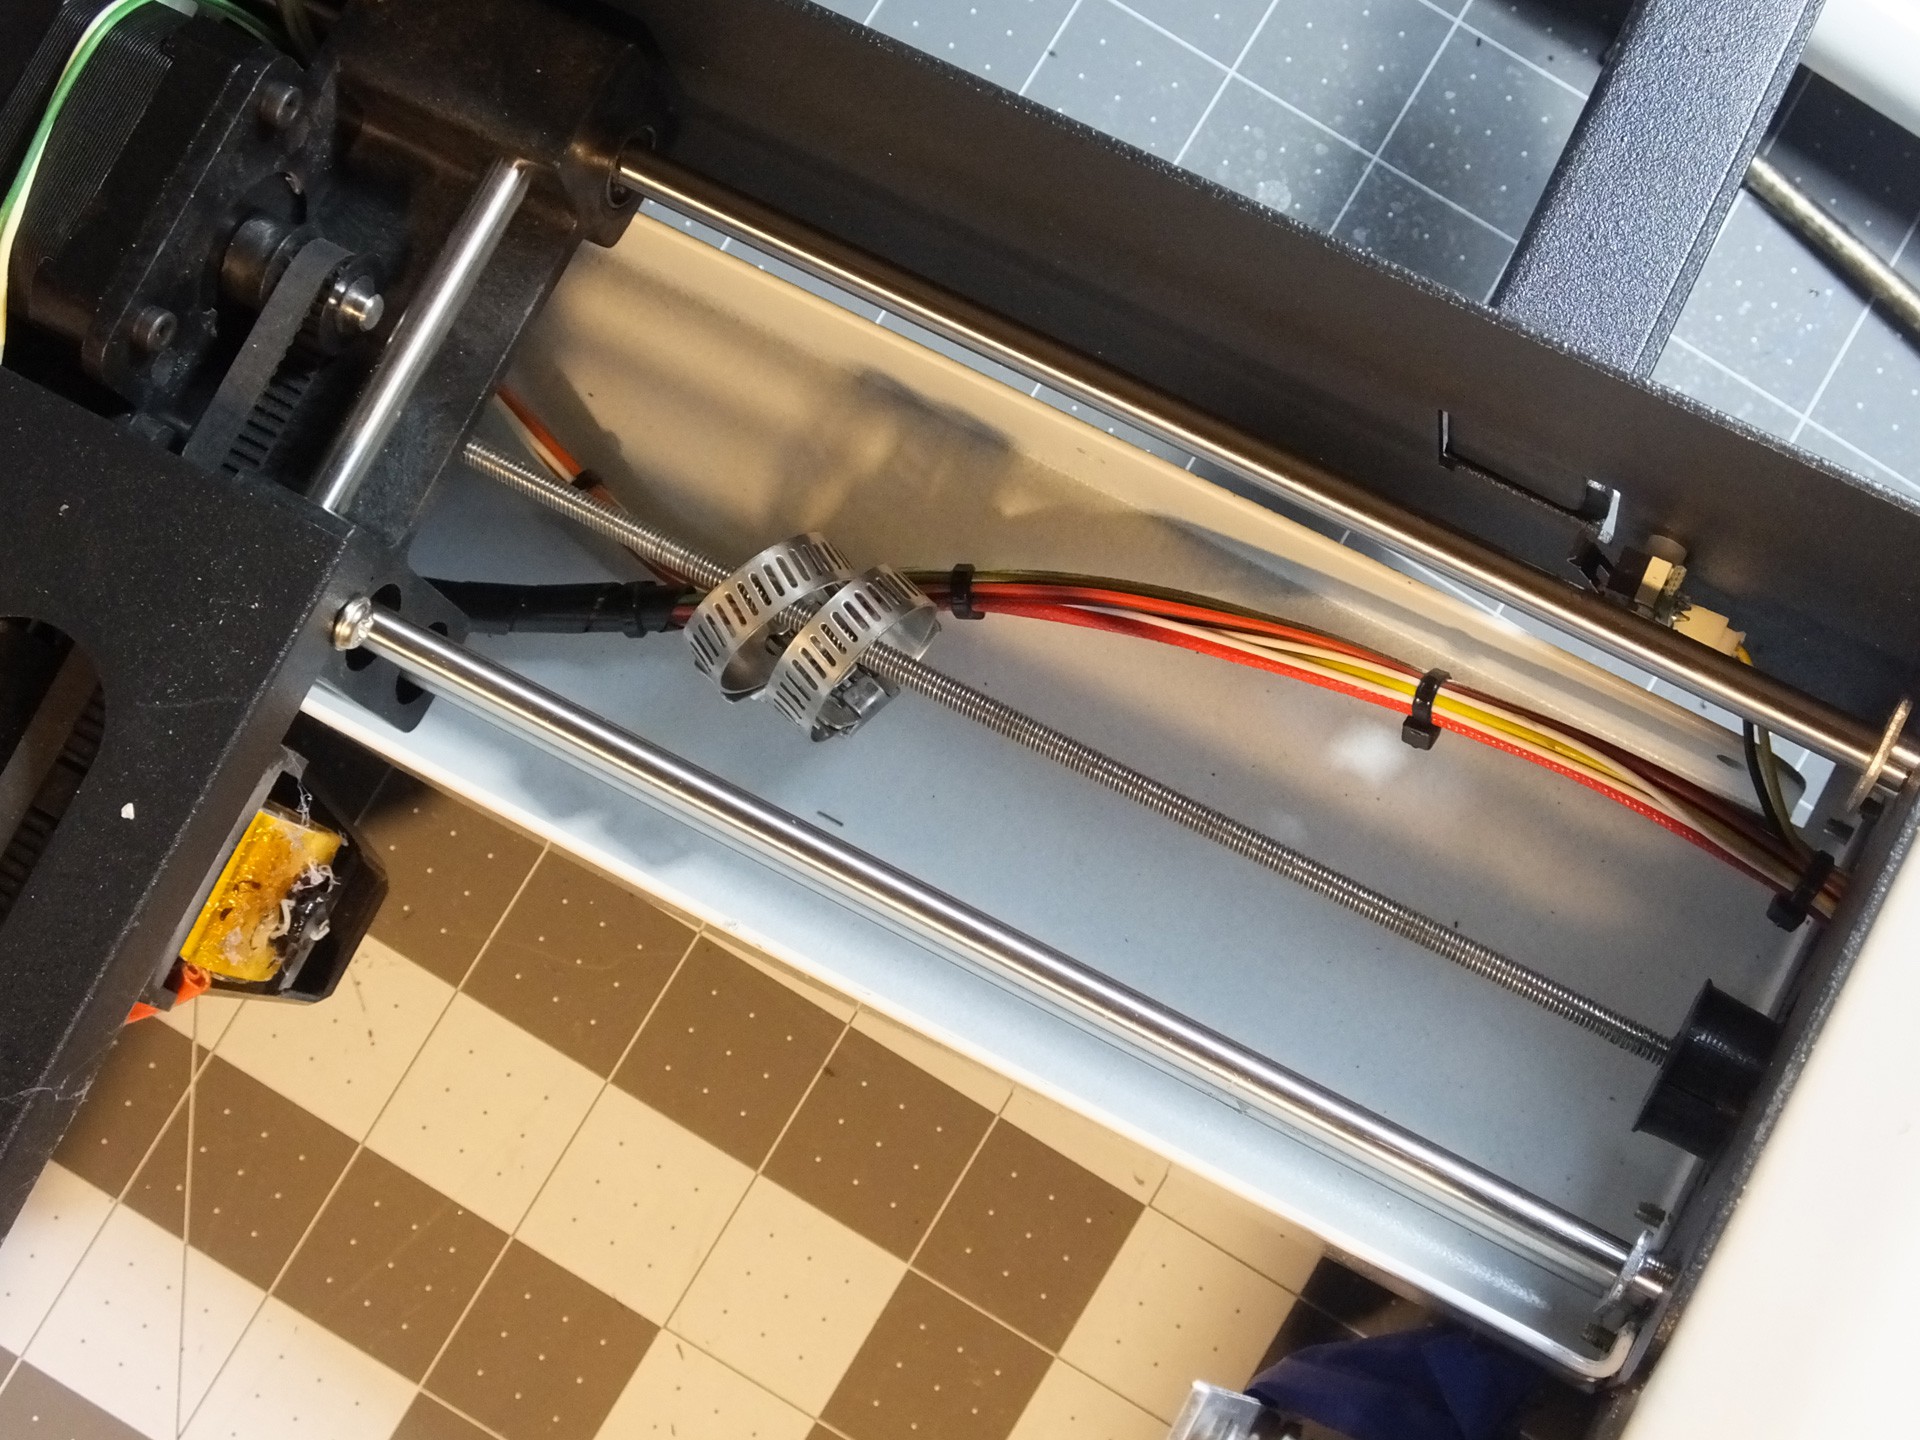 Now, insert the Threaded Rod through the hole and slide the Hose Clamps over the rod before you start threading it back into the Gantry where you removed it. Keep screwing the Threaded Rod into the Gantry until you can seat the Stepper Motor back where it belongs and screw it back in place, making note to get the connector back in the right position to reach the connector on the wiring harness.
 Now you can slide the Hose Clamps down into the grooves in the New Coupler and tighten them up, to secure the Threaded Rod and Z-Axis Motor Shaft in perfect alignment.
Check that the clamps don't interfere with the wiring inside the tower. If you think they may snag, you can cover the clamps with Electrical Tape to prevent them from catching the wiring.
Reinstall the rear cover of the tower, and then put the bottom cover back on the printer.
This upgrade cost me about $1.00 total, for two hose clamps. That's it!
Happy Printing!
 U.S. Water Rockets
Discussions
Become a Hackaday.io Member
Create an account to leave a comment. Already have an account? Log In.