Max Kviatkouski
-
Dealing with lagging RTC in PyBoard lite
05/22/2018 at 05:40 • 3 commentsTo refresh the context of the problem: RTC in my PyBoard Lite is ~2.4% slower than it should be based on comparisons with PC clock. While it may not look much it, for example, gives 23 min error over the period of about 15 hours. Given that I plan to deploy current meter for a month it's clear why there has to be some way to compensate.
RTC.calibrate() method doesn't allow to compensate that much. Maximum it can do is to slow down or speed it RTC for ~0.0488%.
I assume that this RTC lag is consistent in it's speed so I can do following:
- Before logging setup RTC to match my PC clock and capture that as t0
- Deploy meter and let it do the logging
- Dismount logger for data download
- Before downloading logs and while PyBoard is still running, connect to it and capture PyBoard RTC value and my PC clock value as t_actual and t_expected correspondingly
- Based on difference between expected and actual timestamps and duration since logging started calculate "speed up coefficient"
- Apply that coefficient to timestamps in my logs before processing them further
Math is pretty simple here. Let's assume that our RTC speed is some fraction of real (well working clock) speed. Than if we sync them at moment t_0 we get this:
I've finished two scripts to automate part of what's described above: setrtc.py - to automatically connect to PyBoard, set RTC based on PC clock and make a record of that in datetime.correction file. checkpointrtc.py - connect to PyBoard and write current RTC as well as PC clock values to datetime.correction. Going forward there will be a third script that will take that file + log files and will update log files adjusting timestamps on data series.
-
Unexpected issue with RTC in PyBoard Lite with accelerometer.
05/21/2018 at 20:41 • 0 commentsYesterday after soldering 3V backup battery holder to my PyBoard and playing with RTC I explored an issue. RTC in my PyBoard is much slower my PC system clock. Error is about 2-3% which is not really good for data logger. What's worse is that this level of error is beyond what can be corrected with RTC.calibration(). After asking a question on MicroPython forum I was told that it's a known issue since PyBoard lite uses internal resonator instead of crystal. And this resonator is quite inaccurate. Indeed feature table confirms that:
https://store.micropython.org/pyb-features
There are a few options I can deal with it:
- Buy and use regular PyBoard
- Buy external crystal oscillator
- Write a few scripts to "stretch" timestamps based on reference times during log postprocessing
I think I'll go with option number 3. Because it's cheaper, my datalogger doesn't require continuous clock precision. Eventual is fine. Also since I'm going to measure current once every 5 to 60 seconds (didn't decide on frequency yet) precise clock is not that important at all.
I'm going to write two scripts:
- First one to setup first time reference point (take system time from PC, set PyBoard's RTC, save this timestamp to file on PyBoard)
- Second one to read clock time from PyBoard, compare with PC time and write difference into another file
- Third script is to use results of first two scripts to adjust timestamps in logs after they've been downloaded
-
Testing and calibration of accelerometer to angle conversion
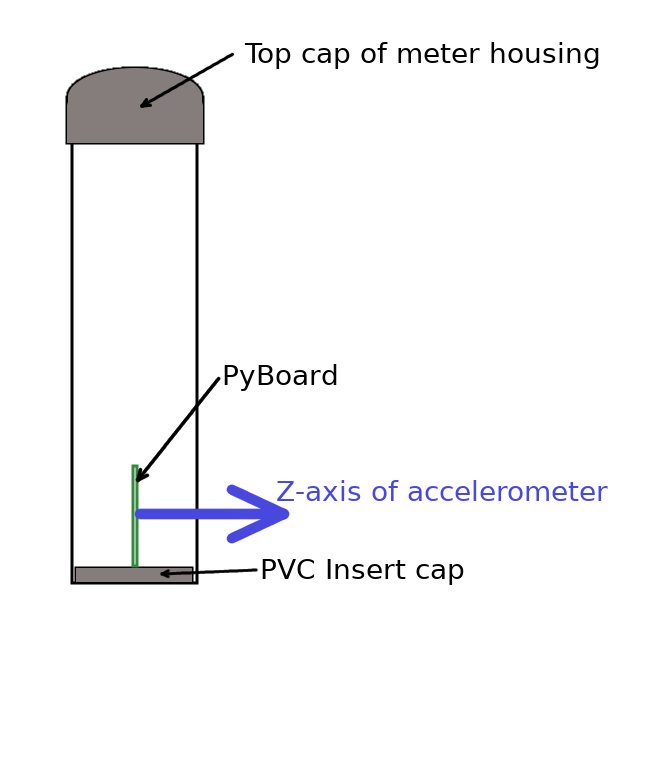
05/20/2018 at 07:31 • 0 commentsThe only angle I think I will be really interested in is the angle between current meter housing and true vertical (gravity force line). Z-axis on pyboard is one perpendicular to the surface of the board. I'll have to mount the board like thi
![]()
This type of mount has additional benefit that angles between Z and vertical less than 90 degrees mean left tilt, 90 to 180 degrees mean right tilt. That should be sufficient since I assume there is a line that current follows in either direction. It is possible that some downwell will occur pushing water in offshore direction. It will be possible to identify that later.
I'm going to log raw values of accelerometer. Two reasons to do that:
- No need to slow down logging and increase power consumption by doing computation that can be done afterwards
- Raw data will allow to compute any types of derived metrics: z-angle, other angles, etc.
I've already wrote some code that transforms raw accelerometer values into Z-angle. I've used pretty known formula for the angle between two vectors described here: https://www.wikihow.com/Find-the-Angle-Between-Two-Vectors
Python numpy module is capable of operating with vectors.
Also I finally was able to write some utility code that would let me:
1. Upload python file into PyBoard and start executing it
2. Listen to PyBoard output and process that output in "live" mode
I need it to simplify calibration of PyBoard (to proof that code and formulas result in proper angle calculation).
For that I used ampy Python module from Adafruit: https://github.com/adafruit/ampy (cannot say it's extremely mature but it's certainly helpful and is certainly better than nothing).
Few tips for those who might need to do similar things:
- If you cannot connect to your PyBoard using ampy check if any process is using your PyBoard:
$ fuser /dev/ttyACM0
/dev/ttyACM0: 10980
In this case fuser tells that a process with PID 10980 is using my PyBoard. You can kill it by executing kill 10980 (that works in Ubuntu, not in Windows)
- Out of the box Pyboard class module from ampy doesn't allow you to upload a file for execution and start listening for PyBoard output. You can check sources and either submit a patch for them or read a file into a string and send for execution (you can see example here: https://github.com/max-kviatkouski/pyboard-current-meter-logger/blob/master/log-processing/calibration-util.py)
In the end a bit of video how it works all together now. I can submit file into pyboard to start printing accelerometer values and other python script will listen to the output, convert values into angles and print them on screen.
-
Soldering headers to PyBoard.
05/19/2018 at 06:10 • 0 commentsToday I got package with female headers and wires for PyBoard. My thought was that they will make it easier to connect and disconnect main and backup batteries. Now I think I probably didn't really need them. However, I've soldered them already so will keep them. Just a few takes from this exercise for those who might need to install headers on their PyBoard:
- Header pin set doesn't include headers for backup battery slots. I had to just solder wires there. I might think that you can just snap two headers off. The problem is that backup battery sockets are a bit closer to each other than regular sockets + there is some resistor that doesn't allow good fit for headers.
- If you're new to soldering like I am, few tips:
- If you don't have soldering station, at least get wet dishwashing sponge. Wiping hot iron tip really helps to clean it.
- If you're tempted to put some solder on the tip of the iron first and then apply it to the joint - don't. Flux in solder burns off and you can't make it stick (wet) to the joint. So clean the tip and use proper technique: press iron tip against the joint, apply some solder and wait 1-2 sec for it to wet the joint.
- Pay attention to your tip. I used sharp tip (I have 40W Weller iron). After cleaning and carefully looking at it I figured that it's not just a straight sharp tip. It has a bit of "hook" shape which makes it handy - help to "grab" tip of the wire sticking out of the joint
- And, of course, don't try to keep heating joints for more than 2 seconds. If you can't get solder stick to joint in two seconds - you're doing something wrong and there is a good chance you'll overheat some electronics on the board.
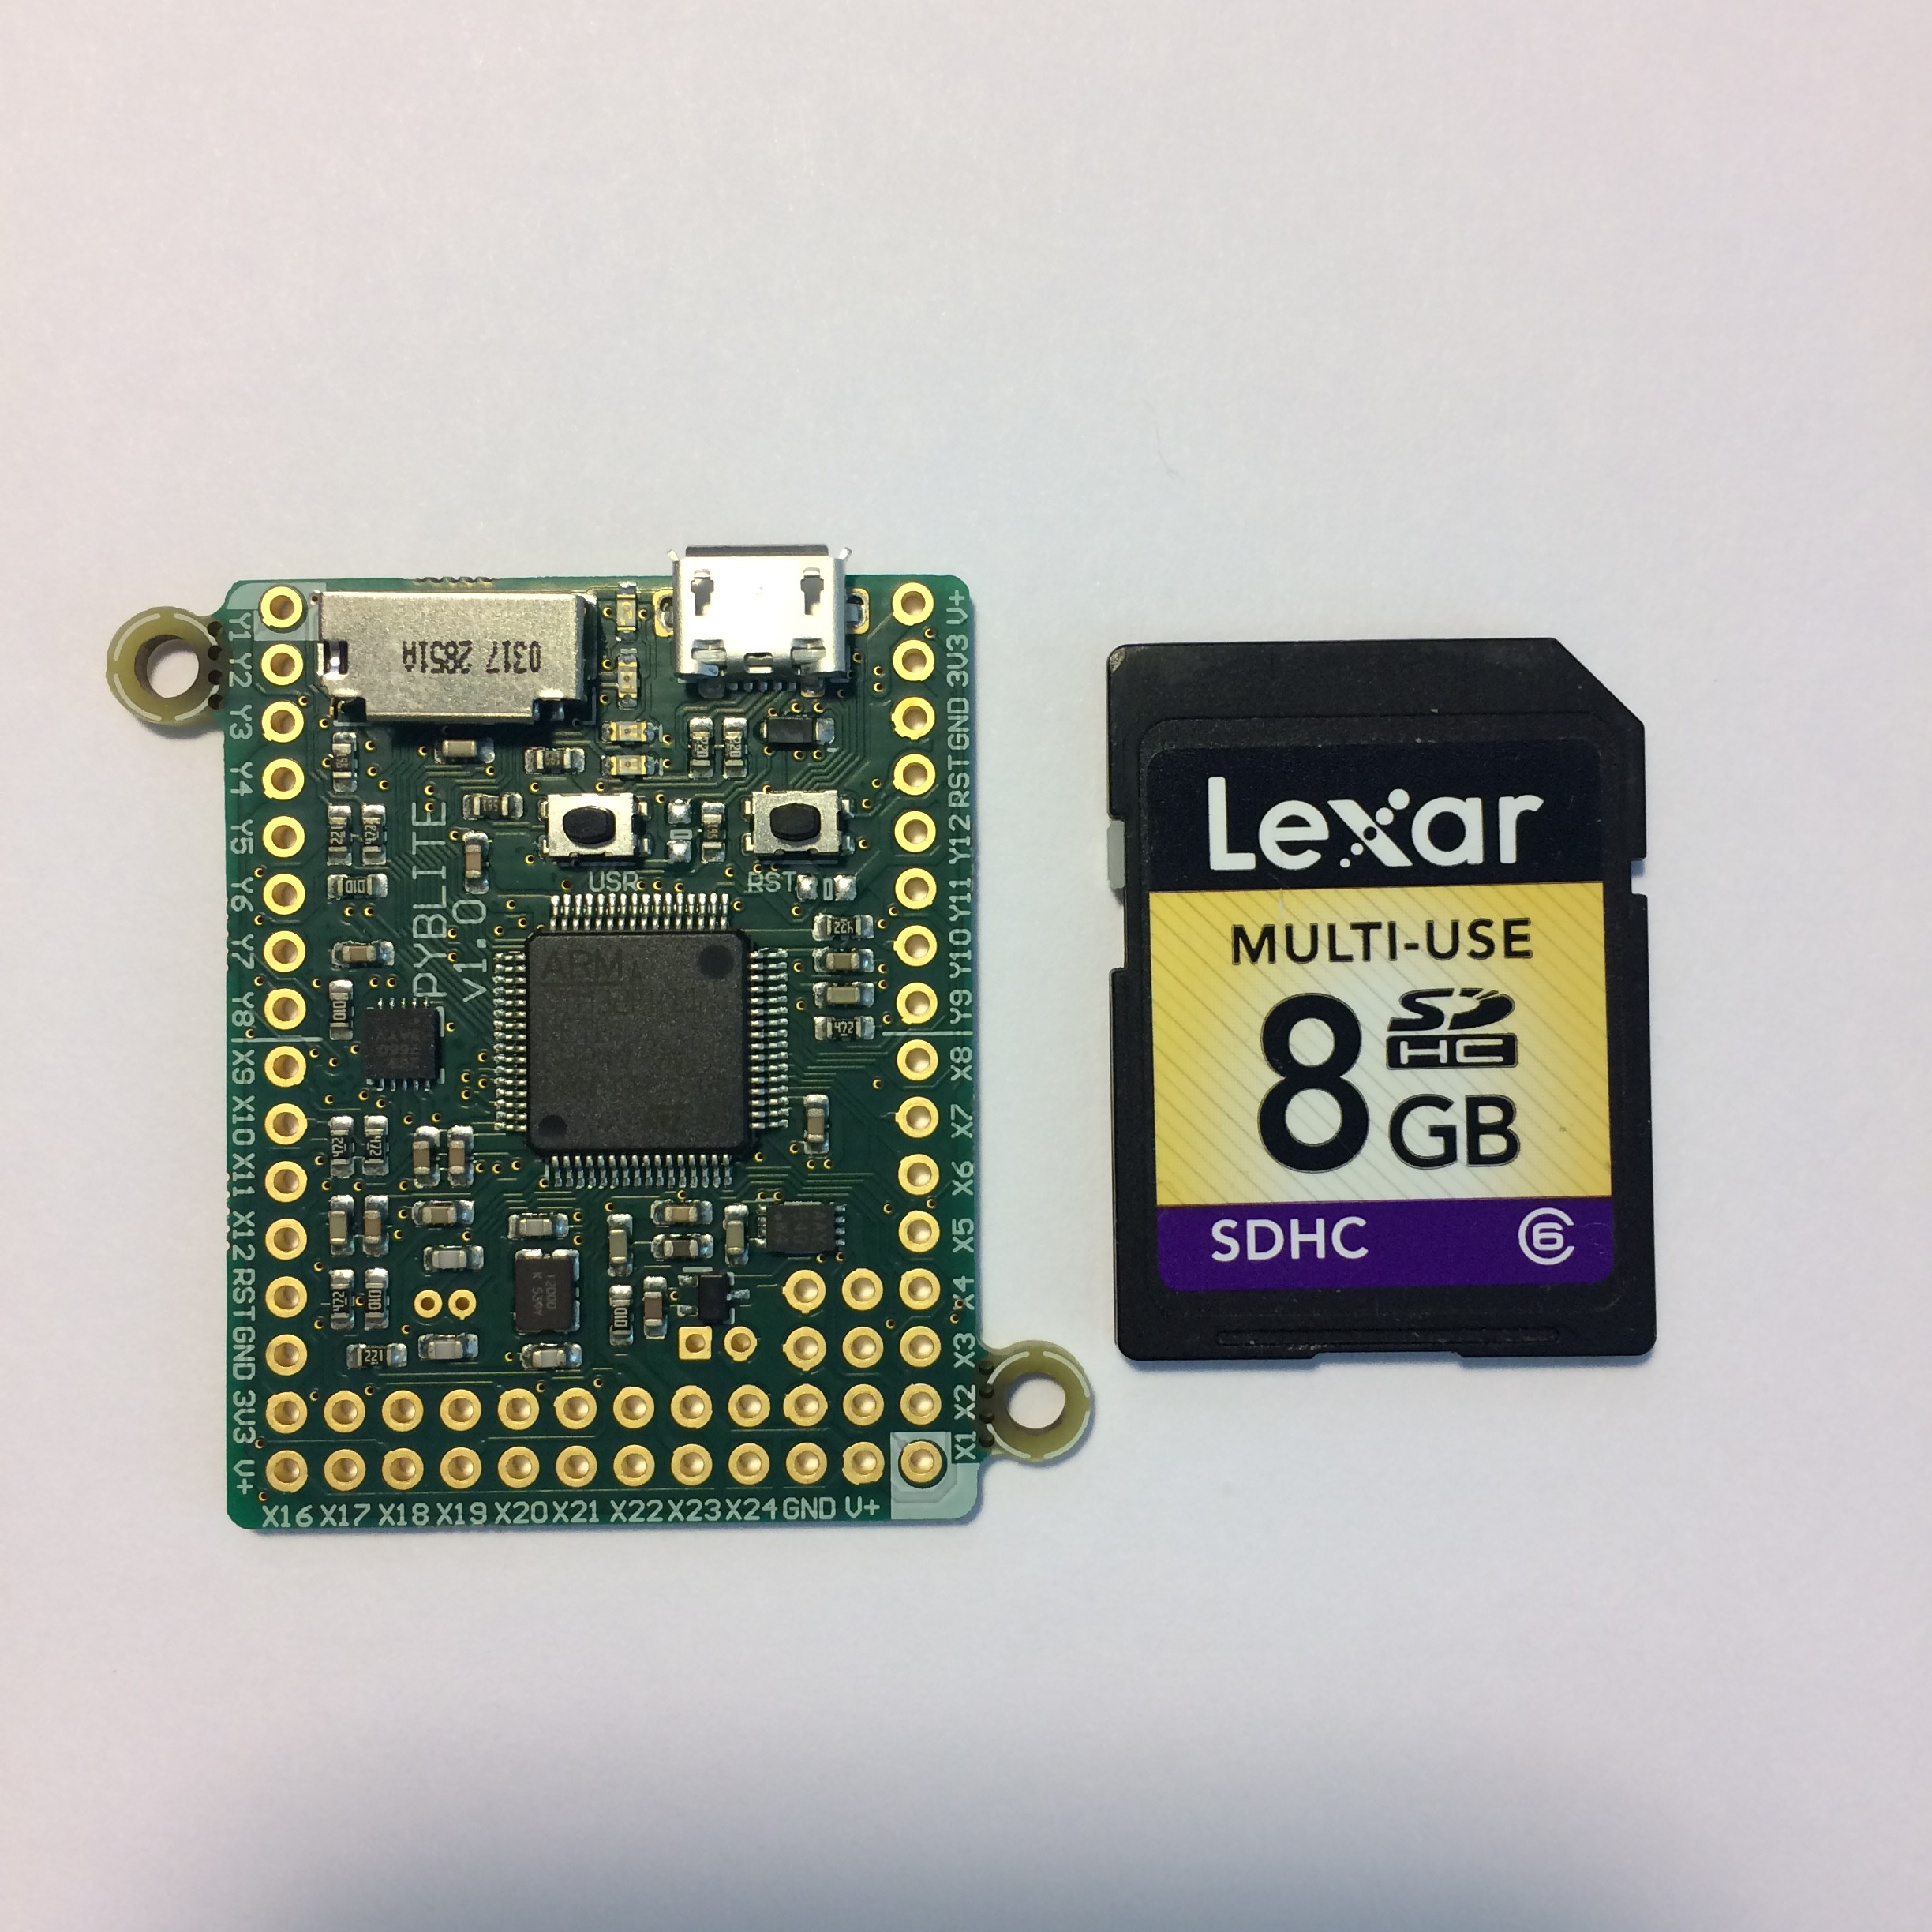
I managed to solder all headers and the board is still working. So it was a good exercise. Picture of the board with headers:
![]()
On the picture below you can see close up of soldered joints. One in focus is not really good - that's one that I messed up initially by trying to apply solder with burned out flux (kept solder on the tip for too long). And I couldn't make it really nice afterwards. Those nicer joints around are those that I got first time right.
![]()
On the software side my next step is to experimentally proof that accelerator value is linearly proportional to cosine of tilt angle. I'm going to make small stand with protractor to make measurements. Now I'm writing some Python scripts that will allow me to observe "live" values from accelerometer on my laptop while I'm tilting the board.
-
Power of open source software
05/14/2018 at 04:13 • 0 commentsI guess this is my truly first time when I took some open source code and added feature that I was missing. That's quite an interesting feeling that you have influence on how things are. You can change something. And someone else can benefit from that as well.
Anyways.
You can download fixed plugin here: https://github.com/max-kviatkouski/intellij-micropython/releases/tag/1.0.6-fix-pyboard-excludes (it includes description of the fix and example of use)
Pull request has been submitted so hopefully fix will be available soon in official distribution of the plugin.
-
Setting up development environment
05/14/2018 at 02:55 • 0 commentsAt first my development environment was Ubuntu + Sublime Text + bash script to copy files over to PyBoard. Bash script simply copies all *.py files to PyBoard that appears as a flash device. (Attached for an example, you'd have to put the name of your PyBoard instead of mine).
https://github.com/max-kviatkouski/pyboard-current-meter-logger/blob/master/deploy.sh
Then I thought that it would be nice to checkout if PyCharm offers any support for MicroPython. And it does! There is a plugin that offers some autocomplete support. The only issue is that at least in latest version (which is 1.0.6 now) plugin ignores specified excludes and attempts to copy .idea folder of your project as well as .git folder (if you're using git). It's possible to move .git outside of your project folder. Moving out .idea is possible as well but it's getting tedious so I'll try to fix the plugin and make a pull request.
One more important note: make sure you have proper permissions to access serial port. I had to make my user a part of "dialout" group to have access to PyBoard serial port as non root. After you add yourself to the group don't forget to logout/login out of Ubuntu for changes to take effect.
-
Housing v0.1 pressure test 70ft down passed!
05/13/2018 at 04:55 • 0 commentsSurprisingly first version of housing for tilt current meter did really great today. I took it down to 70 ft. Could see rubber cup intruding into the housing and bulging on handle of pvc insert cap behind it. But after I got back home and opened it no water was inside. That's great news. Next tests would be to:
- Take it down to 120ft for a few minutes
- Deploy it empty at 70ft for a week or so to make sure there is not significant material degradation happens
-
Got Pyboard and some PVC
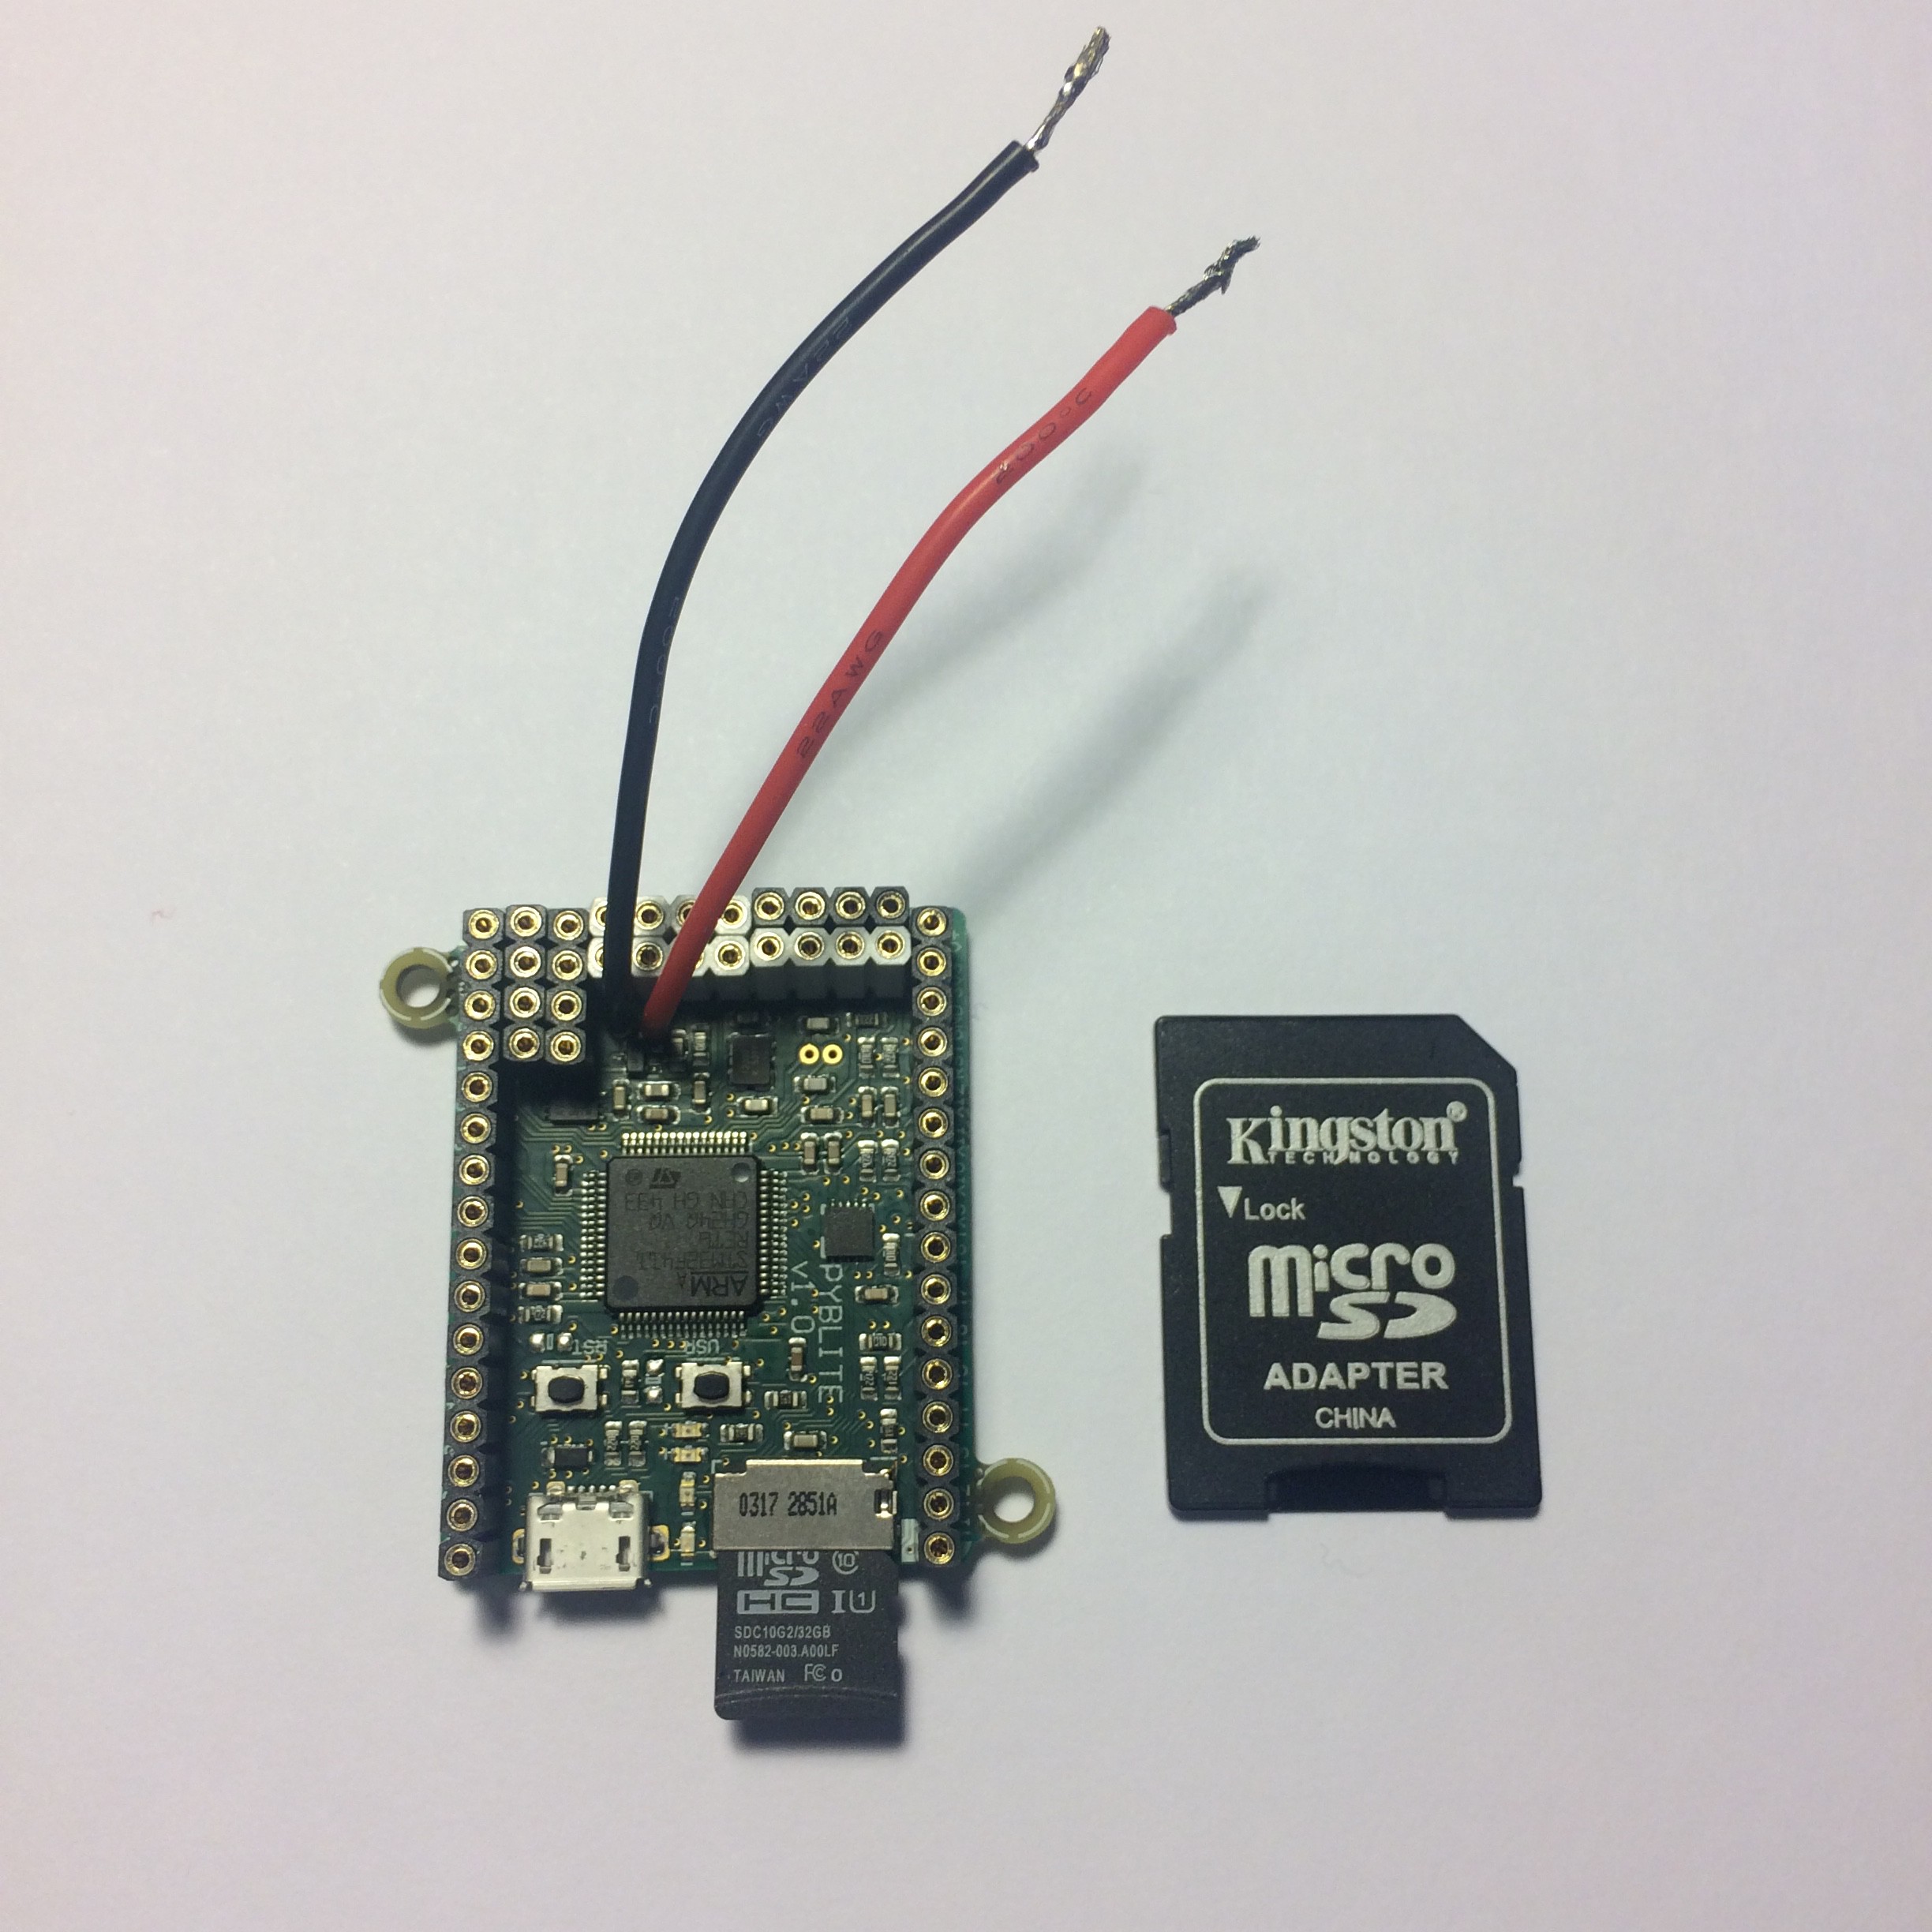
05/12/2018 at 18:27 • 0 commentsSo yesterday I got my Pyboard Lite 1.0 with accelerometer.
![]()
Very nice and tiny board. Thought that it came in broken only to figure out that micro-USB cable I used was not working. Couldn't make it show up as a COM port on my Windows machine. Rest of the day was spent trying to install Ubuntu as my second OS. Everything works just fine with Ubuntu - you can see the board as a flash drive, you can connect to it using screen or ampy from Adafruit. I needed to switch to root user to use ampy. And you cannot have both connected to PyBoard. One or the other only.
First difficulty is error handling and debugging. If you have syntax or runtime error in your scripts the only thing you'll see is green and red leds alternating on the board. The only way to figure what's going on is to connect to REPL and try to execute your script line by line - then you'll see exception or error message. If it becomes a bigger problem I'll try to find out another way to do it.
http://wiki.micropython.org/SDdatalogger provides very good foundation for datalogger implementation. So I'm following it. Code is available at https://github.com/max-kviatkouski/pyboard-current-meter-logger
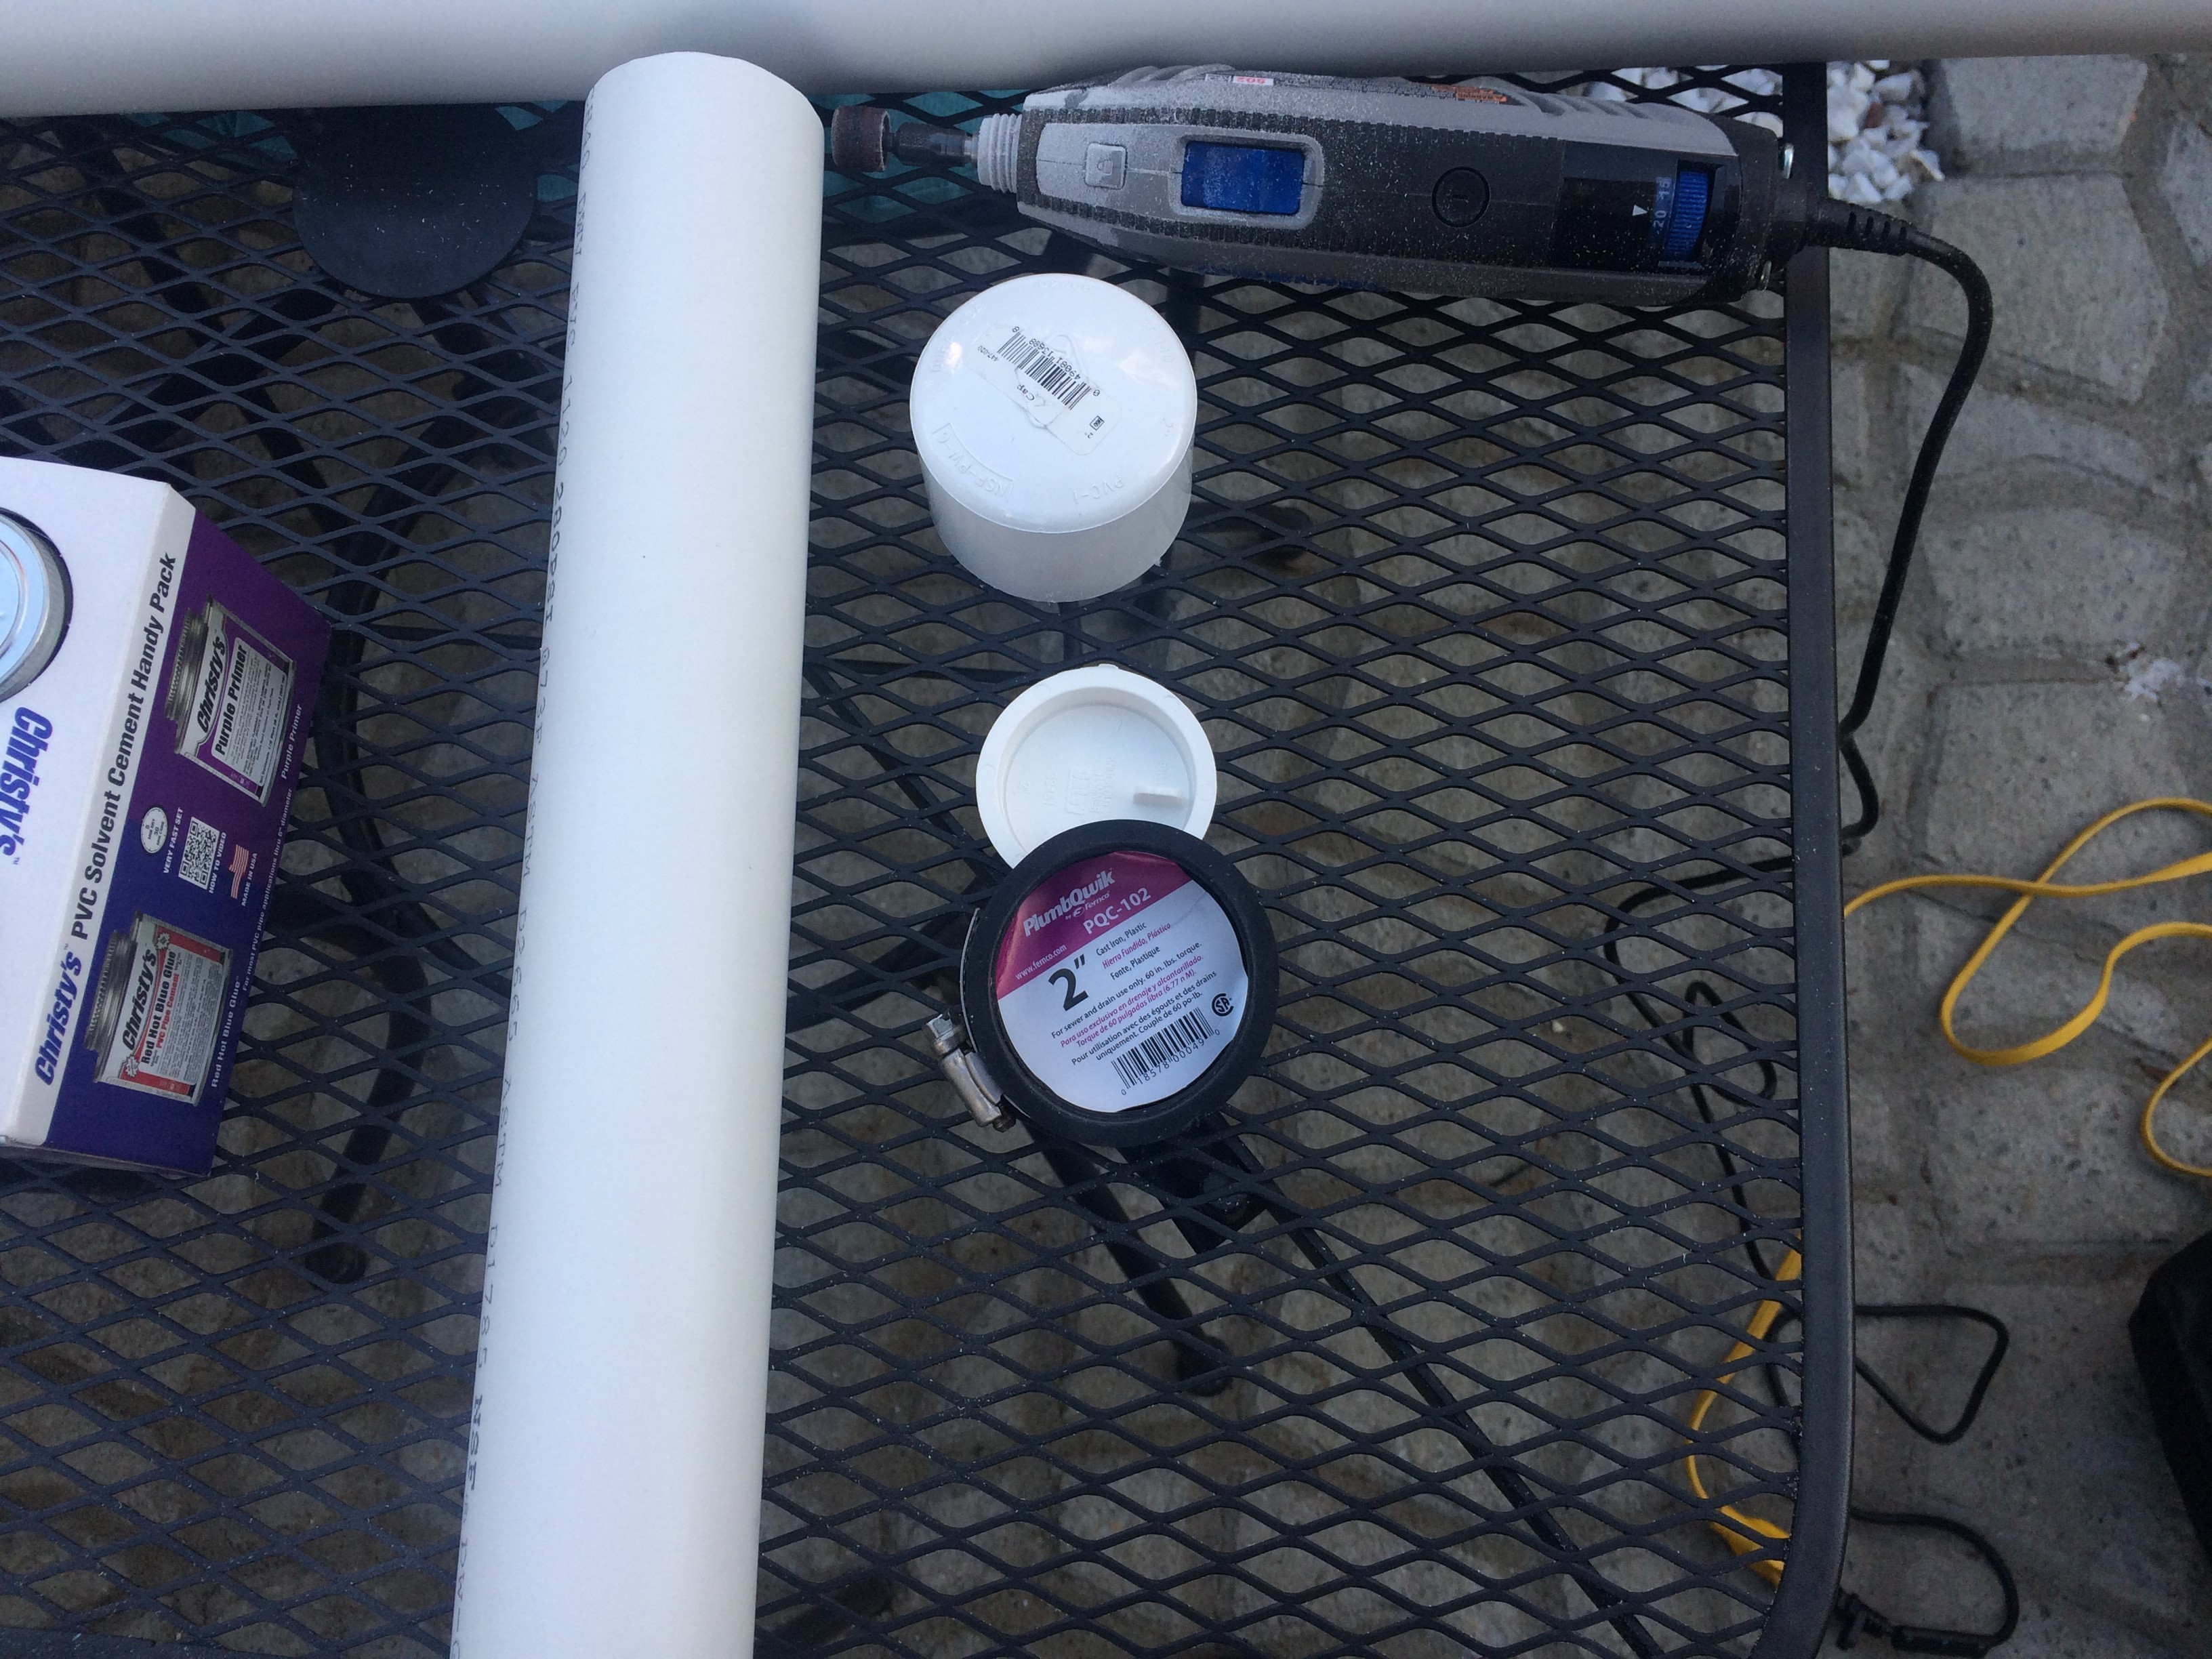
Now back to another stream of work: waterproof housing. After going to Home Depot with PyBoard I figured that 2'' PVC pipes are just enough to fit the PyBoard in. Below are parts for housing v0.1.
![]()
I'm trying to keep housing as simple as possible. On the picture you see 1ft long 2'' PVC pipe (schedule 40), 2'' PVC cap, 2'' insert cap (I plan to use it as a foundation to mount PyBoard on - it is easy to insert and it will ensure consistent alignment of the board between deployments, 2'' rubber cap with clamp. I'm pretty convinced that rubber cap is where it's going to fail but nevertheless I'm willing to give it a try. I'm going to take it down to 70-80ft with me on a dive today.
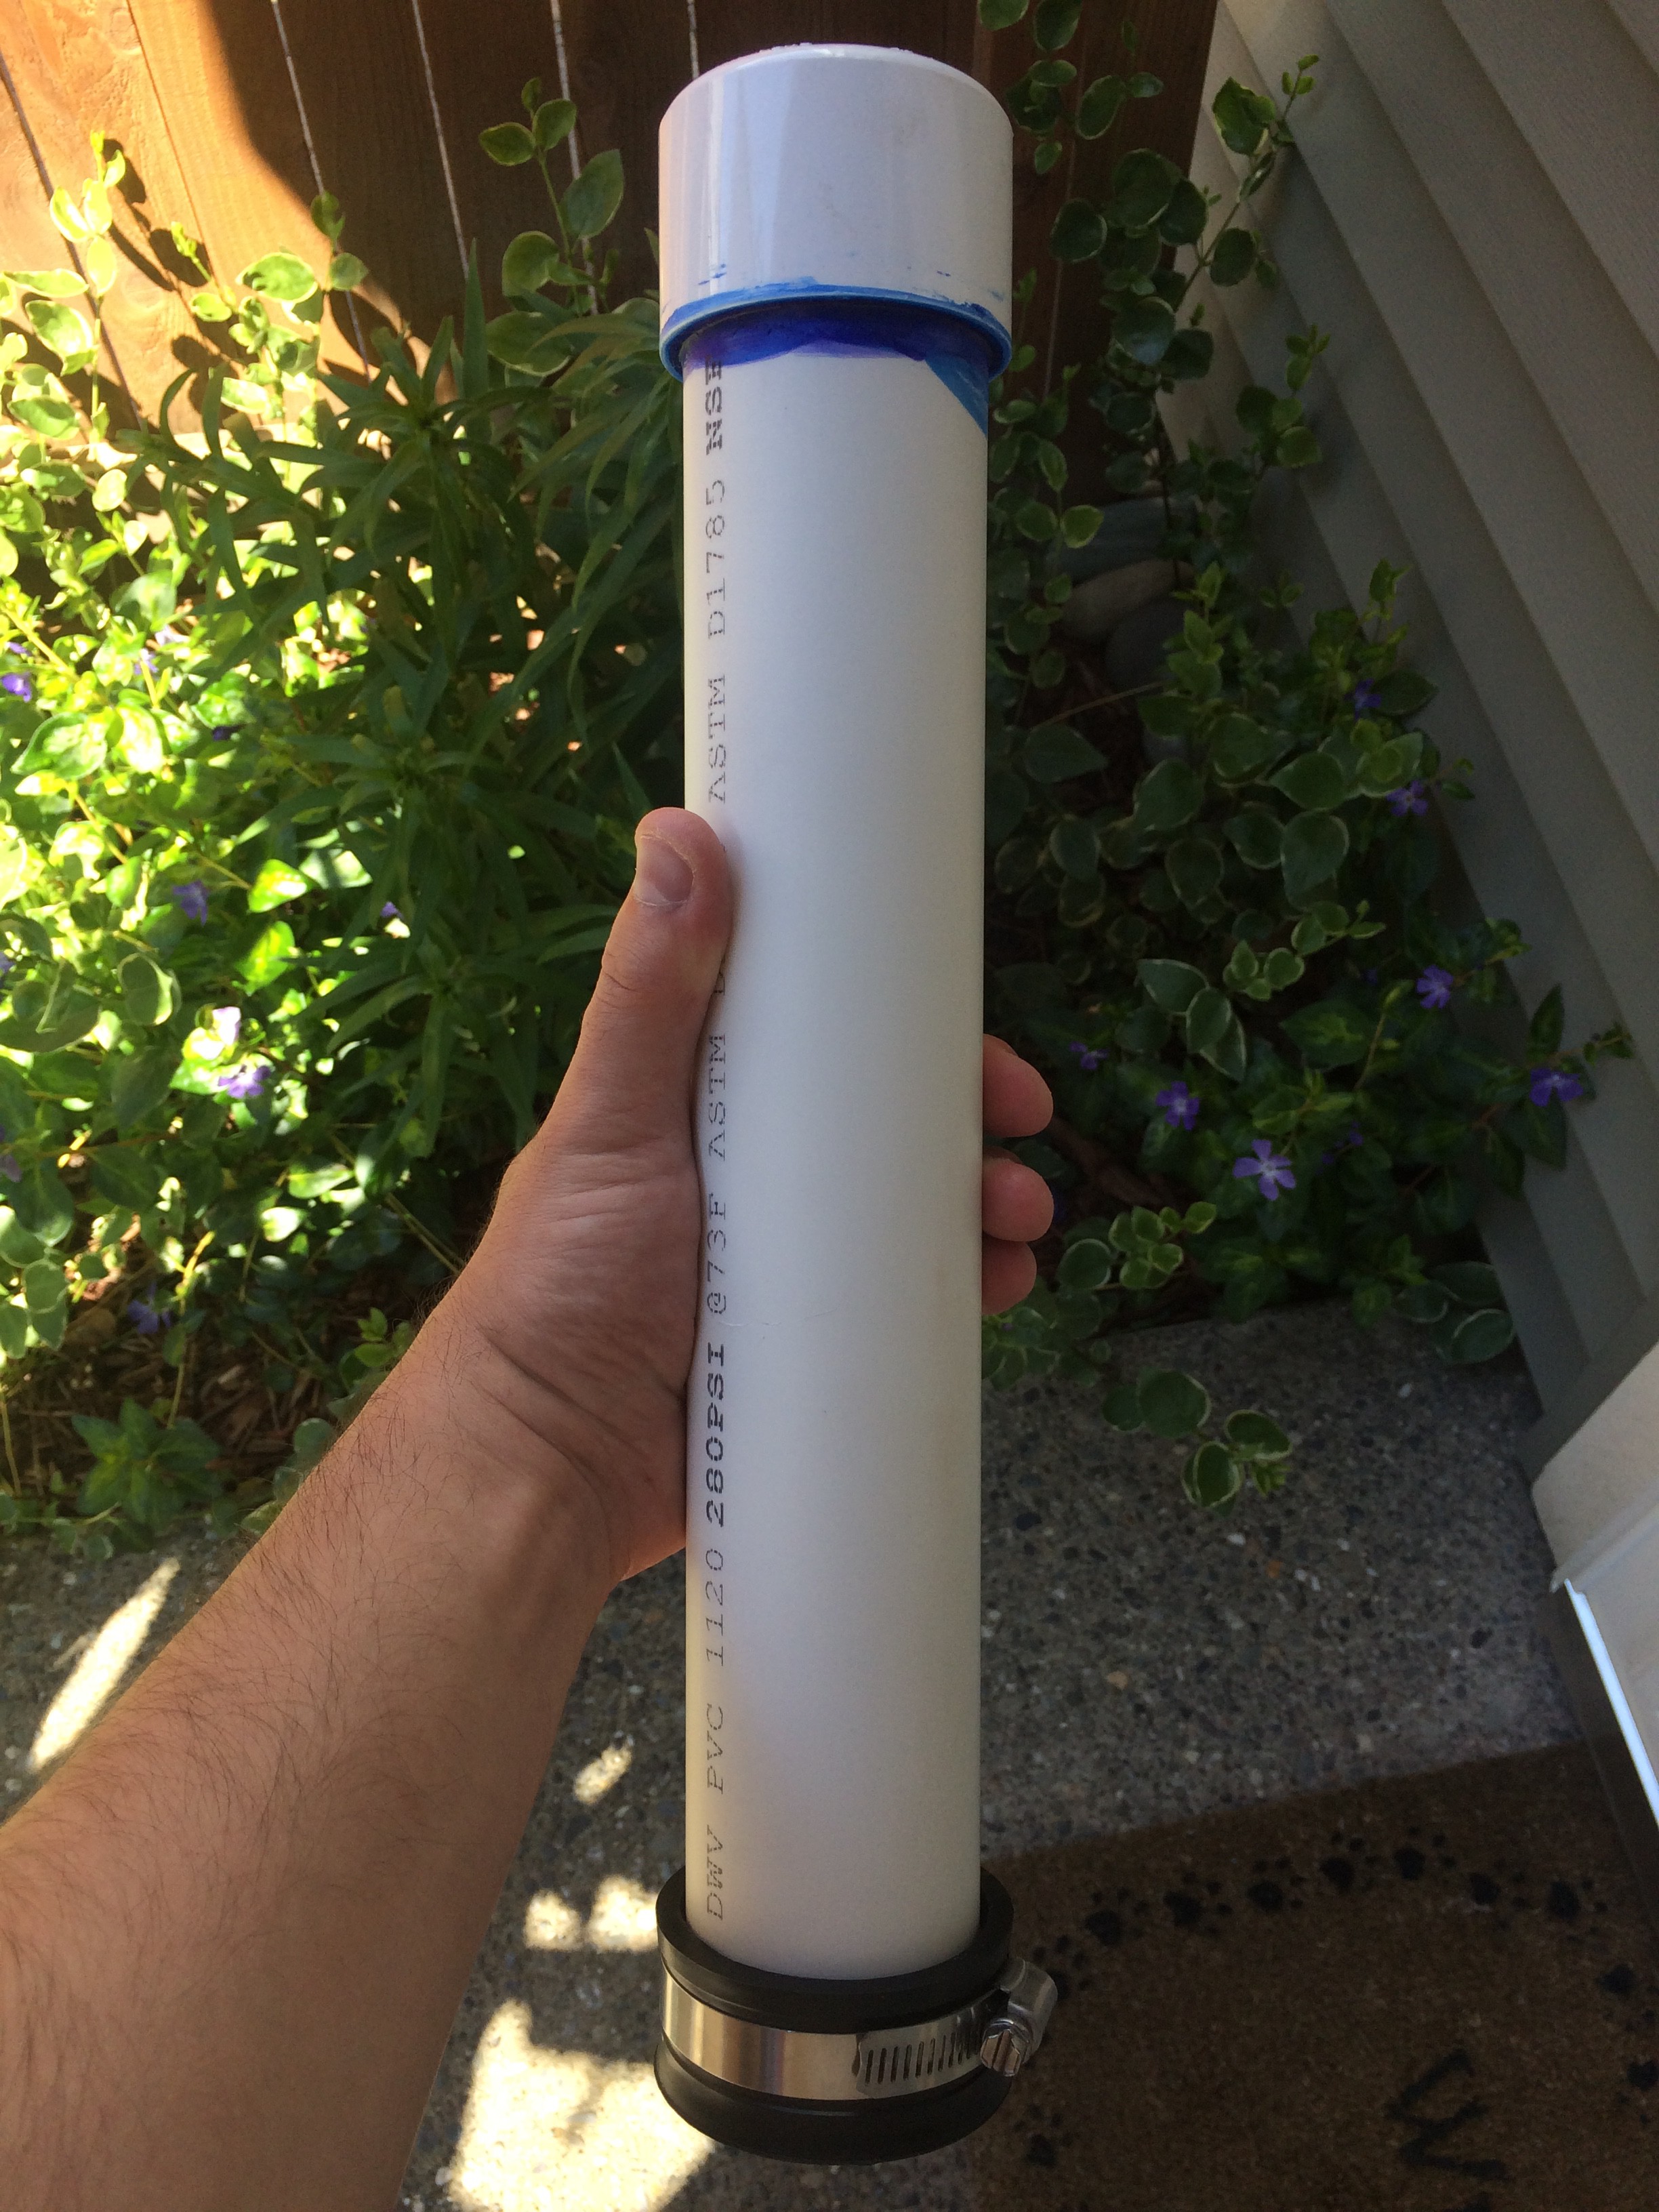
Below is an assembled housing.
![]()
-
Entry 1
05/07/2018 at 05:30 • 0 commentsTilt current meter was chosen since it appears to simplest type of current meter from manufacturing and deployment perspective. An example of commercially available tilt current meter can be seen here: https://lowellinstruments.com/products/tcm-1-tilt-current-meter/. Even though there is more than one manufacturer of tilt current meters they are not particularly cheap. TCM-1 is quoted at $1-$1.5k. Other types of current meters didn't seem to be any cheaper.
Other prospective type of current meter considered was a drag force sphere + load cell described in this work: http://journals.plos.org/plosone/article?id=10.1371/journal.pone.0083240. Unfortunately this approach will only allow to measure absolute current speed. Another benefit of tilt current meter is that whole meter can be fully enclosed. There is no need to make any special waterproof ports for wires, shafts and so on. Even one cap with some o-ring or gasket should be sufficient.
I plan to use PVC pipes and plumbing components to make an enclosing. PVC is relatively cheap, doesn't require any special tools to work with, strong enough to sustain planned depth and it's also not susceptible to corrosion underwater.
Now "the brain" of the meter. In the long run I would like to receive live data stream. But that is much more work. For now my goal is to be able to deploy the meter for a month (or at least two weeks). After that I will retrieve it, download the data and redeploy it again during following dive.
Onset HOBO Waterproof Acceleration Data Logger for G Forces, Tilt, Orientation, Activity and Motion is a very attractive option for following reasons:
- Has software to process data
- Waterproof down to 100ft (no need to deal with sealing enclosure)
- Reasonable price
However, it's limited memory (can keep only 64k measurements for all 3 axes combined - about 6-7 hours or measurements at 1Hz) is a show stopper. And there is really no way to extend that memory.
After googling a little bit I've found what appears to be a perfect candidate: https://www.adafruit.com/product/3497
![]()
Pros:
- Very affordable
- Built-in 3 axis +=1g accelerometer
- On-board voltage regulator allowing voltage range 3.6 to 16V
- MicroSD card slot - should allow to have enough space for prolonged continuous logging.
- Python as programming language
Cons:
- Need to write firmware for this controller to perform data logging
- Unknown power consumption
- Need to write software to process data log (since I'm a software engineer it's not a big issue, I'm much more comfortable with it than with soldering)
I've already ordered the board so hopefully can tinker with it late next week.
So far I see following challenges ahead:
- Making a waterproof PVC enclosing (out 2 or 3'' PVC pipes) with at least one cap that can be re-opened
- Figuring out controller power needs and arranging sufficient power supply for at least 2 weeks of logging
- Calibrating built-in accelerometer
- Finding a way to deploy the meter (on a rope or some elastic hose)
- Calibrating the meter to find match between inclination angles and current speeds
- Making a base for the meter (hopefully one-two cinder blocks will do)
- Finding a way to redeploy the meter without ruining calibration
- Writing some software to process datalog
Next action items:
- Try to make a waterproof PVC enclosing
- Get some hands on with controller board.
Cheap underwater tilt current sensor.
Cheap (<$100) underwater current sensor that can be deployed at 70ft depth. Your thoughts, comments and advice are very welcome here!