Today I gave a fresh try to the tandem networkboot-customiso.
As the network boot is already working, I will try to explain the steps to create the iso and make it available over tftp boot.
- Create an ISO I can boot: (ideally with pre-installed compilers and stuff)
- boot from that ISO -> fight again the UEFI vs BIOS monster.
- add filesystems to my ISO, (ideally I would like to have home in the network, but a local scratchpad mount using the node hdd)
First attempt
As my ISO is based in Ubuntu16 (don't look at me like that, the man has constraints) I found a compresive list of steps to follow here: https://help.ubuntu.com/community/LiveCDCustomizationFromScratch
Nevertheless one must fill the gaps when following this document:
prepare the host
The following code creates some sort of fake filesystem and then we can "boot" the fresh system inside:
mkdir -p work/to_be_sysfs
cd work
sudo debootstrap --arch=amd64 xenial to_be_sysfs
sudo mount --bind /dev to_be_sysfs/dev
sudo cp /etc/hosts to_be_sysfs/etc/
sudo cp /etc/resolv.conf to_be_sysfs/etc/
sudo cp /etc/apt/sources.list to_be_sysfs/etc/apt/
cat /etc/apt/sources.list
sudo chroot to_be_sysfs/
I copied some network configuration and the package manager configuration. no issues here as the target ISO is the same distro version as the host machine.
Inside the Fake Linux:
And then after chroot we are like in a fresh system (so fresh that does not have anything)
inside of chroot:
mount none -t proc /proc
cat /proc/cpuinfo mount none -t sysfs /sys
mount none -t devpts /dev/pts
export HOME=/root
export LC_ALL=C
sudo add-apt-repository ppa:ubuntu-desktop/ppa
sudo apt-key adv --keyserver keyserver.ubuntu.com --recv-keys 399B698EEA9EF163B6F9A0F62CC98497A1231595 apt-get update
apt-get install --yes dbus
dbus-uuidgen > /var/lib/dbus/machine-id
cat /var/lib/dbus/machine-id
dpkg-divert --local --rename --add /sbin/initctl
apt-get --yes upgrade
apt-get install --yes ubuntu-standard casper lupin-casper
apt-get install --yes discover os-prober
apt-get install --yes linux-generic apt-get install --yes grub2
here the problems begin, first whit finding out what PPA GPG key to use... but a fast google came out with that one that seems to work, because it downloads stuff.
Then, installing GRUB. it asked questions that were not described in the web, I got pretty scared that I was flashing the boot partition of the host system, I closed my eyes and selected one of the options. Everithing seems to work fine in the host, so it was a success
Back to the host
Now is time to unmount dev partition... but guess what! it does not.. I can not locate which process keeps the resource busy. But this was fixed with a system reboot (although if the resource was blocked, there should be a reason for it).
reboot
cd work/
sudo umount to_be_sysfs/dev
sudo apt-get install syslinux squashfs-tools genisoimage
mkdir -p image/{casper,isolinux,install}
cp to_be_sysfs/boot/vmlinuz-4.4.0-128-generic image/casper/vmlinuz
sudo cp to_be_sysfs/boot/vmlinuz-4.4.0-128-generic image/casper/vmlinuz
sudo cp to_be_sysfs/boot/initrd.img-4.4.0-128-generic image/casper/initrd.lz
ls to_be_sysfs/boot/
ls /usr/lib/syslinux/isolinux.bin
And here is where we stop. there is not memtest, and not isolinux... everithing points out that the tutorial was based on some old livecd... and it requires some magic knowledge of the bootstrap process to update it to new distros...
Lets try something else :(
Second attempt:
I found something else: this seems to be a little more updated:
https://www.hiroom2.com/2016/06/10/ubuntu-16-04-create-customized-livedvd/
This code is basically the same series of steps, but this time a tool called systemd-nspawn. It is similar to chroot but in this case the new system is booted. I guess we are running in a new process space now, somehow this gives me a better feeling.
Everything runs smoothly until the ISO is generated (I skipped the Japanese keyboard layout as I don't see myself using that).
There was a difference when comparing this method grub script with the one I currently use in PXE or the grub first from the first method. it defines the boot argument of the kernel as live... ok, this is new.... the other one used casper. I may have to learn what is all of this about:
# this one from the live CD
menuentry "Try Ubuntu without installing" {
set gfxpayload=keep
linux /casper/vmlinuz.efi file=/cdrom/preseed/ubuntu.seed boot=casper quiet splash ---
initrd /casper/initrd.lz
}
# this one from my PXE live cd
menuentry "Ubuntu 16 live cd" {
linux ubuntu-16.04.4-desktop-amd64/casper/vmlinuz.efi root=/dev/nfs boot=casper netboot=nfs nfsroot=10.1.0.1:/srv/tftp/ubuntu-16.04.4-desktop-amd64 splash --
initrd ubuntu-16.04.4-desktop-amd64/casper/initrd.lz
}
# and this one from this second method
serial --speed=115200 --unit=0 --word=8 --parity=no --stop=1
terminal_input console serial
terminal_output console serial
menuentry 'boot the thing' {
linux /boot/vmlinuz-4.4.0-128-generic boot=live console=tty1 console=ttyS0,115200
initrd /boot/initrd.img-4.4.0-128-generic
}
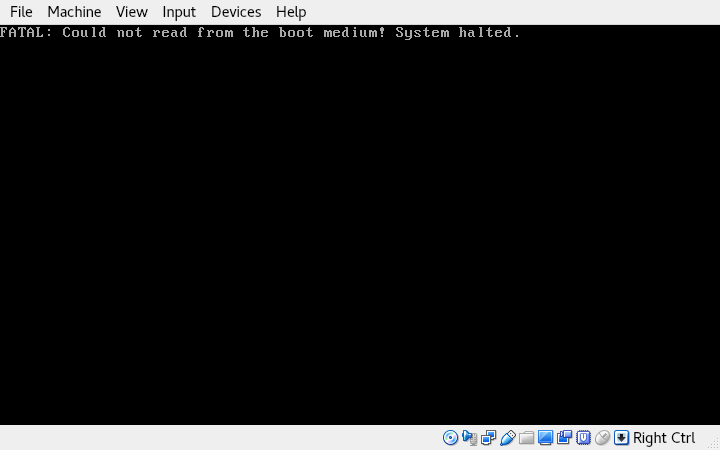
the outcome of this one last method was the following:

maybe not quite there yet...
Conclusion
From here I have some options:
- tweak method 2 to use casper, whatever this means.
- find some other tutorial to follow.
- learn to debug the bootloader.
- boot in a virtual machine first and then move into pxe.
- get myself a cold beer.
 Luis Ayuso
Discussions
Become a Hackaday.io Member
Create an account to leave a comment. Already have an account? Log In.