Introduction
In this tutorial, we will check how to setup a socket server on the ESP32 and how to contact it using Putty as a socket client. The code will be implemented on the Arduino core for the ESP32.
Note that we have already covered in greater detail how to set up a socket server on the ESP32 on this previous post. Nonetheless, we had to implement a Python socket client to reach the server and thus test the code.
Although Python is a very easy to use language, using Putty is even easier and doesn’t need any kind of programming to implement the client, allowing us to focus on the ESP32 code.
Among st many other features, Putty allows us to establish a raw socket connection to a server, making it a very useful tool for testing. Putty is a free and open source tool and you can download it here.
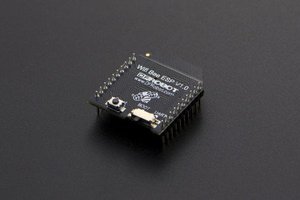
The tests were performed using a DFRobot’s ESP32 module integrated in a ESP32 development board.
The code
To get started, we need to include the WiFi.h library, so we can connect the ESP32 to a Wireless network. We will also need to store the network credentials (network name and password), so we can connect to it.
#include "WiFi.h"

const char* ssid = "yourNetworkName";
const char* password = "yourNetworkPassword";
In order to setup the server, we will need an object of class WiFiServer, which we will store in a global variable so we can use it on the Arduino setup and loop functions.
As we have seen in previous posts, the constructor of this class receives the port where the server will be listening. I will be using port 80, but you can test with other values.
WiFiServer wifiServer(80);
Moving on to the setup function, we will start by opening a serial connection so we can later output the results of our program. Followed by that, we will connect the ESP32 to the WiFi network to which we have previously declared the credentials.
At the end of the setup function and after the WiFi connection procedure is finished, we will call the begin method on our WiFiServer object so the server starts listening to incoming socket clients.
You can check the full setup function code below, which already includes the mentioned connection to the WiFi network and the call to the begin method to start the socket server.
void setup() {

  Serial.begin(115200);

  delay(1000);

  WiFi.begin(ssid, password);

  while (WiFi.status() != WL_CONNECTED) {
    delay(1000);
    Serial.println("Connecting to WiFi..");
  }

  Serial.println("Connected to the WiFi network");
  Serial.println(WiFi.localIP());

  wifiServer.begin();
}
We will handle the connection of clients and the reception of data on the Arduino main loop function.
The first thing we need to do is calling the available method on our WiFiServer object. This method takes no arguments and returns as output an object of class WiFiClient.
Note that by default this is a non-blocking method, which means it will return an instance of the WiFiClient class even if there is no client connected.
Thus, we need to check if the client is indeed connected, either by calling the connected method on the returned object and checking its value or directly using the returned object on a IF condition. This second option is only possible because the WiFiClient class overrides the C++ bool operator to return the same value as the connected method.
WiFiClient client = wifiServer.available();

if (client) {
  // Code for handling the client
}
Inside the IF block we need to handle the reception of data sent from the client. Nonetheless, we will only try to get data while the client is connected and we need to detect when the client is no longer detected. So, we will do a inner loop that will keep running only while the client is connected.
To check if the client is connected, we simply need to call the connected method on the WiFiClient object, as already mentioned before. The return of this function can be used as the stopping condition of the while loop.
while (client.connected())...
Read more »
 muzi
muzi


