 zakqwy
Floe has a wheel kit assembly and installation guide that shows the location of the part ("wheel kit assembly", p/n 110-00146-02) I am refurbishing: https://floeintl.com/wp-content/uploads/2018/03/610-17300-00_Medium_Wheel_Kit_DISC.pdf
0%
0%
Floe Aluminum Dock Lead Screw Replacement
Floe docks have ACME screws for height adjustment, but they can rust up and aren't designed to be user-replaceable. Hmmm...
Become a Hackaday.io member
Already have an account? Log in.
Just one more thing
To make the experience fit your profile, pick a username and tell us what interests you.
Pick an awesome username
hackaday.io/
Your profile's URL: hackaday.io/username. Max 25 alphanumeric characters.
Pick a few interests
Projects that share your interests
People that share your interests
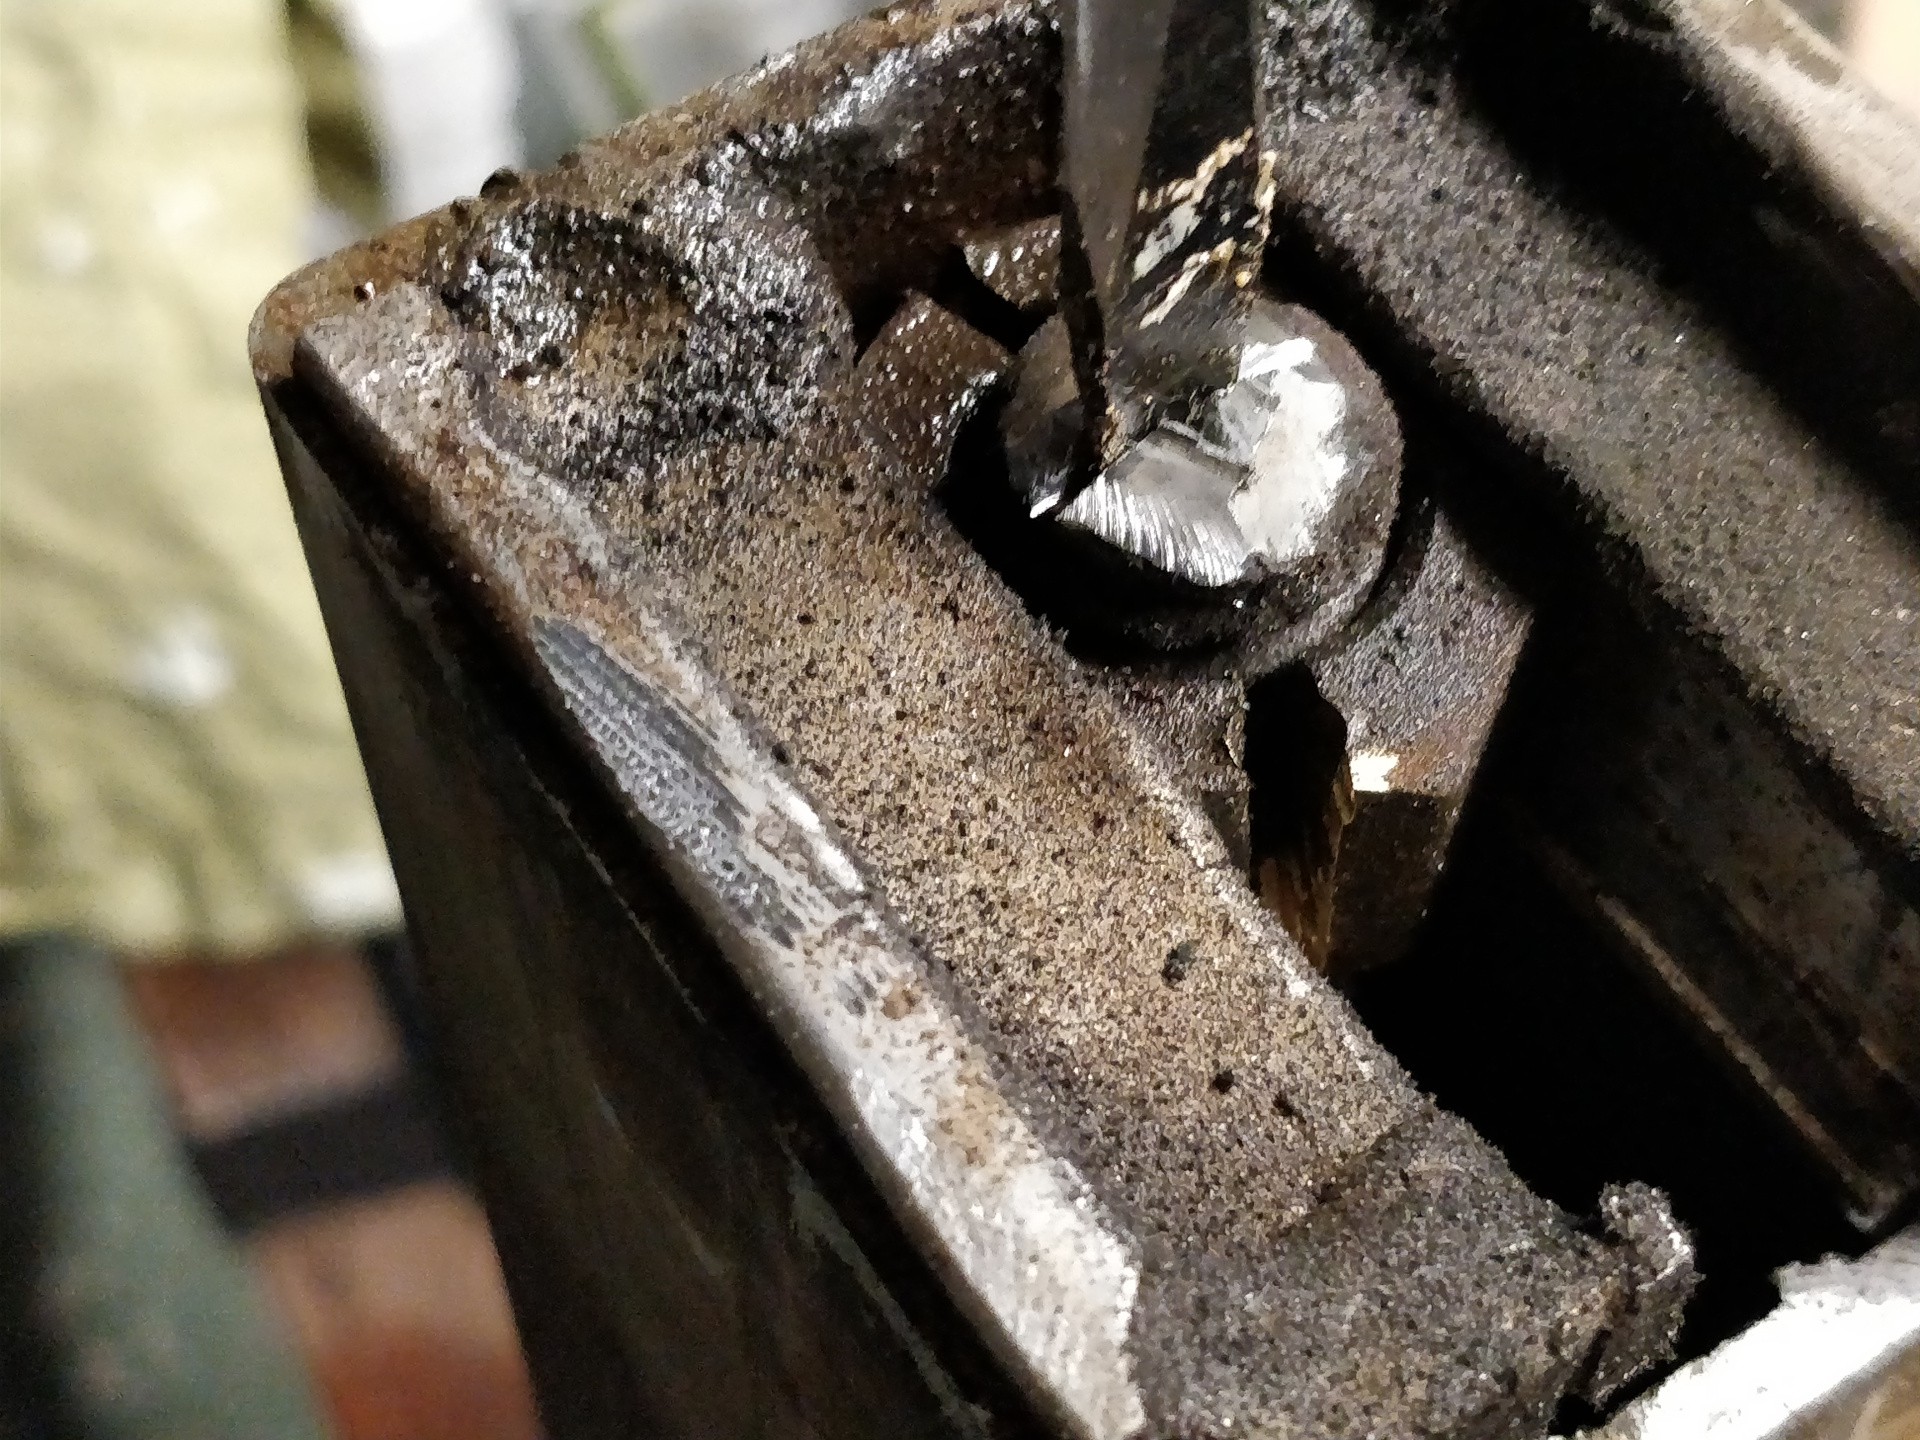
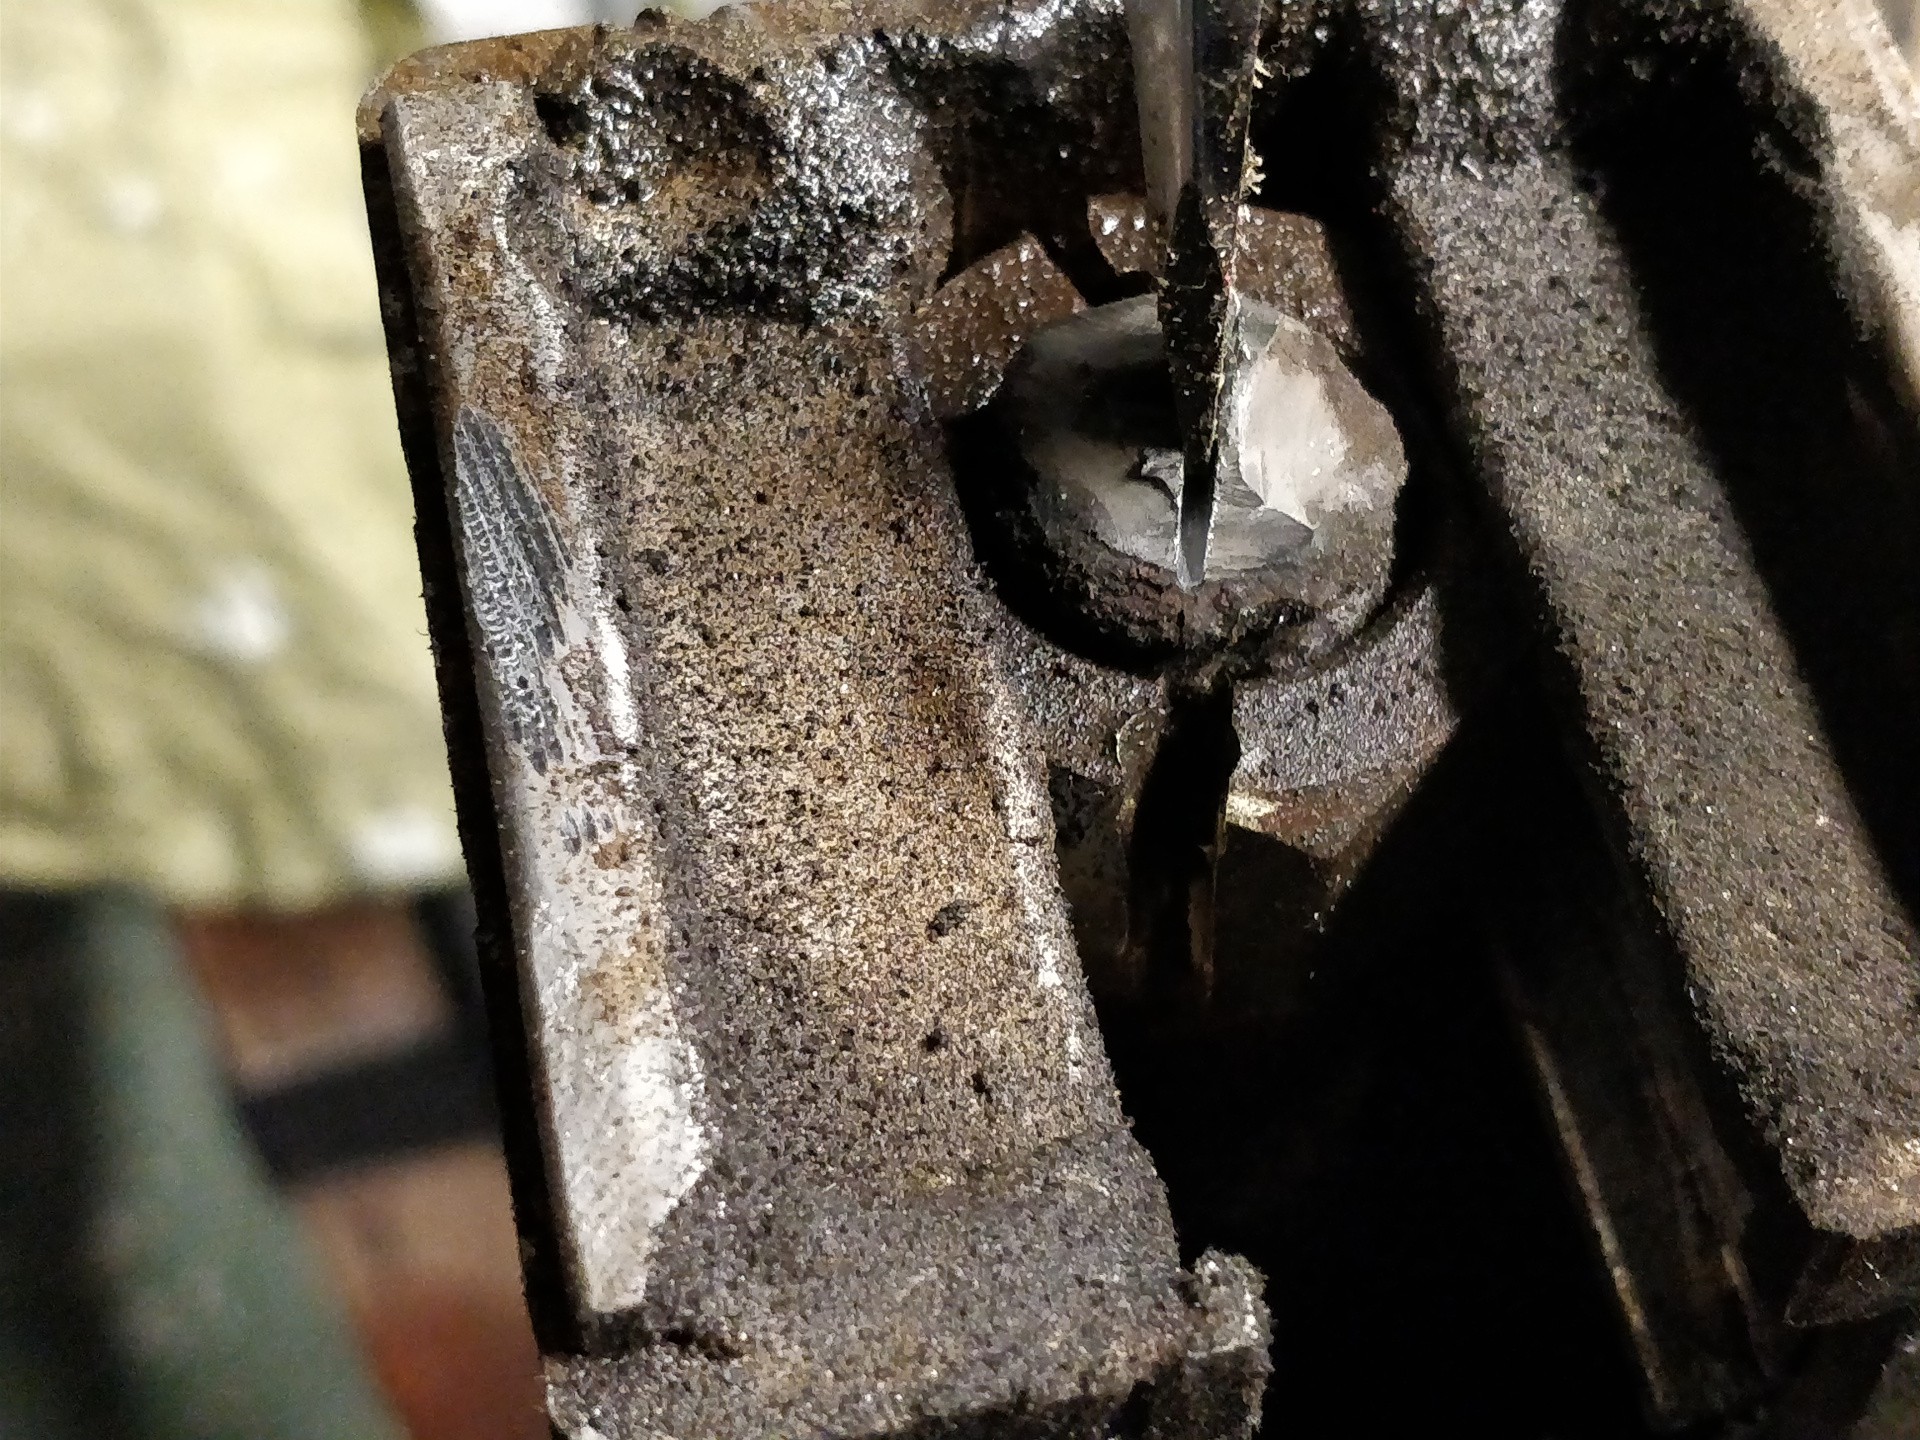
 I unscrewed the three aluminum posts, revealing the Acme screw:
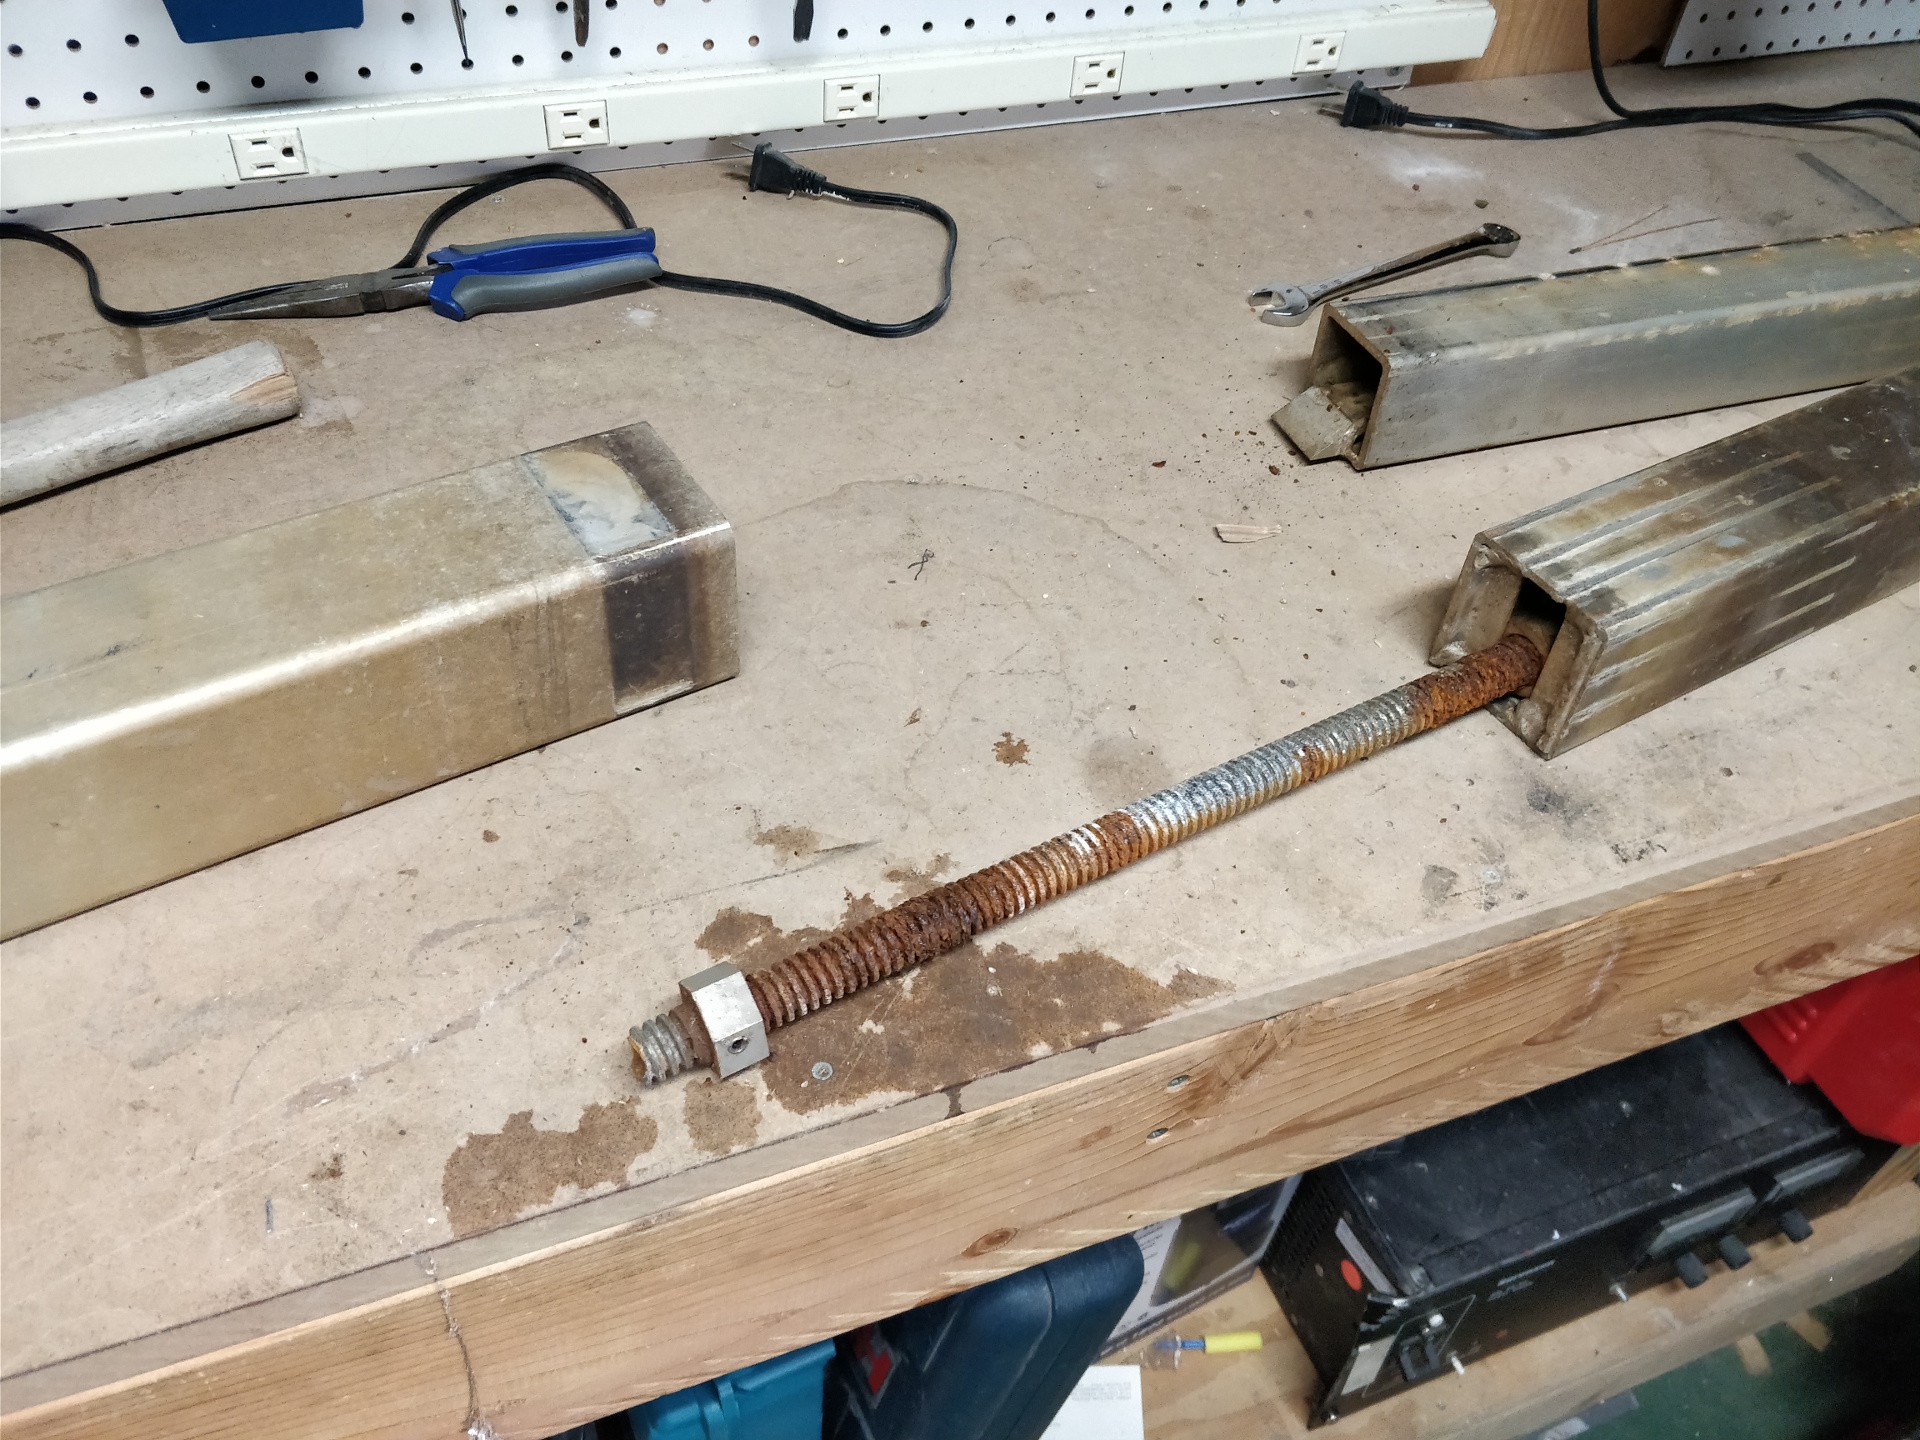
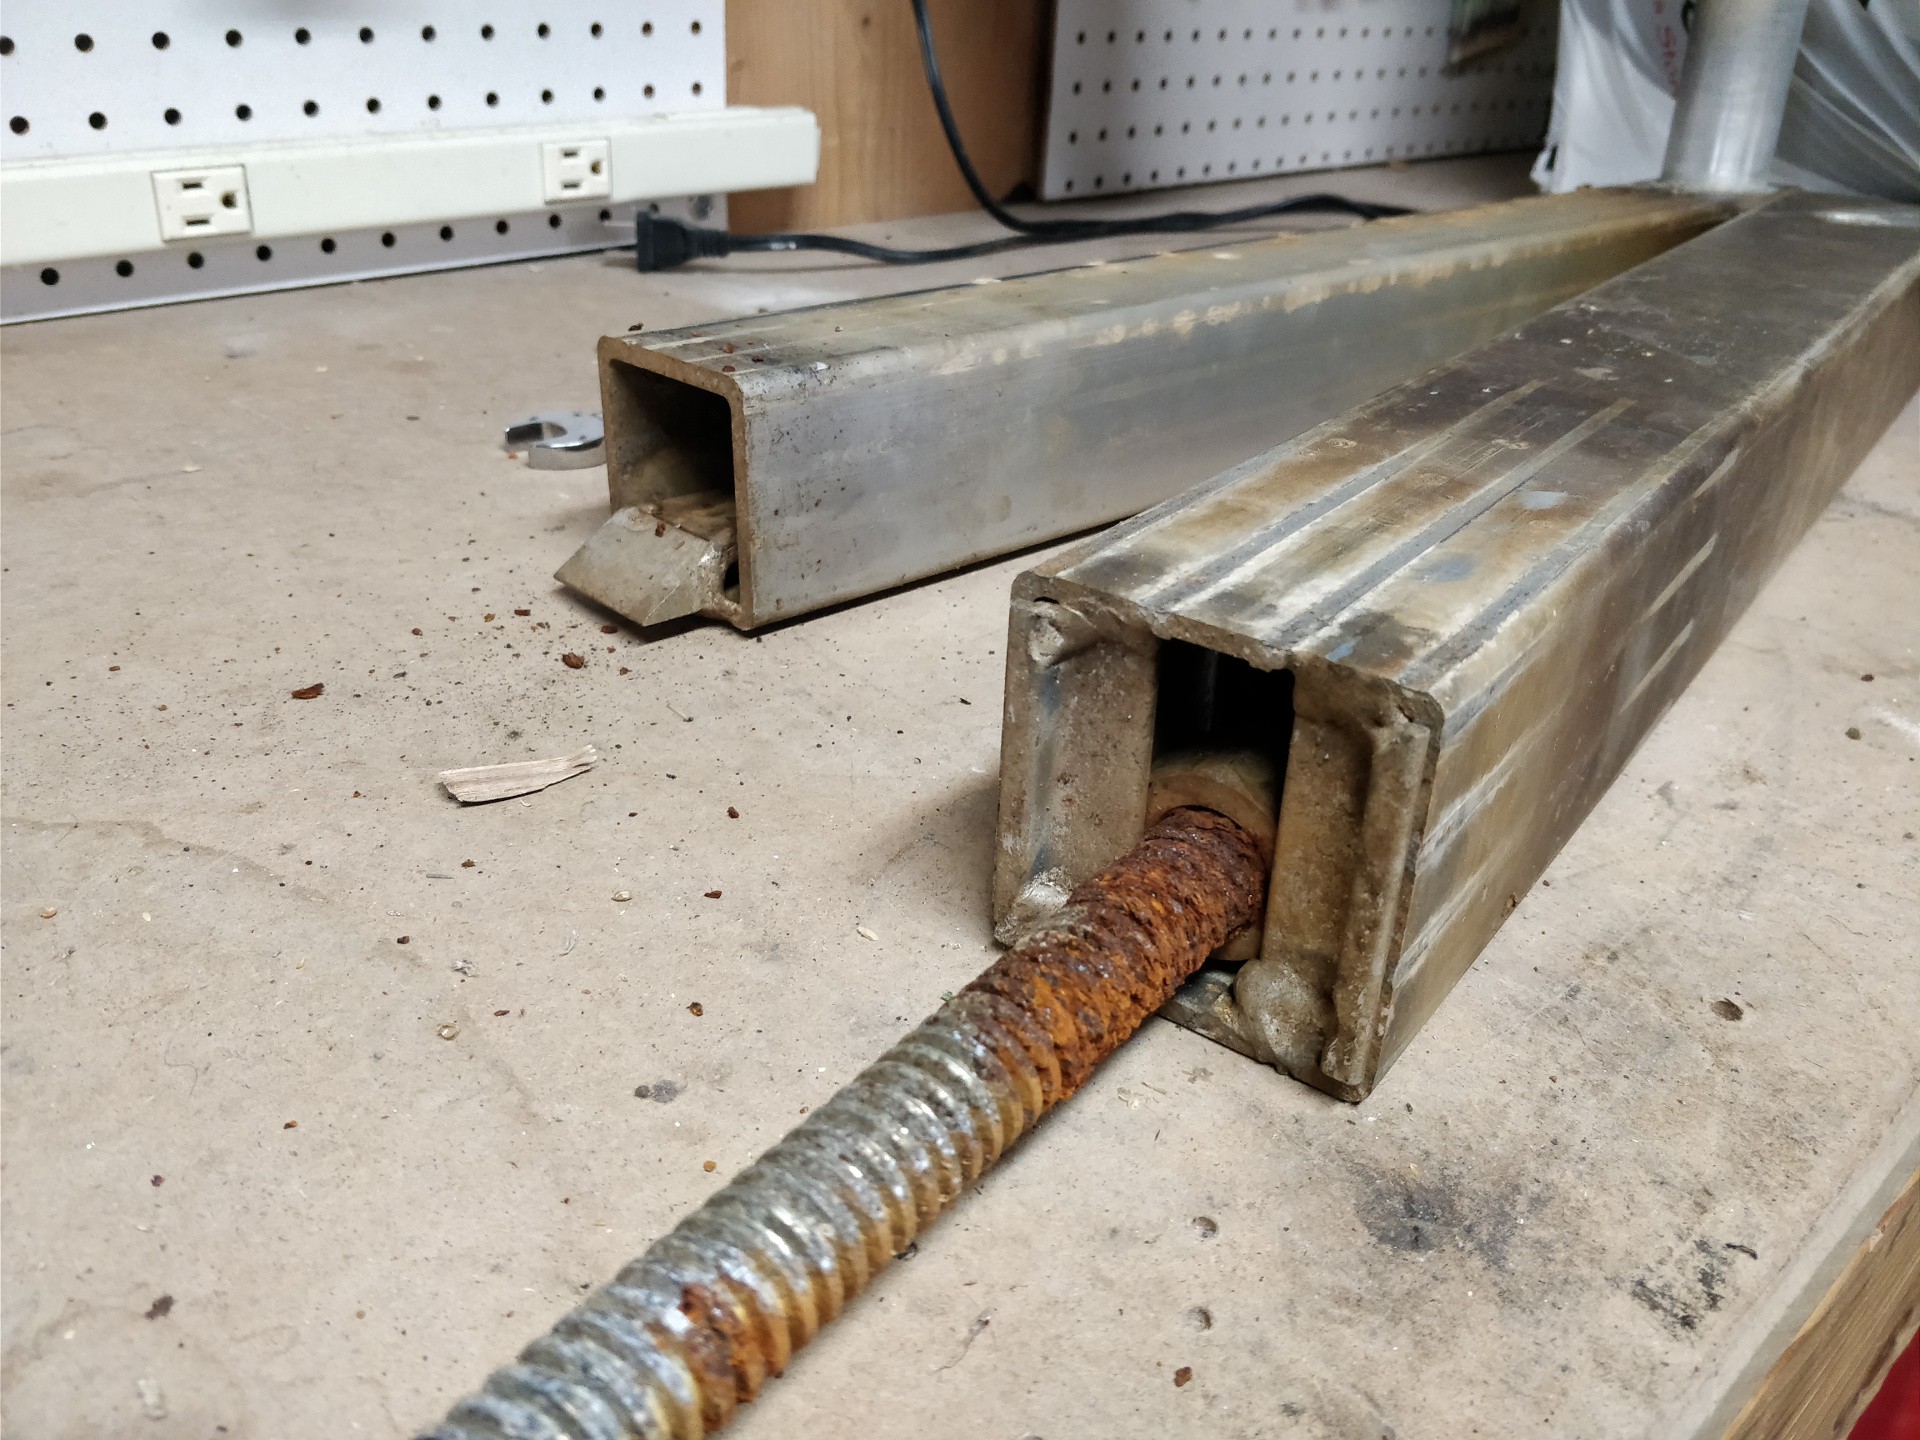
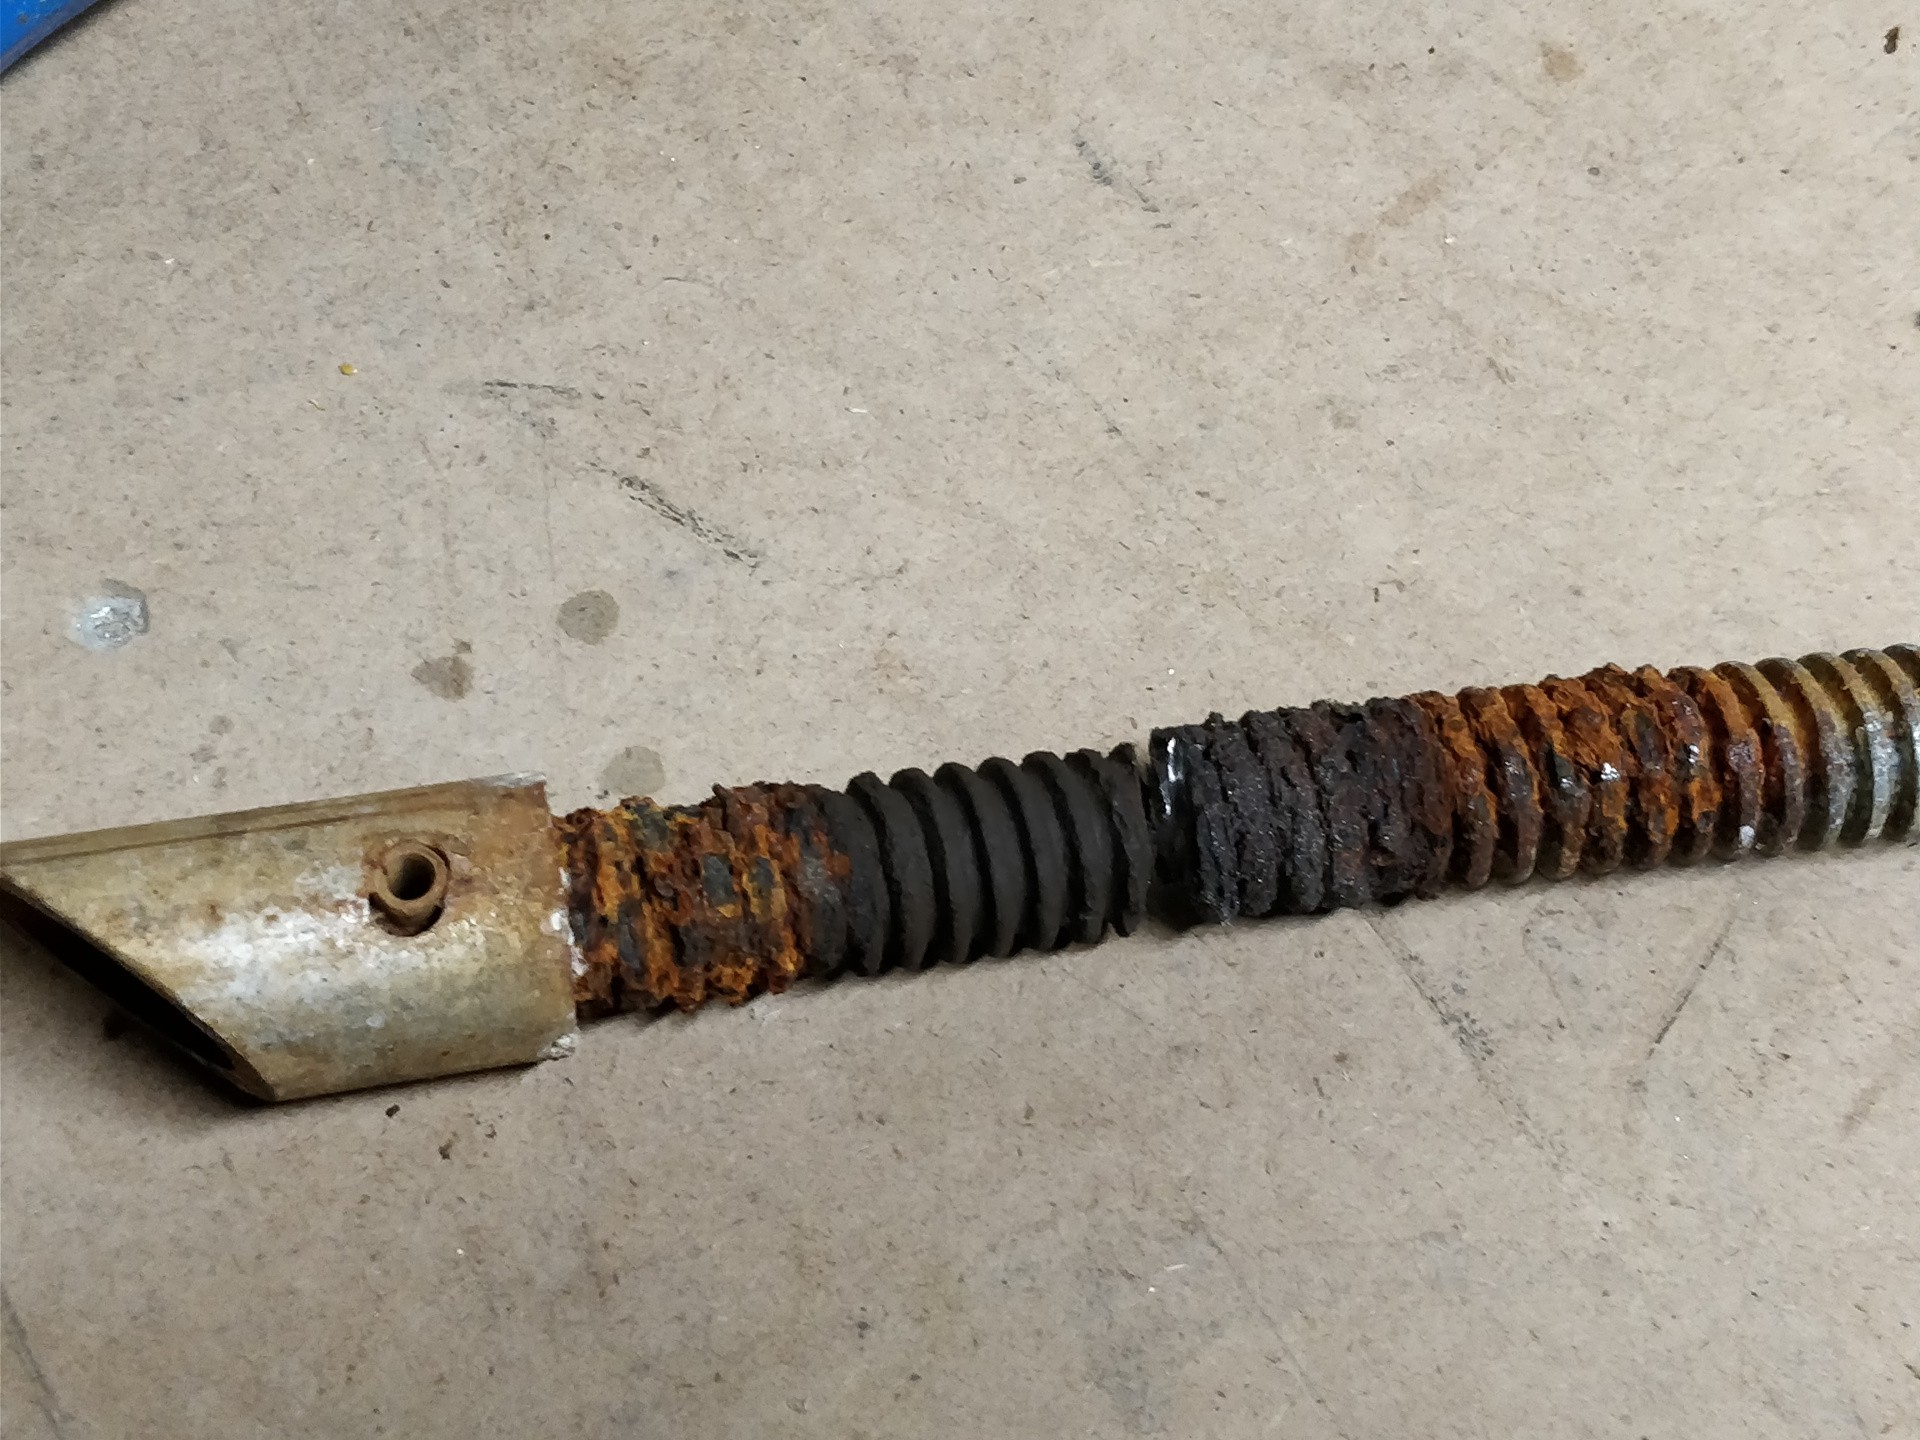
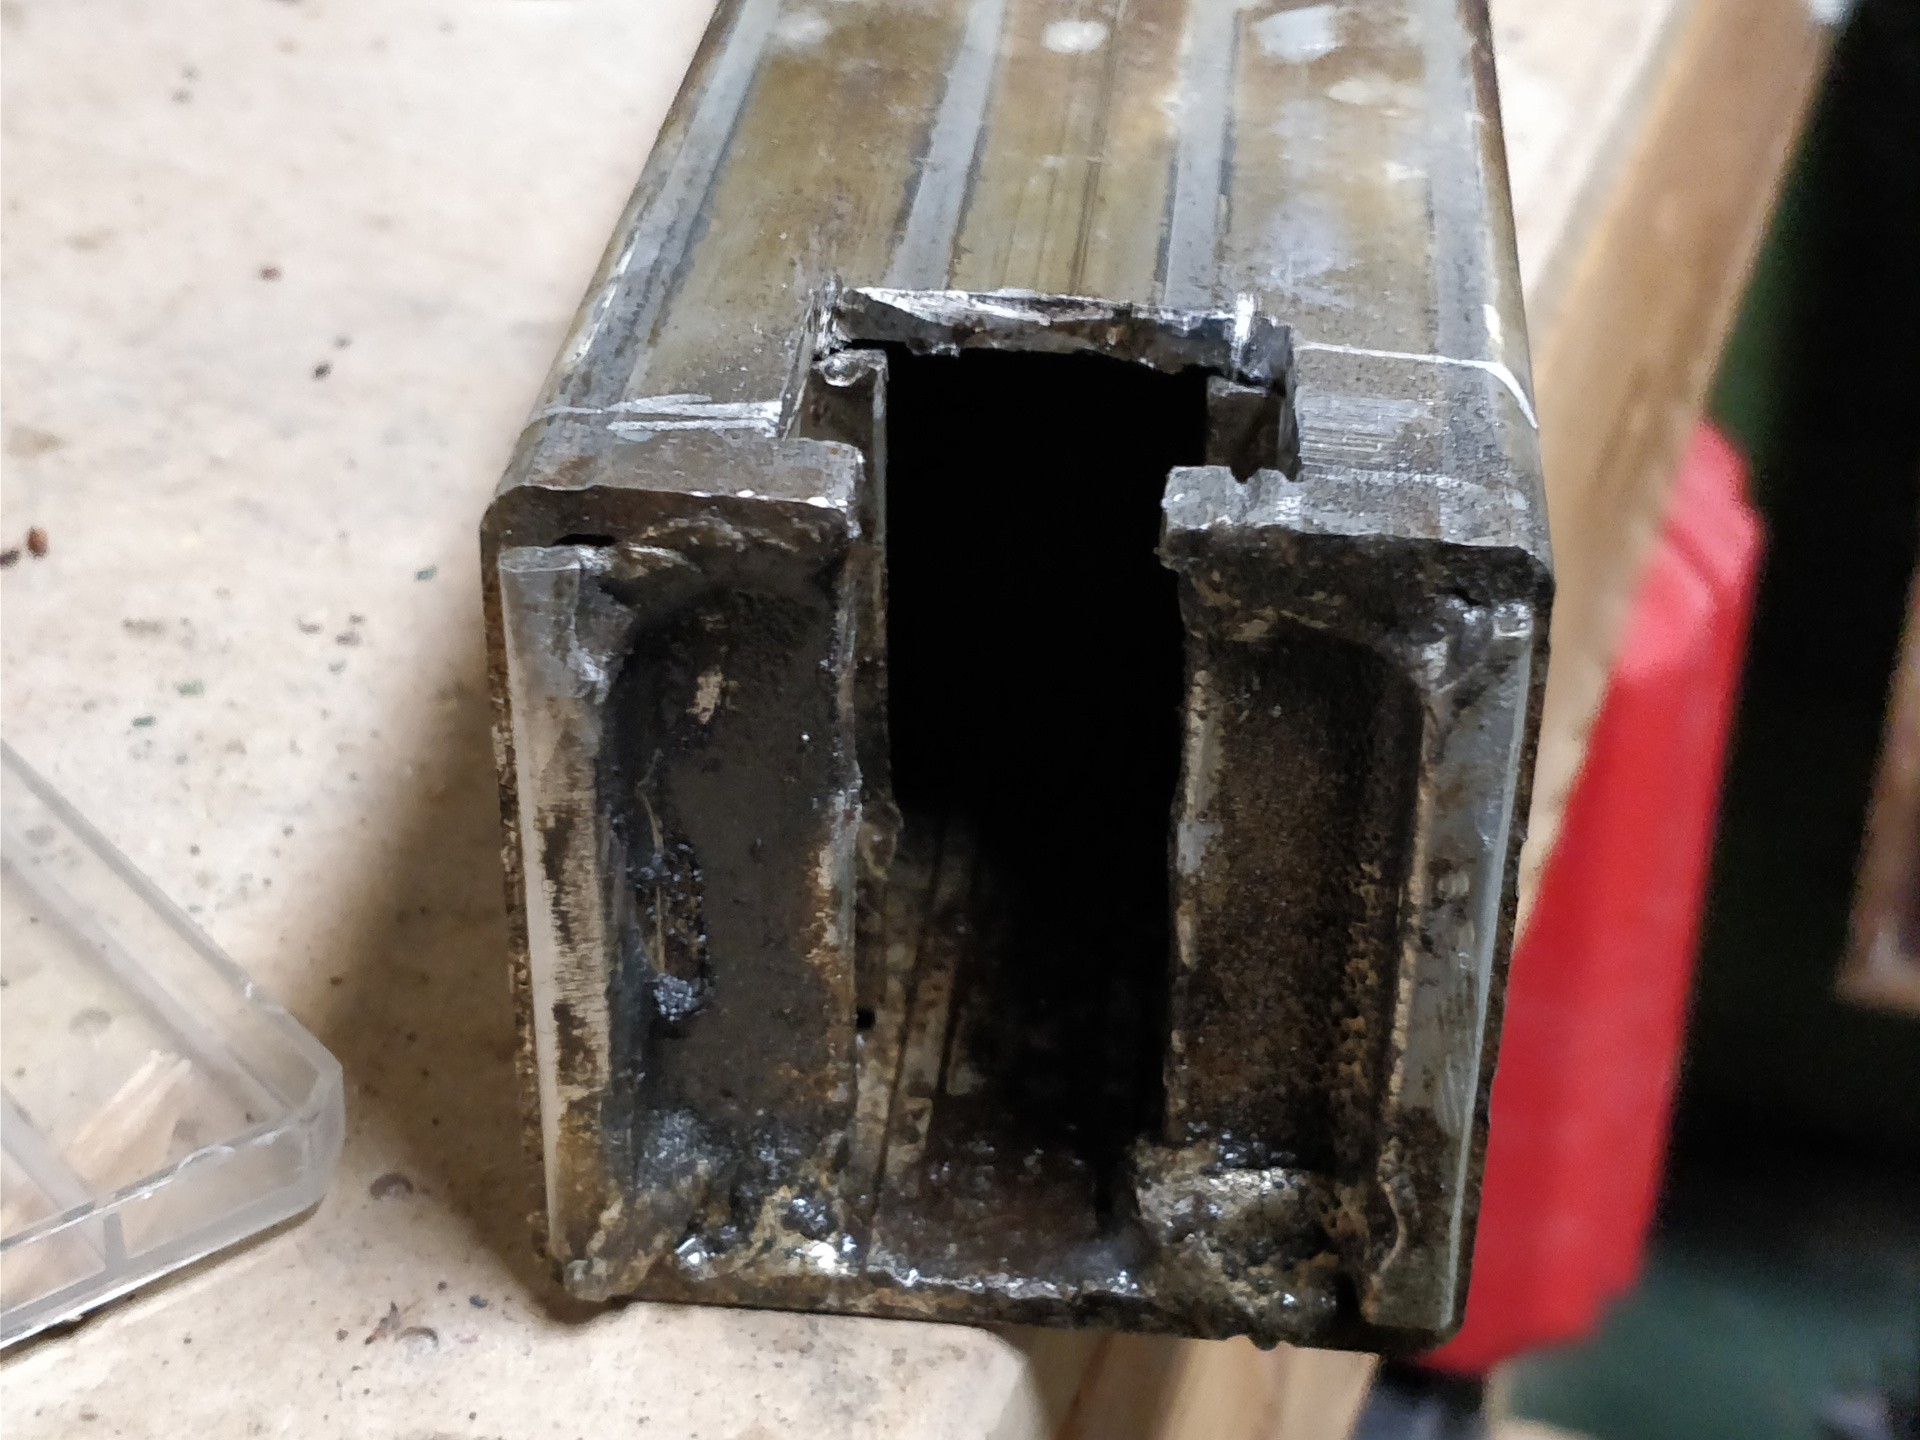
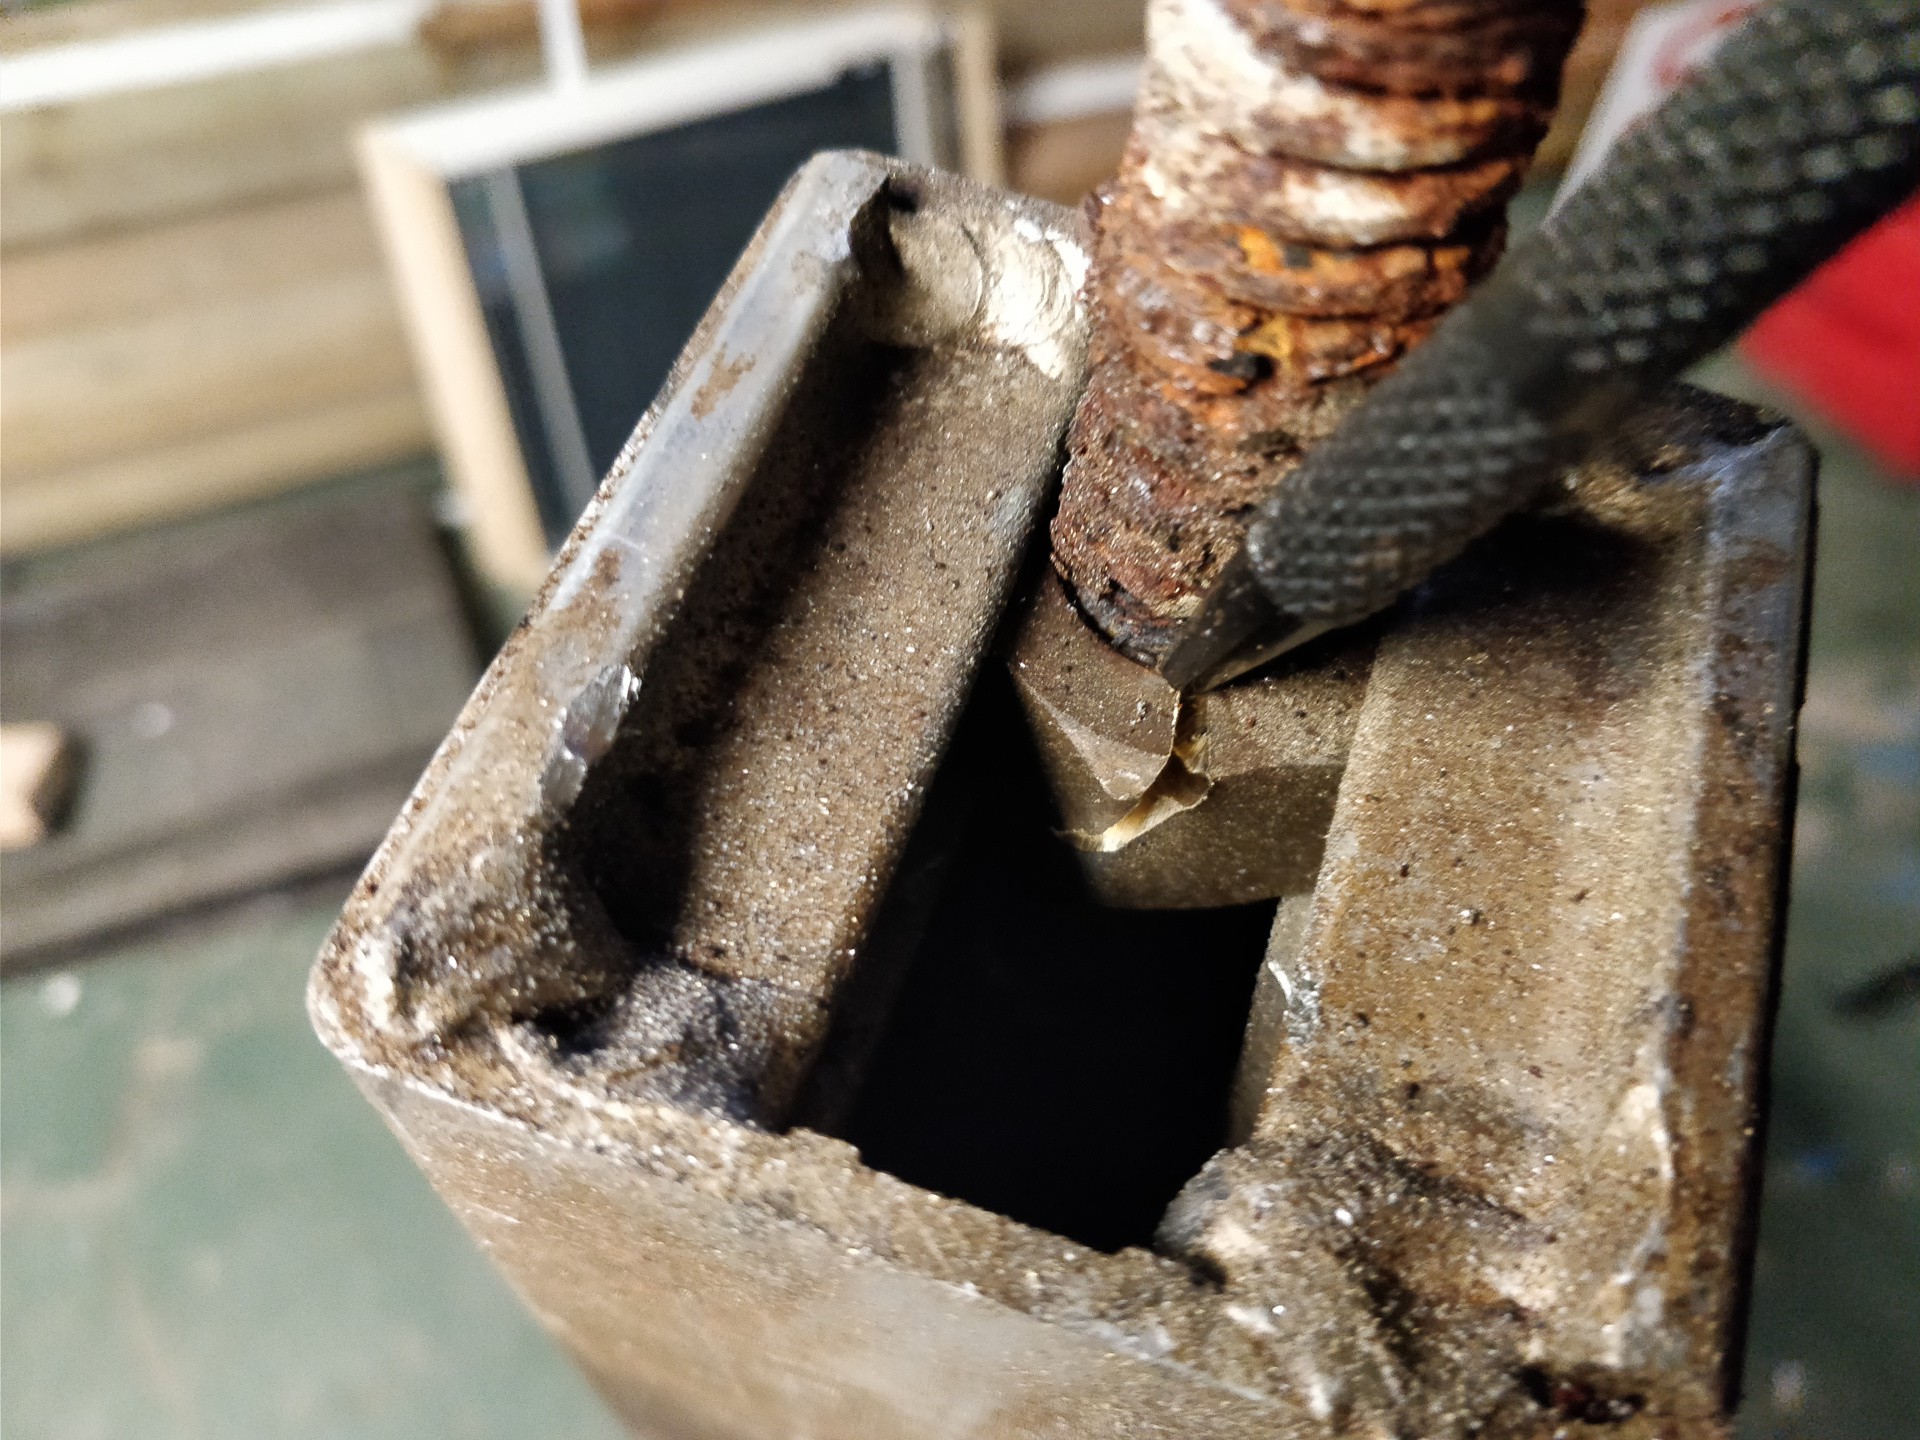 Then I cut an access hole in the side wall of the square aluminum tube, which allowed me to slice the nut the rest of the way:
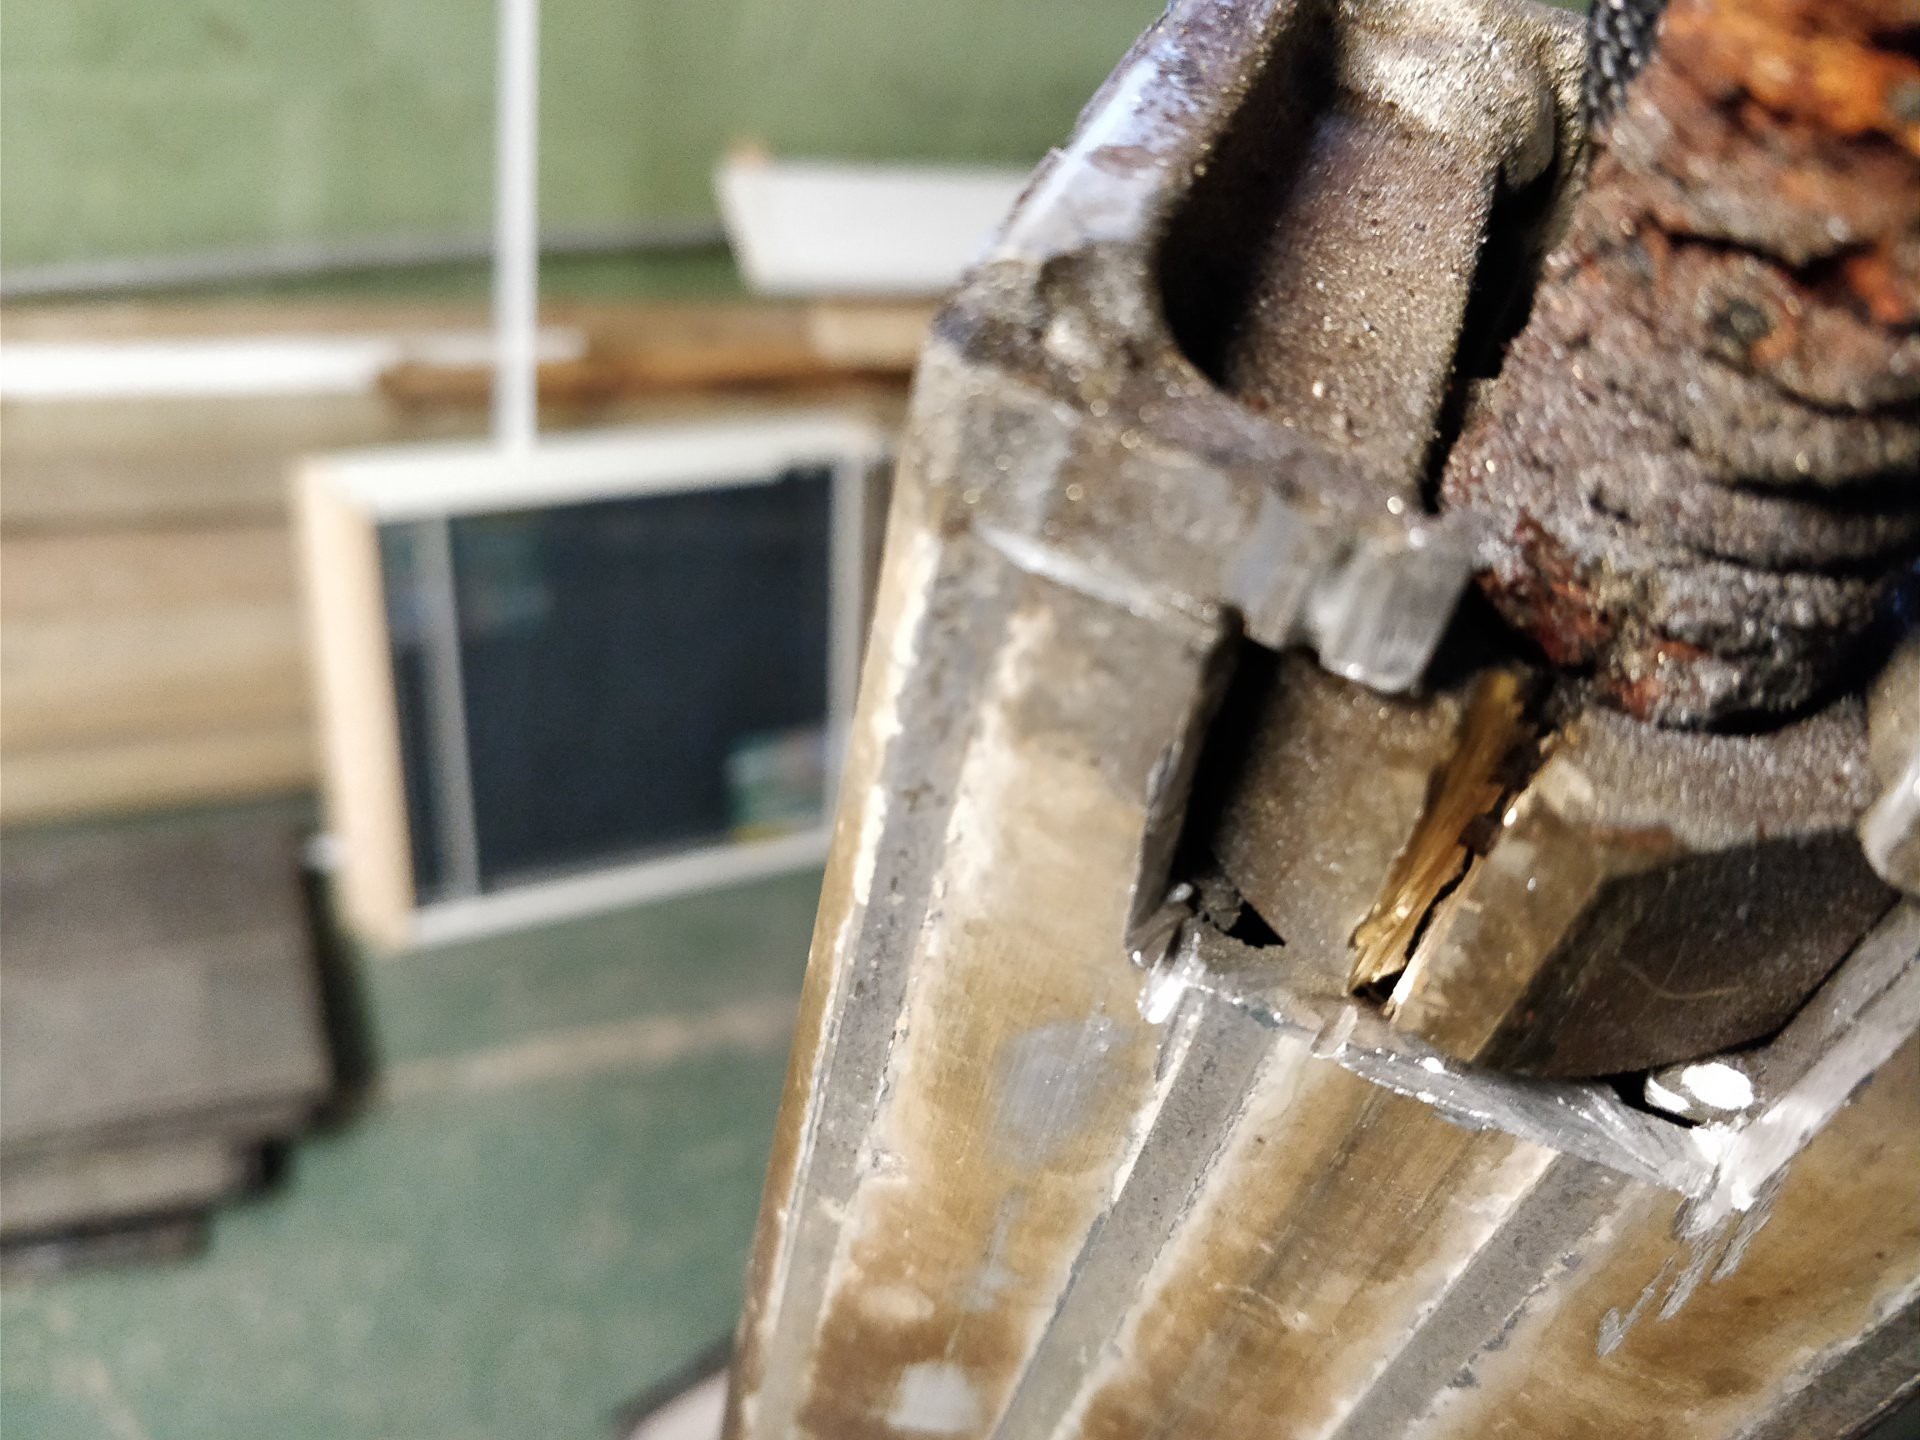
This was gold, thanks for taking one of these apart zakqwy, I searched every inch of the internet trying to find pictures of how these legs were build.
I'm building an aluminum pier and telescoping legs and wanted to build something similar. Curious e-randy how the Loctite Red worked for holding the nuts. I don't like the idea of drilling the bolt and creating a weak point, etc.