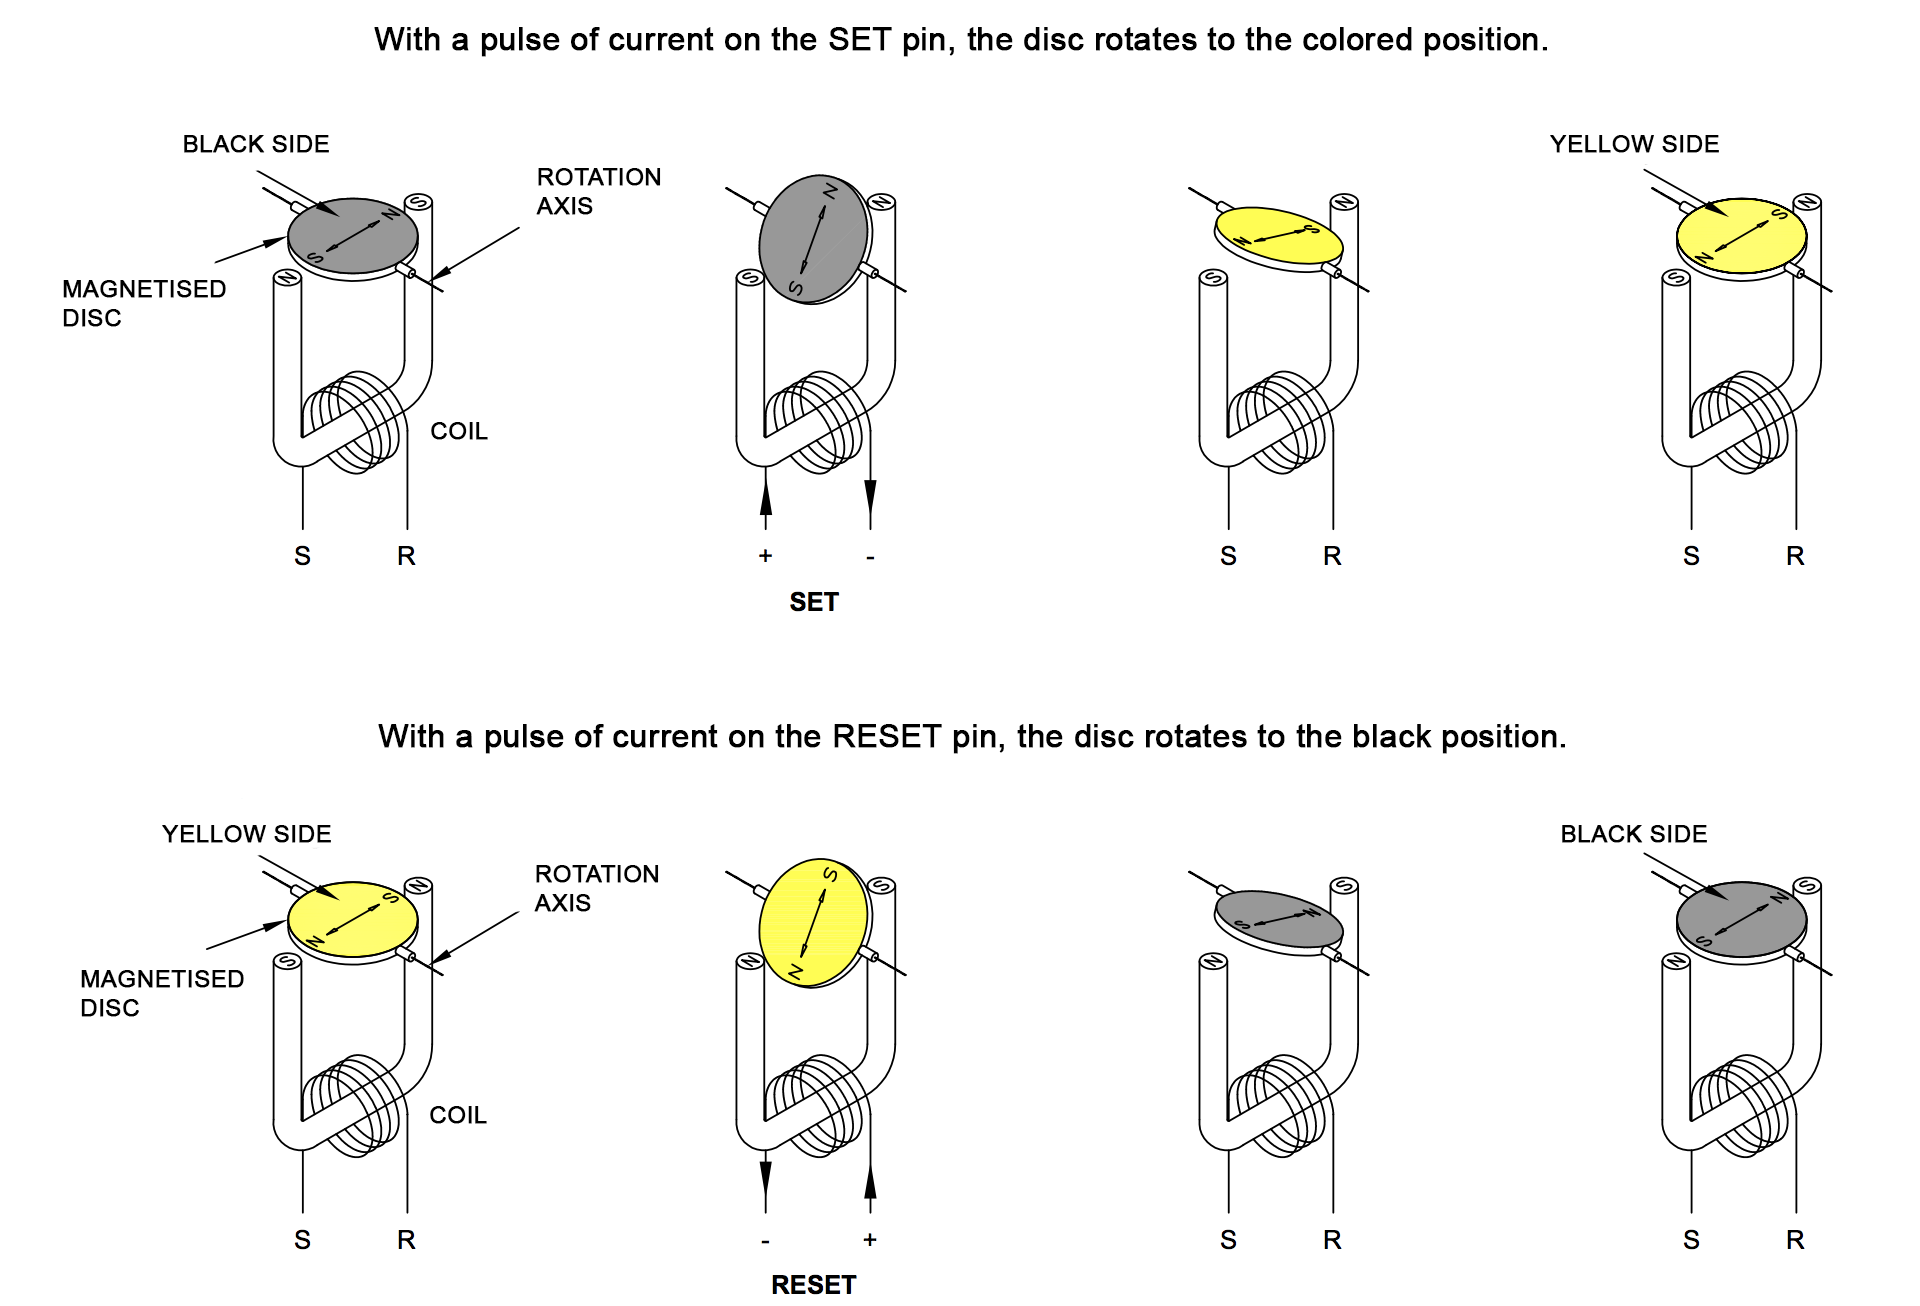
I will quickly cover how a dot flips before looking at the bigger picture.

Each dot contains a permanently magnetised moving surface (usually a disc, or a triangle in my case), usually black on one side, and yellow on the other.
To turn the disc, ie. flip the dot, a coil is placed underneath, along a rod (core) of ferromagnetic metal. When a short pulse of current goes through the coil, the metal core becomes magnetised, with a polarity depending on the direction of the flow of current through the coil during the pulse. Once the pulse is over, the core will retain it's polarity until a new reversed pulse is applied.
When magnetised in either direction, the metal core will attract or repulse the permanent magnet on the yellow and black surface, hence flipping the dot and locking it in it’s new position.

(Pay attention to the polarity of the core tips, drawings from Eldi datasheet)
Why does the core retains it's polarity once the current is removed you may ask (as opposed to electromagnets) ?
Well, I'm not an expert but I believe the core is made of a metal with specific magnetic properties, such as high permeability (its ability to become magnetised when subjected to the magnetic field of the coil), and high remanence (its ability to remain magnetised afterwards).
This would turn the ferromagnetic core into a permanent magnet once magnetised by the coil, and it would remain so until the next opposite pulse through the coil.
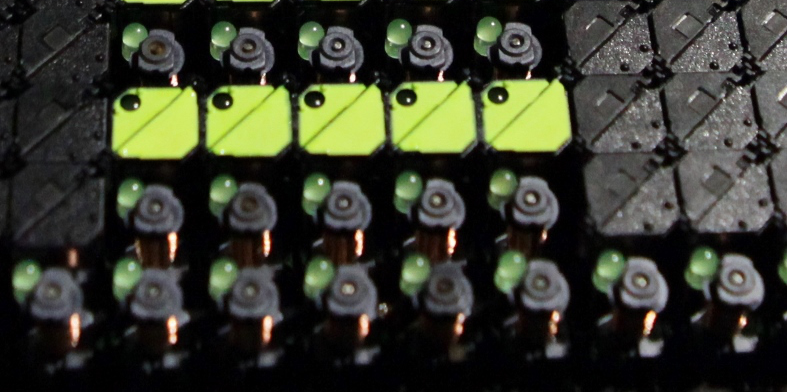
On the picture below you can clearly see:
- The permanent magnets (small squares on the upper-left black triangles)
- The vertical copper coils underneath each dot
- The tip of the ferromagnetic core that sticks out from the center of each coil.
- An associated LED for each dot on this specific display

ANNAX flip dot anatomy (source)
One advantage of these displays is that you can remove all current and the display will remain as is, hence very cost effective for static messages.
We'll discuss later the power requirements to flip 1 or more dots simultaneously but for now, let’s take a step back and look at how a whole display is made.
 Frederic L
Discussions
Become a Hackaday.io Member
Create an account to leave a comment. Already have an account? Log In.