stupid
-
Shipped Some Early Evaluation Units
06/11/2019 at 12:49 • 0 commentsWe Shipped! (...technically)
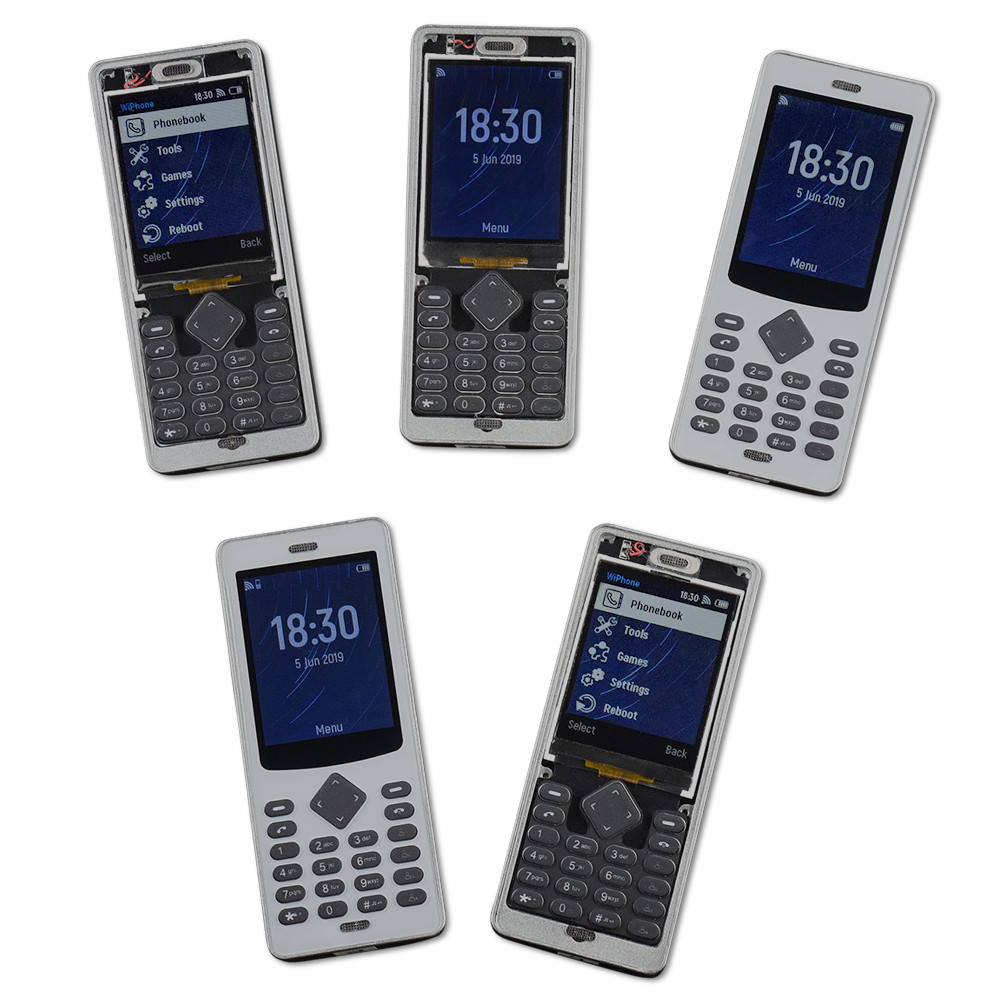
The first evaluation units are on their way to the early testers. These are closer to beta hardware than the final version, but it's a good milestone regardless. Looking forward to as much constructive feedback as we can get, and hopefully some cool projects.
![]()
The Ongoing Keypad Saga
Extracting the keypads from our current (soon to be previous) vendor was a bit of an adventure, and I'm pretty unhappy it took so long... we really need to be iterating, but that's near impossible if the vendor drags their feet over a month getting the samples made. Luckily the samples we have now work reasonably well and we did learn a good deal about what needs to change in the next revision. The main takeaways are the area around the button needs to be more flexible for easy actuation, and the membrane that supports the dome contacts seems to require surprisingly precise alignment to make button actuation reliable. We will look into this more later and if alignment is as important as it seems to be, figure out what can change on the design to make alignment accuracy less important.
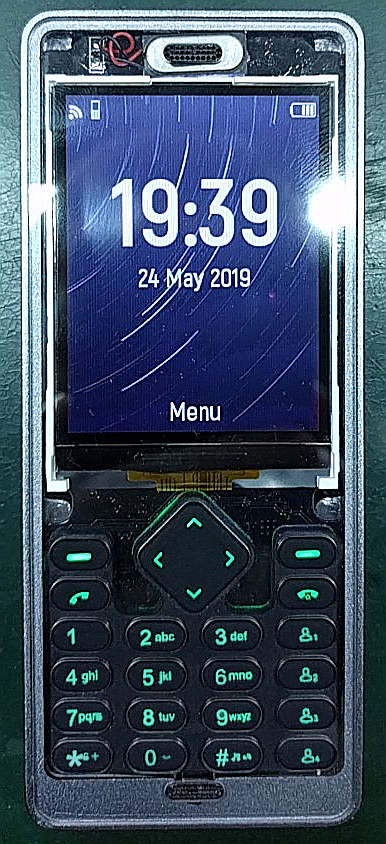
The backlights also work now:
![Someone is apparently a closet fan of energy drinks. The production version will use white backlight LEDs.]()
Someone is apparently a closet fan of energy drinks. The production version will use white backlight LEDs. It's kind of a cool process how keypads like these are made. They start out as white translucent compression molded silicone, then the black layer is sprayed on, and the lettering is etched by laser. Under the keypad there are a few LEDs on the PCB, that provide the backlight.
Electronics
Aamir has been hard at work rooting out bugs and he has a pretty impressive collection of dead ones at this point:
- backlight brightness improved with correct resistor value
- audio codec running on appropriate clock now, audio is sounding quite good
- software shutdown circuit debugged (software shutdown allows the phone to close the SD card connection before shutting down, so as to avoid SD card corruption)
- ongoing power testing to maximize battery life and overall power system reliability
- found a surface mount mic and a spring mount speaker to replace the previous ones that had wire leads
- testing with a 2W loudspeaker (the phone likely won't ship with a loudspeaker, but the hardware currently supports adding one and we want to make sure it would work well)
- switched to a GPIO expander with PWM functionality. This lets us control the LCD backlight brightness, keypad brightness, and vibration motor without running out of processor pins.
- testing adding an extra mic on the back of the phone so people can do things like echo and noise cancellation.
Software
- updated code to handle the new audio clock source (MCLK of I2S is now synchronized with ESP32 directly instead of an independent crystal, fixing audio quality issues)
- added a simple MP3 player app and MP3 ringtone
- store multiple SIP accounts (use one at a time)
- back up of critical config files to non-volatile storage (WiFi networks, SIP accounts)
- added querying of the in-memory save-file (this is how large message threads could be handled later)
- fixed multiple minor UI/UX bugs, like improved input of special symbols
- a sample graphic app: ported Fairy-Max chess engine
Schedule
I think we are actually still on track to start shipping the Pro versions in August. However, we have ate up most of our schedule margin and we haven't started the injection mold yet because there are a few mechanical design considerations that need to be resolved before we should jump into making tooling. So while it's likely that the Pro versions can still start shipping in August if we continue to track our current schedule (since they are made by CNC the lead time isn't so long), because we haven't started the tooling the regular ones won't.
A major unresolved issue right now is bonding of the clear face to the frame. We really don't want those coming off later, and it's going to take some longer term testing to prove any particular adhesive is going to work well from both durability and asthetic standpoints. I'm actually considering making the plastic version of the phone as a unibody design (join the frame and front face), and do it entirely in clear material. Then we can paint the outer frame and completely sidestep the bonding issue, at least on the regular model. Before we start the tooling we also need to have keypads that feel super-sexy-silky, and right now it's more like the fumbling around that happens at a highschool dance: sometimes amazing and sometimes just awkward. As I mentioned before, miles better than the stuff on most hobby-type hardware, but we don't want to be operating at that level. We also need to make sure the antenna and mounting arrangement are exactly what they need to be, nail down the tolerances on the PCBA assembly and mating features with the phone frame, and a few other details. So we're going to make sure that's all good as we can get it before starting tooling, not after.
We're also gearing up to start the certification process, so there's still some room for SNAFUs there as well. But we've been through that before so it won't be completely blind.
Open Issues and Current Tasks
- simplified API for handling audio
- headphone jack detection
- audio issue during calls (other sounds and music playing sound great, but we're still sorting out audio in calls after the recent clock change)
- diagnostics app (to streamline testing and troubleshooting of newly assembled WiPhones. Should also be useful for users later)
- start a tester/programmer for the electronics
- start certifications
-
Crowdfunding Video Preview
03/22/2019 at 07:36 • 6 commentsFeedback appreciated... please let us know if you see something that could be improved, or clarified.
Hoping to launch next week.
Can also check out the Kickstarter preview page here (the campaign won't be live until next week):
https://www.kickstarter.com/projects/2103809433/338898127?ref=761478&token=f27f373c
-
A Hot New Place for Sexy Pics
02/28/2019 at 15:32 • 0 commentsWe added an Instagram account and will probably be posting more of the "finished product" type pics there. Some uploaded already as we get ready for crowdfunding.
https://www.instagram.com/esp32wiphone/
Nerd pics still go here :).
-
Testing the Keypad Mold
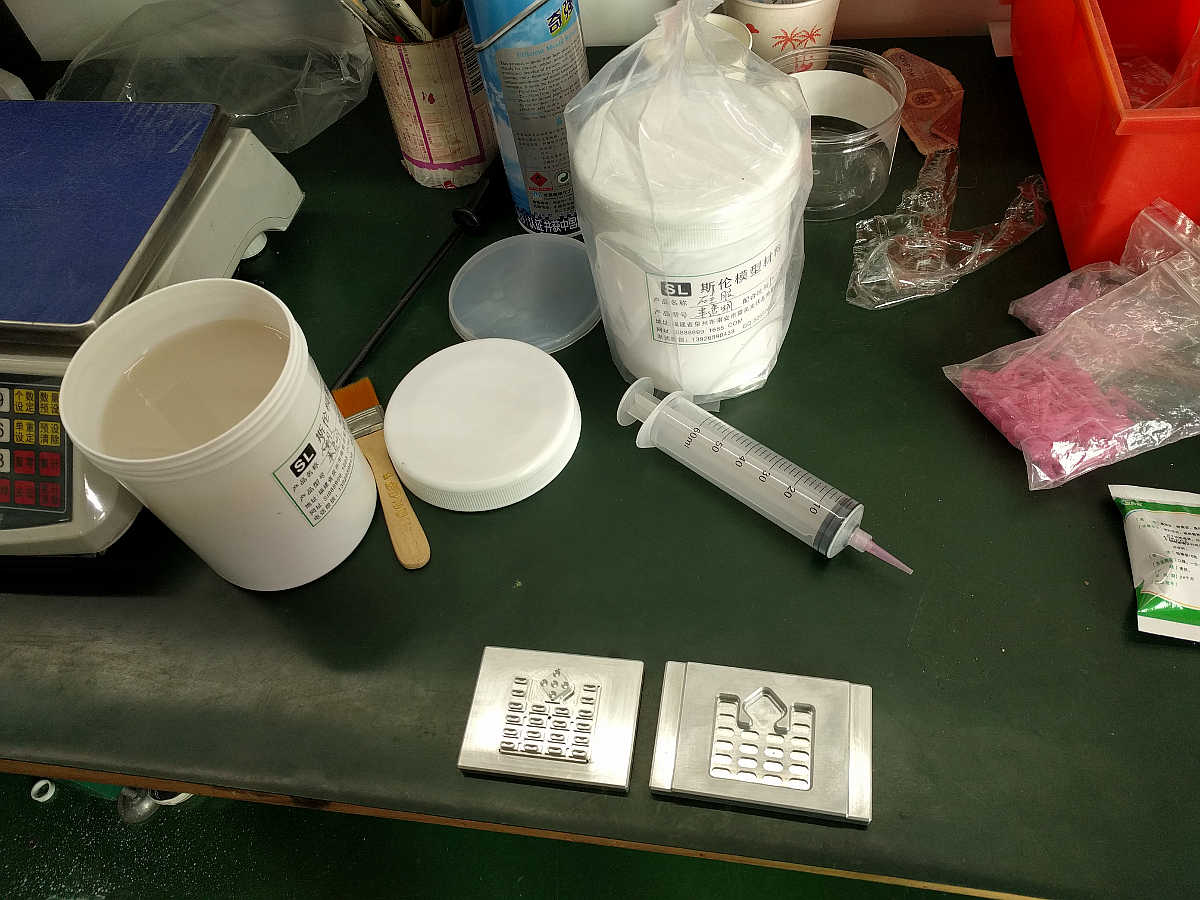
02/21/2019 at 15:51 • 0 commentsOur prototype keypad mold arrived and we made some test parts, and also learned a few things about handling silicone.
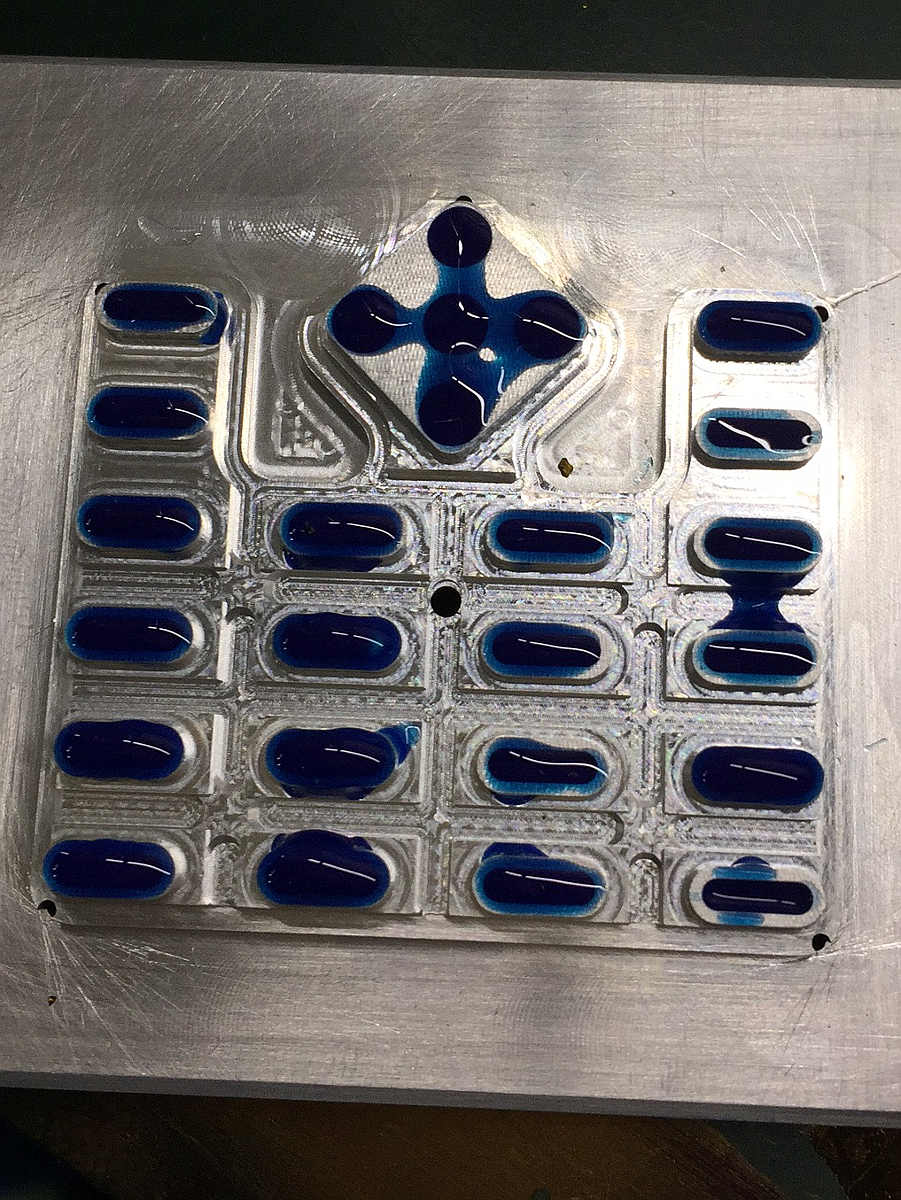
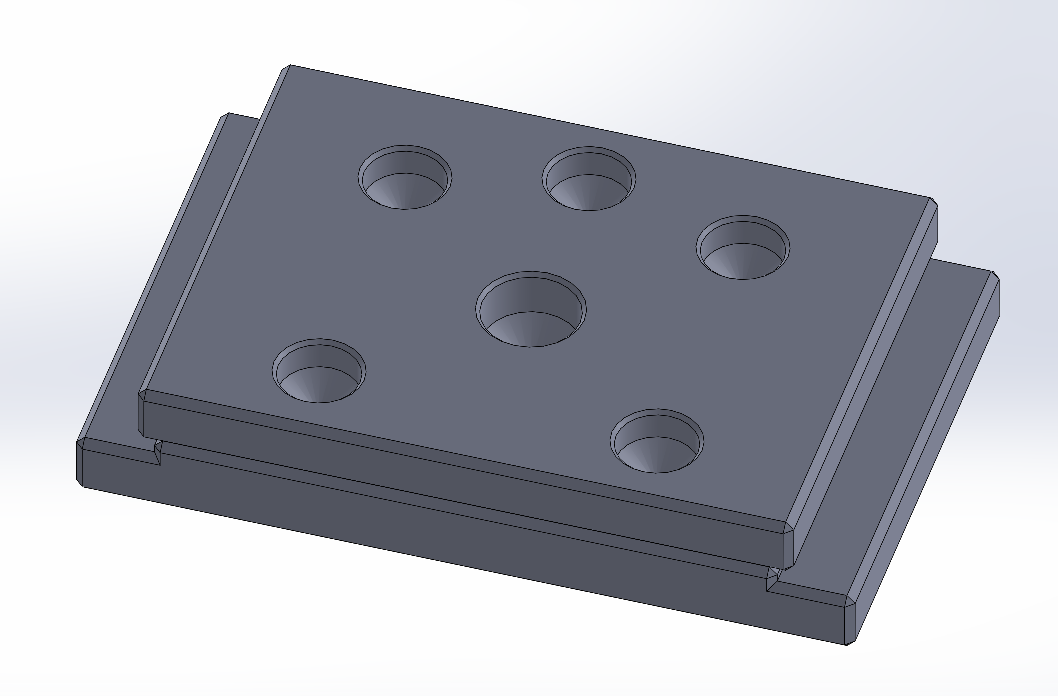
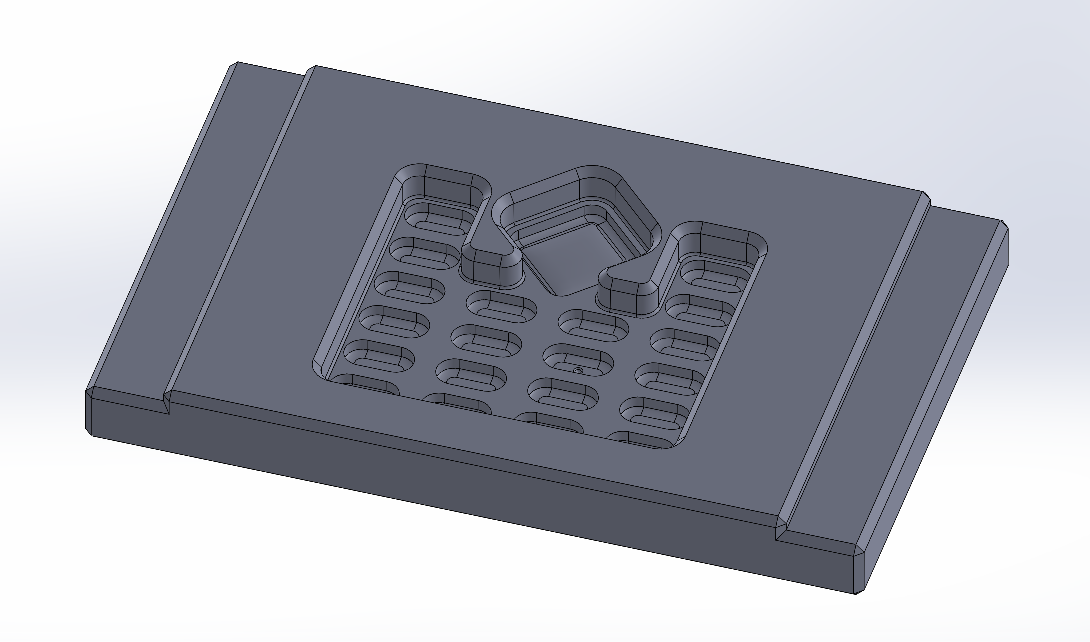
Some pics of the mold:
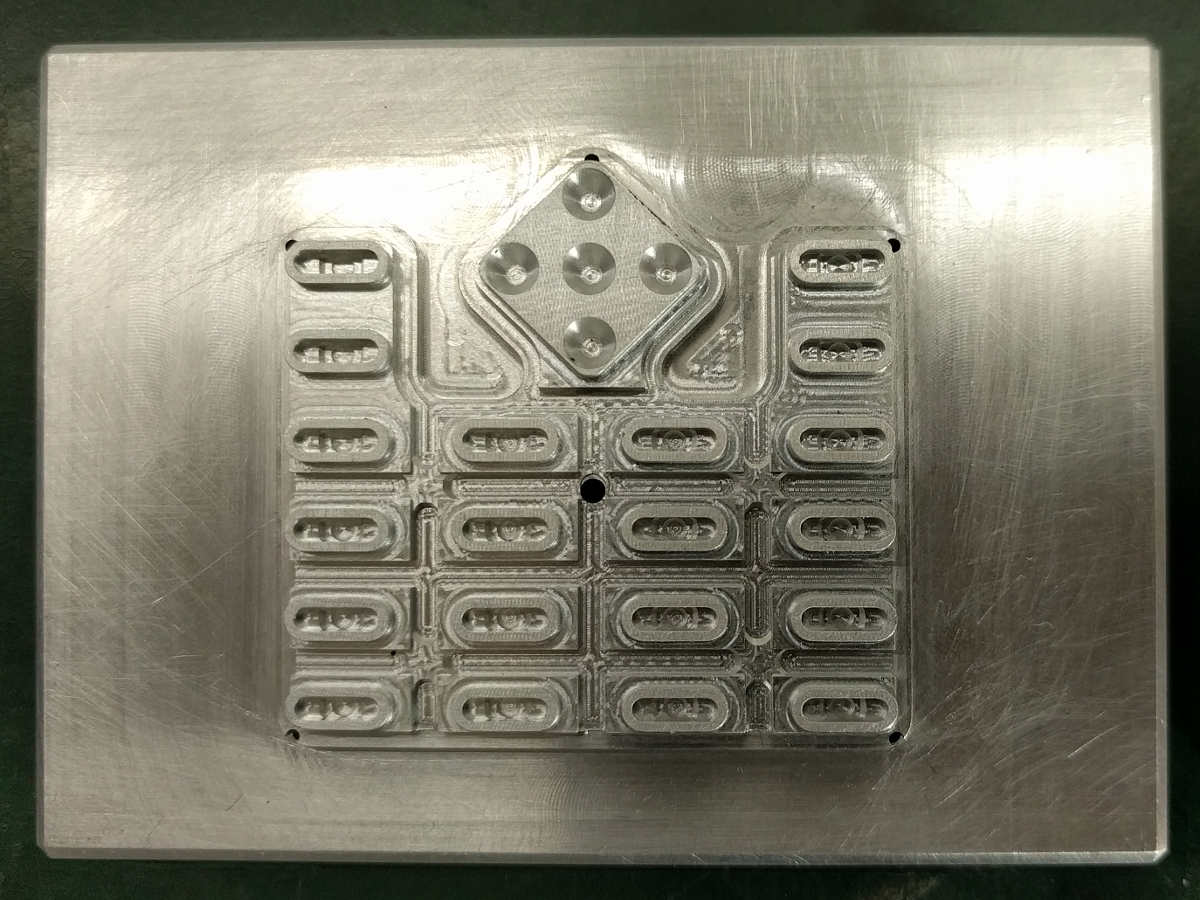
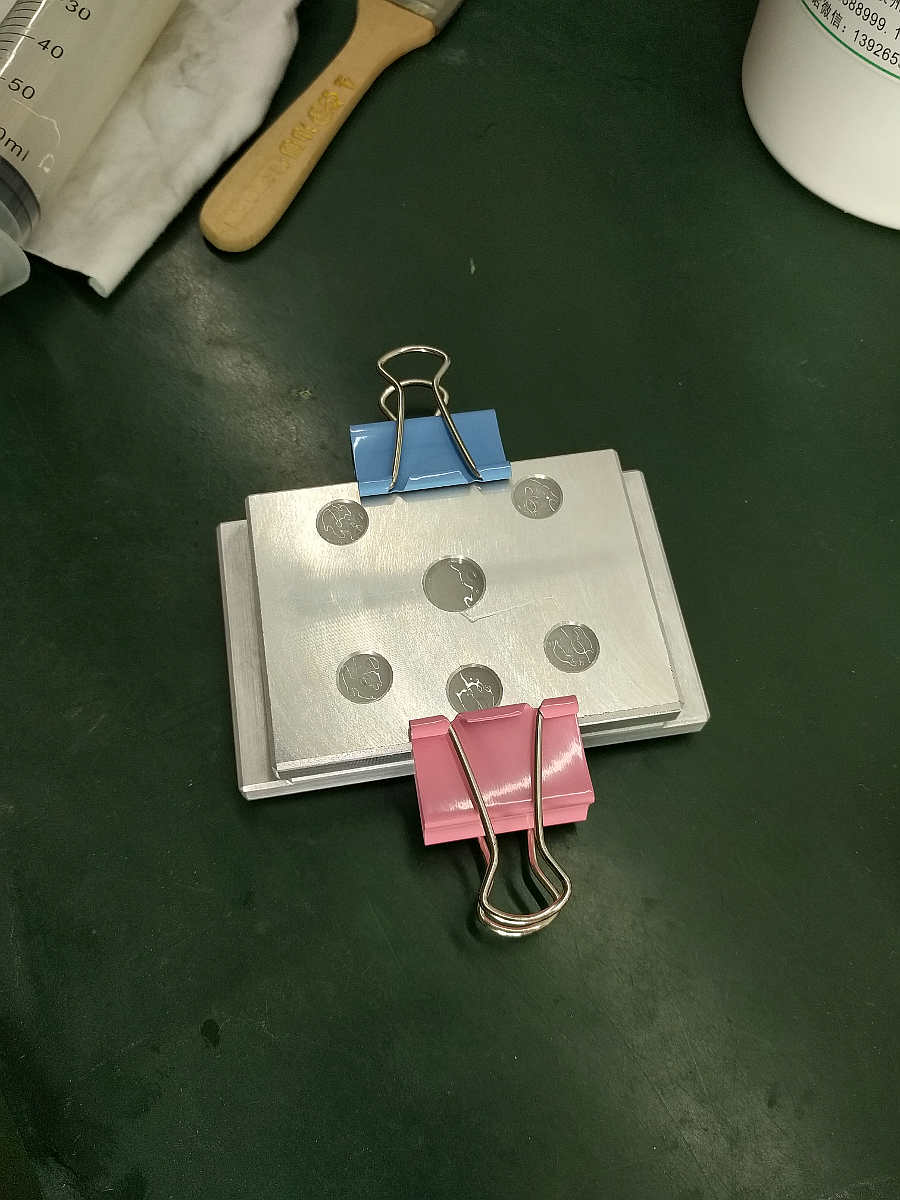
![Top Surface of Assembled Mold]()
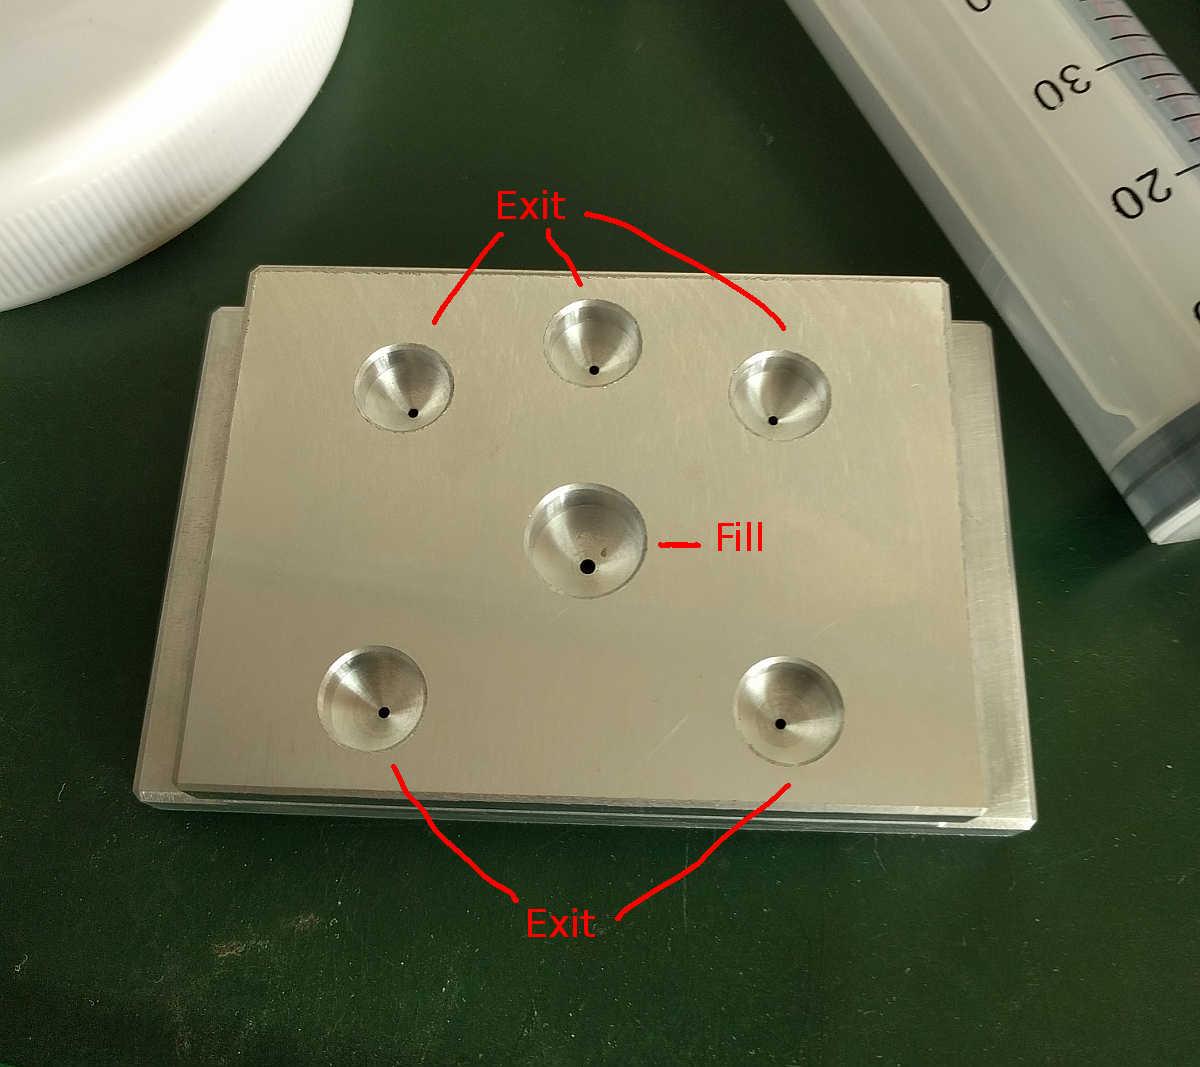
Top Surface of Assembled Mold This mold is a very simple clamshell type that's only going to be used for manual testing. We just want to figure out if the keypad geometry is correct before moving to a production mold, and also get a few parts to use in the latest batch of testing phones. We will fill it by hand using a syringe.
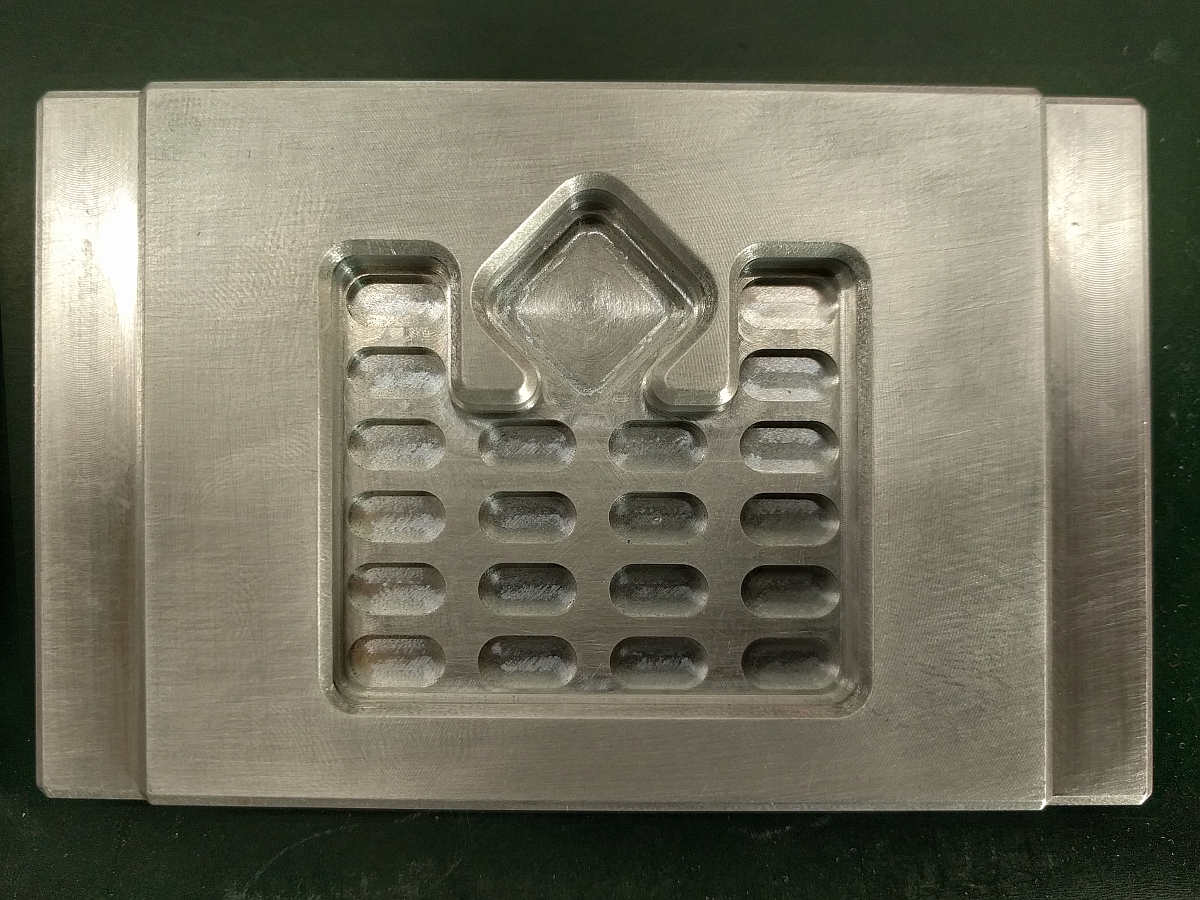
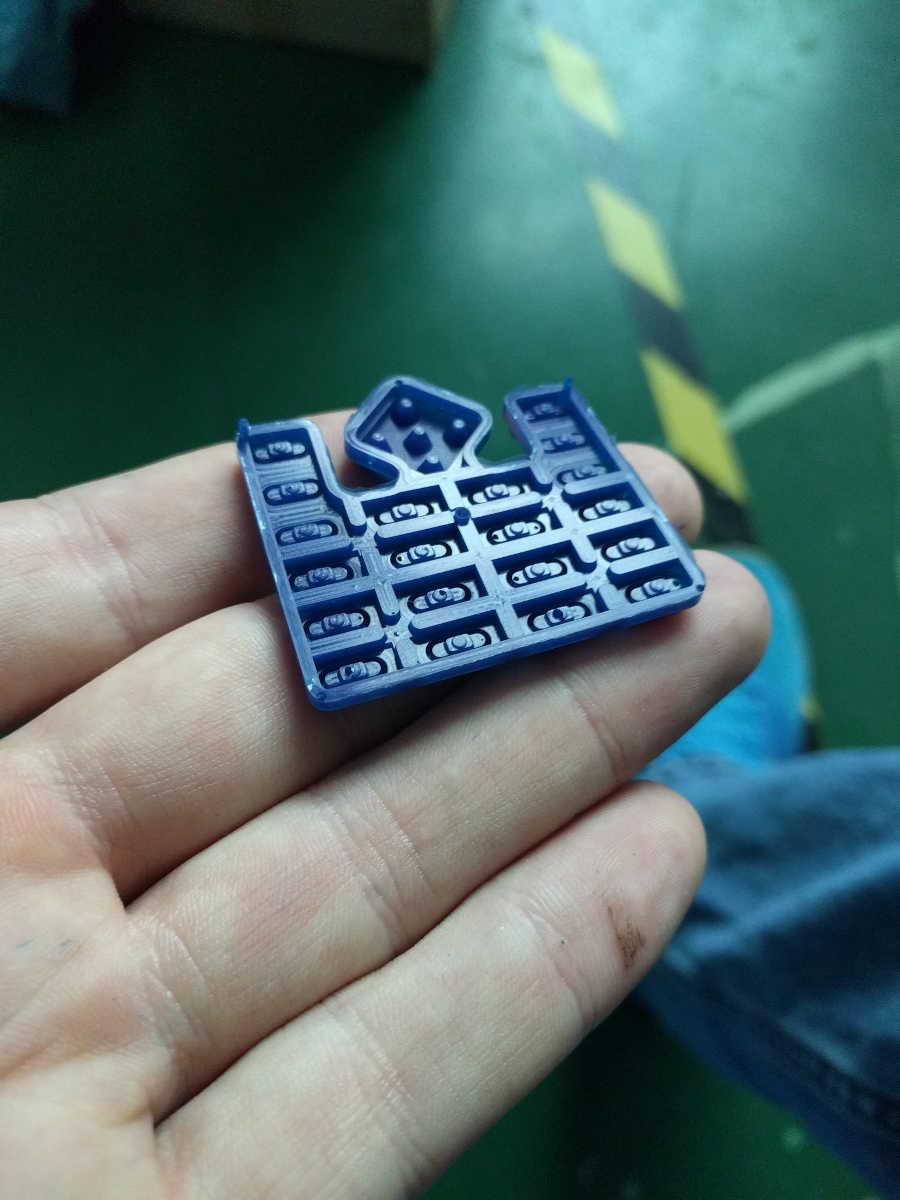
Views of the inner surfaces. One side for the buttons, and the other side makes the inner features, including the little pips that push the dome contacts and close the electrical circuit.
![Button Side]()
![Keypad Inner Surface]()
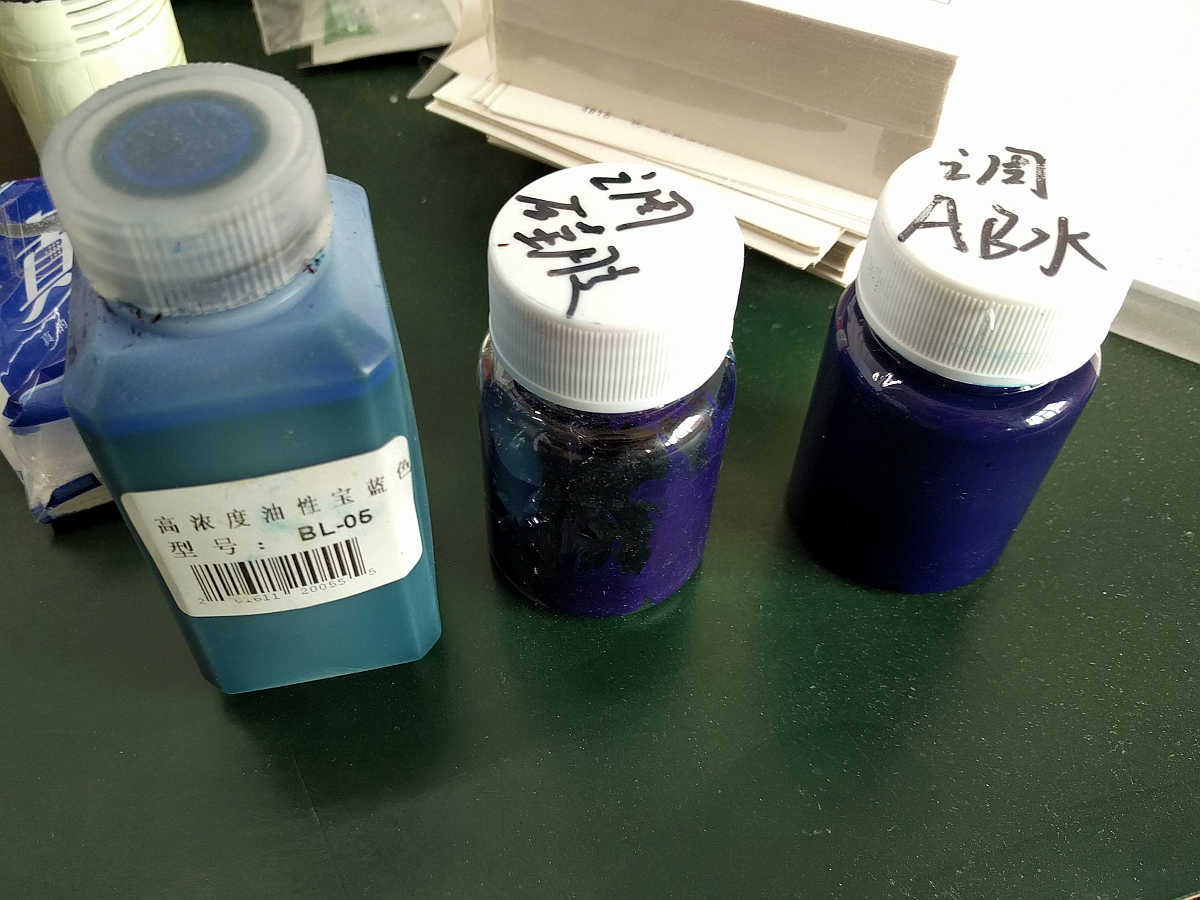
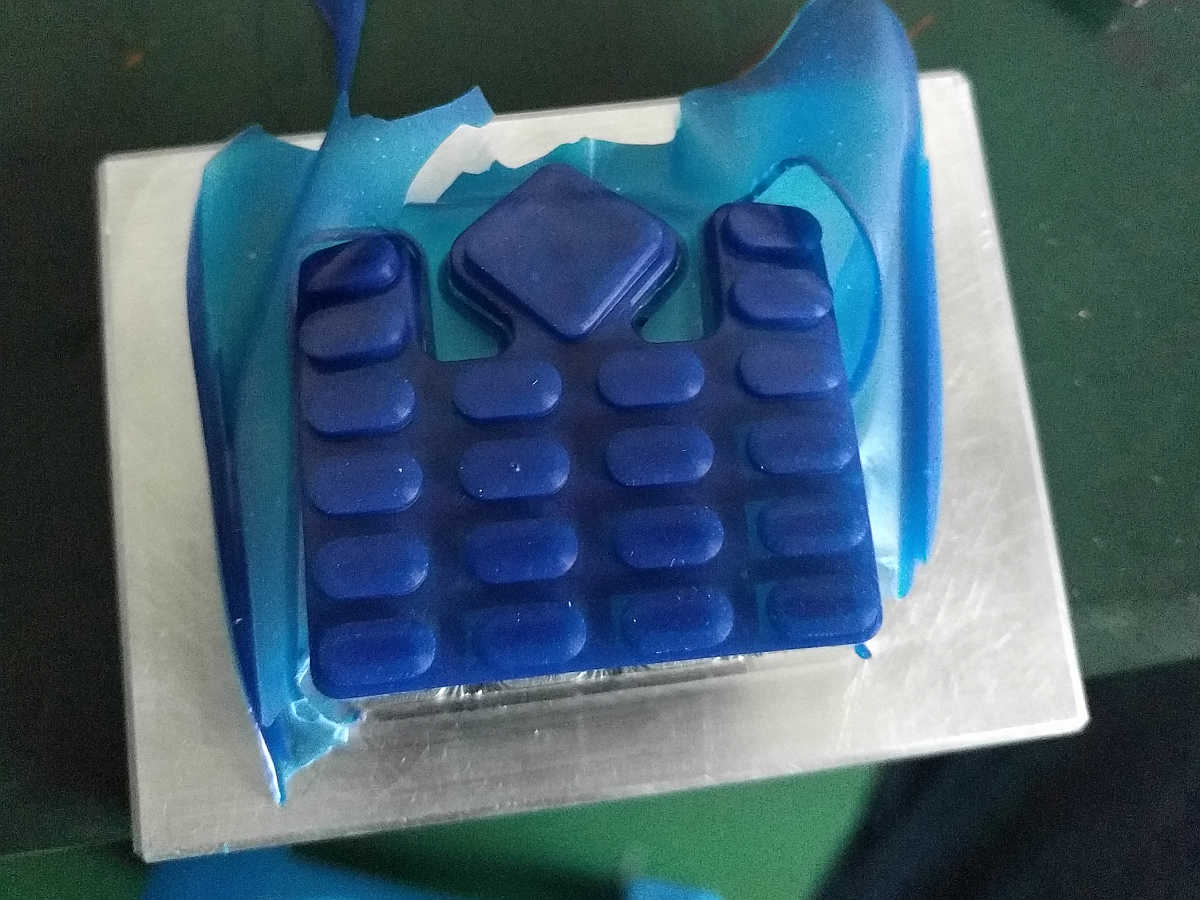
We also had some silicone compatible dye on hand, so later pours were tinted blue. The keypad will probably be black in production, but we didn't have any black dye.
![]()
Before using the dye in a casting we made a few small test batches to make sure it would cure correctly. The supplier said it should work, but since we bought the dye and silicone from different places we wanted to test it first.
![]()
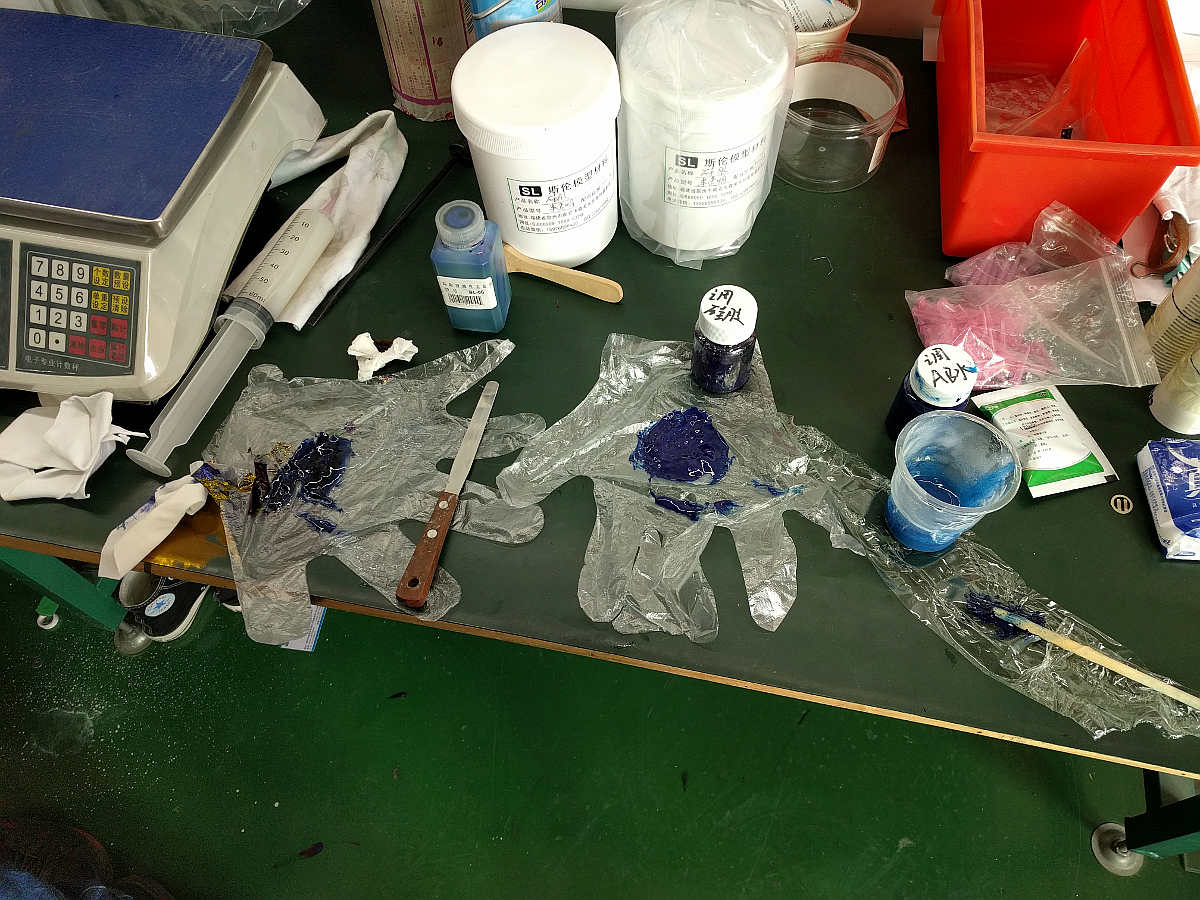
The silicone is a 2 part condensation cure type. The first rubber hardness we tried was Shore 50A, which turned out to be too soft.
We also learned a few tricks to make the process go smoother.
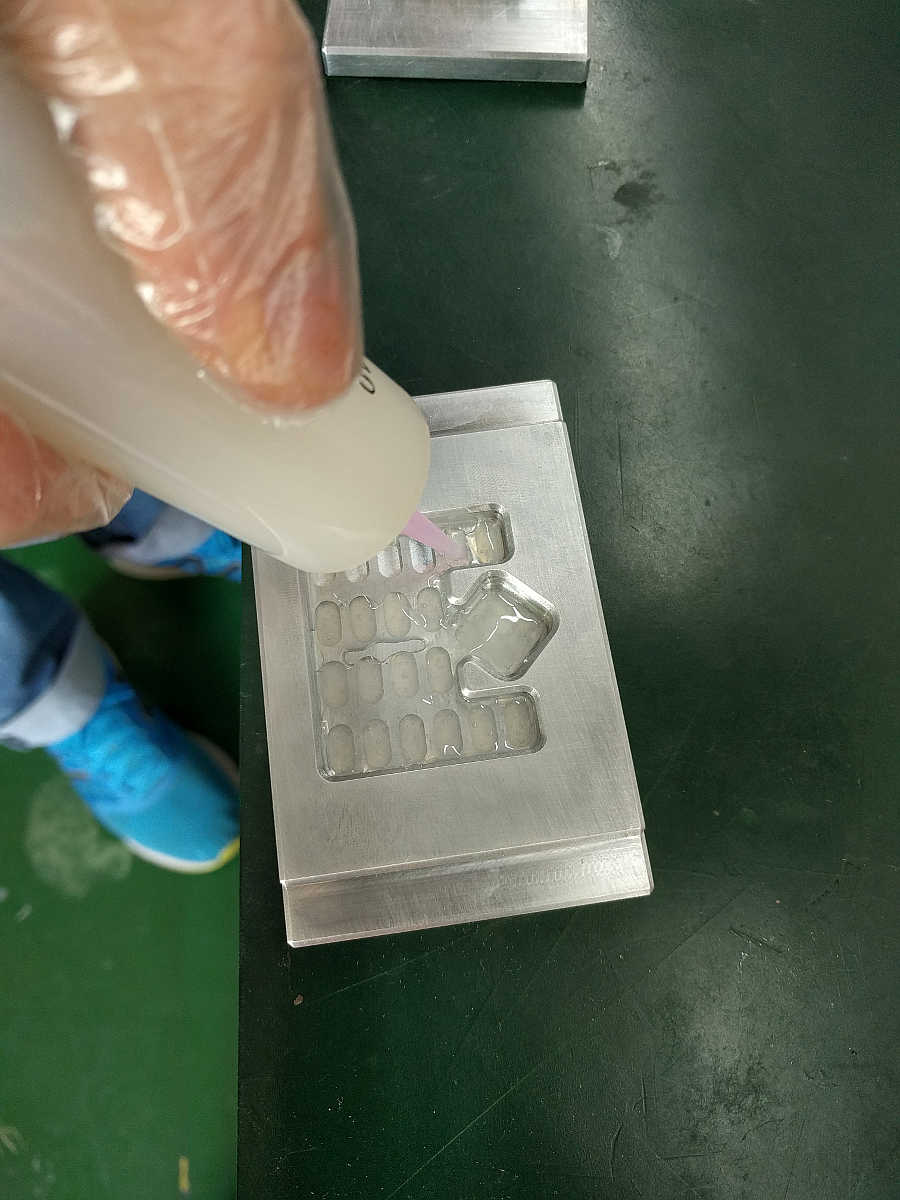
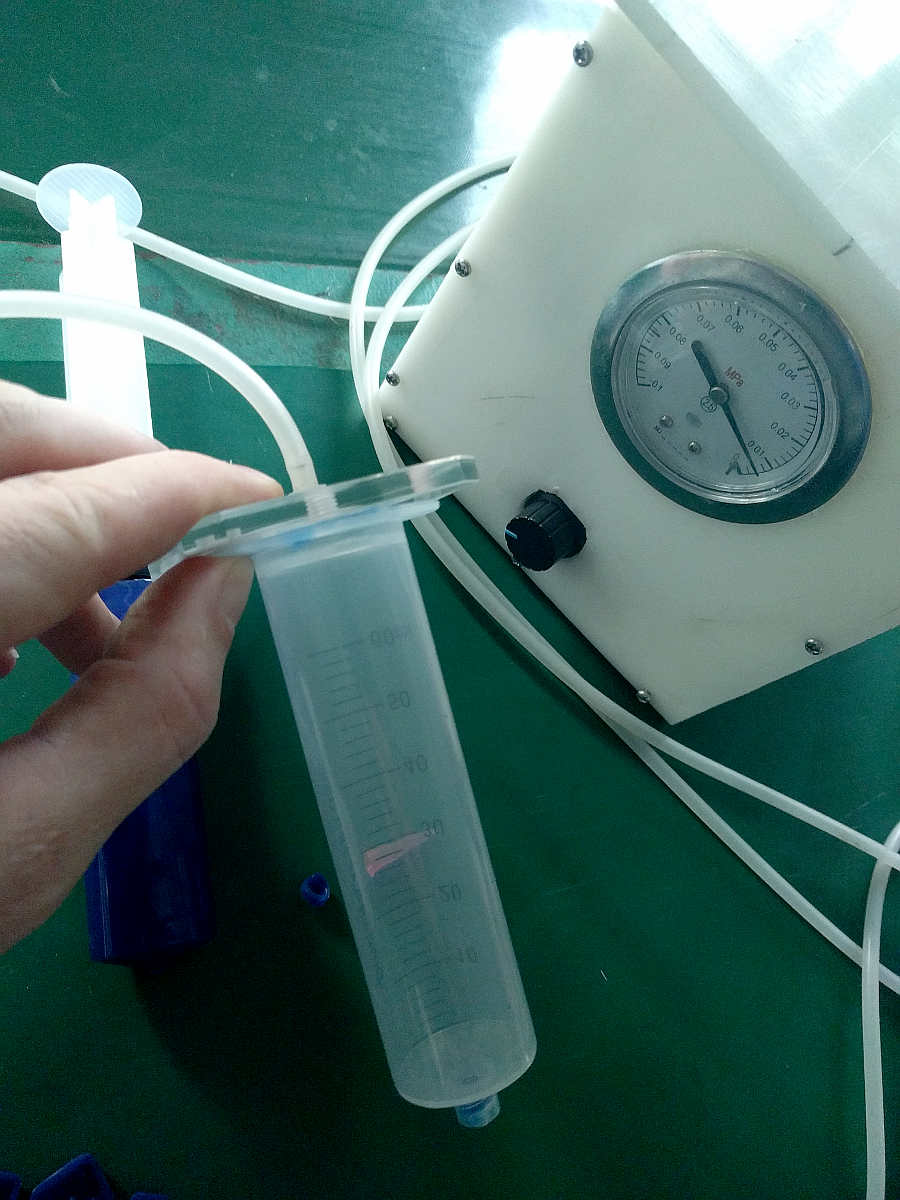
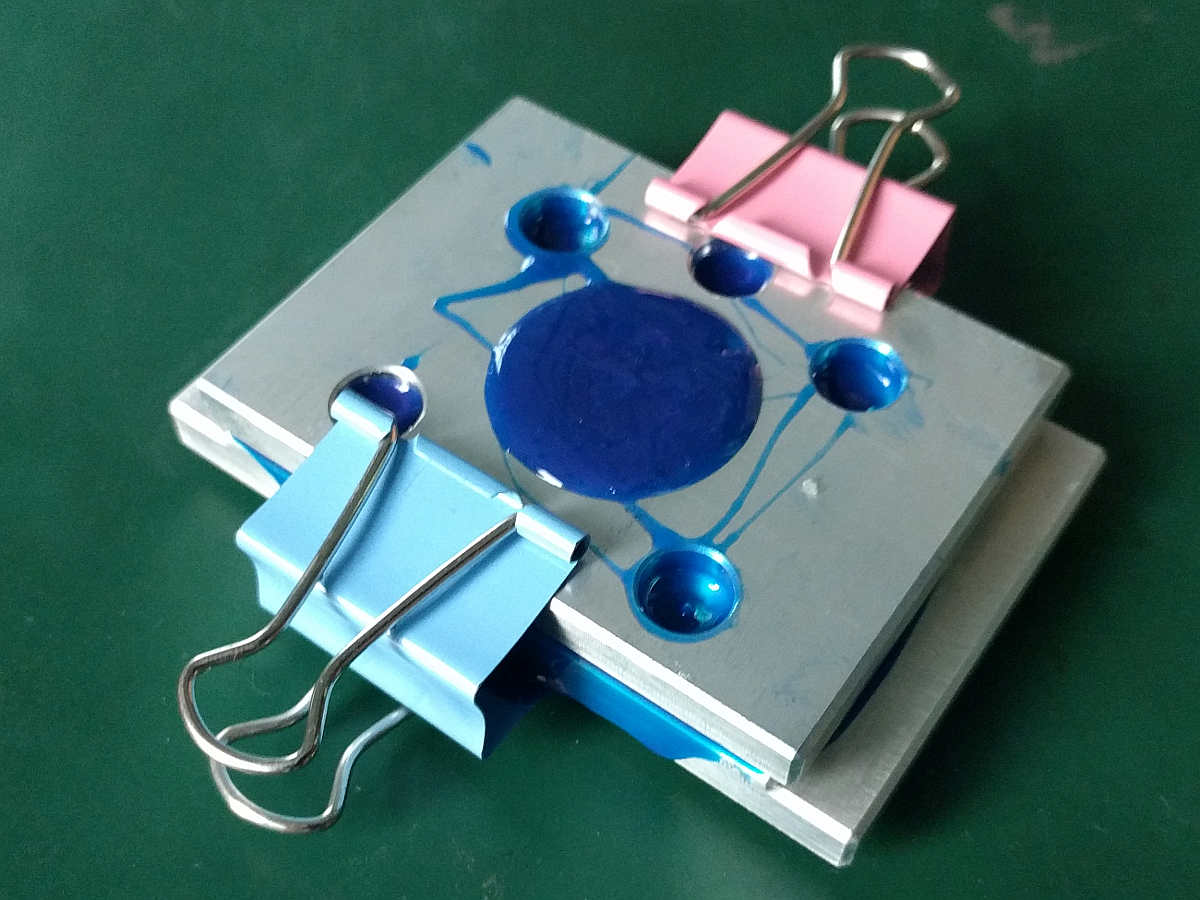
This particular mold has some critical features on both sides that form natural bubble traps. Button surfaces tend to trap air on the outside, and the pips that press the dome contacts trap air on the inside. So we have to be careful when filling to mold to eliminate bubbles. Since the silicone is thick and not prone to running, we could fill the bubble trap areas using the syringe before closing the mold and pouring the reminder through the main sprue. There were likely still a few bubbles caused by this method, but they all end up in areas we don't care about.
![Filling Bubble-Trap Areas]()
Filling Bubble-Trap Areas Another trick was to vacuum degas the syringe after loading it with silicone. It's almost impossible to mix silicone by hand without introducing bubbles, but the degas step pulls them back out.
![]()
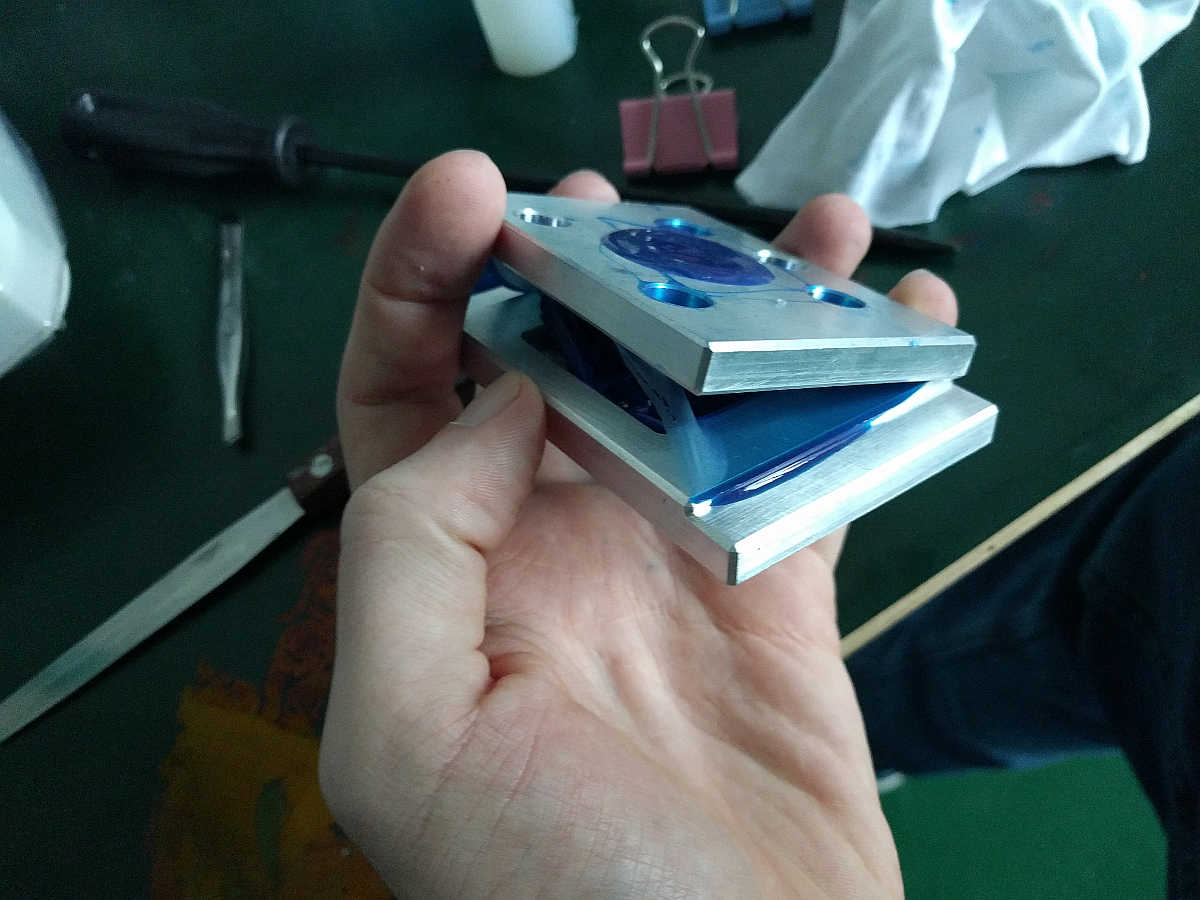
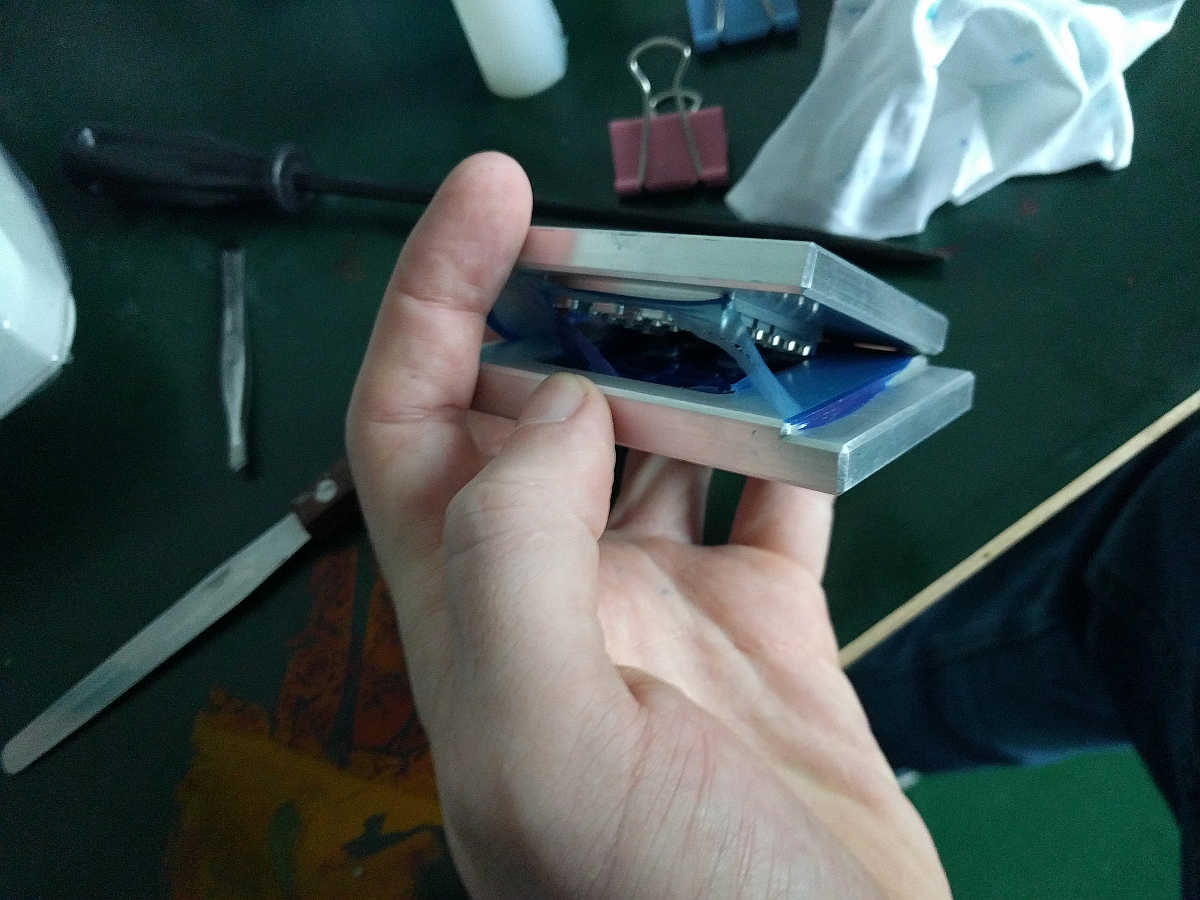
The pour process:
![]()
![]()
![]()
Some results:
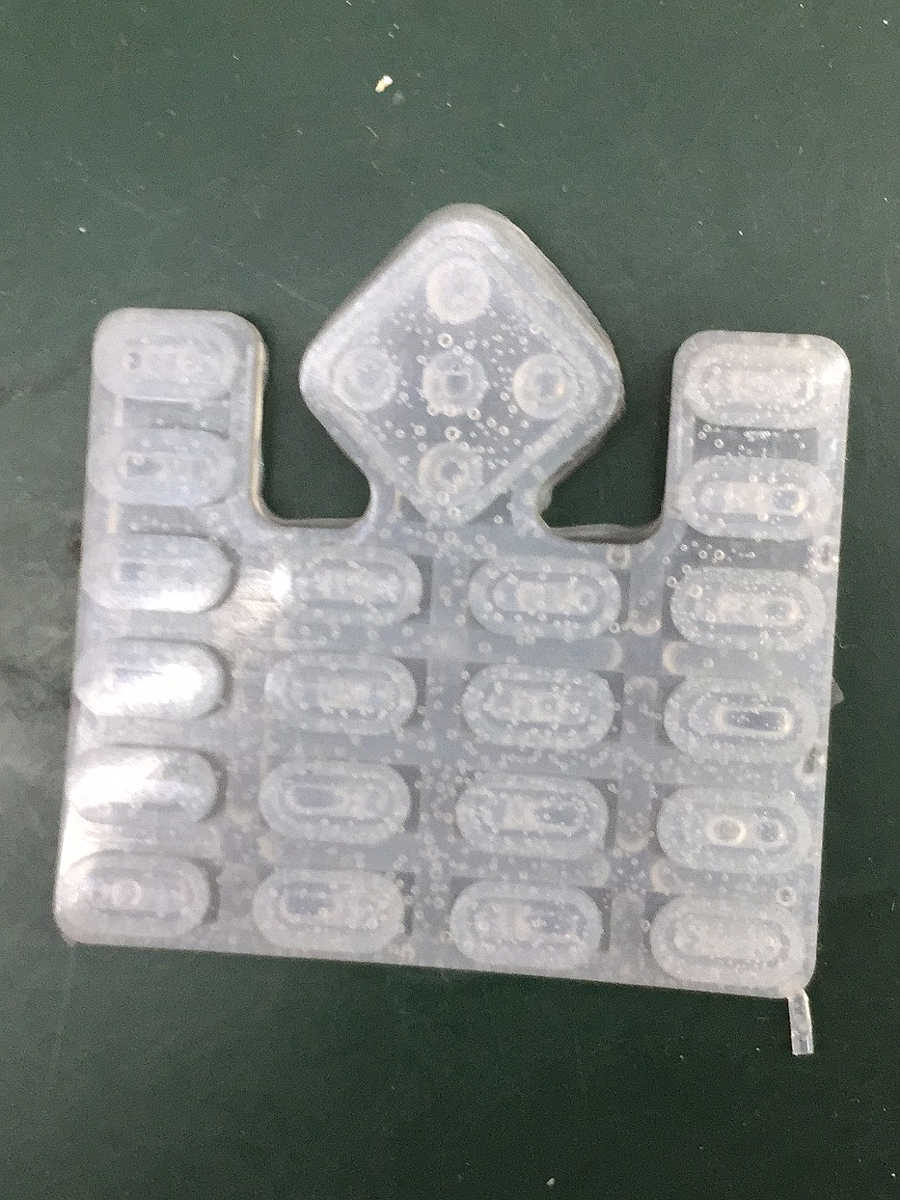
This first one was not degassed. As you can see, there were lots of bubbles:
![]()
Next pour went better. We degassed, were careful to fill the critical areas of the mold, and used the blue dye we had tested earlier:
![]()
![]()
![]()
![]()
![]()
![]()
![]()
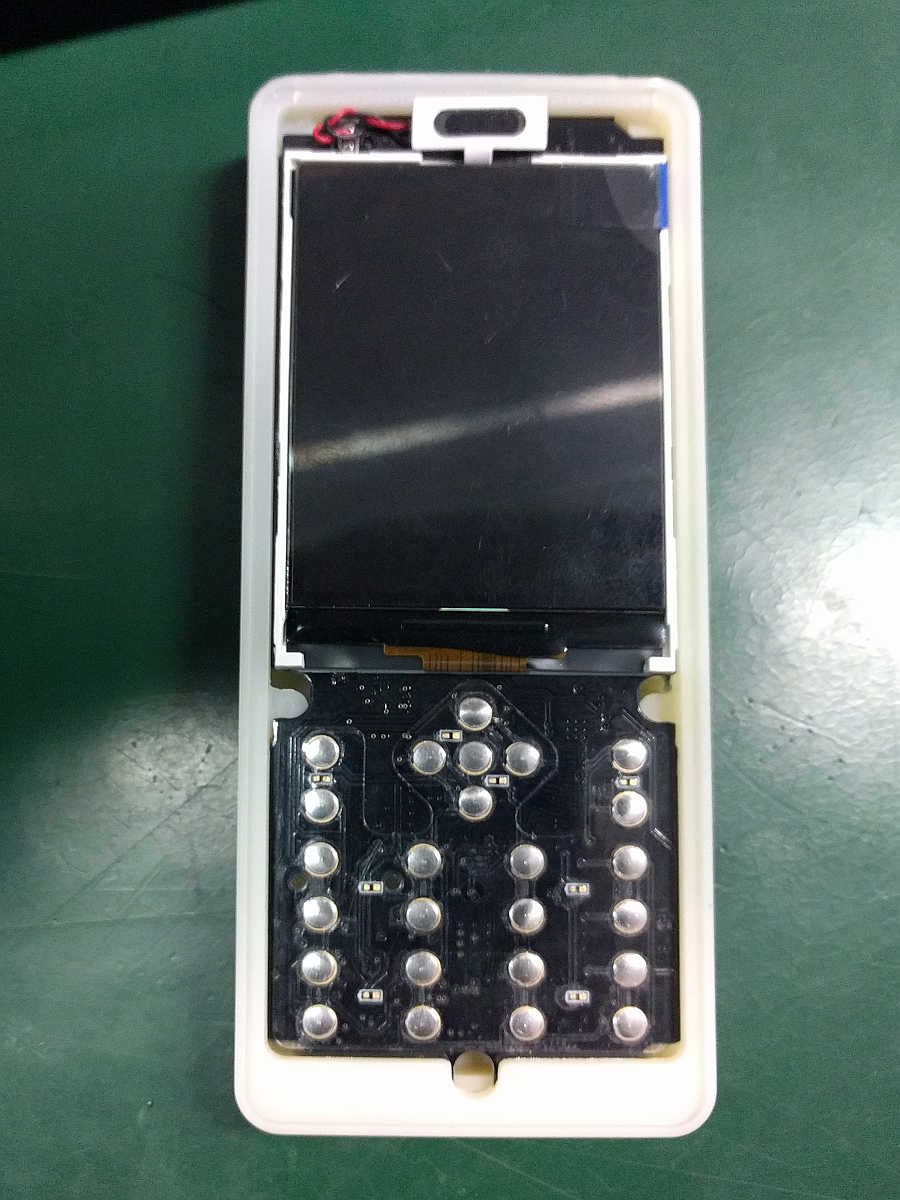
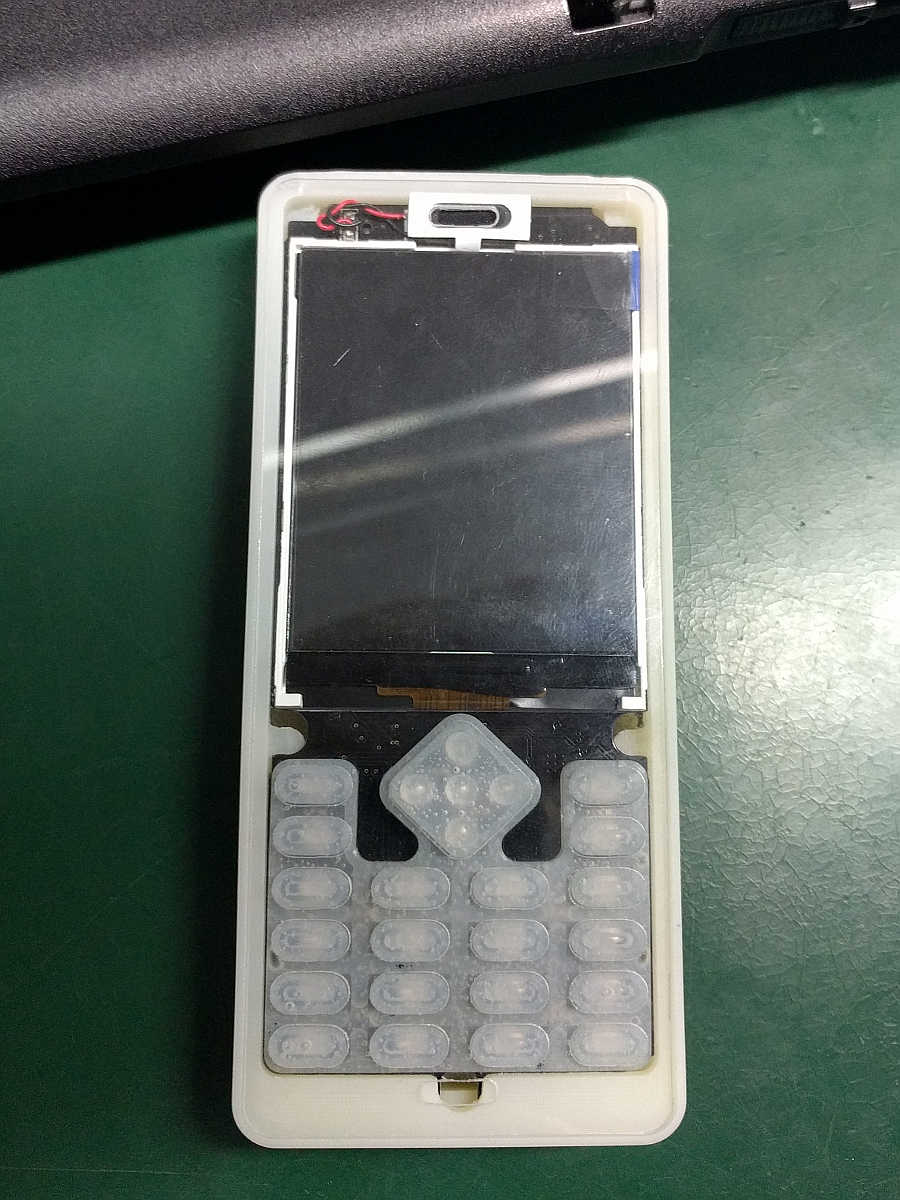
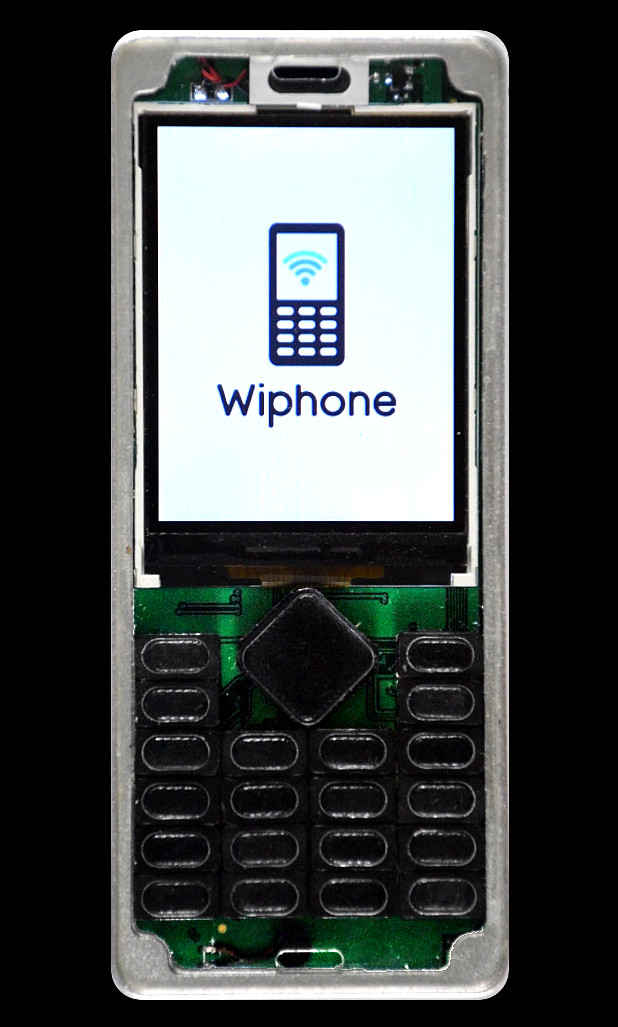
Some shots of the keypad in the prototype phone:
![]()
![]()
The buttons weren't pressing the dome contacts enough to easily make the electrical contact, so we added some foam underneath. With the foam it works better, but is still a little soft. Later we will try some harder silicone. We will also need to modify the shape of the mold to add more silicone near the dome contacts so that the production parts make better contact.:
![]()
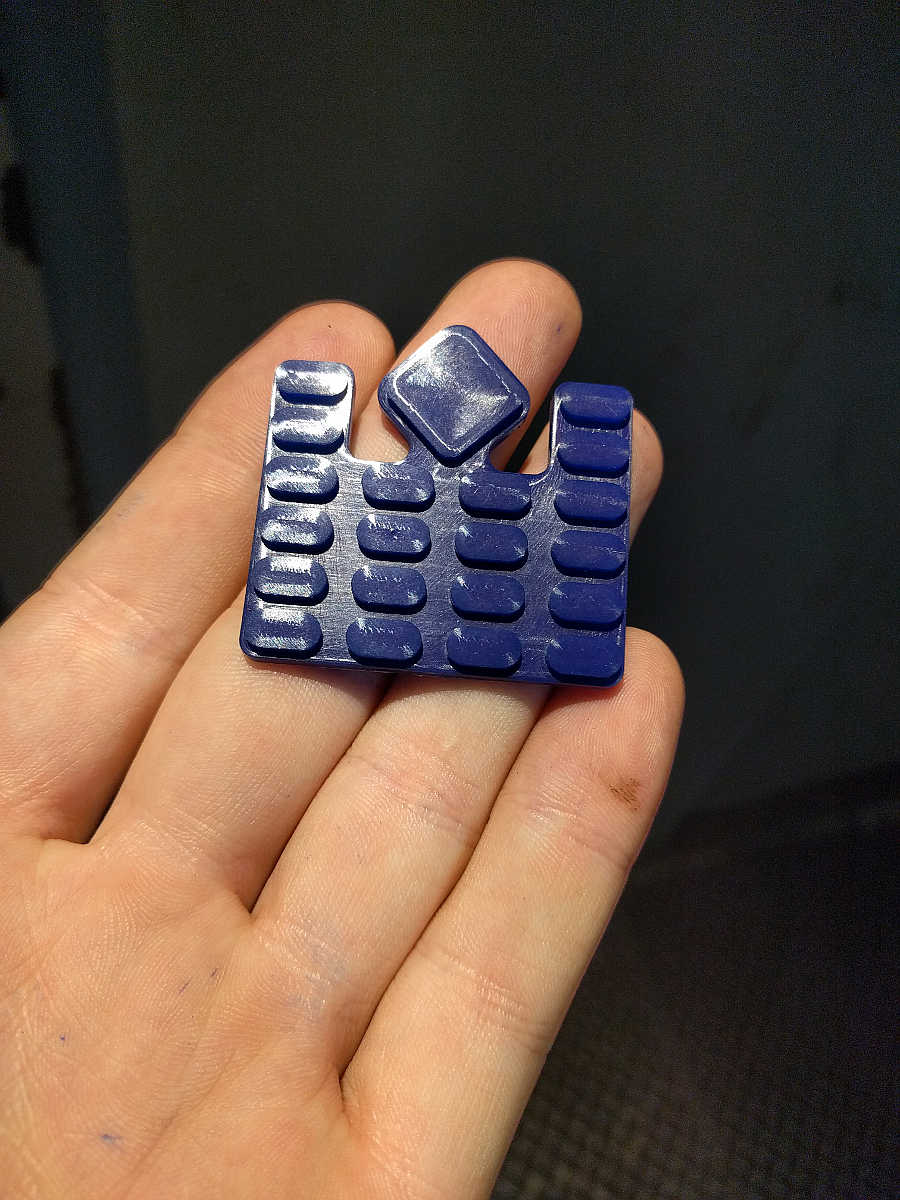
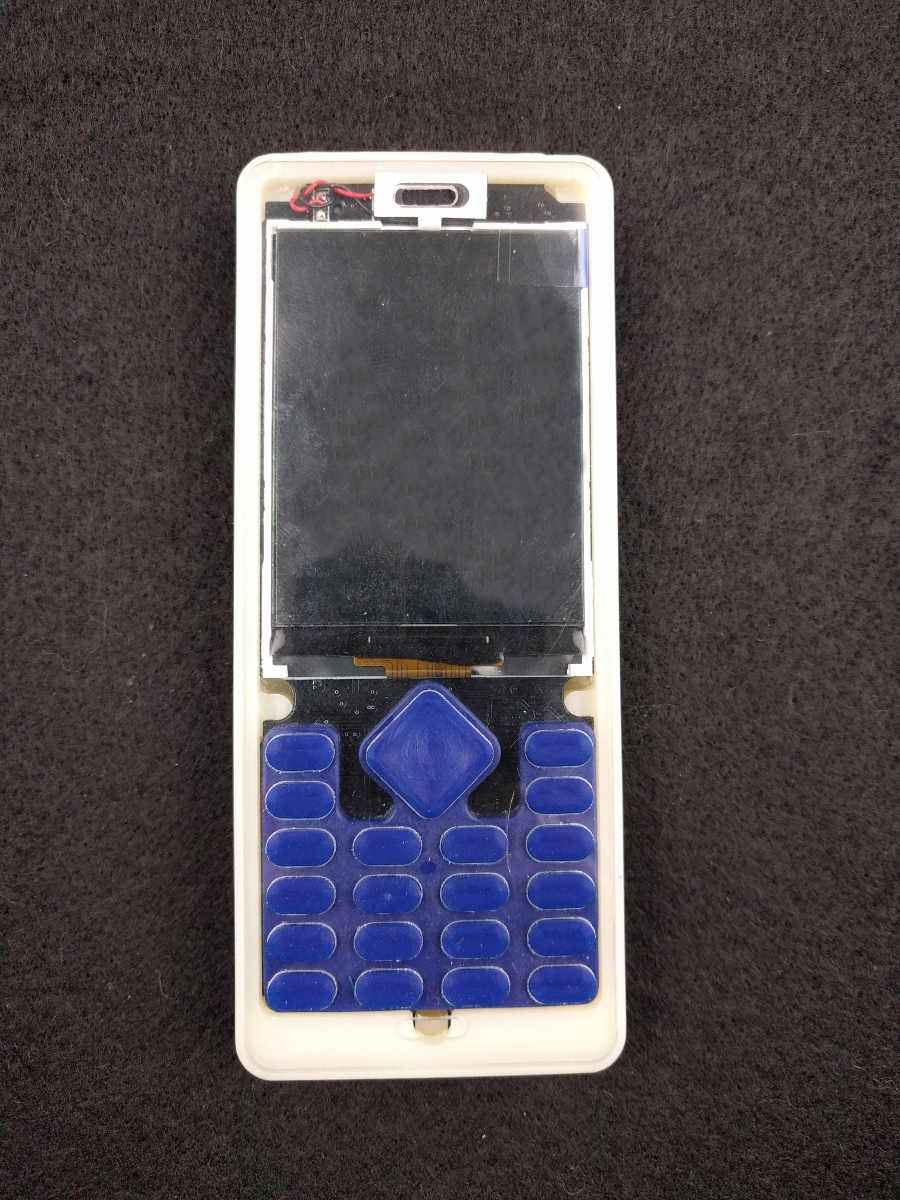
Result after using the blue dye:
![]()
-
Another Hackaday Blog Writeup
02/06/2019 at 15:26 • 0 commentsOn the main page right now (2019/02/06):
-
Keypad
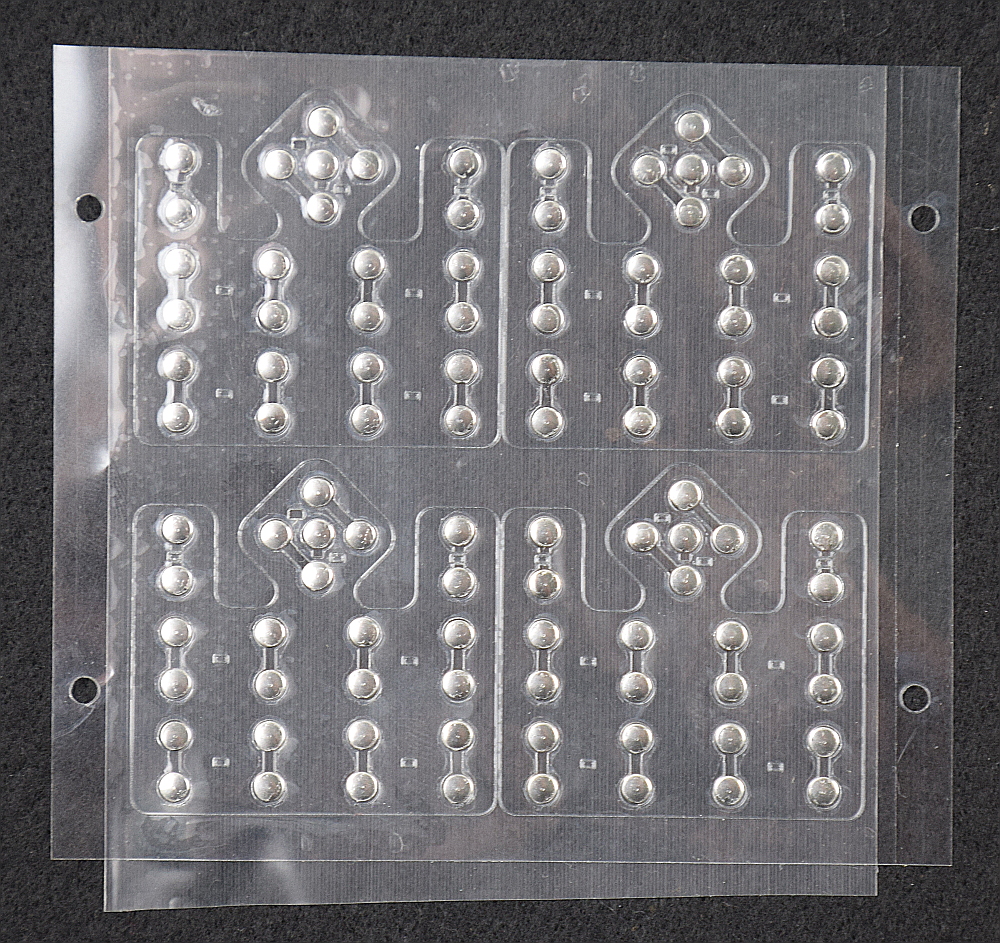
01/21/2019 at 02:55 • 0 commentsGot some samples in today for the production keypad buttons. We went with dome contacts. These will be positioned over gold plated fingers on the main PCB, and they are held in position with a clear plastic overlay.
![WiPhone Button Array]()
WiPhone Button Array Also sent out a little mold for the keypad. This is not the production mold, just a quick/cheap one to confirm the keypad geometry works. Should arrive later this week and we can make a few samples by squirting silicone into the mold using a syringe.
![WiPhone Keypad Mold]()
WiPhone Keypad Mold ![WiPhone Keypad Mold - Bottom]()
WiPhone Keypad Mold - Bottom -
GUI, Software and Electronics Improvements
10/19/2018 at 03:44 • 0 commentsWe've been dialing a lot of things in on the motherboard. The biggest noticeable change is the GUI. It looks much more polished now. We're almost ready to start carrying the phone around for daily use.
For complete details, read the full post on the WiPhone blog:
https://wiphone.io/blogs/blog/2018-10-18-wiphone-progress-update-gui-ee-and-sw-improvements
![WiPhone Boot Screen]()
WiPhone Boot Screen -
Daughter Boards
10/08/2018 at 10:10 • 0 commentsWhat's an electronics project without an attempt at modularity? As part of our project goals, we want a phone that can be easily modified and expanded, but still remains something you could actually use every day. How do we balance those requirements?
For complete details, read the full post on the WiPhone blog:https://wiphone.io/blogs/blog/daughter-boards
![]()
-
Capacitive Button Panel Testing
09/21/2018 at 09:38 • 0 commentsOriginal post on the WiPhone blog: https://wiphone.io/blogs/blog/testing-a-capacitive-button-panel
![]()
We wanted to see if it was possible to eliminate the physical buttons on the front of the phone by using a capacitive button panel.
It has a few advantages:
- At this point in time, it's what people expect (it looks good)
- If we do it right, it could be easy to let people swap out a PCB with a different button layout, opening up the ability to adapt the hardware to different purposes.
- Potentially longer design life, due to no moving parts
Disadvantages:
- Somewhat risky. Physical button panel examples are everywhere, but you don't generally see capacitive button panels as dense as we need. There's probably a reason for that, so we expect to have issues with crosstalk/inadvertent triggering of neighboring buttons.
We made a test panel, shown above, that has buttons of approximately the size and pitch we need for the phone. Overall, the test panel works OK. It is, in fact, easy to accidentally trigger neighboring buttons. But it was interesting enough we'll go ahead and make another panel using our current button layout and see how it performs in the phone.
-
Prototype 2 Assembly Video
09/18/2018 at 12:56 • 0 commentsWe wanted to post an assembly video showing how the mechanical parts of the phone go together. It's already a pretty simple process, and should get even easier once we have a single-piece keypad.
At this stage it's still more of a prototye model than a production unit. The main purpose of this version is to give us something to actually use. Real world use is important for finding all the little issues that show up once a design moves from pictures on a screen to reality. Once we have a list of those we will evaluate what's possible to fix, and incorporate the improvements into the next version.
We've been playing around with the phone for a few weeks, mostly debugging electronics and software. Once we get the bug situation under control we will start carrying the phones around and collecting improvement opportunities for UI, software, electronics, and hardware.
ESP32 WiPhone
The WiPhone project is an open source mobile IP phone. WiPhone is intended to be hackable, modular, cheap, and open, while remaining usable.