TM
TM-
Productivity Meets Urology
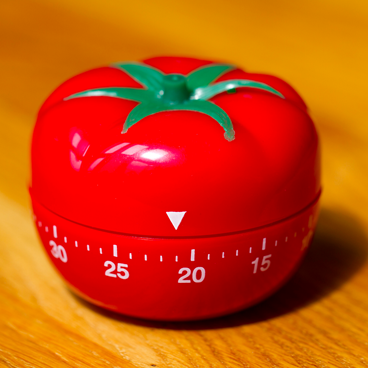
08/16/2018 at 23:22 • 0 commentsWay back in 2014 I saw a piece about a Pomodoro Timer on the Hackaday blog and I've been meaning to build one ever since. (A timer that shows 5 red LEDs each representing 5 minutes of work; after 25 minutes they're replaced by 5 green LEDs, each representing 1 minute of rest.)
![]()
Unfortunately, in the 4+ years since, I've never been able to focus for the 25 minutes needed to get a good start on a hardware Pomodoro timer project. But now I have VoiceBox, complete with a Blinkt strip of RGB LEDs on my desk, so I finally got around to implementing one.
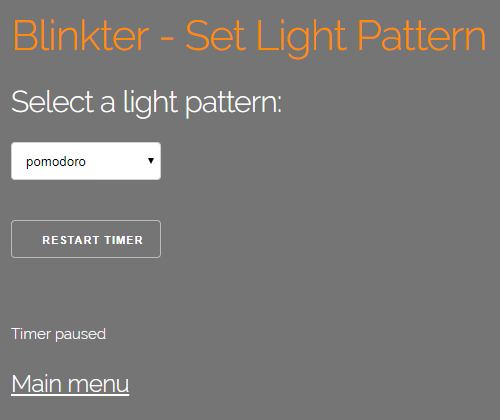
The main meat is the addition of a new pattern, 'pomodoro', to the Blinkter server:
# ************* POMODORO *************
POMODORO_INTERVAL = 30.0
POMODORO_WORK     = 25.0
POMODORO_REST     = POMODORO_INTERVAL - POMODORO_WORK
POMODORO_LEDS     = 5
WORK_MINS_PER_LED = POMODORO_WORK / POMODORO_LEDS
REST_MINS_PER_LED = POMODORO_REST / POMODORO_LEDS
POMODORO_SLEEP    = 0.2
POMODORO_SOUND    = '/home/pi/Python/Blinkter/static/sounds/small_bell.wav'
def pomodoro(pomodoro_start_time):
    global paused, paused_time

    start_processing_time = time.time()
    minutes = ((time.time() - pomodoro_start_time) / 60.0) % POMODORO_INTERVAL # minutes elapsed this cycle
    blinkt.clear()
    if minutes < POMODORO_WORK:
        work = POMODORO_WORK - minutes         # minutes of work remaining
        for i in range(0, 5):
            residue = work - i*WORK_MINS_PER_LED
            if residue > 0:
                brightness = 1.0 if residue > WORK_MINS_PER_LED else residue / WORK_MINS_PER_LED
                setRGB(i, RED, brightness * (0.25 if paused else 1.0))
        if work*60.0 <= POMODORO_SLEEP:
            subprocess.Popen(['aplay', POMODORO_SOUND])
    else:
        rest = POMODORO_INTERVAL - minutes     # minutes of rest remaining
        for i in range(0, 5):
            residue = rest - i*REST_MINS_PER_LED
            if residue > 0:
                brightness = 1.0 if residue > REST_MINS_PER_LED else residue / REST_MINS_PER_LED
                setRGB(7-i, GREEN, brightness * (0.25 if paused else 1.0))
        if rest*60.0 <= POMODORO_SLEEP:
            subprocess.Popen(['aplay', POMODORO_SOUND])

    blinkt.show()
    time.sleep(POMODORO_SLEEP)

    if paused: paused_time += time.time() - start_processing_time # shift the pomodoro start time if paused
I also modified the Blinkter pattern page to display a pause/restart button while the 'pomodoro' timer is running.
![]()
So now I have no excuse not to be focused and productive.
P.S. Why "urology"? In the absence of a timer, I used to alternate between coffee breaks and bathroom breaks. The Pomodoro timer should be much better for my plumbing.
-
We Don't Need No Stinking Playlists
08/15/2018 at 20:11 • 0 commentsWhen I started playing with mpd the natural progression was to keep adding more radio streams to a single (unsaved) playlist. I then added voice commands to switch to the next stream, wrapping back to the beginning of the list. This only worked until the music stopped. as the Google Assistant can't be relied on to recognize the phrase "Hey Google, next stream" while the radio announcer is talking.
So I needed a web interface to select radio streams, but I was then presented with the problem that there's no consistency is the quality or quantity of meta information provided by different streams, e.g. BBC Radio 3 returns the single title string "bbc_radio_three" regardless of what's playing, with no info in any other fields.
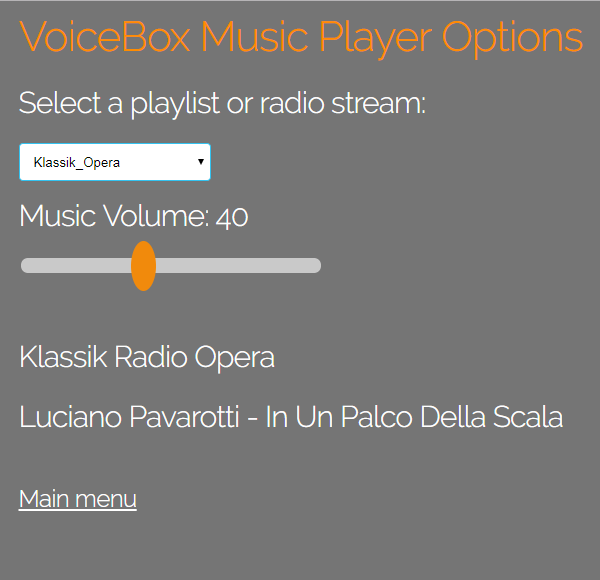
My chosen solution is to split the list into single stream playlist files, with meaningful names, and to display whatever currentsong() information the stream chooses to return.
![]()
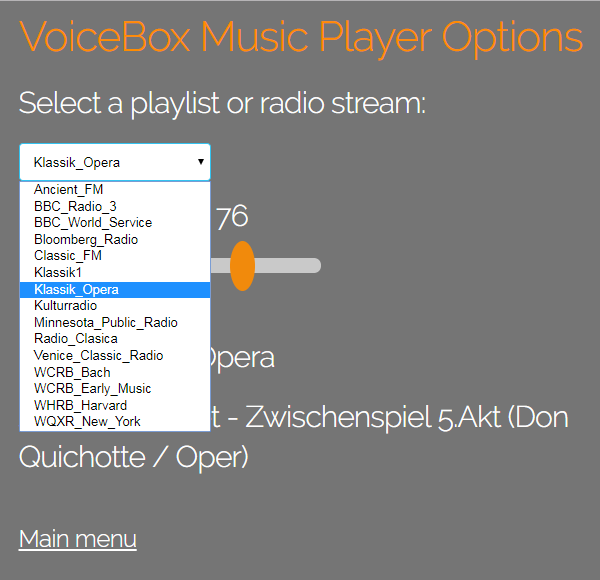
I can then select streams from a drop-down list box which lists the contents of the directory ~/.mpd/playlists:
![]()
I've left the "next song" functionality in VoiceBox in case I ever want to play lists of .mp3 files, but for now, the single stream .m3u files suit my needs.
In the unlikely event that you share my taste in music, download the file playlists.zip and extract to directory ~/.mpd/playlists (assuming that's where /etc/mpd.conf points to).
-
Volume Control Driving Me Poetty
08/13/2018 at 20:23 • 0 comments![]()
I was having trouble changing the volume after turning music off (it seems that mpd stop drops the daemon's connection to PulseAudio). A search for the mpc error "problems setting volume" took me to an ancient archlinux.org thread which recommended adding mixer_type "software" to /etc/mpd.conf. So I changed the pulse part of my mpd.conf to:
audio_output {
    type          "pulse"
    name          "My Pulse Output"
    mixer_type    "software"
}
With the "software" setting, mpd output volume is muted: I had to turn the volume up to 100 to match the previous volume at 50. (I suspect it's a dB vs percentage thing, or that the VoiceHat hardware amp is being bypassed.) So back to the drawing board.
After an hour ritually cursing Lennart Poettering, and five minutes reading the pacmd man page, I realized that perhaps failing to change volume when music isn't playing isn't entirely unreasonable behavior. Maybe, just maybe, I ought to change my code. So now setVolume() checks whether music is playing before attempting to change the volume.
# Set and display music volume
def setVolume(volume):
    if not connectMPD(): return
    try:
        if mpdState() == 'stop': music('on')
        mpc.setvol(volume)
        displaySplitText(1, 'Volume: '+str(mpc.status()['volume']))
    except Exception as e:
        print('Error setting music volume: '+str(e))
        aiy.audio.say('Error setting music volume')
Sorry Lennart.
![]()
That feel when you dodge putting in the effort to understand the Linux sound system, again.
-
Looks Like HTML's Back on the Menu
08/10/2018 at 23:21 • 3 comments![]()
I've been experimenting with ways to cross-link menus between flask applications running on different ports on the same server. None of the obvious ways to link to, say, the piHole menu on port :9012 from the Blinkter root page on port :9013 work. The best solution I could find via Google was a suggestion by Craig McQueen on StackExchange. When the link is clicked (onclick), a little embedded javascript is run to add the port number to the link. I've modified Craig's approach slightly to run the same script on right-click (oncontextmenu). This is to allow <right-click>, <open in new tab>, or <copy link location>.
<h5>
<a href="/" onclick="javascript:event.target.port=9010" oncontextmenu="javascript:event.target.port=9010">SysInfo</a>
  •
<a href="/" onclick="javascript:event.target.port=9011" oncontextmenu="javascript:event.target.port=9011">VoiceBox</a>
  •
<a href="/" onclick="javascript:event.target.port=9012" oncontextmenu="javascript:event.target.port=9012">piHole</a>
  •
<a href="/" onclick="javascript:event.target.port=9013" oncontextmenu="javascript:event.target.port=9013">Blinkter</a>
</h5>
And the end result looks like this:
![]()
I'm going to add this menu bar to the bottom of the root pages of each of the server programs. Hacky, but good enough for my needs.
-
Turn On, Tune In, Drop Out
08/09/2018 at 15:27 • 0 commentsI started out with Unix on vt100 terminals, so the thought of playing music from the Linux command line would never have occurred to me. If you wanted music on a dumb terminal you could only press ^G and use your imagination, just like ASCIIpr0n (NSFW if you're Amish). However, the Hackaday bots added Brad Arnett's Wolfgang project to the "Similar Projects" section below my first log entry (if only Google Assistant's AI was as good). "Wolfgang" introduced me to MPD, the Linux Music Player Daemon which makes adding basic music playing functionality almost painless. The first thing to do is to install MPD and a command line client, MPC.
sudo apt-get install mpd mpcThen comes a bit of a problem: we're relying on the cooperation of two Lennart Poettering projects: PulseAudio and systemd. To get sound from PulseAudio, the mpd service needs to be run by a user (pi) rather than root. This screws up access control to the various log files used by the daemon. The simplest solution is to move MPD's files to pi's home directory.
mkdir ~/.mpd
mkdir ~/.mpd/playlists
Edit the file /lib/systemd/system/mpd.service (using sudo nano) to add a couple of entries under the [Service] heading:
[Service]
User=pi
Environment=DISPLAY=:0
(This causes systemd to run the MPD service as pi and gives the service access to PulseAudio in an X environment.)
We then edit the MPD configuration file /etc/mpd.conf changing pathnames to point to the new directories:
music_directory         "/home/pi/music"
playlist_directory      "~/.mpd/playlists"
db_file                 "~/.mpd/tag_cache"
log_file                "~/.mpd/mpd.log"
pid_file                "~/.mpd/pid"
state_file              "~/.mpd/state"
sticker_file            "~/.mpd/sticker.sql"
I also enabled PulseAudio output in mpd.conf (to enable music volume control):
audio_output {
    type    "pulse"
    name    "My Pulse Output"
}
After a reboot, the MPD service should be up and running ("journalctl -u mpd -f" should show the error log). We can now add some music. I used:
mpc add http://audio.wgbh.org:8108
to add WGBH Boston's Bach station to the (initially empty) playlist.
You can then test with commands like:
mpc play
mpc volume +10
mpc current
mpc playlist
mpc stop
We can have the Assistant switch music on and off by adding the following to process_event():
def process_event(assistant, event):
...
    elif event.type == EventType.ON_RECOGNIZING_SPEECH_FINISHED and event.args:
...
        elif 'music on' in text or 'play music' in text:
            assistant.stop_conversation()
            subprocess.Popen(['mpc', 'play'])
        elif 'music off' in text or 'stop music' in text:
            assistant.stop_conversation()
            subprocess.Popen(['mpc', 'stop'])
And that's it, you should now be all Bached up:
![]()
Later we'll add some more streaming functionality (using the python-mpd2 library), but that's enough for now.
-
Star of the Silver Screen
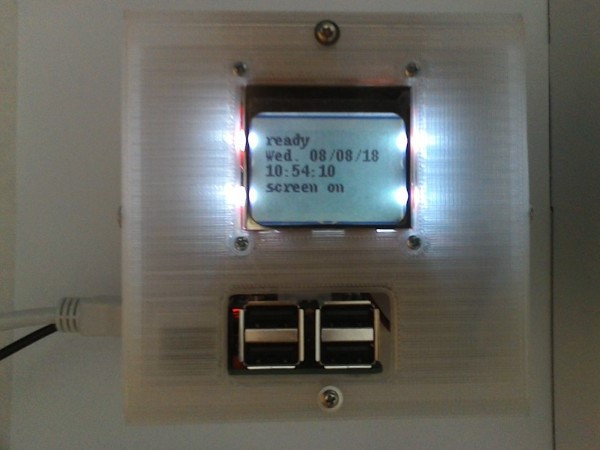
08/08/2018 at 15:50 • 0 commentsI'm still tinkering with voice command processing for music playing and Blinkter patterns, so for now I'll just post a quickie on the Nokia 5110 display. (See "A Note on Wiring" for connection details - AND DON'T BLOW THE BACKLIGHT!)
![]()
For now, the top row of the display shows the Assistant status ("listening", "thinking" or "ready"), the next two rows show contextual information (date & time, song name, etc), and the last two rows show what the Assistant thinks you last said (handy for spotting when she interprets "pattern" as "patent").
def process_event(assistant, event):
...
    elif event.type == EventType.ON_RECOGNIZING_SPEECH_FINISHED and event.args:
...
        elif text == 'screen on':
            GPIO.output(BACKLIGHT, GPIO.LOW)
        elif text == 'screen off':
            GPIO.output(BACKLIGHT, GPIO.HIGH)
The code is almost identical to the code for controlling the cooling fan, and like the fan, the backlight can be controlled from the piHole GPIO page too. Note the logic is inverted - GPIO.LOW is on. I think my previous 5110, with a different pinout, had a logic high backlight. Hard to say now as I blew it by connecting it to the 5V Driver3+ pin.
As I add more bells-and-whistles, I'm beginning to find the 5110's 5 rows x 14 columns a bit too cozy. If I add a bigger screen, I'll probably move display handling to a separate process, so it can handle dynamic displays - like scrolling stock tickers - without making VoiceBox.py too messy.
-
Do The Fandango
08/07/2018 at 21:53 • 0 commentsProbably the easiest way to get into the functionality of VoiceBox.py is to look at the cooling fan. A bit of background first, having printed the first version of the enclosure and running Blinkter (which chews a lot of CPU) without a heat-sink on the Pi's SoC, I was getting intermittent black screens.
It turned out that the black screens were mainly due to the crappy swivel HMDI to DVI converter that I was using, but before biting the bullet and buying an HDMI to DVI cable, I first added a heatsink:
![]()
and ordered some cooling fans from DealExtreme:
![]()
The fan is a 30mmx30mm 5V unit, connected to DRIVER2+, the buffered 5V VoiceHat output driven by GPIO27. (See "A Note on Wiring" below.)
The code is very straight-forward, in process_event(),
    elif event.type == EventType.ON_RECOGNIZING_SPEECH_FINISHED and event.args:
        ...if 'fan on' in text or 'cooling on' in text:
            fan('on')
        elif 'fan off' in text or 'cooling off' in text:
            fan('off')
where fan() is
def fan(action, quiet=False):
    GPIO.output(COOLING_FAN, GPIO.HIGH if action == 'on' else GPIO.LOW)
    if not quiet:
        assistant.stop_conversation()
        aiy.audio.say('Cooling fan '+action+'.')
So, if the user says "Hey Google, Cooling fan off", GPIO27 will be set to LOW. (I added the word "cooling" as Google really struggled to recognize the word "fan" out of context.)
As we saw in the previous log ("Double-Tap"), the fan can also be turned off by pressing the button twice within 1 second.
A third method for controlling the fan is via the GPIO page of piHole (see screenshot in "A New Home For piHole").
By default, the rear face of the enclosure is printed to mount the fan in "suck" mode: sucking hot air out of the upper part of the box, to be replaced by cold air drawn in at the connection holes. (See enclosure log entry.) With the fan running, the CPU temperature drops from circa 60ºC to circa 40ºC. Unfortunately, the fan noise makes Google's voice recognition less effective, so the fan is probably most useful when using the Pi with a keyboard.
-
Double-Tap
08/06/2018 at 21:53 • 0 commentsA bit out of sequence, as I haven't covered cooling fan control or music streaming yet, but today I added a double-tap feature to VoiceBox.py.
DOUBLEPRESS = 1.0 # Button is double-pressed if twice within 1 second
def button_wait_thread():
    global last_button_time
    button = aiy.voicehat.get_button()
    while mode != 'quit':
        button.wait_for_press()
        button_press_time = time.time()
        if button_press_time - last_button_time < DOUBLEPRESS:
            print('Double-press, killing music and fan')
            fan('off', quiet=True)   # switch off fan without fanfare
            music('off', quiet=True)
        else:
            print('Button pressed, enabling mic')
            response = requests.get('http://localhost:9011/button')
        last_button_time = button_press_time
So, if the button is pressed twice within a second, the music and cooling fan are switched off. I added this feature because when the fan is on, and the radio announcer is talking, Google Assistant can really struggle to understand commands (such as "music off" and "cooling fan off"!).
Before the fix, I was using the GPIO control tab of piHole at <your-pi's-ip-address>:9012/gpio to switch off the "COOLING FAN". If the radio got really loud I'd have to ssh in and "mpc stop" from the command line to kill the radio manually.
-
VoiceBox Code Overview
08/05/2018 at 23:01 • 0 commentsIn this log I'll outline the structure of VoiceBox.py. In later logs we'll look at features in more detail.
if __name__ == "__main__":
    global mode, flask_thread, assistant
    mode = 'hotword'                   # 'button' / 'hotword'

    # Try to connect to Assistant before starting sub-threads
    credentials = aiy.assistant.auth_helpers.get_assistant_credentials()
    try:
        assistant = Assistant(credentials)
    except Exception as e:
        print(e)
        aiy.audio.say("Couldn't connect to Assistant, see error log.")
        exit(-1)

    flask_thread = threading.Thread(target=flask_run_thread)
    flask_thread.start()

    button_thread = threading.Thread(target=button_wait_thread)
    button_thread.start()

    assistant_loop()
At the start of the main program we set the global variable mode to the default value, 'hotword', meaning that the microphone is on and the Google Assistant will be listening for the keywords, "Hey Google" or "Hello Google" to trigger speech processing. (In 'button' mode, speech processing will only start when the button is pressed.)
We then try to connect to Google Assistant. Last night, I spent so much time tinkering with the program that I burned through my entire 500 query Google Assistant API daily quota. This caused the Assistant() call to fail with Error:429: hence the try/except wrapper.
After creating an Assistant client, we start a thread, flask_run_thread(), to process web requests. This just runs the app Flask() object as in the three previous servers we've looked at: sysinfo, piHole and Blinkter.
def flask_run_thread():
    app.run(host='0.0.0.0', port=9011, debug=False)
    exit()
We then start another thread, button_wait_thread(), to wait for button presses.
def button_wait_thread():
    button = aiy.voicehat.get_button()
    while mode != 'quit':
        button.wait_for_press()
        print('Button pressed')
        response = requests.get('http://localhost:9011/button')
The clue's in the name. This thread calls the aiy API to wait for a button press, and then triggers the flask thread's button_get(). Note that if the mode global variable is set to 'quit', the button thread will end.
@app.route('/button', methods=['GET'])
def button_get():
    global assistant
    print('Button press requested, enabling mic')
    assistant.set_mic_mute(False) # enable microphone
    assistant.start_conversation()
    os.system('aplay src/VoiceBox/static/sounds/glass_ping.wav')
    return 'button requested'
This switches on the microphone, nudges the Assistant, and rings a bell to let the user know that VoiceBox is ready to listen.
We mention a 'quit' mode, how is the mode set? Via flask routines:
# Change mode to 'quit', send wake-up message to assistant and shutdown flask thread
def quit_flask():
    global assistant
    set_mode('quit')
    assistant.send_text_query('Goodbye.') # send text to wake Assistant loop
    func = request.environ.get('werkzeug.server.shutdown')
    func()

# When quitting from assistant thread, post rather than get
@app.route('/quit', methods=['POST'])
def quit_post():
    quit_flask()
    return 'quit' # return simple text so calling thread doesn't hang when flask thread stops

@app.route('/quit', methods=['GET'])
def quit_get():
    quit_flask()
    return redirect(url_for('root_post'))
The routine quit_flask() can be called either in response to a browser 'GET' at url /quit, or to a programmatic 'POST' to the same url.
If /quit is requested from a browser, quit_flask() is called and the browser is redirected to the VoiceBox root page. (This prevents restart loops where a browser directed to /quit constantly shoots down the VoiceBox server after every restart whenever the browser refreshes.
The /quit 'POST' routine is triggered by a request from the Google Assistant thread - when the user says "Hey Google, quit".
And here is the quit() routine in the Assistant thread:
def quit():
    assistant.stop_conversation()
    global flask_thread
    if mode != 'quit': # No need to send quit request if already triggered
        response = requests.post('http://localhost:9011/quit') # n.b. post, not get see below
    else:
        aiy.audio.say('Terminating program')
        GPIO.cleanup()
        button_thread.join()
        flask_thread.join()
        os._exit(0)        # sys.exit() doesn't shut down fully
This quit routine can be called in two places in the Assistant thread: either in response to the user saying "quit", or when the assistant processing loop discovers that the mode is set to 'quit'. The actual setting of this mode is done in the quit_flask() routine, either due to a web request, or a programmatic request from quit().
It's a bit fiddly, but this was the only way I could get the three threads to exit gracefully. Flask has so many hooks into the OS that it can't be shot down by brute force.
Almost done for this log. We just need a quick look at the structure of what I've been calling the Assistant thread (it's actually the continuation of the main program after launching the flask and button threads.)
def assistant_loop():
    global assistant
    initDisplay();
    displayText(0, 'VoiceBox 0.1')

    for event in assistant.start():
        process_event(assistant, event)
Just initialize the Nokia display, then loop forever (until the os._exit(0) call), processing assistant events.
The process_event() routine is just a hacked version of the Google demo code in assistant_library_with_local_commands_demo.py, so get your head around that first.
That's enough. Next log we'll look some functionality.
-
The Main VoiceBox Server
08/05/2018 at 20:17 • 0 commentsI've been stalling on posting about the main VoiceBox (Google Assistant + Flask) server as it's still a work in progress. Rather than drag my feet any longer, I'm going to put up the code and run through the main structure and features. I'll expand on different parts of the functionality, like music playing or controlling esp8266 devices, in later log posts.
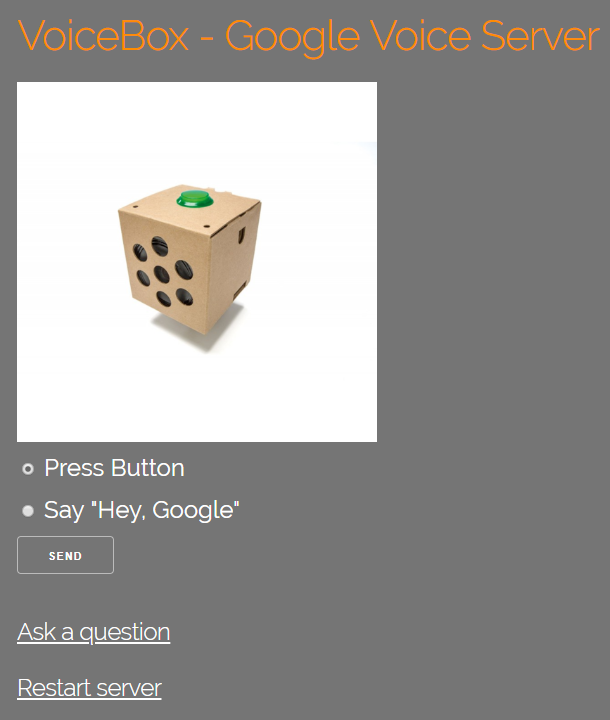
![]()
The VoiceBox root menu, visible at <your-Pi's-address>:9011. From here you can switch between "hotword" mode (where the Assistant is listening all the time for "Hey Google", or "Okay Google"), and "button" mode (where the Assistant starts listening when the button is pressed - and bell wrung).
You can, of course, switch modes verbally by saying "Hey Google, button mode" or <press button>"hotword mode".
![]()
The "Ask a Question" page is a bit of a work in progress. At present whatever you type is passed straight to the Google Assistant for processing. Unfortunately, I can't think of a clean way to have local processing performed before handing the query to the Google Cloud.
I'll upload the source now and go over the program structure in a separate post. Download VoiceBox.zip and unzip into /home/pi/AIY-projects-python/src. If running manually, you'll have to us the "Start dev terminal" link on the Pi desktop to load the correct environment. From there, type src/VOICEBox/VoiceBox.py, and the program will be run via python3 with AIY libraries installed.
You may get warnings about imports being "not found". I'll post a separate log on what needs to be installed when I feel guilty enough to use the stack of SD cards I bought to re-create the process from scratch.
VoiceBox
Adding a Flask web interface (and other stuff) to the Google AIY Voice Kit.