Hacky Racers is a new racing league created by a few bored engineers who like the idea of soap box racing, but want more power. The concept is based heavily on the US Powerwheels Racing Series, which takes toy electric cars and crank them up to 11 to compete against each other in races. The rules allow a budget of £500 to build an electric race car to race others around a circuit. Style is as important as speed, ensuring a suitable level of crazy. Each car is fitted with a fuse to keep a level playing field, and there are some safety rules too (see www.hackyracers.co.uk for the full list) but other than that it's pretty open.
This is the story behind my racer, the Dustbin 7. It was built in around 4 days costing about £400, and is both great fun and terrifying, as all good projects should be!
I had been invited to participate at Fully Charged Live at Silverstone, the largest electic vehicle show in the UK to date, with my Hacky Racer to help us spread the word about what we were doing. This was great, except I only had two weekends free before Fully Charged Live, and I hadn't started building yet.. Better get on with it!
As with any good project, I started with some research. This was mainly looking at how things were being done in the US; my racer was one of the first built in the UK so it's still a bit of a blank sheet over here. I found that one of the most common drive systems appeared to be the budget scooter motors available on eBay, either a pair of 1kw brushed ones, or a 2kw brushless one. A lot of people also use water cooled hobby brushless motors and the like, but those require a bit more work to get right, and given I only had a few days to build it, I decided to keep things simple and get myself a 2kw brushless scooter motor.
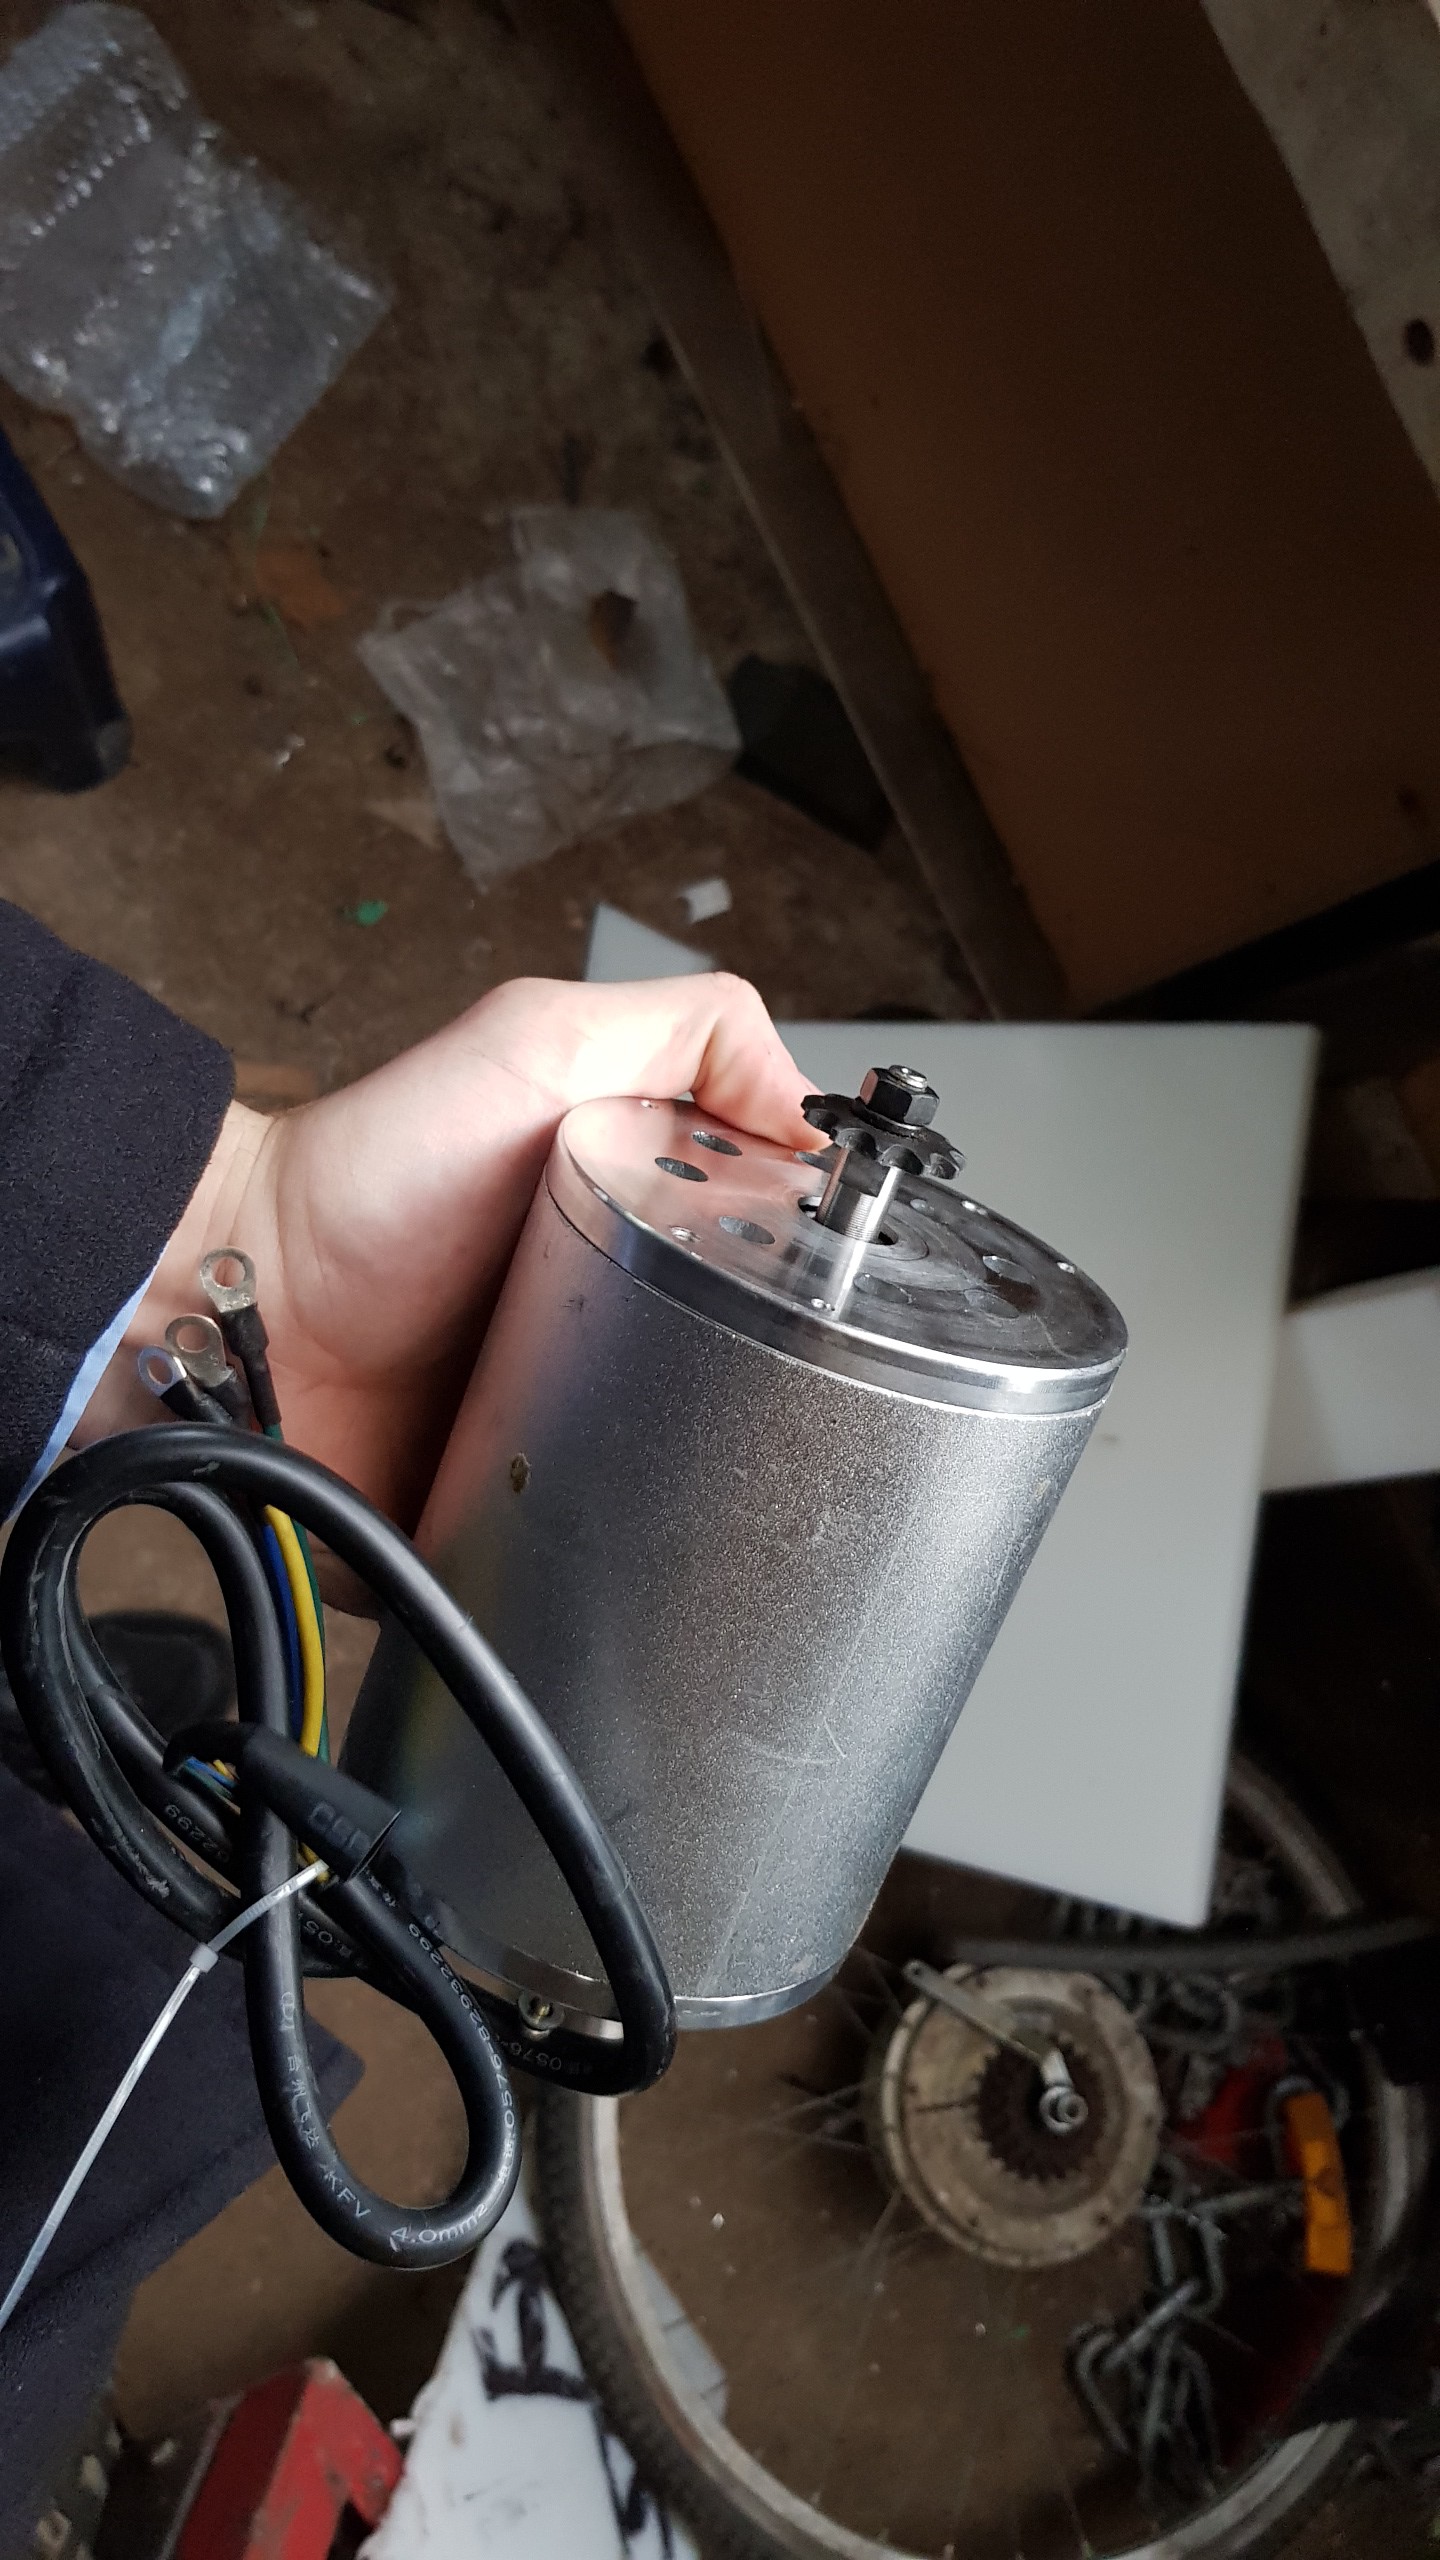
They're much bigger than a standard hobby brushless motor for its power, but have a lot of thermal mass and are designed for continuous running without additional cooling. At £80 it's not the cheapest solution out there, but it definitely seems to be one of the more reliable.
To control it, I bought a 1.5kW 48v brushless ebike ESC for £30, which while its a little underrated for the motor, it was a lot cheaper than the 2kw version, and I was reliably informed by the PRS lot that it'd work just fine. The instructions were entirely in Chinese, but with the help of a good camera translator app I got it all wired up and working.
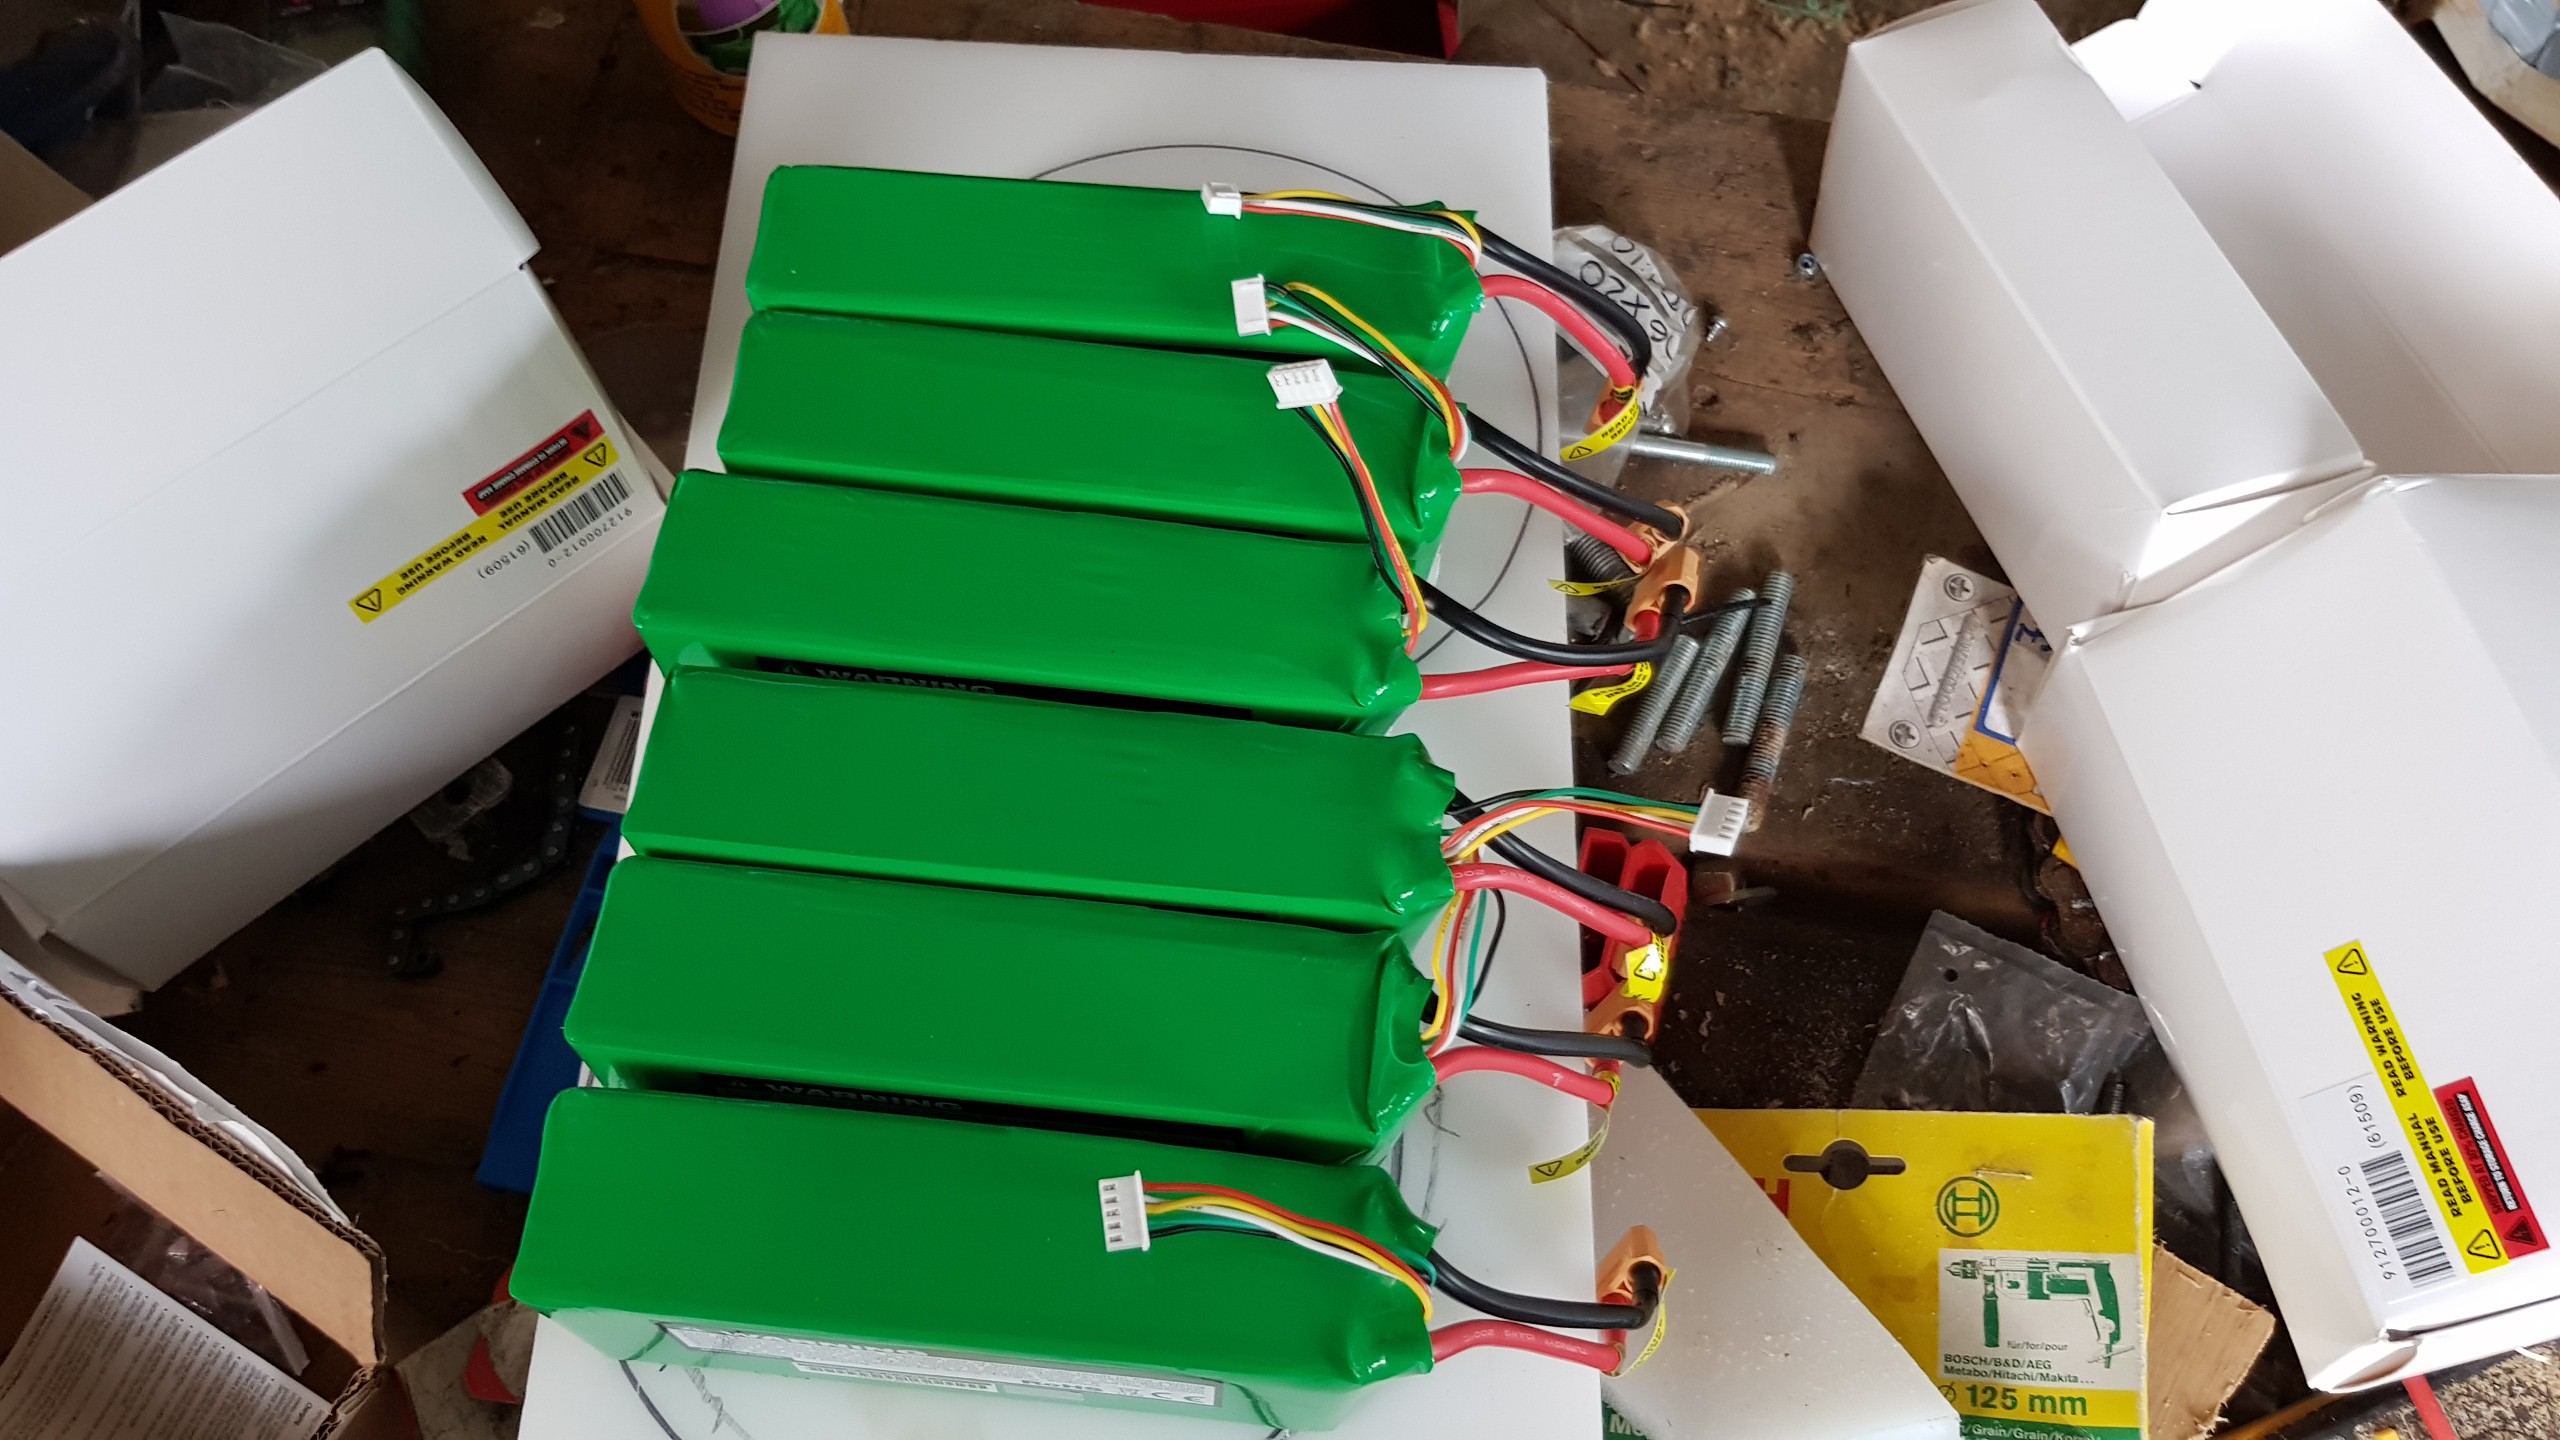
The batteries commonly used in the US were Nissan Leaf cells stripped out of scrap cars and sold on cheap. Unfortunately this doesn't appear to be a thing in the UK, so I went for the slighly more volatile lipo packs. Batteries are usually the most expensive part, and as such we allow them to only count %50 towards the total budget. I bought 6 x 16Ah 4S Multistar packs for £260 (they were on offer), which makes 2 full sets so I can charge one set while racing with the other... That was the plan at least, but one of the packs was dodgy on arrival and they had been discontinued and I apparently got the last ones, but anyway, I had batteries.
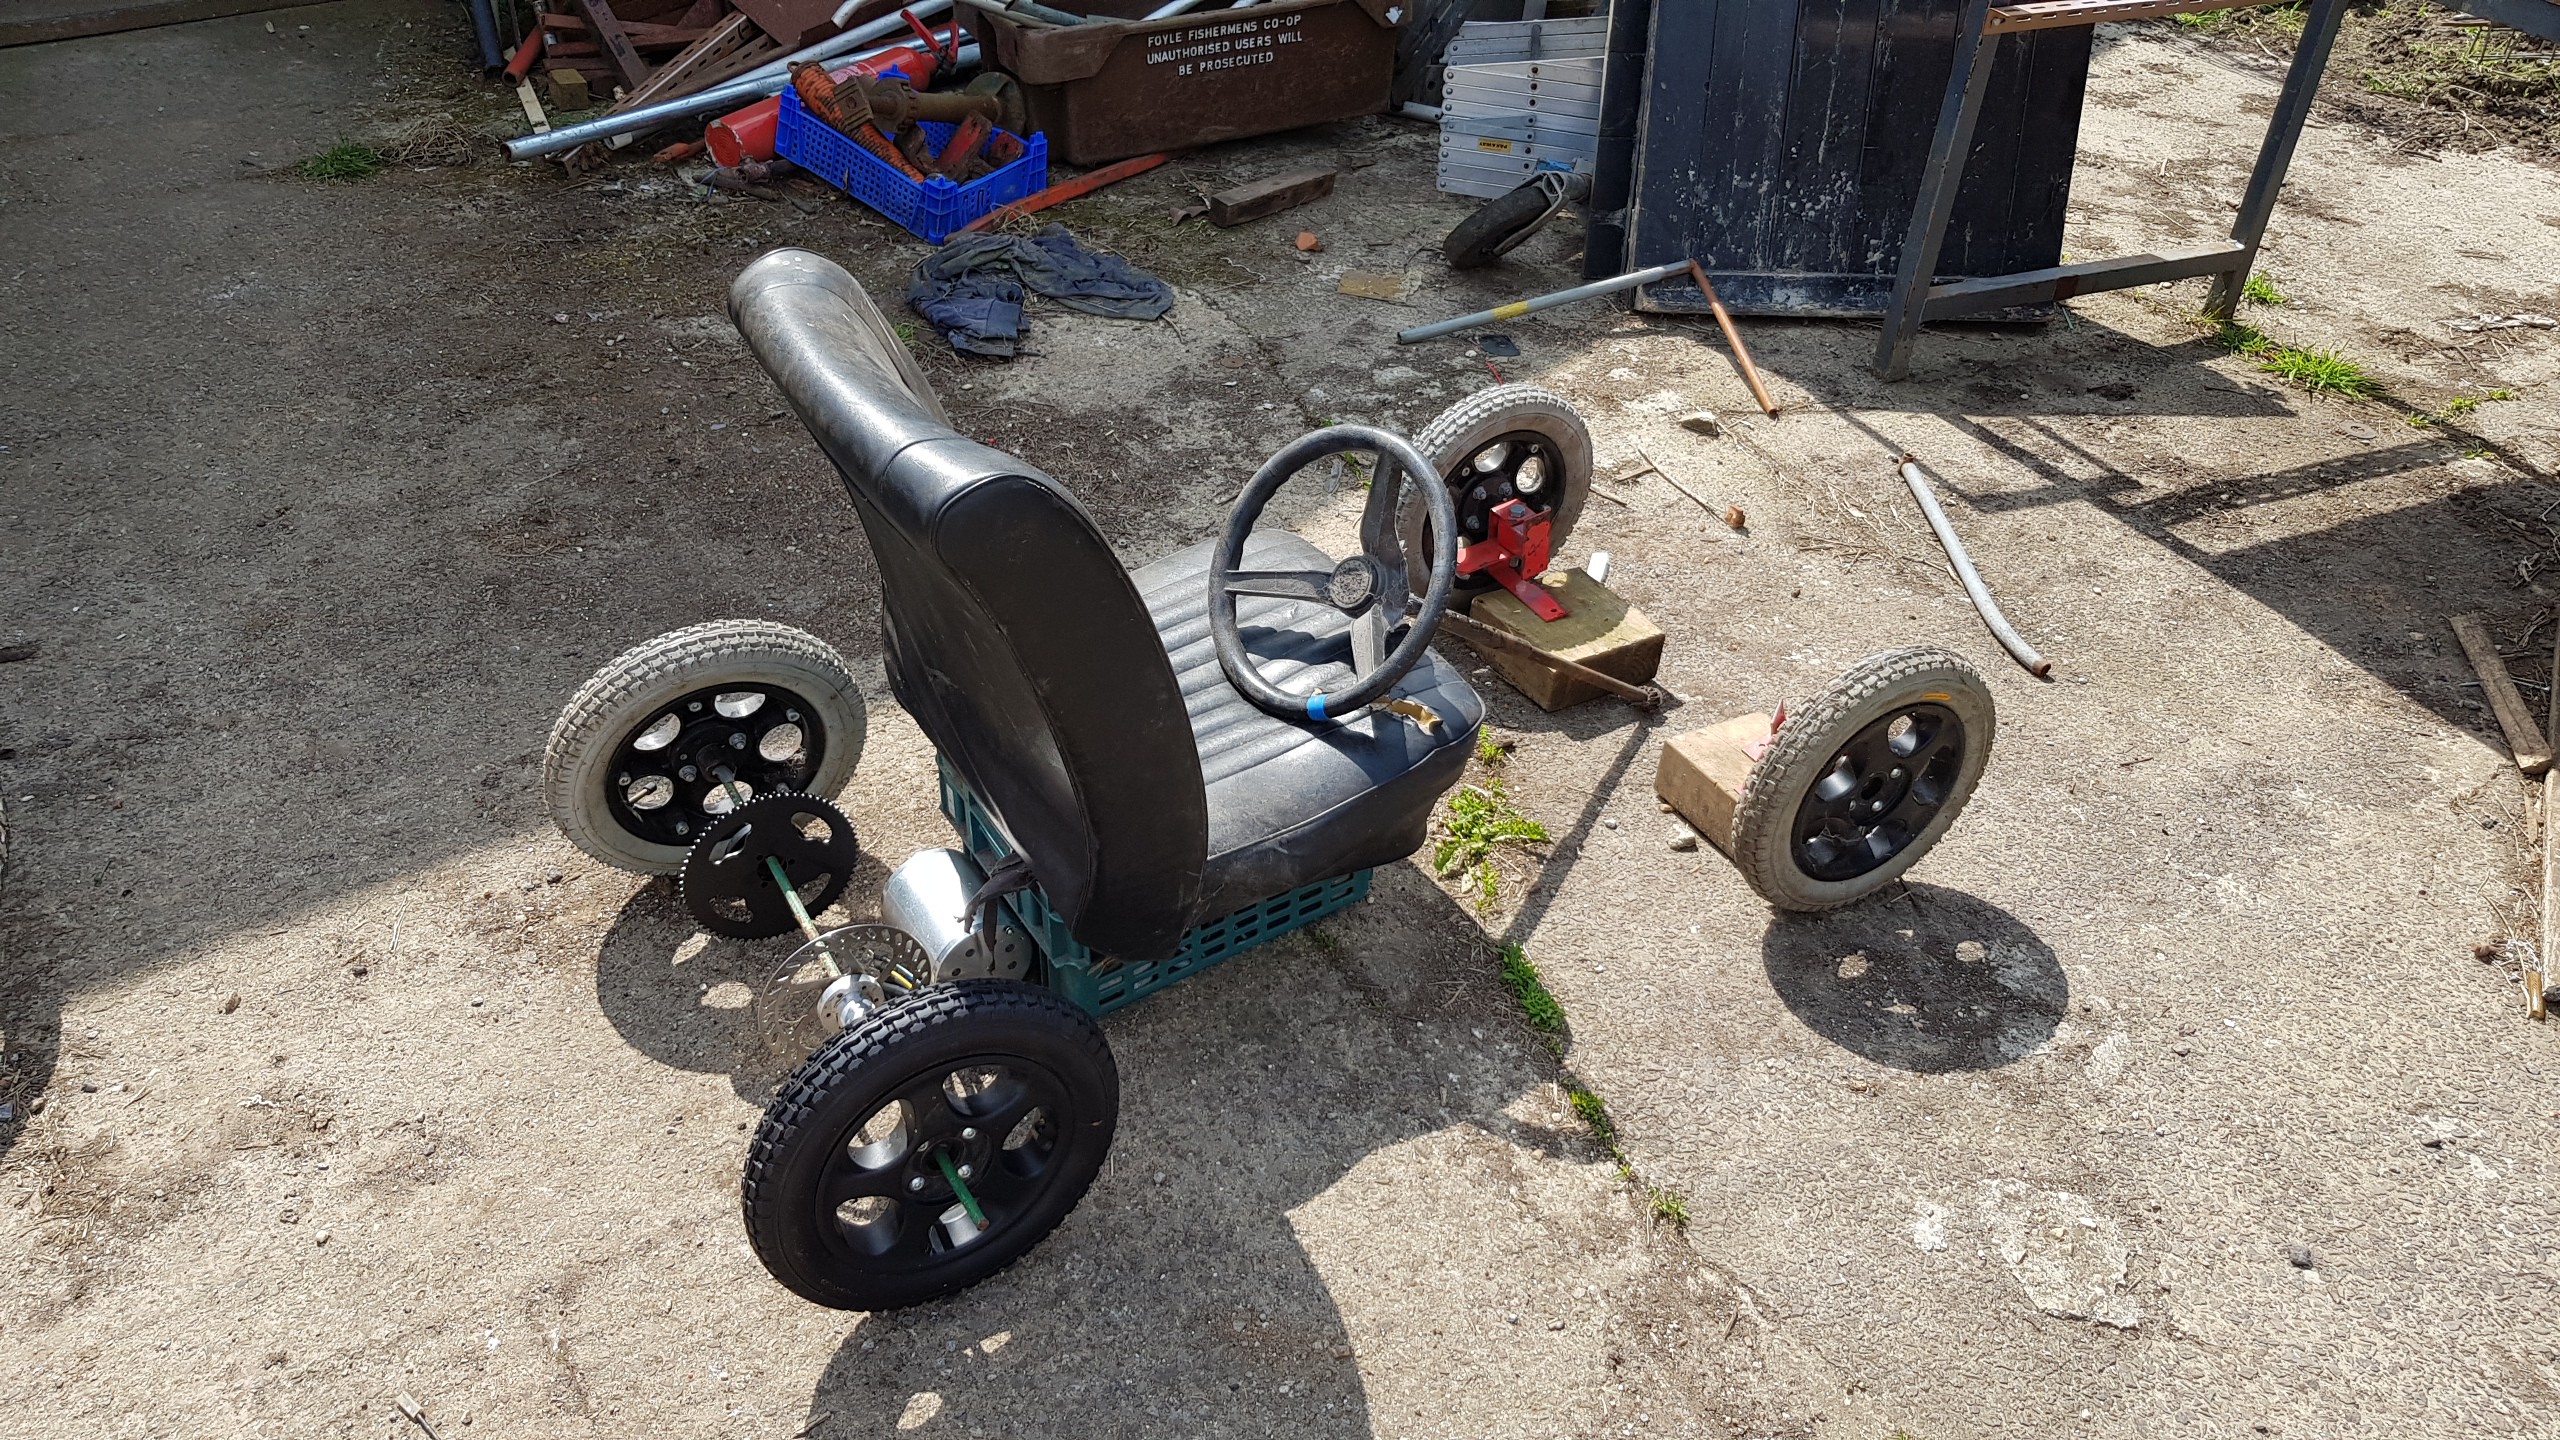
Now I had most of the electronics covered, I started on the hardware. I decided to go for a classic car theme, as I have a set of shelves filled with old Triumph parts, including an old Herald seat which I wanted to use as it was particularly comfortable! For the wheels and steering I used parts 'borrowed' from an old Formula 24 kit my school was getting rid of many years ago. It just consisted of some electric wheelchair wheels and some really flimsy steering axels, but it had some nicely made hubs to attach everything. Also had a hub for a bike brake disc which saved a lot of work on the brakes. I got a length of 20mm diameter silver steel for the back axel and some bearings to match. I laid all out these parts along with the steering wheel was from an old ride on lawnmower to get an idea of the design.
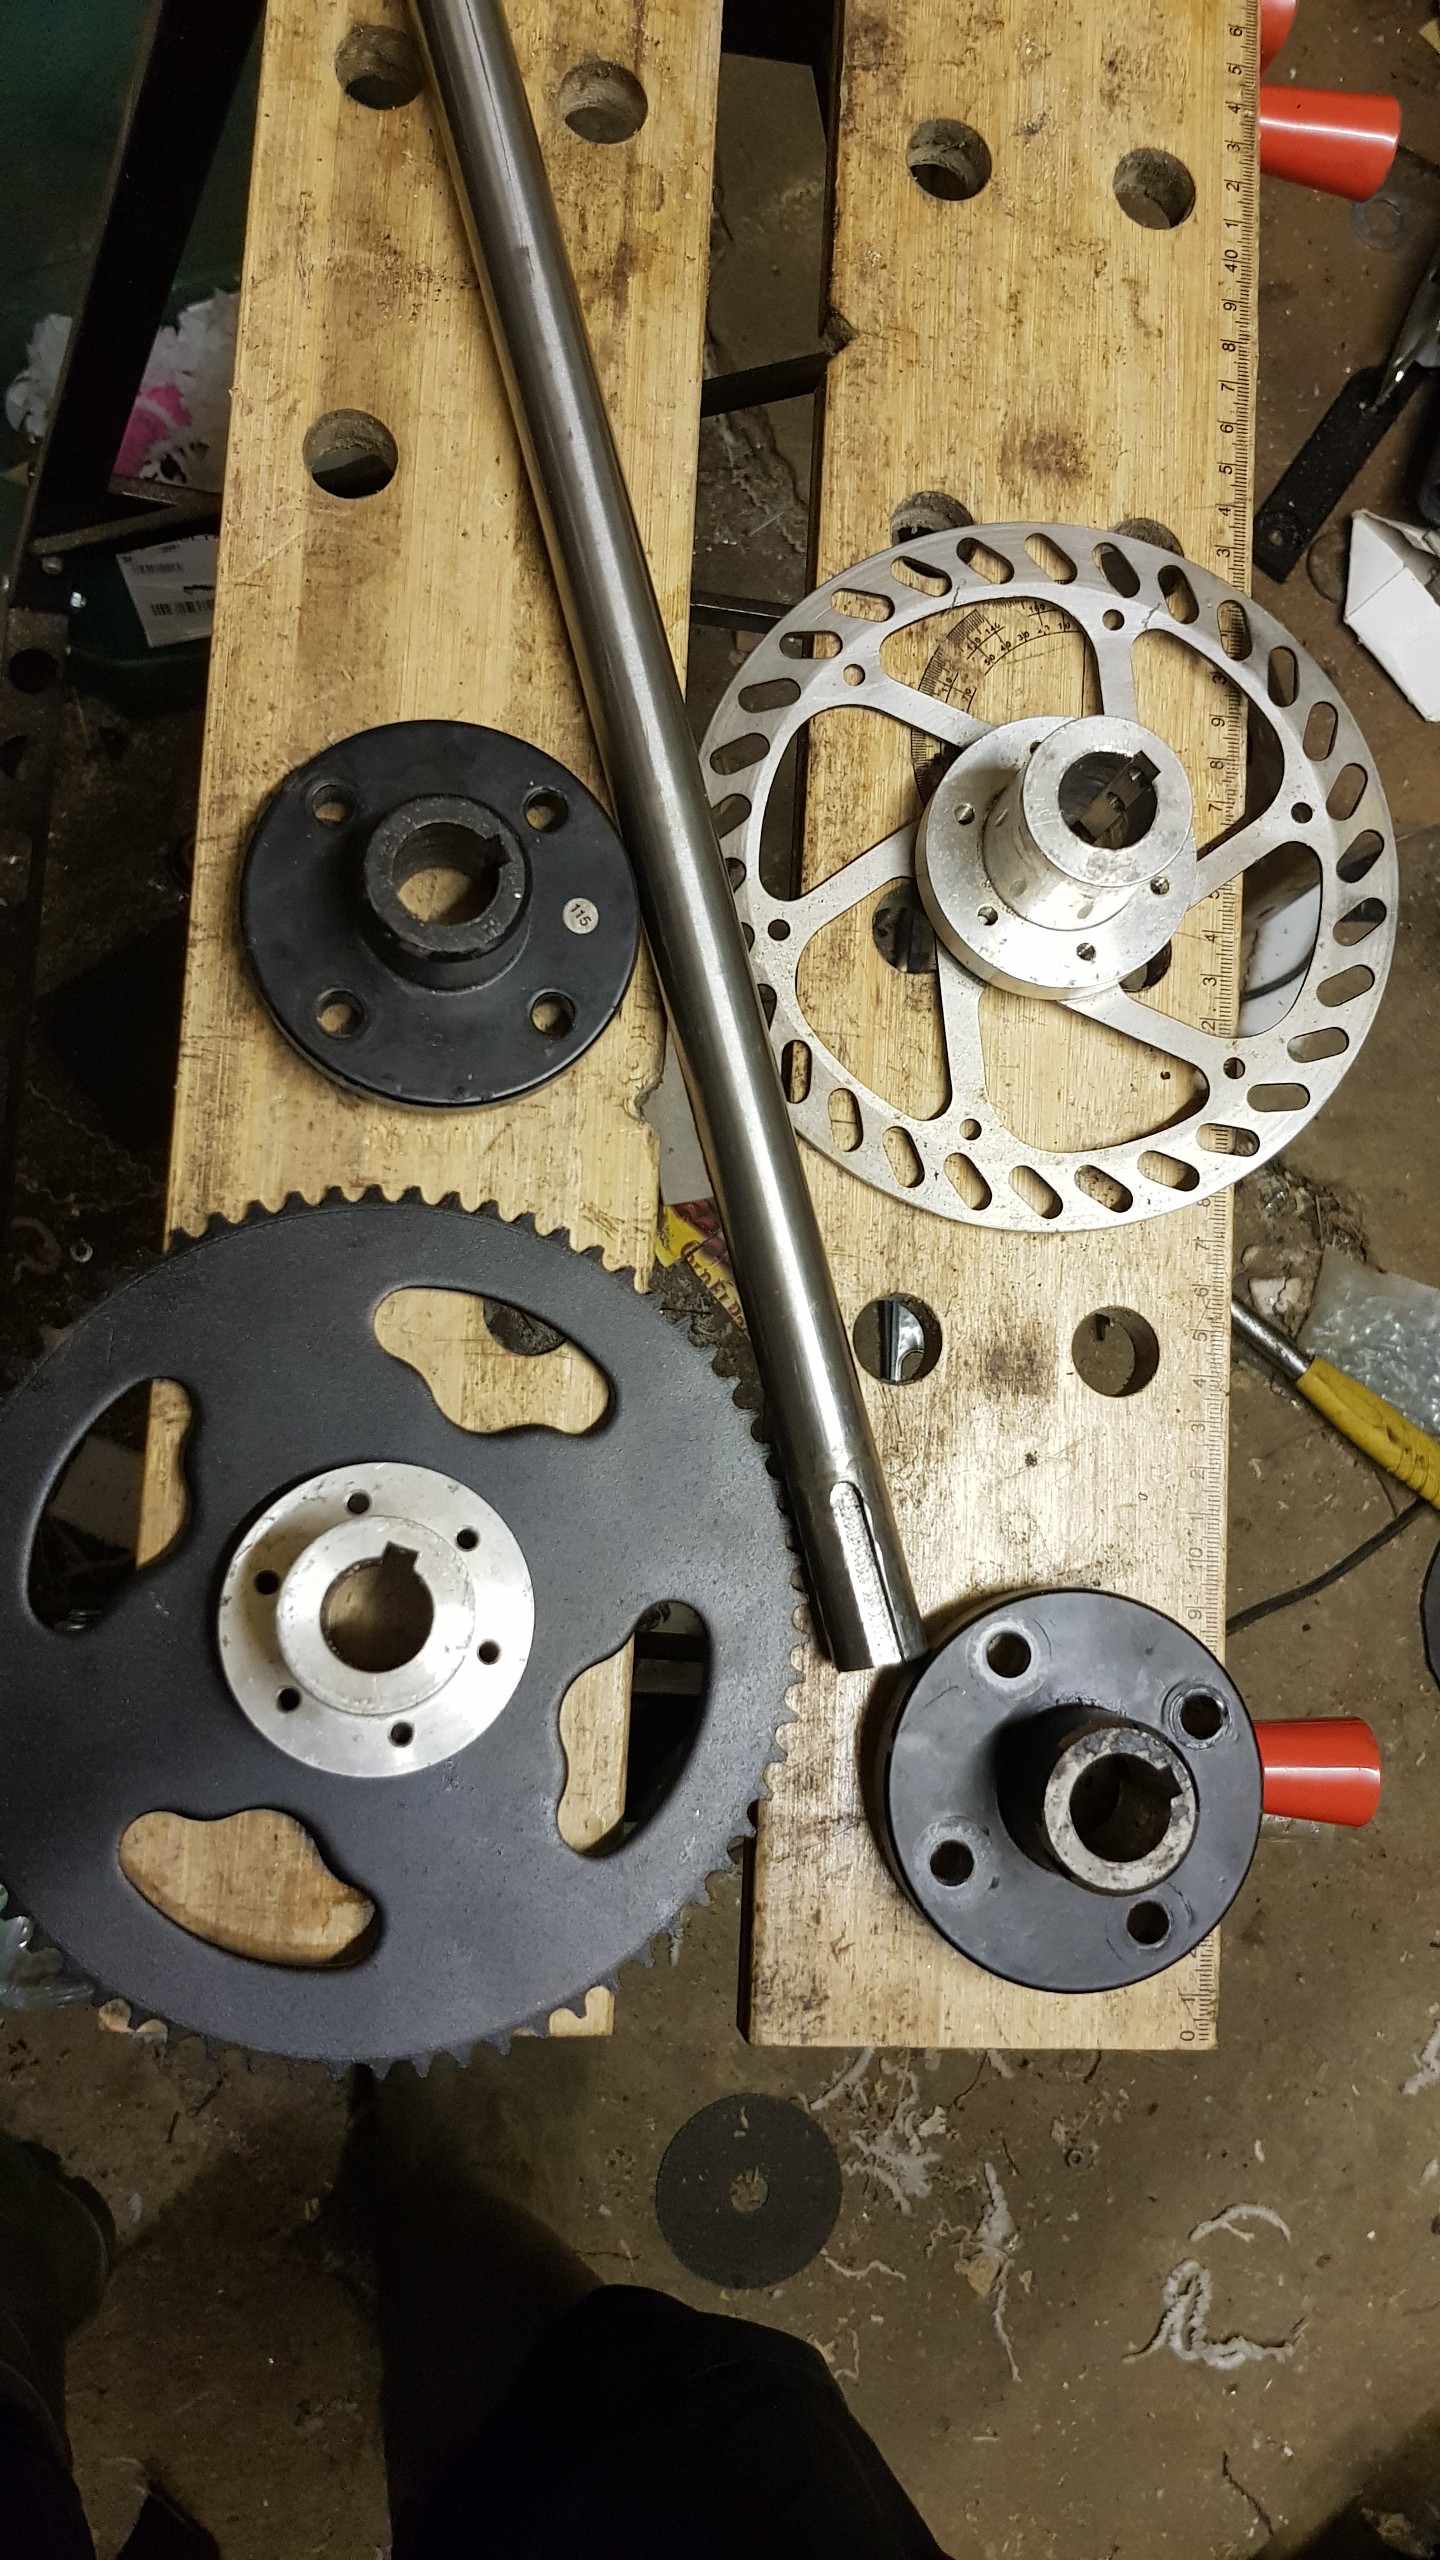
The back axel was going to be the hardest part as it required the most machining, so I started there. All the hubs I had were for a 15mm shaft, but I'd gone for 20mm for the extra rigidity, so first job was to drill out all the hubs. To transfer power, I decided to go for keyways as it would make it robust as well as maintainable. This meant I either had to pay to get some keyways cut into the hubs, or buy the tooling my self. Given its the second time I've needed to do keyways on a project, I bought the tooling. I got a 6mm broach with a load of collars on eBay, then set about modifying my hydraulic press to take the broach. It wasn't pretty but it did the job. The other half of the keyway in the shaft was a relatively simple job in the mill.
I also had to attach the drive sprocket to one of the hubs. I took one of the brake disc hubs and put it in the lathe to make an inset to center the sprocket, then marked out and drilled the holes for mounting it (most of which lined up...). After this the back axel was pretty much ready to be assembled.
With this sorted I could start looking at the frame. Since I was making it up as I was going along, I decided to prototype the chassis from shelving brackets I had lying around.
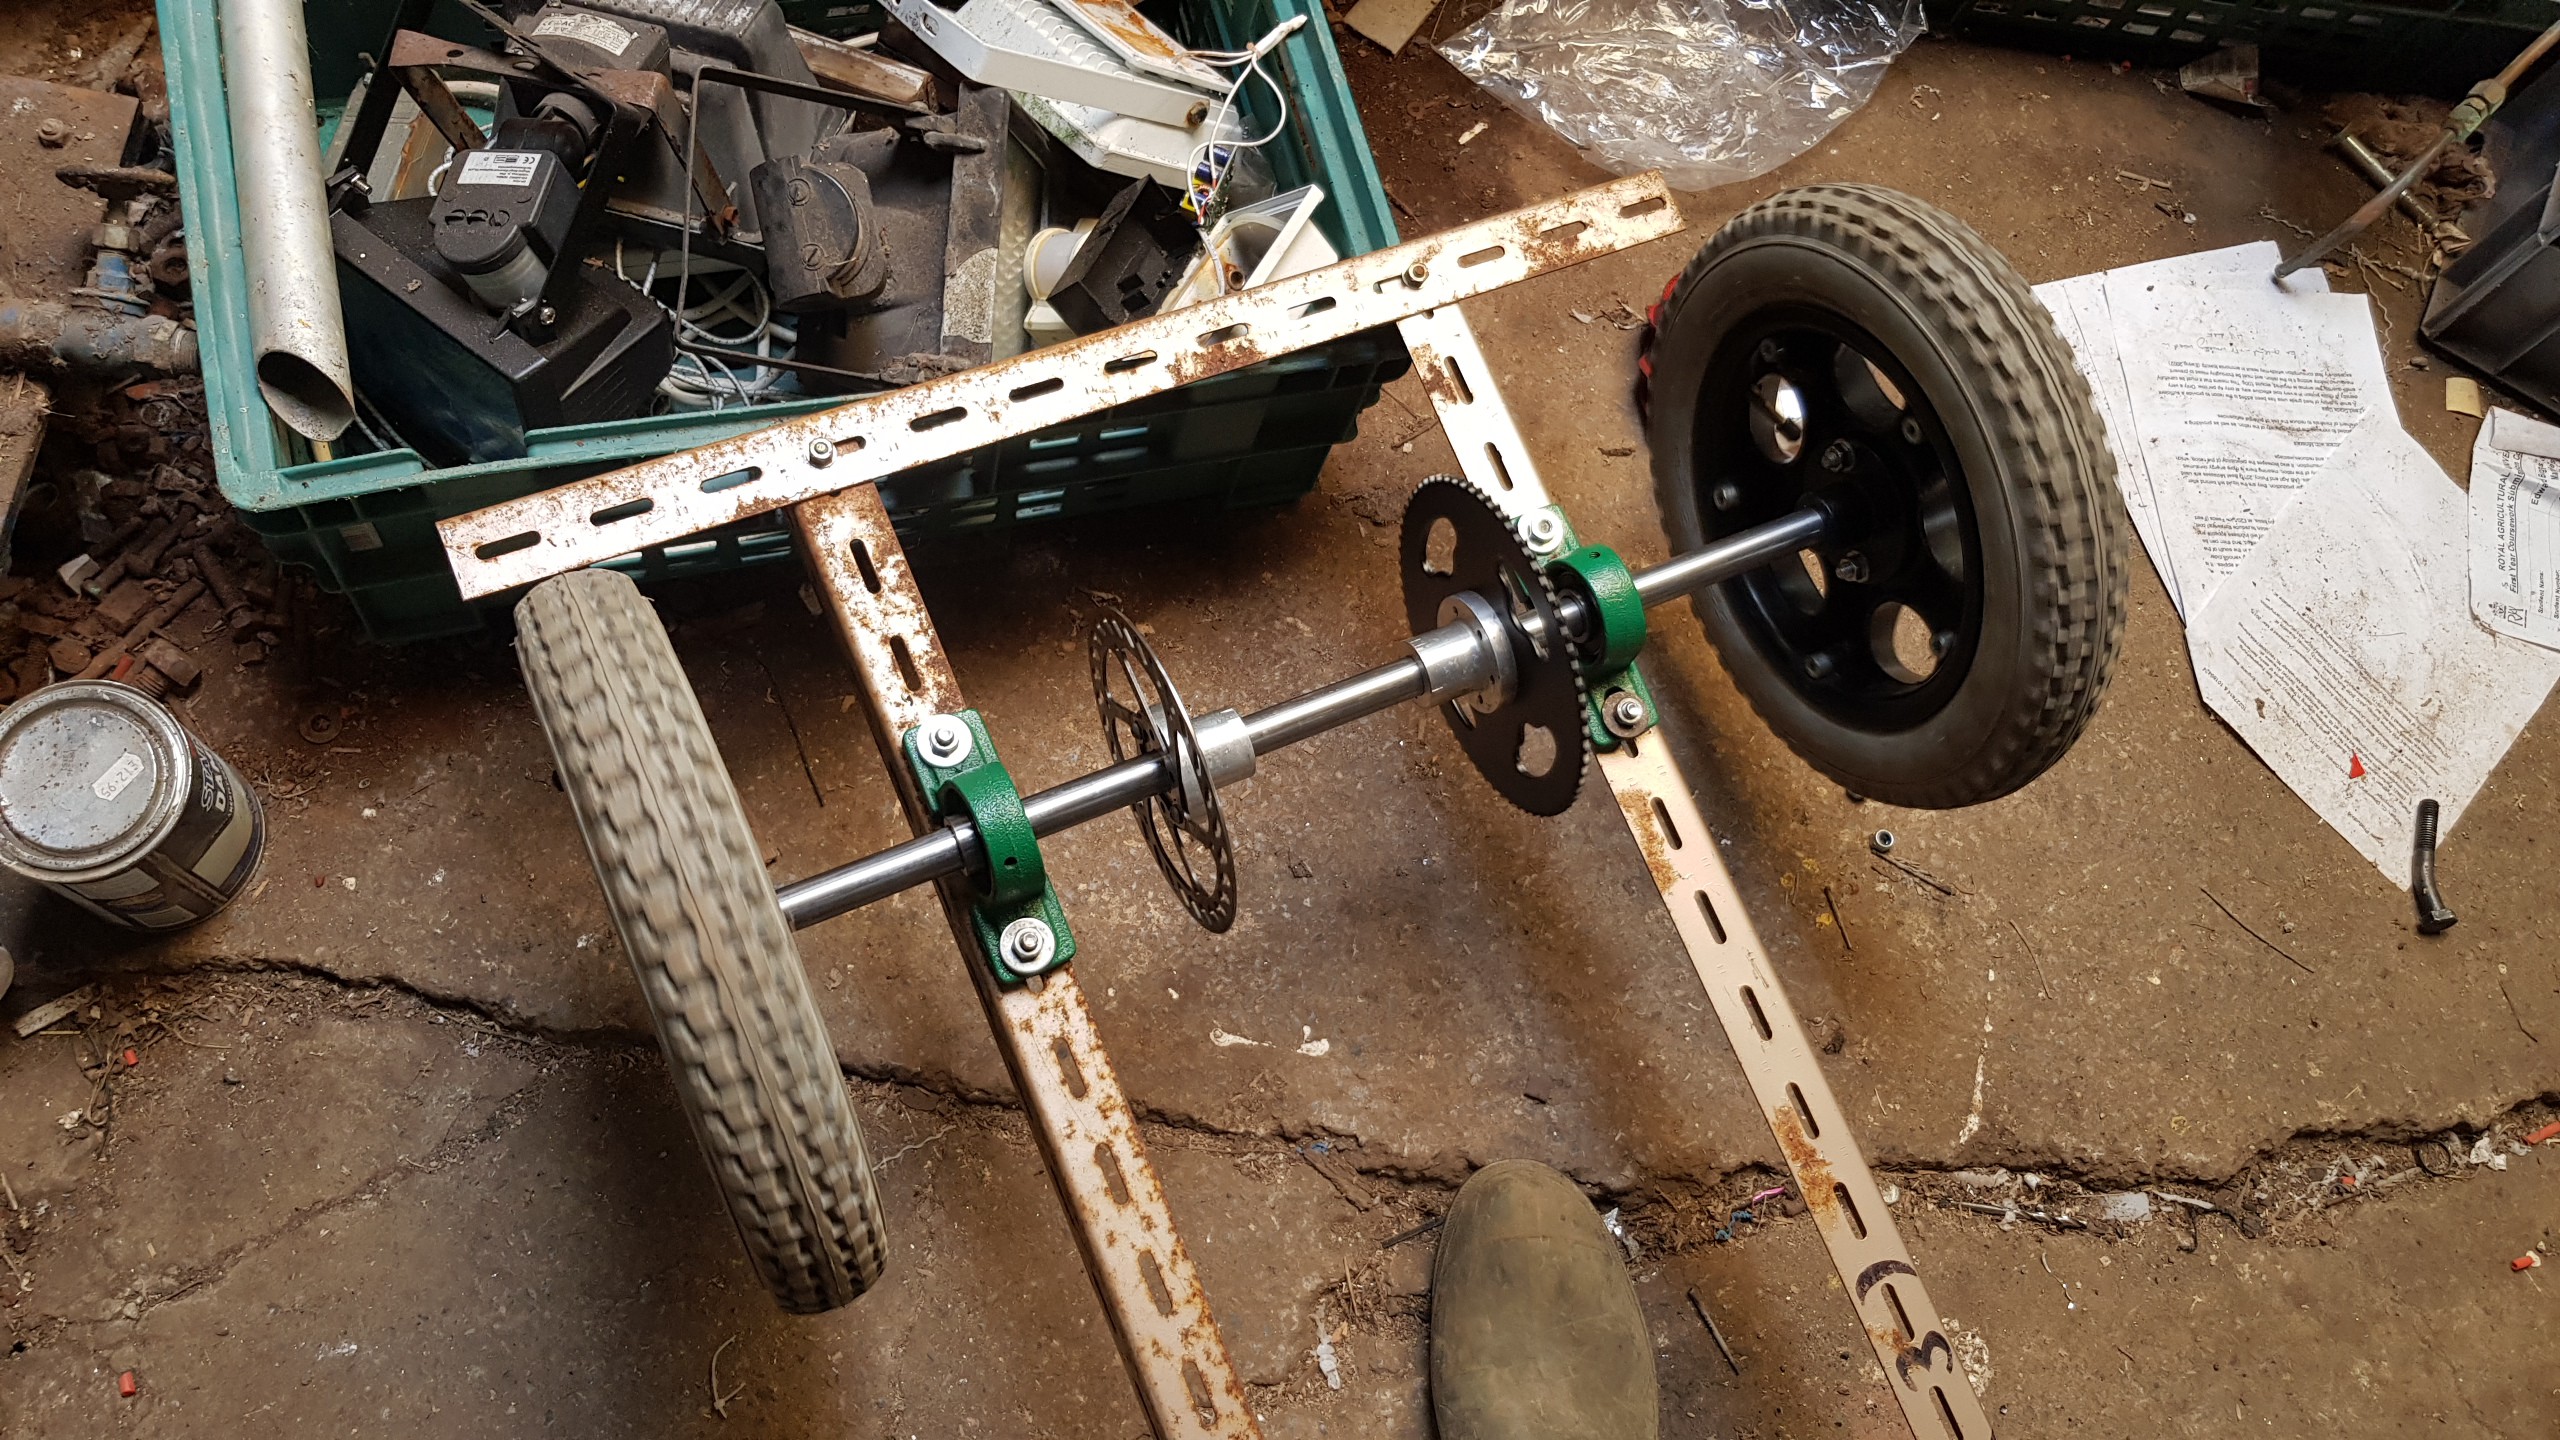
I got it to the point where I could sit in it, and realised I'd have a lot less leg room than I was expecting as I was planning to have the seat in front of the motor and electronics. As such the seat was moved right back over the rear axel, which ruined the weight distribution but meant I'd actually fit in it, which was the more pressing concern!
Now I'd worked out the layout I could start work on the actual chassis. This was made in two halves, and almost entirely bolted togetger so it could all be dismantled to fit in the boot of my car.
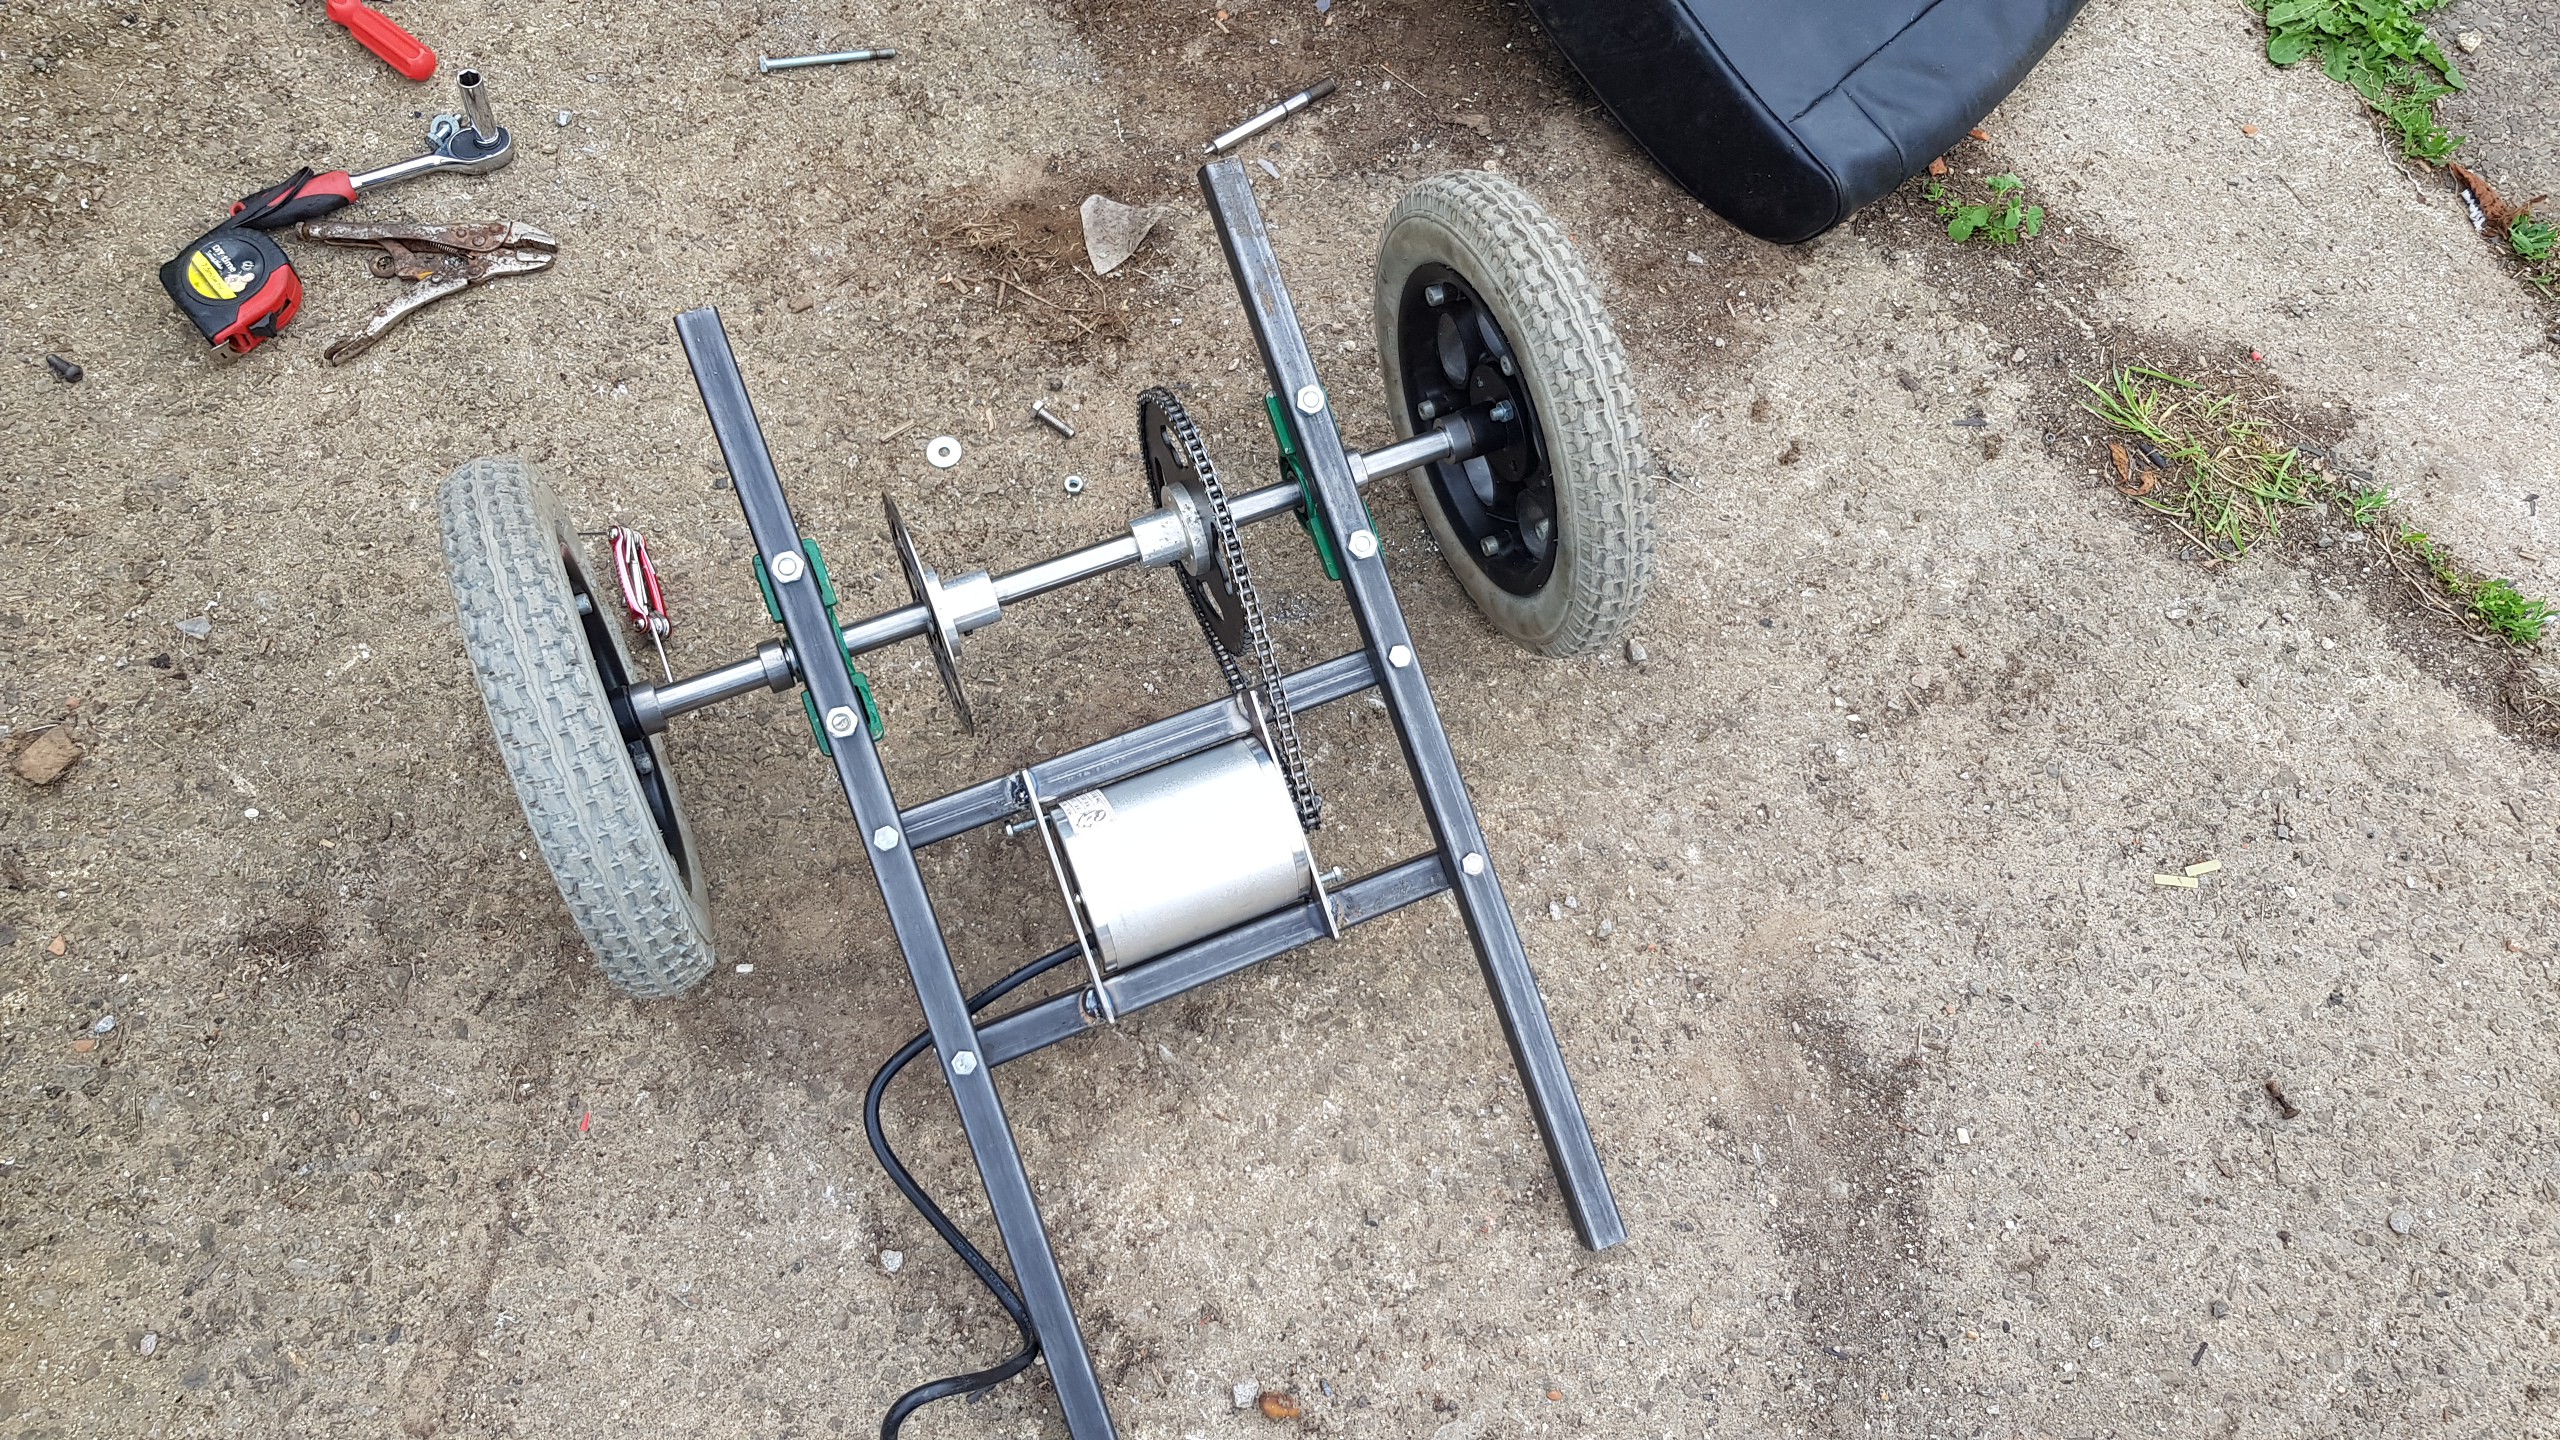
The design was kept simple to keep build time down, and the metal work came together pretty quickly. The steering was a bit more of a pain. For the steering column I eventually settled on a bit of old steel water pipe, which I welded an arm onto. I made some steering links by flattening the ends of some thin pipe and drilling holes in it, and then welded up a support to stop it flopping around. It was reasnobly robust and gave a good turning circle, so I was happy with it. The seat was then just bolted in using the two bolts at the front so it can pivot up to access the motor and electronics.
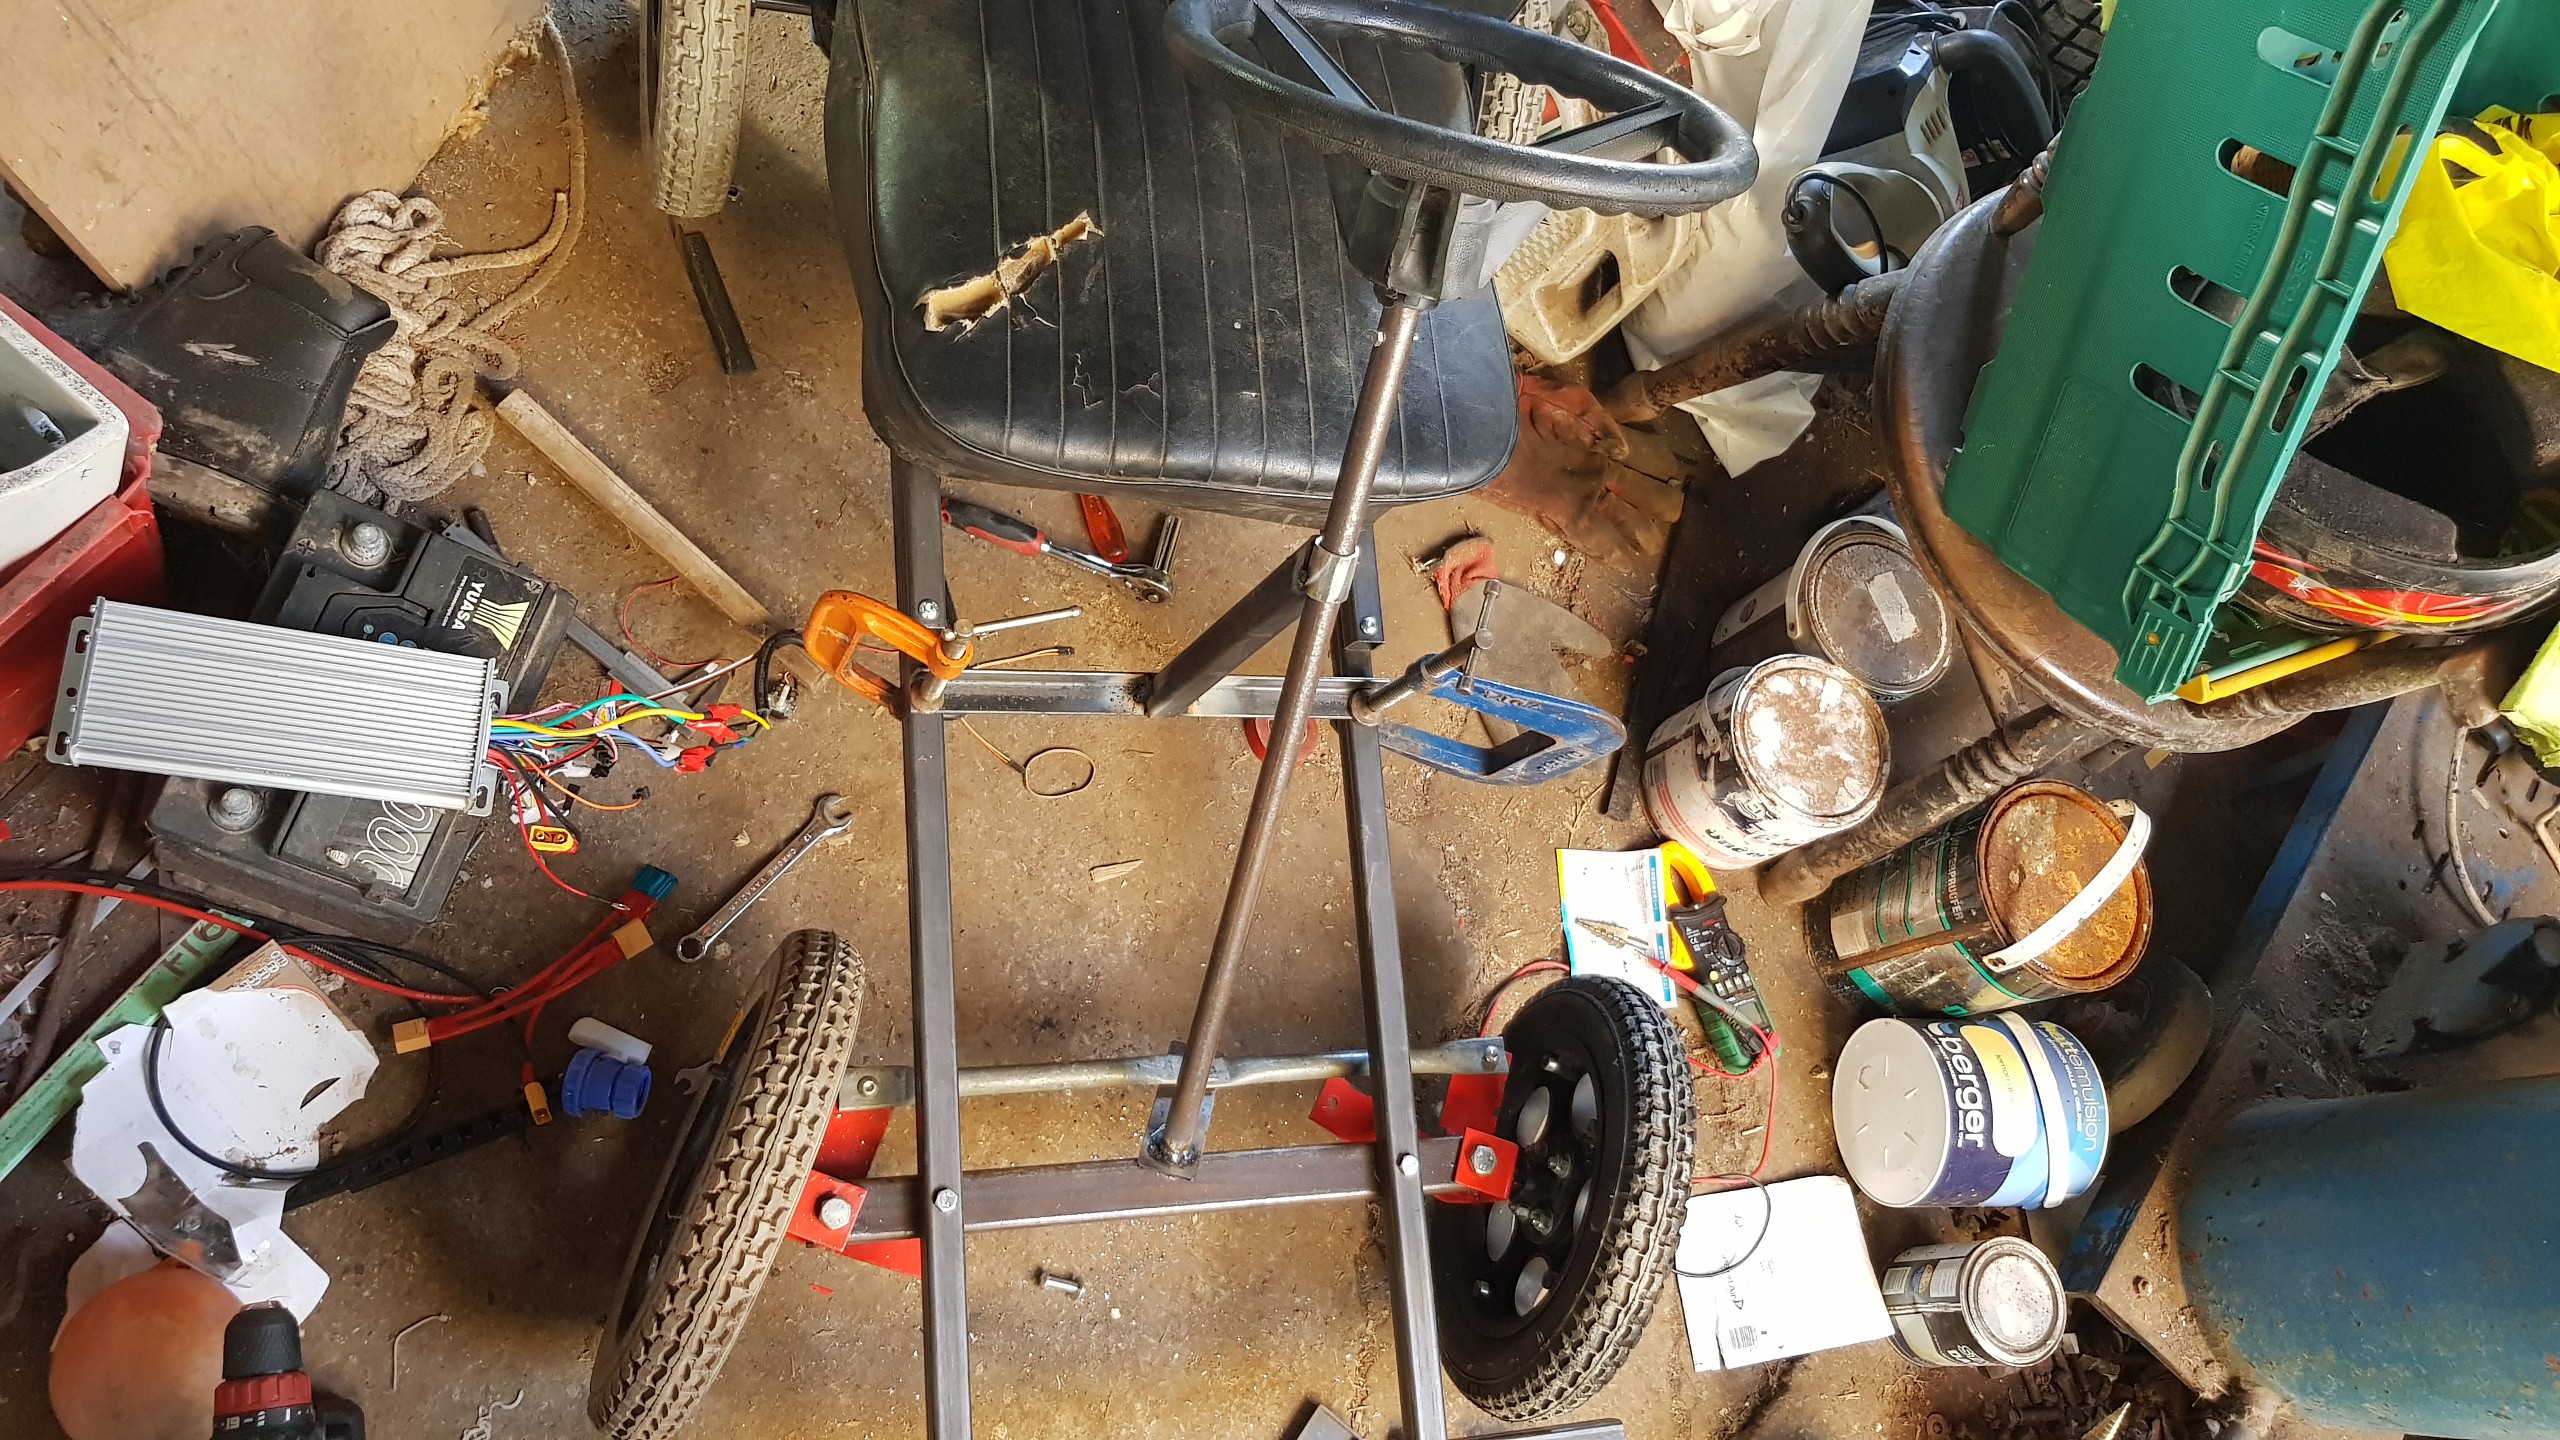
Now the chassis was mostly together, I roughly wired it all up and took it for a test drive. Had a bit of trouble getting the motor to run smoothly, but in the end it turned out to be a loose sensor wire. The handling was terrible due to almost no weight over the front wheels and the solid rear axel, but the motor had plenty of kick and it was pretty good fun!
Now it was time for some bodywork. To complete the classic car look, I needed a bonnet of some kind, preferably in british racing green. I considered making one myself out of folded HDPE, but that would be tricky and would likely only be white or black since those are the only colours you can easily get HDPE in. Instead I looked for something kinda bonnet shaped, light weight, cheap, and preferably the right colour...
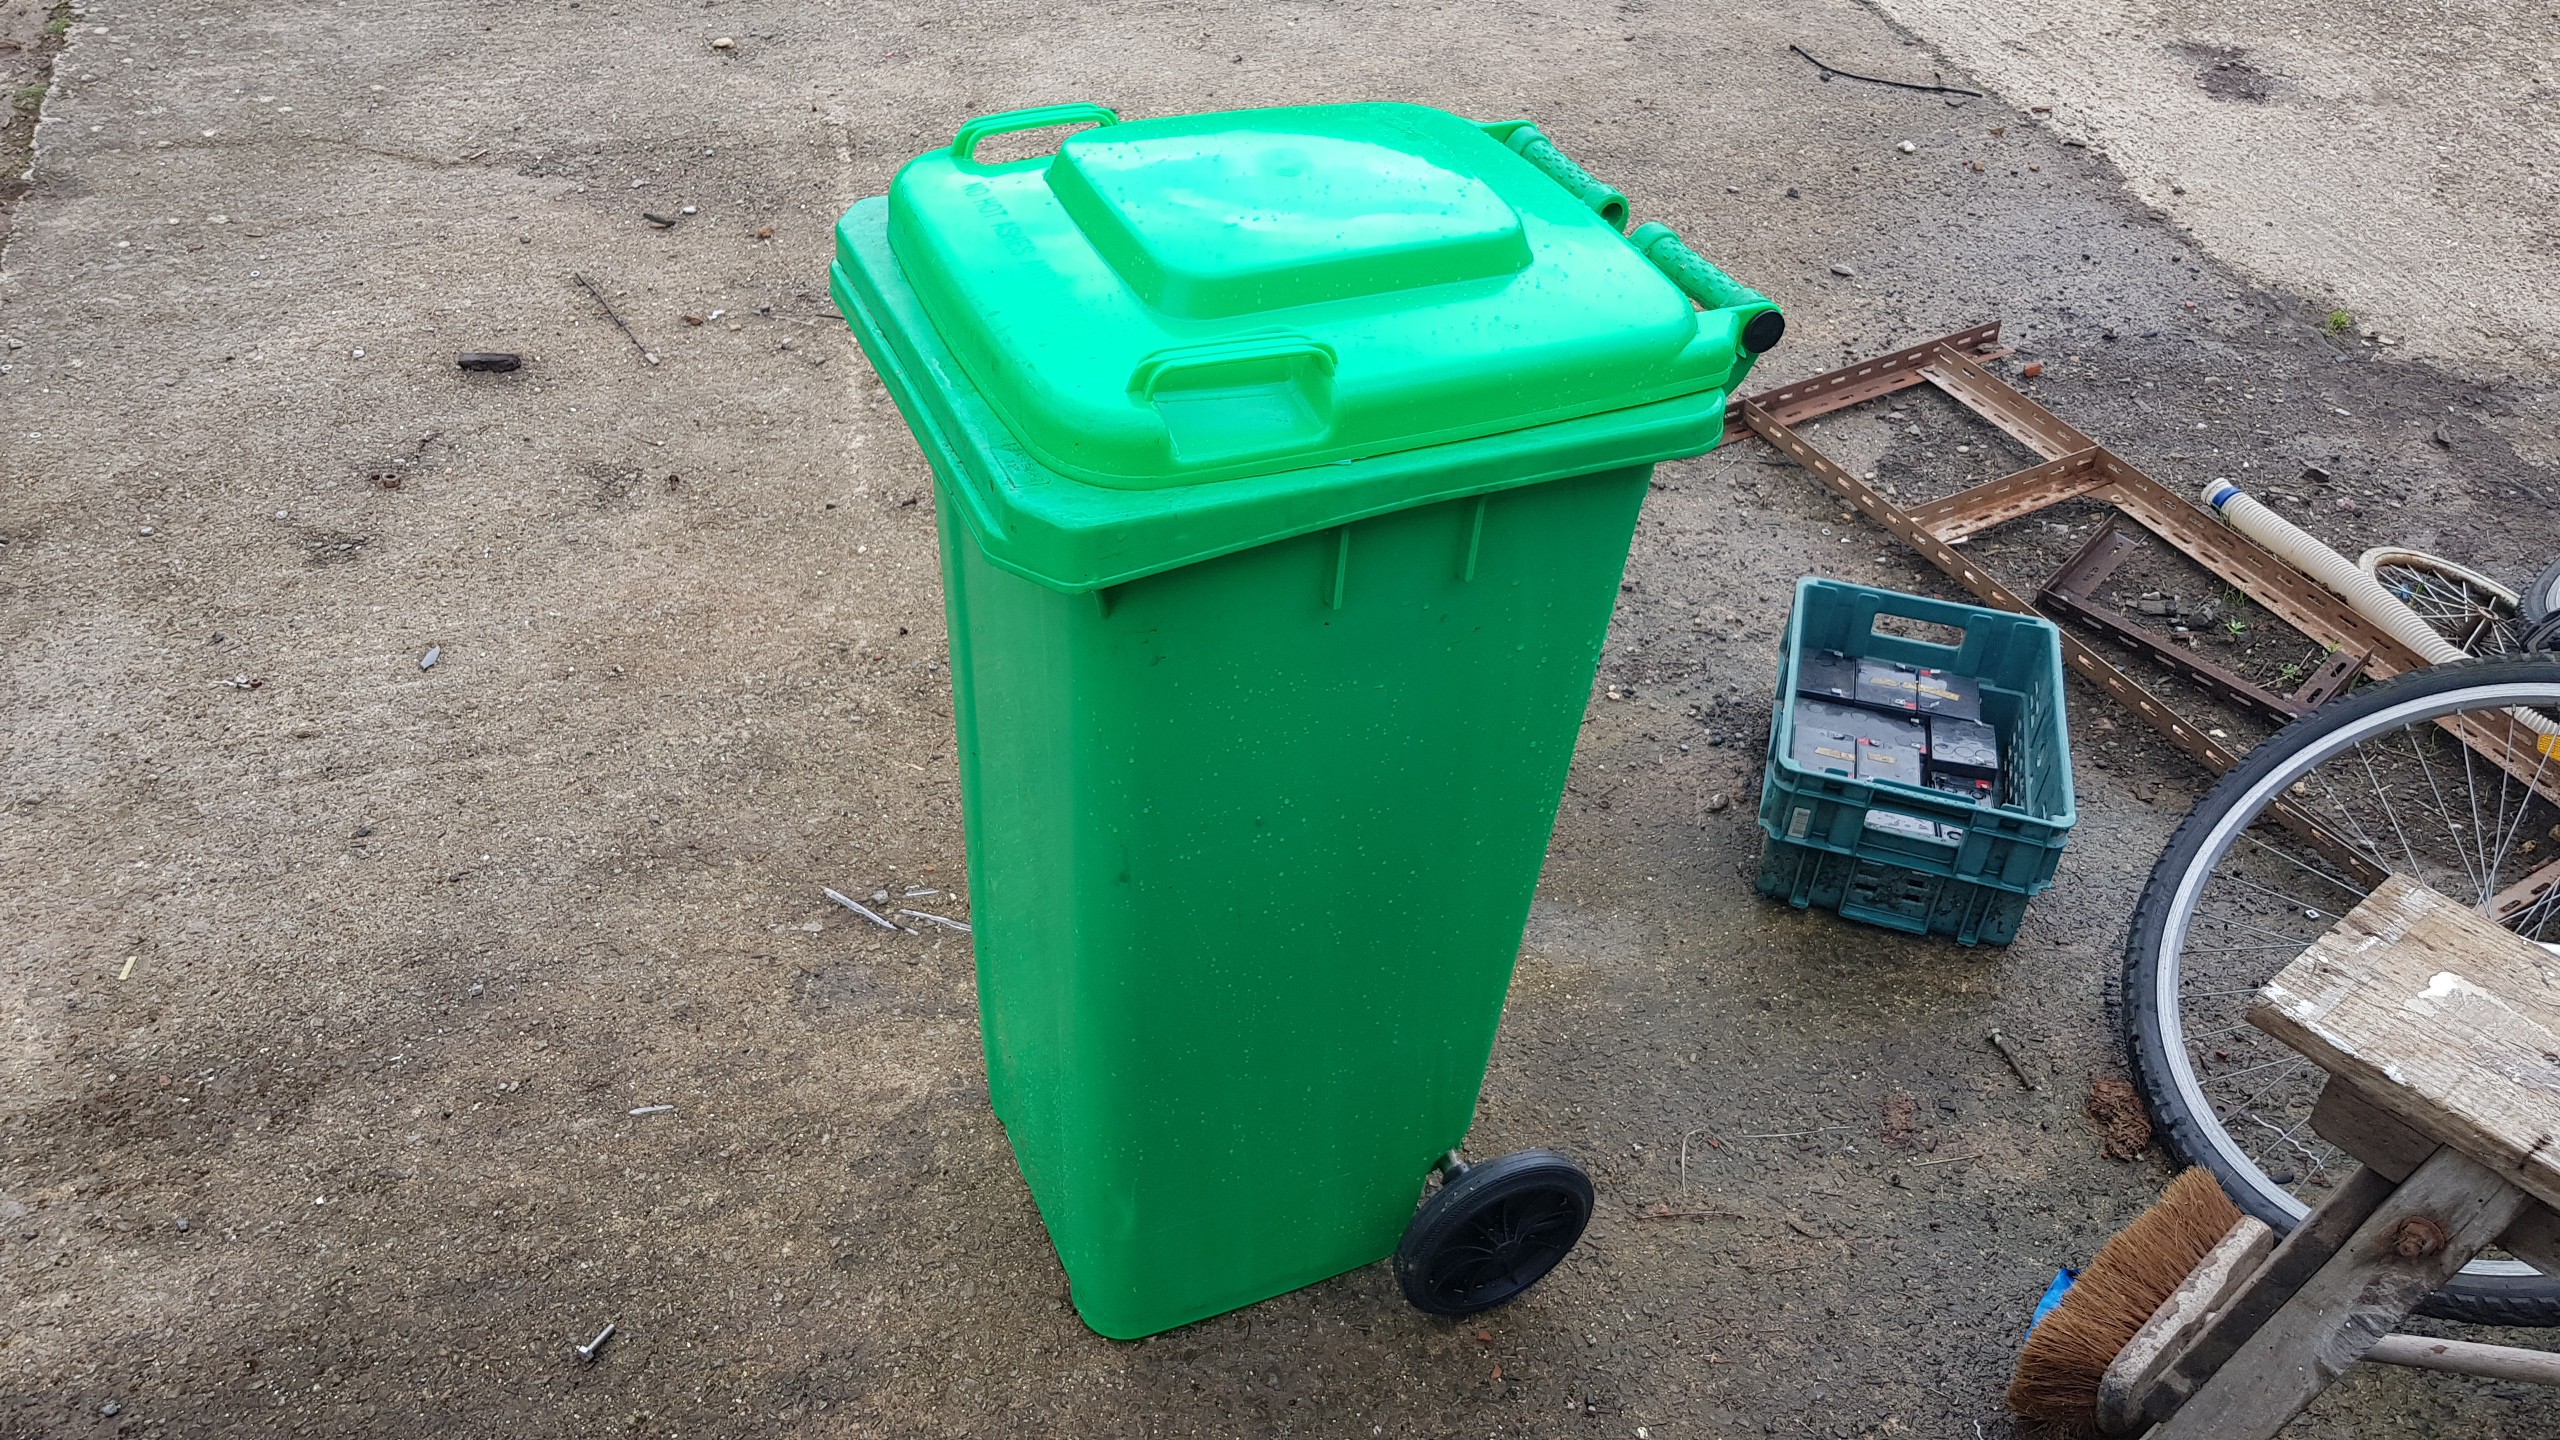
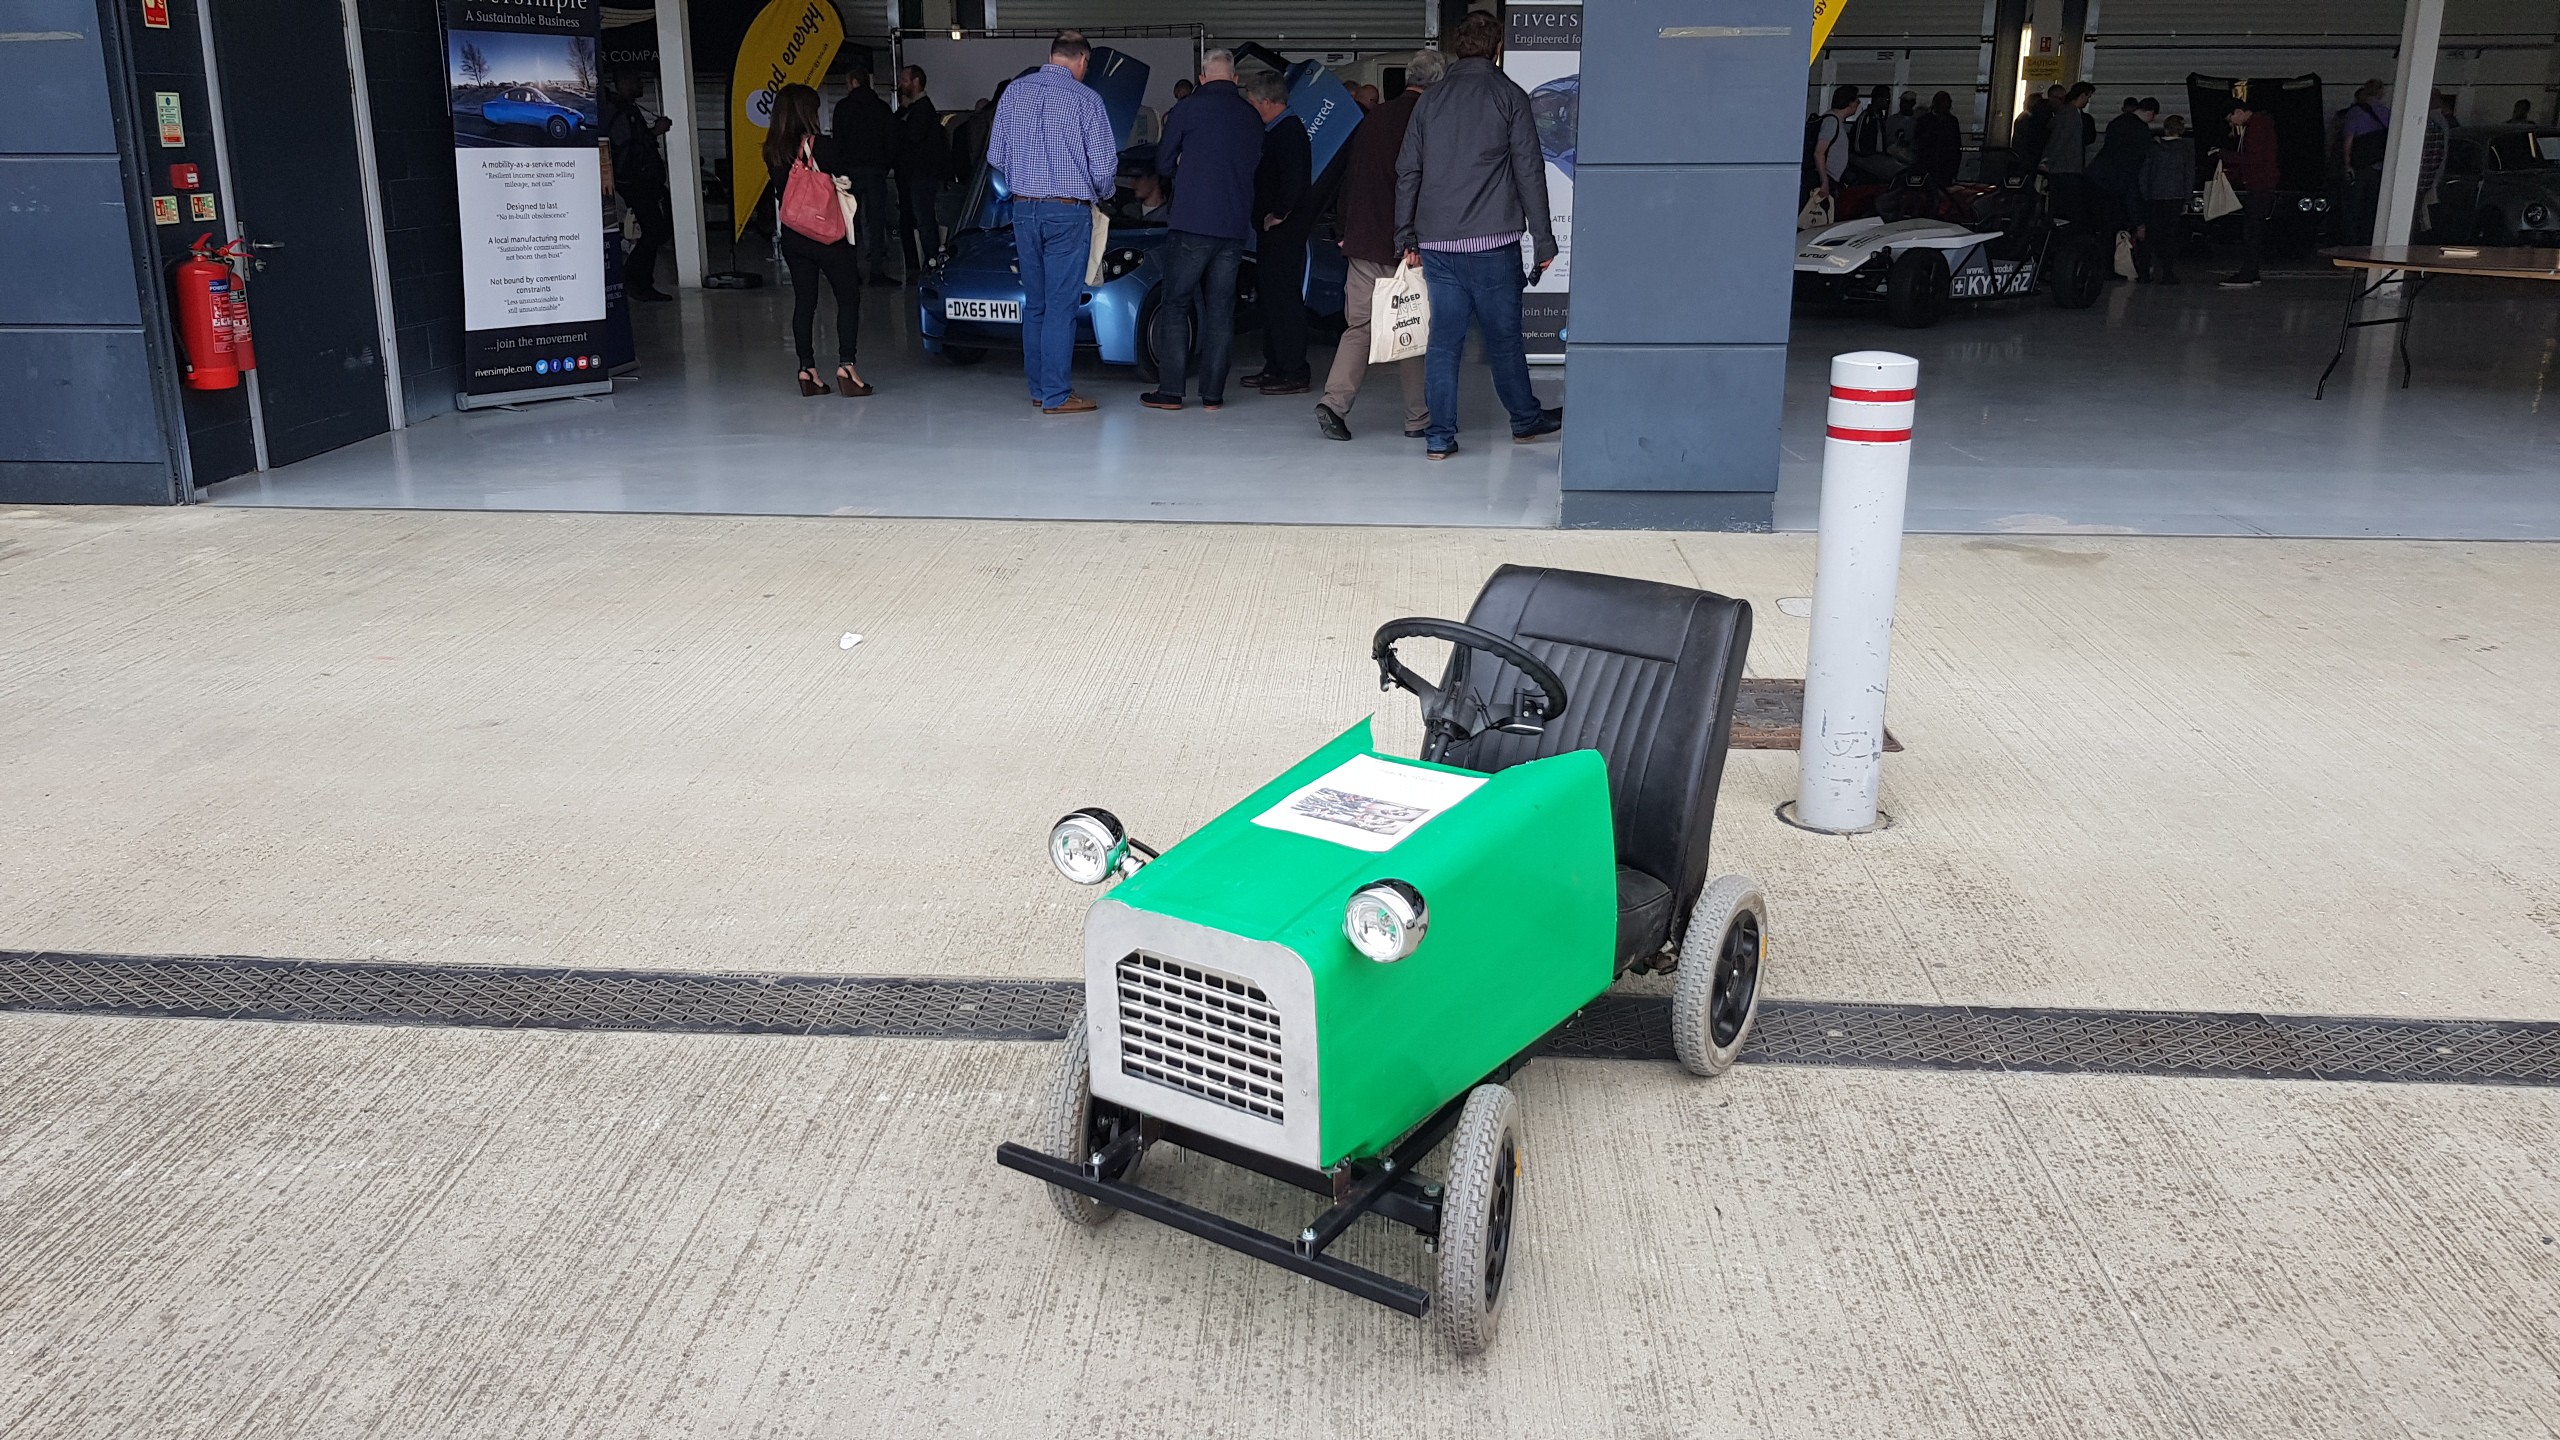
Yes, a green wheelie bin fits the bill nicely. After cutting a few chunks out of it, and replacing the wheels with a pivot that could be welded to the chassis, I had a bonnet! Still looked too much like a bin though, so I cut up a bit of Triumph Herald grill, and mounted it in an aluminium frame on the front. After that it was just a case of fitting some big chrome bike lights and the look was complete! I then tidied up the wiring and electronics, and mounted the batteries in an ammo case out the back (Yay, even more rear weight..)
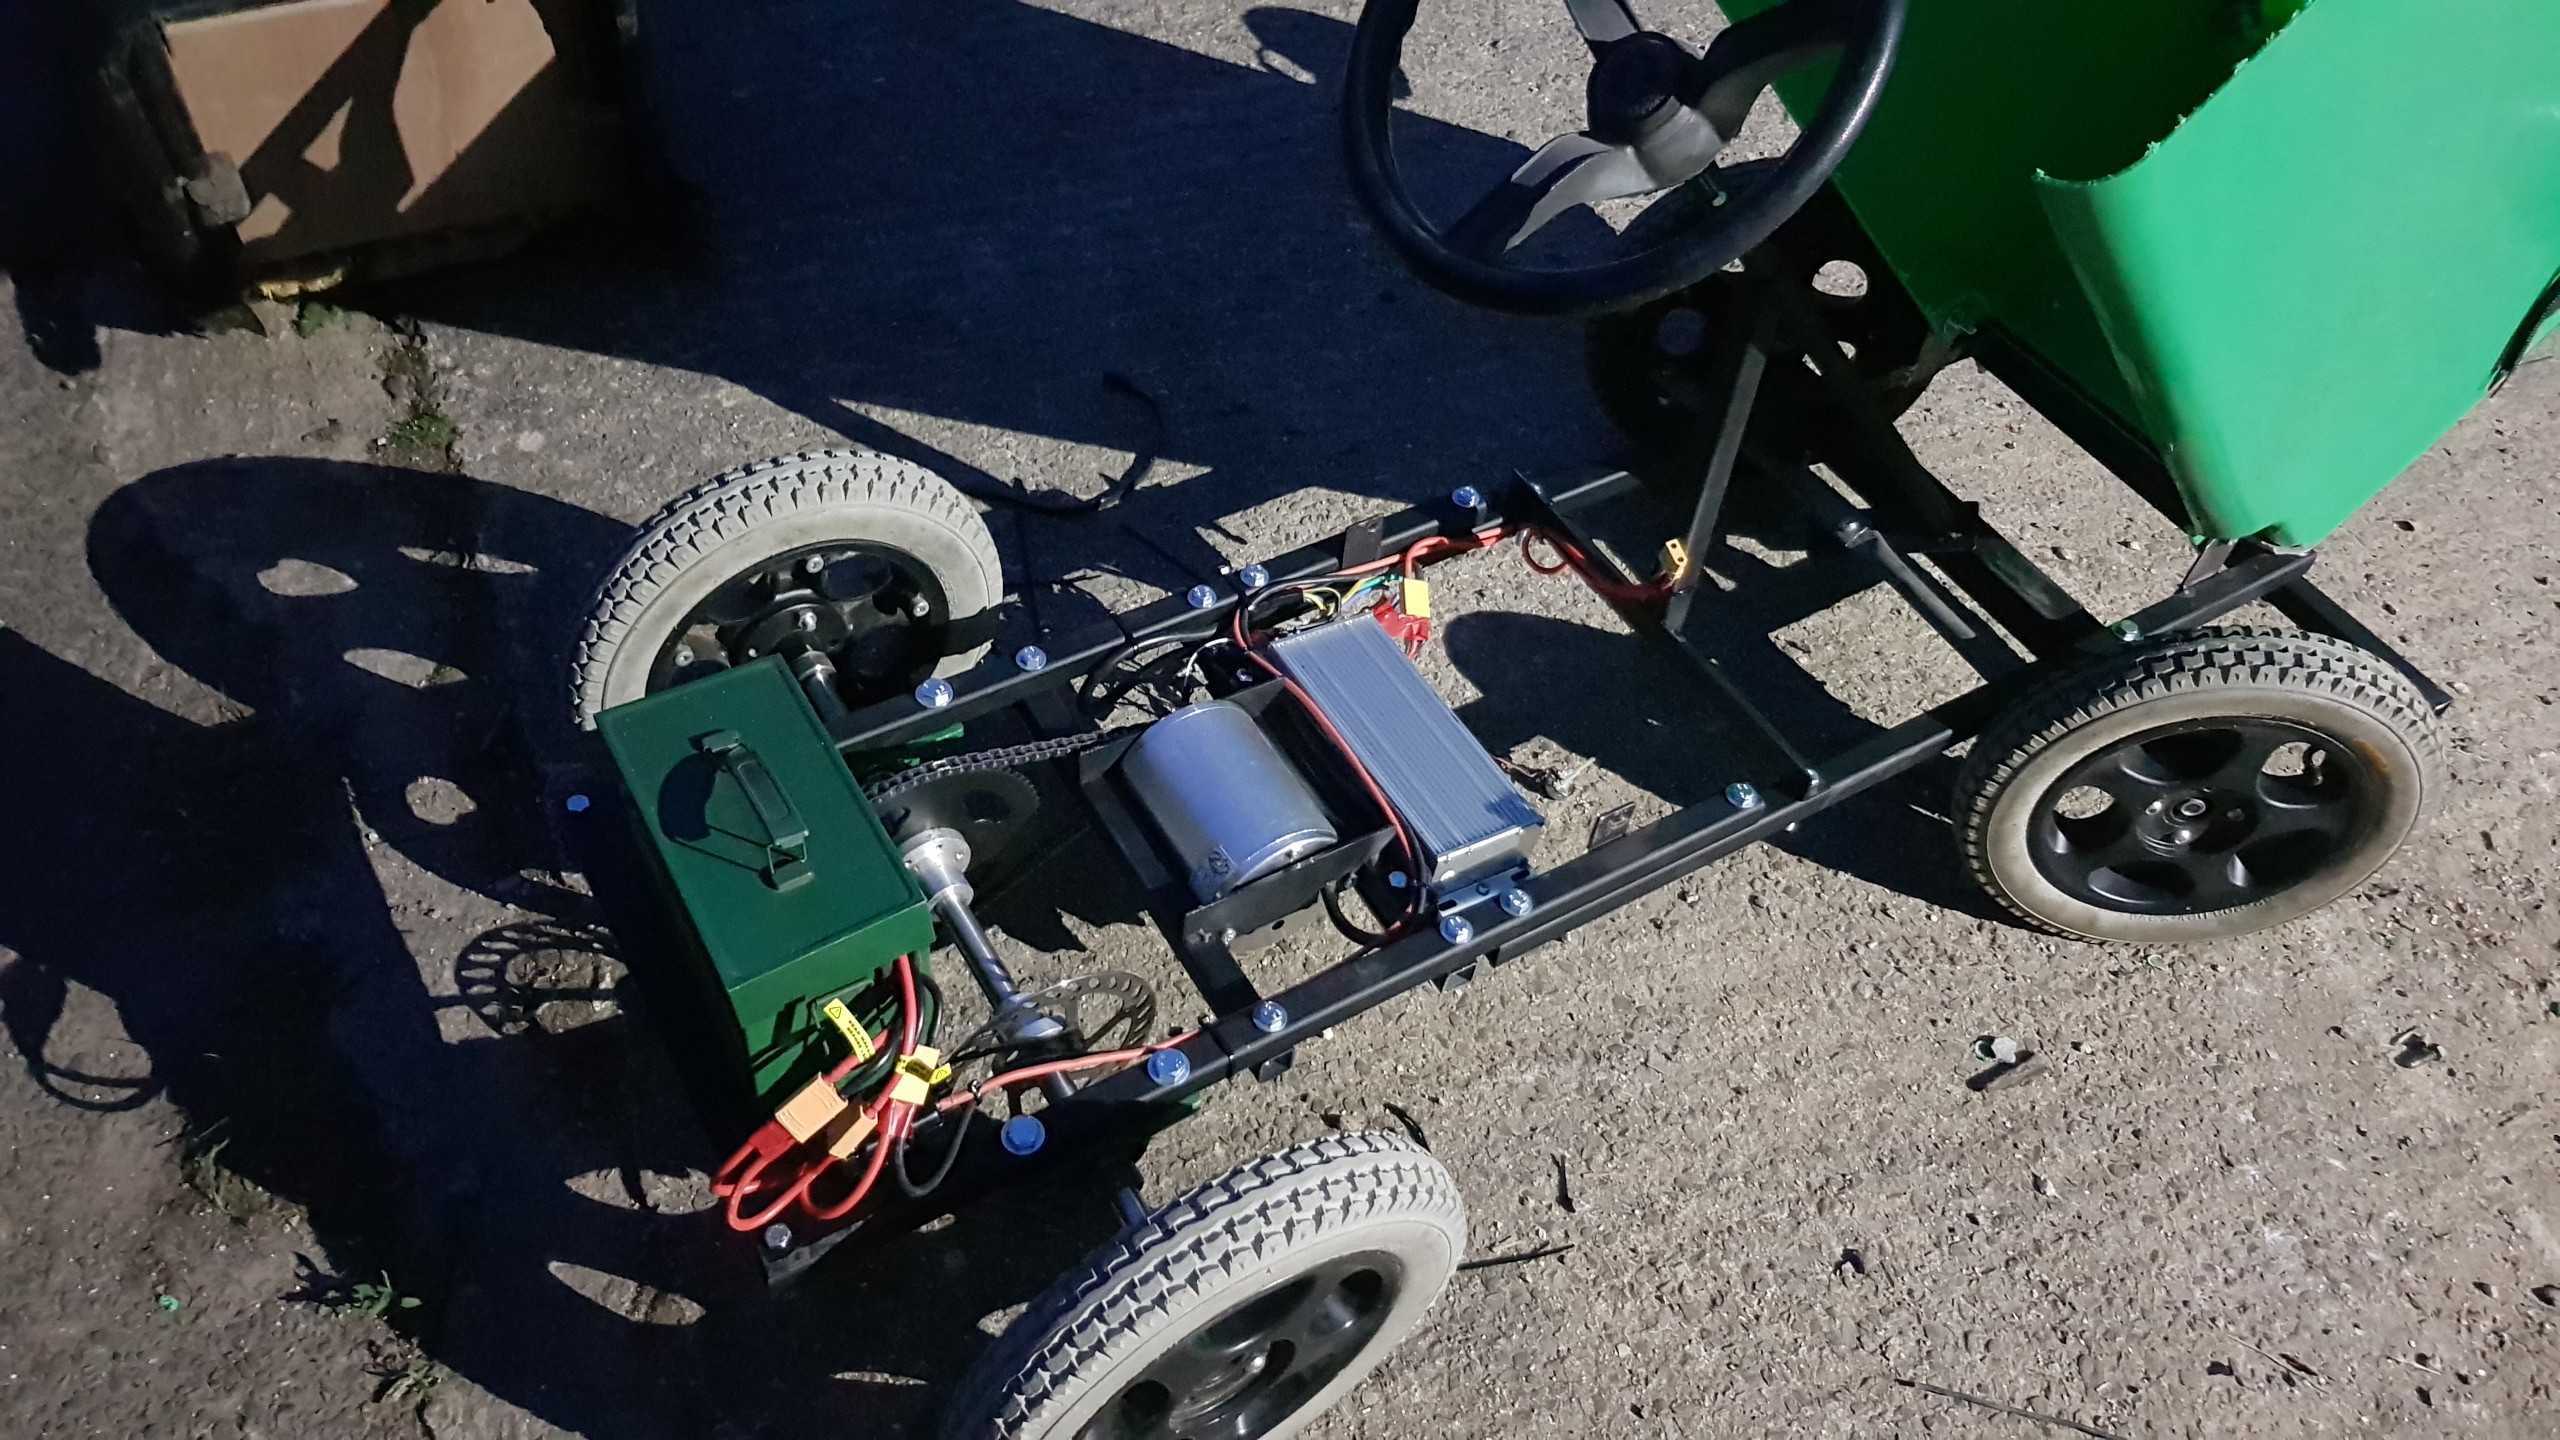
At this point the car was pretty much done, apart from the brakes. It was the day before it was due at Fully Charged live, and although I was only going to be exhibiting, I felt that some brakes would be good as I'd almost certainly end up riding it round at some point. The original plan was to wire up the electronic brake on the ESC, but for some reason this wouldn't work, so I hastily made a mount for the brake caliper and fitted the brake handle and cables in a hurry. It wasn't great, but it worked.
So that was it. As done as it was going to be for now. It was still pretty rough, but it looked the part which was the important thing. I packed it all in the back of the car and headed out early to Silverstone where the Fully Charged Live setup was taking place. I was directed to the pit lane and found myself a spot out the front surrounded by all kinds of electric sports cars and Teslas and various other serious projects, with my little car made from a bin sat right in the middle. I was along side the Trampa electric skate board guys, who were great fun and let me use their skateboard test area for driving around. The car worked great all weekend doing various demos, and even got to blast it at full speed across the car park after everyone had left. It was one of the more bizzare things I've ever done, but it was fantastic! Looking forward to racing it now!
UPDATE
We've now held two events! I set up a pilot event just so we had an idea of how to do things ahead of our first proper event. This was two days spent at my farm messing around with gokarts, and was an absolute ton of fun. Mark did an excellent documentary style summary of the day.
A few weeks later we headed to EMF camp and set up a course. As the carpark was due to be a long way from the campsite, I quickly put together a trailer, and it worked great! Did take three trips back and forth to unload everything, but much easier doing it by racer!

This was our first real event with an audience, and we had proper pit tents and a proper(ish) track. The Dustbin 7 was working well, aside from a few recurring motor issues (The sensor power kept shorting out for some reason), and I managed a few wins! It didn't rain this time, but instead there was just a ton of dust! The clip below gives an idea..