I bought a new CPU and a motherboard from a Black Friday sales. It is like a reverse hermit crabs upgrade with each of my PC downsize to an older case. The old $20 thrift store P4 Dell lost in the musical chair to my older FM1 PC. It has PCI, PCIe, Parallel, Serial port (header) and no Pesky Security Processor (PSP).
You may think that stuffing a mini-ATX board into a mini-ATX case is straight forward, but this isn't the case here.
One of the most annoying thing about the Dell Dimension 3000 is the missing Reset button. The Dell case has a removable cover and uses push rods for the buttons and light pipes for the LED. Their push rods are mounted from behind the front cover. Instead of a long dangling wire for a quick and dirty mod, I have decided to follow the flow as it is a bit easier for maintenance.
 |
| It ain't pretty, but it does the job |
I used a ball point pen for the push rod. It was one of those freebies I got from either a trade show or a vendor. It has just the right length and right push button. I used some hot glue to attach it to the middle piece behind the front case panel. I extended the other end with an empty pen cartridge cut to the right length for the push button. I used the mounted ballpoint pen part as a guide for my drill bit for the metal panel and the front cover.
The diameter of this cartridge is a loose fit over the narrow part of the push button.
I use a (grey) PCV insulation from a power cord on the transparent tubing to stop the push rod from falling out the front.
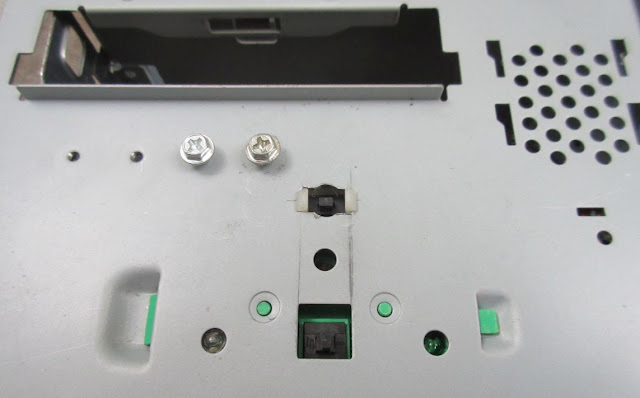
I used a nibbler to cut out a slot for the panel mount Reset switch from an old PC. I could have solder a push button onto a small PCB and mount it to the case with a spacer.
I was going to use the existing hole below it, but it was a bit too closed to the On/Off button mechanism. It was probably for an optional LED illuminating the On/Off switch.
 |
| The new Reset button in the full depressed state. |
Dell uses a swing out removable vertically mounting bracket for the 3.5" HDD. I made a mounting bracket for 2.5" SSD with 100% recycled DIMM PCB. I used a nibbling tool to cut the slot that was needed to clear the bracket. The bracket is mounted to the HDD screw holes.
I have a left over AMD Ryzen 7 1700 Wraith Spire Coolers. Too bad they change the mounting brackets in the AM4 socket the the old FM1 days, but doesn't stopped me from replacing the fan on the old stock cooler. The larger fan is quiet with a lot more air flow.
I was going to make a two piece mounting bracket as an adapter for the larger fan, but it was too much work. It turns out that all I needed was 4 short strips of old FR4 PCB. They are mounted diagonally with 4 screw to the original heatsink mounting holes and another 4 to the larger fan. I offset the fan so that it would clear the heatsink latch mechanism.
FR4 strips mounted to the heatsink
The fan is then mounted with 4 screws onto the FR4 strips.
This is what the internals looks like when the AMD logo is lit up.
 K.C. Lee


Discussions
Become a Hackaday.io Member
Create an account to leave a comment. Already have an account? Log In.