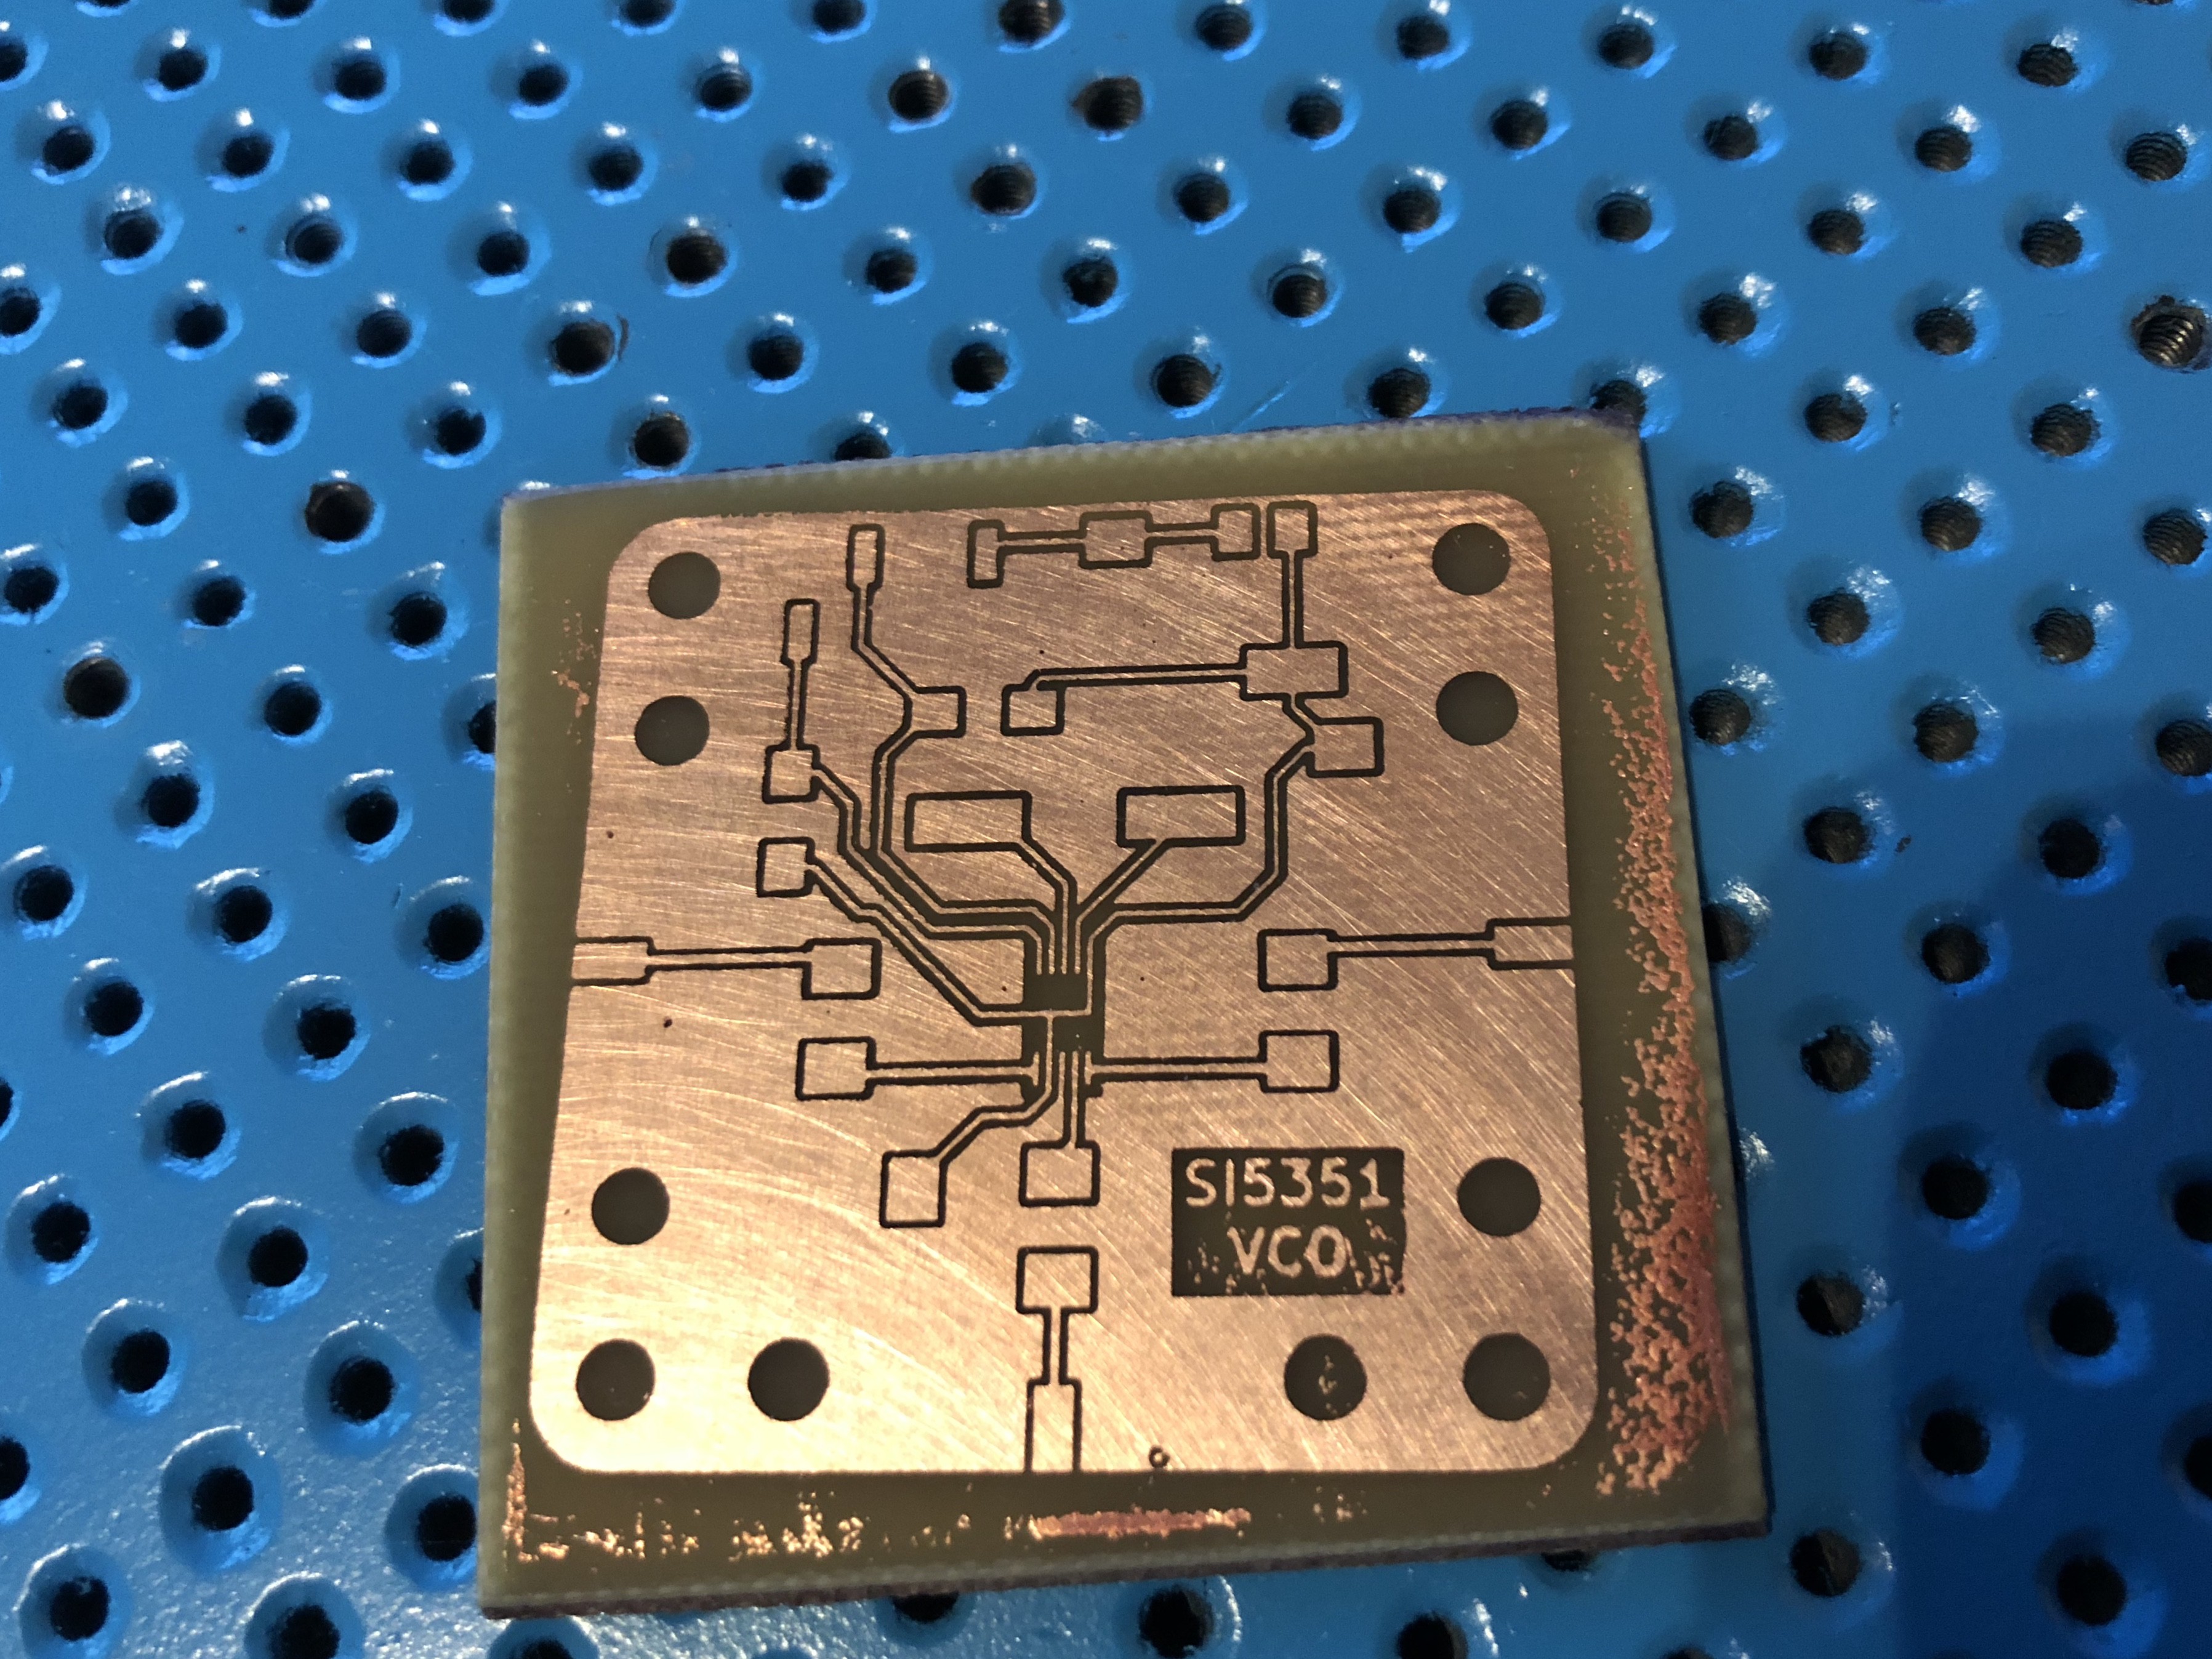
Hoe-lee-cow. I lucked out into a winning recipe. I switched over to a tin foil baking dish to do my Positiv resist spray in, that way I could chuck it in the oven. To give myself a better chance I also modified the layout to remove any sharp transitions between the MSOP pads and their tracks, and bumped them up to 0.3mm. This time I used 3 stacked transparency images for my exposure plate to get a more crisp transfer.
Instead of chucking it in the oven though I set my 3D printer to heat its bed to 70 degrees and left it on there for 20 minutes. Something odd happened though and all the resist spray dried in a big bead in the middle of the board. This could have been contamination but I also wondered if the resist dried too fast instead of being able to spread. So I sanded the board properly with 800 grit paper on a level surface and set it on the printer again at 60 degrees for 45 minutes on a slight angle. This worked absolutely perfectly giving me a totally even surface, so without wasting a second I got it in the UV exposure unit but this time for only 6 minutes, as a test at 10 minutes was way over exposed - I guess I made a more powerful UV box than I had thought.

The end result after etching was this. There's a little bit of un-etched copper on the edges but the actual tracks were perfect so I didn't want to risk over etching them. This is about the best PCB I've made ever ever, so yeah this is definitely my process going forward.
Now it's time to tin this board and get some components on it to see where it fails.
 Colin Alston
Discussions
Become a Hackaday.io Member
Create an account to leave a comment. Already have an account? Log In.