Close
0%
0%

Making Techno with Music Robots

I was bored with synthesizers, but still wanted to make electronic music. So I build a lot of techno music robots!

Similar projects worth following
New sounds from the future! Robotic Electronic Music is played with only music robots, mechanics and physical sound devices. Its not a single instrument, its a full concept. I developed a lot of DIY futuristic music robots in the last years (like my big MR-808 Drum robot). beeing both a classically traines musician and a robotics engineer, I am creating a futuristic way of playing electronic music, to give a tangible body back to electronic music.

This is not an single instrument but a concept: to produce techno - with robots! I prodiced electronic music for many years with computers and synths. But I realized that something was missing: being a classically trained clarinetist, I needed some physical context. I still wanted the repetitive character of techno: Born was the idea of Techno Music Robots!

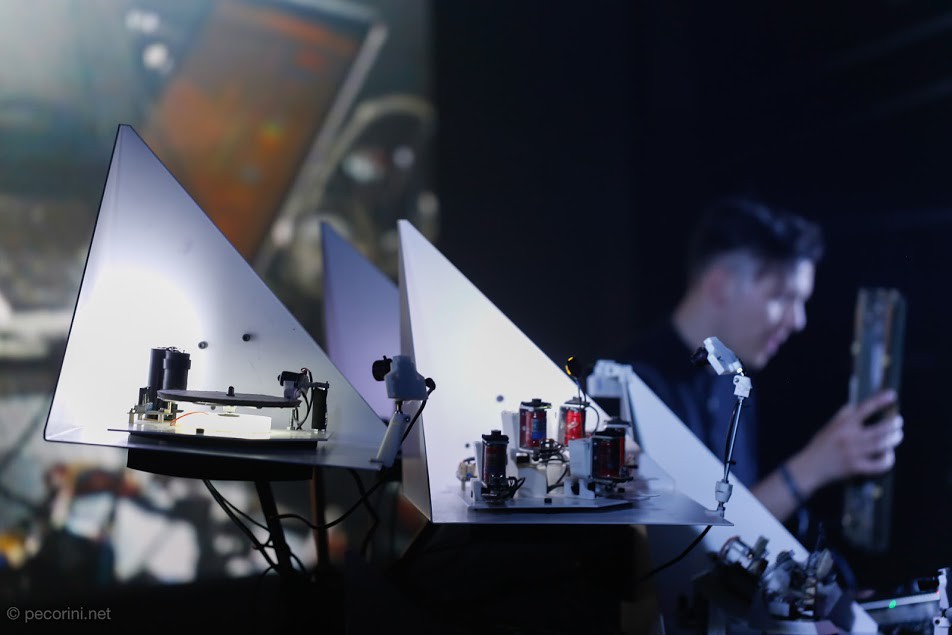
"Each sound is played by robots. Small motors beat on metal, 3D-printed robo-kalimbas vibrate with deep bass sounds, salvaged parts from old hard drives click and cut. Over several years Moritz Simon Geist committed to build, tweak, test and play all of his DIY robotic instruments.

Geist’s ‘Sonic Robots’ push the boundaries of the imaginable and invent a new plurality in music creation. In electronic music, many imagine humans playing machines. Few imagined these music machines being actual robots. In 2012, Geist ventured into this exploration with the invention of his well-known oversized 808 robot. The MR-808 robot is an iconic drum machine gone physical, no longer dwelling in the confines of circuitry alone. In the form of a 4 by 2 meter music box, filled with mechanical parts which play the instruments live, a new idea in electro and human-machine interaction was born. Now, he goes even further to pioneer the unknown and futuristic sound world of ‘Robotic Electronic Music’.

In this quest, Geist teamed up with the Berliner sound alchemists ‘Mouse On Mars ‘ to dig deep into the history of mechanical music and experiments of early electronic music. What Moritz Simon Geist came up with is a stunning record of what is possible today – to explore the sound of mechanics that continually describe our world. Geist creates a smashing soundtrack for both the precise automation and physical fragility that shapes today‘s society."


I am just about to release my first debut album with help from Mouse On Mars, Kompakt and many many other wonderful people. Its the worlds first techno record made only with robot! You can find it here

8 x Mosfet und TLC 5490_03.sch

sch - 1.58 MB - 09/26/2018 at 17:57

Download

8 x Mosfet und TLC 5490_03b.sch

sch - 1.57 MB - 09/26/2018 at 17:57

Download

8 x Mosfet und TLC 5490_03b_back_PCB.pdf

Adobe Portable Document Format - 315.92 kB - 09/26/2018 at 17:57

Preview

8 x Mosfet und TLC 5490_03b_circuit.pdf

Adobe Portable Document Format - 43.75 kB - 09/26/2018 at 17:57

Preview

8 x Mosfet und TLC 5490_03b_top_PCB.pdf

Adobe Portable Document Format - 286.91 kB - 09/26/2018 at 17:57

Preview

  • Step 4: Amplification of Music robots

    Moritz Simon Geist09/22/2018 at 21:53 0 comments

    There are different philosophies of how to approach the sound in music robotics. Some artists don’t use amplification at all and work only with the natural sound. This is somehow the major-league, because it involves a lot of knowledge about acoustic instrument design. I use amplification, to even out the different volumes of the many instruments, but also because I play electronic music and that has to be loud. When using direct microfones like SM58 or C414 it is easy to capture the main sound of a music robot. But on biggers stages this easily gets a feedback-disaster. So I am only using contact microphones. You can build them yourself, and they are pretty cheap. The issue here is, contact mics take only direct vibrations inside a body – you can not capture air pressure differences (like normal mics). For some instruments that doesn't work. All flutes, woodwinds etc. are hard or impossible to catch with a contact microphone. But hey, we are talking about techno here, and we wouldn't want pan-flutes there anyway!

    The placement of a piezo mic is most important. Sometimes 1-2 millimeters make the difference.

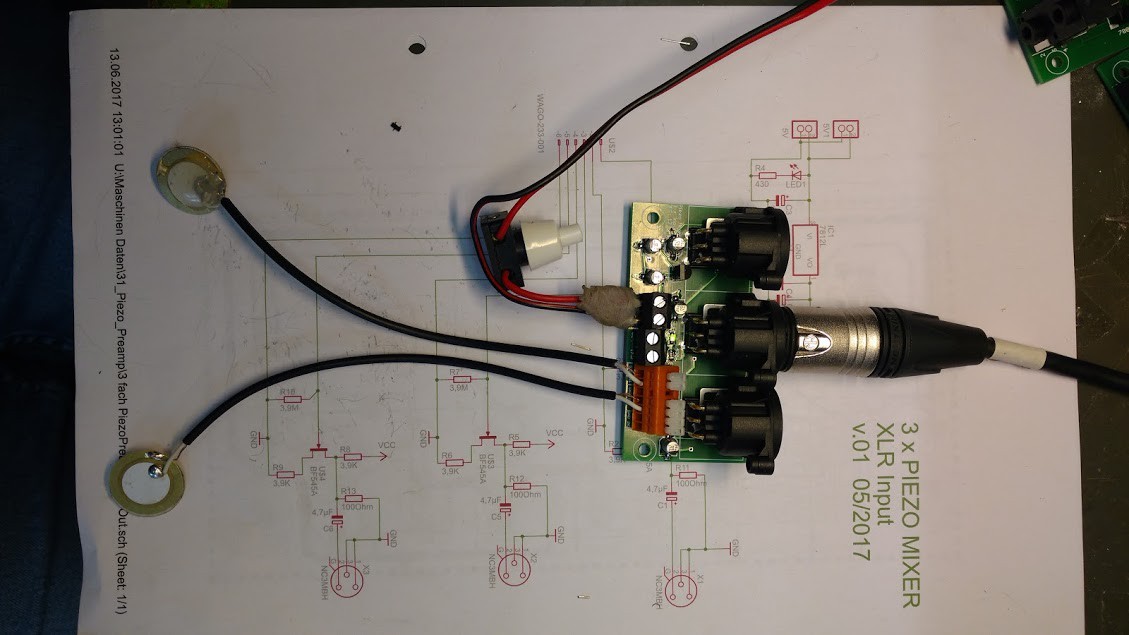
    Then there is the pre-amplifier. You can plug a piezo mic directly in any line or mic preamp. But as piezo mics have a very high resistance, the will create a high pass / low pass with any standard input, so the sound gets “phony” – no bass, and no highs. When you uses a High-Z piezo input a new sound world will open up. Everything is suddenly clear, balanced. I can only recommend that!

    I use a digital mixer (the Behringer X32) to mix everything. Its not the worlds best, but the cheapest of its kind digital mixer. For my TRIPODS ONE Installation I have 10 Inputs, all from piezo mics. With the digital mixer I can get compression, EQing, Gate, etc to all of the inputs at once.

    Active High-Z Piezo Preamp
    Active High-Z Piezo Preamp
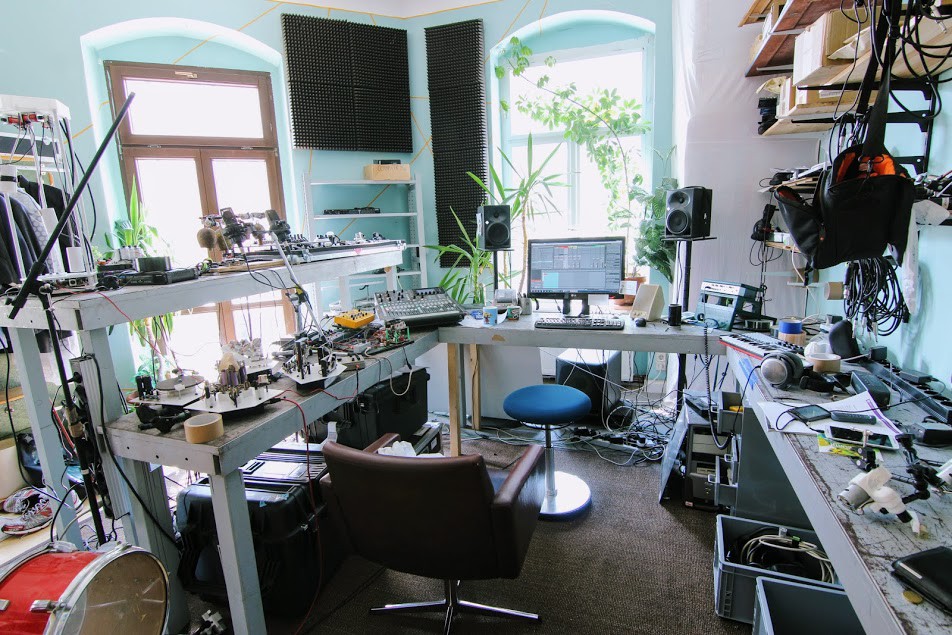
    My Studio
    My Studio

  • Step 4: Electronics

    Moritz Simon Geist09/22/2018 at 21:49 0 comments

    I started with building everything on breadboard PCBs and did this for many years. After a short journey to PCB etching, China PCBs got so cheap that I don't bother anymore to handle the chemicals myself. I order everything from JLCPCB (EsayEDA). I use eagle and KiCAD for PCB creation.

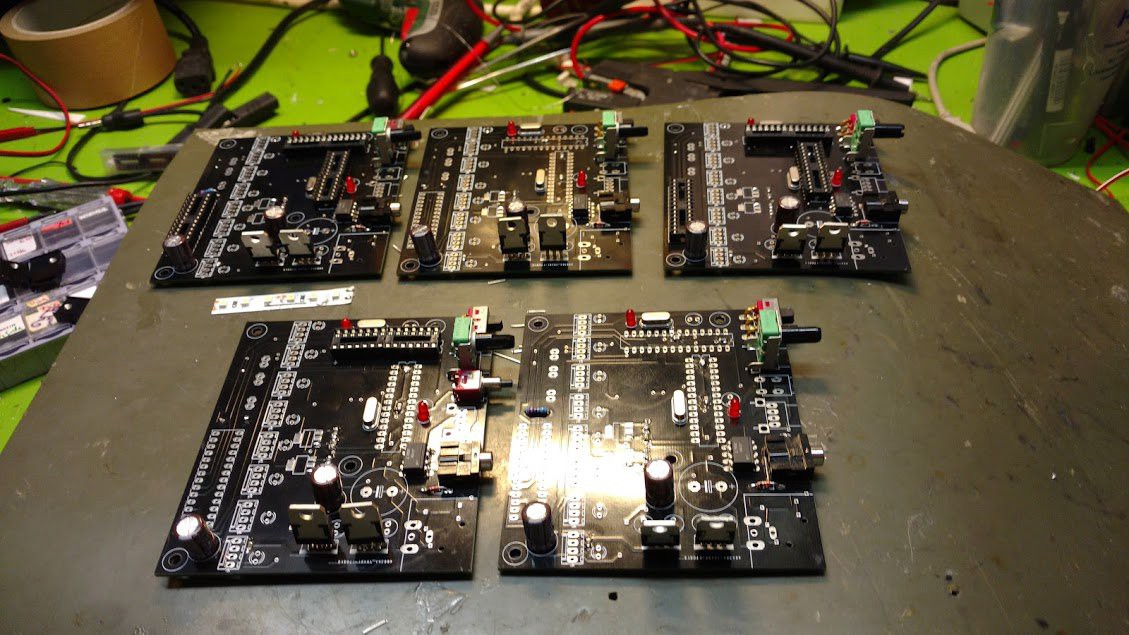
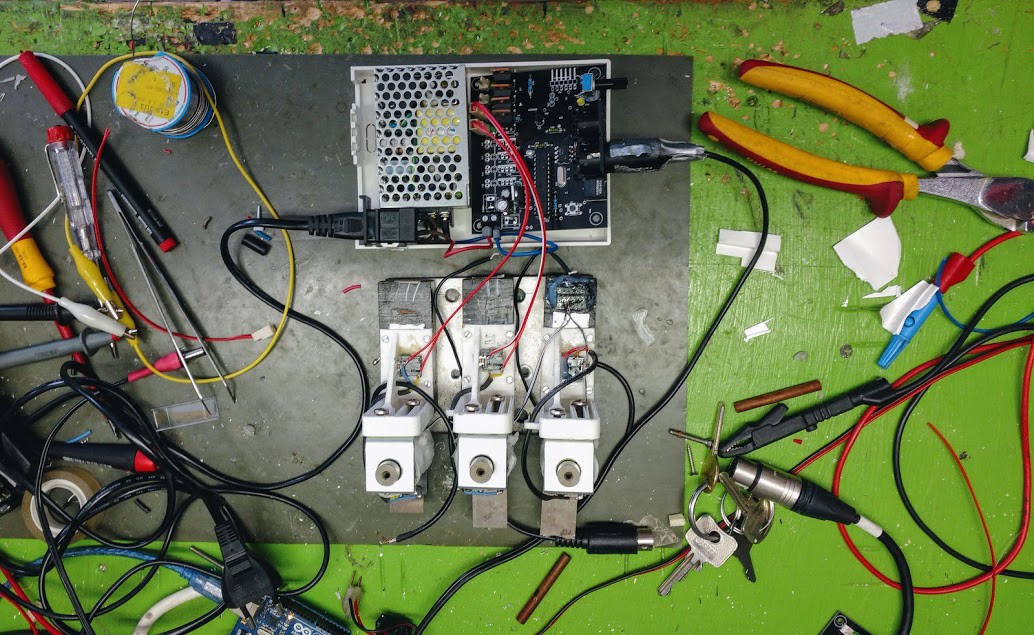
    The electronics are used to create an electric pulse out of a MIDI Signal, so that the actuator (motor or solenoid) starts moving. The electronics normally consist of an ATMEGA328, an MIDI-IN, an logic level MOSFET (e.g. IRLZ34N or VN820P) and something to drive the lights (an TLC5940 or just some small Mosfets). The general setup is like this:

    I use only MIDI notes with velocity to control robots. Throughout the years and performing solo on big stages, on rainy festivals, with broken cables and in a hurry, and working with a lot of other artists like Mouse On Mars I learned that the simpler, the better. No CC Commands, no OSC, no complication. To control the volume of my robots I use Velocity Through Impulse Length Control (VILC – I made up that term, haha!). This means that with mapping the MIDI velocity to the length of an electric impulse for a motor or solenoid you can actually control the acoustic volume. Pretty nifty! Other music robot builders like (Dada Machines) or Polyend use this technique, too.

    In music robotics it is very important to work with visual key elements, so it is visible what is actually happening. Either one works with very big movements – this is nice, everyone can see whats happening. But it has the disadvantage of very high latency and normally theses robots are hard to transport. The other option is to add light to a very small movement. I chose this option, which after my knowledge Uk based Robot artist Felix Thorn introduced in the mid-2000s. Like this, my robots have a latency of 5-20ms (from MIDI note to acoustic signal) so you can actually play them live! But the movement is only a few millimeters, so I added a pulsed Light (fade out) to make it more visible. When I perform on bigger staged I also use a dedicated multicam system so everyone can see what's going on.

    I started in 2003 with a PIC based MIDI system. Then Arduino came along. Over the years I developed a lot of different systems, involving ATMEGAs and RasPis. Now everything is written in C++ by my Programmer Lennart on a Arduino basis.

    You can find most of the code here in the github repo.

    Electronics for TRIPODS ONE. Each PCB contains: MIDI Input, Atmega, 5 MOSFET Channels, TLC5940.
    Electronics for TRIPODS ONE. Each PCB contains: MIDI Input, Atmega, 5 MOSFET Channels, TLC5940.
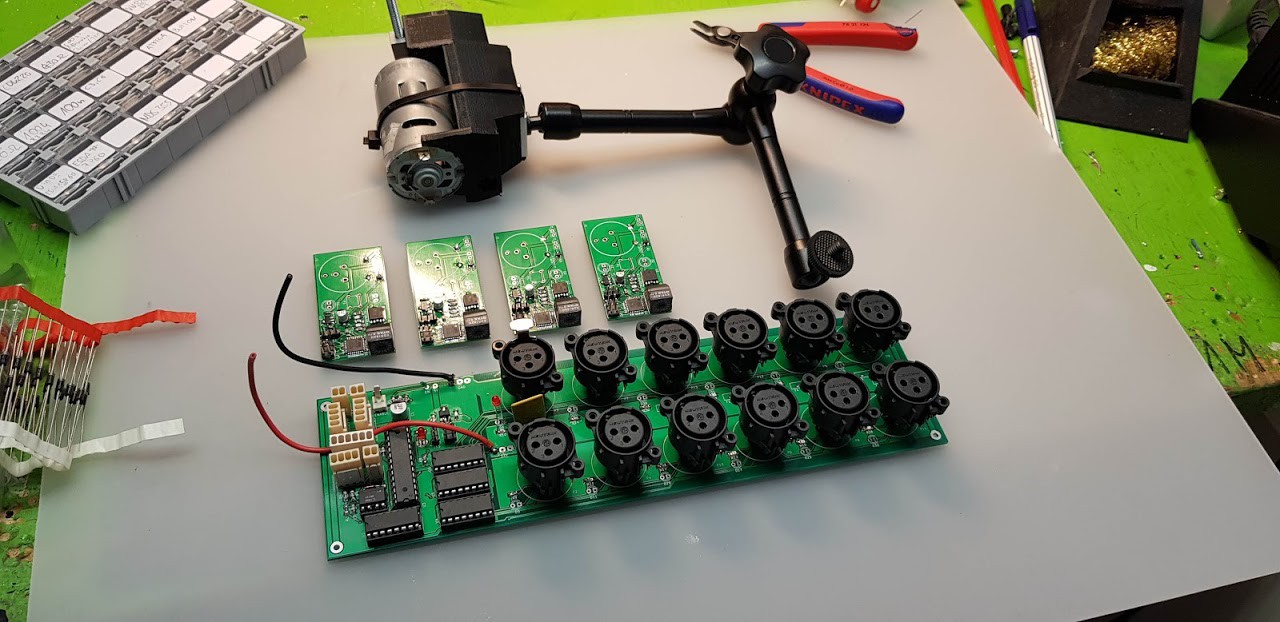
    More PCBs and actuators
    More PCBs and actuators

  • Step 2: Mechanics

    Moritz Simon Geist09/22/2018 at 21:41 0 comments

    So I want to use my newly developed 808is -ike-futuristic-kalimba-robot as a music instrument on stage and it has to be stable. To build quick-and-dirty mockups is fine in the workshop and maybe studio - once a experimental hacked-together instrument breaks in front of a several hundert people audience and lets you leave stage in embarrassment, you swear to yourself to go the last mile the next time.

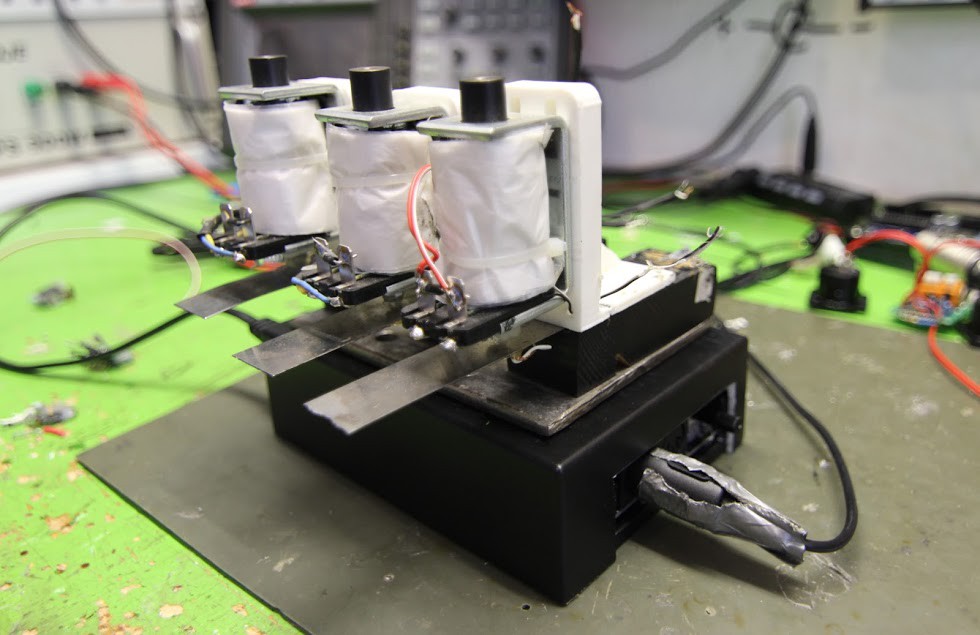
    I have a lot of actuators in my workshop, motors, solenoids, stepper motors, gear motors. I don’t usually work with pneumatics, and I like DC motors from 12-24V most. I normally search on ebay or pollin (german cheap reseller) for cheap stuff and buy always 5-100 in bulk. Also I wrote Schulz Magnete (a high quality german solenoid manufacturer) and they gave me some of their over-stock for free. Very generous!

    I often experiment with a lot of different solenoids to find the right one in terms of force and build volume. For this build I am using some solenoids (electromagnets) from Schulz magnet. The solenoids I bought from china often had a poor quality, in terms of mechanical precision (how the anchor moves in the coil) and of efficiency (electrical power-to-mechanical force ration).

    When I started building robots I used a lot of wood, old piano pieces and old stuff I found on the scrap market. Then, I bought my first Makerbot 3D printer in 2013 and it changed my build from custom-made unique copies, to reproducible devices.

    I design everything in Autodesk Inventor, and I designed most of my standard devices (solenoids, motors, LEDs, connectors) as 3D Models. I now have three 3D Printers in my workshop, two Replicator 1 and one new Prusa i3 (love it!) for more experimental material than PLA.

    Since I have my 3D printers I print everything I can, and insert metal parts (e.g. as screw inserts) where I need more stability. For my last instrument TRIPODS ONE I also ordered some custom welded aluminum parts from a local welding shop.

    for the building and designing process, working with 3D Printing mostly means I can use an iterative process. I sketch the rough idea by hand, maybe build a cardboard and wood model and then it takes 3-8 3D-Printed iterations until I have my last design. This definitly creates a lot plastic trash, but I give it to my local fablab in Dresden where they recycle it.

    • 0.8mm Spring steel metal tongue
    • Piezo Microphone
    • 3D printed holder to adjust everything
    • Solenoid 24V / 5A from Schulz Magnets

    With the length of the spring steel you can change the pitch of the instrument. I ended up using five different tongues for different tones.

    What I want to do to improve this is using a special made corpus that supports the frequency of the tongue. Every acoustic body has some main frequencies to it – you know that from an empty room with a standing wave, or from an empty bottle where you beat on. A normal instrument builder would avoid that: A guitar body for example tries to have more softer body-frequency spectrum with little spikes. But we can uses that to support our main frequencies of our bass drum tongue! Longer decay and a softer tone. I am currently building such a tuned body and will keep you posted about the progress.

    Robotic Kalimba Prototype
    Robotic Kalimba Prototype
    Robotic Kalimba Prototype
    Robotic Kalimba Prototype
    The Final robotic Kalimba
    The Final robotic Kalimba
    Robotic Kalimba on Stage

  • Step 1: Research. How to Build a Music Robot

    Moritz Simon Geist09/22/2018 at 21:22 0 comments

    I build music robots for many years already. Music Robotics is a broad field involving acoustics, electronics, mechanics, programming and music (obviously!).  And there are gorgeous projects out there, and its easy and fun to start!

    For the building logs I picked out one of my favorite instruments, the futuristic kalimba, and I will walk you through my building process!

    I start from the musical side: what do I need in the musical context? Most important in electronic music is Bass! Because Bass is the mother of all sound!

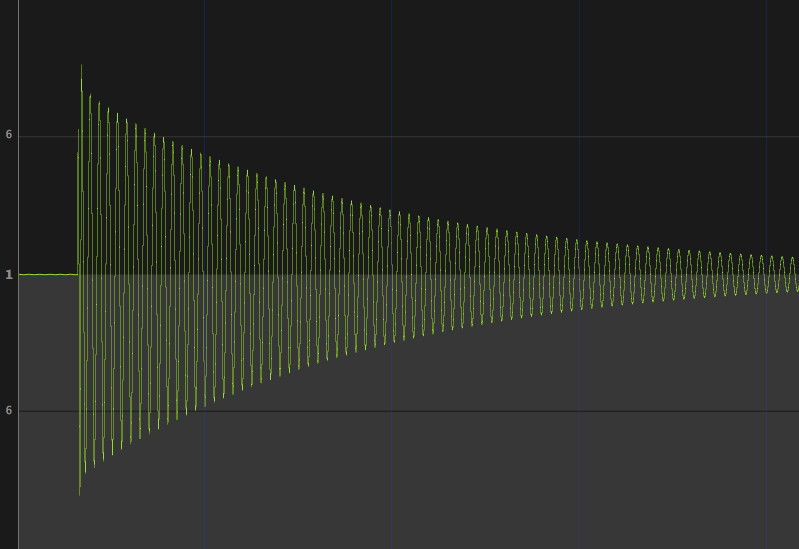
    So what do I want, soundwise? Undisputed, the most iconic bass sound in history of electronic music is the TR-808 Bass drum sound. Let’s try to replicate that - with a robot. First I looked at how the 808 bassdrum actually sounds:


    As a starting point I also look at the circuit. One can see in the circuit (or read somewhere) that I consists of a Sine Wave + an envelope. That should help us later.

    Bass sounds are appearing at a lot of places in the real world. I got used to walk though the world with open ears and listen to all different sounds that you can find in daily life. "I could always need that special metal piece I found, that made this perfect boomy BANG."

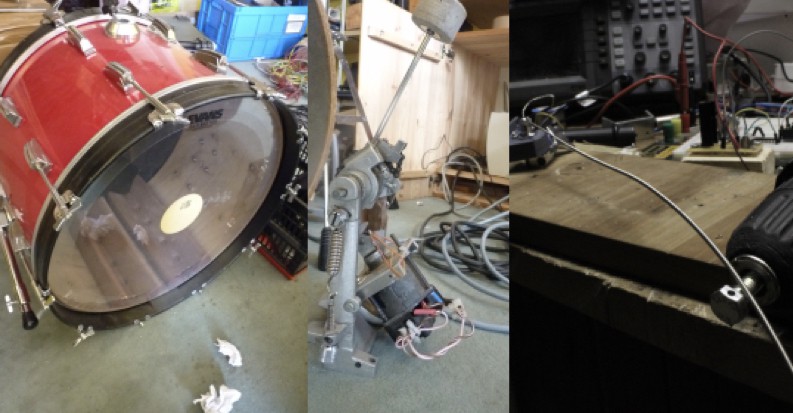
    Back in my workshop, I start developing a 808-ish Bassdrum. I started with the kick drum from my ex-drummers drum set (he hated me for trying to replace him with a robot!) and a mechanic beater. It didn't sound like a 808 at all. Hmm. I could also use a string from an old E-bass. Dampend. That sounded much more like a 808 bassdrum! Because - see above - a string frequency is much closer to a sine wave + envelope than a drum.

    Last thing I tried was replacing the string with a metal tongue - as in a kalimba. To really get a deep bass sound I experimented with piezo contact mics and found out that you can get a decent clean bassdrum sound out of that. Its tuneble and has a nice decay. BOOM! Here we go!

    808 Waveform

    808 Waveform


    fltr: a) Bassdrum, b) Beater with 25A 12V Solenoid at it. c) String
    fltr: a) Bassdrum, b) Beater with 25A 12V Solenoid at it. c) String

View all 4 project logs

Enjoy this project?

Share

Discussions

Dr. Cockroach wrote 09/19/2018 at 14:29 point

That is way cool :-D

  Are you sure? yes | no

Morning.Star wrote 09/19/2018 at 13:55 point

Dude, that is slicker than Molybdenum grease. Awesome and inspiring video, made my brain proper twitch :-)

  Are you sure? yes | no

Similar Projects

Does this project spark your interest?

Become a member to follow this project and never miss any updates