Jack Flynn
-
Web-server - Pi - Where to start?
10/01/2018 at 15:06 • 0 commentsThe criteria for the web-server is to not only have full control of the layout and effects but also to provide that control in a clean and friendly manner. There is an epiclly complex package already available for a raspberry pi compatible DCC control called JMRI. Like this project, JMRI is used to interface to off-the-shelf DCC controllers and can work as a standalone interface, web-server or communicate with smartphone apps. My hat goes off to the guys at JMRI as it truly is an excellent bit of software for the hardcore DCC fans. However, for our application I wanted something more friendly for the kids and I was looking for a chance to learn more about the raspberry pi and web development in general.
Python and Django
So where to begin with the raspberry pi? Well first off I knew I wanted to work in python. Python is an excellent programming language for beginners and is heavily favored in the raspberry pi community. This means there's plenty of support out there and reduces the need to "re-invent the wheel". With that in mind there are plenty of options for getting a pi to display a web page. For this I've used Django;
![]() ---------- more ----------
---------- more ----------I'm not claiming to understand Django in it's entirety but for my usage it allows me to run a lightweight web server on the raspberry pi using Python and has a lot of useful features to simplify the process. I followed a useful online tutorial for my first run at Django; Django Girls Tutorial. I then went back to use it as a guideline for my own custom site.
Database - what's in a name?
The part of Django I found most interesting was the integration of a database. Every train on the DCC controller requires an "address". This is part of how DCC physically communicates with the trains on the physical track. I could have spent my time assigning every variable and detail for each train on my track and stored manually if I wanted to. This would mean that any time we wanted to swap out a train or add an additional train on the layout I would need to reprogram my web server for the new details. Instead, by creating classes in the "models" file I was able to produce a database based on the following details for my trains and lighting.
class Train(models.Model):
	title = models.CharField(max_length=200)
	description = models.TextField()
	address = models.PositiveSmallIntegerField()
	speed = models.PositiveSmallIntegerField()
	direction = models.BooleanField()
	lightsOn = models.BooleanField(default=True)
	hornIs = models.PositiveSmallIntegerField(default=1)
	silentRunning = models.BooleanField(default=False)
	soundOptions = models.PositiveSmallIntegerField()
	image = models.ImageField()
	created_date = models.DateTimeField(
            default=timezone.now)
	def __str__(self):
		return self.title

class Light(models.Model):
	title = models.CharField(max_length=200)
	description = models.TextField()
	address = models.PositiveSmallIntegerField()
	type = models.CharField(max_length=200)
	brightness = models.PositiveSmallIntegerField()
	colour = models.PositiveSmallIntegerField()
	lightsState = models.BooleanField(default=True)
	hexValue = models.CharField(max_length=200)
	created_date = models.DateTimeField(
            default=timezone.now)
	def __str__(self):
		return self.title
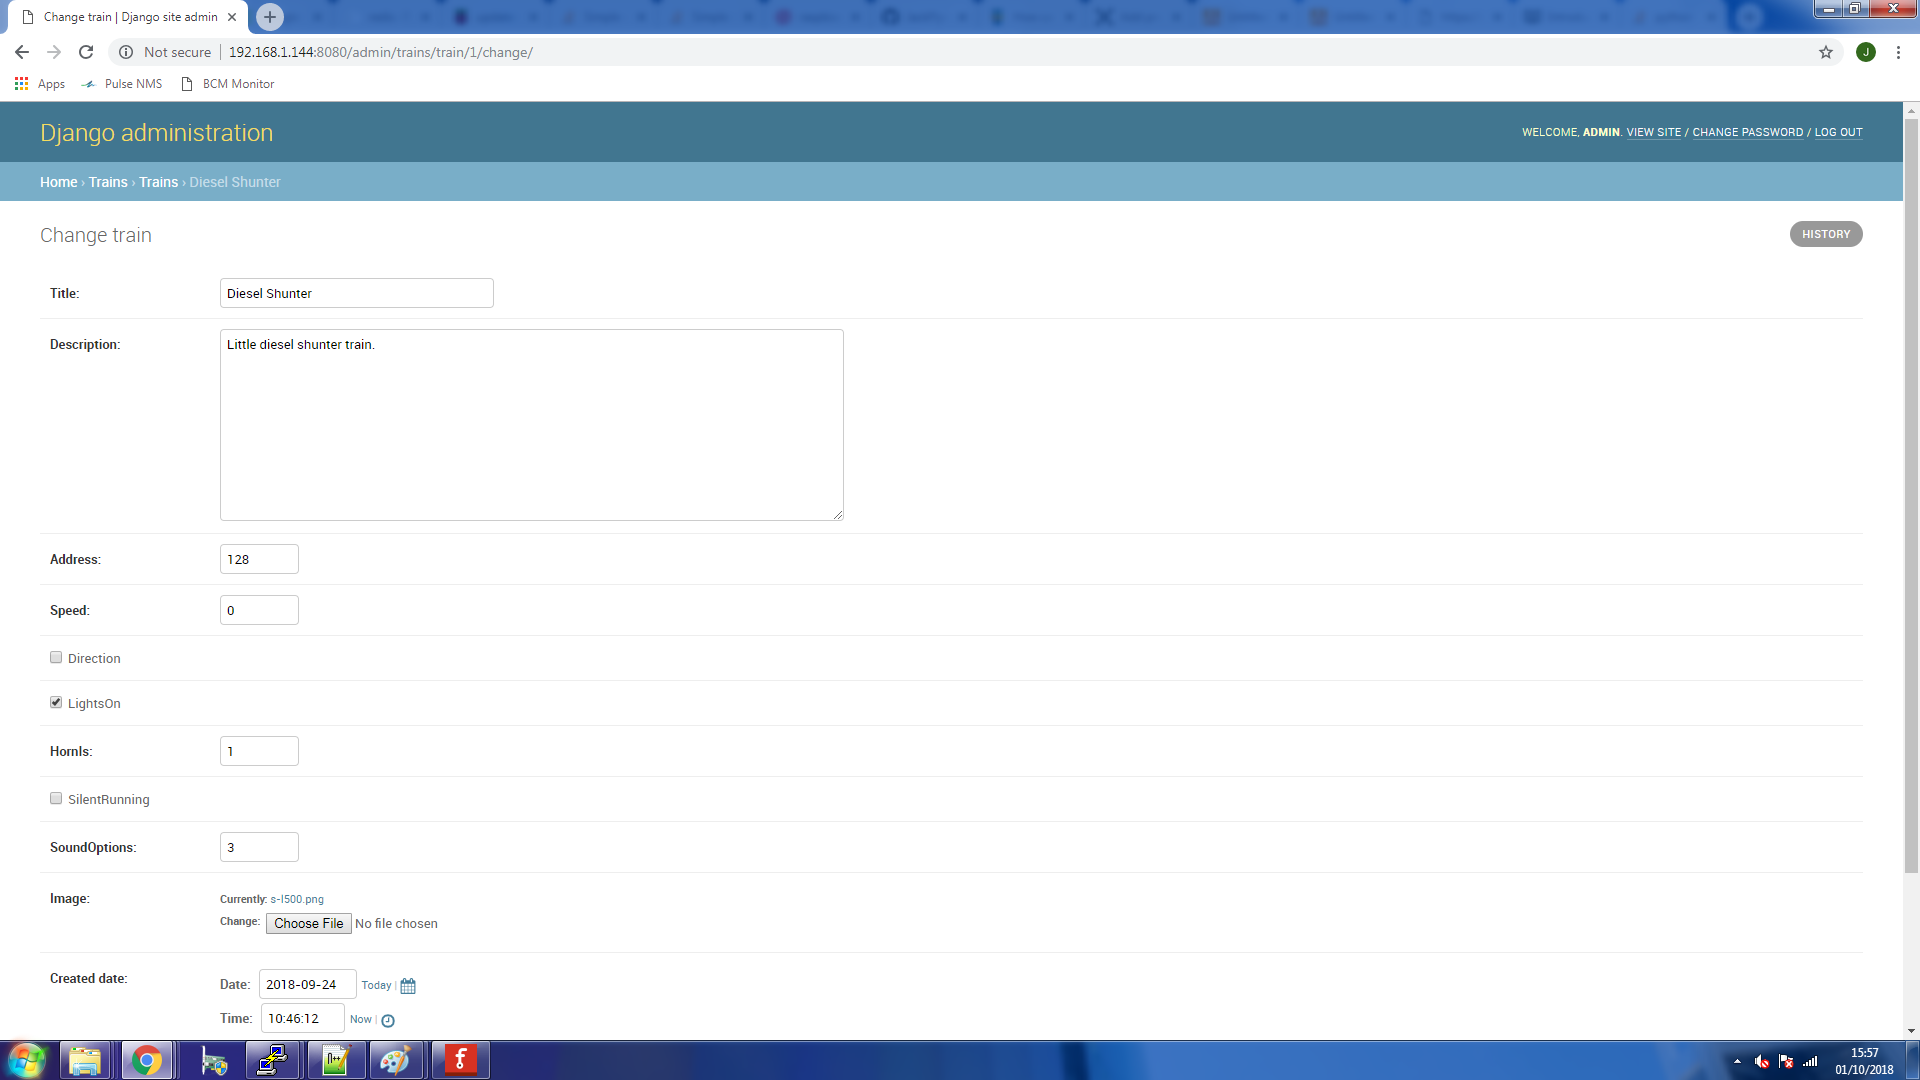
By using the database in Django, I can simply go to the "admin" page and fill out a new entry in the page and all of the details will be organised in one place for me, including images which is pretty sweet.
![]()
This becomes even more powerful when we go to build the HTML for the site. The website served by Django can have it's HTML generated using the database on the fly with a refresh. See below;
    {% for train in trains %}


			<div class="flex-container">
				<div class="post">
					<h2><a href="">{{ train.title }}</a></h2>
					<p>{{ train.description|linebreaksbr }}</p>

					<ul style="list-style-type:circle">
					<li>Address: {{ train.address }}</li>
					<li>Speed: {{ train.speed }}</li>
					<li>Direction: {{ train.direction }}</li>
					<li>Lights On: {{ train.lightsOn }}</li>
					<li>Horn Loc: {{ train.hornIs }}</li>
					<li>Mute: {{ train.silentRunning }}</li>
					<li>Numb. Sound Options: {{ train.soundOptions }}</li>
					</ul>
				</div>
				<div>
				<img src="{{ train.image.url }}" alt="No Image">
				</div>
			</div>

    {% endfor %}
The beauty of this is by passing the database model "trains" I can generate a display page with the details of each train entry in the database. The "for" loop in the HTML is recognised by Django and it knows to cycle through the database for every train entity and produce the html enclosed in the loop. Then each train in the database has it's related fields, such as it's name -
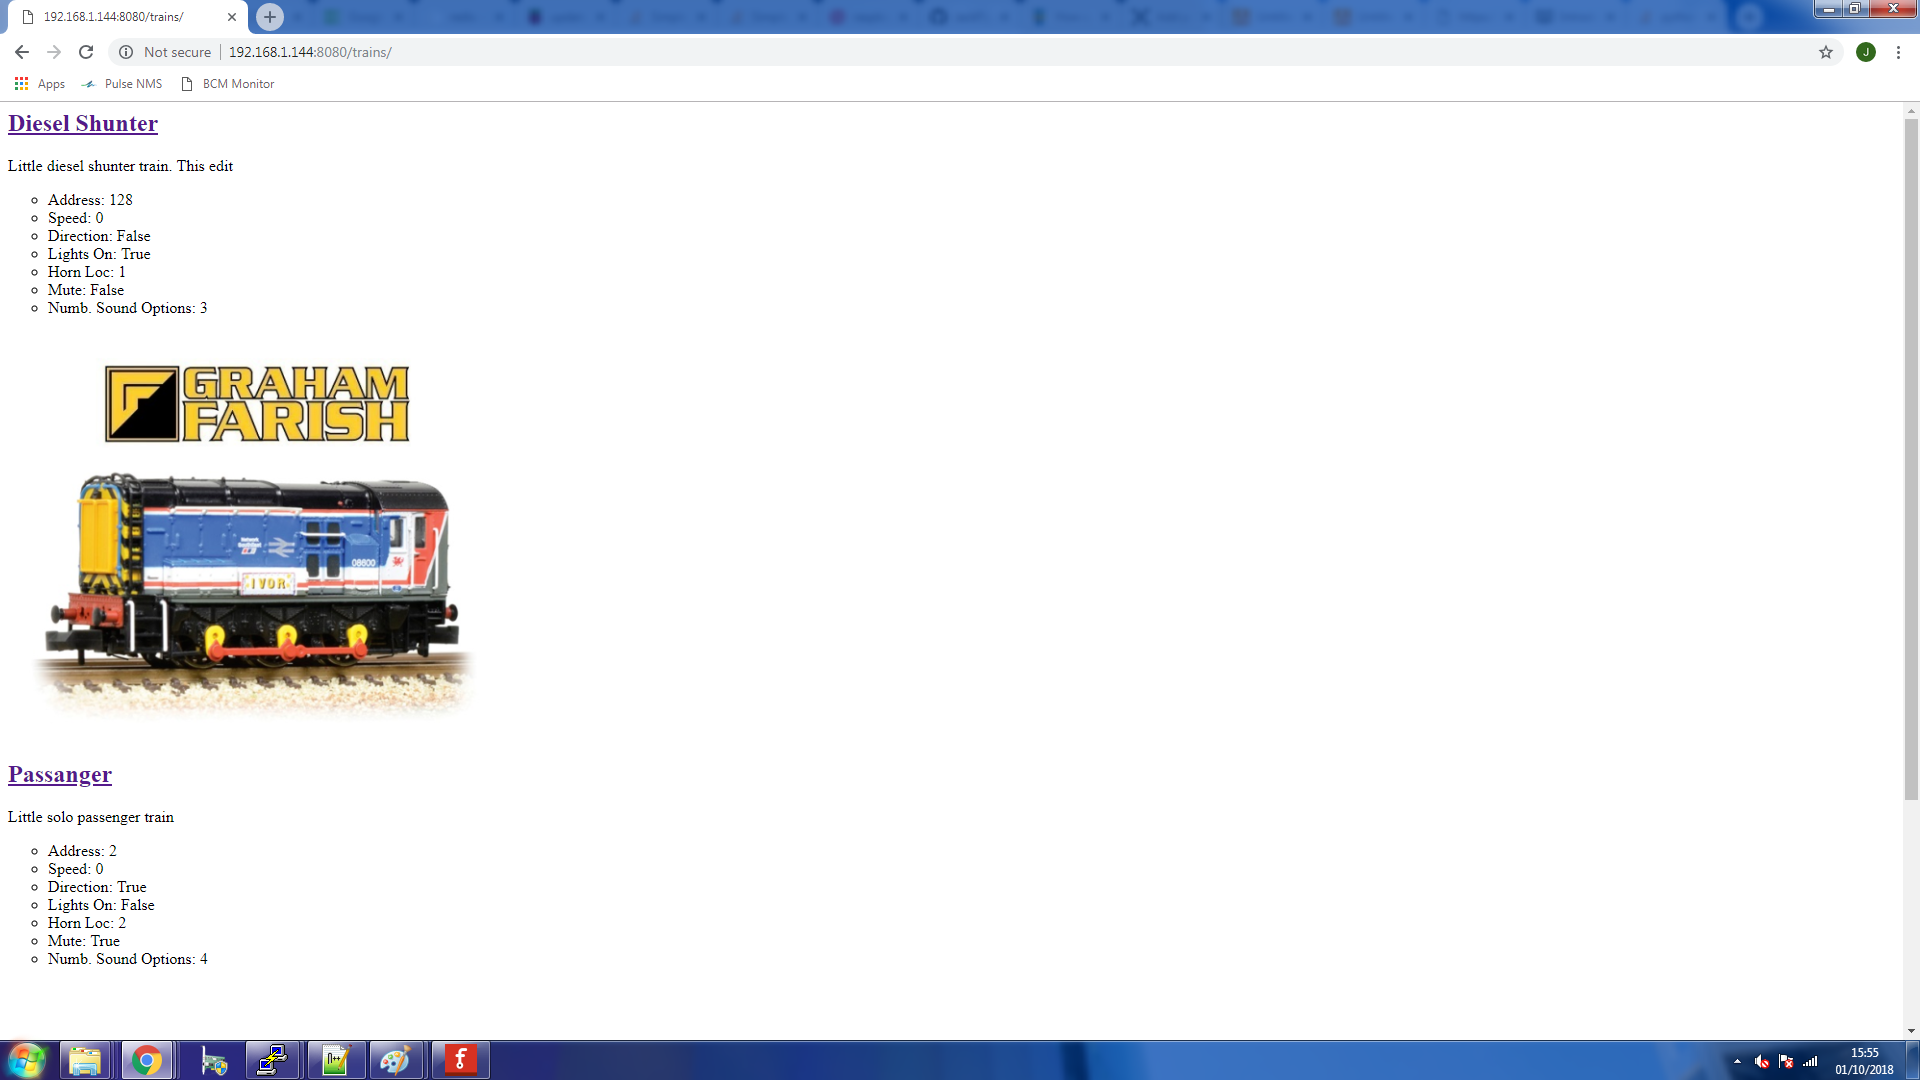
{{ train.title }}- pulled and printed out in the html using the Django tags. This produces the following result;
![]()
So now I have the power to add, edit and remove trains on the fly as required and the webserver will reactively change the html to display what ever trains are available. The same logic applies with the lighting. It's a really nice feature and one that I may have missed had I not gone through the tutorial.
-
Electronics - Teensy - Initial Code
10/01/2018 at 13:49 • 0 commentsYou can find the Teensy code at the following git-hub.
The main function of the Teensy is to control the physical side of the effects on the layout. For now I've setup an RGB led on my test bench with a Teensy 3.1. The code as it stands simply waits for incomming commands via serial-USB and then turns on or off the various pins related to the command.
You can see the main loop here;
---------- more ----------/* * ArduinoEffectsManager.ino * * Created: 9/26/2018 4:03:43 PM * Author: Admin */ #include "RGBManager.h" #include "Comms_SerialExtended.h" #include "HW_Pin.h" Comms_SerialExtendedClass USBSerial; HW_PinClass TeensyLED; #define pinRGB_r 21 #define pinRGB_g 23 #define pinRGB_b 22 void setup() { RGBManager.setup(pinRGB_r,pinRGB_g,pinRGB_b); USBSerial.setup(); TeensyLED.setup(13); TeensyLED.SetPin(LOW); USBSerial._PacketLayout.StartChar = ':'; Serial.println("Hello World from ArduinoEffectsManager"); USBSerial._PrintIncomming = true; } void loop() { if(USBSerial.Read()) { switch(USBSerial.parseCommand()) { case 1: RGBHex_Received(); break; case 2: RGBOutput_state(); break; case 3: LEDState(); break; default: Serial.println("Command Not Recognised. Data received;"); USBSerial.printLastPacket(); break; } } RGBManager.Refresh(); static unsigned long timer_handshake = millis(); if(millis() - timer_handshake > 15000) { Serial.println("USB Handshake"); timer_handshake = millis(); } } //RGB Hex value command // Changes stored colour values for RGB Manager class void RGBHex_Received() { byte hexVal[3] = {USBSerial.parseInt(PacketPosition1),USBSerial.parseInt(PacketPosition2),USBSerial.parseInt(PacketPosition3)}; Serial.print("Hex value received;"); for (int i = 0; i <3; i++) Serial.print(hexVal[i]); Serial.println(); RGBManager.SetColours(hexVal[0], hexVal[1], hexVal[2]); } //RGB Output control command // Enable/Disable the RGB LED output. Passes to RGBManager class void RGBOutput_state() { boolean enable = USBSerial.parseInt(PacketPosition1); Serial.print("RGB Output State;"); Serial.println(enable? "Enabled" : "Disabled"); if(enable) RGBManager.Enable(); else RGBManager.Disable(); } //LED State command void LEDState() { boolean newState = USBSerial.parseInt(PacketPosition1); TeensyLED.SetPin(newState); Serial.print("Teensy LED State Change;"); Serial.println(TeensyLED._Status? "On" : "Off"); }So after some initial variable setup you can see that I'm setting up the USB port and pin outputs to allow for LED toggling and colour control of the RGB led. I'm using my own custom built USB serial library for handling the parsing of the in-coming commands.
The serial command library data works on the basis of reading defined in-coming packets. with the following layout;
<"Start Character" "Seperator" "Data1" "Seperator" "Data2" "Seperator" "End Character">
Or for the current setup
<:,"Command","Data2","Data3", \n>
The in-coming serial bytes trigger on the "start character" and finish on the "end character". Once the packet has been received it returns with a valid packet available ready for parsing. The "line seperator" in the library is used to pick out values from the string.
Once a "Command" is parsed from the packet and used to decode which command has been called. By using <ints> as our data type in the packet it allows for the use of a switch statement which makes the command code nice and neat.
Each command will have its own requirements for data parsing and thus this is taken care of in the called function. These functions then toggle leds or change the colour of the RGB led depending on what was received. A nicety of dealing with our data packets in ASCII form is that we can easily send these commands via the Arduino serial monitor and test the results.
Finally a "USB Handshake" is fired periodically to ensure that data is flowing correctly during debugging.
-
Electronics - Initial Concept
10/01/2018 at 13:03 • 0 commentsThis is my personal bread and butter. I've worked with Arduino, Teensy and the Raspberry Pi for the better part of 5 years now. The main electronics criteria is to be low budget but high results. With that in mind we're leaning heavily on the side of using what we already have. Luckily, I have a nice collection of parts. Starting with a general layout plan, I'll explain each part below;
![]() ---------- more ----------
---------- more ----------Raspberry Pi
The Raspberry Pi is the go-to product for hobbyist projects. It's both cheap, small, easy to get running, exceptionally versatile and powerful. It's a fantastic product that for us will be employed as the "brains" of the coffee table. It will be running the reactive web server that will provide the main interface to both the train controls and also the lighting as well as controlling automated tasks.
Sprog DCC Controller & DCC Trains
The Sprog DCC controller will be handling the DCC Train track controls. We're using the Sprog II which is a DCC controller in a very nice compact package. It uses the DCC protocol to control the trains on the track that can be individually addressed and controlled. The raspberry pi will pass commands to the sprog via USB and a custom python script which will allow us to control the trains via the web interface.
Teensy Microcontroller
Currently undecided "which" Teensy microcontroller to use but these devices are all essentially Arduino compatible fast prototyping microcontrollers with a variety of interfaces. The Teensy will be our effects manager handling; the ambient RGB strip lighting, LED lighting for individual parts as well as possibly servos for track switching and manual input buttons for a secondary tactile control method
NEO Pixel Strip
There are a variety of cheap controllable LED lighting strips now available. We'll be using the strip lighting to provide an "ambient" lighting effect within the layout. The current plan stands to integrate this lighting into the top section of the table so it's casting down onto the track layout. Everyone loves a bit of RGB lighting.
LED Lighting
LEDs can add a really nice layer of visual effect to a train layout. We plan to integrate LEDs into the housing and there are off-the-shelf cars and street lighting that contain LEDs we can use for added effect
Manual Switches
Currently under-thought about. It could be nice to have some tactile switches that can be used to control the coffee table effects. A potentiometer for speed and various buttons for lighting and sound effects would create a fun interactive control for the kids.
Servo Track Switch
PSU Management
Power is another factor that will be thought out as we finalise more parts of the design. DCC requires in the range of 12v-16v DC while the Pi and Teensy run off of a standard 5v. Using parts we have, I'm hoping a laptop power supply may suit the power requirements once we settle on the current draw of the system.
USB Power Ports
A coffee table that can charge your phone? Yes please!
-
Design - Initial Design Ideas
10/01/2018 at 10:50 • 0 commentsBuilding a table from scratch is all well and good. However, a plan to work from makes life much easier and we want to keep this on a reasonable budget. This is the coffee table we're using for inspiration for the general look and feel of the table to start with;
![]()
The nice thing about this ikea table is that we can replace the open space in the body of the table with our train layout and apply perspex or glass to the outside faces to allow viewing into the layout from more angles. There's plenty of height to work with so we can hide the electronics under the train layout without compromising the floor clearance. We also like the idea of the drawer but we can move that to the under bottom level to give us the storage for the living room "stuff". This is a rough draft of how we'd like it to play out ;
![]()
(an artist I am not...)
Not Just Another Coffee Table
Custom coffee table with a DCC train track, automation, LEDs and a web interface