 daniel.bryand
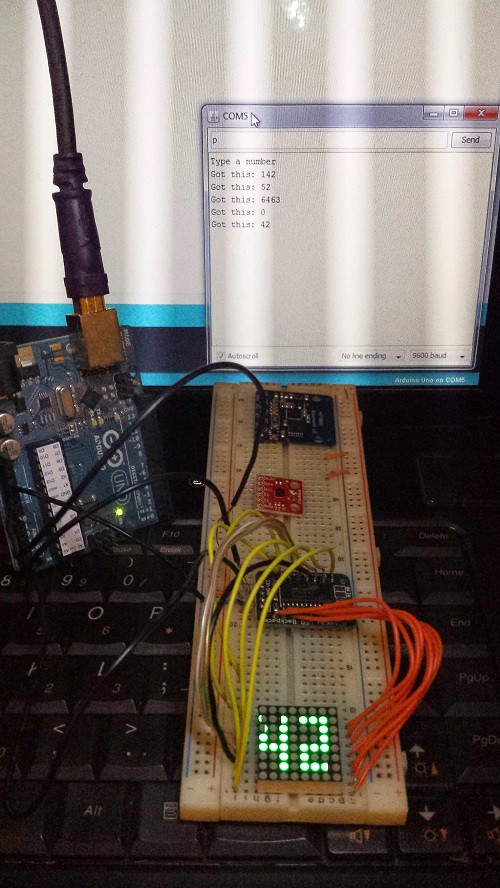 I found some time to play with the 8x8 LED display and control backpack I got in last week. At this point in the project, I am just going to look at each component individually and figure out how to use them.
For this micro-project, I used the Arduino Uno, 0.8" 8x8 LED matrix, HT16K33 LED driver, breadboard, and the Arduino development IDE. I pretty much followed the tutorial on Adafruit to get started, except where it says to solder the matrix pins into the backpack, I wired it up.
Using the graphics libraries provided was quick and easy. I had graphics and text scrolling on the display in no time, and this may be useful depending on where the project goes. This is where I had to modify some things.
The built in font characters are 5x7 pixels in size, and I would like to fit at least 2 characters on the display at once (for now, number only). I created a new number font and layout method for the numbers. All the numbers are now 3x6 pixels in size, except for the 1, which is 1x6. I was hoping to fit 3 characters on the screen if 1 was the first digit, but I forgot I'd need 9 pixels across with spaces between the numbers.
The serial over USB was used to control the numbers being displayed. The Arduino has to check to see if a number was typed, figure out which number it was, and display that number. I will put the code up for this project on github soon!
Now that I am a little familiar with using this display and controller, I want to dig a bit deeper. One thing is I would like to use a smaller microcontroller, like the ATtiny85 (which I did receive, by the way). These have a smaller program memory, 8Kb, and the code I was using compiled to a little over 6Kb. With all the other devices, I might have to use only the parts from the libraries I need to get the bare bones working.
Also, I believe that this LED controller works well with 7 or 8 segment displays. I have a small red bubble display that I will be attempting to use as well. I can see how the memory on the LED controller is being manipulated by the graphics libraries, so I might be able to use this to extend to many separate displays as well.
Next I will be trying out the accelerometer and Bluetooth boards and attempting to tie them all together. I will also draw out some of my rough layout ideas on how to connect all these displays into a cube shape.
Discussions
Become a Hackaday.io Member
Create an account to leave a comment. Already have an account? Log In.