All documentation for the expansion board is available on the Supercon Badge project page. Of course you can do a ton more than this hardware, but blinkies are always the first step!
A Demo:
The Hardware:
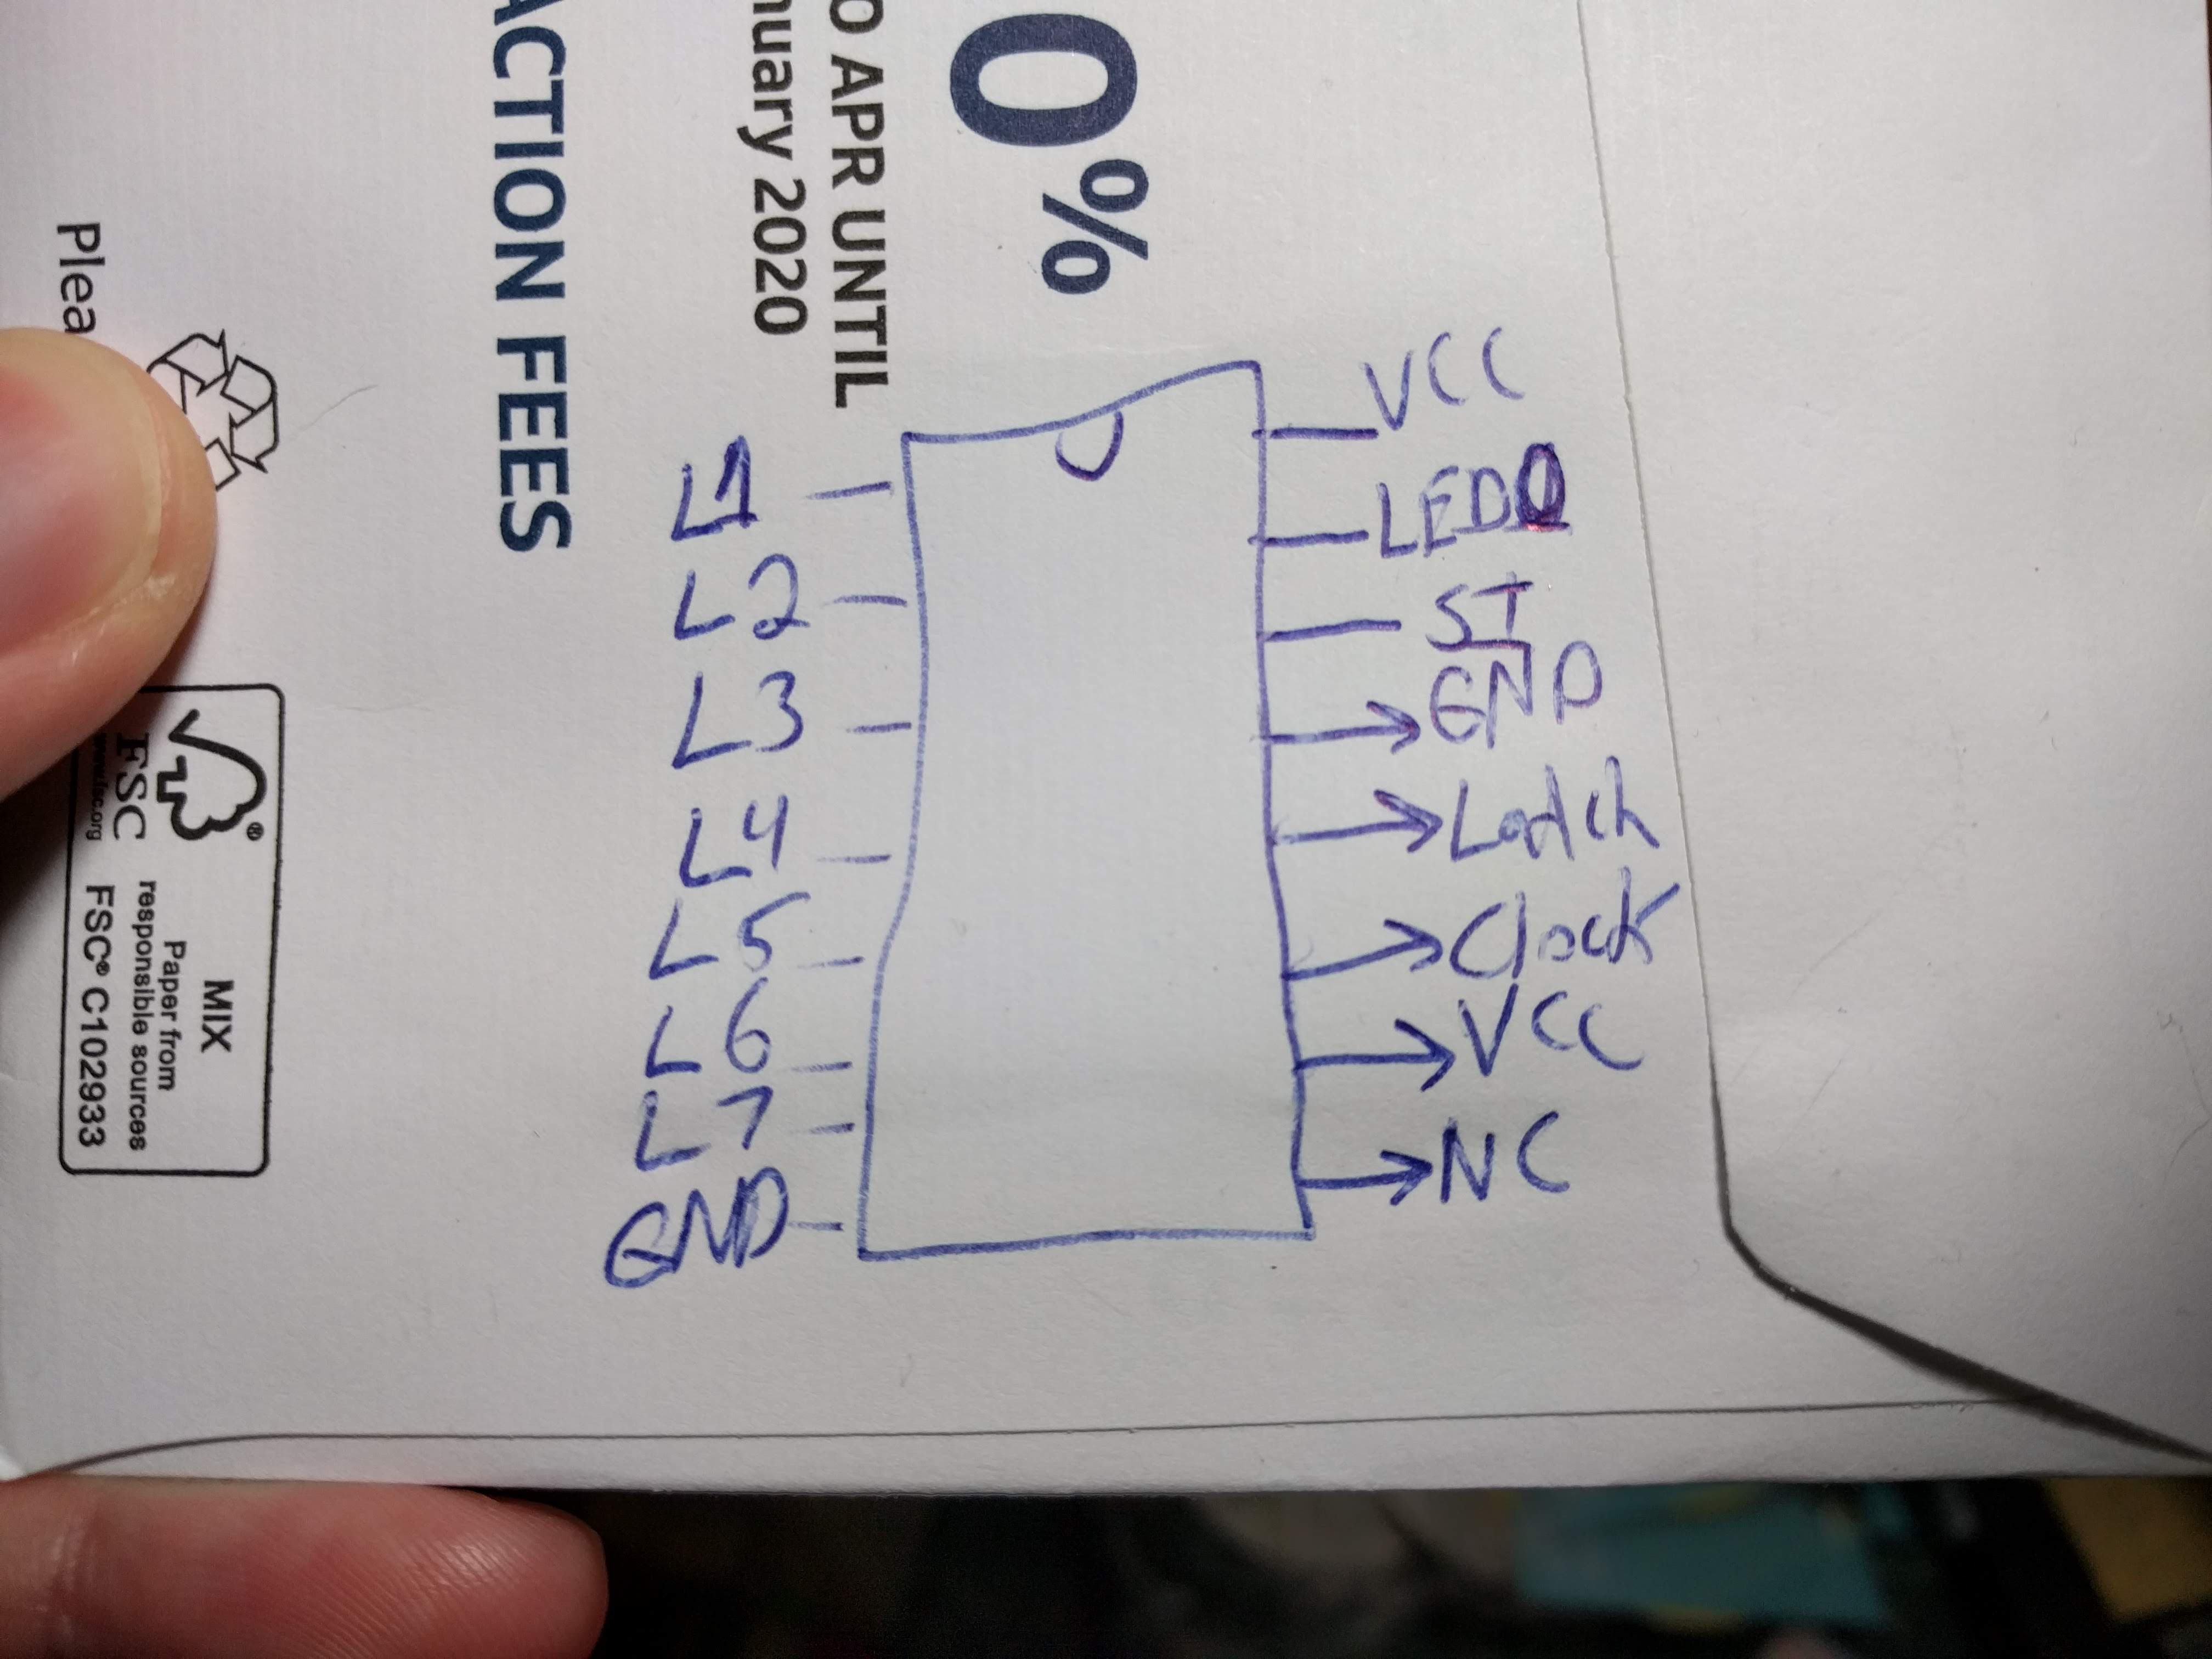
The hardware couldn't be simpler. I added a 595 shift register, using the 8 outputs to drive LEDs. The data line is connected to G2 (edr 0 in BASIC), latch is connected to G3 (edr 1), and the clock line is attached to B0 (edr 2).
Here's my back of the envelope planning (literally):
The Code:
I tested out the code and got this work. The next step was to make subroutines for clock (line 1000), latch (line 1100) and multiple clocks which work by setting x= to the number of clocks and then gosub to line 1200.
This particular example plays chopsticks, using the 8 LEDs as keys and playing tones on the speaker to go along with them. Embarrassingly I made a typo and had "gosub 100" instead of "gosub 1000" at one point. I had such a hard time finding it I thought there was a problem with the interpreter but of course it was just me ;-)
All of this was typed on the badge. I used a serial to USB cable to export it for this project page.
10 D = 0
20 L = 1
30 C = 2
40 edr D,0
50 edr L,0
60 edr C,0
70 eout D,0
80 eout L,0
90 eout C,0
100 goto 500
300 eout D,0
301 P=100
302 gosub 1400
310 gosub 1000
320 gosub 1100
330 wait 300
340 eout D,1
350 gosub 1000
360 gosub 1100
370 wait 300
380 goto 300
500 P=100
510 Q=25
520 gosub 1400
530 for i=1 to 6
540 gosub 2000
550 next i
560 for i=1 to 6
570 gosub 2200
580 next i
590 for i=1 to 4
600 gosub 2400
610 next i
620 gosub 2800
630 gosub 2400
640 gosub 2600
650 wait (P*2)
660 gosub 2000
670 gosub 2600
680 end
1000 rem Pulse clock
1010 eout C,1
1015 wait 1
1020 eout C,0
1030 return
1100 rem Pulse latch
1110 eout L,1
1115 wait 1
1120 eout L,0
1130 return
1200 rem Clock in "x" times
1210 for y=1 to x
1220 gosub 1000
1230 next y
1240 return
1400 rem Clear and wait
1410 eout D,0
1420 x=8
1430 gosub 1200
1440 gosub 1100
1450 wait Q
1460 return
2000 rem Chopsticks FG
2010 eout D,0
2020 x=3
2030 gosub 1200
2040 eout D,1
2050 x=2
2060 gosub 1200
2070 eout D,0
2080 x=3
2090 gosub 1200
2100 gosub 1100
2110 tune 65,67,0,P
2111 wait P
2115 gosub 1400
2120 return
2200 rem Chopsticks EG
2210 eout D,0
2220 x=2
2230 gosub 1200
2240 eout D,1
2242 gosub 1000
2244 eout D,0
2246 gosub 1000
2248 eout D,1
2250 gosub 1000
2252 eout D,0
2254 x=3
2255 gosub 1200
2256 gosub 1100
2257 tune 64,67,0,P
2258 wait P
2259 gosub 1400
2260 return
2400 rem Chopsticks DB
2410 eout D,0
2412 gosub 1000
2414 eout D,1
2416 gosub 1000
2418 eout D,0
2420 x=4
2422 gosub 1200
2424 eout D,1
2426 gosub 1000
2428 eout D,0
2430 gosub 1000
2432 gosub 1100
2433 tune 62,71,0,P
2434 wait P
2435 gosub 1400
2436 return
2600 rem Chopsticks CC
2610 eout D,1
2612 gosub 1000
2614 eout D,0
2616 x=6
2618 gosub 1200
2620 eout D,1
2622 gosub 1000
2624 gosub 1100
2625 tune 60,72,0,P
2626 wait P
2627 gosub 1400
2628 return
2800 rem Chopsticks EA
2810 eout D,0
2815 x=2
2820 gosub 1200
2830 eout D,1
2840 gosub 1000
2850 eout D,0
2860 x=2
2870 gosub 1200
2880 eout D,1
2890 gosub 1000
2900 eout D,0
2910 gosub 1200
2920 gosub 1100
2930 tune 62,69,0,P
2940 wait P
2950 gosub 1400
2960 return
 Mike Szczys
 Keith
Keith
 jaromir.sukuba
 Emilio P.G. Ficara
 Alex Bowen
That's really cool :) I hadn't really thought of what to do with the expansion port, or what is possible. Like you said, blinky lights are always a good place to start, and these are parts I think everyone has / can bring with them if they want to try this at the conference.