SatNOGS On Air
Single purpose indicator for a SatNOGS ground station. Are you currently receiving?
Single purpose indicator for a SatNOGS ground station. Are you currently receiving?
To make the experience fit your profile, pick a username and tell us what interests you.
We found and based on your interests.
First a little catching up. Right before SuperCon I managed to finish the front side of the case. Using a Silhouette vinyl cutter I made a negative cutout reading "SatNOGS On Air" then backed with with a strip of white vinyl. The result came out great despite the beat up piece scrape acrylic I used. I'll repeat this when I make the cover for the new case.
All good projects get googly eyes at SuperCon.
As mentioned in the previous post, this version was simply too heavy. The 2500mAh battery was a silly amount of overkill. With the redesign I wanted to get everything on one side. This made placing the battery tricky. It was too wide to lay flat and have the LEDs unobstructed and it was also too wide to place on the side without making the entire case significantly taller. I could though put it at an angle with the battery hanging over the TTGO board.
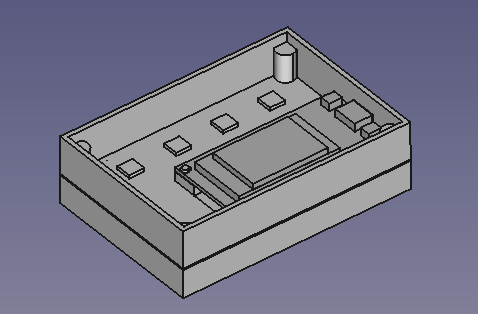
One of the early goals I had for this project was to design the enclosure in FreeCAD. This is partially because I don't have Fusion 360 at home and partially because I wanted to see how productive I could be using FreeCAD. The process was a bit painful but I did manage to get the design done.
And being that I was basically designing this around parts I had sitting on my desk, the 2500mAh battery seemed like a good fit. The ESP32 devboard I had was slightly smaller than the battery width, this allowed me to move up to 4 LEDs which could be used to indicate status of prior passes.
What this resulted in was the battery dictating the overall size and filling it's entire compartment. The LED strip was installed from this side prior the the battery being put it and passed through holes into the front compartment. This also meant the parts where all stacked.
Battery > LED Strip > ESP32
The LED strip is negligible in this case but having the board and battery stacked caused the overall thickness to be more than desirable.
And, this arbitrarily selected battery was... HEAVY. First time wearing it concluded with an awkward tugging at my t-shirt confirming my suspicions it was going to be too thick and too heavy.
As a proof of concept though, it did work. The battery last about a day and a half without much concern with battery life from the firmware. I've sense started basic power tuning and found it idles around 60mA. Quite a bit better than I would have expected given I never turn the WiFi off, ping the SatNOGS API once 1 minute and like mention, have given no concern to battery life so far.
Next I'll be going through the firmware code.
I'll be bringing this project with me to SuperCon in two weeks! Even if I don't manage to make it to V2, this current version should be a fun conversation piece. Let's chat about Space, ESP32s, satellites and SatNOGS! See you there!
Create an account to leave a comment. Already have an account? Log In.
Become a member to follow this project and never miss any updates
Maybe look at my site I developed.
https://satnogs.jwgtechs.com
Also you can see a specific station at https://satnogs.jwgtechs.com/stations/<id> replacing <id> with the station id.
https://satnogs.jwgtechs.com/rotating shows a rotating globe