Introduction
Hey! Thanks for checking out this tutorial, I hope you find it useful and if you have any recommendations, questions or comments, please reach out!
I am one of the organizers of a kickass group NeuroTechLA, the Los Angeles chapter of NeuroTechX, a global network of engineers, designers, scientists, and hackers driven to learn and push forward the boundaries of bona fide neuroTechnology. If you're new to this field and interested in getting started with brain-computer interfaces (BCI) or electroencephalography (EEG), checkout NeuroTechEDU's GitHub repo of awesome list of BCI-related resources. Or, attend one of the events that we might be holding in your city!
This tutorial is the result of our chapters desire to do BCI-related projects with Muse headsets. Specifically, we wanted our chapter to go through workshops like this P300 ERP Juypter Notebook experiment using an extra electrode and many more. There were a few tutorials and forum discussions on how to make these extra electrodes, but I found them a little bit incomplete and inaccessible.
Lastly, special thanks to Interaxon, the company responsible for the Muse headsets, for donating a couple headsets to our chapter! They, along with the many members of NeuroTechX, made this possible.
Disclaimer
- This is not an official Interaxon tutorial;
- DO NOT plug the electrode into a power source;
- Use caution and be safe!
Goal
Our goal in this tutorial is to connect an EEG electrode via a male Micro USB connector to the auxiliary input of our 2016 Muse headset (the back right of the headset where you would charge the device) so we can access EEG (or EMG / ECG, etc.) data.
We will do this by removing the safety jacket and exposing wire from our lead EEG cable, solder said wire onto a 5-pin Micro USB connector, wrap with heat shrink, snap the Micro USB plastic covers on, attach hook & loop fasteners to our headset for keeping the electrode stable while recording, snap on a electrode to our cable lead and test using Python and the muse-lsl library.
Instructions
Note: We assume you know how to solder, or you know someone who can help you. If not, soldering kits are ~$30 on Amazon.
Step 1
- Purchase and gather necessary supplies and equipment.
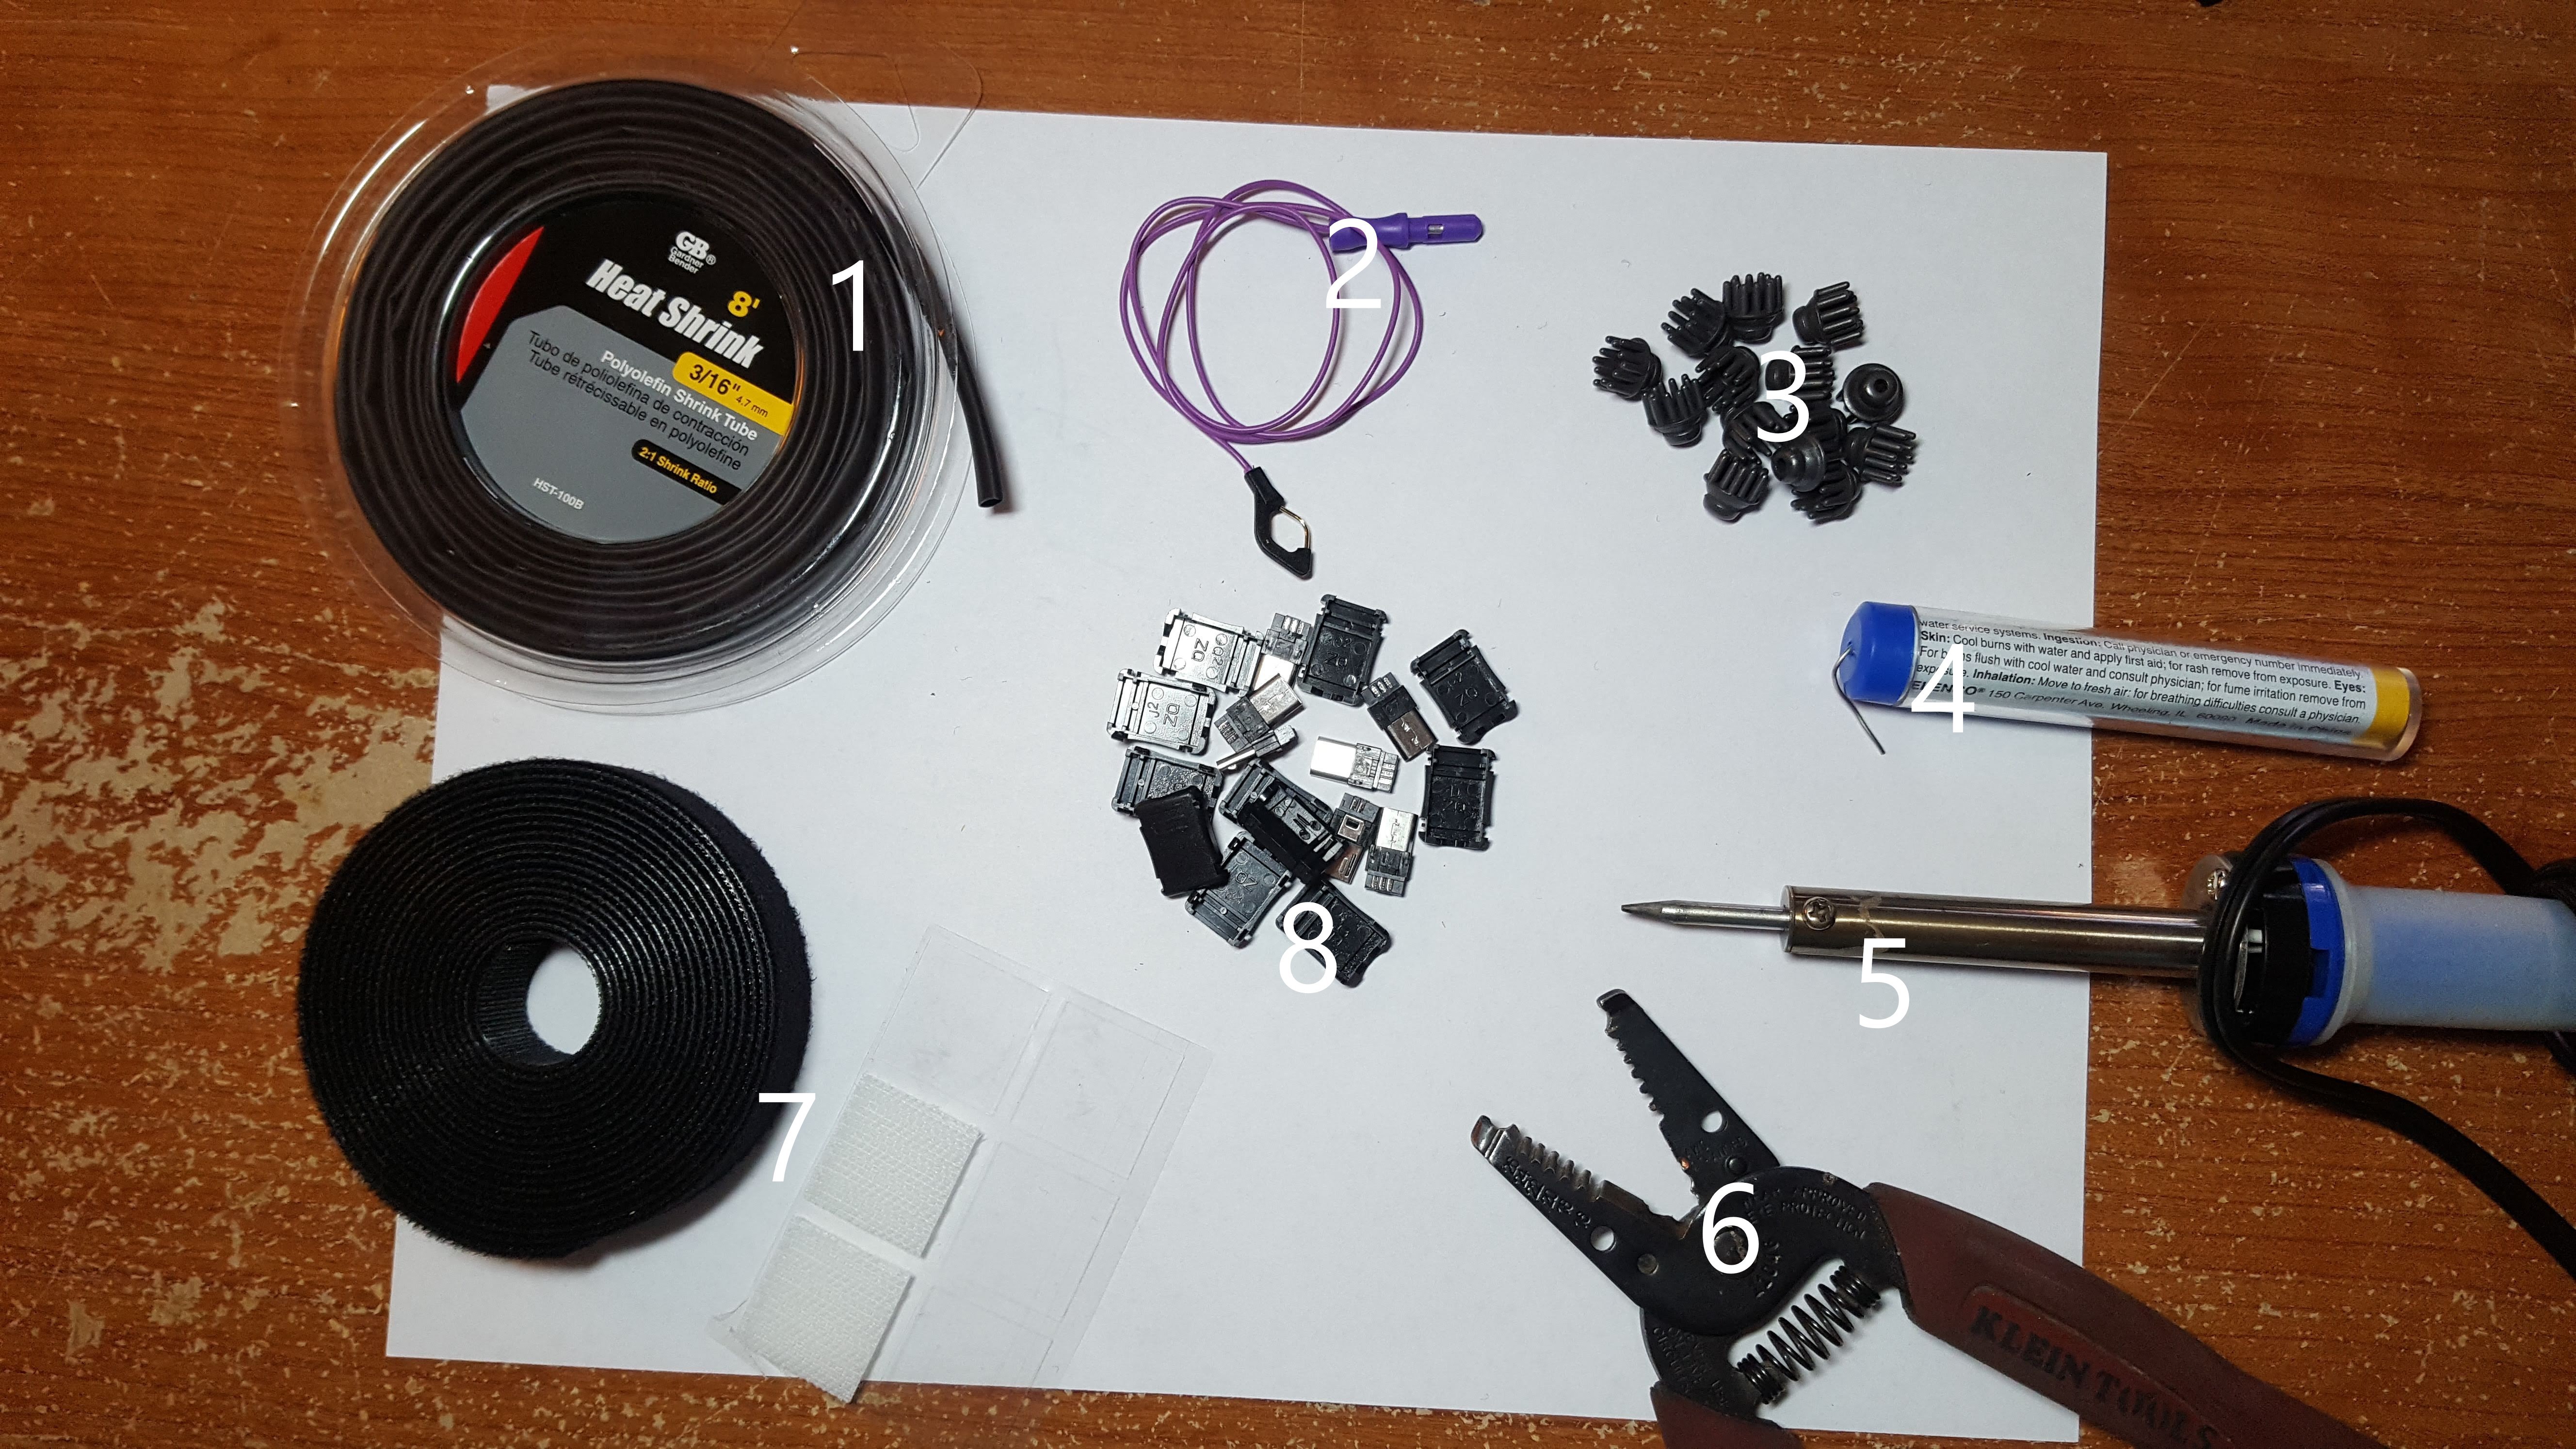
- Below is a photo of everything I used (Muse headset, 3rd arm clamps for soldering and wire cutters not shown).

- Heat shrink for wrapping the Micro USB connector in
- Lead wire for EEG electrodes
- Since we are only removing the safety jacket (the end of our wire) we can use any electrode wire such as an OpenBCI snap electrode cable, gold cup cable, etc.
- In this tutorial, we will be using a lead wire designed for snapping on dry EEG electrodes as shown above.
- EEG dry electrode (pack of 10+)
- As noted above, we could have used gold cup electrodes (which can be referred to as wet electrodes which means they would require conductive paste), or EMG / ECG foam solid gel electrodes that would have been used with snap electrode cables.
- In this tutorial, we will be using dry EEG electrodes that will snap onto our lead wire.
- 60/40 Flux Core Solder
- Soldering Iron (best practice...
 Andrew