Close
0%
0%

S/PDIF from Echo Dot

Adding an S/PDIF / toslink connection to an Echo Dot

Similar projects worth following
Having seen a couple of projects that added a better DAC to the Echo Dot by removing the existing DAC and fitting an upgraded one, I decided I wanted to add an S/PDIF socket instead, hence this project.
Unfortunately, it currently shares the same main drawback that the internal speaker can no longer be used at all - it's digital audio out or nothing. Need to come up with a way around that.

Firstly, the two pages in particular that inspired this project are:

  1. https://hackaday.io/project/28109-hi-fi-digital-audio-from-the-echo-dot
  2. https://www.datenwalze.de/post/echodot/

Before reading these, I didn't really know what i2s was, so it would never have occurred to me that there was anything resembling a standard digital audio interface in there.

Anyway, after some research, it seems the IC to use for this task is a WM8805 (or WM8804); and before potentially breaking an Echo Dot, testing this on an RPi as a I2S source first felt like a good idea.  

Things I've learned (which are no doubt obvious to many);

  • i2s essentially comes in 3 and 4 wire varieties. The MCLK line for i2s is required by some devices, but not by others. Also, different devices can have timing constants for the relationship between MCLK and the BCLK. Specifically, the WM8805 requires MCLK, the Raspberry Pi doesn't supply it, and the WM8805 doesn't like the MLCK from an Echo Dot.
  • i2s devices can operate in master or slave mode, which is independent of which way the audio is going; the master device generates LRCLK/BCLK/MCLK
  • The HIFI DiGi+ boards (S/PDIF hat for the Pi) - which are based on the WM8804 - looked very promising, as they take the 3-wire i2s from the Pi and output S/PDIF - exactly what I want. Except... the WM8804 is operating in master mode, generating LRCLK/BCLK/MCLK (with MCLK going nowhere as the Pi doesn't need it). The Echo is generating LRCLK/BCLK/MCLK, so the WM8805 needs to operate in slave mode, and so will require MCLK meaning the DiGi+ board can't be used. How annoying.
  • MCLK needs to be synchronised to BCLK/LRCLK. Generating a clock that's the right frequency but not synchronised kinda works (frustratingly close to ok), but results in crackling audio. The WM8805 has an inbuilt PLL which can be configured to generate the right frequency, but the input must come from either the S/PDIF input (not used) or a crystal, so it was never synchronised to BCLK. 

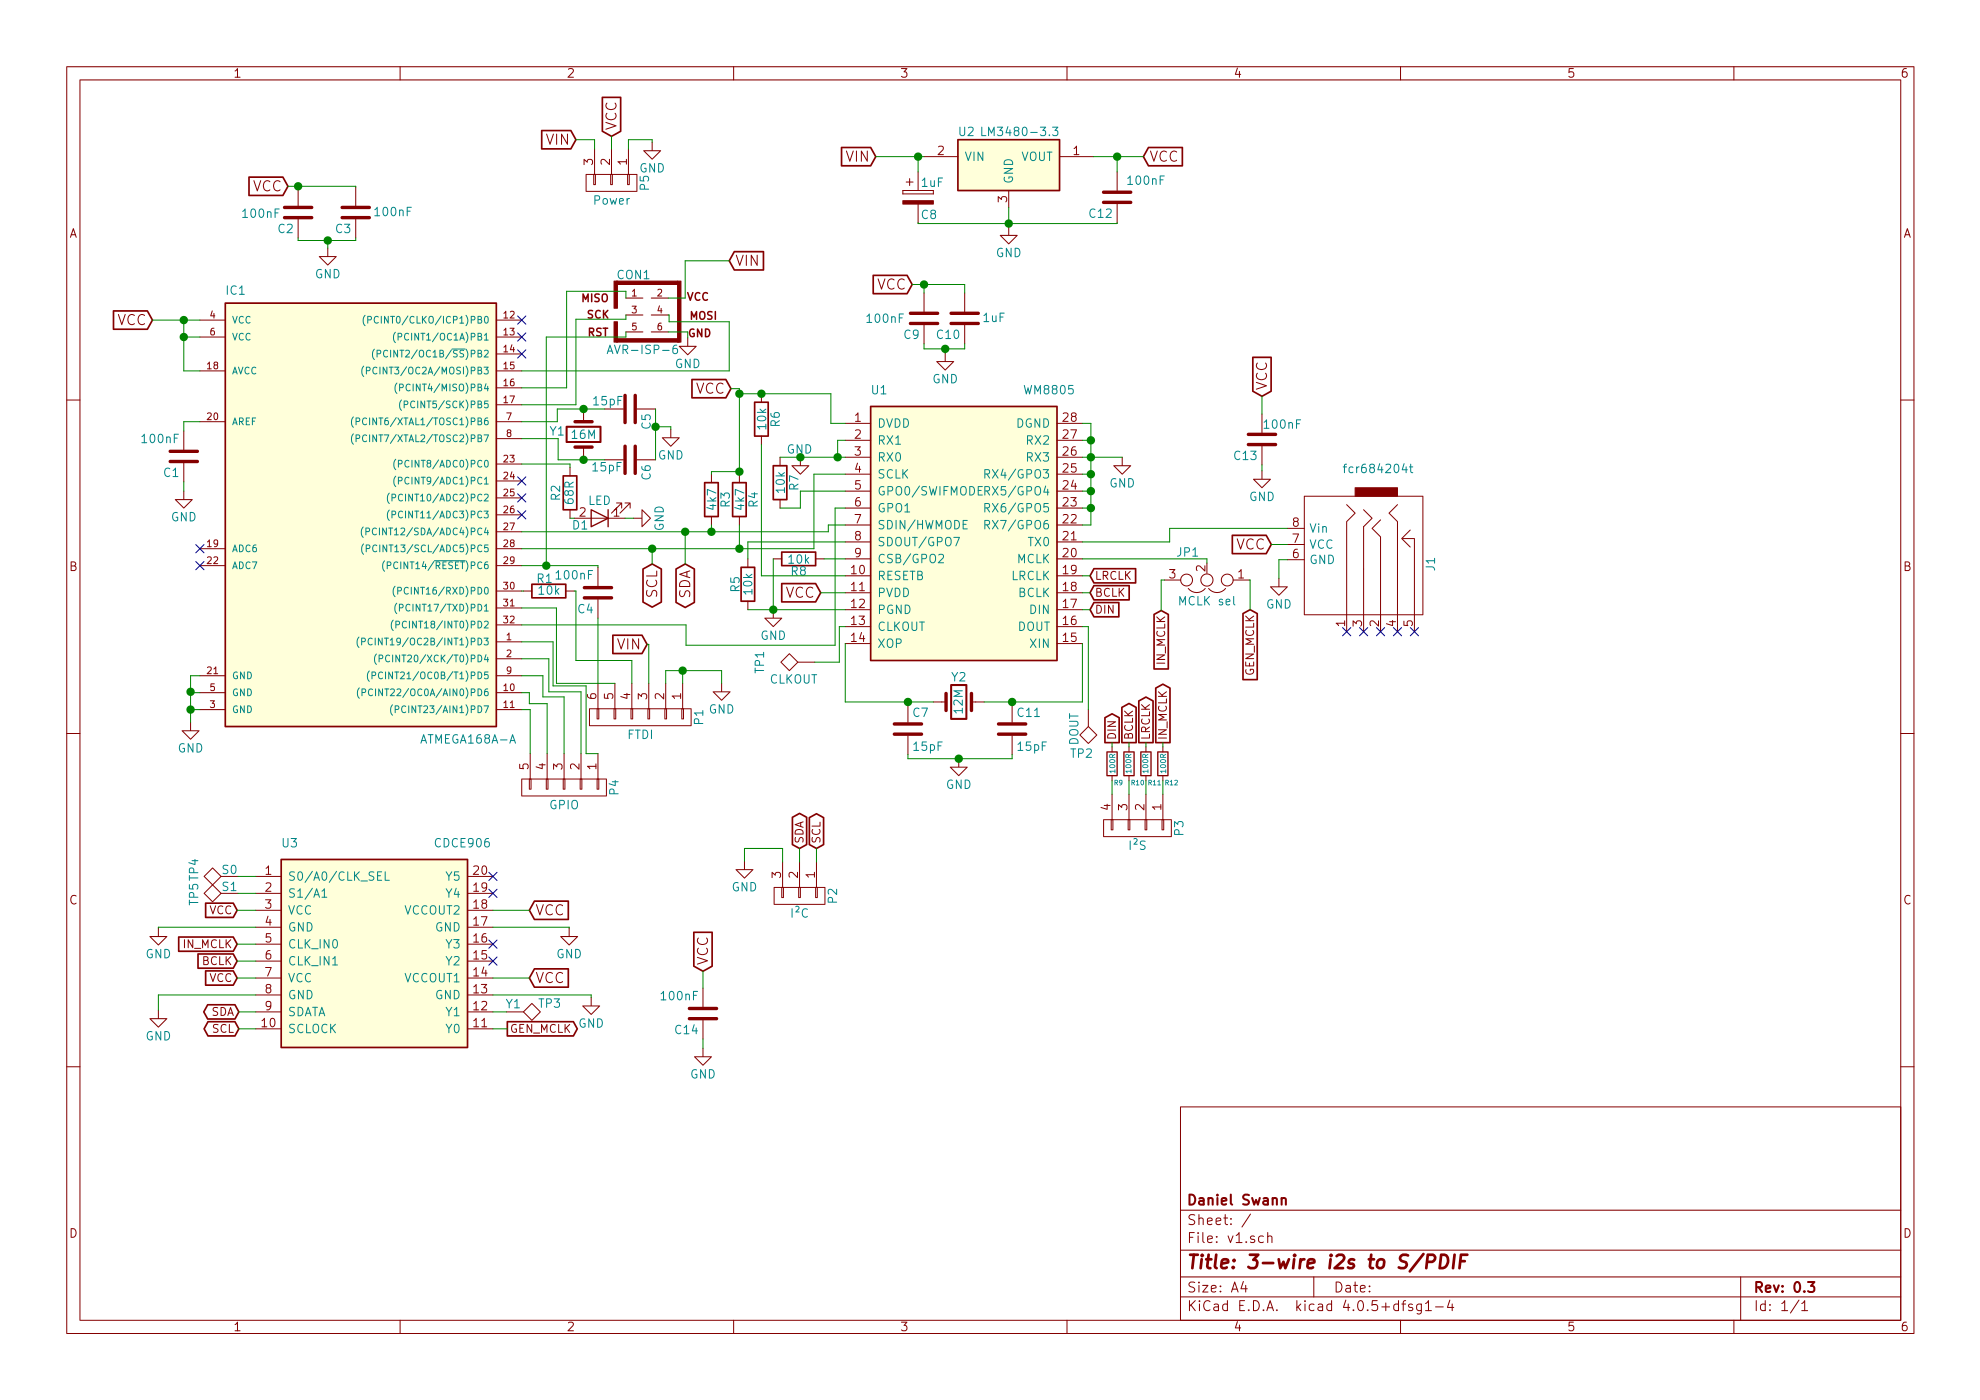
So, the solution I've gone for is to use a CDCE906 PLL to generate MCLK from BCLK, and an atmega328p (no prizes for guessing why) to configure it and the WM8805. There is almost certainly a simpler/cheaper way to multiply the frequency, but this was easy.
This approach seems to work well with both the Raspberry Pi i2s output, and the Echo Dot (with a minor code change when moving from RPi to Echo).

Schematics, PCB layout and code on gitlab: https://gitlab.com/dswann/3wire-i2s-to-spdif

The atmega328p is programmed using the Arduino IDE, naturally, but I've not managed to get the serial programming working (don't think it's auto re-setting and I didn't add a reset button). Not sure if that's a design or assembly issue yet. Programming it using the ISP header works, as does serial output of debugging info, so whatever.

The PCB has a selectable MCLK input - either from the i2s header, or generated by the CDCE906 from BCLK.

As the CDCE906 allows for two clock inputs, I've fed one BCLK and the other CLKOUT from the WM8805. The second is not used and pointless; using it to generate MCLK results in noisy/crackling audio as it won't be synchronised to BCLK. I added it mostly so I could confirm that MCLK really does need to be in sync with BCLK - my earlier test with it unsynchronised was close enough to working that I did wonder if the crackling audio was down to my especially poor PCB layout. As the sketch never selects that clock input, it should be harmless though. With hindsight, using the MCLK on the i2s header would probably have been a smarter choice for the second clock input.

TODO
Whilst the digital audio output works well, it's physically a mess. The board is designed to fit in the Echo, but I've not figured out where/how to mount it yet. 
Also, there's still the issue where the only audio output is now via S/PDIF - which isn't so great when the amplifier it's connected to is off....

Read more »

v1-brd.png

Dimensions from v0.3 board. Beware, may not be accurate! See discussion.

Portable Network Graphics (PNG) - 55.09 kB - 12/16/2018 at 22:16

Preview

  • 1 × WM8805 Digital Interface Transceiver
  • 1 × CDCE906 PLL based Clock Synthesizer / Multiplier / Divider
  • 1 × ATMEGA328 Microcontroller
  • 1 × fcr684204t 3.5mm Fiber Optic Connector
  • 1 × 16MHz crystal

View all 7 components

  • Mounted inside echo dot - done!

    Daniel111111/21/2018 at 19:42 0 comments

    Instead of trying to find a way to mount my last attempt at a PCB inside the echo dot, I added some mounting holes and sent it off to allpcb, and got the boards back in less than a week, not bad.

    New versions:

    Only change to the schematic is that the second input to PLL is the MLCK from the Dot (previously it was clkout from the WM8805). But it's not used; I figured it'd be nice to have the option though.

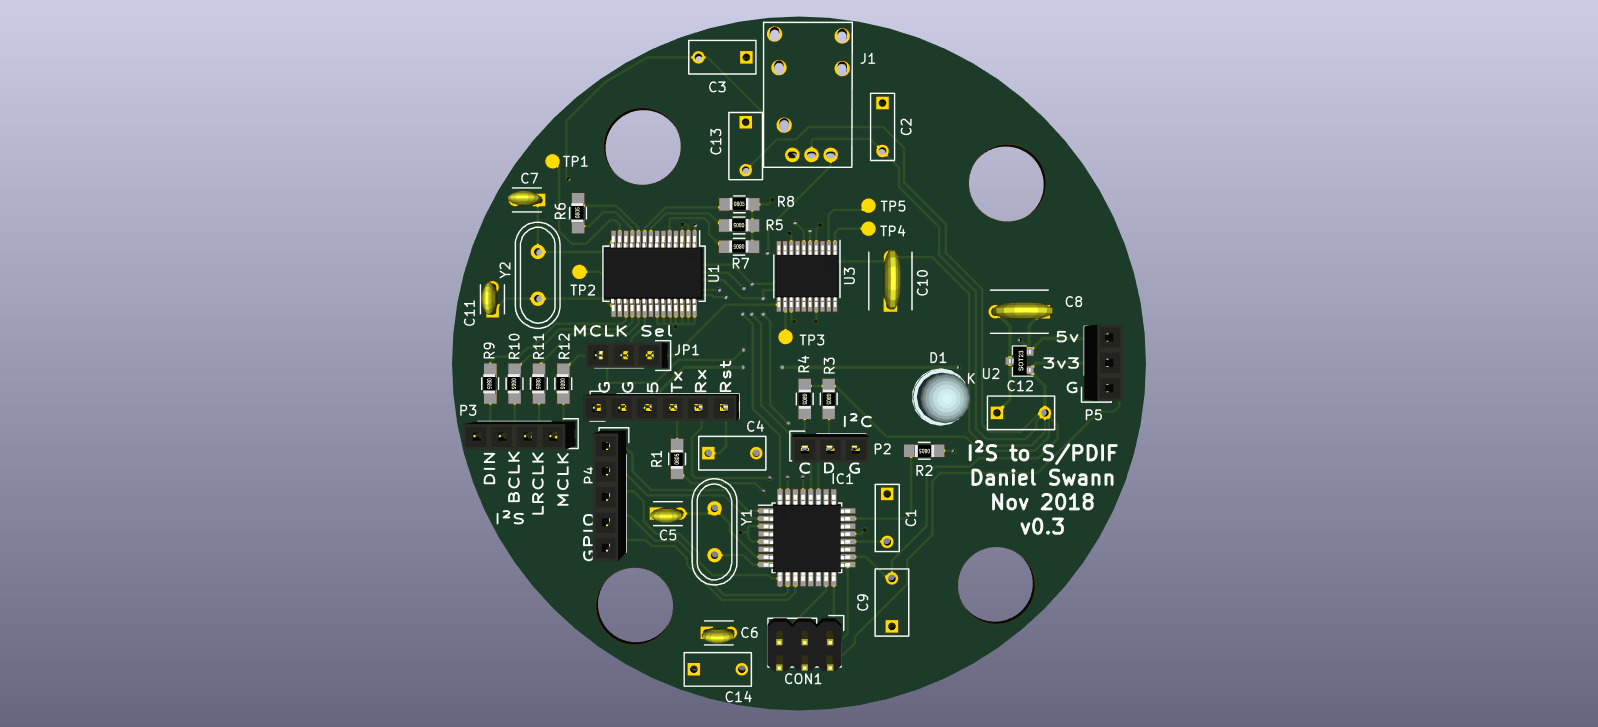
    KiCad 3d render of PCB

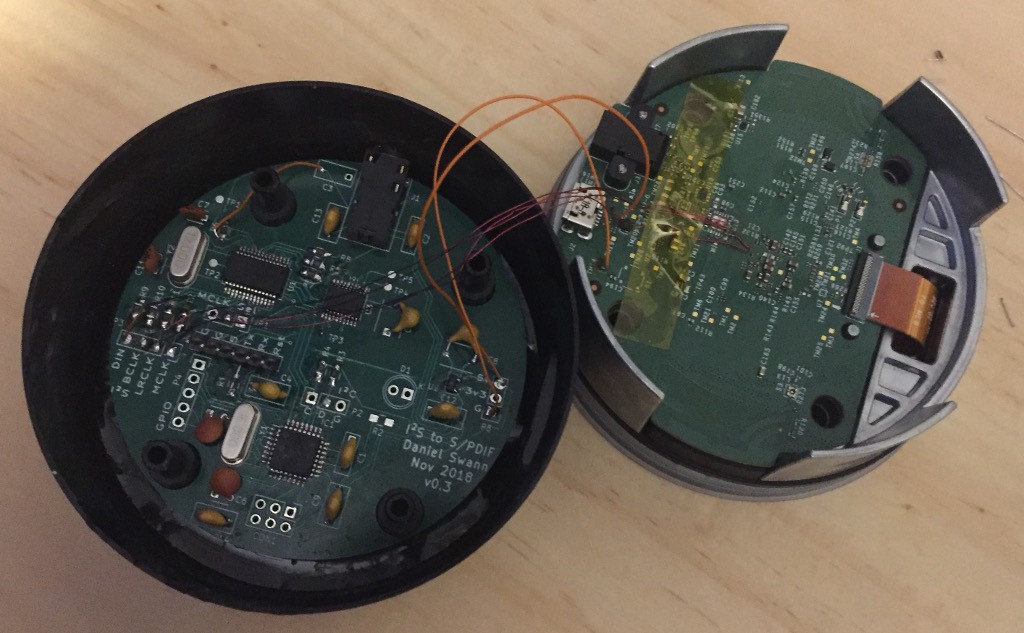
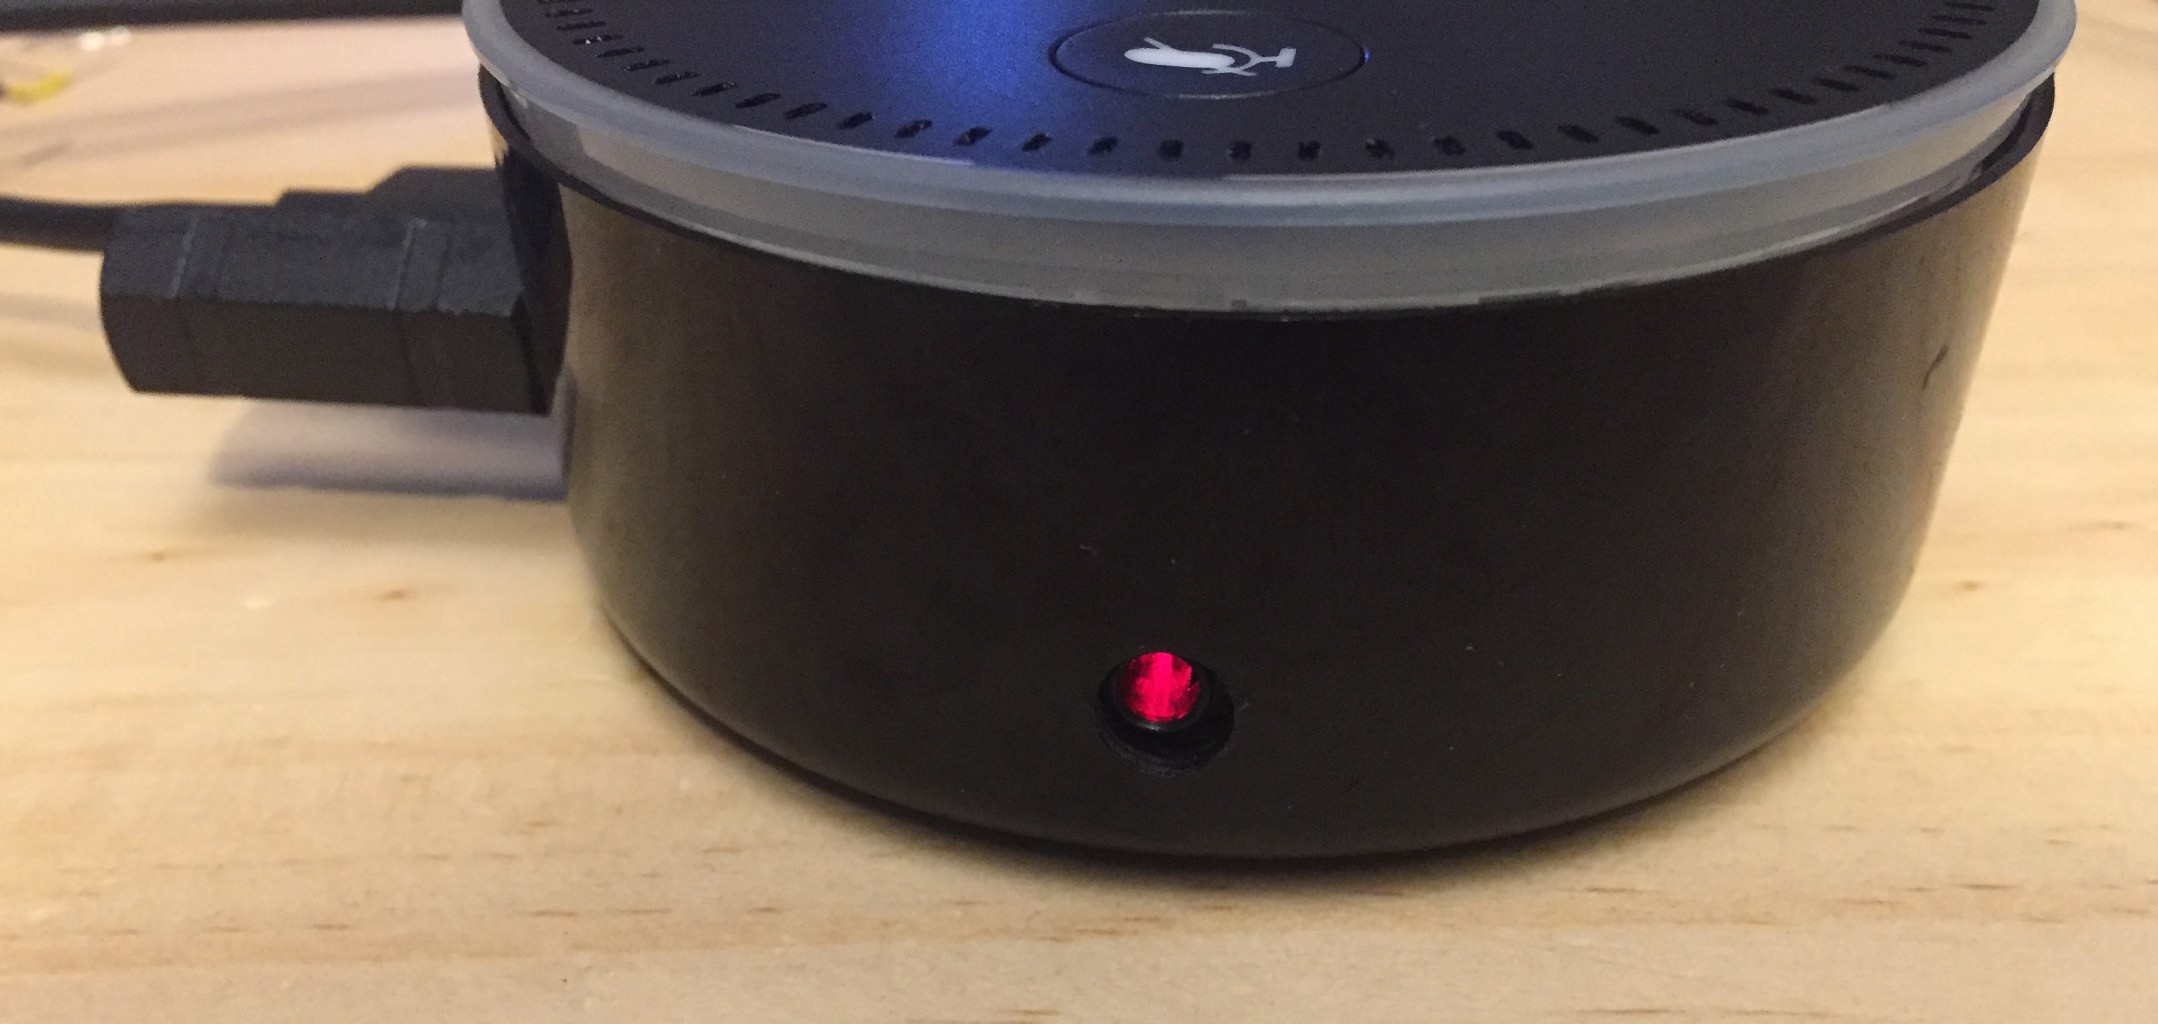
    Assembled PCB mounted in and connected to Echo Dot

    Front view with 3.5mm optical connector in the side.

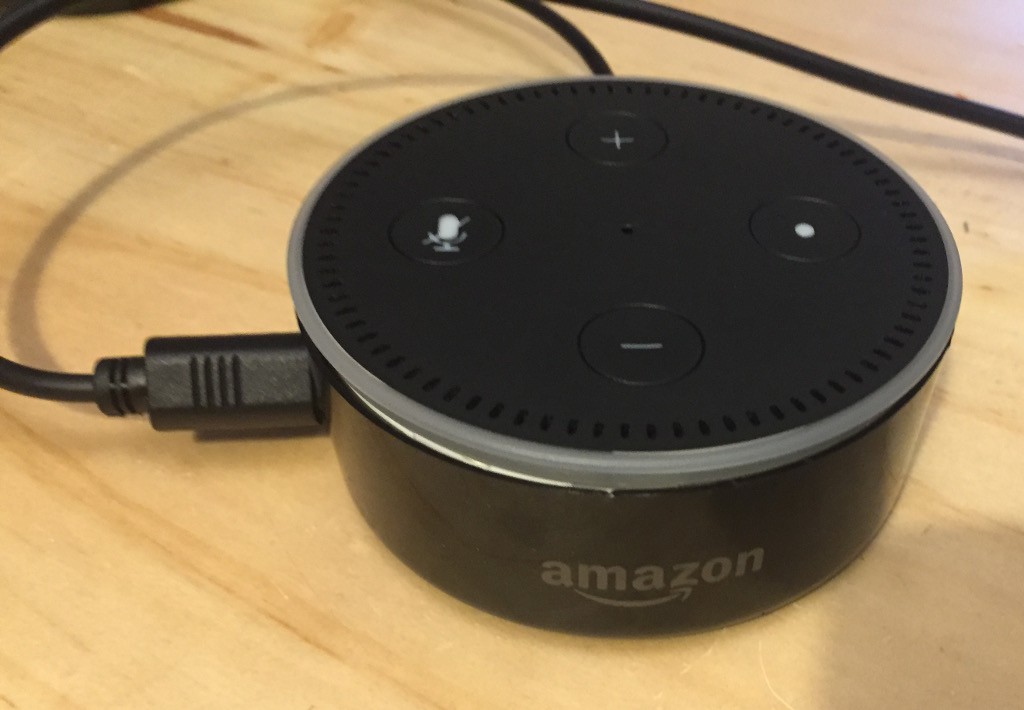
    Side view of echo with new optical socket.

    Problems:

    • One of the tracks is a little too close to the edge of the board, and has been cut off - fixed with a bodge wire.
    • That track is a power line, which was exposed on the edge and ended up touching the grounded dots heatsink when put back together. Not ideal. Resolved with a bit of kapton tape (not in the photo)
    • It is a very tight fit (never coming out tight) - the mounting holes are slightly too small. On the plus side, the optical connector on the side does feel really solid...
    • The whole pcb is slight to big. If it were a few mm's smaller in diameter, i think the echo dot would probably be able to close properly.

    But it works - audio is 48kHz and sounds fine so long as something is plugged into the headphone socket (it sounds terrible without - I assume some EQ for the small internal speaker). So I'm going to call this "done".

View project log

Enjoy this project?

Share

Discussions

albertanfang6 wrote 04/14/2021 at 08:59 point

Is this project still active?
I think it's great.
To be able to implement it myself, I unfortunately need (much) more help.
I would like to convert my Echo Dot 2nd generation so that I can tap a digital audio signal. I don't need the internal speaker. I also have two Fire TV Boxes 1st generation, these have a Toslink out, but unfortunately cannot multiroom :-(. Can I install this toslink out in the dot?

Or can I buy a finished PCP which I only have to mount within the echo dot (pherhaps in Germany)?

  Are you sure? yes | no

Markus Reschka wrote 02/17/2020 at 09:18 point

Great project - last week I ordered 10 PCBs (v4 from your git) - they look very good. As soon as I have all the parts I will solder them. I'll post an update here.

  Are you sure? yes | no

C wrote 12/08/2018 at 19:07 point

This is great. I'm hoping to do the same, but without the microcontroller. I'm planning on using a hardware controlled PLL multiplier and a different transmitter IC.

I can't seem to find a good way to get the dimensions of your board from the gerbers, would you mind sharing with the cutout locations, that you've found worked for you?

  Are you sure? yes | no

Daniel1111 wrote 12/12/2018 at 17:30 point

Hi, I'd be interested in knowing which transmitter IC you've picked, because I was struggling to find much in the way of alternatives to the WM8804/5.

I'll have a go a getting the cutout locations shortly, but I've created them by removing the speaker, tracing round it with a pencil, then scanning the result. I then imported that into KiCAD, and placed mounting holes + board outline over the relevant positions. So... not terribly accurate, and a little tricky to describe the exact positions, because I'm not sure what to use as reference points, however I'll have a go.

  Are you sure? yes | no

C wrote 12/16/2018 at 18:38 point

Ha, that's exactly why I was hoping someone else had worked it out!

I'm planning on using the DIT4096, mostly because the WM parts are less available, and I don't need the (reportedly) better PLL on the receive.
My end hope is to use the SRC4392, so that I don't have to use the dot as clock master. Maybe I'll skip this stage, and just go straight for that.

Also, since opening it up I am a little unsure about the mods to the dot itself as I've not done any SMD stuff. Did you use a hot air rework station?

  Are you sure? yes | no

Daniel1111 wrote 12/16/2018 at 22:23 point

Interesting, I didn't come across either of those ICs in my searching! The DIT4096 in particular looks like a great choice.

I'm not quite sure what you mean about not using the dot as a clock master, though? unless I'm completely understanding something (more than possible), the dot is always going to be master unless you can update it's firmware/software to get it to operate in slave mode?

As for the mods, yes, I used a hot air rework station (858D) to remove the DAC. This is the first time I've really done much in the way of SMD stuff, so it's the first time I've actually used the hot air for it's proper purpose (instead of, erm, heatshrink...).
For soldering the wires on, my suggestion would be to use some kind of magnification (I used a "MixMart Digital USB Microscope") and copper enamelled wire to make the connections.

Anyway, I've made a diagram of the dimensions I used - it's the dimensions from the one I've actually mounted in the dot (i.e. the one in the photos), and as such, I *know* it doesn't quite fit (case won't close).
Also, I really wouldn't put too much faith in these dimensions... if you use them, definitely print out your design, cut out the mounting holes (which I've just realised I've not included the diameter - they're 8mm), and check it actually fits (!)

dimensions:
https://cdn.hackaday.io/files/1623096944228256/v1-brd.png

  Are you sure? yes | no

C wrote 12/18/2018 at 09:16 point

I'm currently using a Bluetooth to SPDIF box to bypass the dot's converters. It is connected to a larger setup which I use for Pro Tools. There is a single master clock which drives all the AD/DA converters. To use the dot as a source, I need to switch everything to that as the master clock. This is fixed at 48kHz, and is of lower quality, so I wouldn't want to use it while recording. 

The asynchronous sample rate converter will resample the dot's audio to the Pro tools clock. It's clearly not the purist option (though some hifi people do this believing it reduces jitter), but I'm hoping getting the Bluetooth link of the chain will be a big enough improvement. 

  Are you sure? yes | no

Daniel1111 wrote 12/19/2018 at 12:33 point

I see, the more advanced SRC4392 makes sense now, interesting set up, good luck :)

  Are you sure? yes | no

Matt wrote 11/26/2018 at 23:00 point

Excellent work! This is exactly what I was hoping to accomplish with my project, but obviously didn't get this far. Glad you got the WM8805 clock figured out. I tinkered with various settings on that chip for hours and couldn't make any progress.

As far as the enclosure, I'd love to see someone think up something with a bit more of a premium feel to match its new hi-fi audio chops (aluminum, concrete, etc). I may just have to build one of these and do that myself. 

Solutions for keeping the internal speaker are a bit tricky. A workaround I dreamed of is to put another cheap DAC and amplifier on the board for the internal speaker only and use an esp8266 emulating a wemo switch to switch on and off the amp via voice command. Would be a bit convoluted but would work in theory! 

  Are you sure? yes | no

Daniel1111 wrote 11/27/2018 at 21:30 point

Thanks; I've played for too many hours as well with the WM8805 trying to get it to do what I wanted on its own, but eventually ended up using a dedicated PLL IC to deal with the clock issue. After that, it pretty much "just worked" straight away.

As for enclosures and audio switching... I did have some plan about some external audio switch that redirected audio based on a 12v trigger from the amplifier (I had similar for the analogue out). But I've taken the easy way out - I've now got two echo dots in the same room. The first with the S/PDIF out has the mic muted, sits out of sight and is set as the rooms "preferred music speaker". The second I use as normal. So, when telling Alexa to play some music, you hear voice feedback about the station, etc. from the second dot, but music is actually played on the first via digital out.

Only downside is that when the amplifier is off, you don't hear any music (but you get everything else). However, I don't think I'd ever really want to listen to music through the Dots speaker, so don't particularly care. It's a bit of cop-out solution, but it's good enough for me.

  Are you sure? yes | no

After Dark wrote 11/23/2018 at 19:54 point

Great project!

  Are you sure? yes | no

Similar Projects

Does this project spark your interest?

Become a member to follow this project and never miss any updates