I first saw a picture of a monocular thermal imager here: https://makezine.com/2016/06/30/these-custom-night-vision-goggles-dont-even-look-homemade/
That inspired me to see if I could use a raspberry pi zero w paired with HD quality goggles to provide the image to both eyes and display temperature readings as well.
My first set of goggles I used were the carl zeiss cinemizer oled glasses. Glasses are great but I want to wear everything on my head. So next I choose eachine 200v fpv goggles. 45 degree FOV, 720p, can attach battery to headband.
I used a y cable with a step down converter on one leg to provide 5v to the pi zero. The other leg remained stock with a 5.5mm dc barrel. Power pack I found on Amazon its for FPV goggles and it allows you to use 2 18650 batteries.
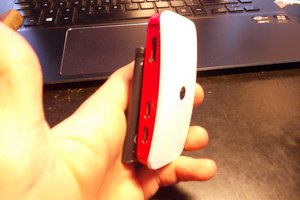
I attached the pi zero with case onto the removable eye visor using hot glue. Next I attached the picamera to the case with hot glue. For the flir camera I added foam to the back like a wedge then glued it so it would be even with the picamera and not set back.
next I added the battery to the headband via the battery straps built into the headband, connected the hdmi out of the pi to the hdmi in of the goggles, I then connected the pi and headset to the battery pack and powered it up. Double clicked on the pylepton script and I was up and running.
Only problem was there was no color for the thermal camera and I had the radiometric version of the flir 2.5, so it has the ability to get temperature readings from multiple points. Here we enter my weakest strength when it comes to innovating: coding.
I've only coded for one other project before and that was building a VPN server with a pi 2 which I setup to allow anyone with the correct RSA key to access my network which would then give them an ip adress as if they were at my residence. This allowed me to watch any channel I had in my package(all) from anywhere in the world as long as I had a wifi/4g connection and a device with the cable subscribers app installed. Worked flawlessly. That requires just setting some tables up for routing and I did it 2 years ago. This was above my head but I wanted to learn python anyway so I gave it a shot.
I started by searching pylepton in Google and for hours looked at as many examples as possible. Some came close but none had what I really needed/wanted. I spent a few days looking over the files in the system, browsing the libraries, and figuring out the pi eco system a little better. I tried piecing bits of code from other projects I came across but realized you can't just do that for a plethora of reasons, one main being you can call for an argument and that argument has never been addressed anywhere in the script. So I spent the next few days learning commands, how to convert colors through opencv, adding temp readings, overlaying everything together. I now have the temperature reading text to overlay, and a heat map scale to overlay. I read up on how to manage to do this through Google search and reading through opencv, raspi vid, capture, adding weighted overlays, resizing, arguments, attributes, option parsers, flipping, rotating, transparency, etc..
I wrote out a script about 150 lines that finally produced the image I was looking for. I'm now currently working on a similar project that will be using the same script along with some other features such as facial and object recognition and a handful of others. This project really opened up my eyes and showed me how science fiction and our reality as it is today have already intertwined themselves. Once energy production/consumption is vastly improved the sky will no longer be the limit.
 Carl Winslow


 Arya
Arya

 jordanbrandes
Nice Work! I love your drive and enthusiasm. You remind me of myself and of the many engineers I worked with in my 35 years as a broadcast engineer. I came to hackaday to find people like you. I too completed a project this year and I'm ready to start part 2. Maybe we could collaborate on it?