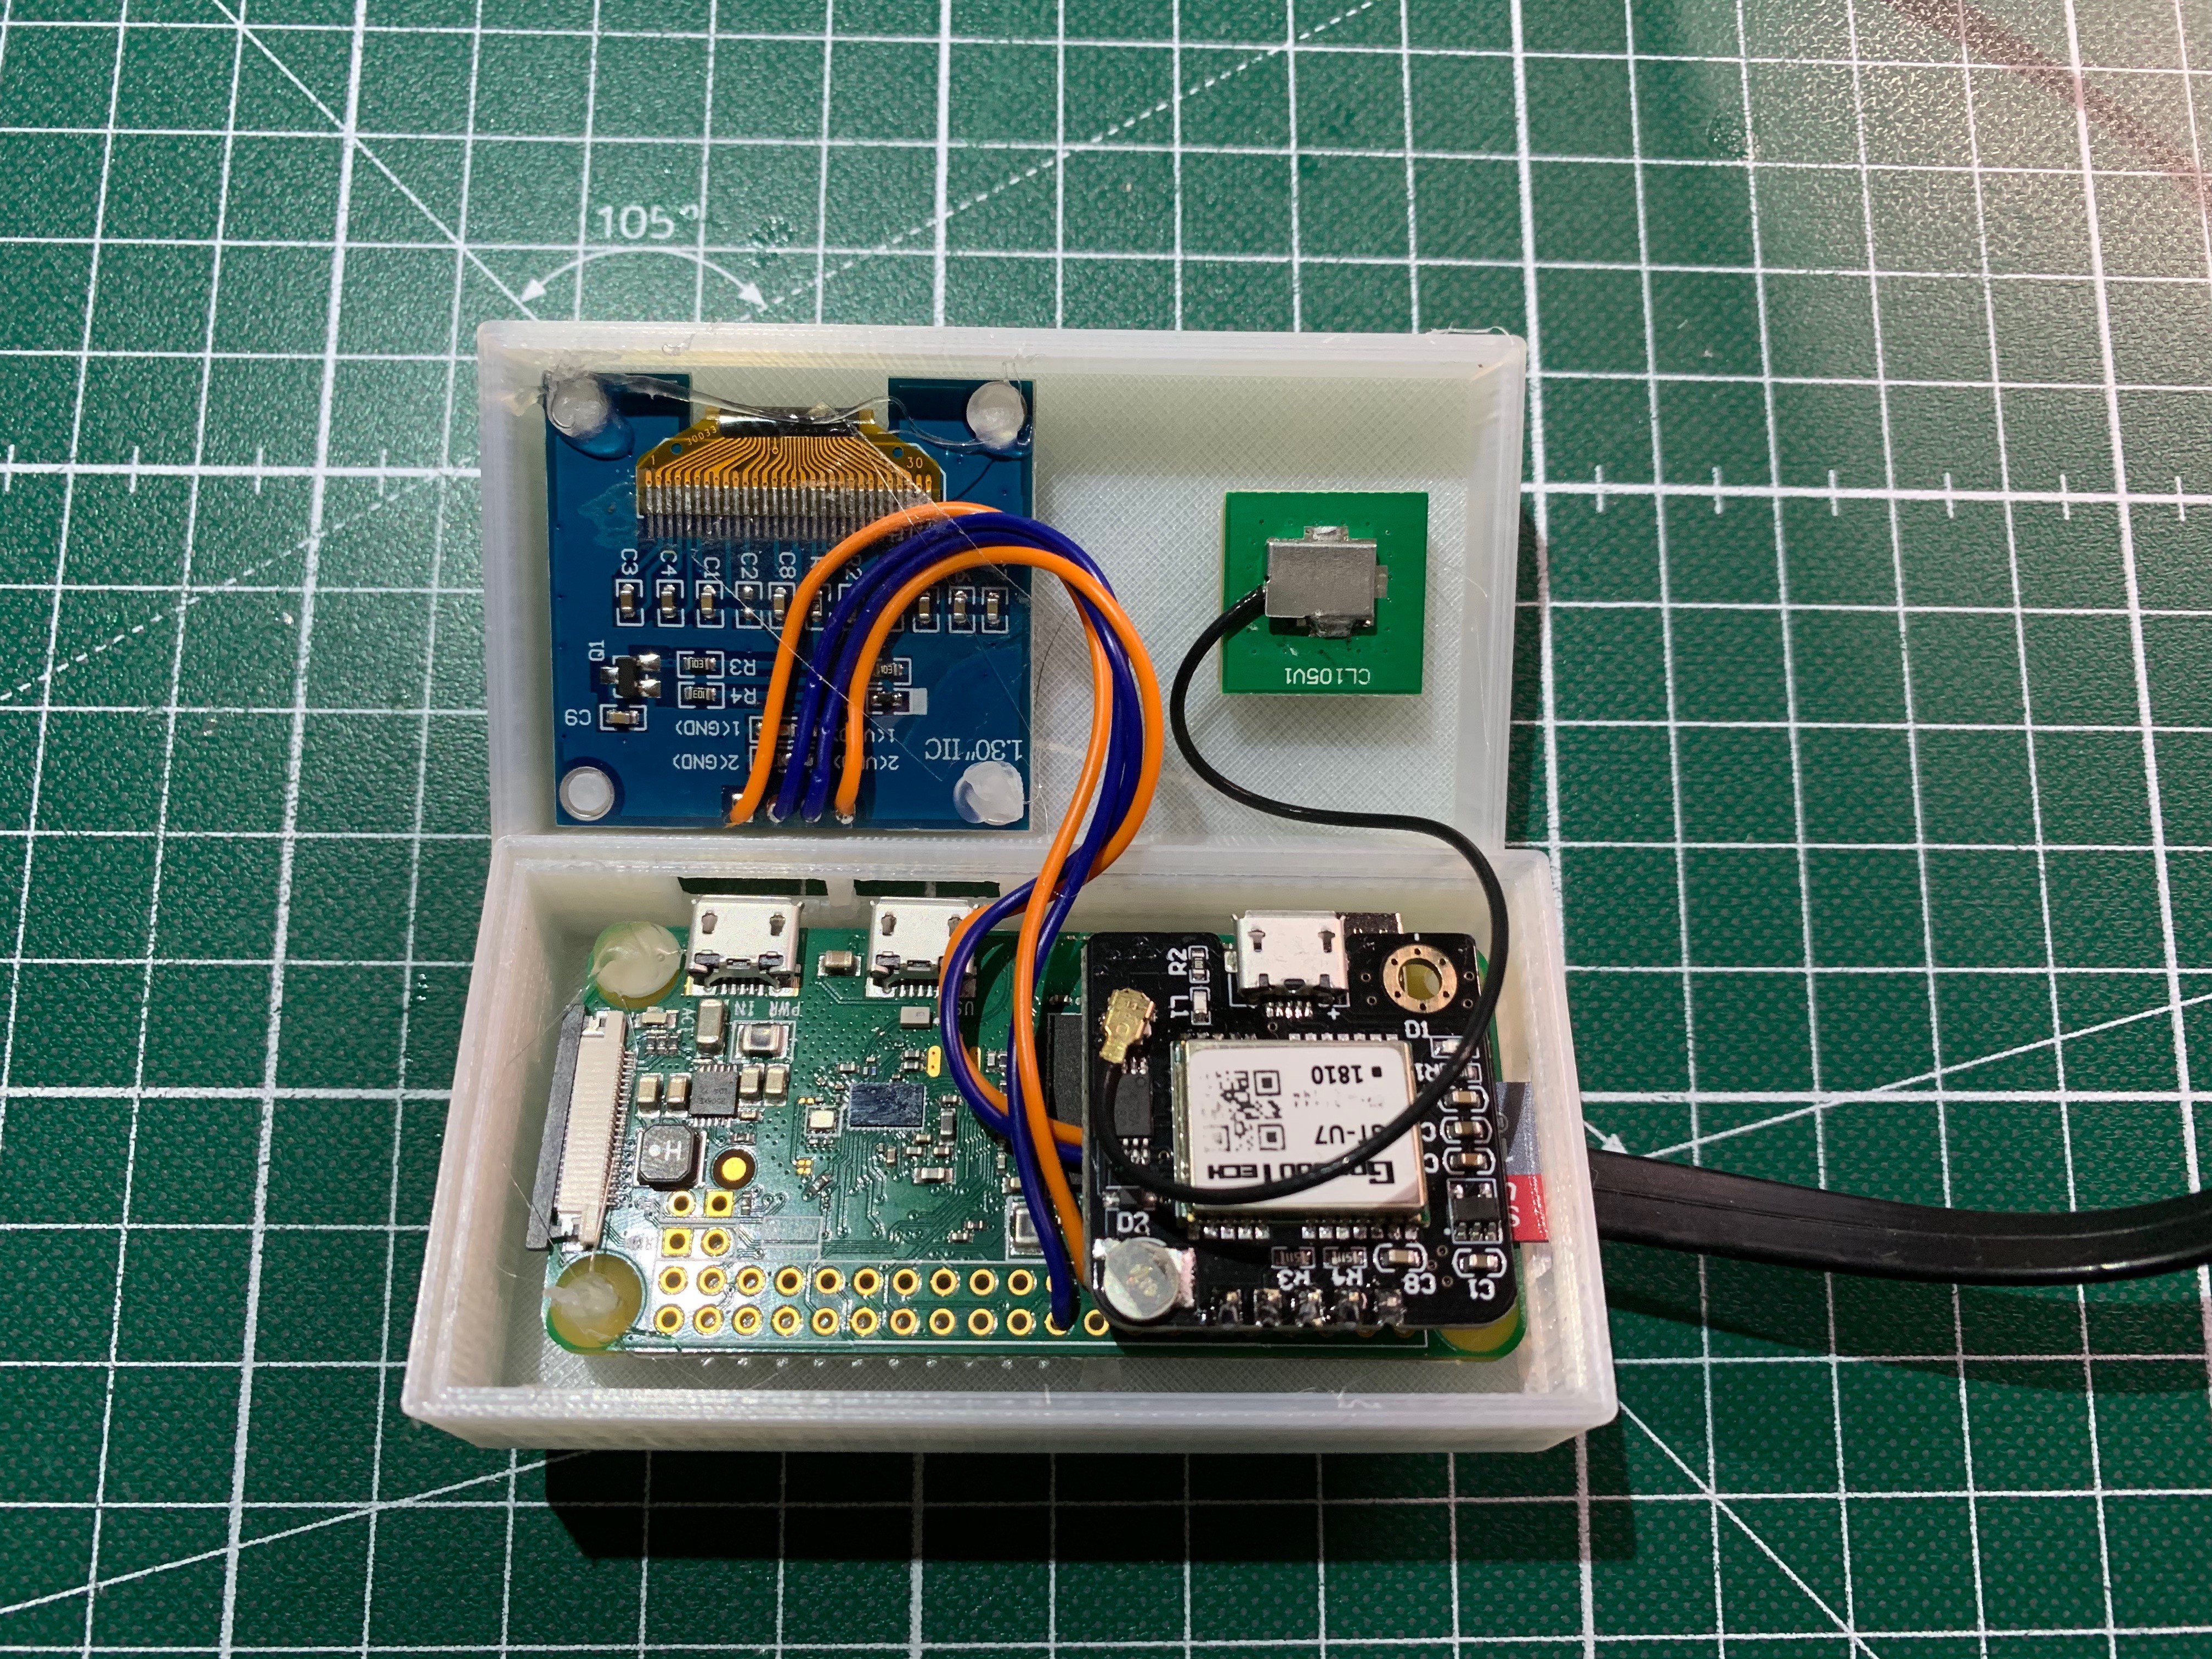
Just uploaded the STL files for the case (look at the project files here) and a new image with the hotspot to Dropbox.
Take care of the changes to the other image below!
The new SD-card image on DropBox: https://www.dropbox.com/s/tqi5yzdyyuuqd3b/astro_gps_hotspot.dmg.zip?dl=0
You need a 16GB SD card. larger are OK as well of course.
*** UPDATE: Even I am using an 8GB to create the image it seems to be too big to write it back to an 8GB card. So please use a 16GB card. It's anyway difficult meanwhile to get an 8GB card. ***
It should boot on PI 2 B+ and PI 3 B+ and also on PI Zero W. Username: pi Password: raspberry
I finished all config steps I described in my project. But there are a few to-do's;
- Wi-Fi is NOT configured, but the PI will create a hotspot: SSID: AstroPI PSK: 12345677890
- Once connected to the SSID you can SSH to the PI at 10.0.0.5
- System is RO! To make any config changes edit /boot/cmdline.txt and reboot. Don't forget to go back to RO once you are done.
- HDMI is not turned off to allow you to boot a PI Zero with keyboard and screen so you can configure the Wi-Fi
- you should add a GPS, everything is configured, just connect the hardware.
- hand controller time is set from NTP or GPS. If you don't have the GPS set time and location manually or push from SkySafari. Please edit rc.local accordingly.
- location is set to a fixed location, have a look at /home/pi/hc-location.sh
- Check the script to disable the green LED and run it manually /home/pi-led-off.sh You might need to change one value for your hardware.
This should give you a quick start in just 30min.
Let me know if you found the little easter egg.
I know, pictures or it did not happen:

I found a way to use header pins to solder the GPS directly to the PI. Make sure to add I2C wires for the display first. On top you can see the back of the display and the GPS antenna (you should put some isolating tape at the back). I used some hot glue to keep everything in place. The voltage regulator is under the PI, also hot glued. It is a pretty tight fit, I might need to add 1mm here or there in the next version.
 ChrisG71
Discussions
Become a Hackaday.io Member
Create an account to leave a comment. Already have an account? Log In.