 Matt Bradshaw
I feel like I have a handle on the noise issues now. Part of the issue was the PWM noise (Mozzi generates audio via pulse width modulation rather than a "proper" digital-to-analogue converter). The Mozzi website gives a useful low-pass filter circuit for filtering out this noise, but I found that it wasn't sufficient once I started amplifying the signal. Although the signal is only just within my range of hearing, I could tell from recording the signal into my computer that there was a lot of high-frequency oscillation that I wanted to get rid of.
I played around with different resistor and capacitor values, but found that in order to filter out enough of the noise, I was also having to filter out the higher frequencies of the drums, leaving an unwanted muffled sound. I searched the web for "make steeper low-pass filter", and suddenly felt like I was back at university again. I came across this great explanation of passive low-pass filters, which had a really useful section on building a second-order filter. This is basically a chain of filters, and gives a steeper "roll-off", cutting out more of the unwanted frequencies (about 15kHz and above) and keeping more of the frequencies that actually contain drum sounds. I played around with a few different components (why are ceramic capacitors so hard to read?) and found a sweet spot, meaning I was ready for my next PCB...
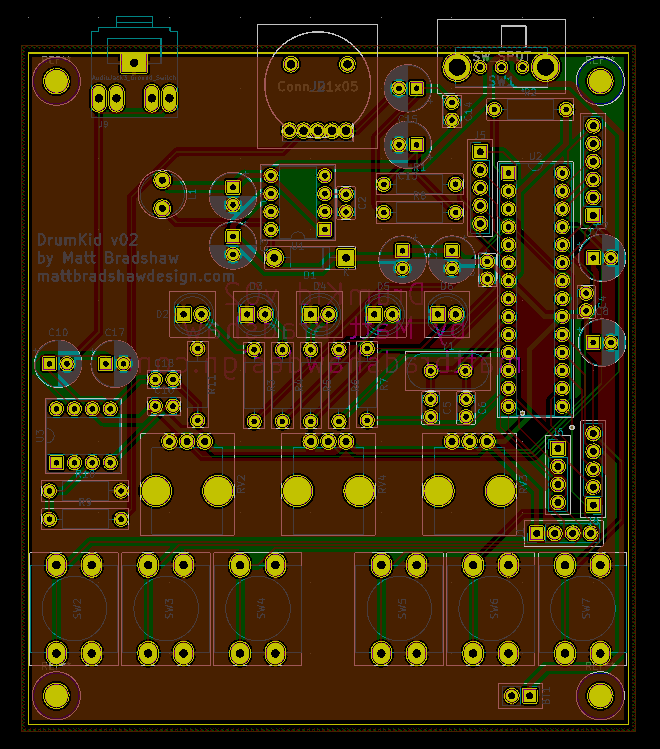
There are a few key differences from the first version:
- LM386 amplifier for louder headphone signal (friends told me the last version was too quiet)
- Different button layout after testing the first design
- Three control knobs instead of one after testing the first design
- Different type of button - the previous ones were hard to source and impossible to find with an RoHS certification, which is worth thinking about before I start selling DrumKid
- Bigger on/off switch for better ergonomics
- Horizontal thumbwheel volume control for better aesthetics
- Mounting holes because I forgot them last time
- Better power management - decoupling capacitors for the Atmega328
- Arduino and power pin breakouts for better hackability
I'm still learning about board layout, and should probably get some professional feedback at some point, but for now I've got my fingers crossed that this will be a good improvement on the previous PCB. Now I've got about three weeks before the boards turn up - I could have shelled out the extra money for fast shipping, but I need some time to work on the code anyway, so I'm happy to wait.
Next steps: more work on the code, 3D-print a new case, try DrumKid with my band.
Discussions
Become a Hackaday.io Member
Create an account to leave a comment. Already have an account? Log In.