Starhawk
-
OS UPGRADE
06/06/2020 at 00:45 • 1 commentWanted to try and do something that didn't want to be done... of course I'm stubborn as cr*p (or "stubborn AF" as you youngsters say) so by the time I'd given up, everything was in a right nasty snarl of a mess...
...okay, it wasn't *quite* as bad as https://xkcd.com/1084/, or Strong Bad's little run-in with a virus:
...okay, so maybe the use of the singular 'virus' there was a little optimistic (ha!) -- but, nevertheless, I decided that between my mess, and a few little annoyances with the OS independent of that (not to mention that Steampunkish Too was running Linux Mint 19.1, based on Ubuntu 18.04), I was about due for an upgrade.
That's how I found out that (a) Intel NUC boards do the same 32bit UEFI / 64bit everything else stupidity that the cheap Chinese Atom SoC systems do... and (b) whatever was in Ubuntu 18.04's installer that was designed to handle that, was removed in 20.04's installer :(
After trying what only felt like a hundred or so different Ubuntu-based distros that you've never heard of (seriously, it was six or less), including a spectacular fail with Peppermint OS Ten where it installed fine, and I then spent the afternoon, evening, and a good part of the night trying to configure it the way I wanted (instead of letting it configure itself the way *it* wanted), I went to shut it down and it immediately froze on the button-click...
...well, that was a waste! /sigh
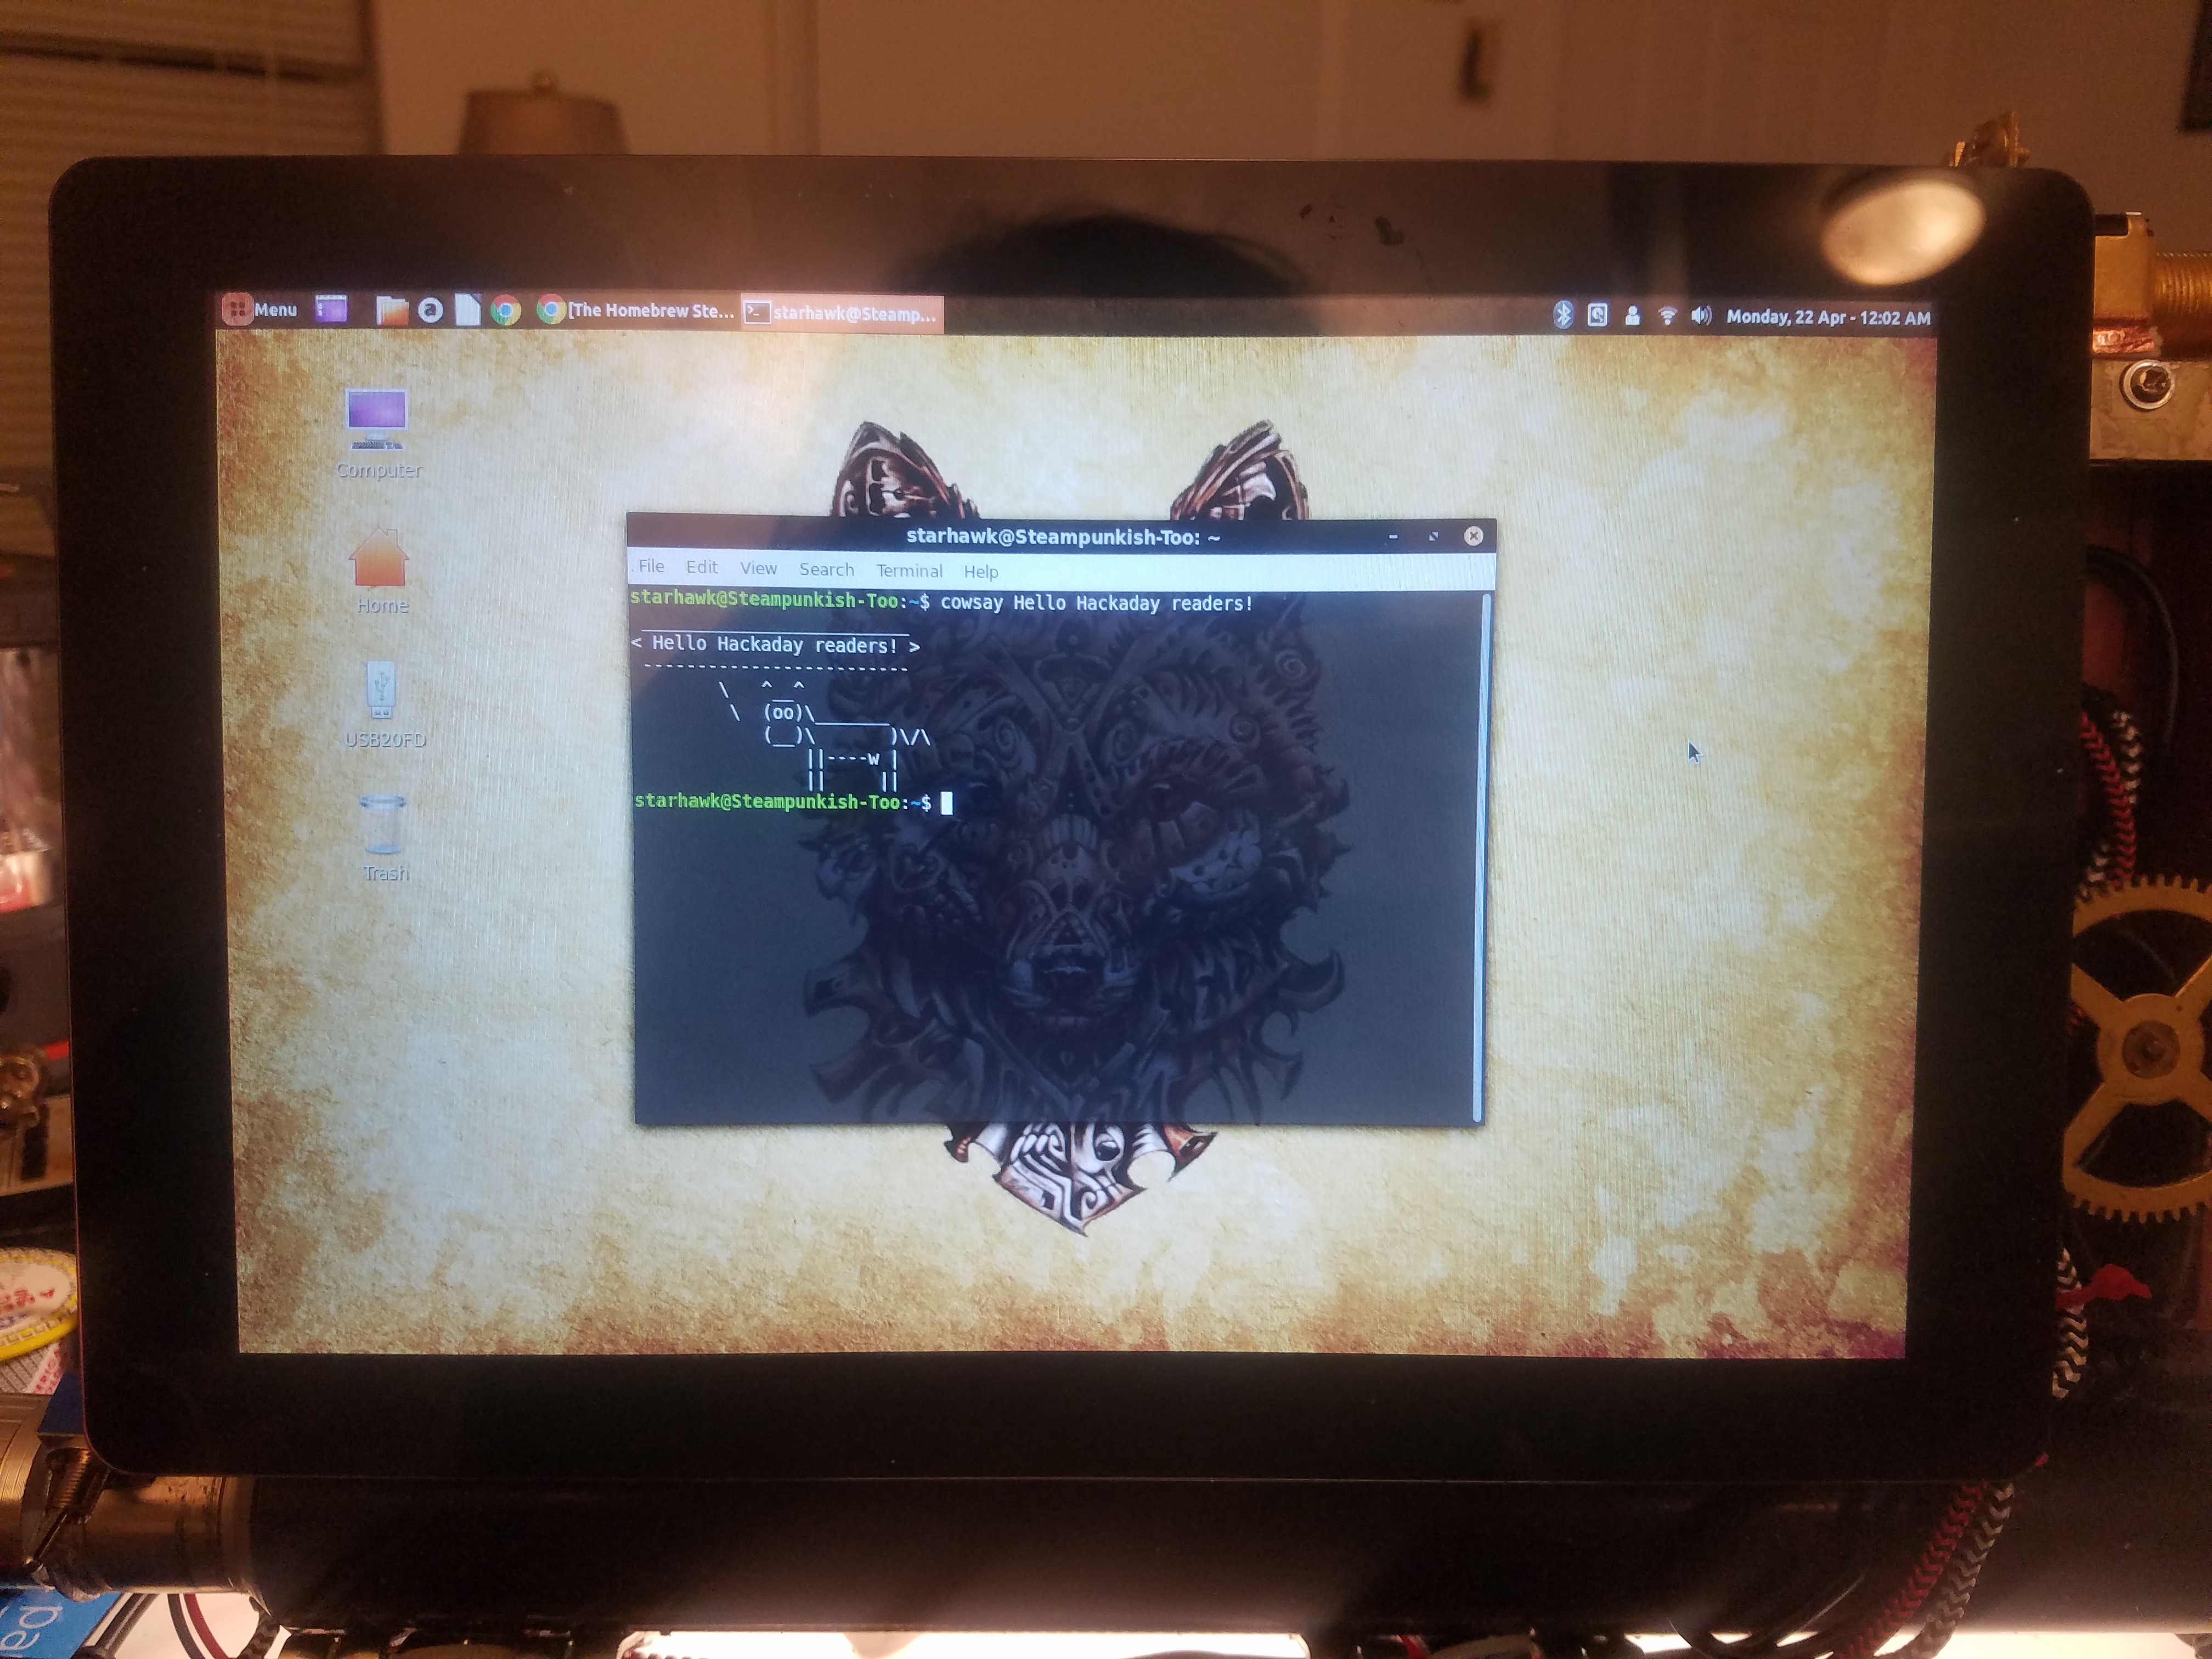
...I settled on Feren OS. It is installed, it is pretty, and it's running quite nicely RN. Here, have a screenshot ;)
![]()
-
The Glamour Reel
04/22/2019 at 05:17 • 1 comment...aka the photographic equivalent of me bragging at length. (Prepare your modems, this is a pack of two dozen poorly-compressed JPEGs straight off my rather nice phone camera.)
Well, without further ado... here we go...
![]()
![]()
![]()
![]()
![]()
![]()
![]()
![]()
![]()
![]()
![]()
![]()
![]()
![]()
![]()
![]()
![]()
![]()
![]()
![]()
![]()
![]()
![]()
![]()
-
"All Good Things..."
04/22/2019 at 05:03 • 0 comments![]()
This project has concluded, quite successfully, and this is me taking the time for a bit of reflection before I put up the Glamour Reel.
I have to say, it's a kind of a bittersweet post, this one. I've had real fun here. Yes, any number of challenges have presented themselves, but they were overcome, one-by-one, and in the end it was more than worth all the blood and sweat and tears, proverbial and otherwise...
I'll share three bits of relevant wisdom. One, from one of my favorite songs -- "Closing Time" by the band Semisonic -- "Every new beginning comes from some other beginning's end." It seems to me that this is only the start of something. After all, I built this machine with a purpose in mind, and that was not just to replace the first Steampunk DIY Laptop I made.
See, I was a lucky asshat when I was born. I got a double dose of creativity. My father has always been an artist or illustrator or designer or something involving the graphic arts basically since he was old enough to hold pencil or pen. My mother has been literary to largely the same degree for largely the same length of time.
I started drawing probably around age 8. I haven't stopped yet :) although most of my early work is so awful in retrospect that TBH I kind of want to burn it. (I suppose we all start somewhere, however.) For the longest time, however, every time I tried to write -- the result was so bad I could smell it (and it didn't smell very good at all.)
But, then, in 2012, something happened. A short story grabbed me and wouldn't let go. It eventually mutated into a novel, and then got completely rewritten once, abortively about halfway three more times, and completely once more. In the next few months, I think, I will be publishing it -- I'm in the very last stages of the very last pass of edits. After that, it's getting submitted to two literary agents (unless the first one picks it up right away) -- and if they both reject it I'm self-publishing on Amazon.
This computer was specifically created to help me finish that book and write its (hopefully many) sequels.
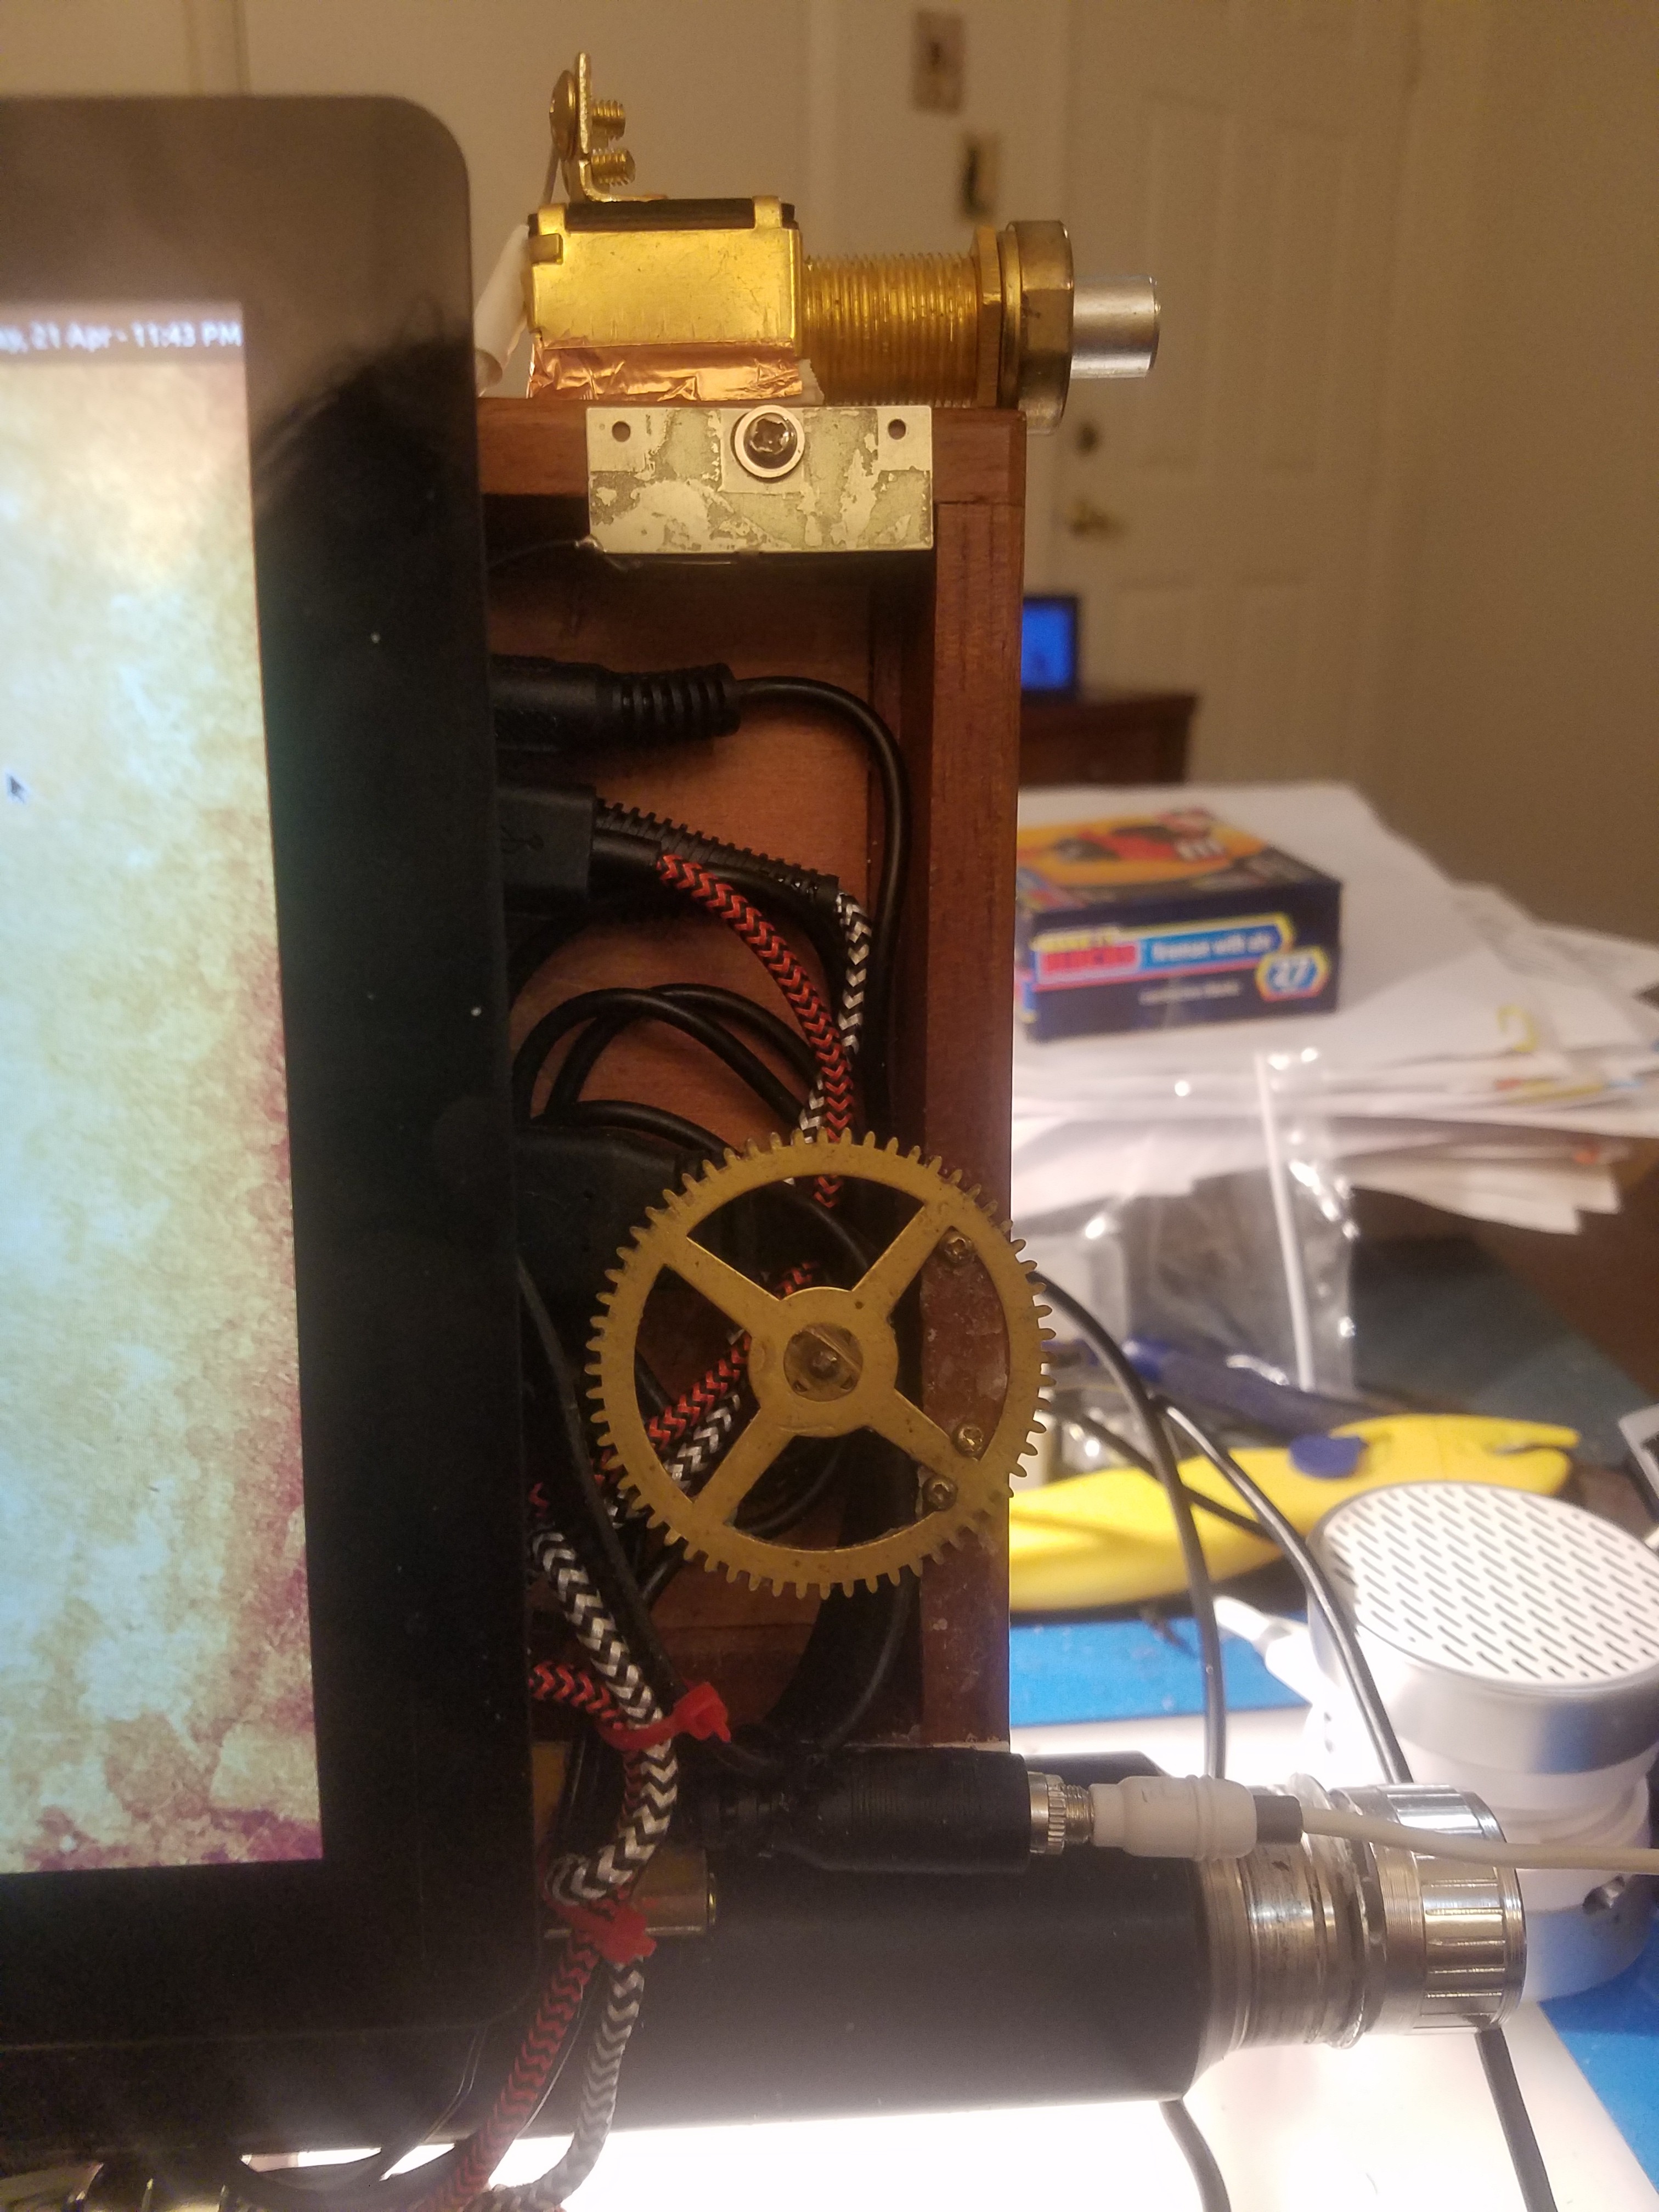
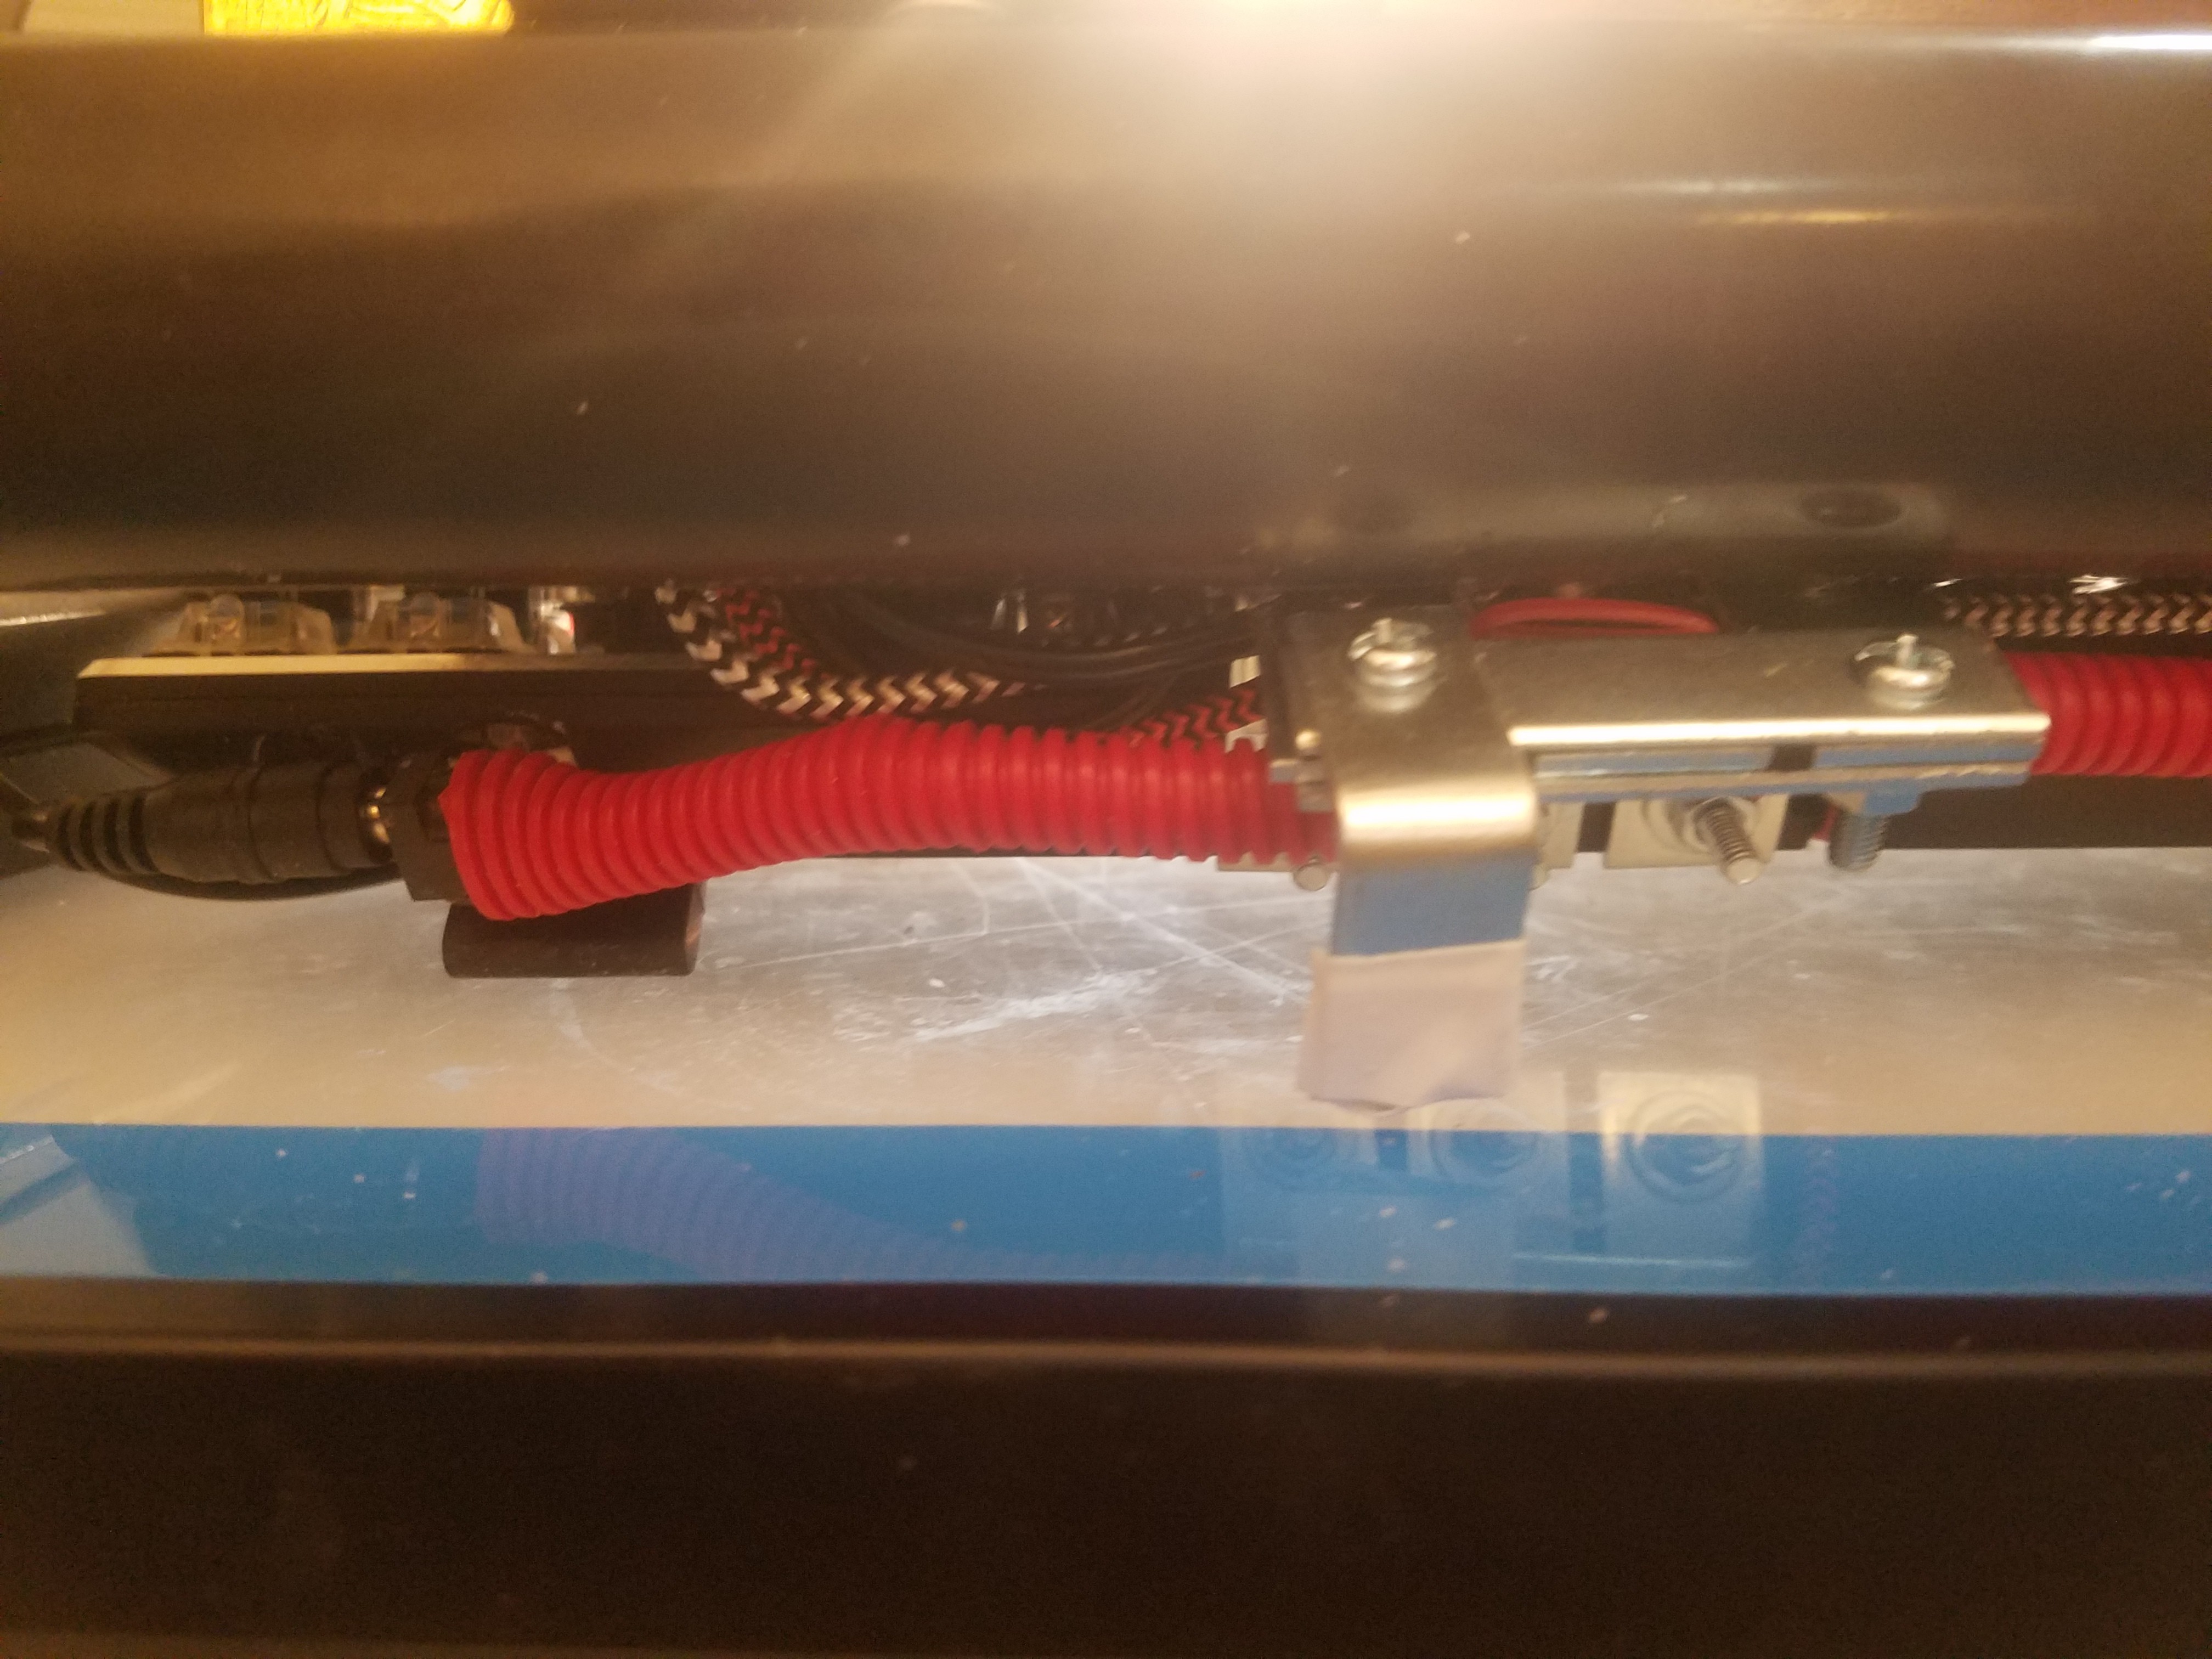
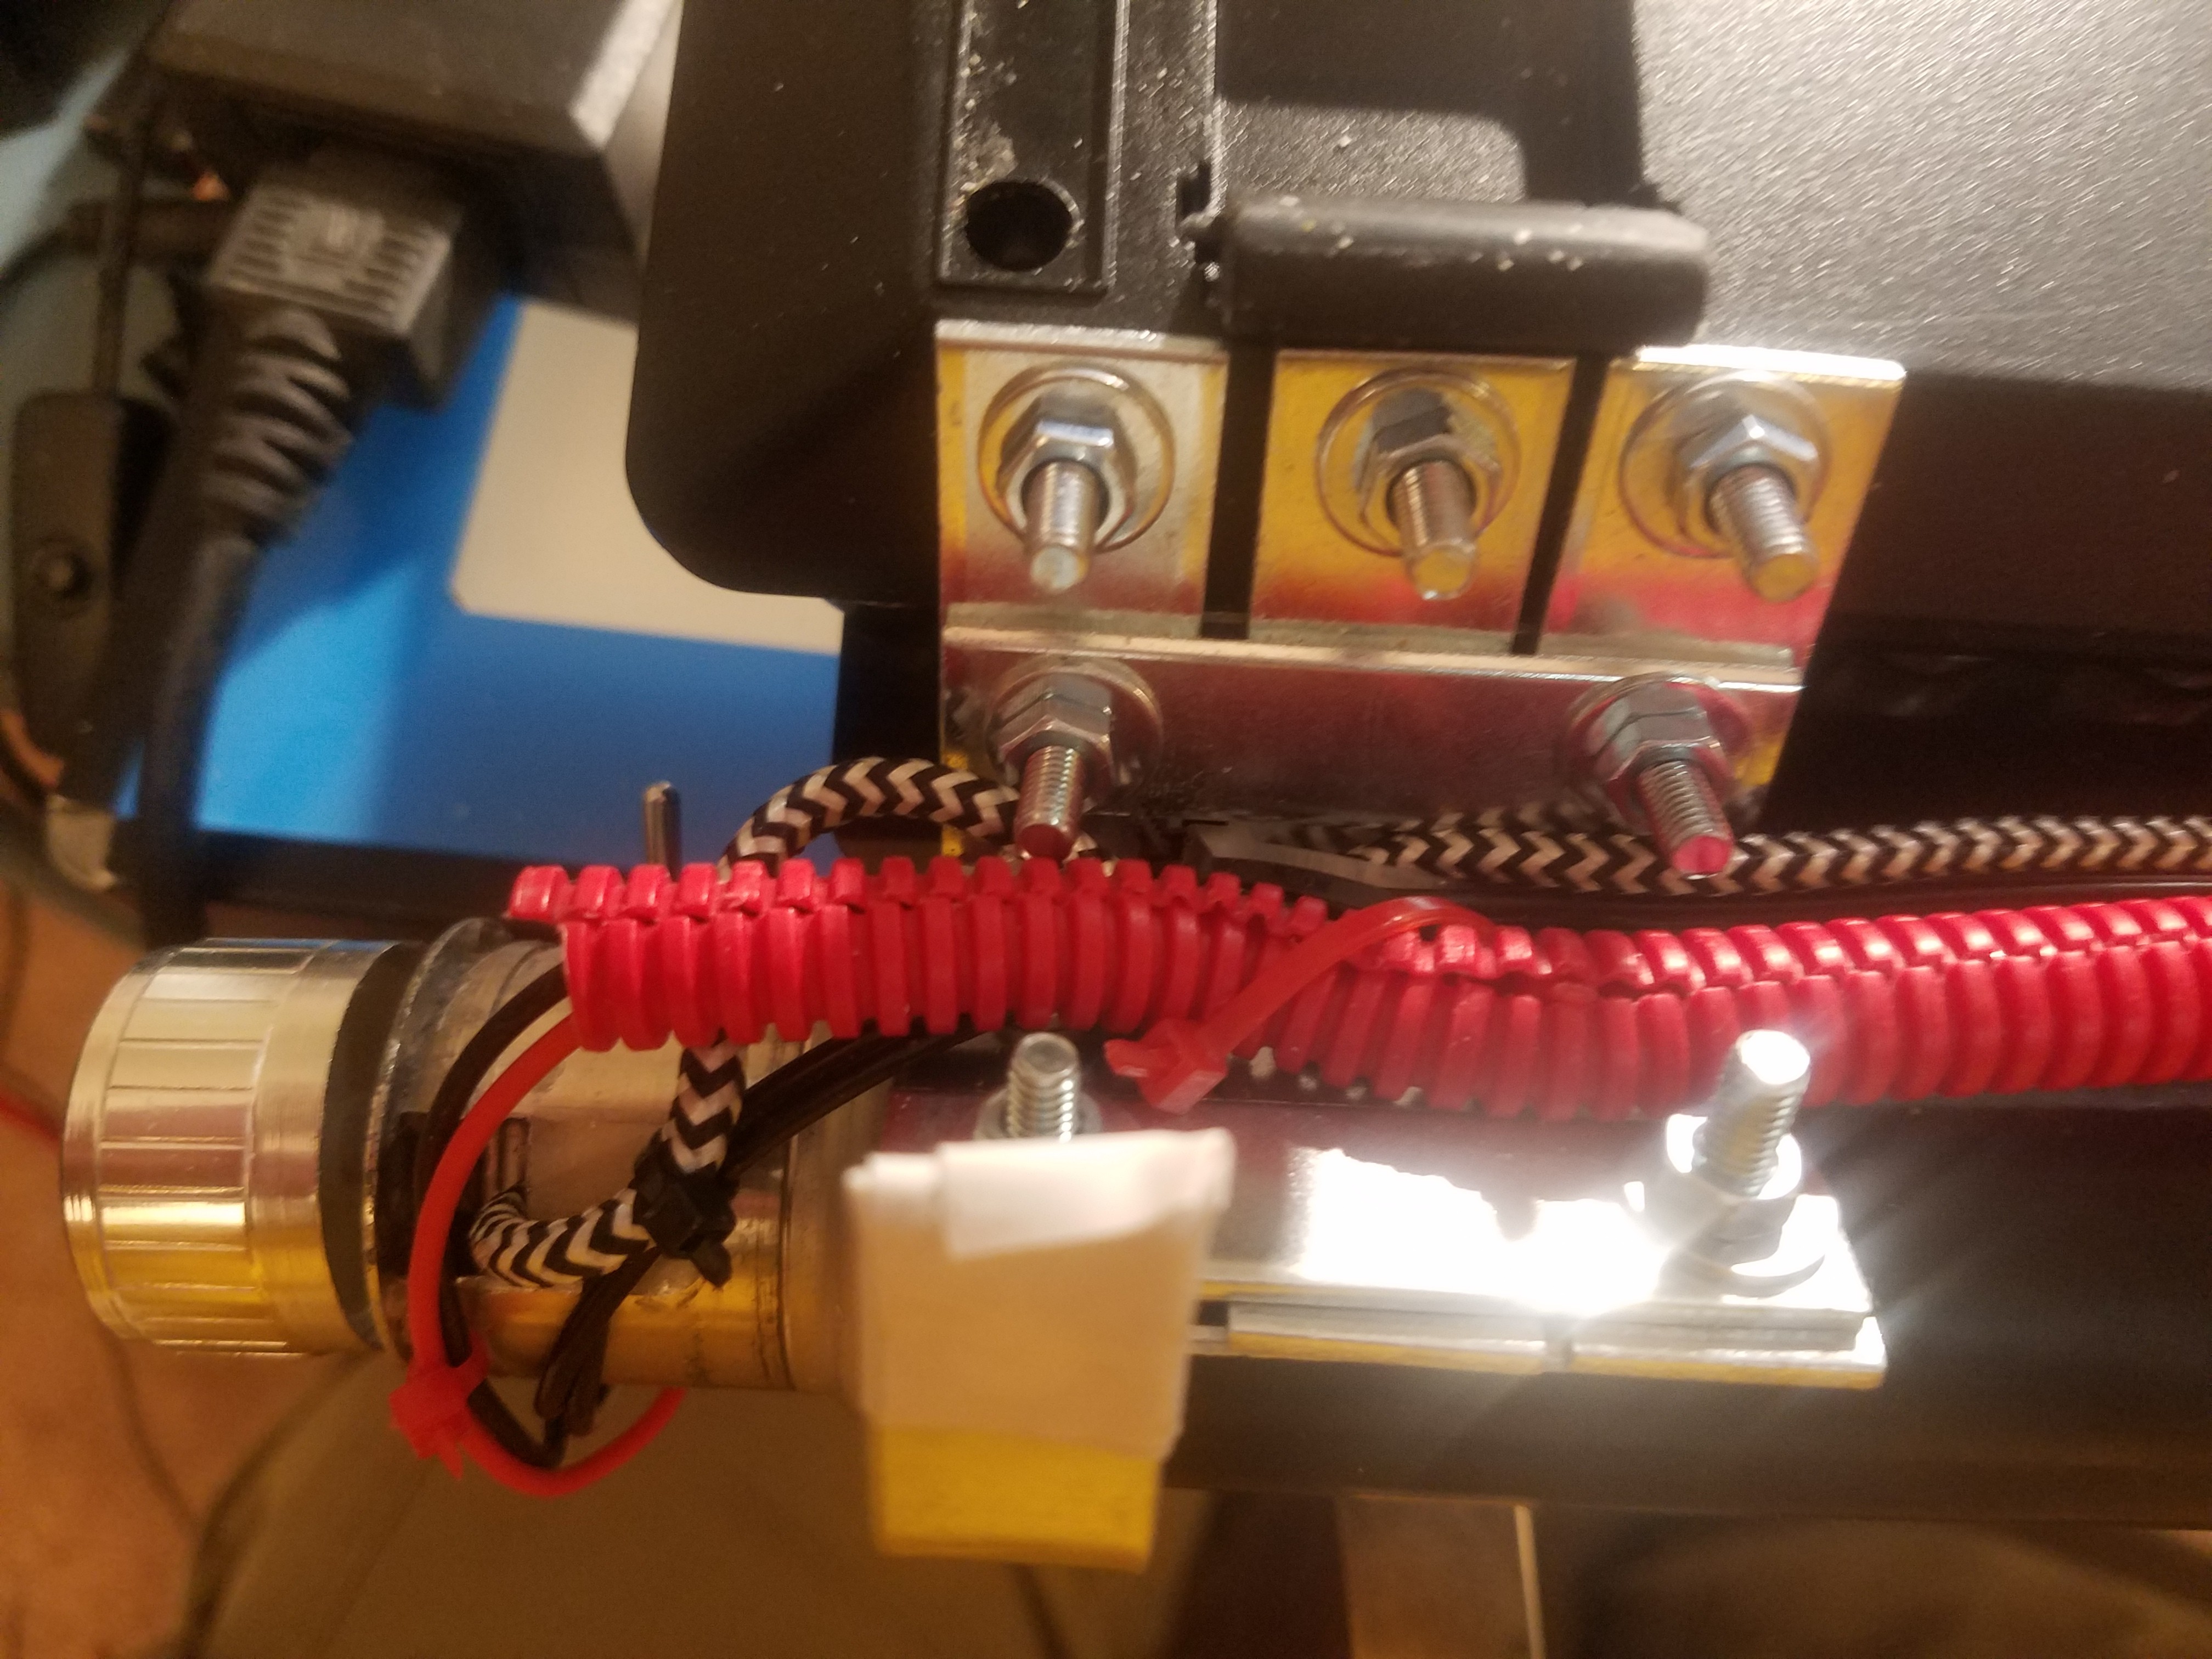
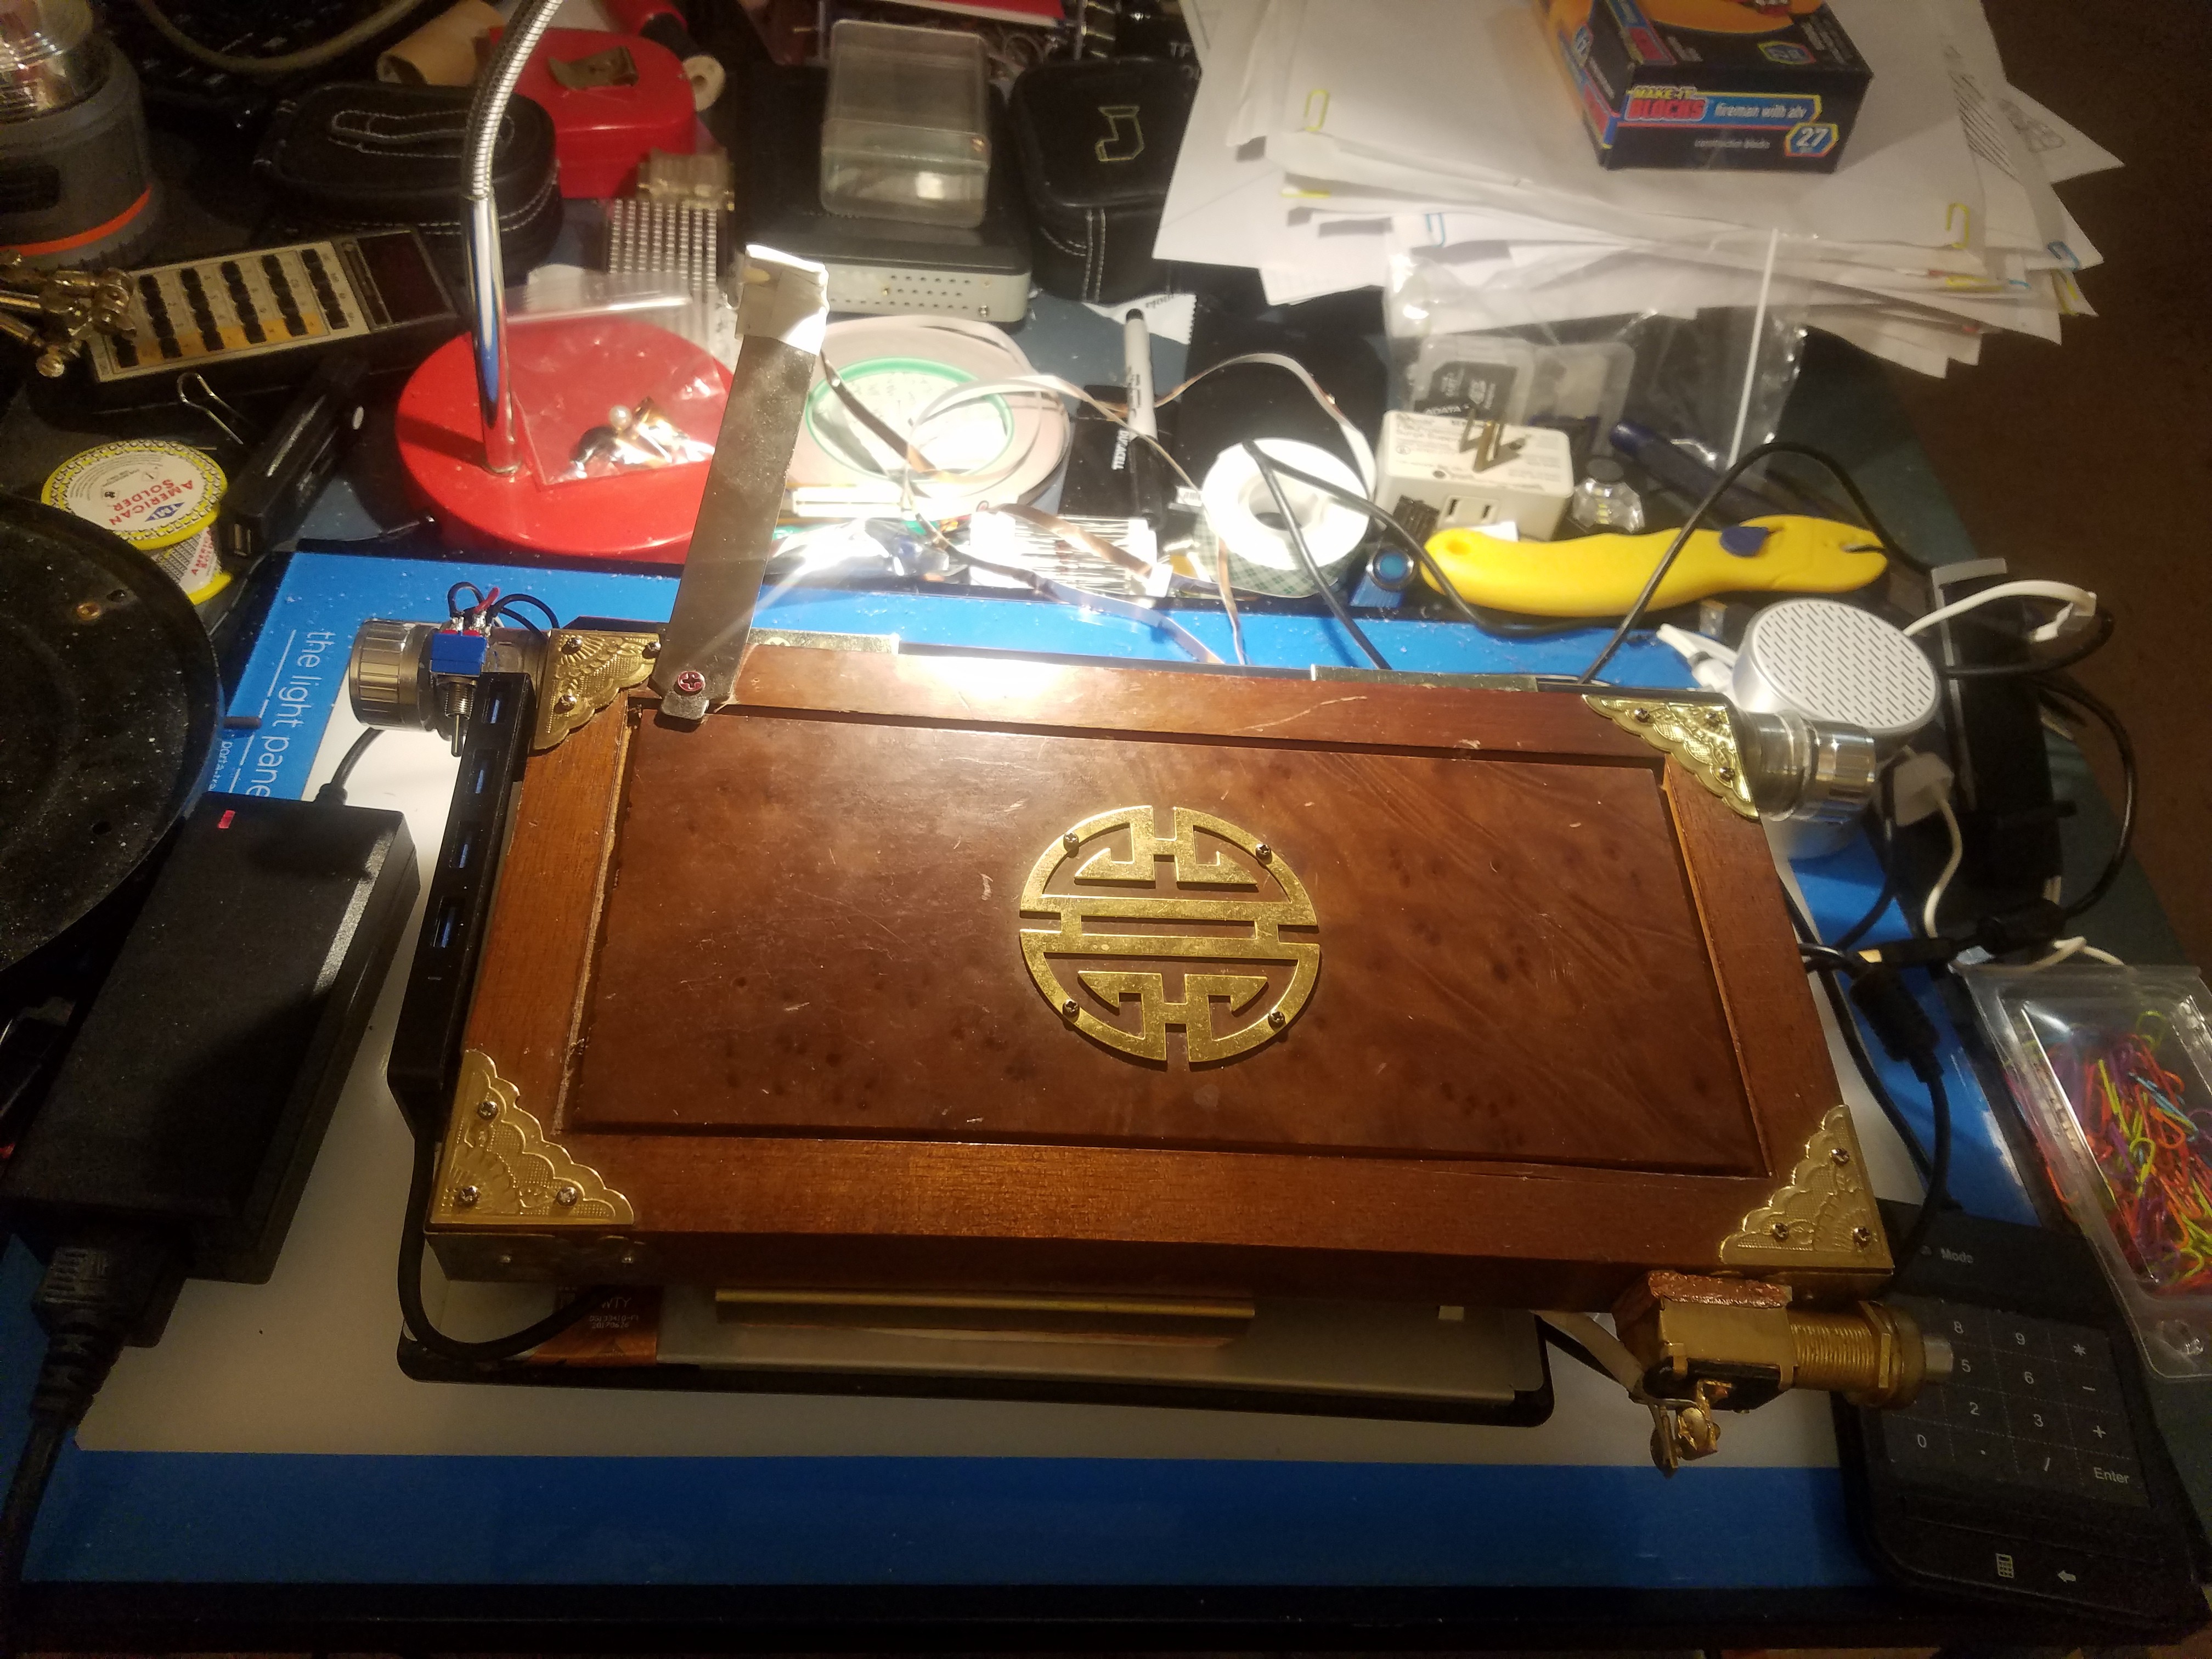
I took inspiration for this machine from a number of sources, obvious and otherwise. The MYST series of games, which I adore. The obvious overall 'steampunk' theme, which I also enjoy and appreciate quite a bit. Typewriters, of course. Various bits and bobs from my scrap pile lended themselves to the task, from the copier drum, to the brass gear from an actual brass clock, to the red cable tidy that was left over from my grandfather and his passion for cars and his aptitude for working with their engines. (I still remember his 1968 -- or was it '67? -- candy apple red Mustang with the canvas soft top -- I think -- and the little compass ball under the rear view mirror. I have never heard an engine with the same note since... sadly it had to be sold to settle his estate... I wonder where it is, now...)
I do hope that this project inspires others to build their own systems -- beautiful and otherwise -- although, all things are beautiful in some way to someone, I'd say. It's really not that hard to put together a computer that looks and works quite well, if one can get past the "OMG IT'S A COMPUTER" intimidation, and do a little research with the help of The Great Goog. On that note -- if anyone is having trouble with that and wants help, PM me. I'm here for that.
...and, with not much further to say, here, I shall close this post, with the second and third bits of wisdom -- the second, a quote from the character Atrus at the end of the game RIVEN, the sequel to MYST: that, in this project and in all things, "...perhaps, the ending can never be written..." and the third, and more significant, being the last line from the two-part "Star Trek: The Next Generation" episode (the series-ender, specifically) from which this post takes its title -- "The sky's the limit."
-
Houston, We Have Liftoff
04/21/2019 at 21:51 • 0 commentsI'm typing this /on/ the Steampunk Laptop. I had a bad HDMI cable and a bad keyboard cable, which mimicked the symptoms of a basically dead system.
A major thank-you and shoutout to Jody, a good local pal of mine and the owner of the town's better tech shop (if you or someone you know are/is anywhere in the Triangle or RTP regions of North Carolina, and you/they need computer assistance, go here / send them here -- http://nctritech.com). Jody helped me troubleshoot -- he's brilliant at that (and I'm crap at it). After he helped me determine that the system was in fact booting, but that there were issues related to video/display and to the keyboard, I was able (with a few extra tips) to take the next set of necessary steps to deduce what was going on with the video -- simply a bad cable, as mentioned above.
The keyboard required some more extensive investigation, but it turns out that the USB implementation used by this partticular keyboard is incomplete -- it is USB 2.0 /only/. It will work with USB3.0 ports at USB2.0 speeds and with that legacy protocol. It will /not/ work at USB 1.1/1.0 speeds, however, no matter what you do, because the controller chip inside the keyboard does not strictly speaking support USB and is instead badly abusing its I2C pins to produce the signals. This means that using the keyboard with an unshielded USB cable will absolutely not work because of crosstalk. The damn thing won't even enumerate.
Fortunately, since this build requires pretty braided USB cables because duh, I had a spare somewhat-random one that had a different color from the rest (red vs white) but that had shielding inside and would work for the purpose. That is now the keyboard cable and -- as evident by the wall of text I'm erecting here -- the keyboard has had no complaints since.
As for the HDMI cable, I was able to relocate the LCD driver board to fit a shorter flat-style cable, and to fit a longer power cord from switch to driver board, as well.
Having fit everything back together, I plugged in the power supply, flipped the switch, and pressed the button -- and soon I was booting into Linux Mint 19.1's LiveUSB environment! The first attempt at installing the OS did not go so well -- GRUB2 would not install -- but this was fixed by changing the SSD access mode from IDE to AHCI and rerunning the installer.
So far the only lingering issue is Internet speed -- one of the antennas is boxed in, badly, so this is somewhat to be expected -- and I'm vacillating badly about how to fix that. I have a PCB antenna from a dead router that I can stick on the outside of the USB hub, and that will improve performance, but the required disassembly at this point is nearly Herculean. OTOH, I have a couple of nice USB adapters, but I'm really not sure that I want to go that route.
EDIT 6:45 PM EST 21 APR 2019 -- dug out a Netgear WNDA4100 USB WiFi adapter and a random USB cradle for it. Speeds are significantly improved. I think I'll stick with that for now... I'll put up the PCB antenna when something breaks or if I get a RAM upgrade... not that I'll need *that* any time soon.
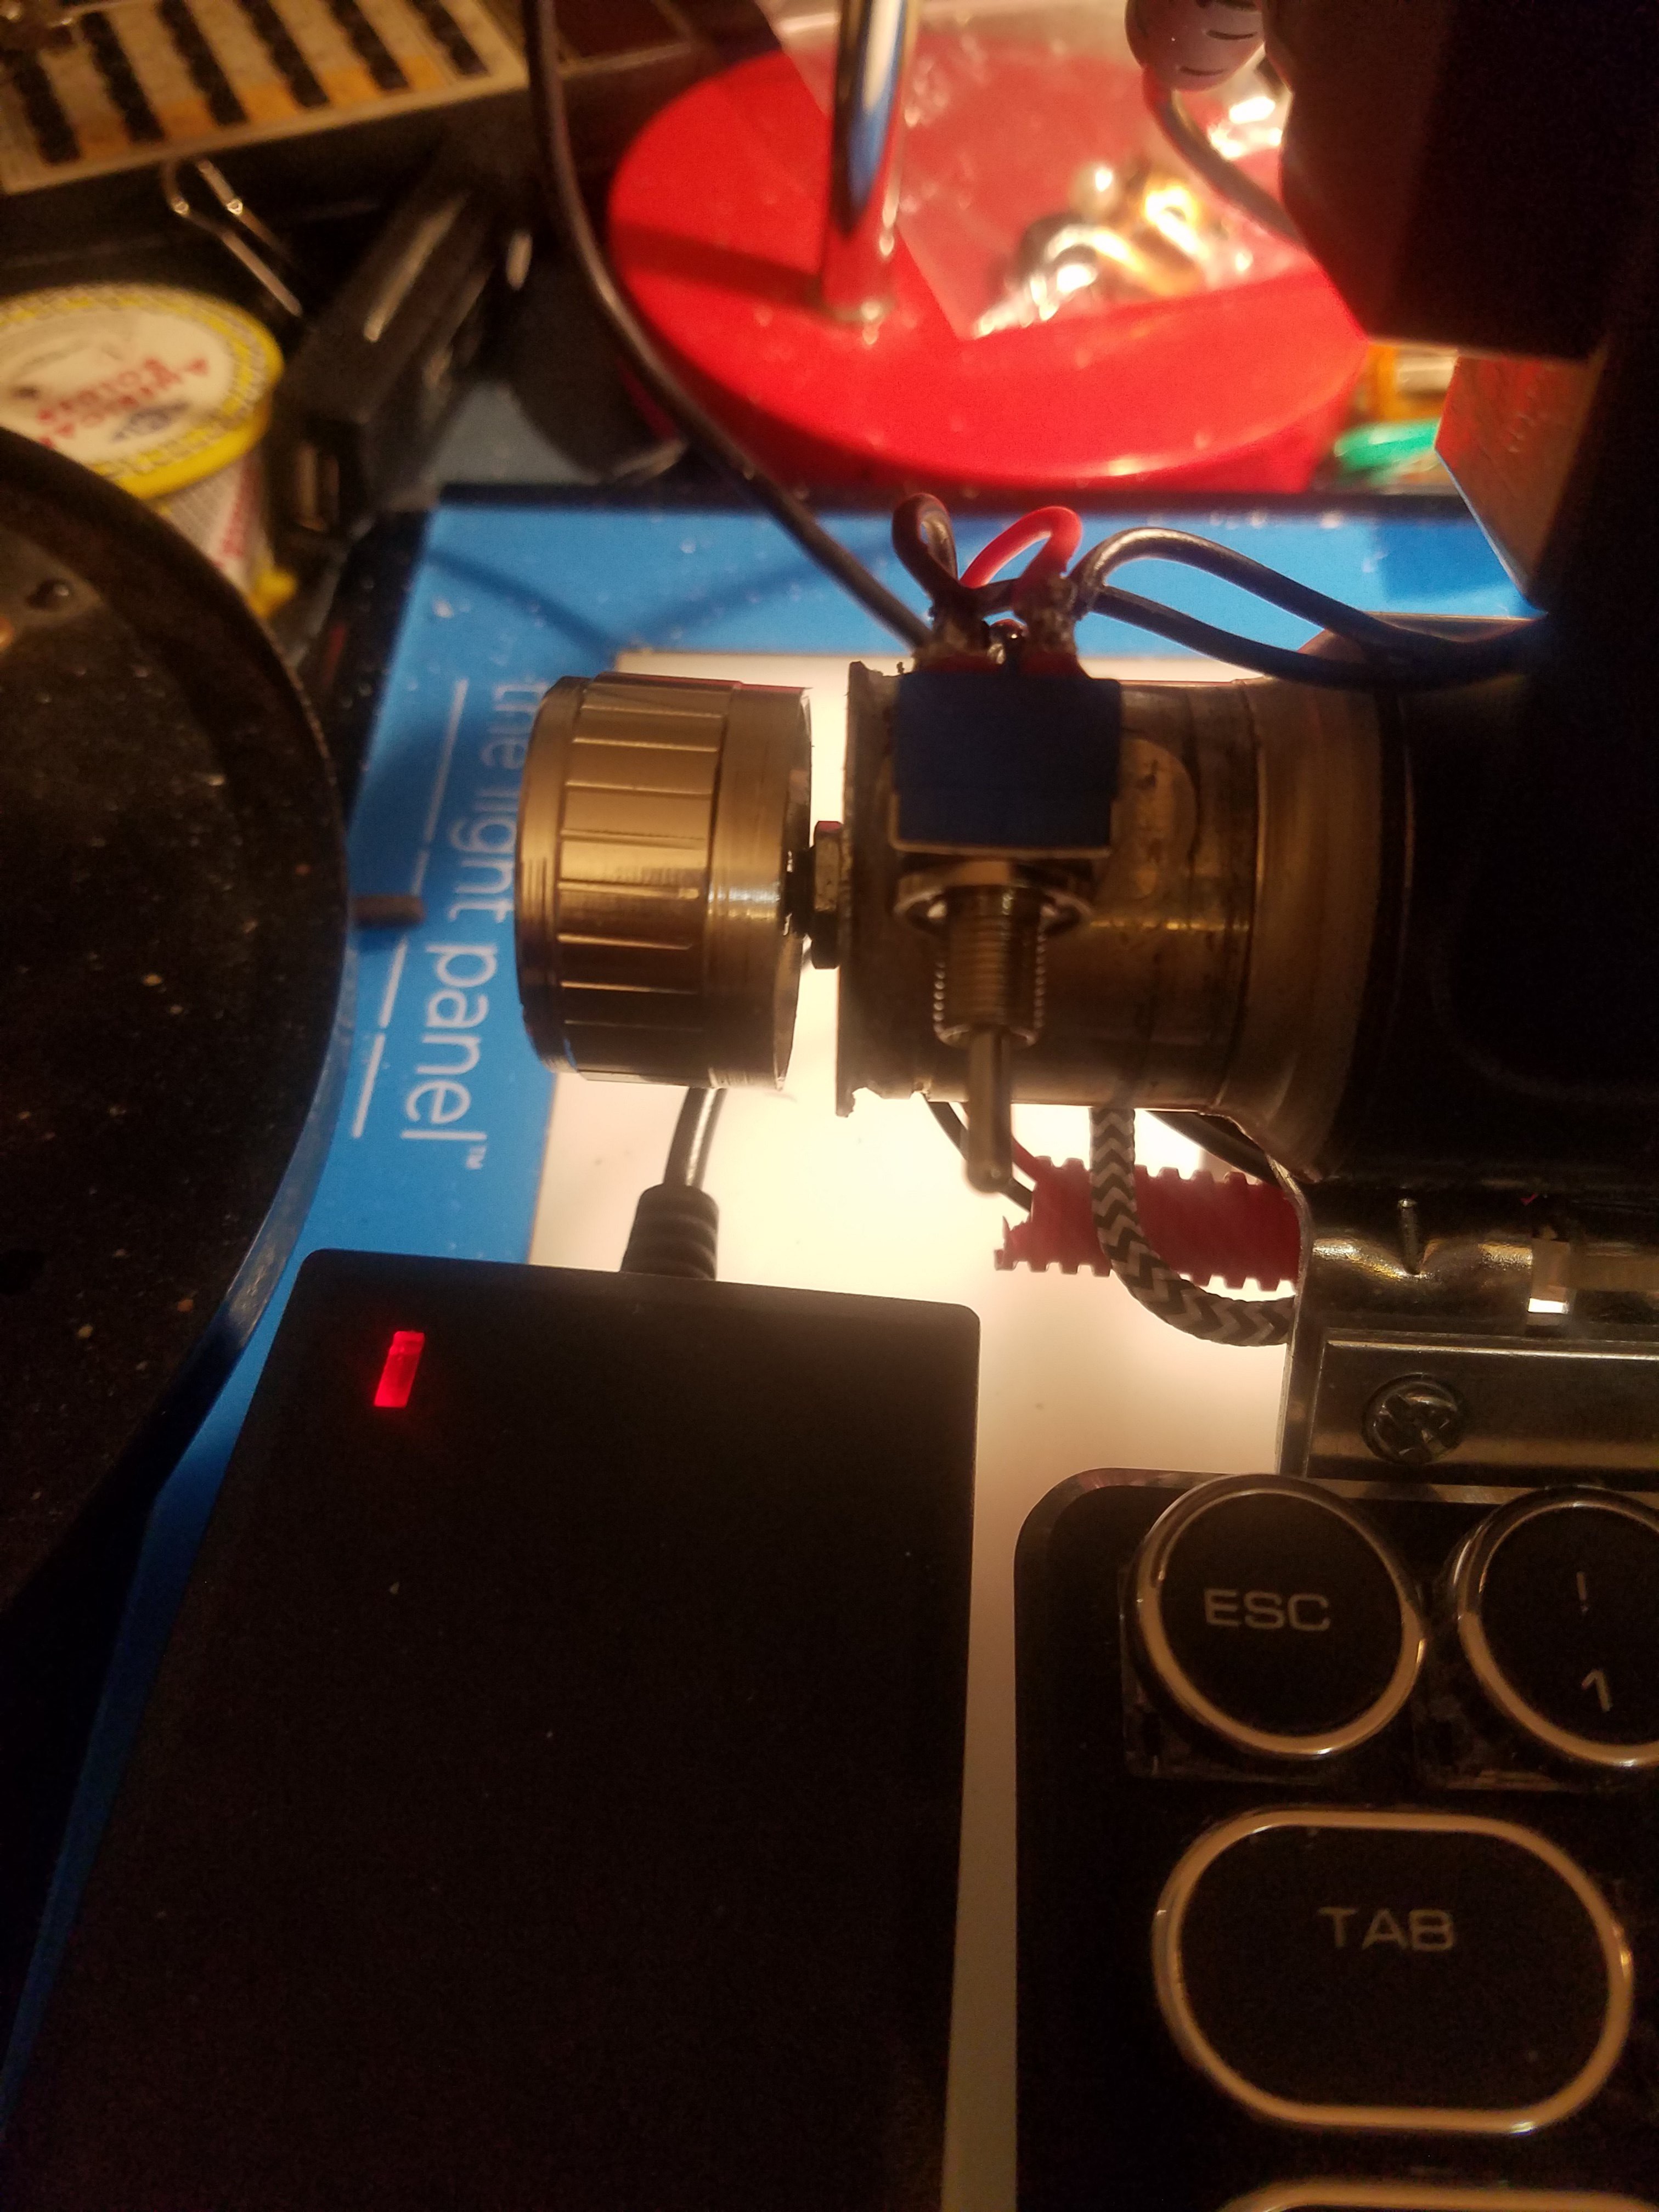
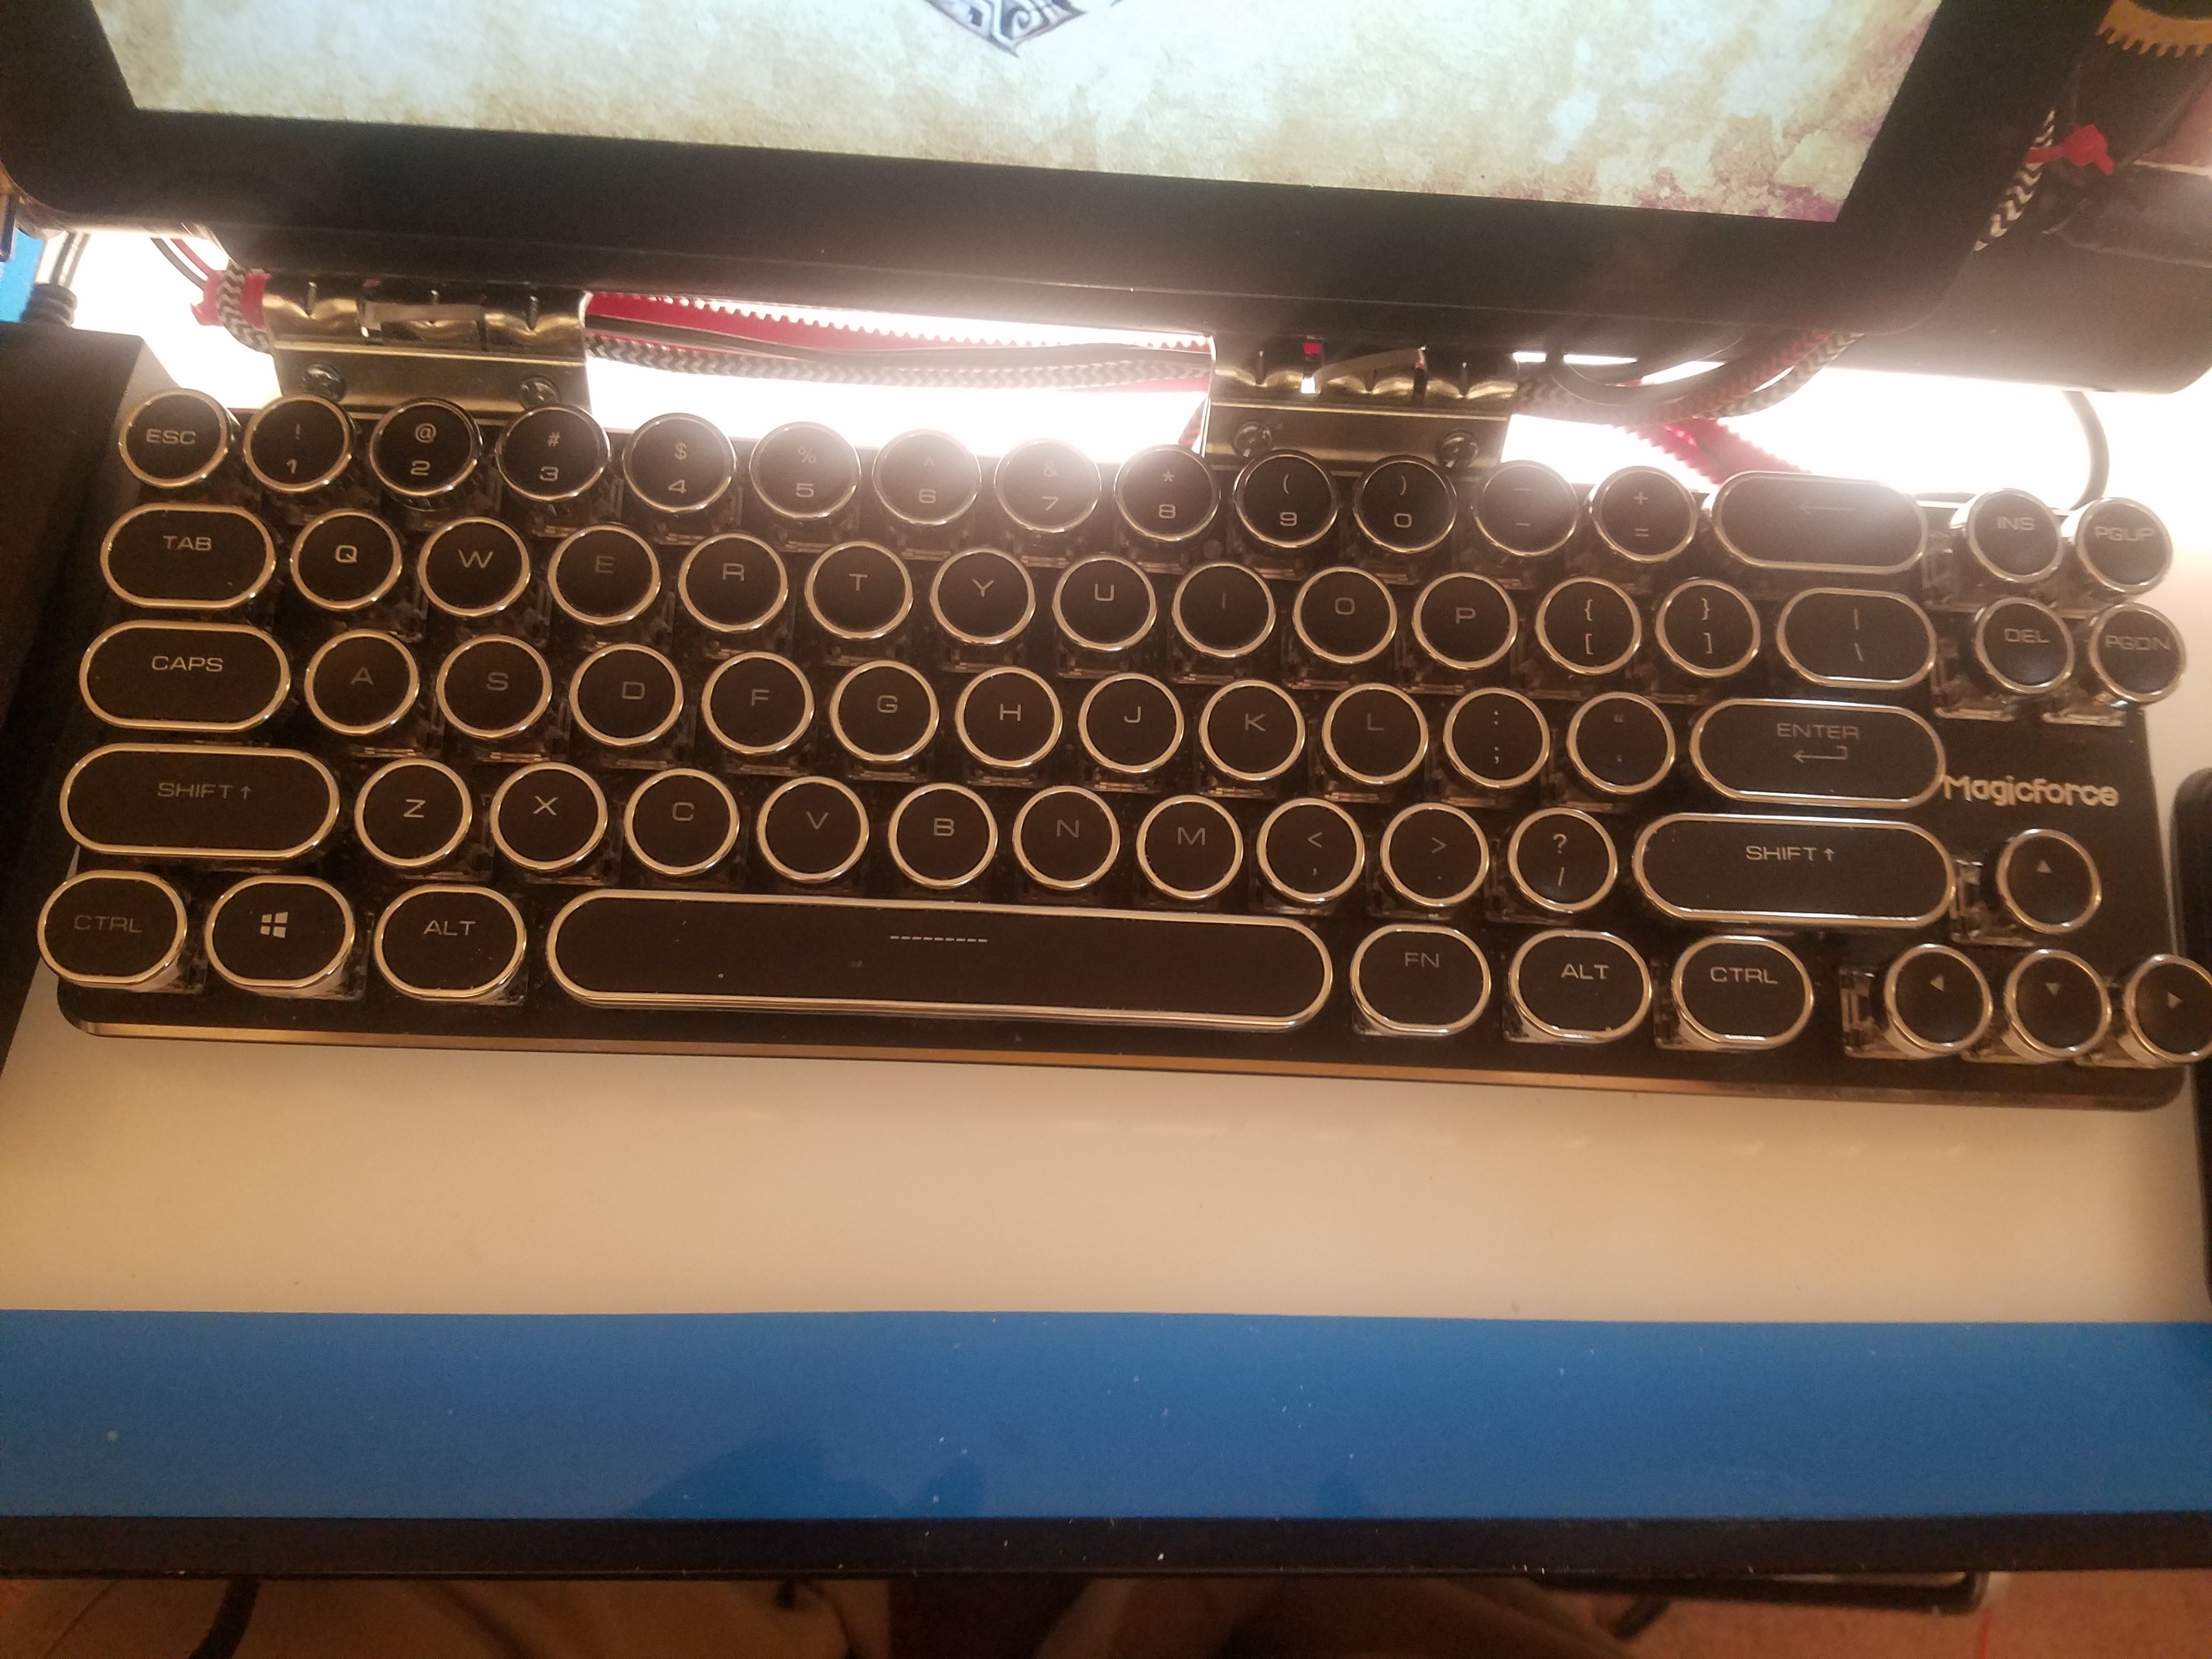
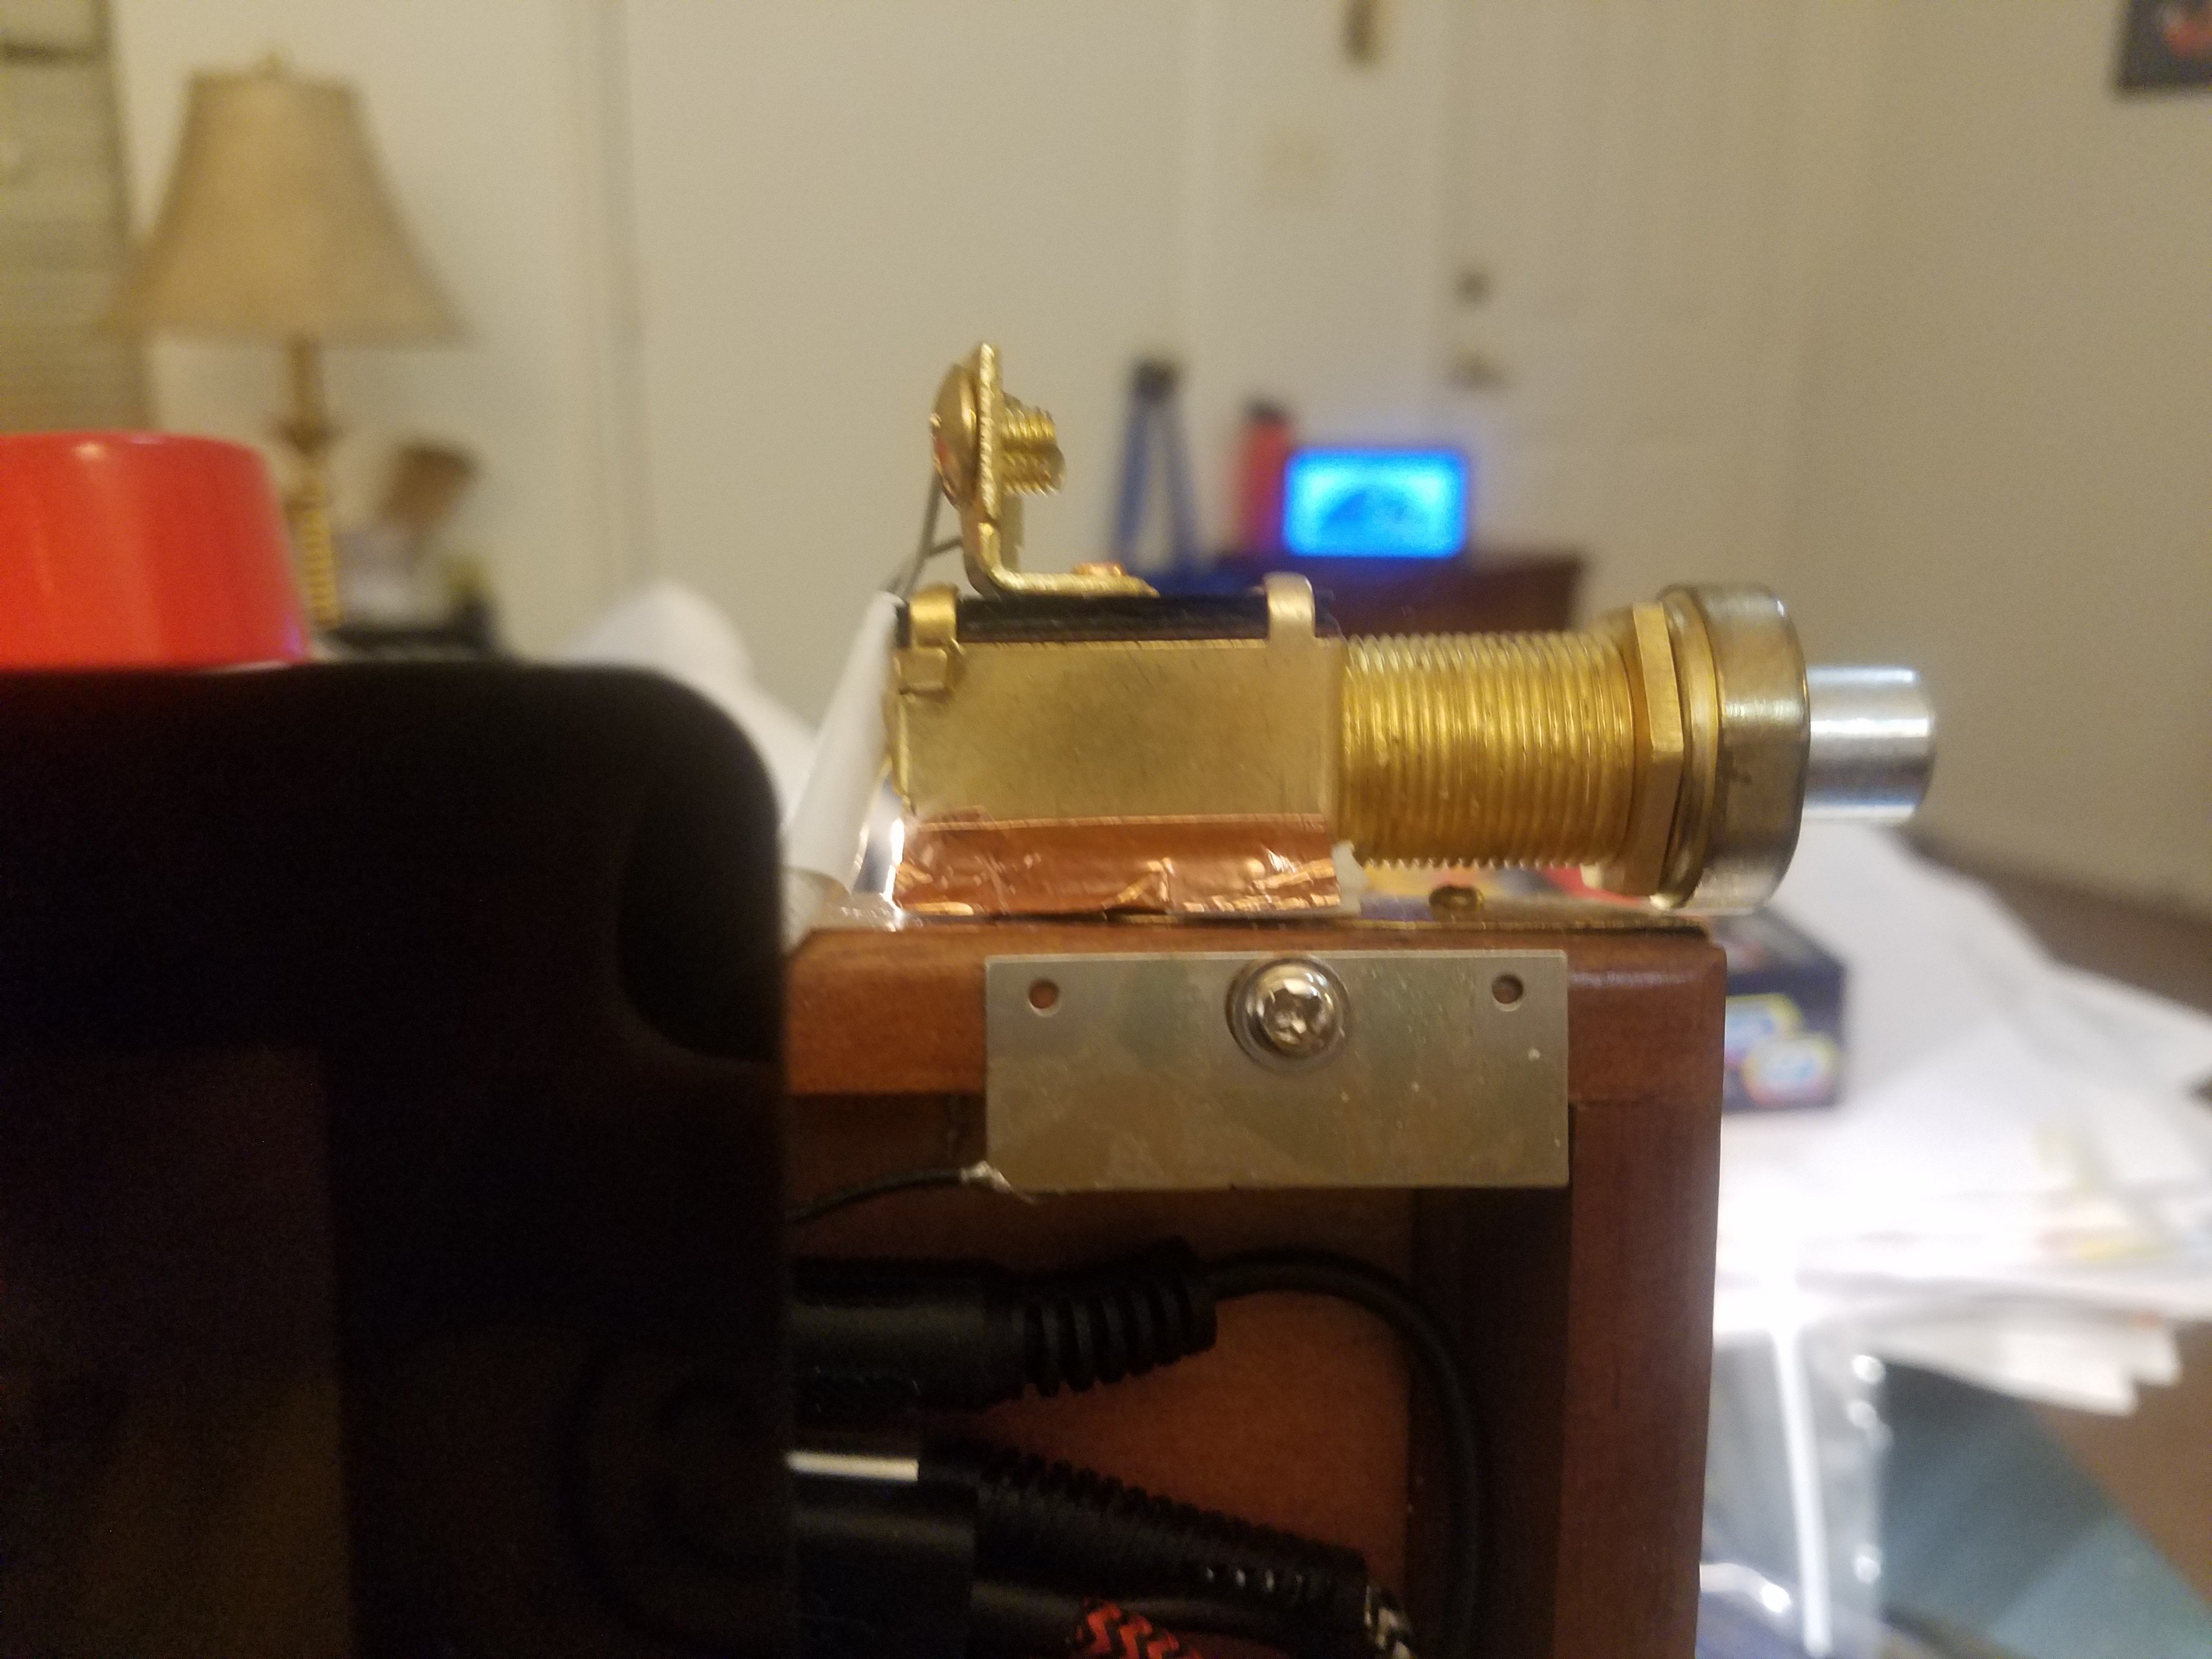
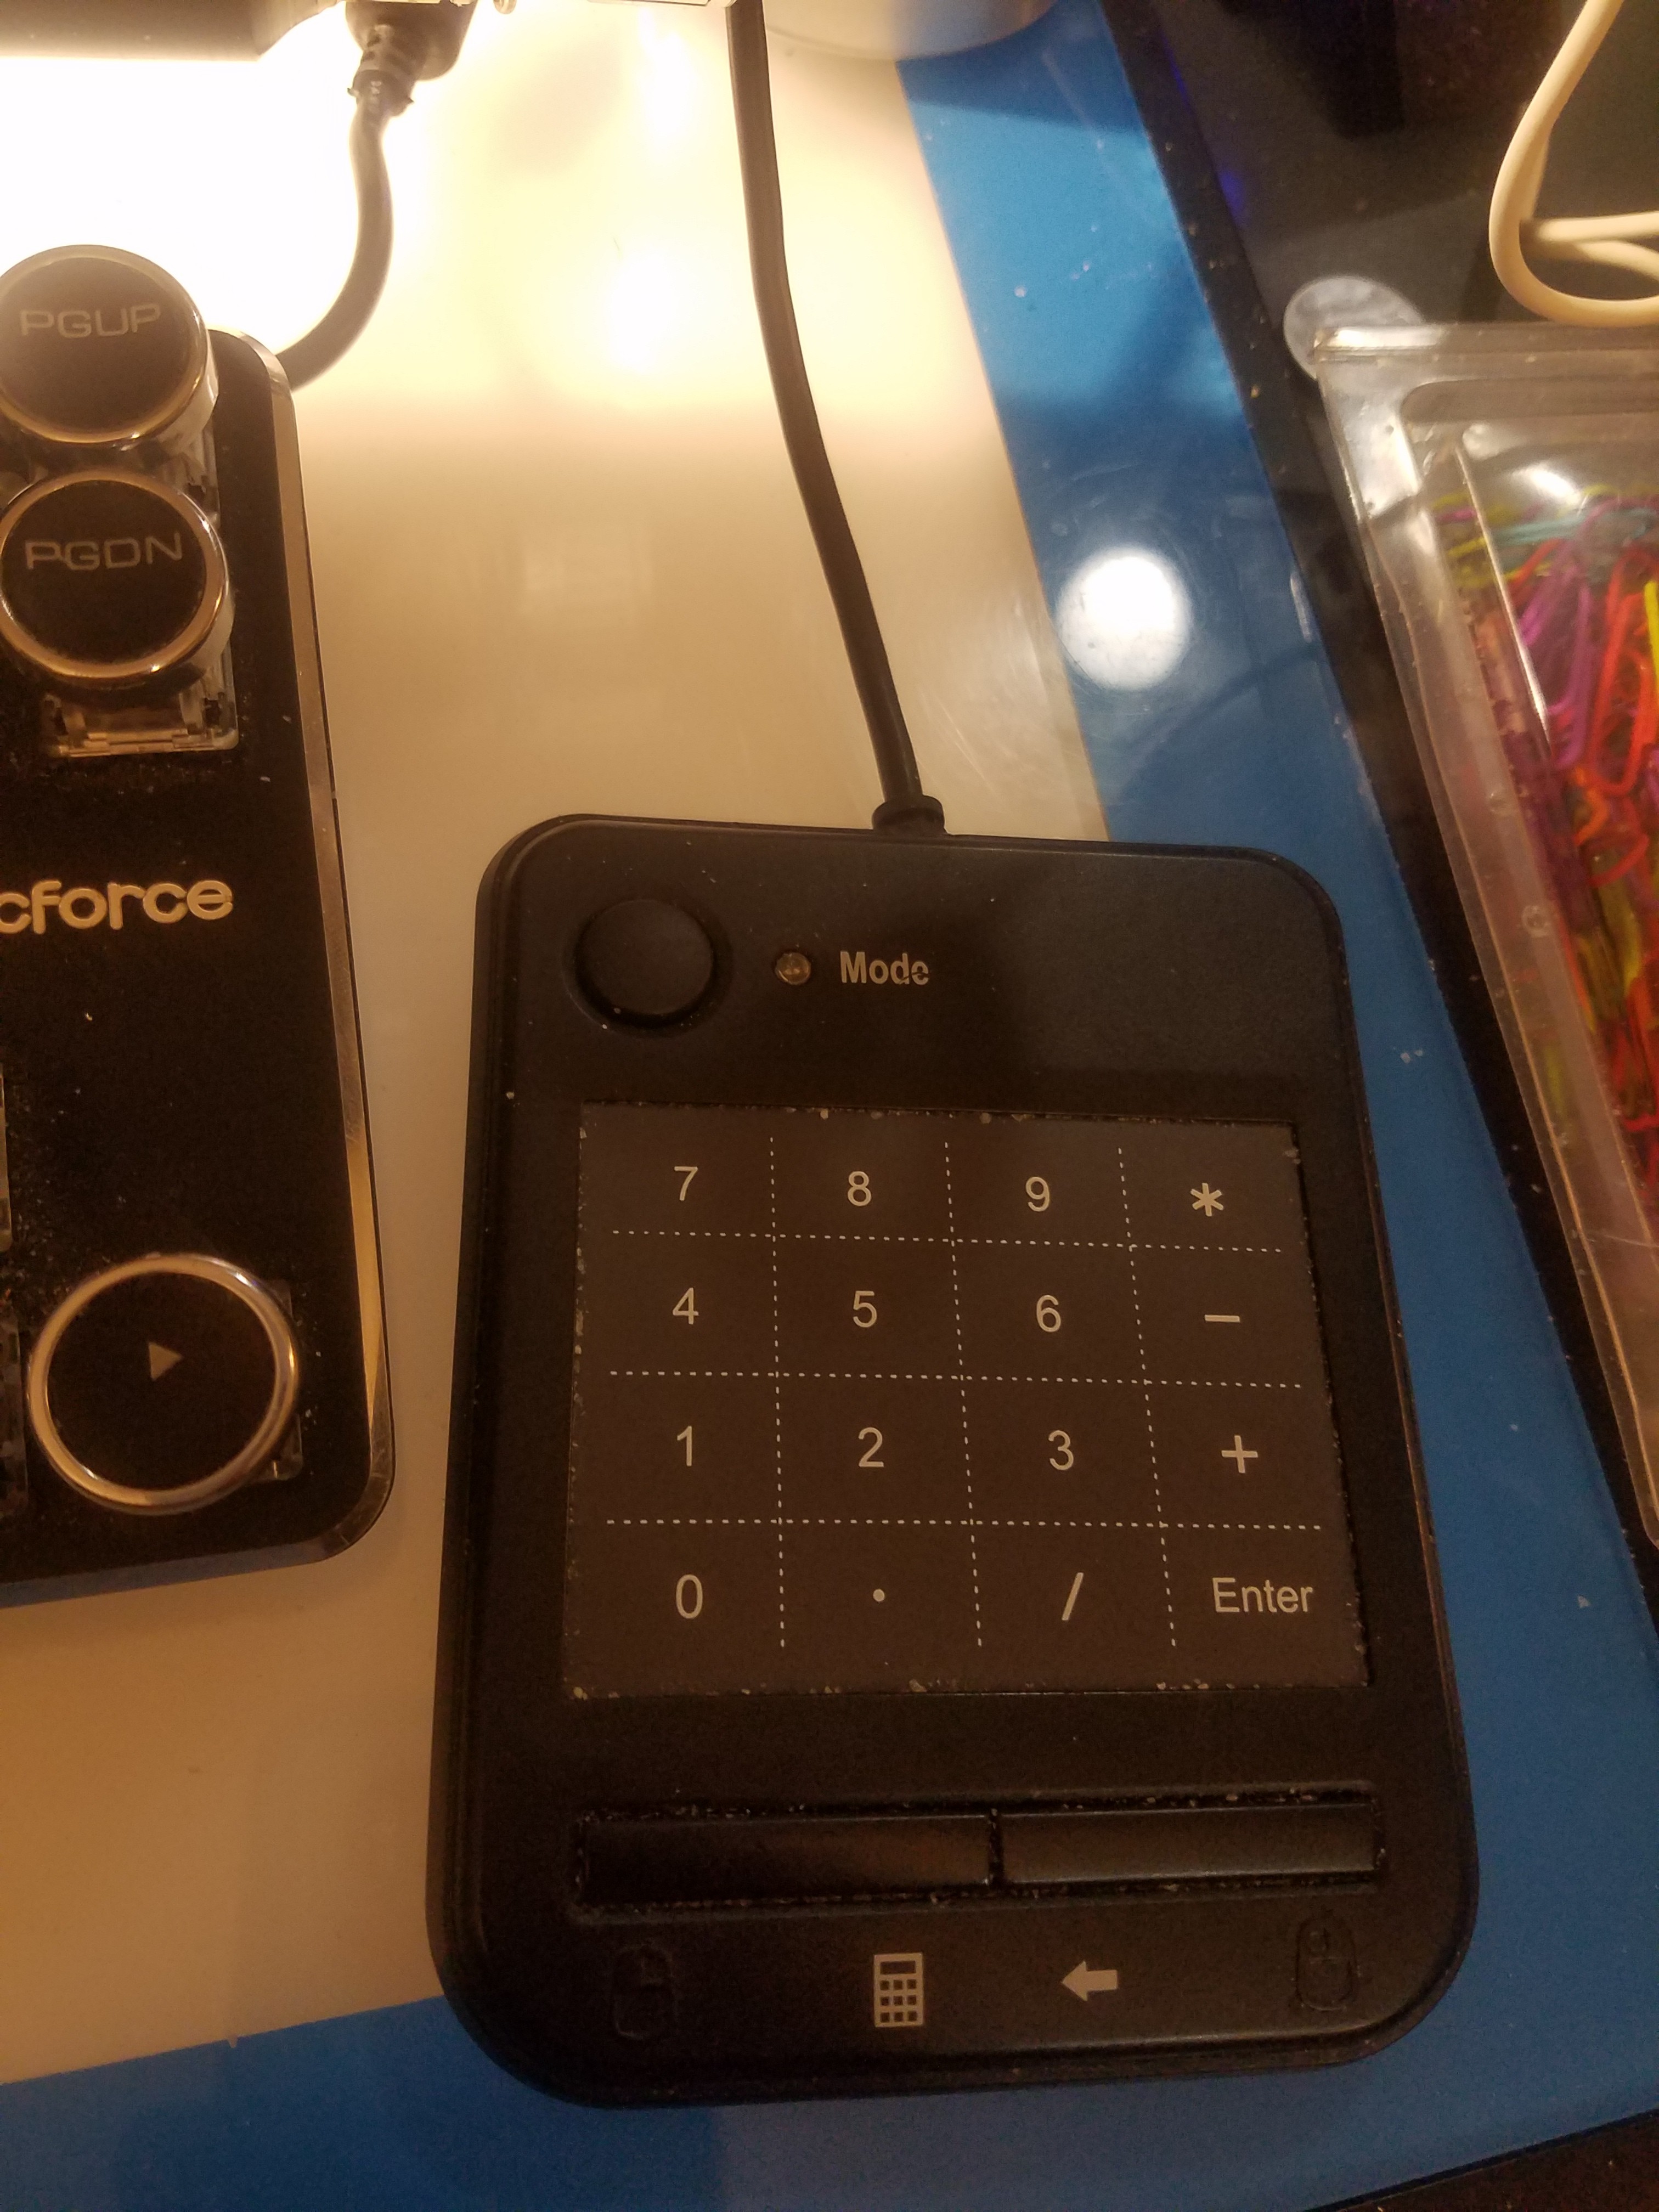
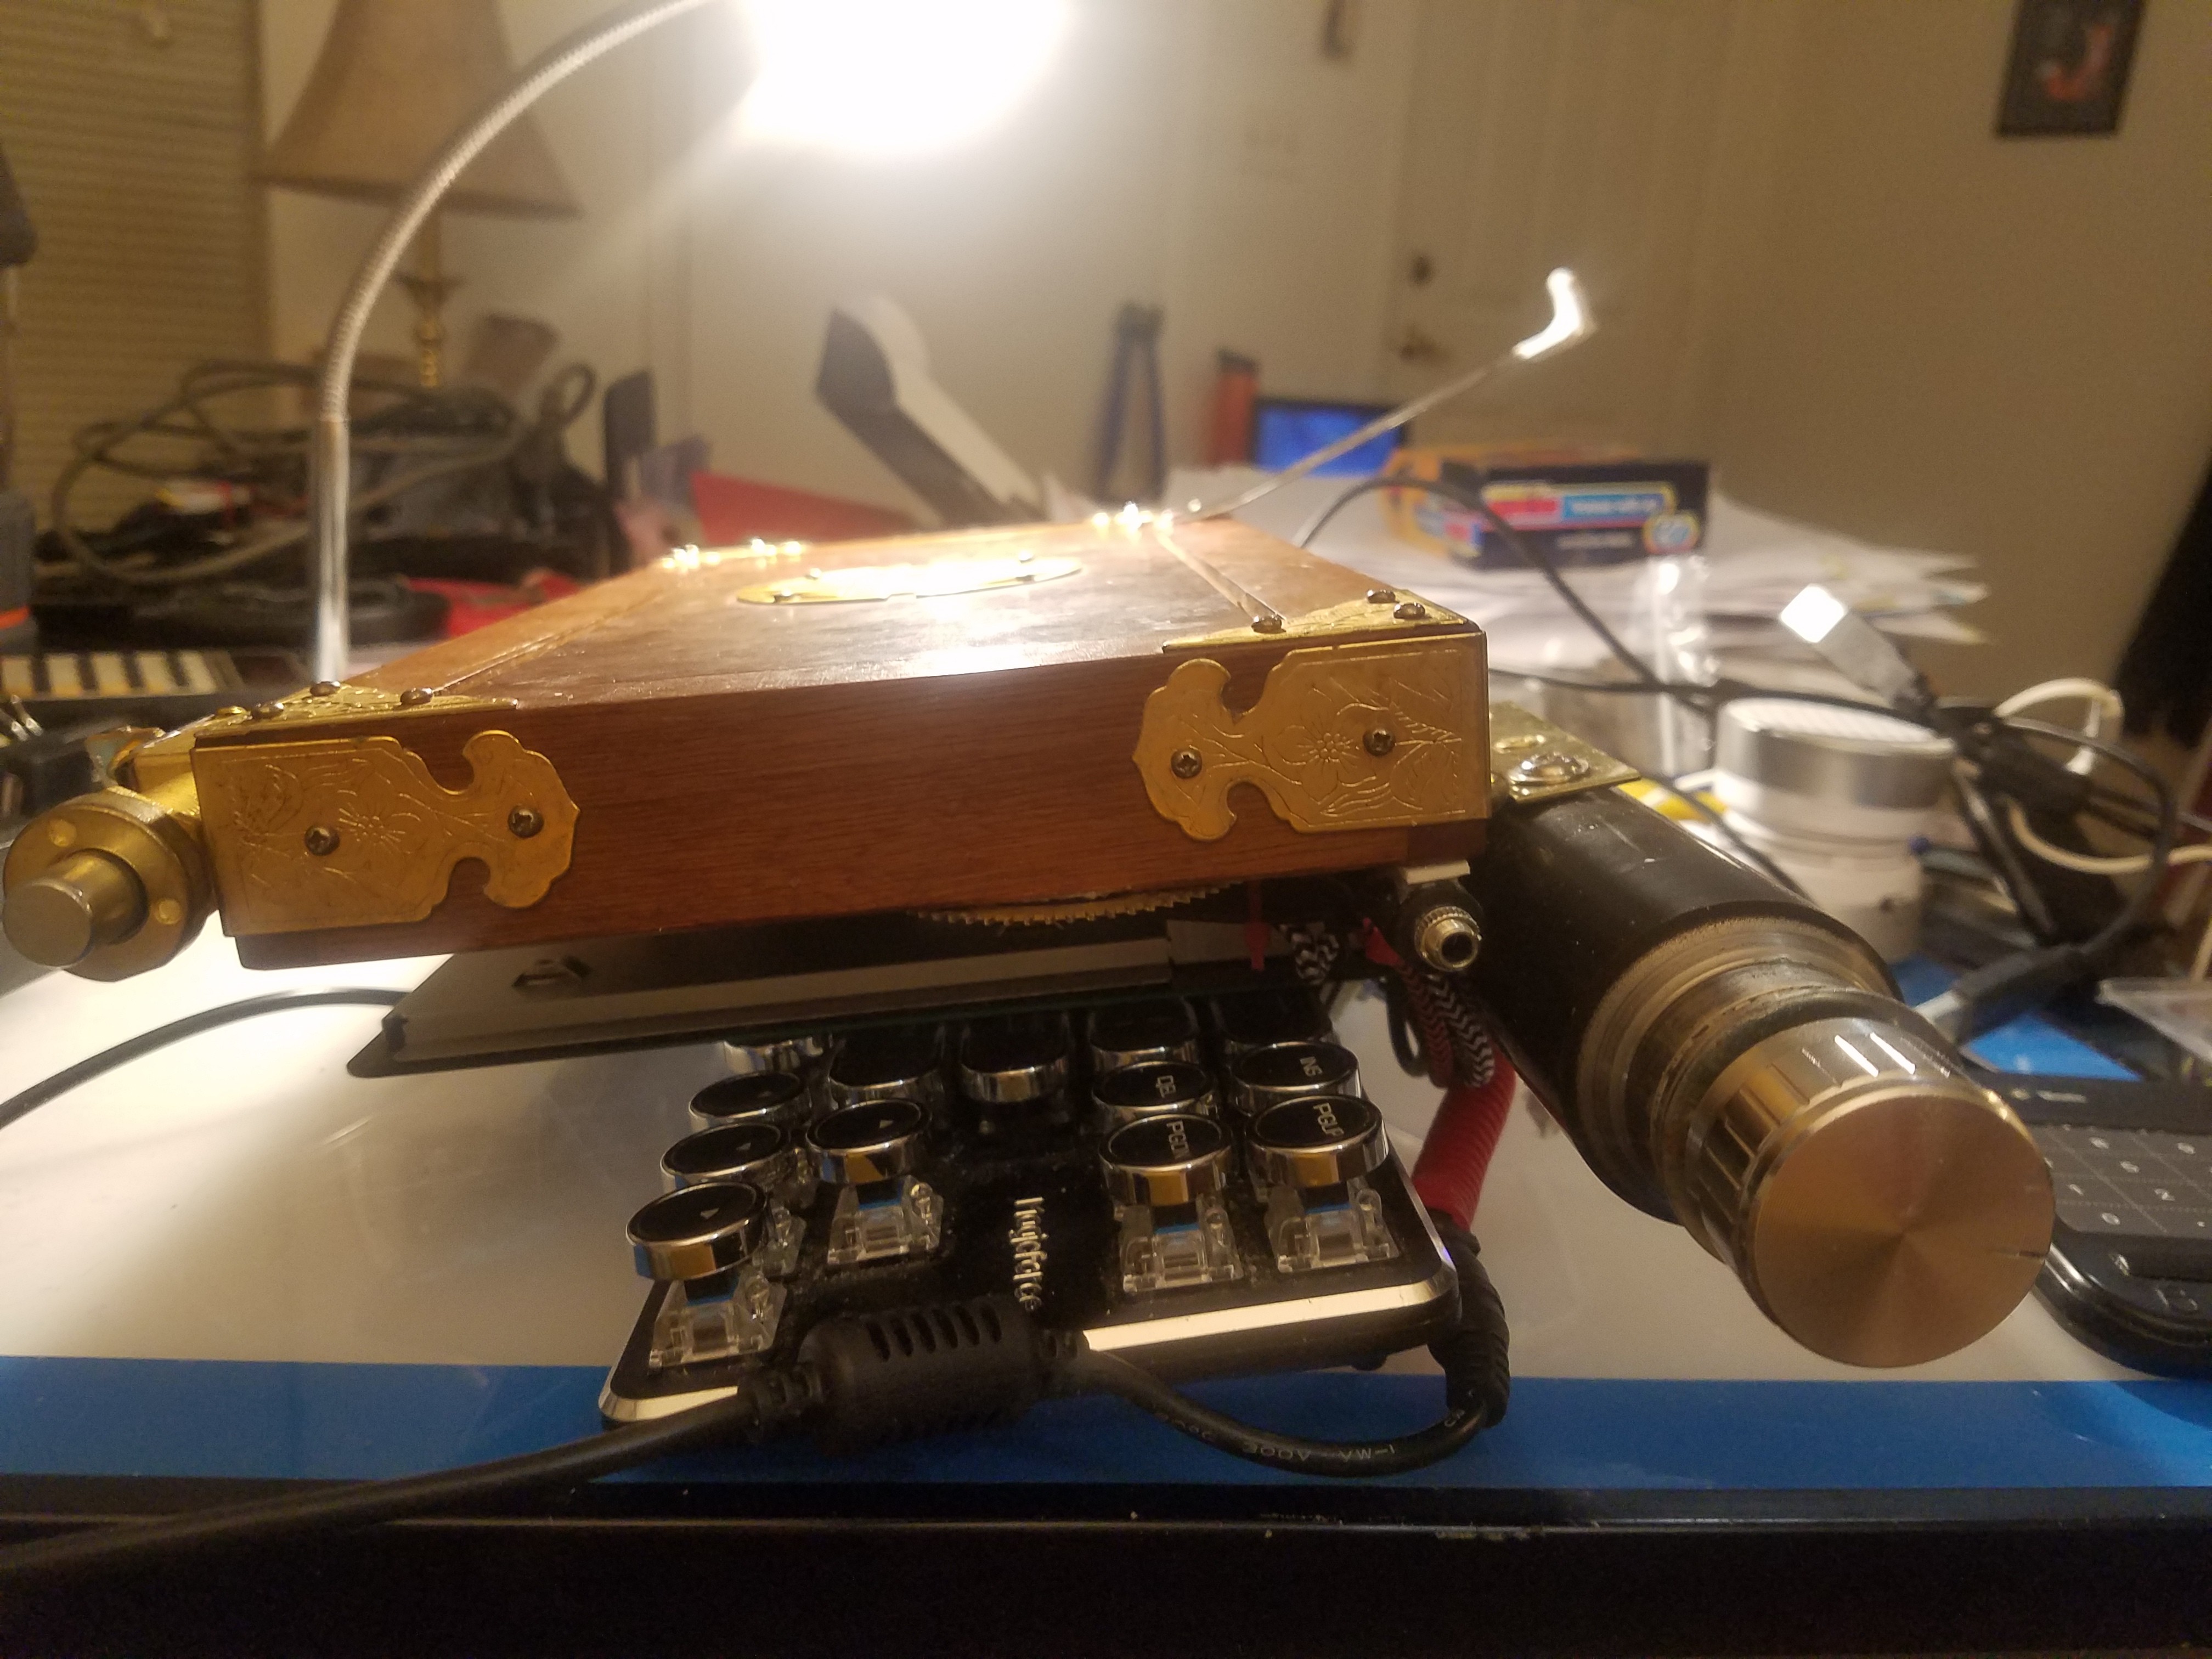
Final system specs -- Intel 'NUC' DN2820FYKH motherboard (from 2014) + Celeron N2820 CPU / 4gb DDR3L RAM / 256gb ADATA SSD. The system has its stock internal WiFi card (switched off for the Netgear adapter) and an Anker 4-port USB3.0 hub hooked into the motherboard's lone USB3.0 port. Screen is a touch-capable SunFounder RasPi job that's 10.1" diagonally and 1280x800 px resolution. Keyboard is a MagicForce 68-key job with 'retro typewriterr' silver/black keycaps, and an Arduino Micro programmed with QMK firmware and some special sauce from me runs two rotary encoders -- the left side controls volume (spin 'up' for vol-up, 'down' for vol-dn, press in to toggle mute) and the right side is a mouse scroll-wheel ('up' to scroll up, 'down' to scroll down, and press for a wheel-click -- "mouse button #3 press"). Operating system is Linux Mint 19.1 with the Cinnamon DE (I made myself try it out -- it's not bad, compared to my usual XFCE. In some small ways, it's actually /better/.)
Later tonight or tomorrow morning I'll take the final set of photos and put that up in one last project log. After that, it hits the tip line like a raging locomotive's cowcatcher :P
-
Future, And It Doesn't Work
04/20/2019 at 18:00 • 0 commentsFirst power-up results: I need to buy an HDMI cable, and there's something fucky going on with the keyboard.
I'll be back when I have more information.
EDIT 6:18 PM EST / 20 APR 2019 -- This is related: https://hackaday.io/page/6124
-
My Steampunk Brings All The Boys To The Yard...
04/18/2019 at 16:23 • 2 comments...and they're like, "it's better than yours." D*mn right it's better than yours! (I could teach you, but I'd have to charge...)
Sorry, I just couldn't help myself :D
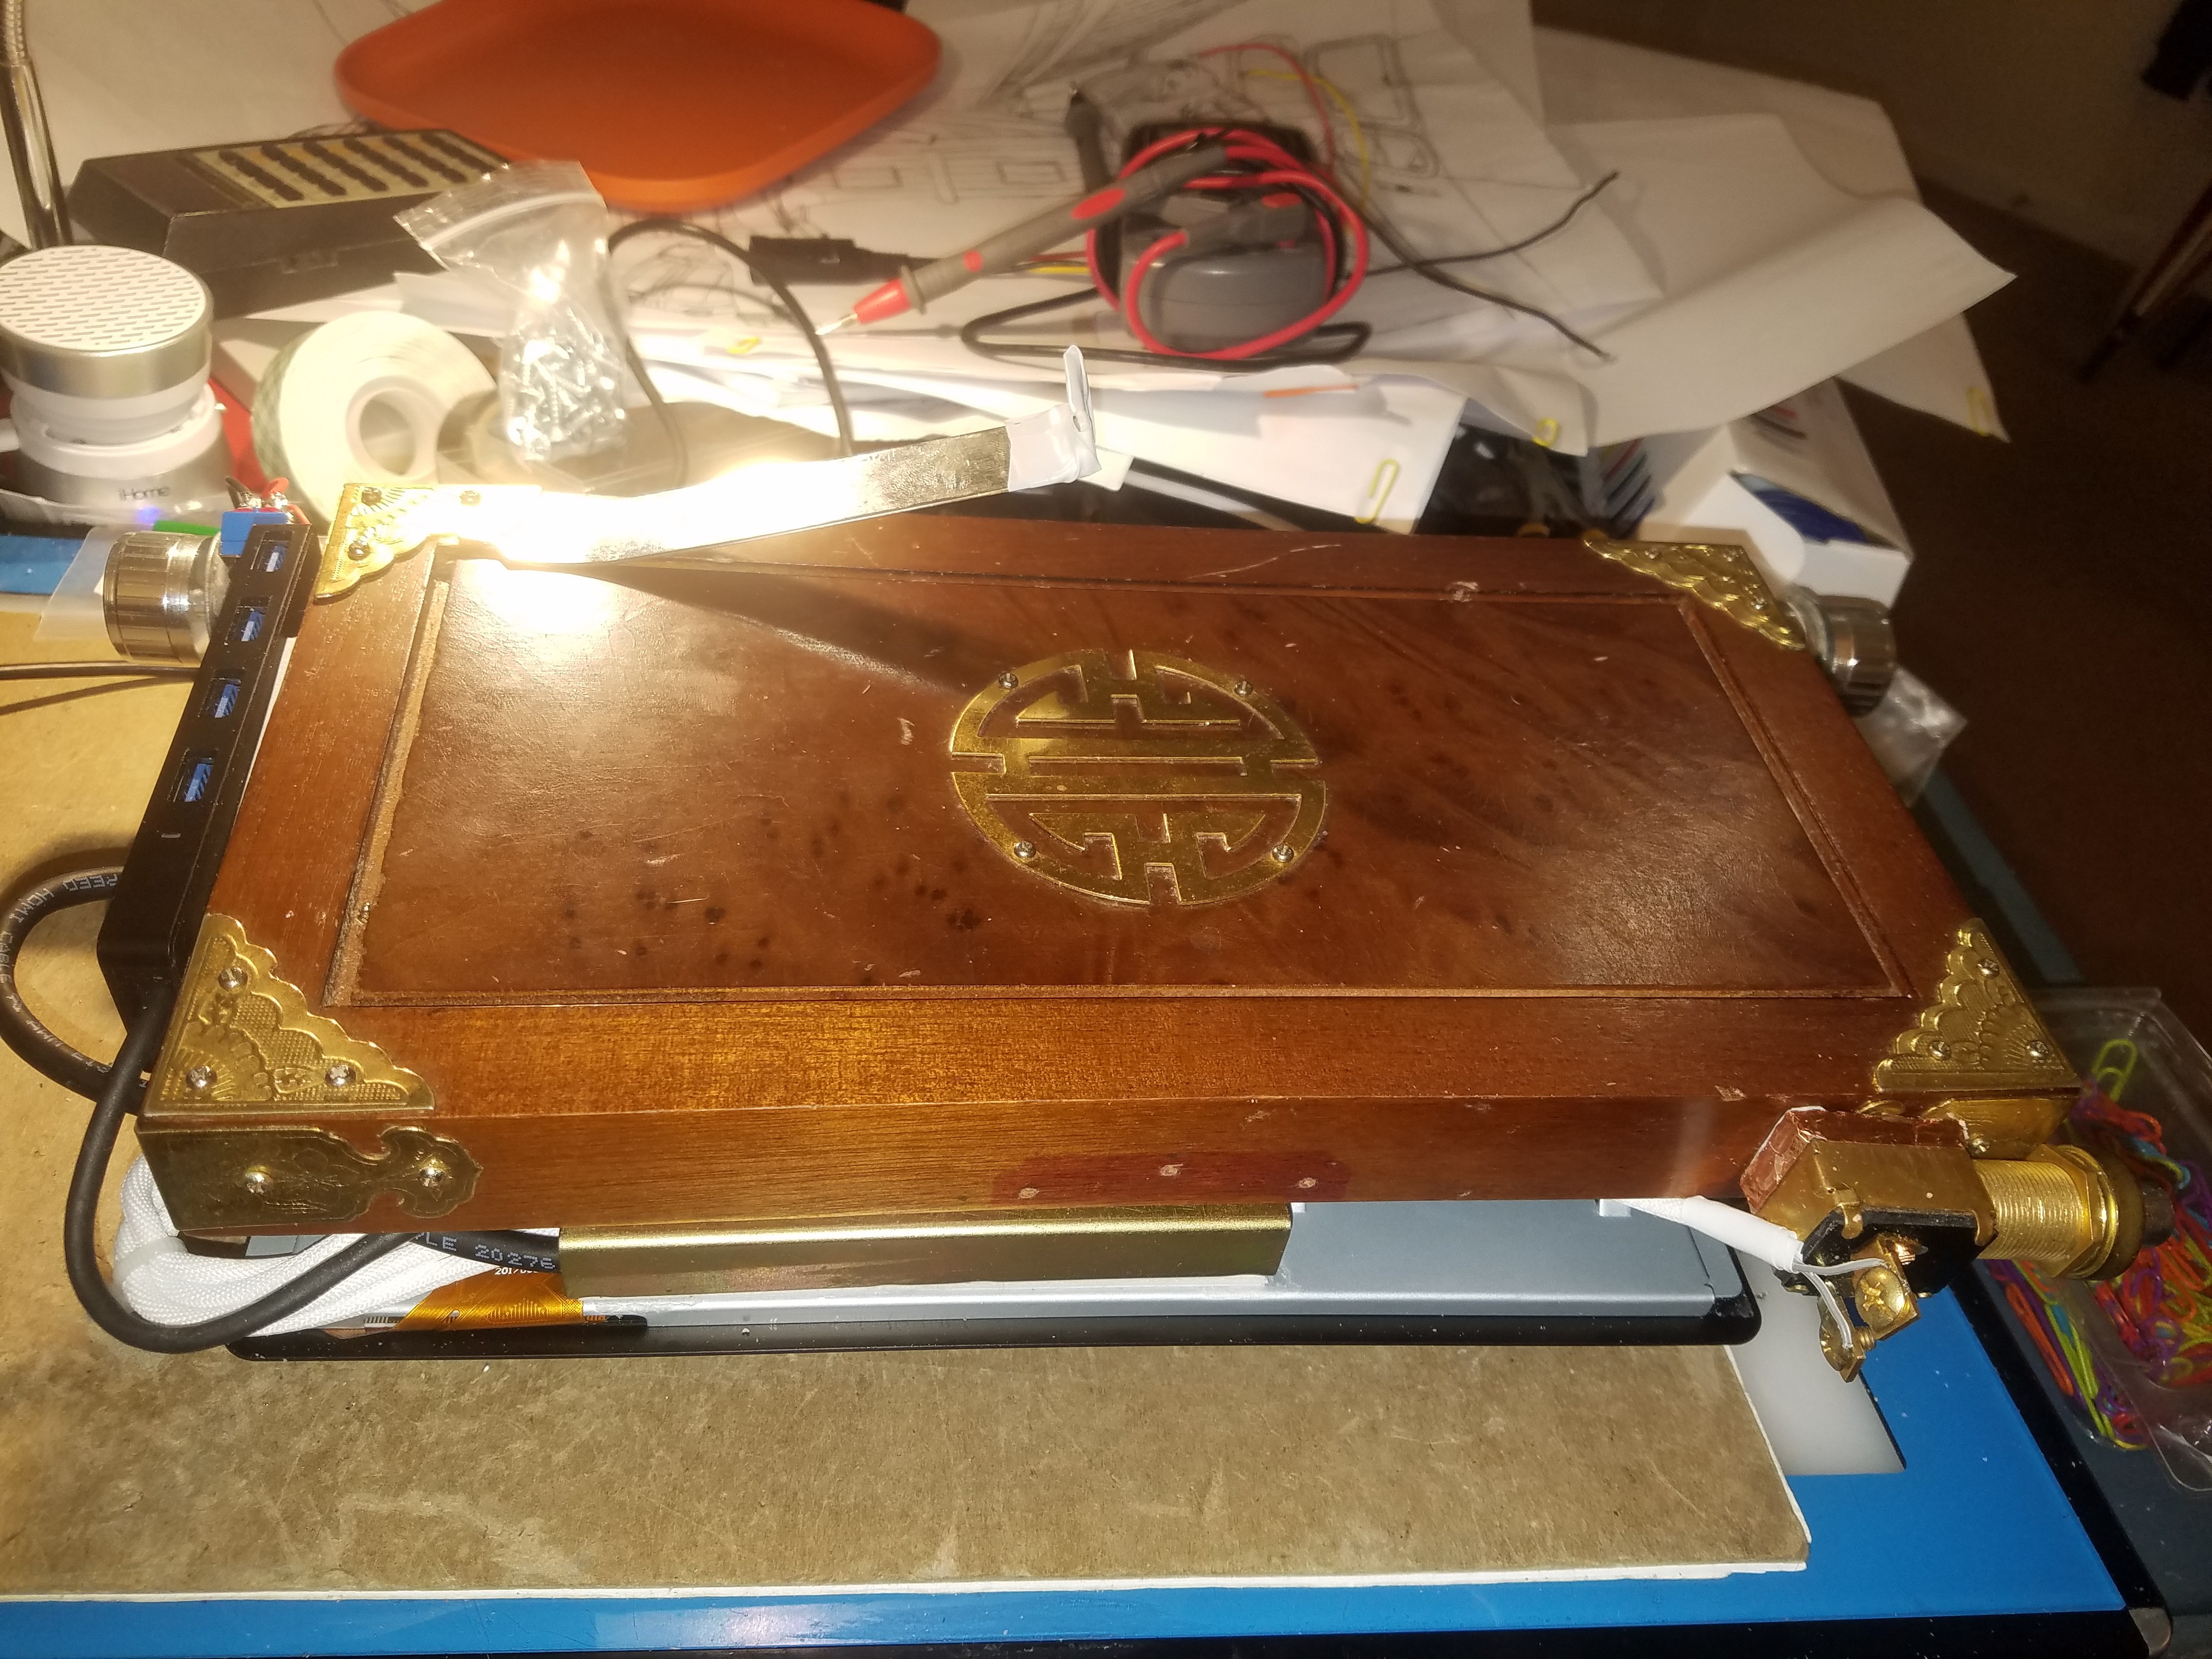
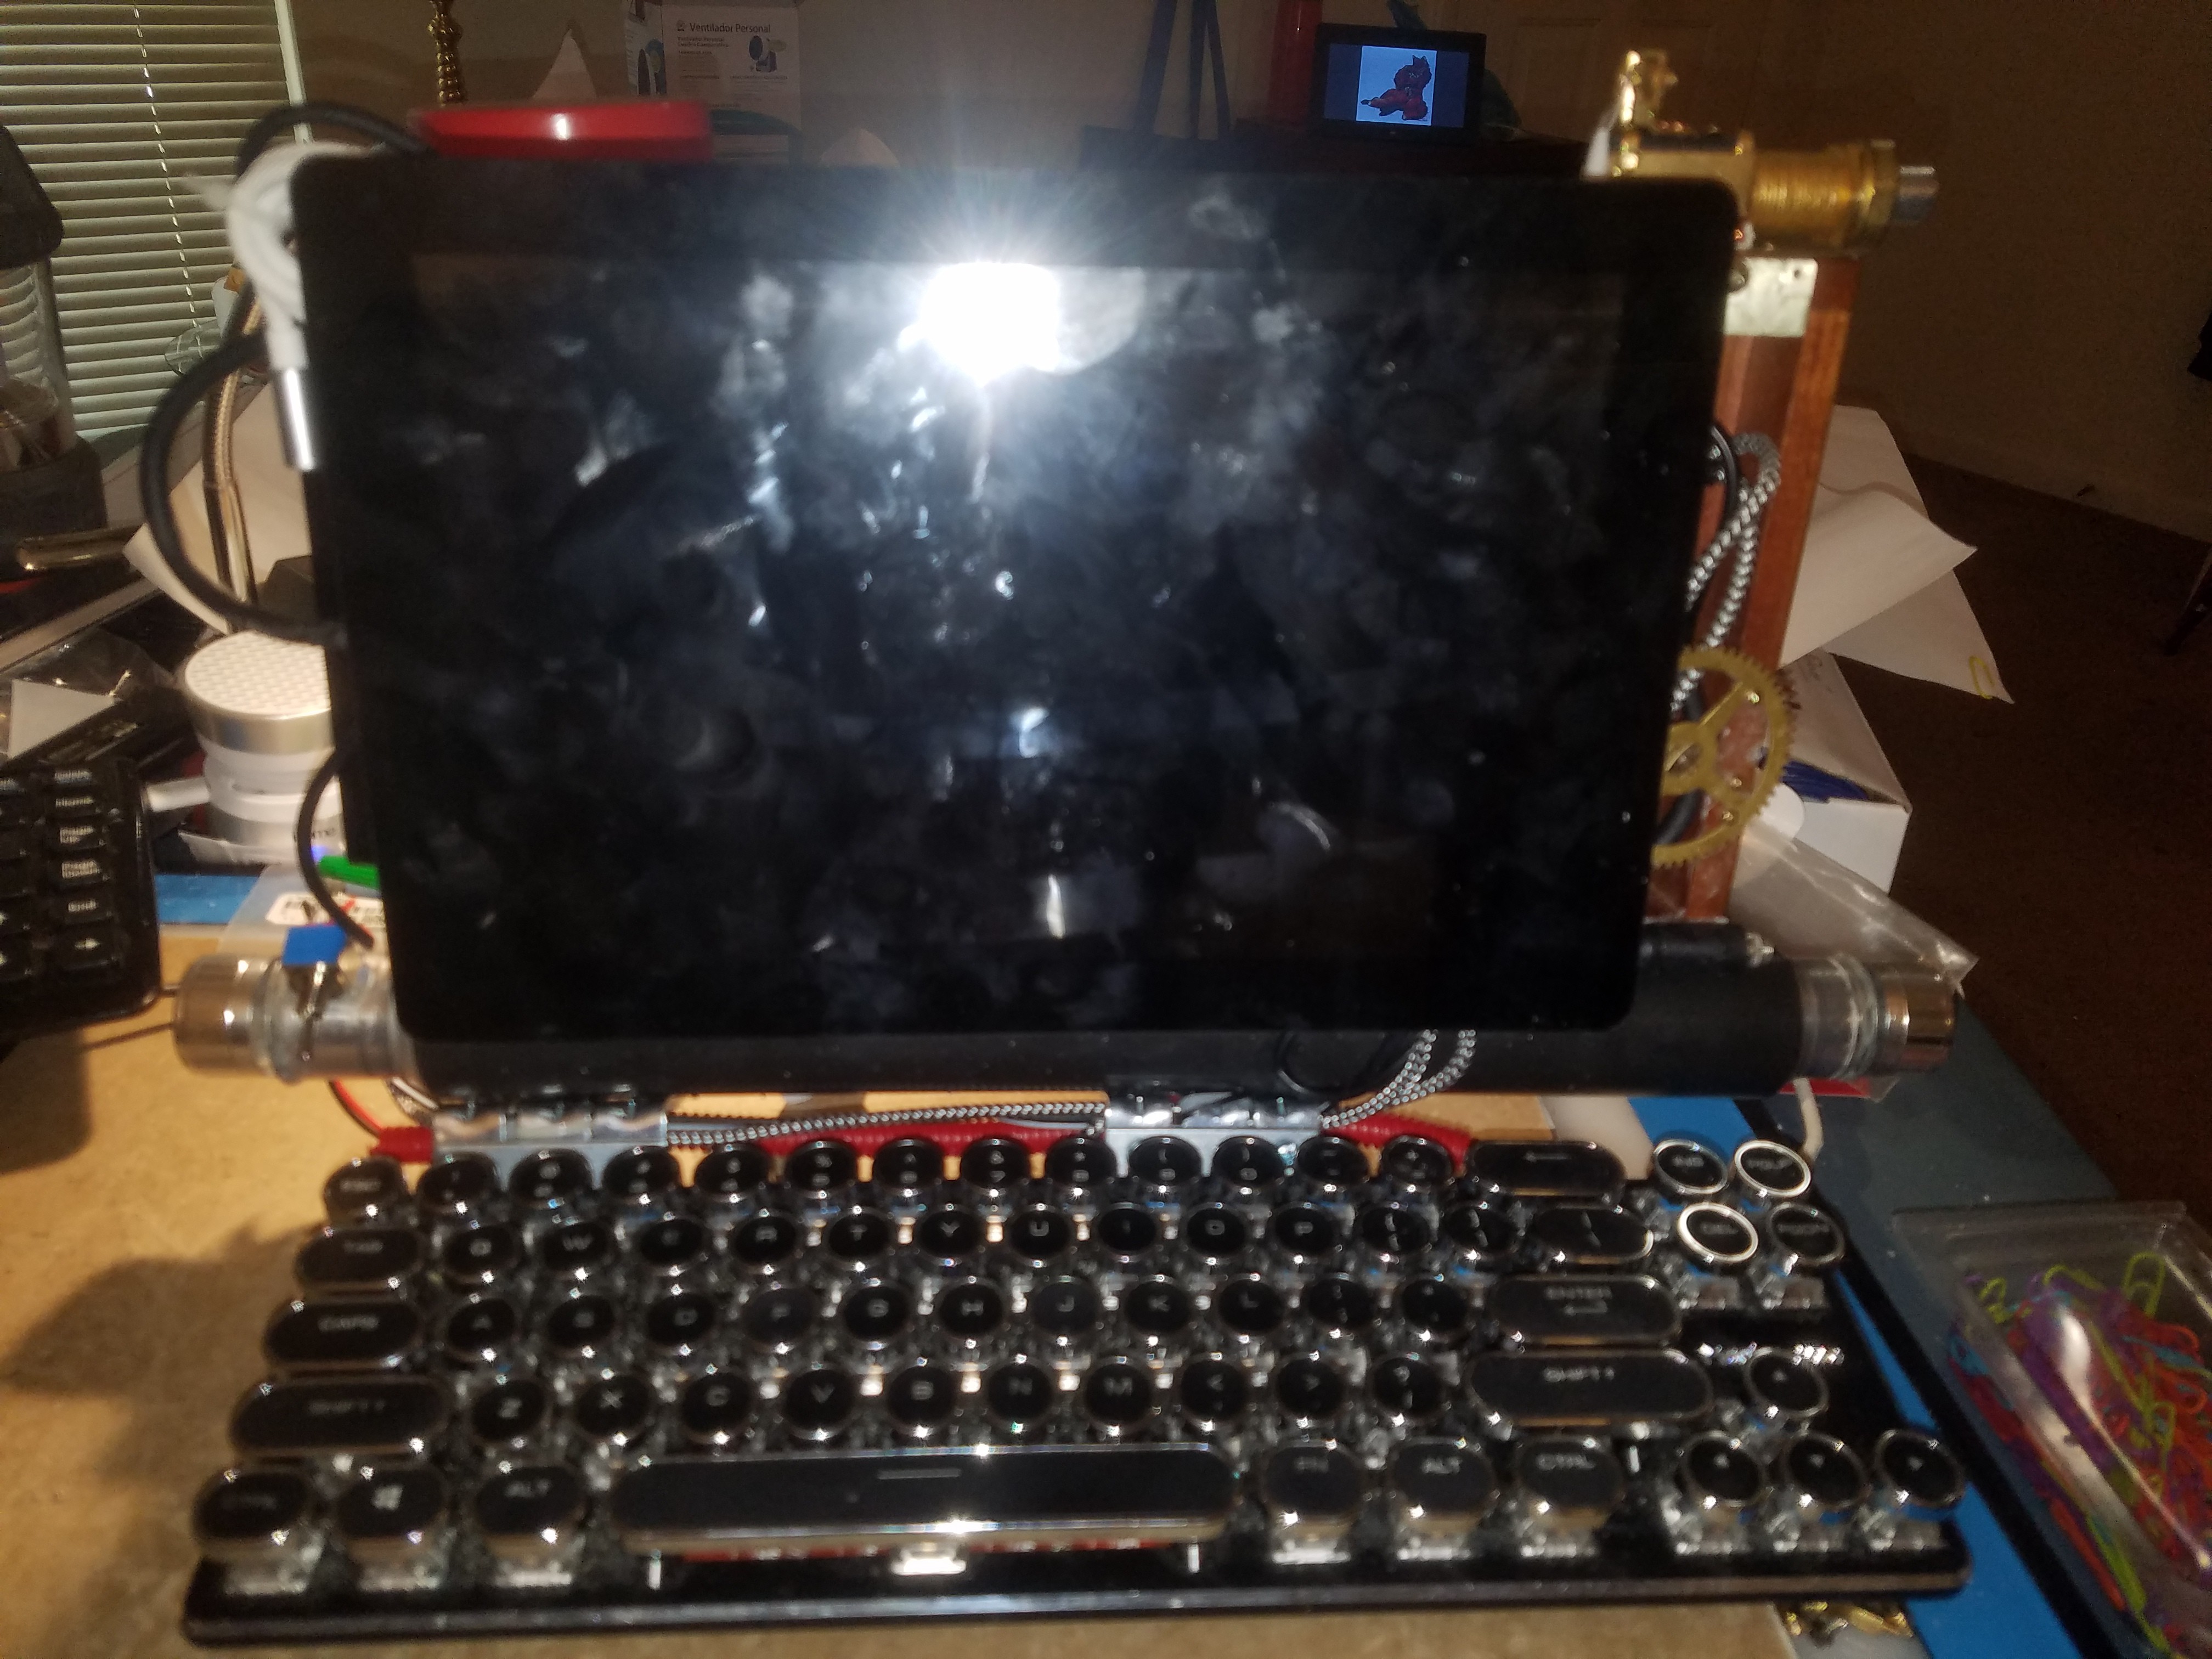
Except for the power brick and OS install, the laptop is DONE! The screen is on, the power harness got redone in the process, and some other things happened as well. Here's a recap.
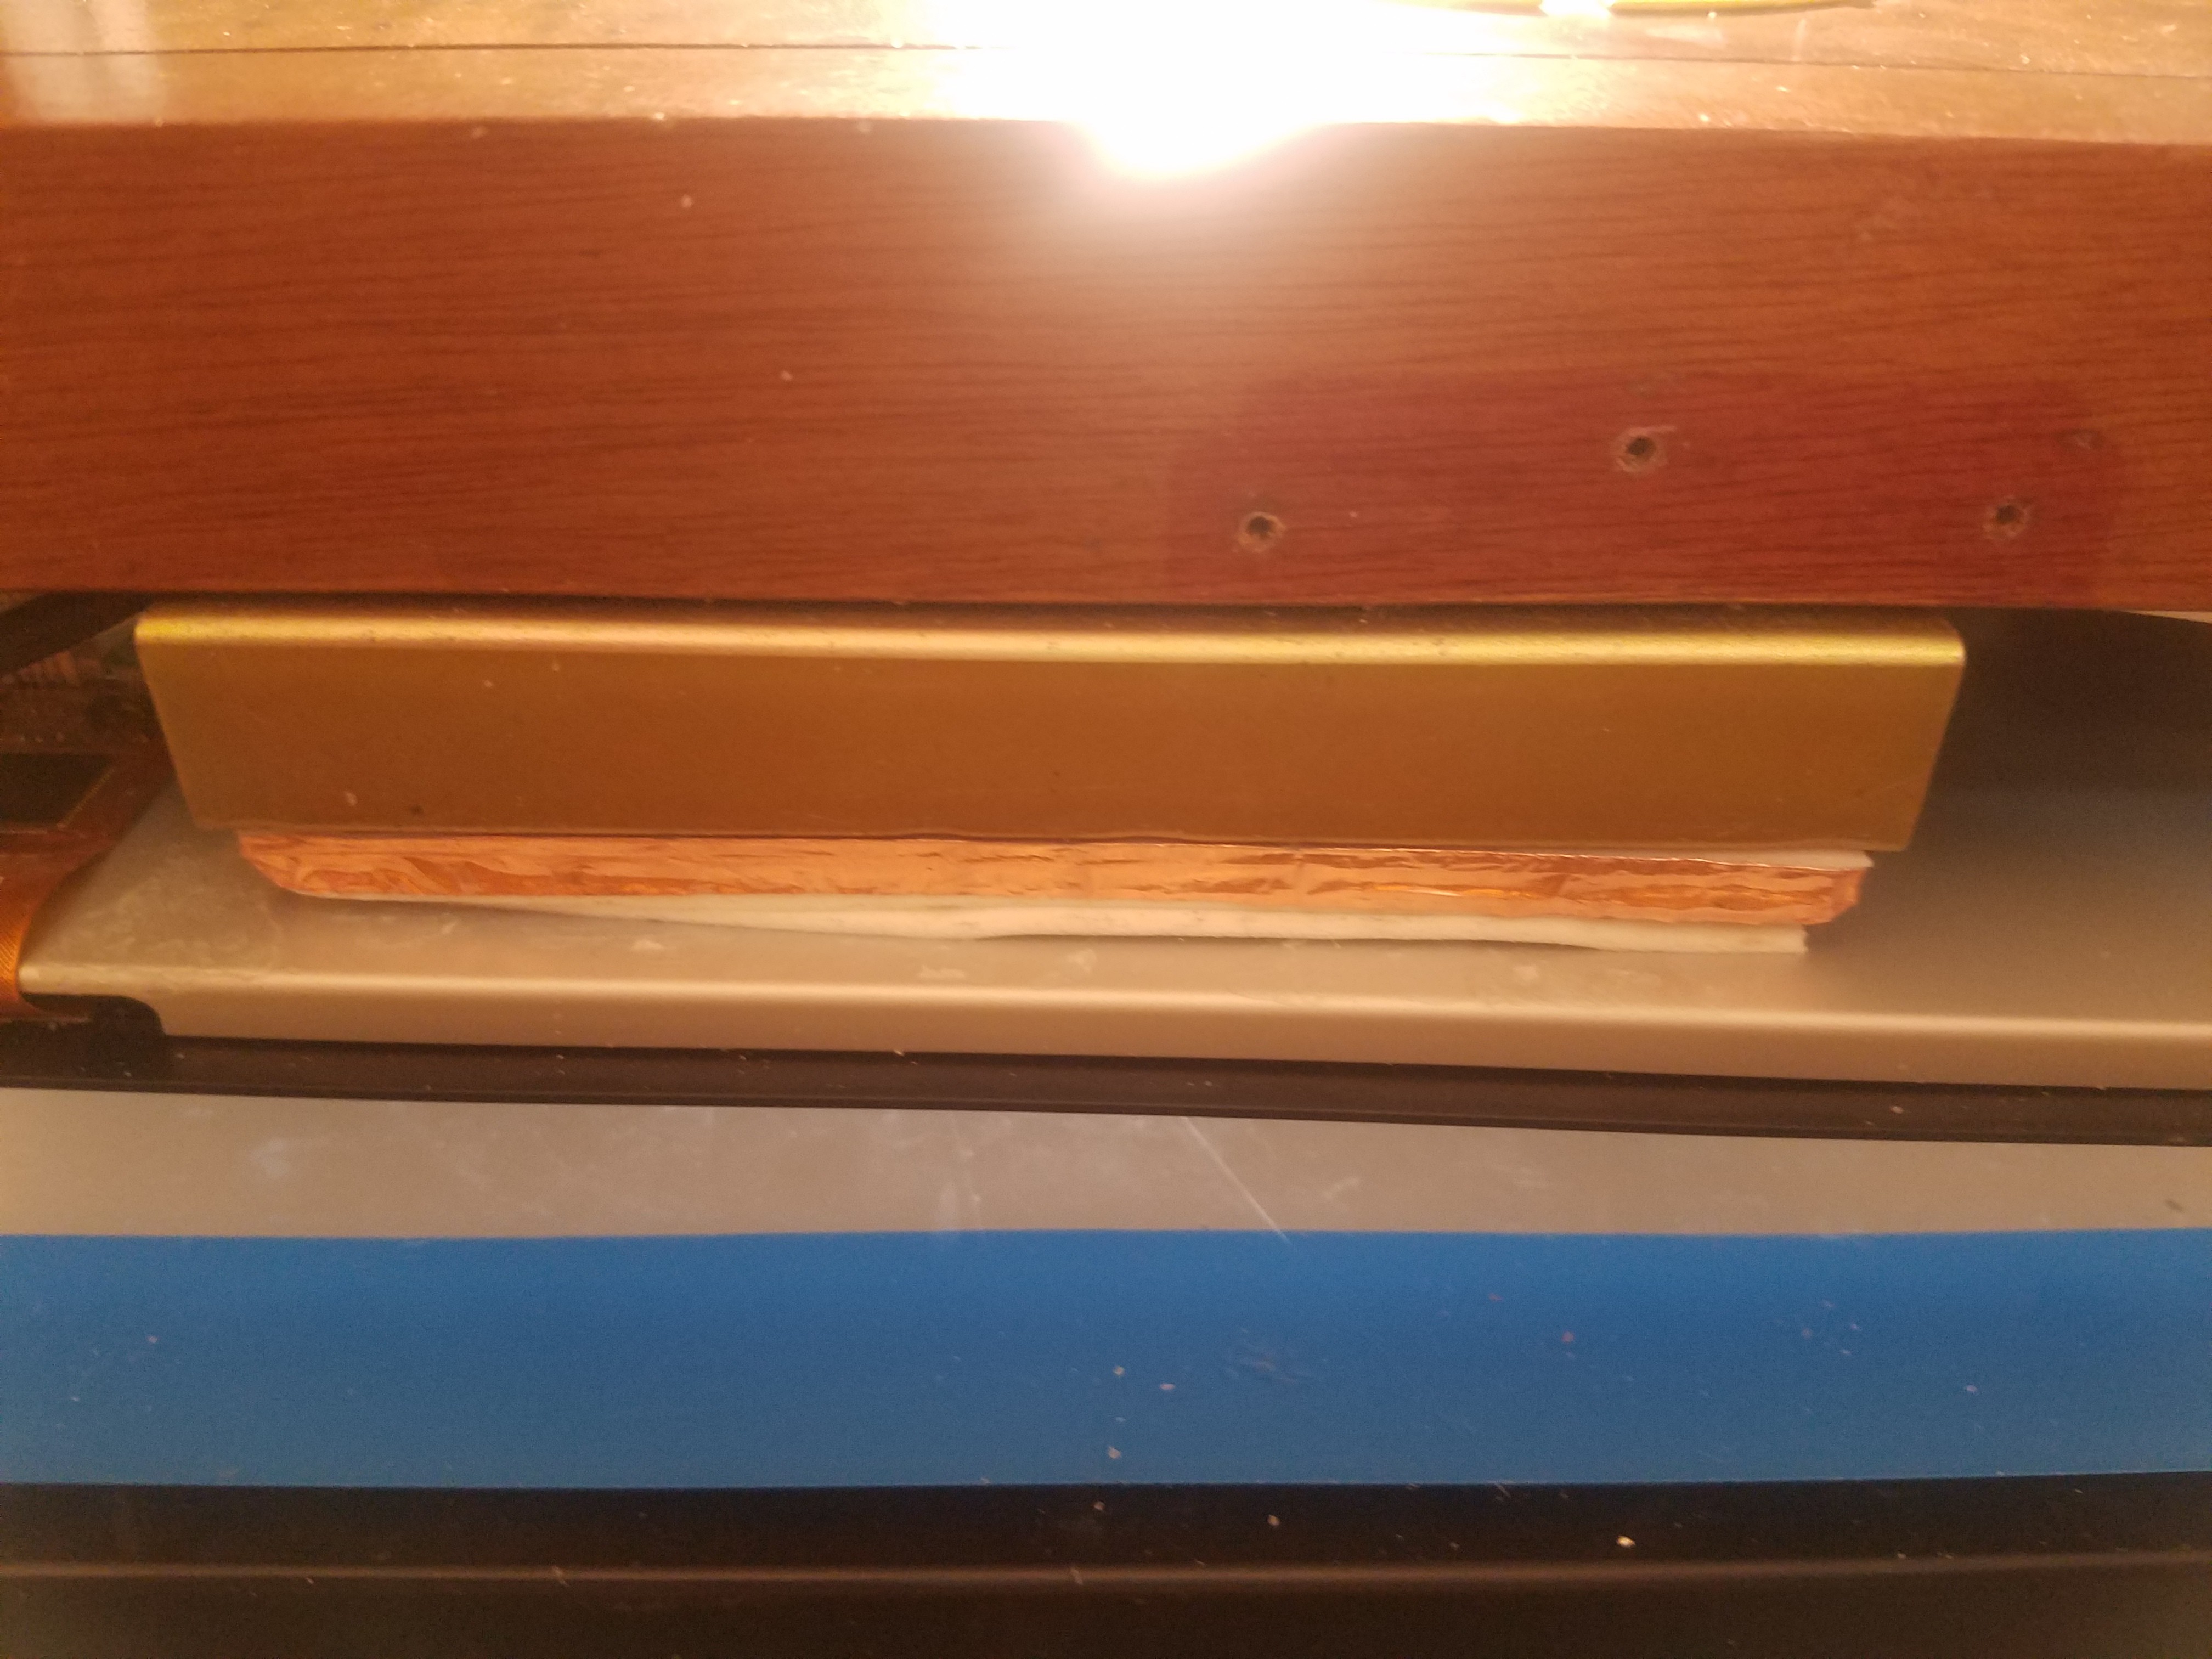
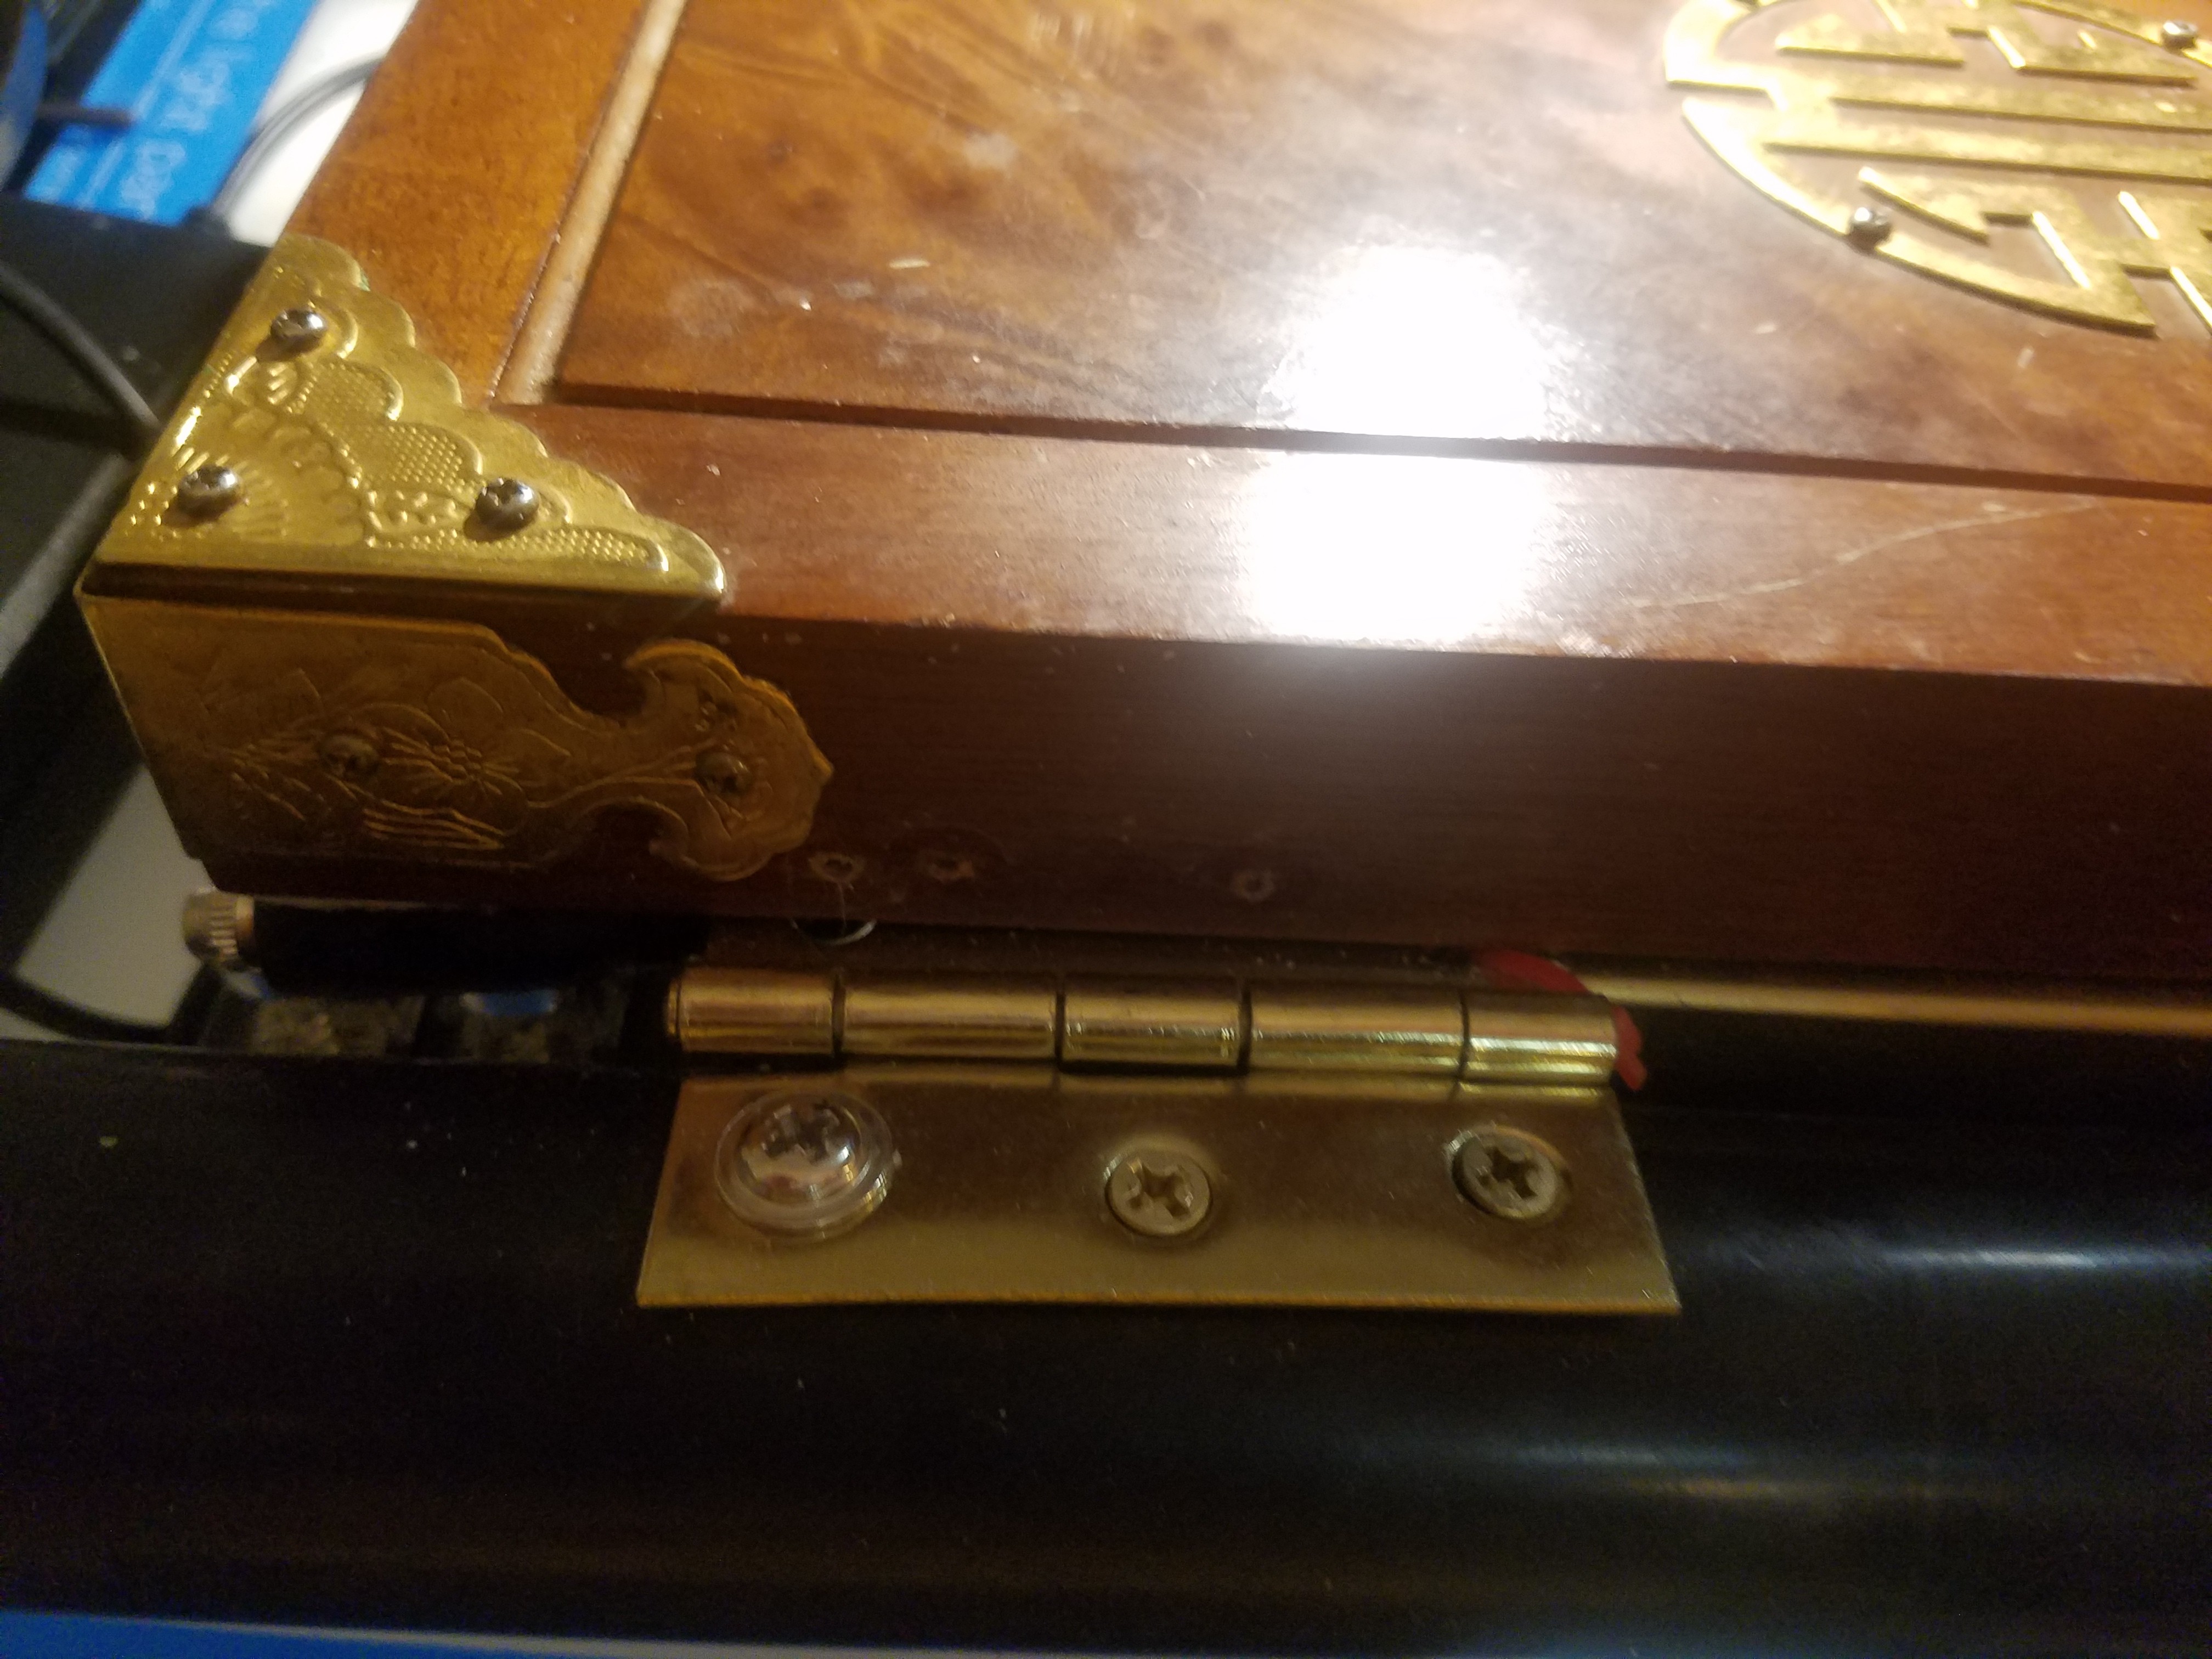
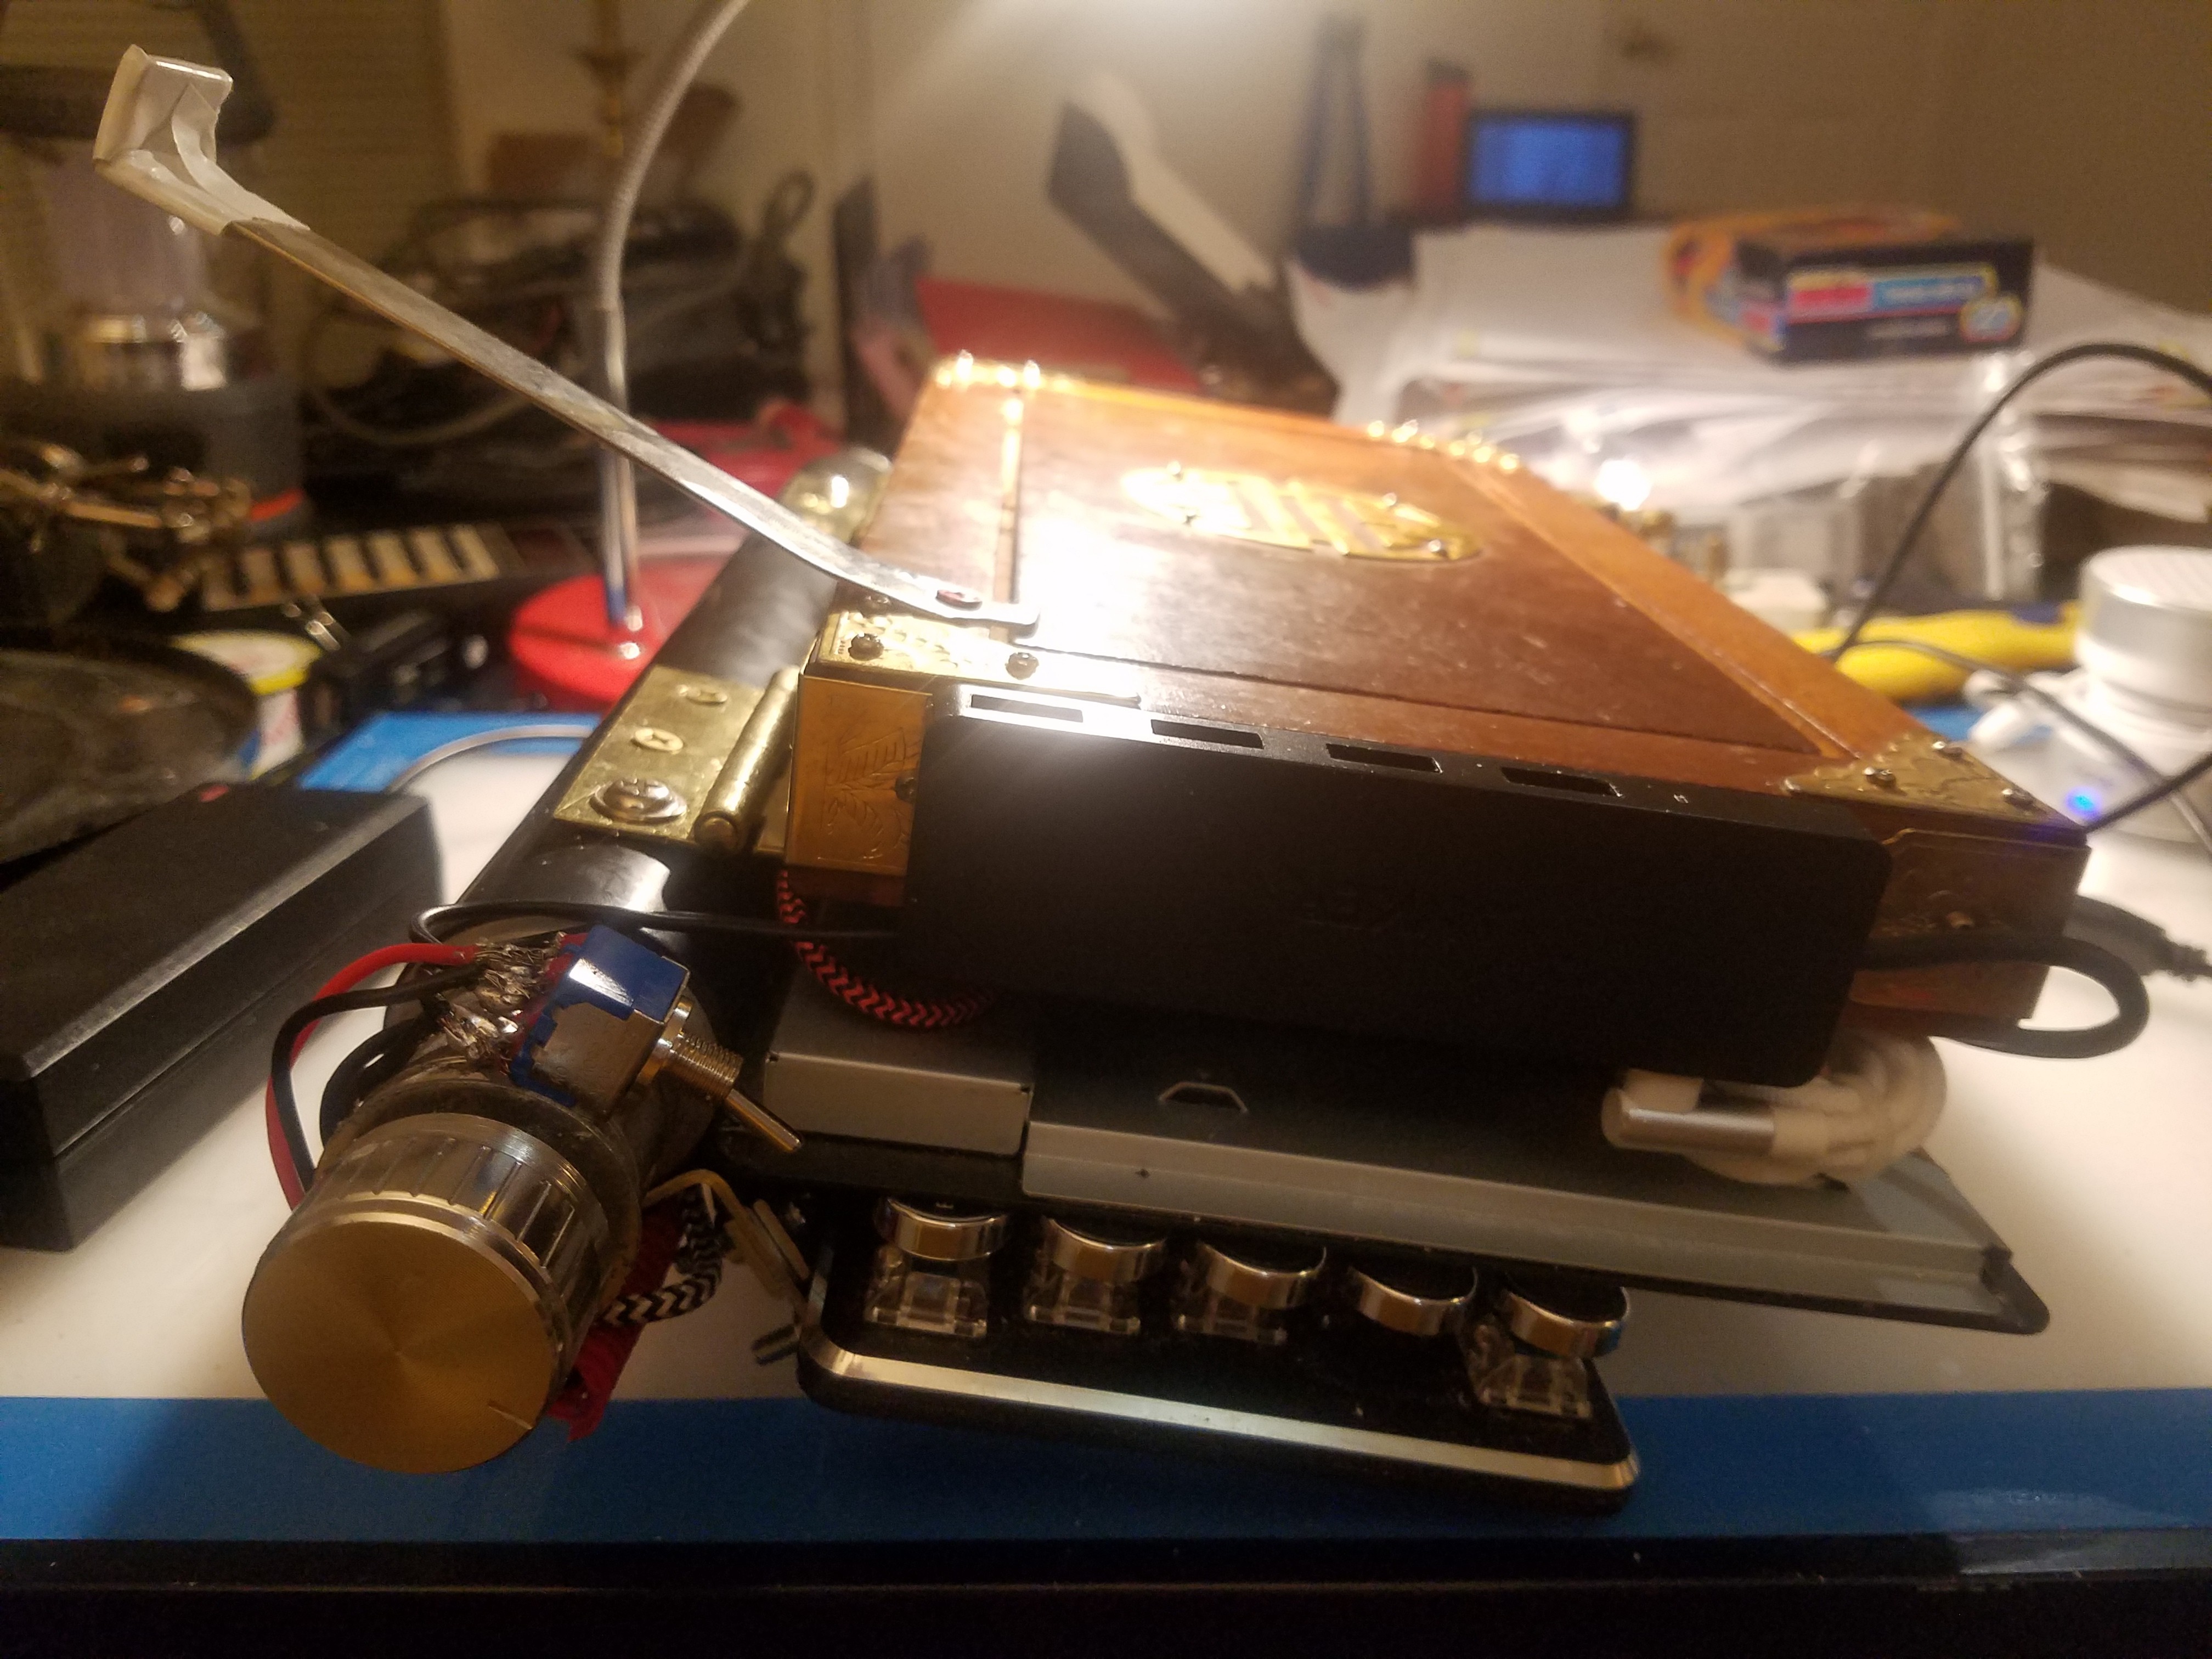
First, the screen. I wound up with a nice 10.1" display from SunFounder that got used (or partially used and found wanting) for something and then tossed up on fleaBay. It's a touch display but I don't have that cable... which is OK because touch displays on laptops are stupid and redundant. (Give me a touch display on something that doesn't also already have a frickin' mouse and we'll talk.) However, the screen was not without its challenges. It has a metal cover over the back, with mounting points for driver board and a RasPi. Some of the Pi mounts are adjustable. It's also somewhat upside-down the way it displays -- on most displays, the display controller PCB that's on the display, is at the top. I'm pretty sure that this one's PCB is at the /bottom/, though, because the metal there pokes out farther. Very strange.
I wound up insulating the back of the driver board with electrical tape and mounting it with the double-stick foam stuff to the Pi area, The display proper is on two hinges, with superglue affixing them both to the screen module and to the bracket on the other side. There's a top bracket and a bottom bracket, both made from steel treated with that iridescent yellow coating. They were originally intended as 5/25"->3.5" bay adapter brackets, but nobody cares. The upper side is held on with two layers of double-stick foam tape. I do not intend to service this machine often, but I want it serviceable in case I need to do so...
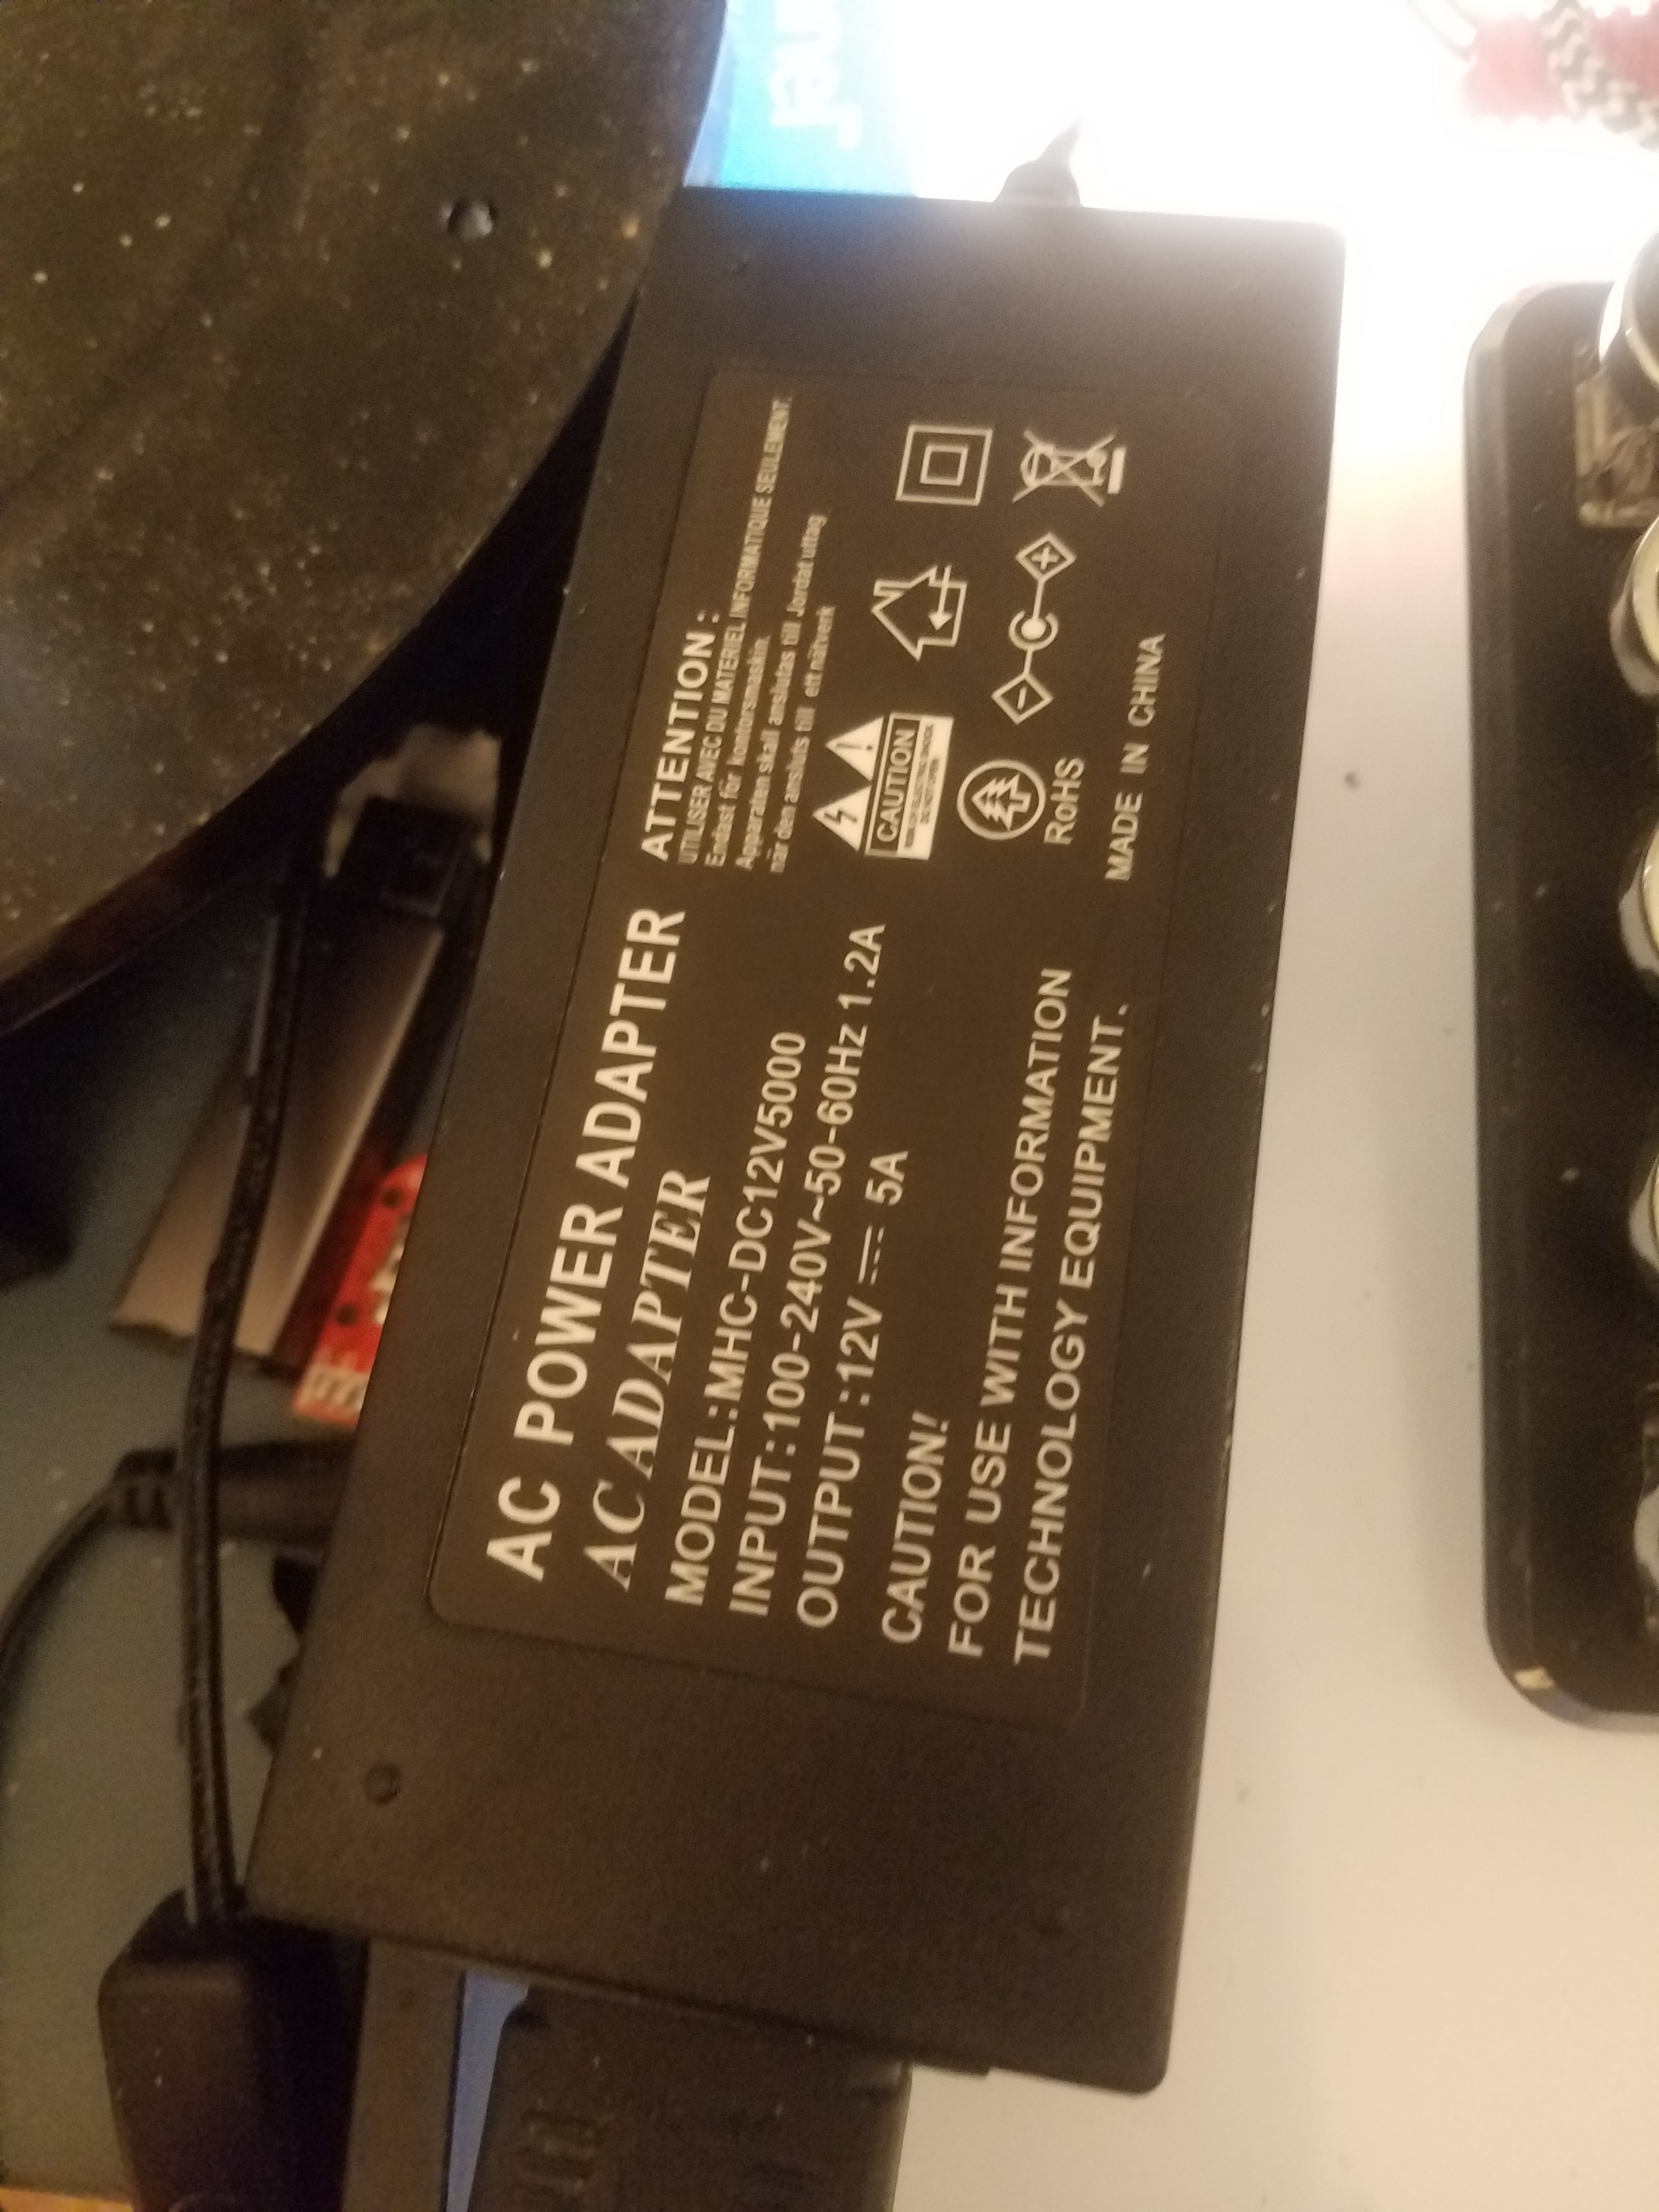
As for the power harness, I was originally going to do something sneaky. The original power supply was to be a LaCie "Bigger Disk" brick, capable of 12v 3a and 5v 4.2a. The problem is, the system unit itself is rated 12v 3a, leaving nothing for the screen. The USB hub needs 5v, but only really 2a -- I'm never gonna plug a 1a device into every single port of that hub, and it'd probably smoke if I tried that. So, to power the screen, I got a step-up converter that was to go in and turn 5v to 12v for the screen.
This SunFounder display, though, has a 5v 2a USB tap on it, intended for powering a Pi. You can probably guess where this is going already... yup, power the USB hub off the display, and then I only need a 12v supply. So I ordered a 12v 5a power brick that will be here hopefully tomorrow (but possibly Saturday), and re-plumbed the power harness to reflect the change.
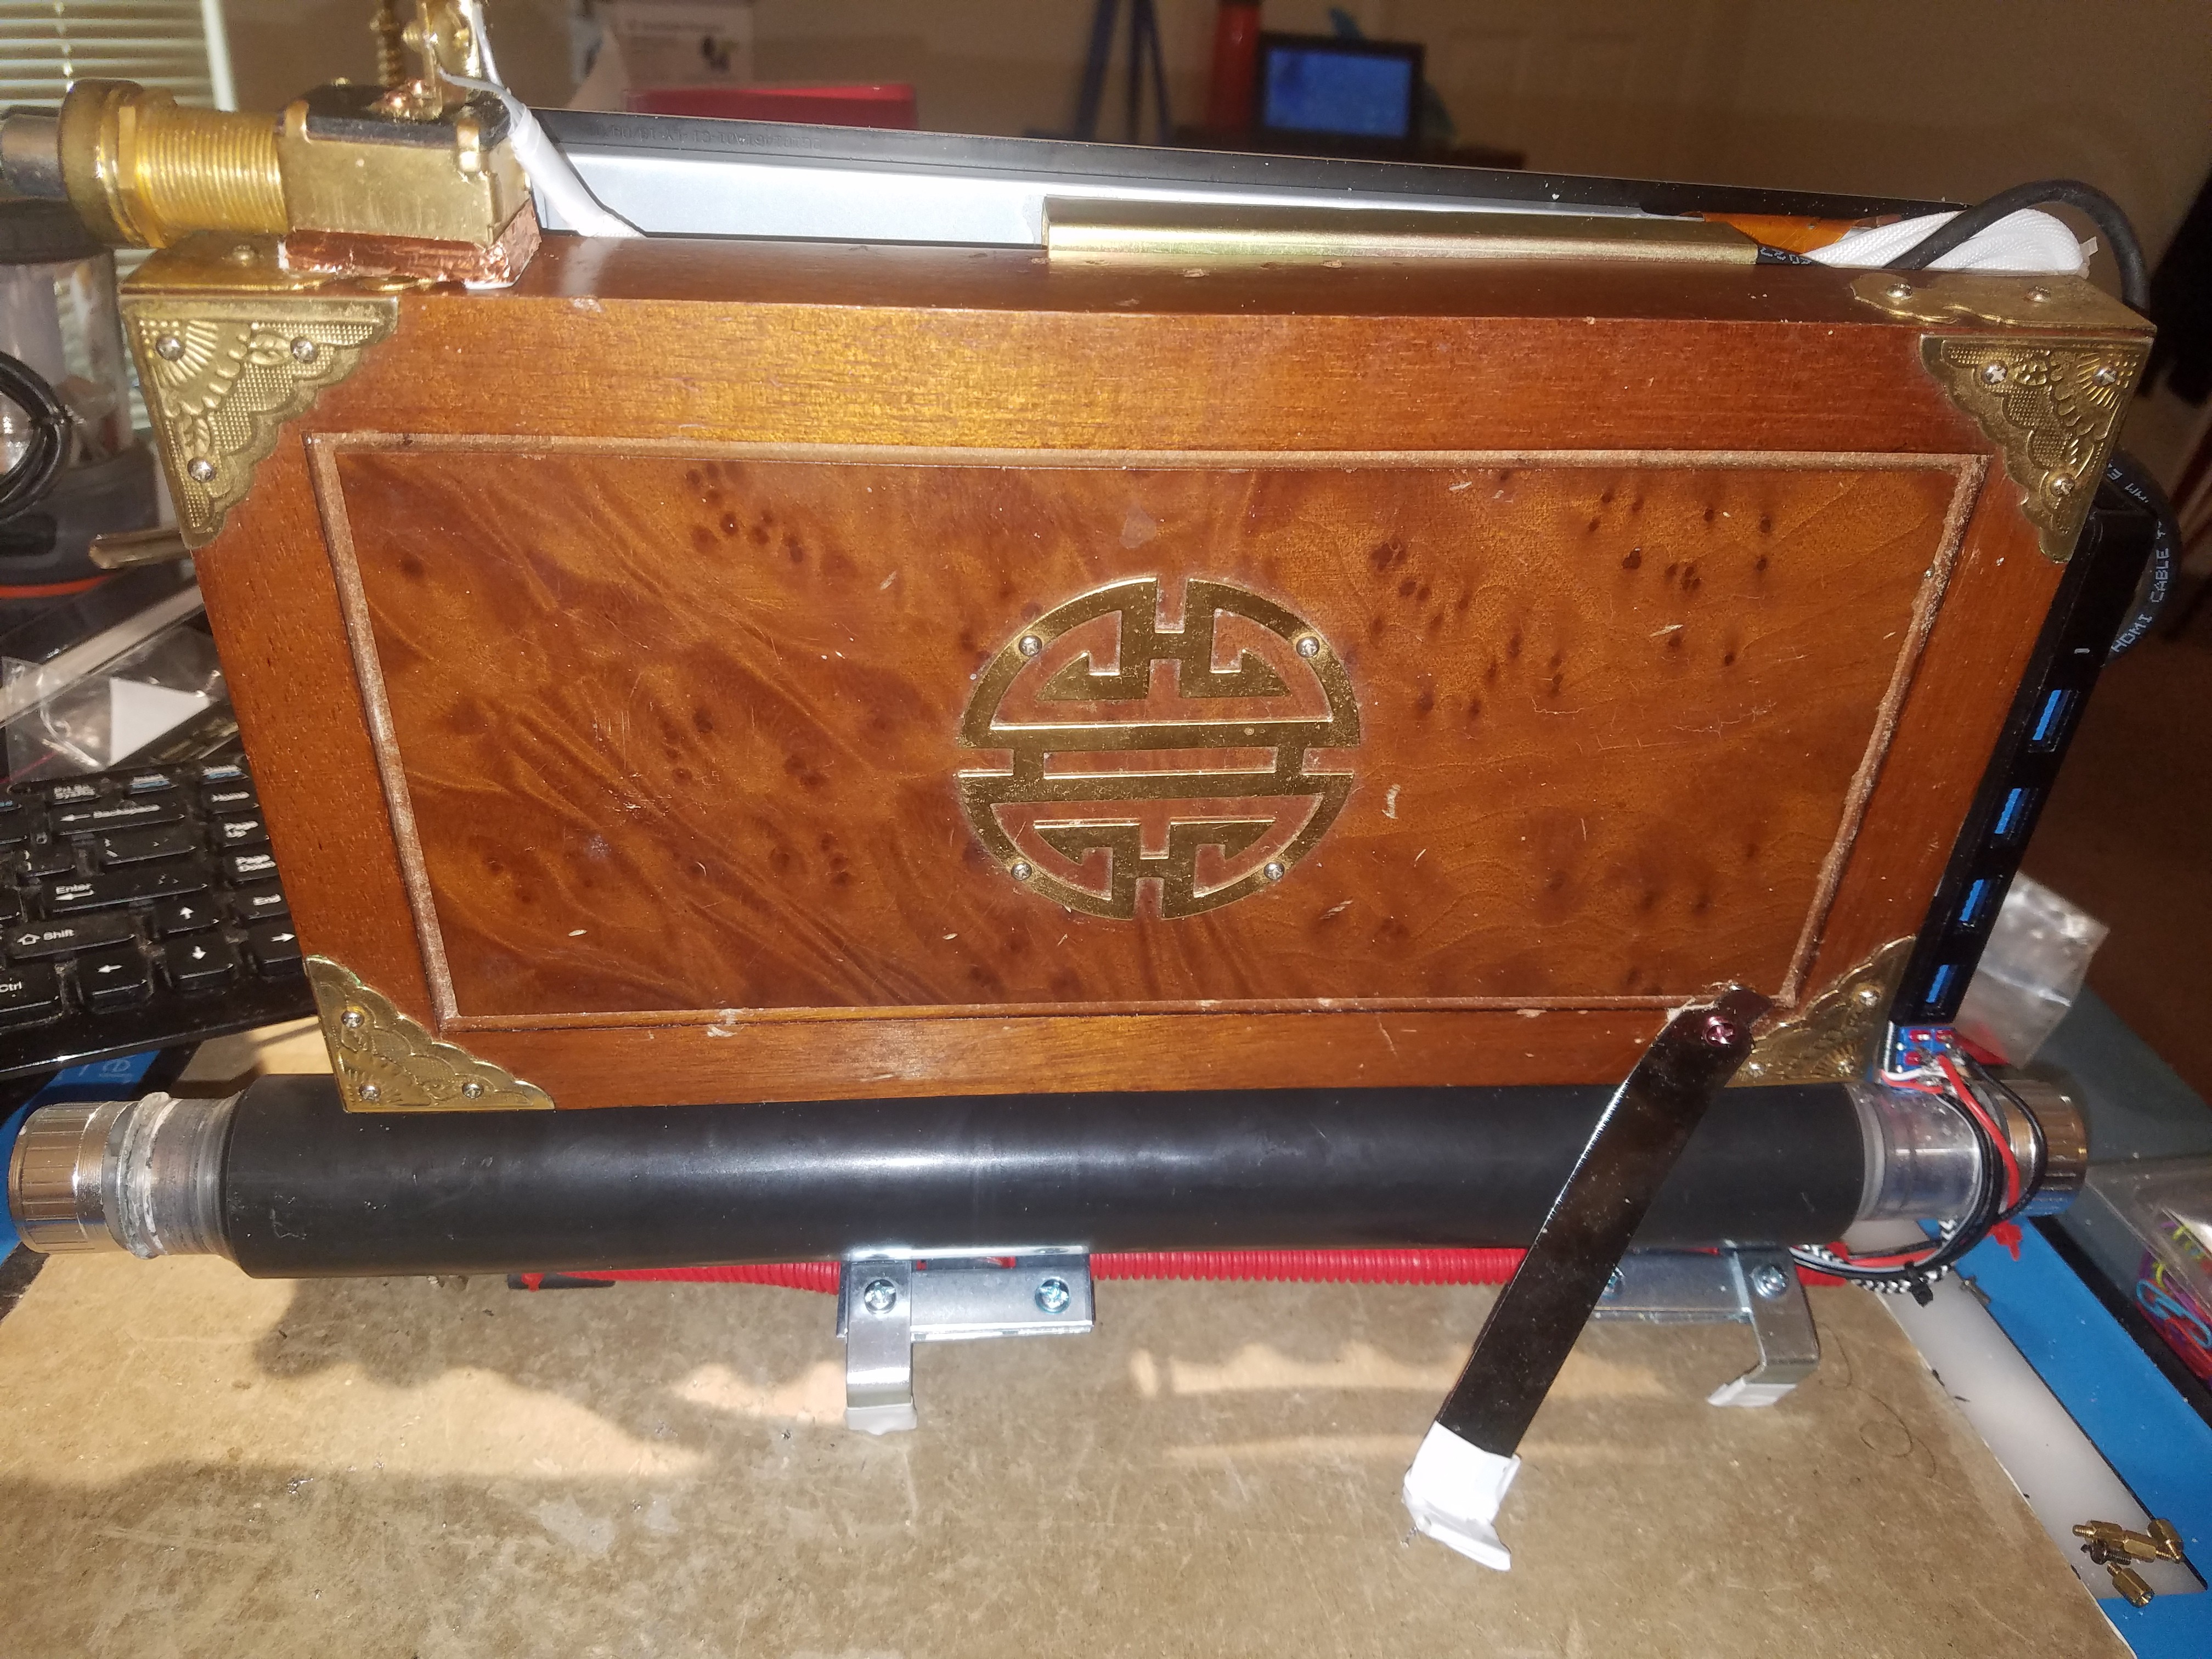
That, and redoing the brackets on the keyboard side (that hold up the copier drum) -- due to the lid being so thick -- that's about it. /Those/ wound up being inch-and-a-half brackets, three each side, with straight braces across 'em. Doesn't look pretty (rather industrial, actually) but it works a charm.
Here, pictures...
![]()
![]()
![]()
-
Intermission
04/16/2019 at 00:22 • 0 commentsSorry folks... I went shopping today and got the angle brackets I needed but right now I'm just too deep into the state of what the locals here call "plum tuckered" to really do anything meaningful. So I'm gonna go draw and listen to VNV Nation and drink Diet Coke. If I get a second wind I'll do something and post the aftermath, but don't get your hopes up, okay...? It'll probably be tomorrow before anything meaningful happens.
-
They see me postin', they lovin'...
04/14/2019 at 23:30 • 0 commentsDon't think I haven't noticed what happens right after I post a project log, every single time... ;)
Do feel free to comment, if you're even slightly inclined, not just +Like and/or Follow -- I'm (usually) open to new ideas and I promise I don't bite. IOW, feedback is both welcome and encouraged, and 'Post' here is more a button and an activity than a cereal company.
"It's not much fun for one...", as Piglett once pointed out, somewhere deep and distant within my youth... so come in and chat. There's magic to be done!
-
"Bracket To Me...!", Part The Second
04/13/2019 at 16:57 • 0 commentsYeah, I'm gonna need the one-and-a-half inch brackets.
/sigh
-
"Bracket To Me...!", Part The First
04/13/2019 at 04:00 • 0 comments...as opposed to "socket to me", because neither a socket set nor former President Richard Nixon are involved in this production, but angle brackets are.
Specifically, in this case, the angle brackets connecting the copier drum to the keyboard, which at this point are too small to deal with the size of the lid. They are scavenged from a Western Electric telephone, one of the Decor series ones with a dial pad and getup in a faux-wood and faux-leather box for people in the 80s who thought they were too cool to have an exposed desk phone on their desk. These brackets held the dial pad in place.
Today I went to Wal-Mart. I got two packs of one-inch angle brackets, two packs of short straight brackets, one pack of longer straight brackets, and some washers and machine screws. I wish I'd looked at the machine screws closer before I paid -- they will not be useful. I also wish I'd been able to get some one-and-a-half-inch angle brackets, but such is my luck that they were out. Hopefully they'll be on whatever truck has been through by Monday afternoon. I'm not 100% sure I need them, but I hope they're there if I do...
Tomorrow I will go about reassembling the keyboard / copier drum getup and see if one-inch angle brackets will add enough height. I have my doubts, but only time and trials will tell. I'm planning on using three angle brackets on each side, with the straight brackets reinforcing, and washers as spacers where needed.
I need to rewire the power harness as well, anyways -- the screen, as it turns out, is made for a Raspberry Pi setup, and it has an integrated 5v 2a power supply for powering said Pi directly off the display. As such, I'm going to repurpose that for driving the USB hub's power port (it's a USB-A connector right there anyways) if I at all can, and that means that the entire rest of the computer takes 12v input, which in turn means that I can drive the system off a 12v 5a single-voltage power brick instead of needing a dual-rail brick. I even have a very pretty matching barrel jack somewhere... this is also nice from an electrical perspective, because it means the power toggle can now take on power and ground at once. I have to check the amp rating of the switch, but I'm relatively sure it'll be fine. If not, I can get another.
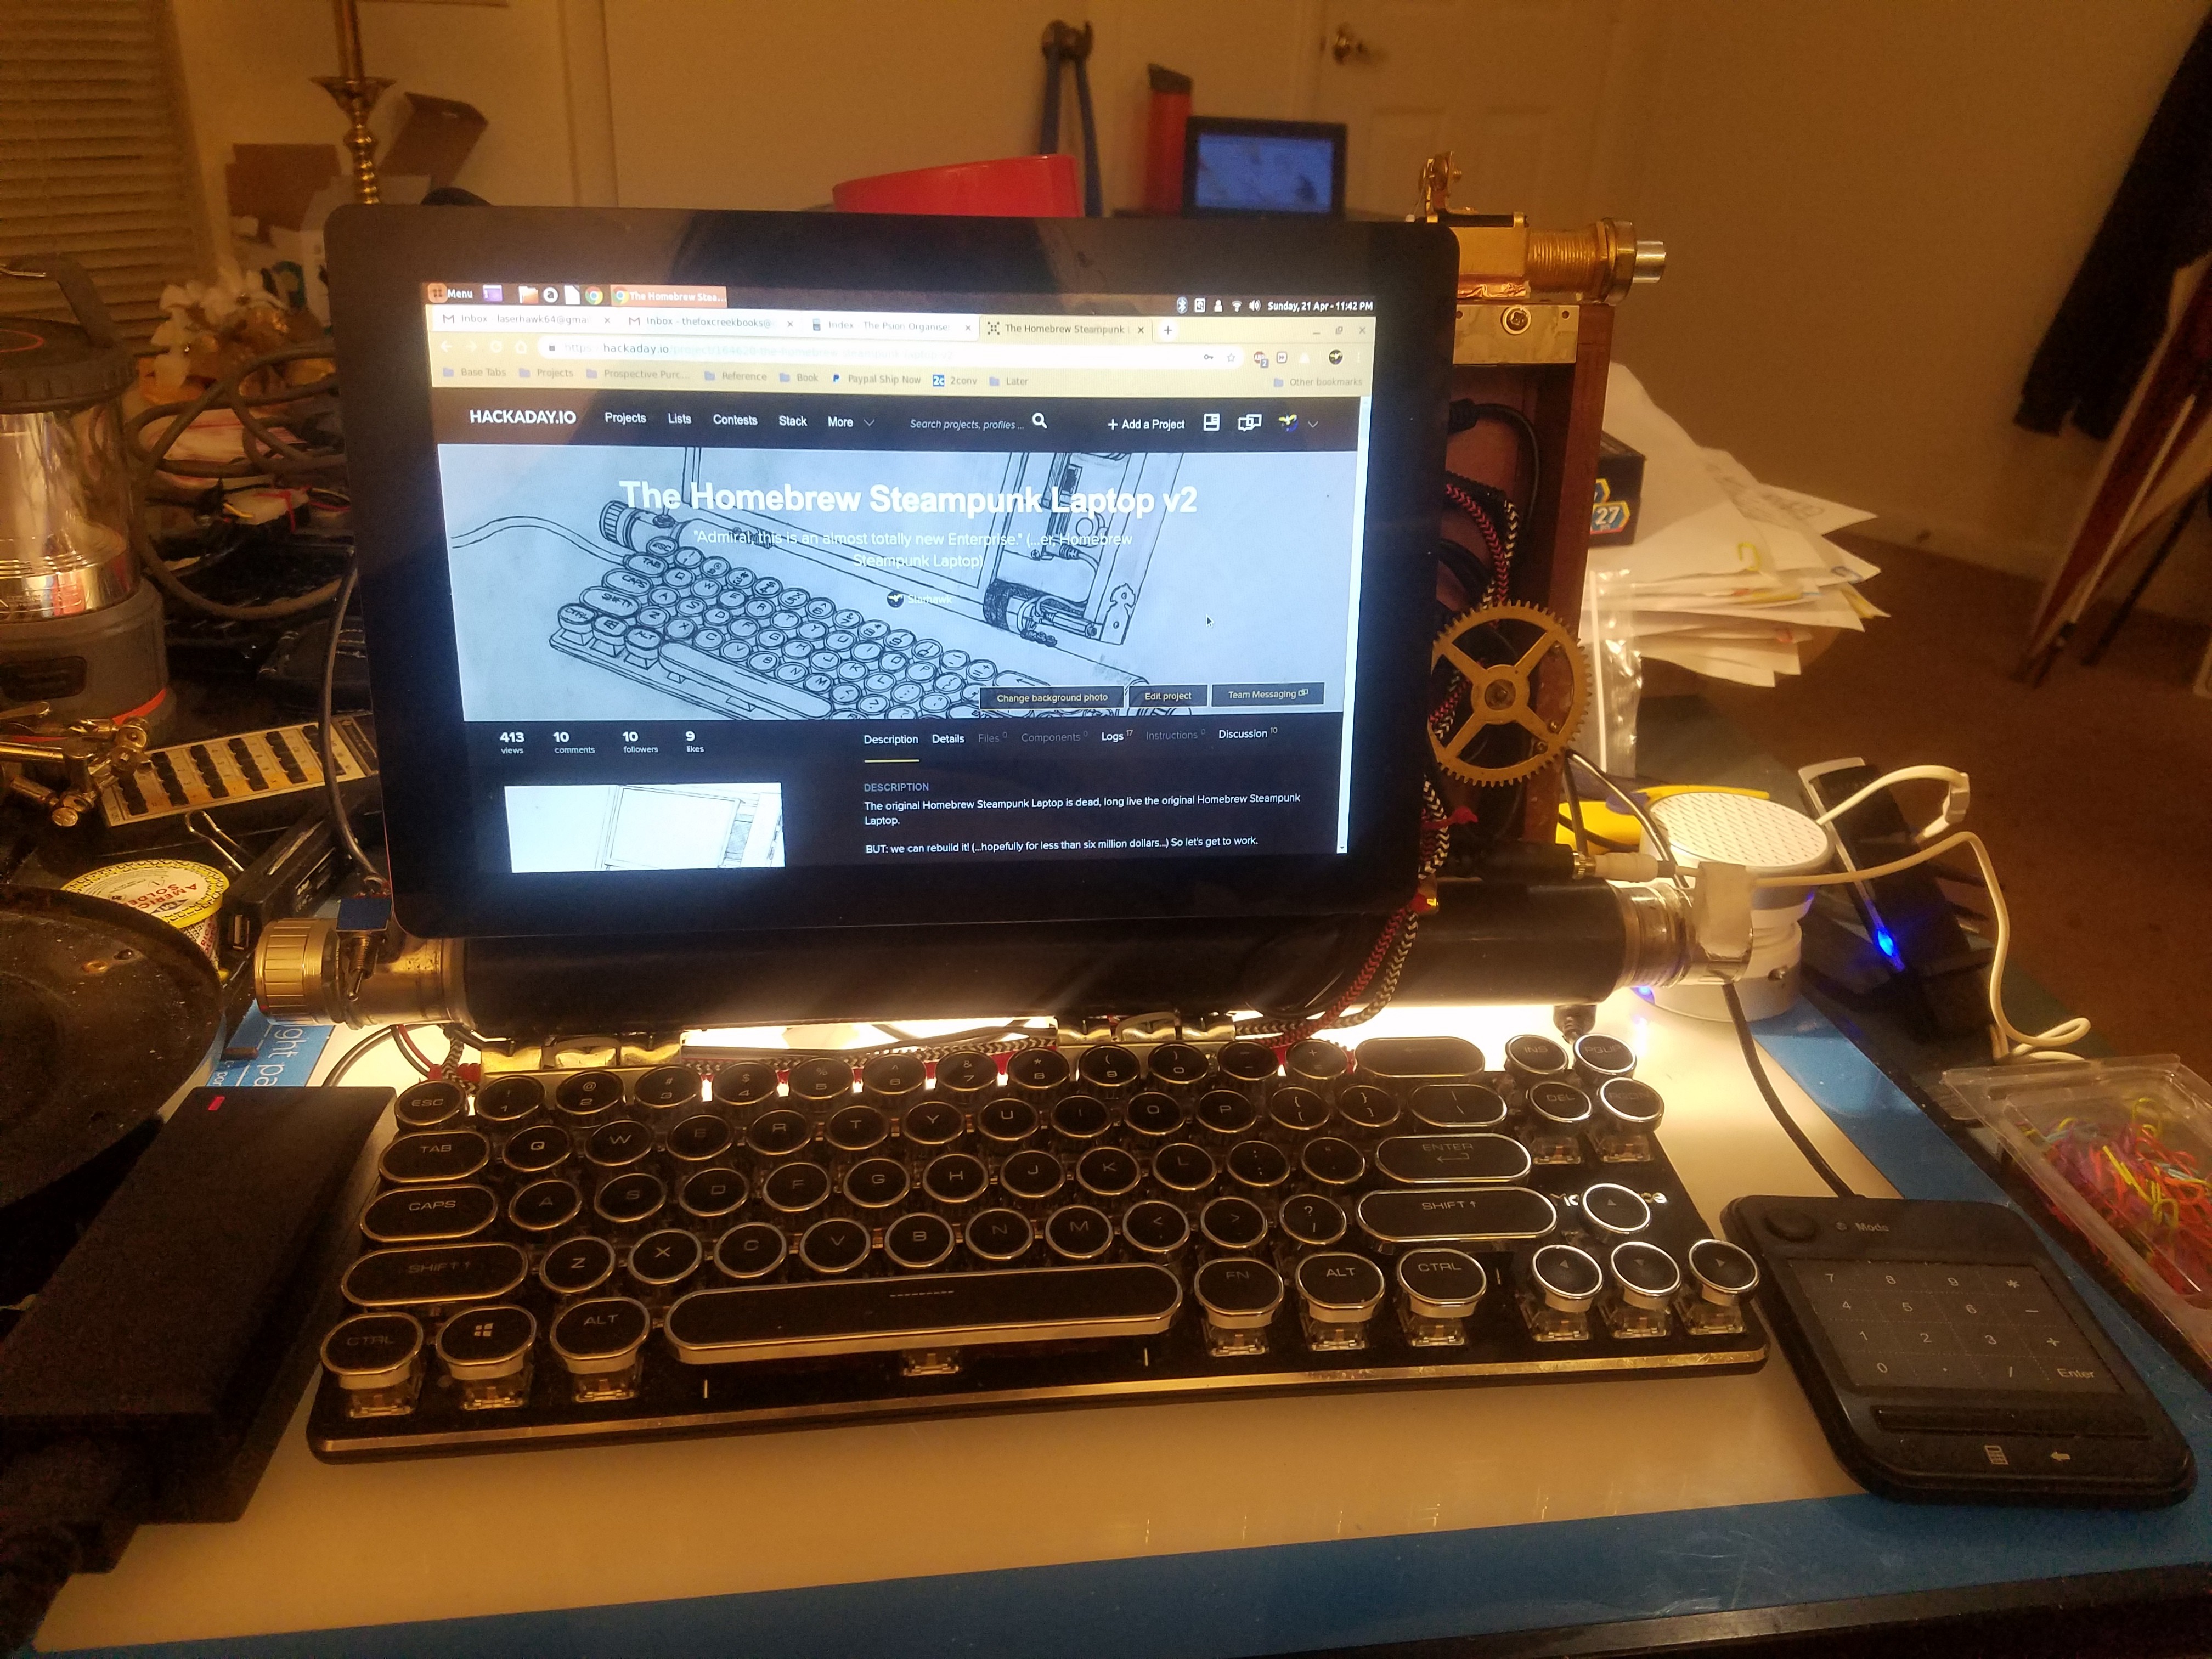
The Homebrew Steampunk Laptop v2
"Admiral, this is an almost totally new Enterprise." (...er, Homebrew Steampunk Laptop)