Starhawk
-
Ole Man Trouble
04/07/2019 at 01:21 • 0 commentsA short one this time. Got the new screen. Noooooooooot what I was expectinig, and by a fat mile. Rigged a way to make it work, but no pictures yet, because the effing thing now blocks the lid from closing with the screen installed. Too thick.
Argh!
-
LCD, but not an LCD Soundsystem...
04/03/2019 at 03:39 • 0 comments(Apologies to pop culture, as usual.)
I ordered the LCD kit today. Hopefully THIS time the seller will have understood correctly that they need to cover the driver board with something not conductive so that static from all the bubble wrap doesn't fry it.
If this kit arrives properly -- it will be the fourth and last. Wish me luck.
EDIT: well, I woke up this morning to a message from the LCD kit seller. He had his tech check it over and it didn't pass muster. I get a refund.
I think I may get a standard 10.1" HDMI monitor and take the effing thing apart.
-
A Series of Fortunate Progressions
04/02/2019 at 03:44 • 0 commentsThe "knob keyboard" -- side knobs that adjust volume and page location, courtesy of two rotary encoders and a bit of wizardry with the QMK custom-keyboard firmware and an eBay Arduino Micro clone -- is programmed and tested, working, known good. (Thank you in particular to a Redditor on the OLKS/QMK support subreddit named "drashna" for that!)
The keyboard proper has a new USB cable and the cabling in the lid in general has been mostly redone.
The system-on button has its cable sleeved and the unsightly foam tape holding it down, mostly hidden behind copper tape.
The gear moved around a little.
The SSD is in.
The foam tape mounting the USB hub was redone as well.
The kickstand has more electrical tape on its foot-end so that it will hopefully grip the table better when it is in use.
Basically all that's left at this point is the purchase and mounting of the screen itself...
Here are the current pictures...
![]()
![]()
![]()
-
"Marty, where we're going..."
03/30/2019 at 19:19 • 0 commentsI'm going to try to sleeve the cord going from the motherboard power button to the system power-on button (which, by the way, is a Cole Hersee marine starter switch), using a bit of the USB cable I cut up for the part of the power harness that goes to the USB hub.
I need to wire up the keyboard proper, and flash/test/correct the firmware to the control board for the rotary encoders.
I've decided to get a 10.1" screen with a better resolution, than the 9" screens I keep getting that don't work. It won't fit as well, but maybe I can get one that actually works. That would be nice. The driver board for that will go in behind the hard drive / SSD holder.
I'm thinking I might cover some of the exposed double-stick foam tape with copper tape.
After that, it's a matter of installing the SSD (I have a nice 256b ADATA brand SSD that I'm gonna throw in) and operating system, and at that point it's done. I'm so close I can taste it!
-
Build Me Up, Buttercup...
03/30/2019 at 19:09 • 0 commentsAt this point, I was kind of "in the zone" as people call it -- in the typical cycle of development where the mnemonic is "form norm storm perform" -- I was definitely in the "perform" stage. You know the cartoon where there's a bunch of gobbledegook on a blackboard and smack in the middle it says 'and then a miracle happens"...?
![]()
Yeah, I was kind of in the miracle business at this point... and I tell you what, it felt mighty good to be there.
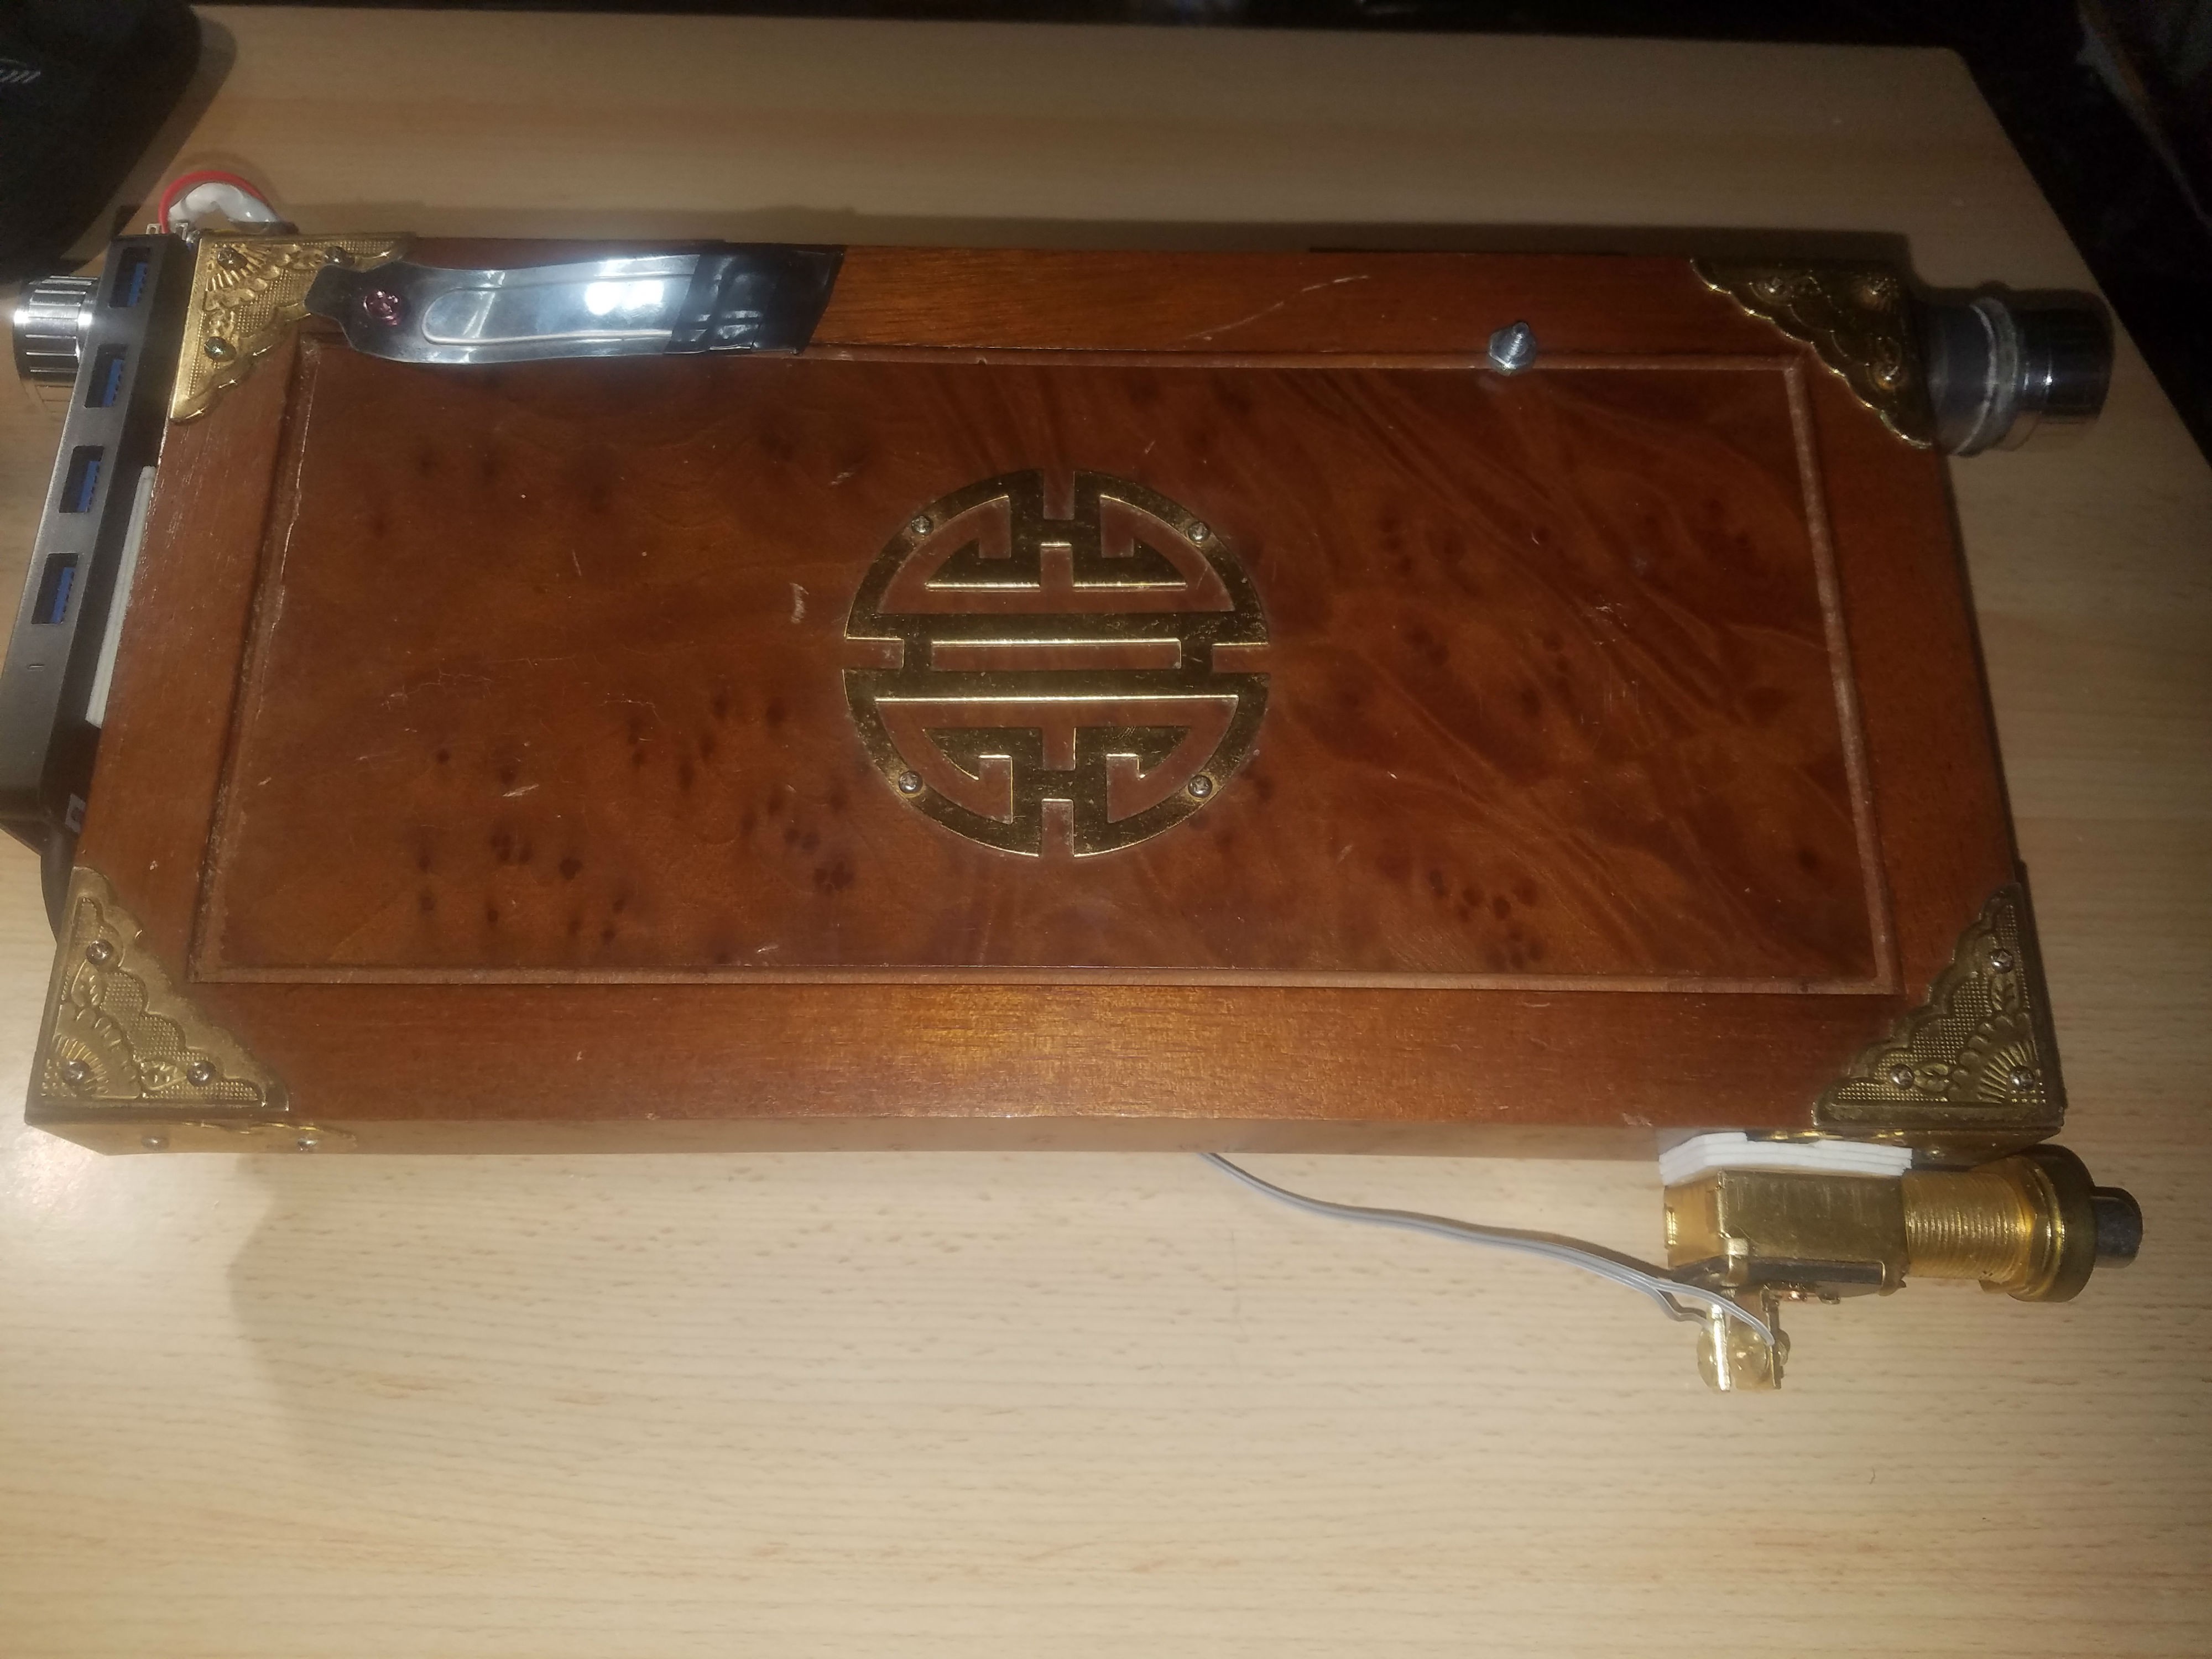
In went the hard drive / SSD holder, the motherboard, the USB hub, the system power-on button, a crapload of cabling, the WiFi antennae, and a decorative gear -- and it all went in relatively cooperatively and smoothly. A welcome change from having to argue with the dang thing, for sure! At around this point, I also implemented a 'kickstand' for the system, because (as usual) the keyboard was lighter at this point than the lid, meaning that without such a device, opening the machine would instantly tip it over backwards. The kickstand was simple -- a PC fan screw held on a PCI slot bracket that I had cut to length.
At this point, the machine looked like this...
![]()
![]()
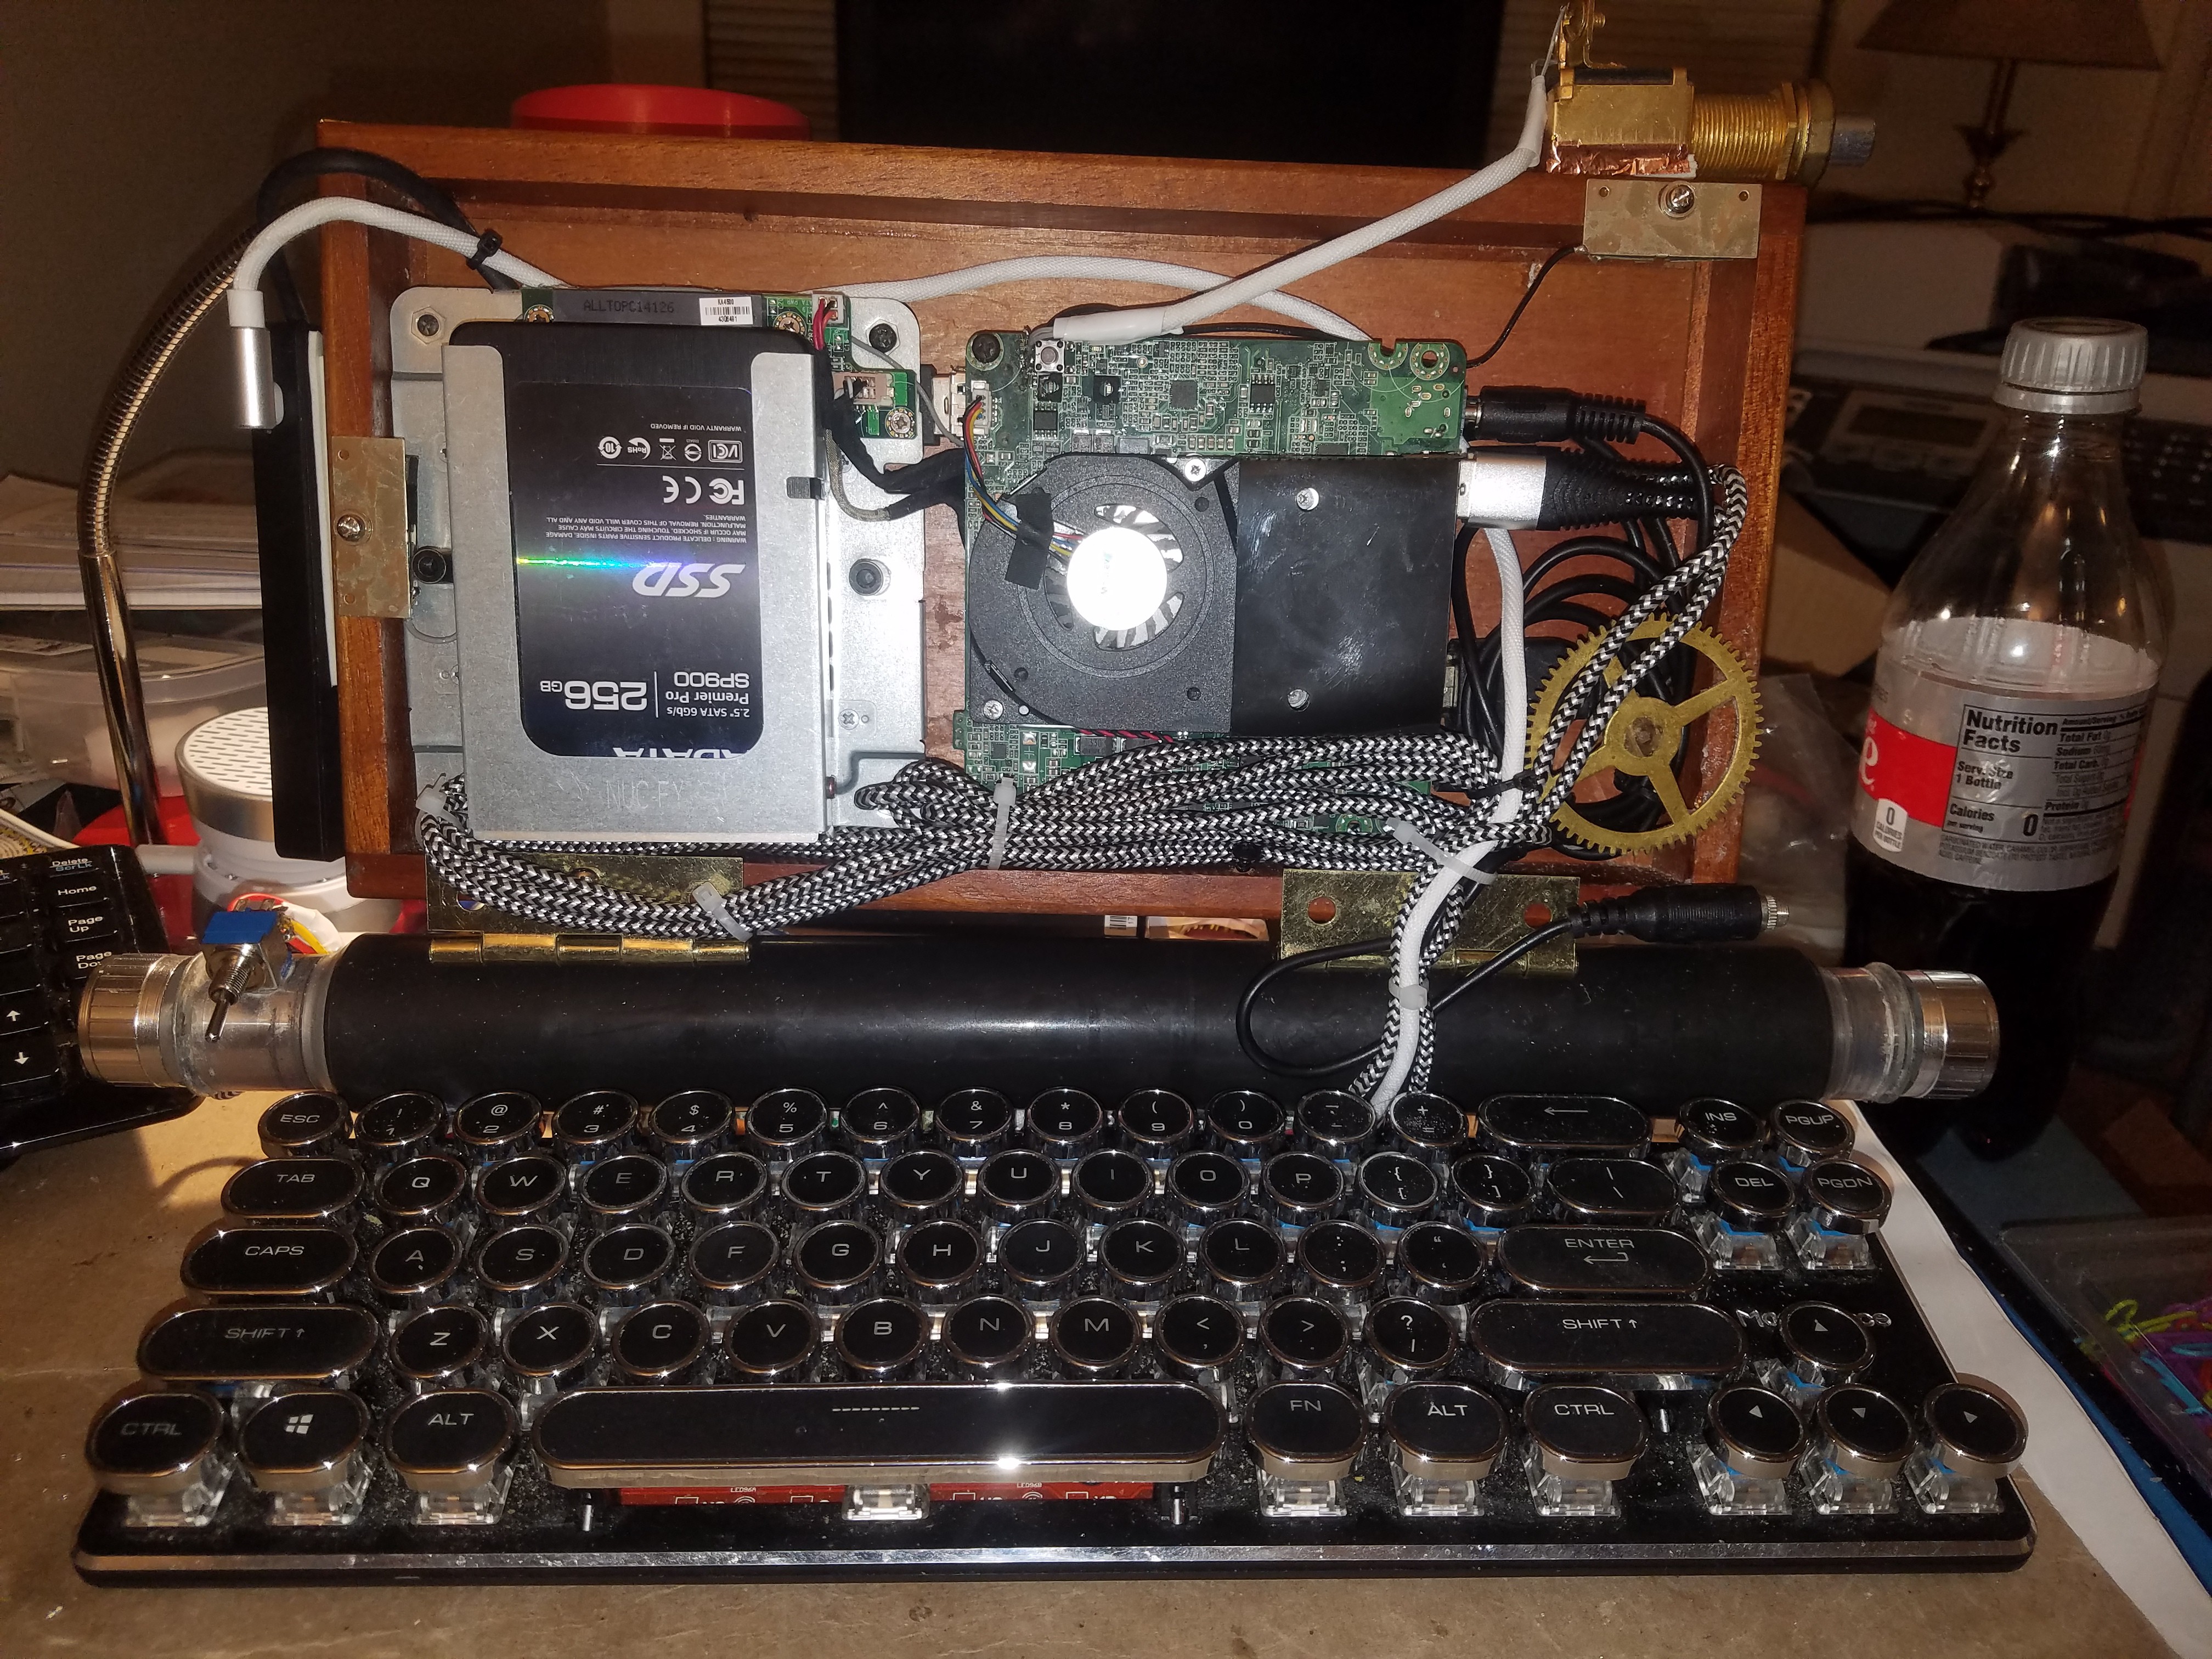
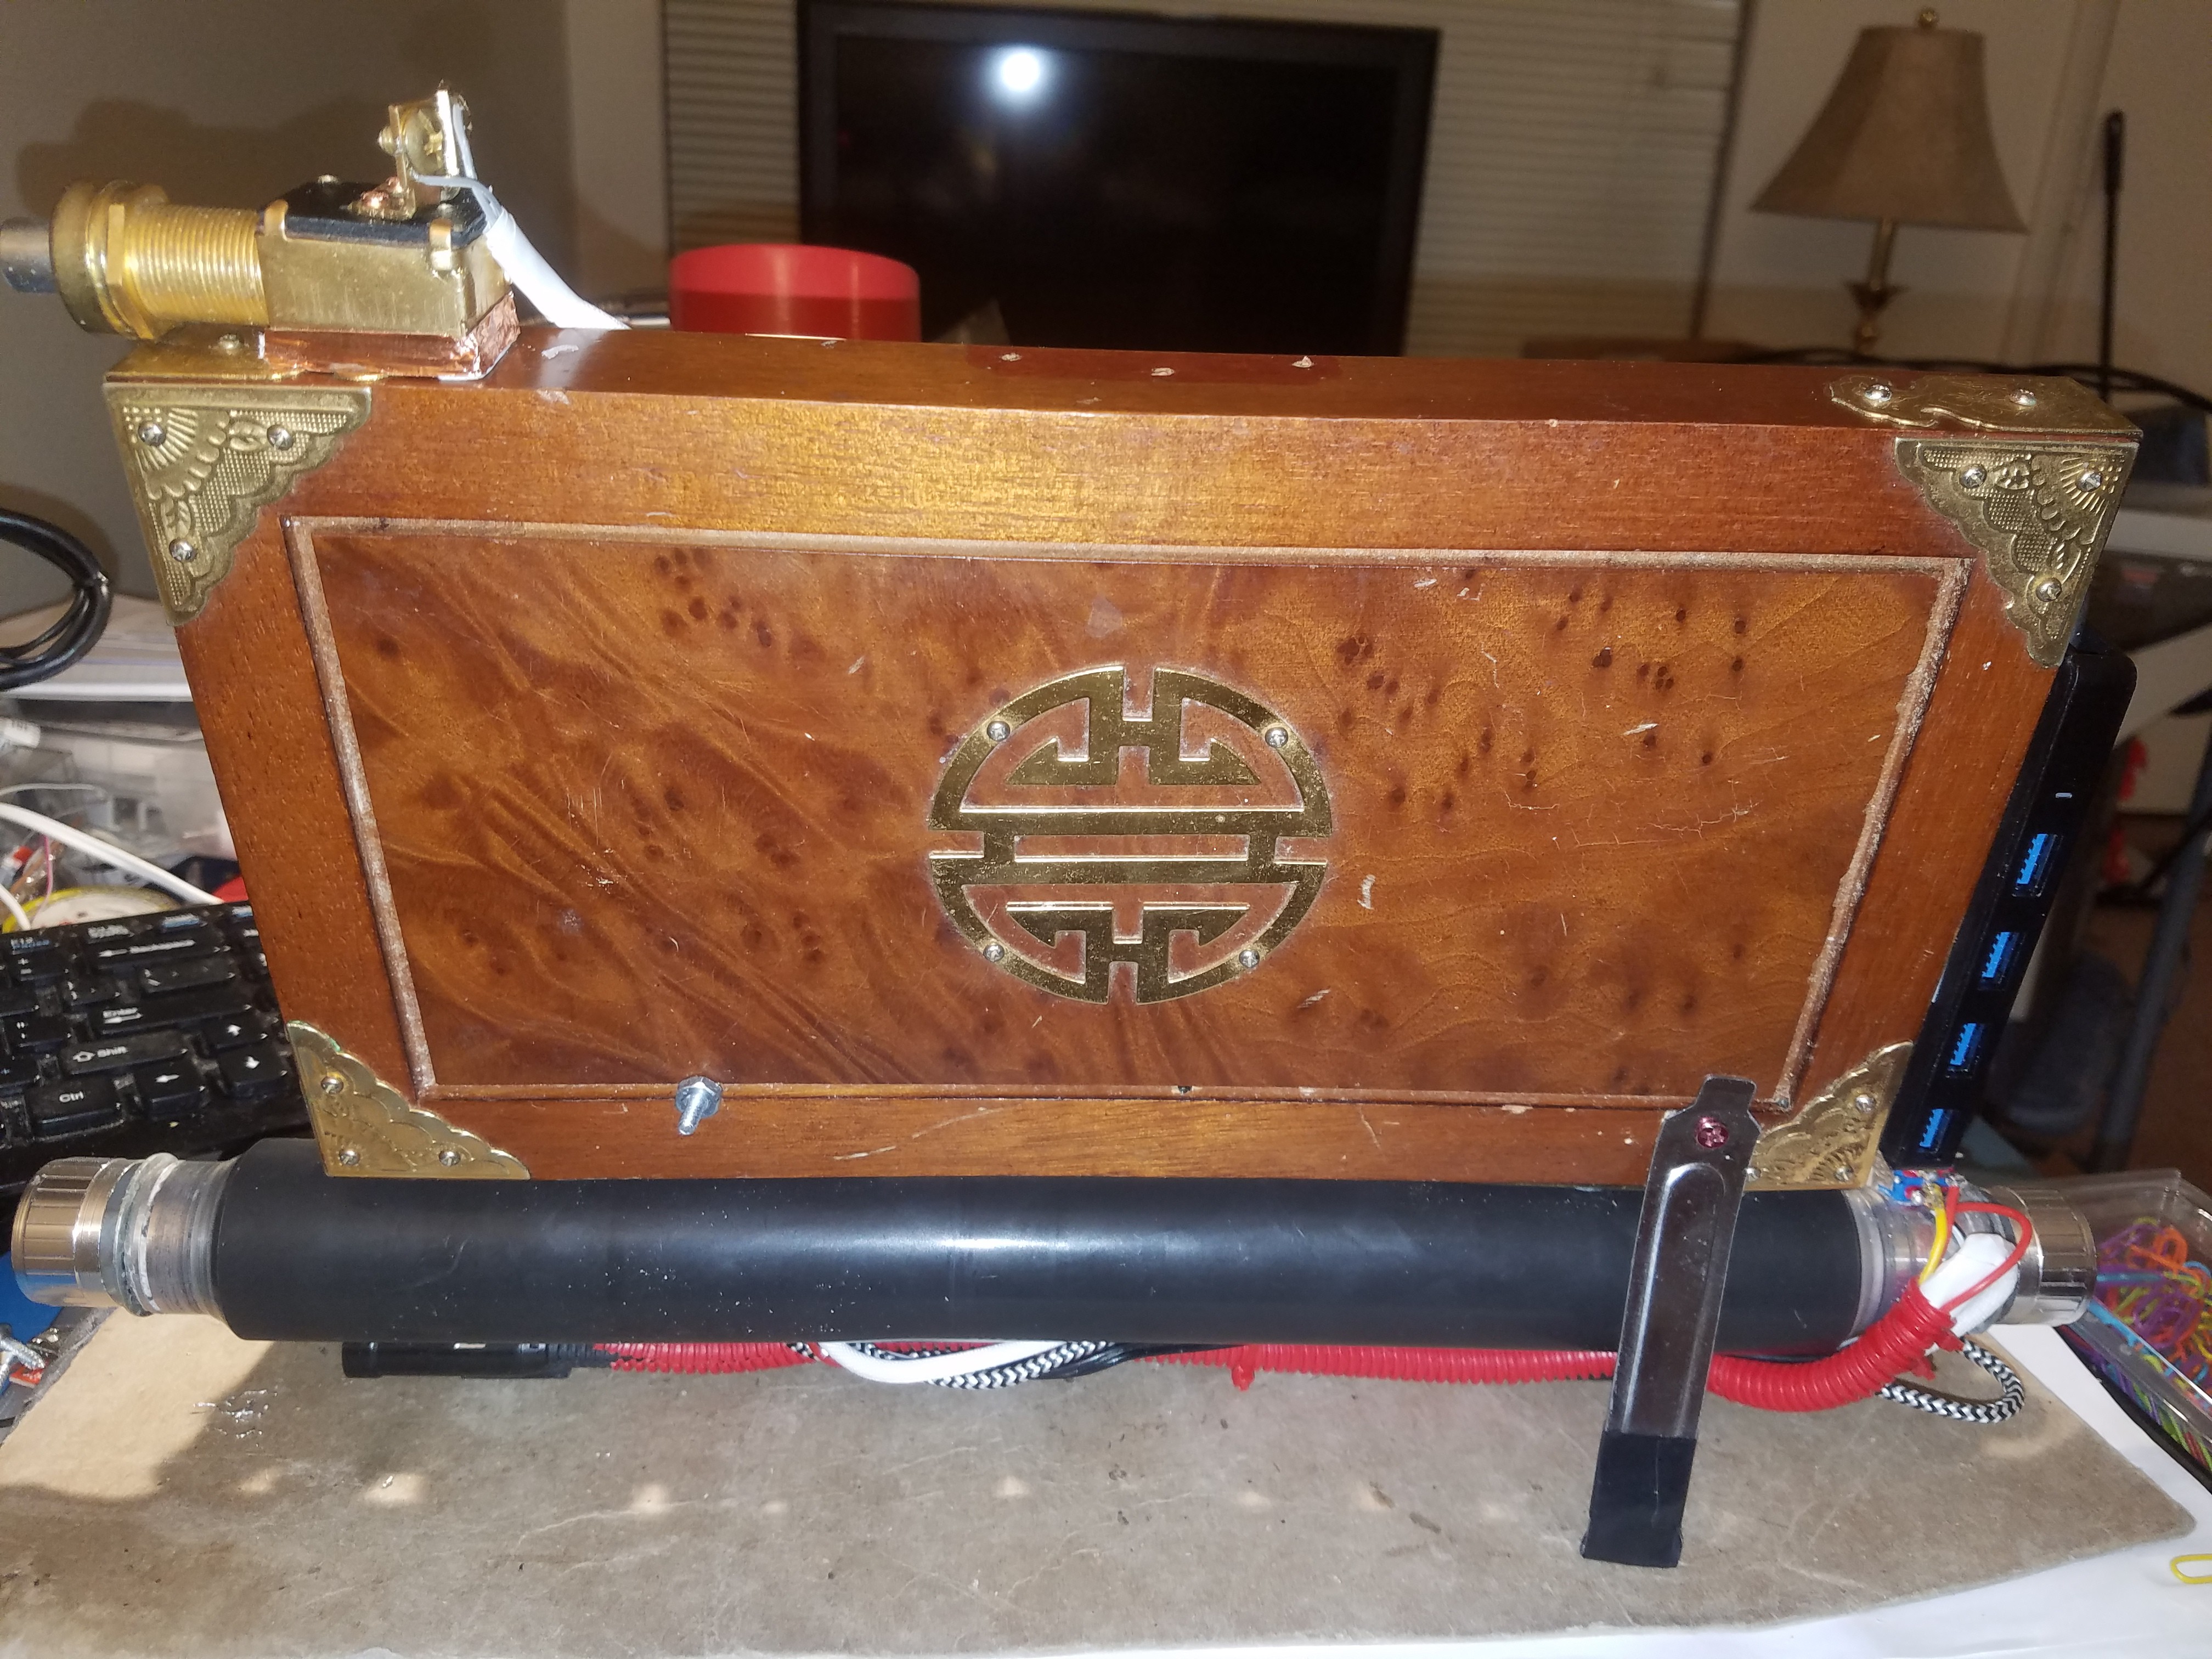
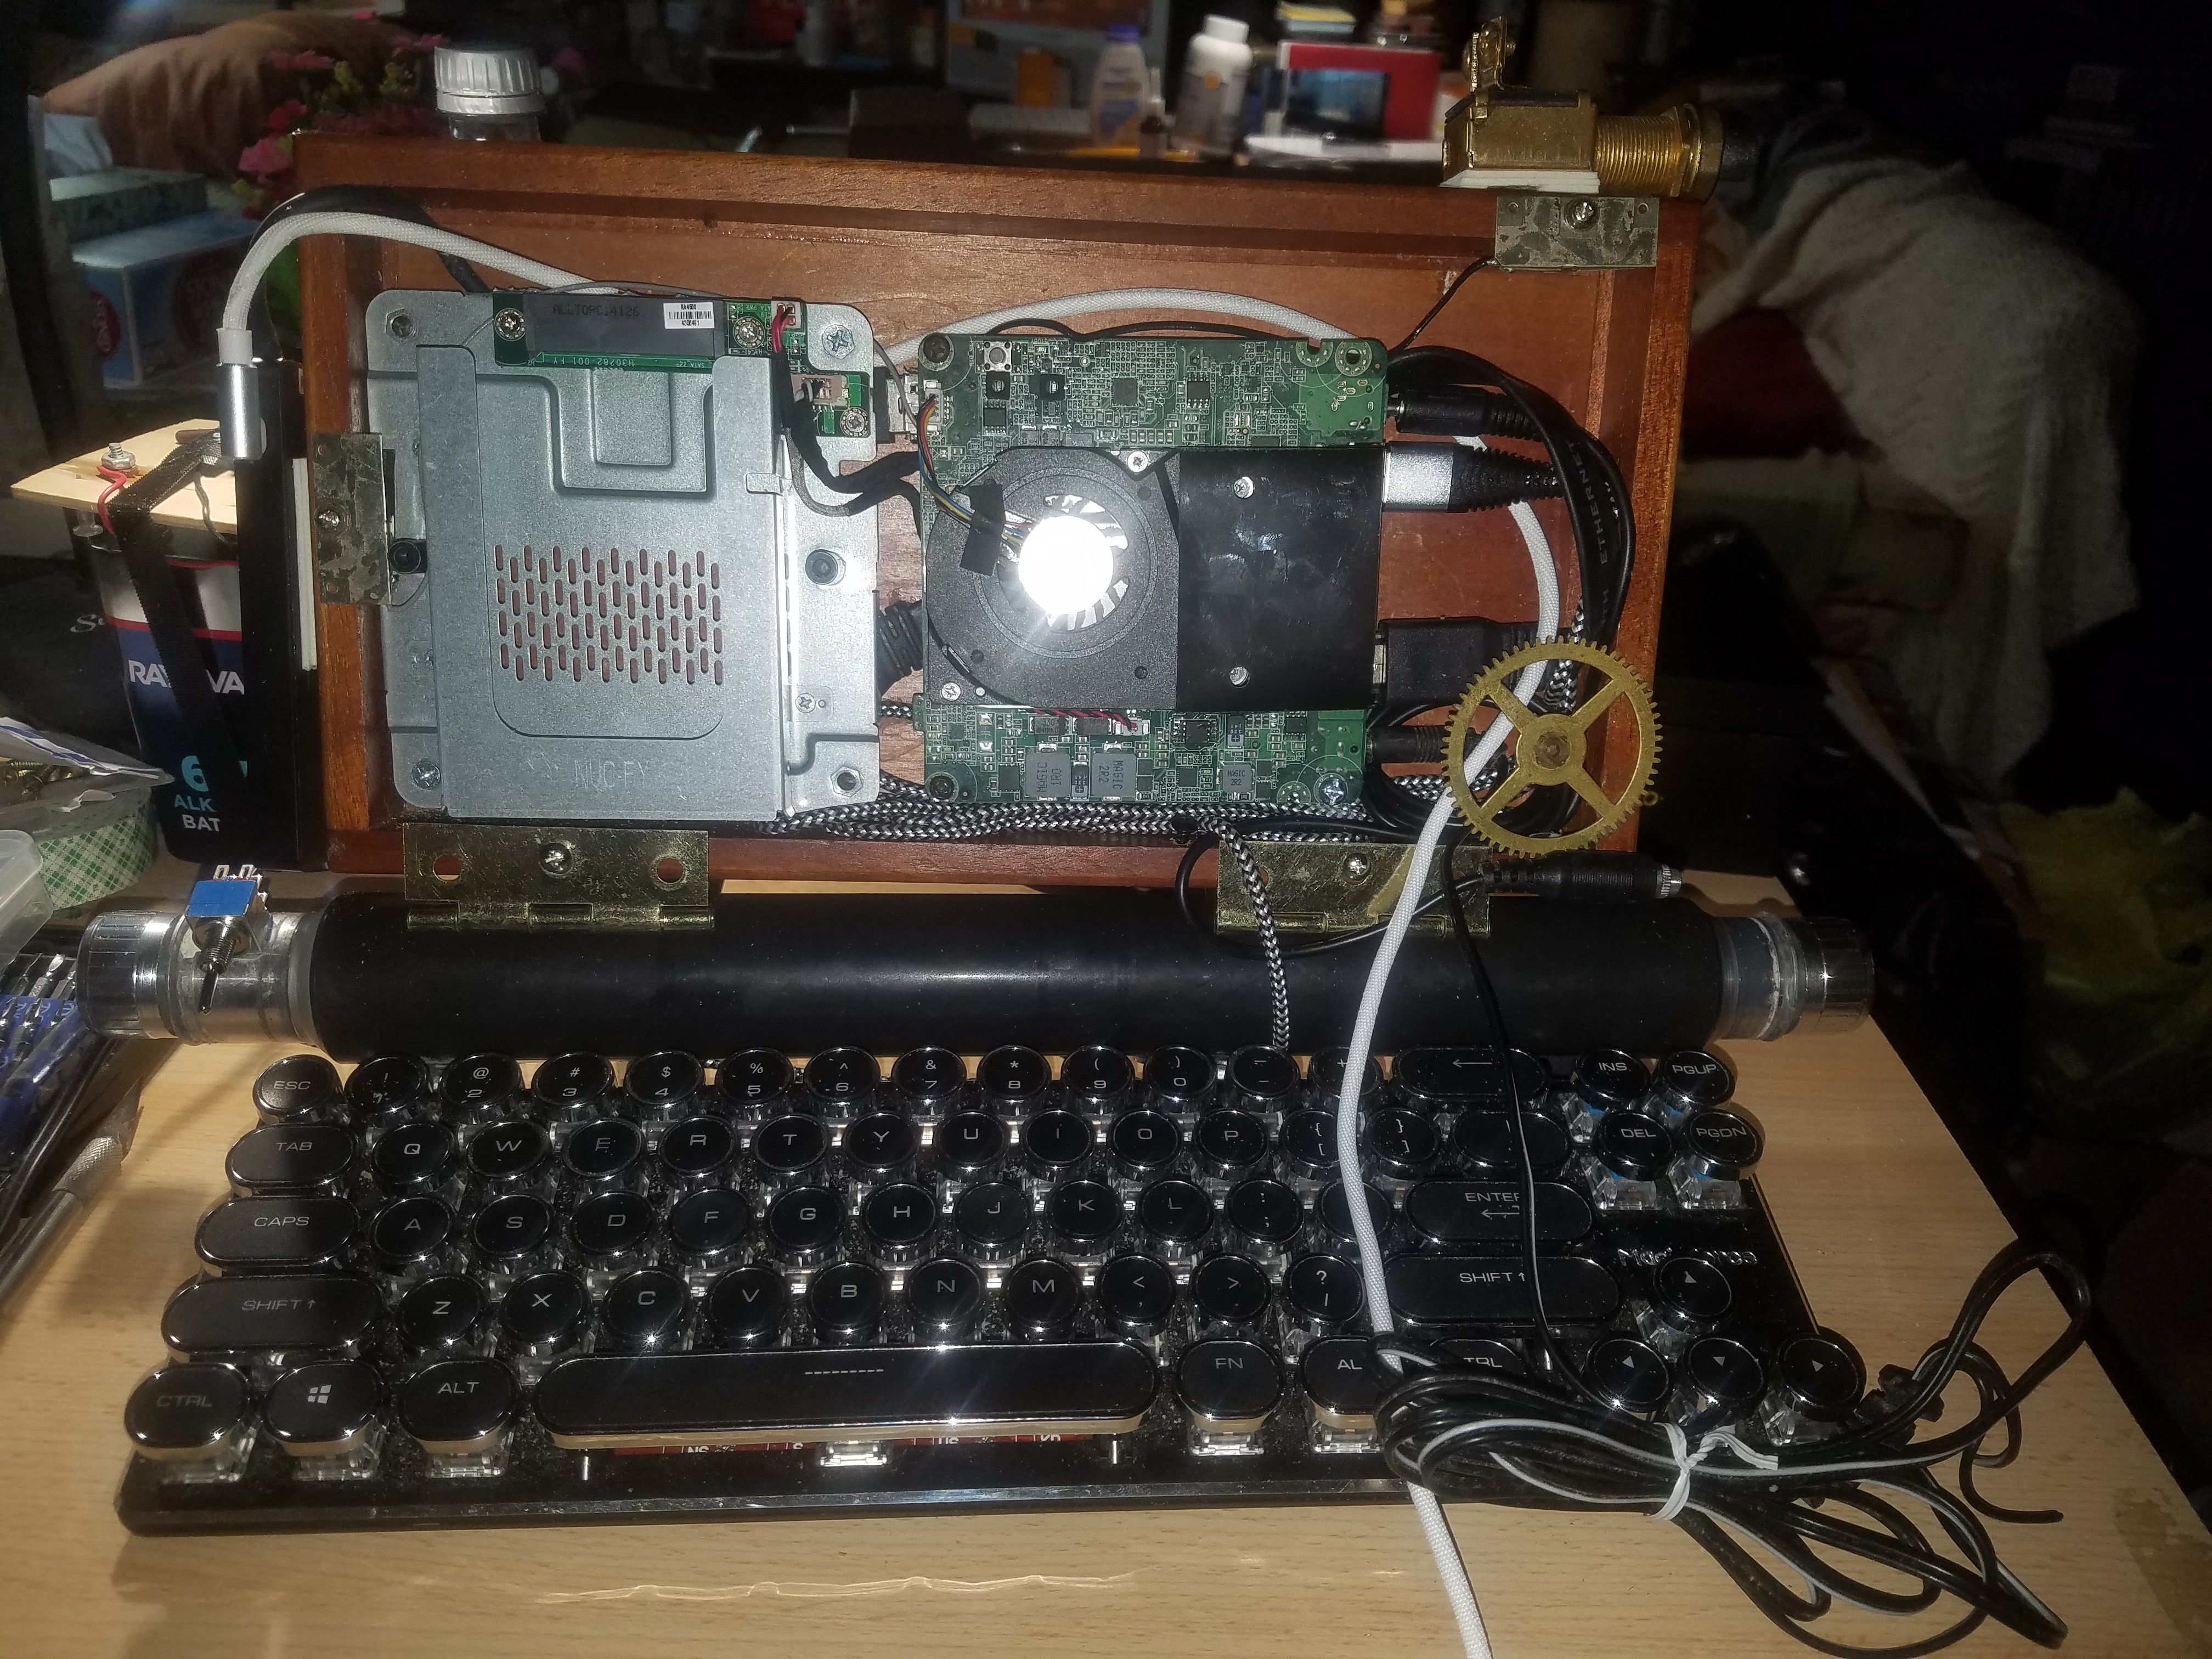
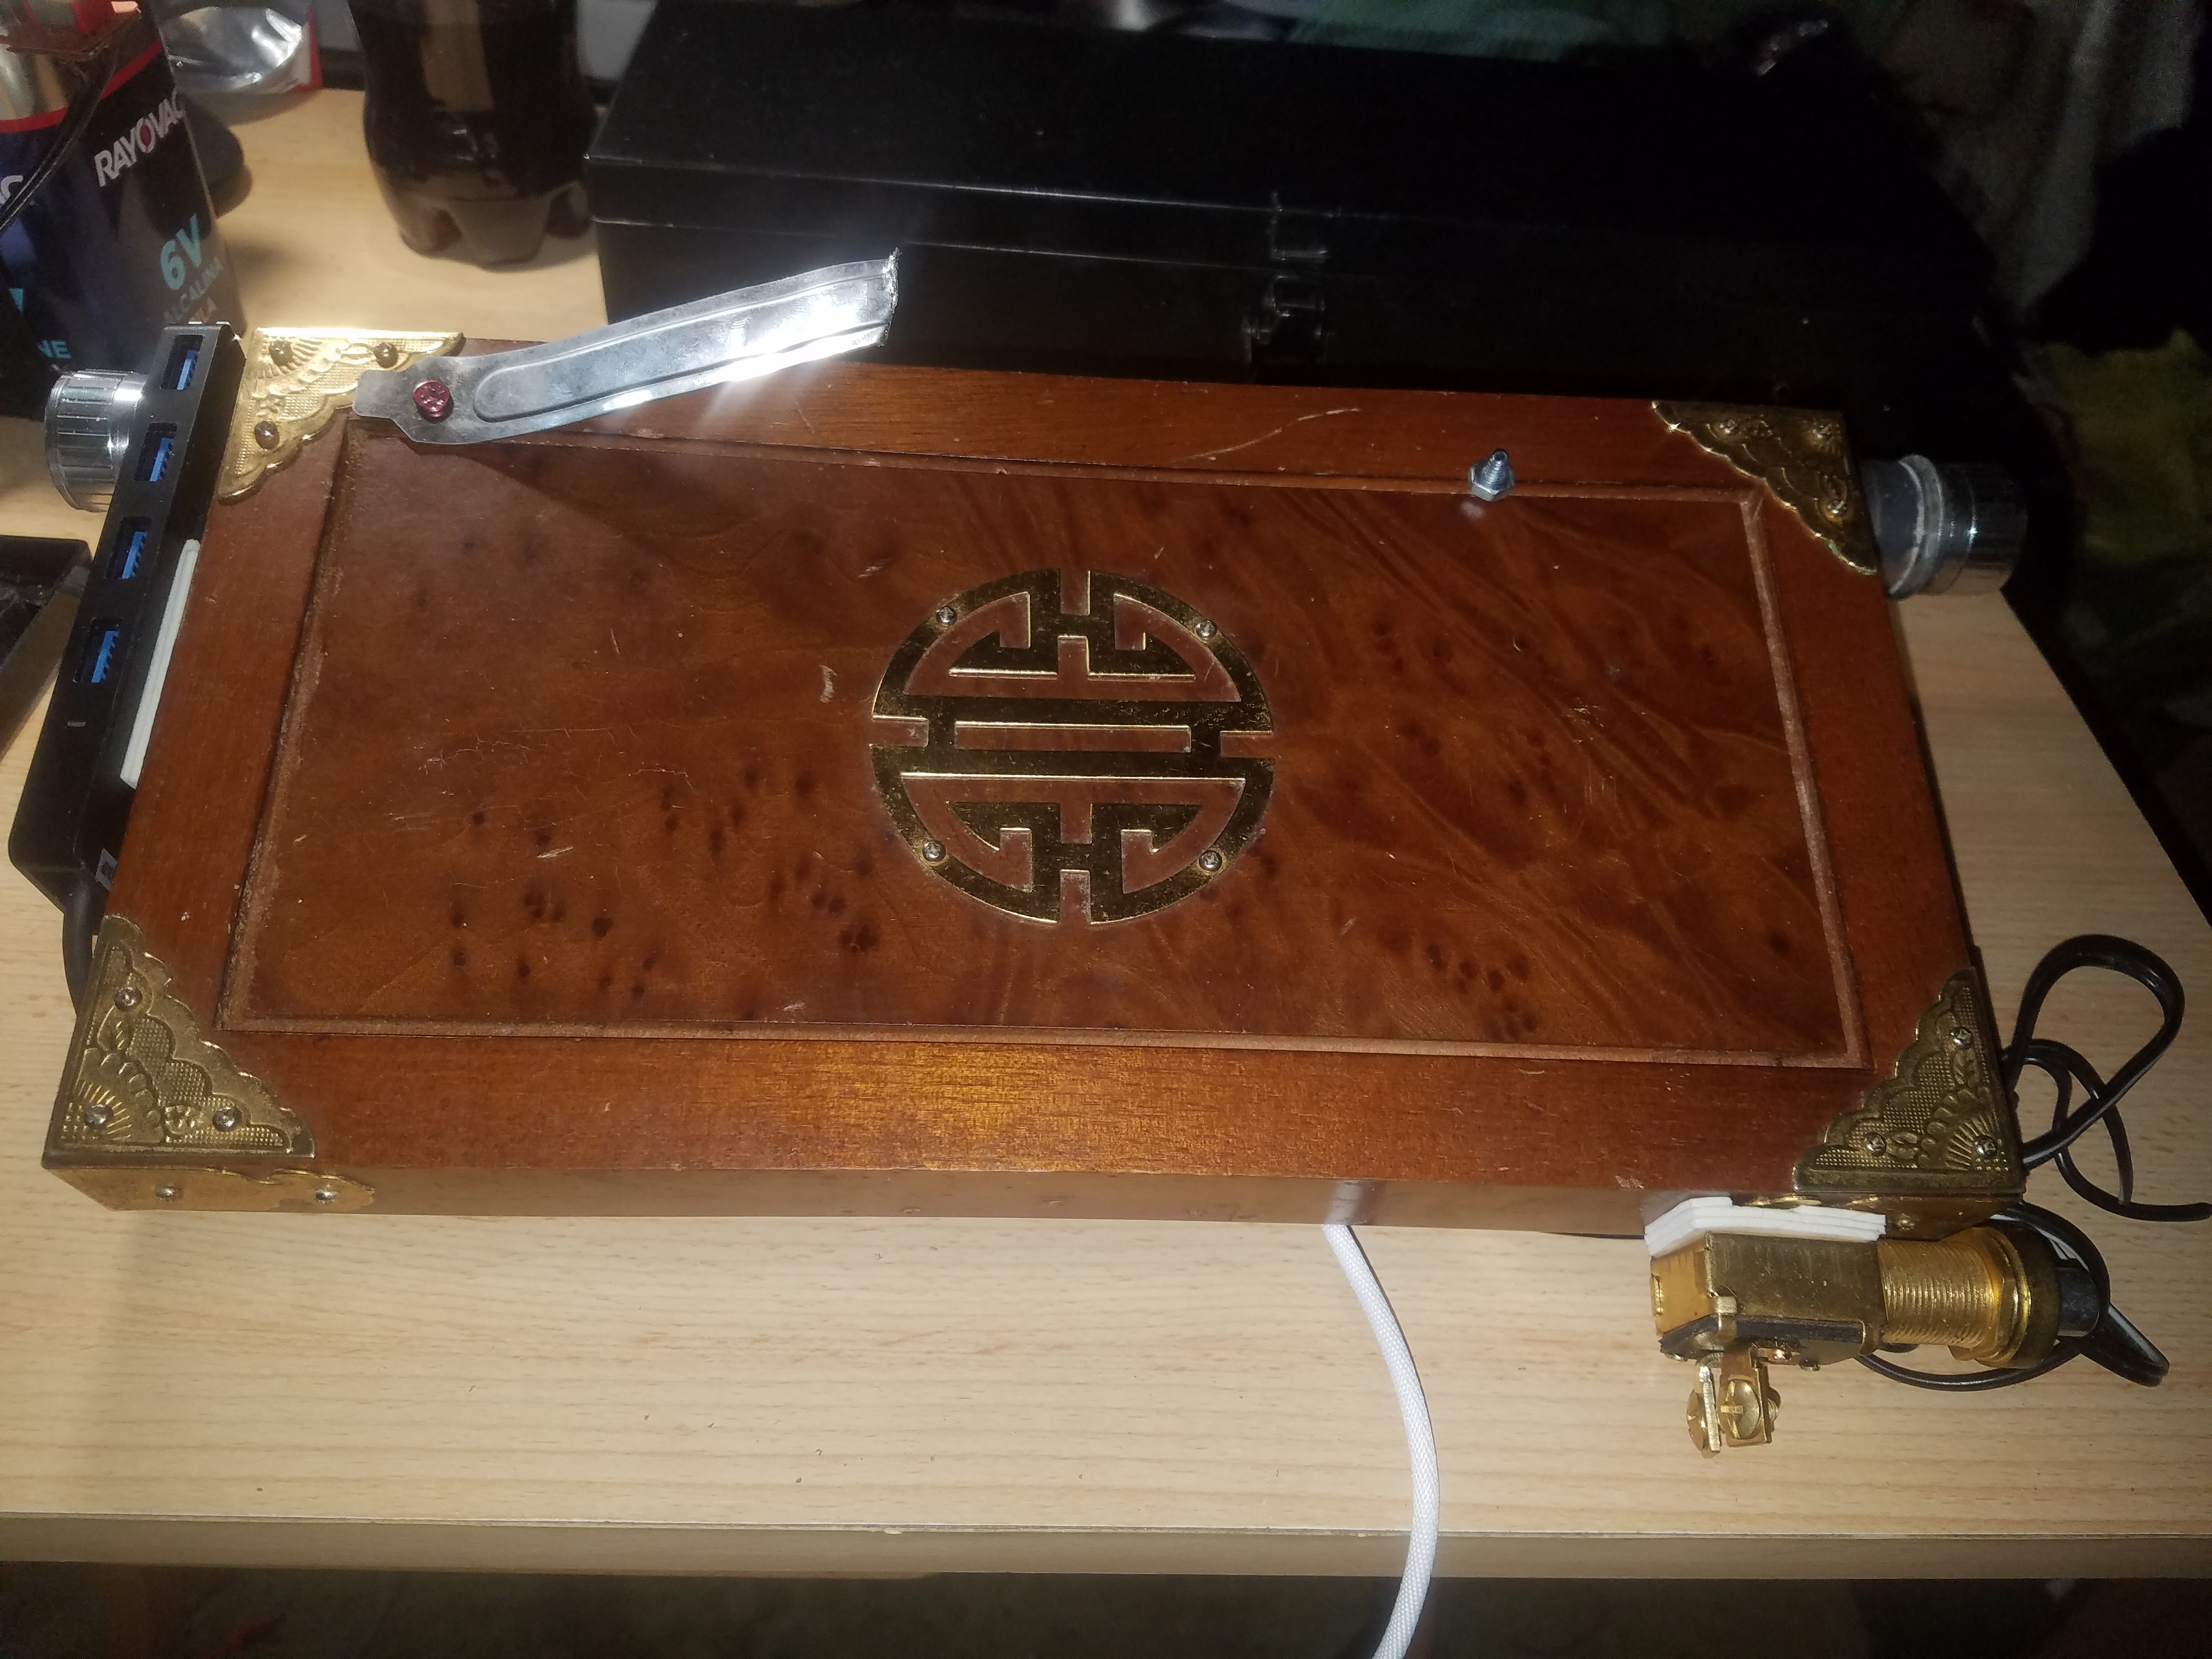
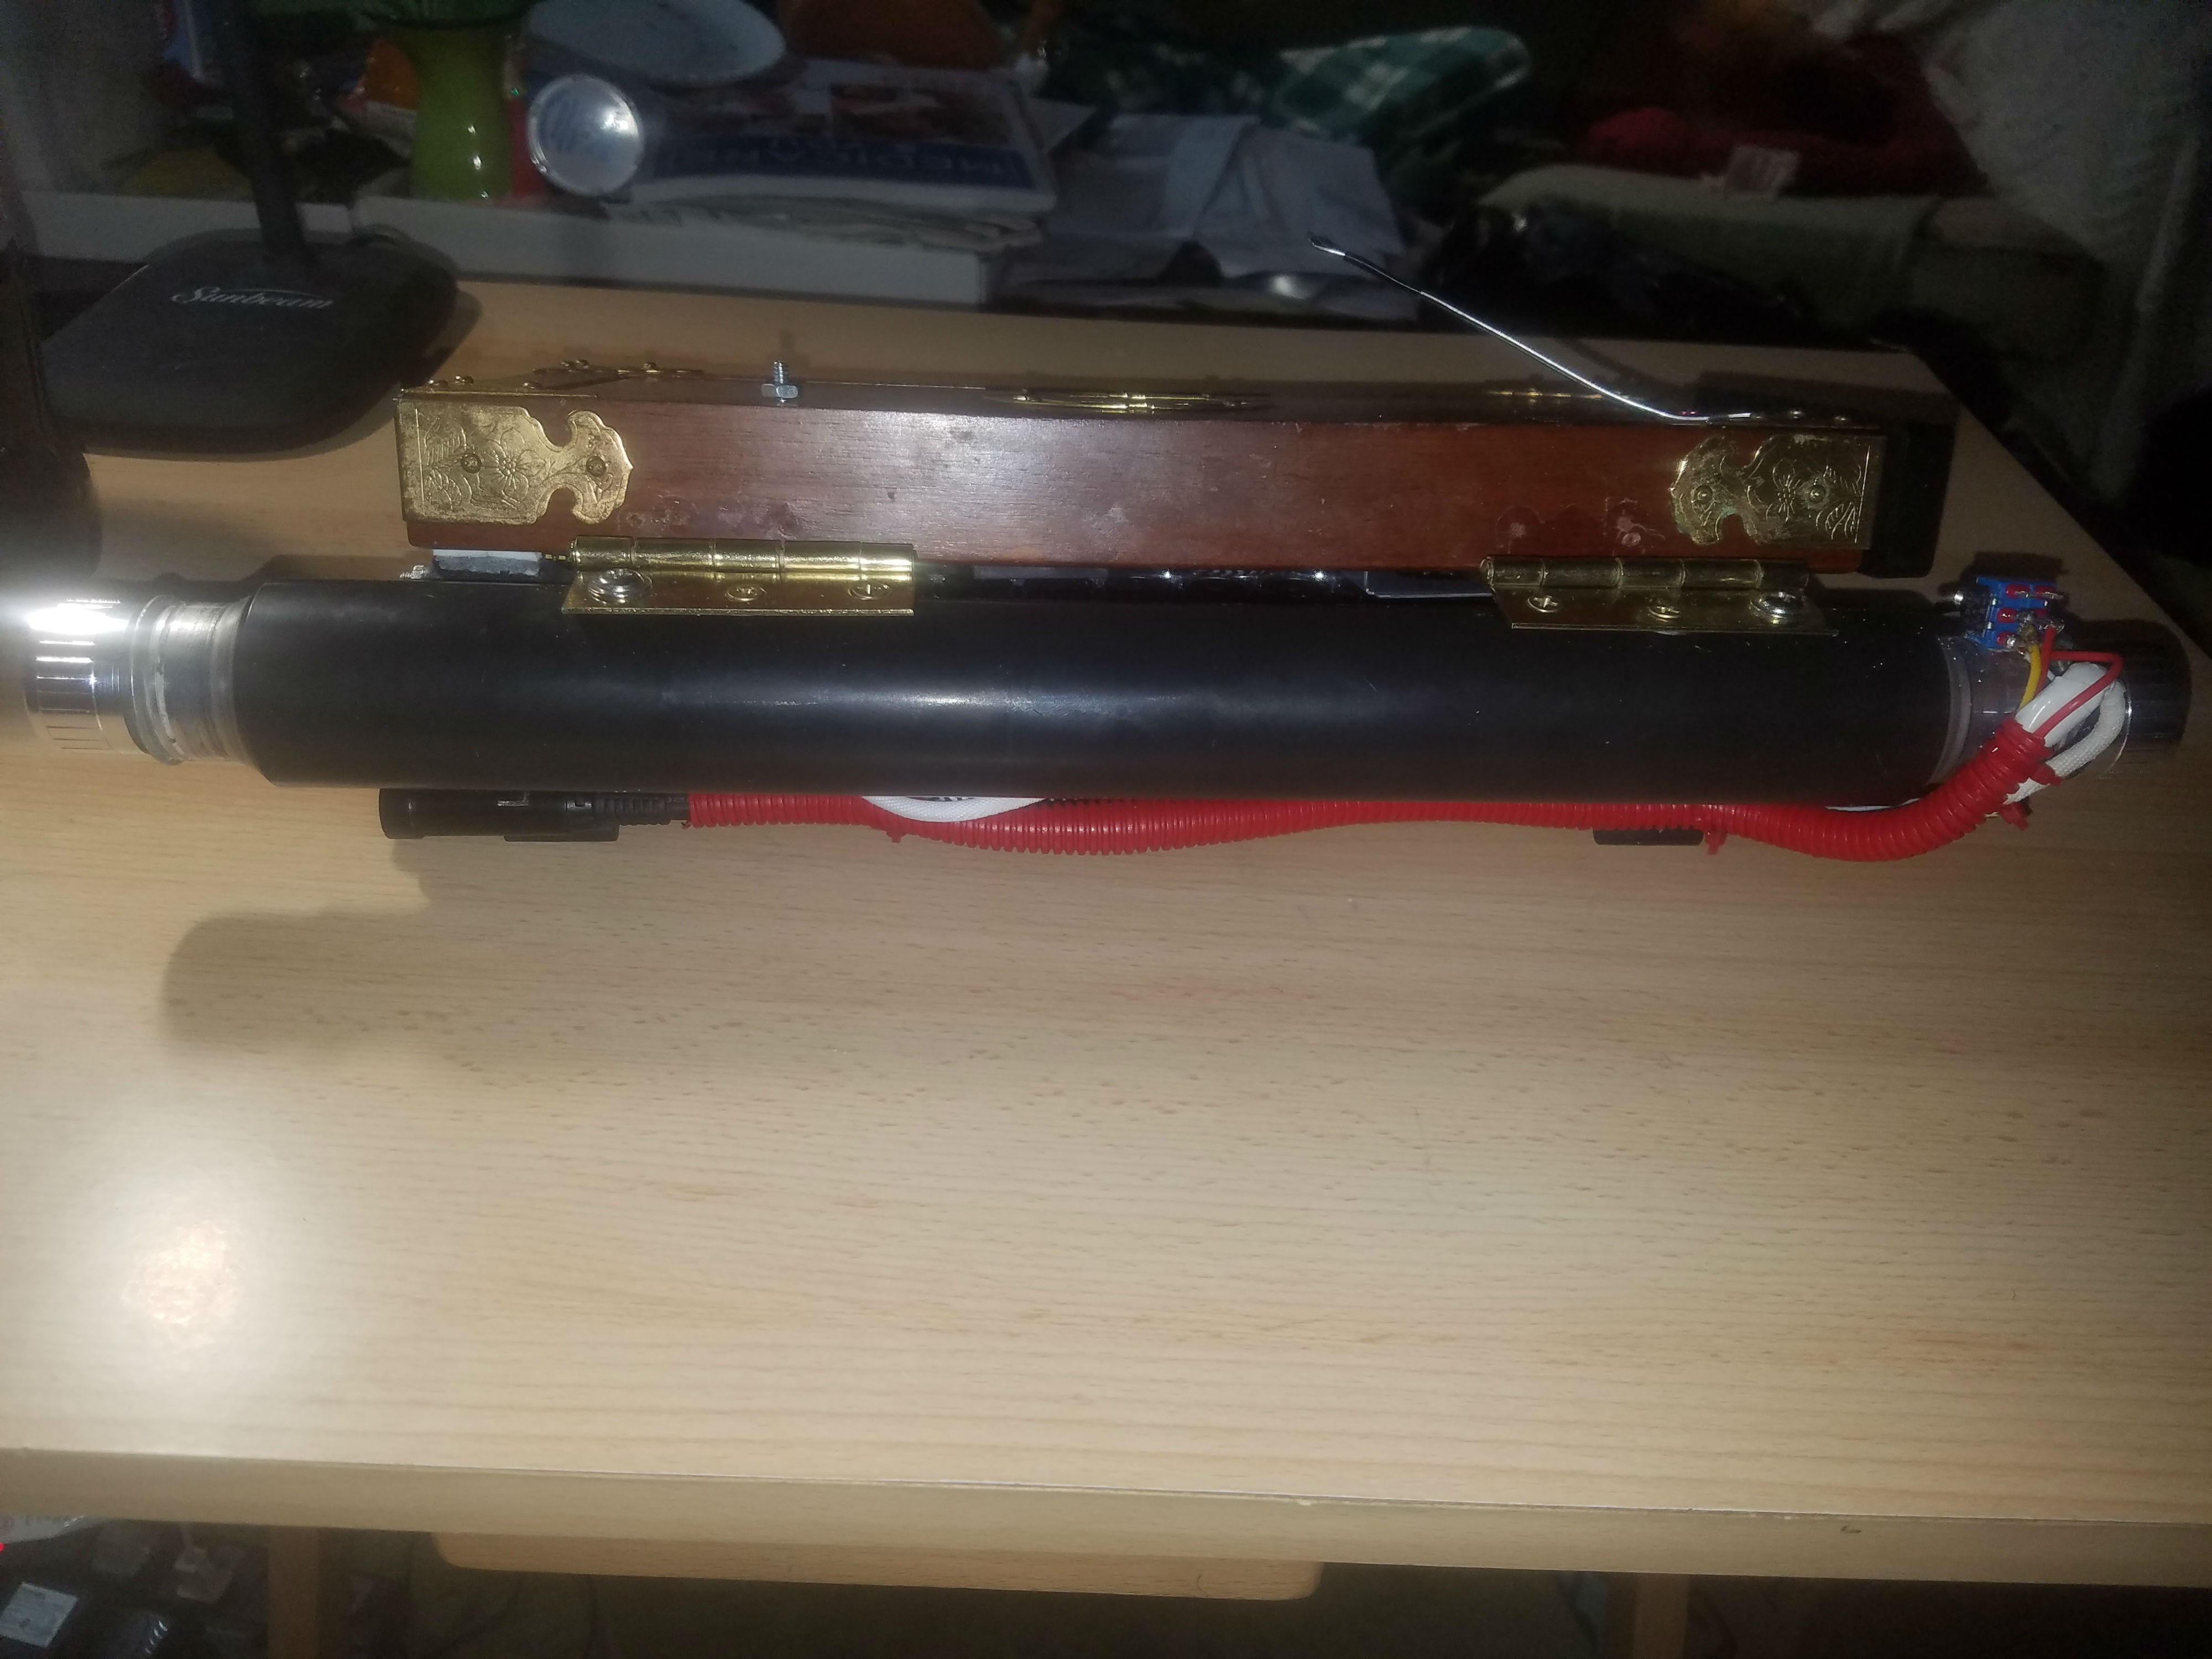
Then I proceeded to wire up the power harness and the system power-on button, and tidied up the cabling somewhat, which brings us to the current state of the project... and more glamour shots, LOL. At this point we are at or past 90% completion...
![]()
![]()
-
Steampunk Begins
03/30/2019 at 18:49 • 0 commentsI initially wanted to set aside the build phase of this project until I could get all the parts to arrive working. However, after the third time I received a nine-inch screen kit from eBay's Hong Kong / China with no antistatic protections whatsoever -- meaning that the driver board was hopelessly D.O.A. -- it occurred to me that the machine might not get built for some time yet if I didn't get going soon.
(Nota Bene -- I am currently arguing with the seller over that kit and will get my money back tomorrow. I hope. Meanwhile, can anyone tell me what the absolute eff yoo see kay they are putting in the water over there in ShenZhen...?! I'd think it'd be just some sort of mistake or something, but this is three different sellers with three different listings for the only approximately same product.)
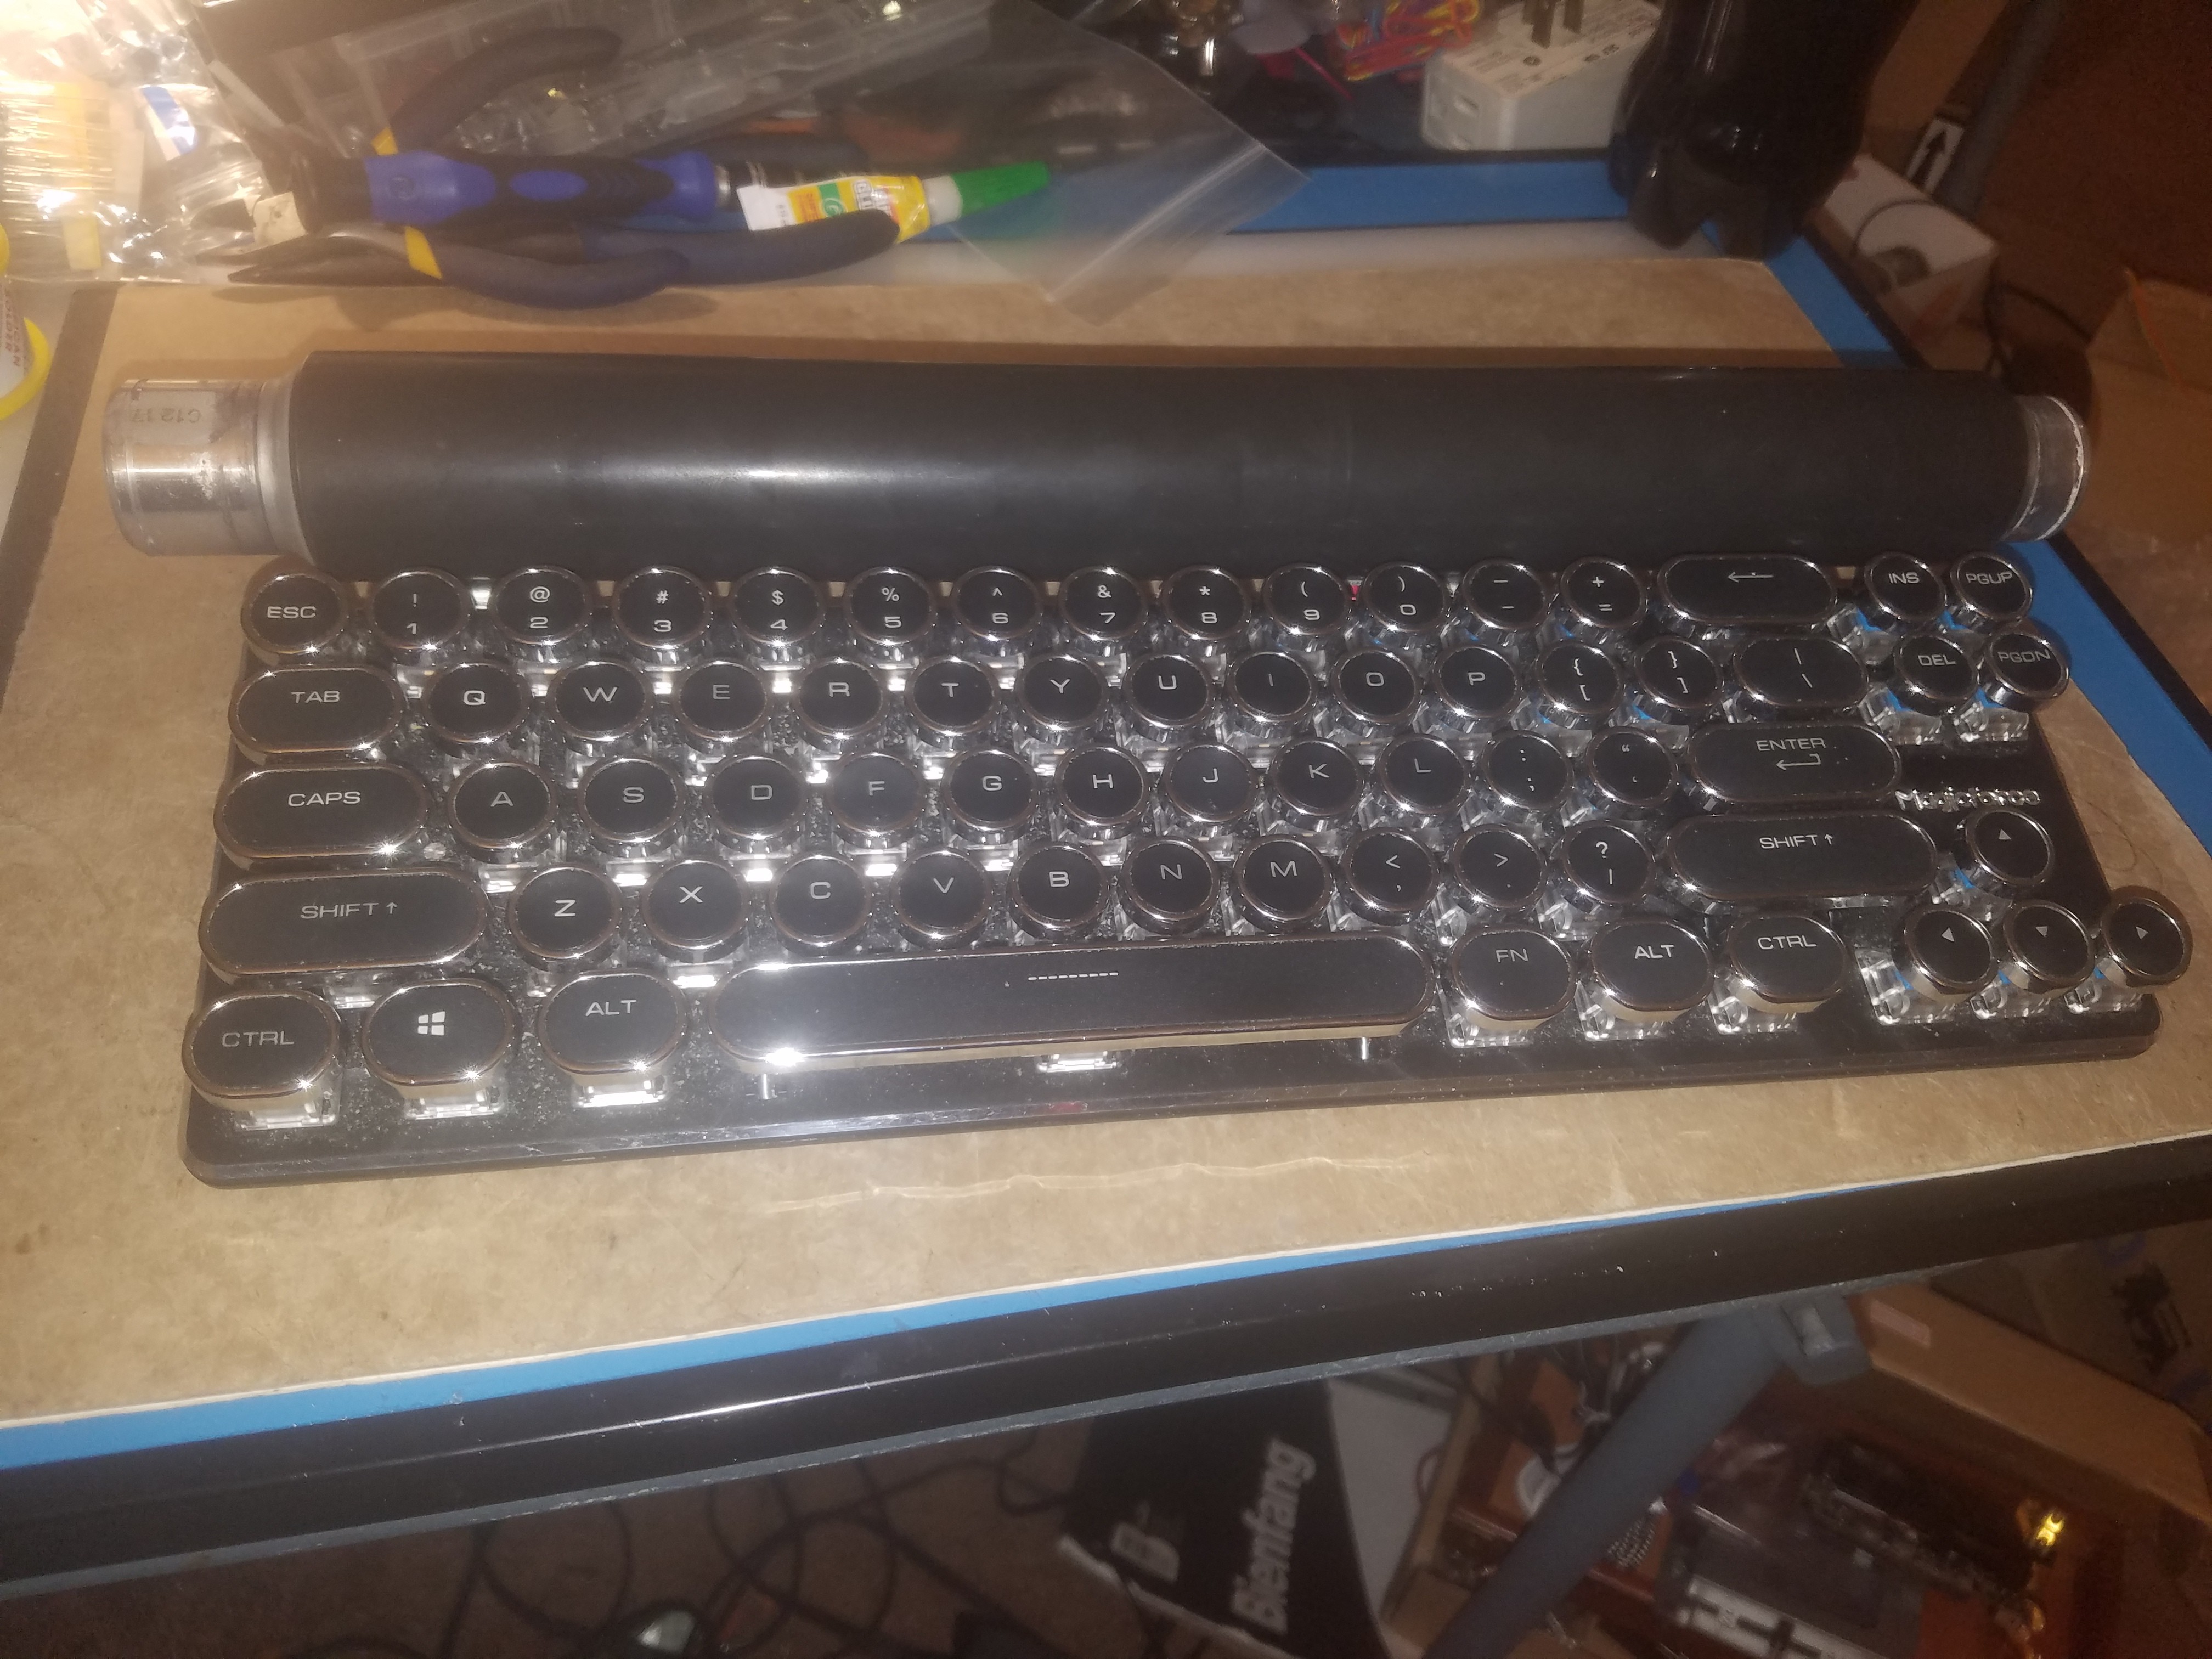
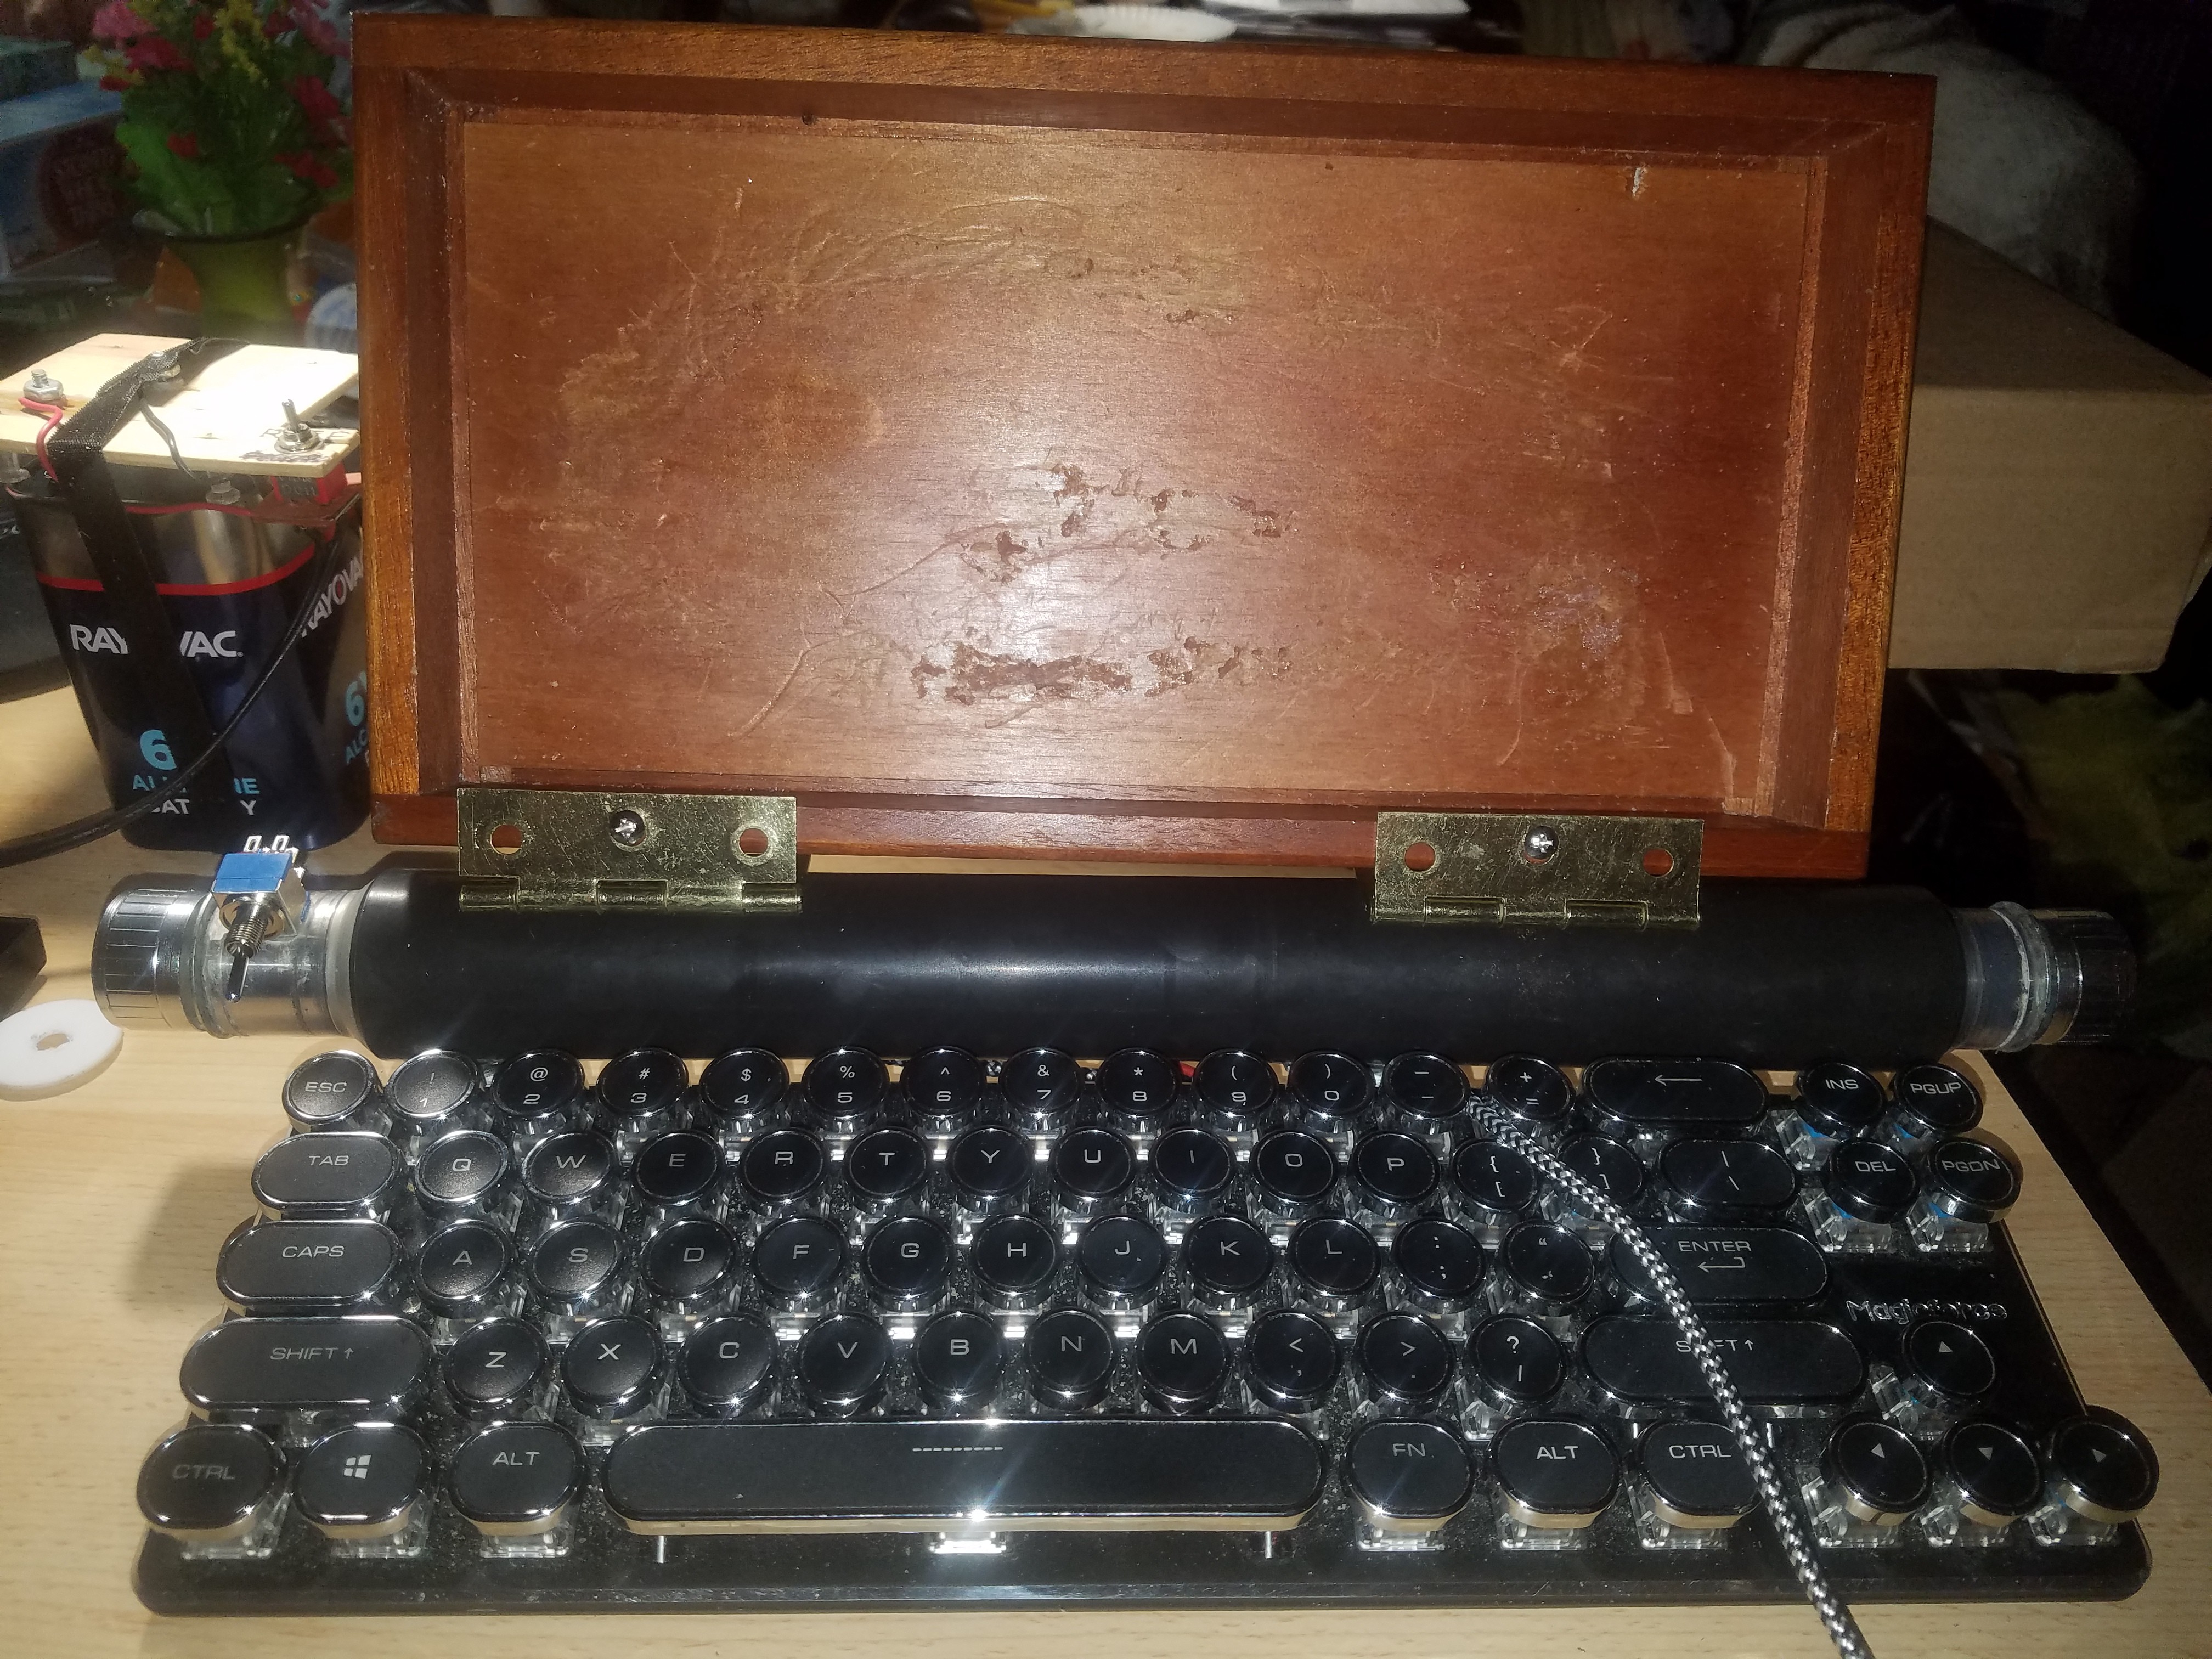
So I got to work. The first step was to assemble the keyboard base. This was supposed to be easy, and by and large it was. I had the keyboard and brackets from the original Steampunk Laptop, and a black and silver copier drum to attach to them. That went relatively smoothly, and I took a celebratory photo.
![]()
Then there were two knobs and two rotary encoders to wire up so that they went one on either side of the drum, mounted on some little plastic disks I had left over from another project, This was non-trivial but also not that bad, until the part where I had to glue the plastic washers to the drum. I'd planned to use super glue, but since the plastic in question was unfortunately PTFE aka Teflon, I was having a hard time getting the stuff to stick.
Around this time I went over to Mom's house to help her with some things, and I took the materials with me to work on the Steampunk Laptop v2. I soon found a pair of steel fender washers that replaced the teflon disks very nicely, and glued even more nicely.
I then tried to attach the laptop hinges I'd bought, so I could fit the lid, and basically hit a roadblock. The hinges were so stiff, and the metal of the copier drum was so thin and pliable, that I basically didn't have screws that would both fit the hinges and grab the copier drum metal, without working loose as soon as I moved the lid. This was rapidly becoming true of the screws I was using to affix the drum to the keyboard brackets as well. After discovering that super glue wouldn't stick to the drum any better than it did teflon, and breaking a drill bit trying to solve the problem in a way that very likely wouldn't have worked anyways, I set the project aside for the night.
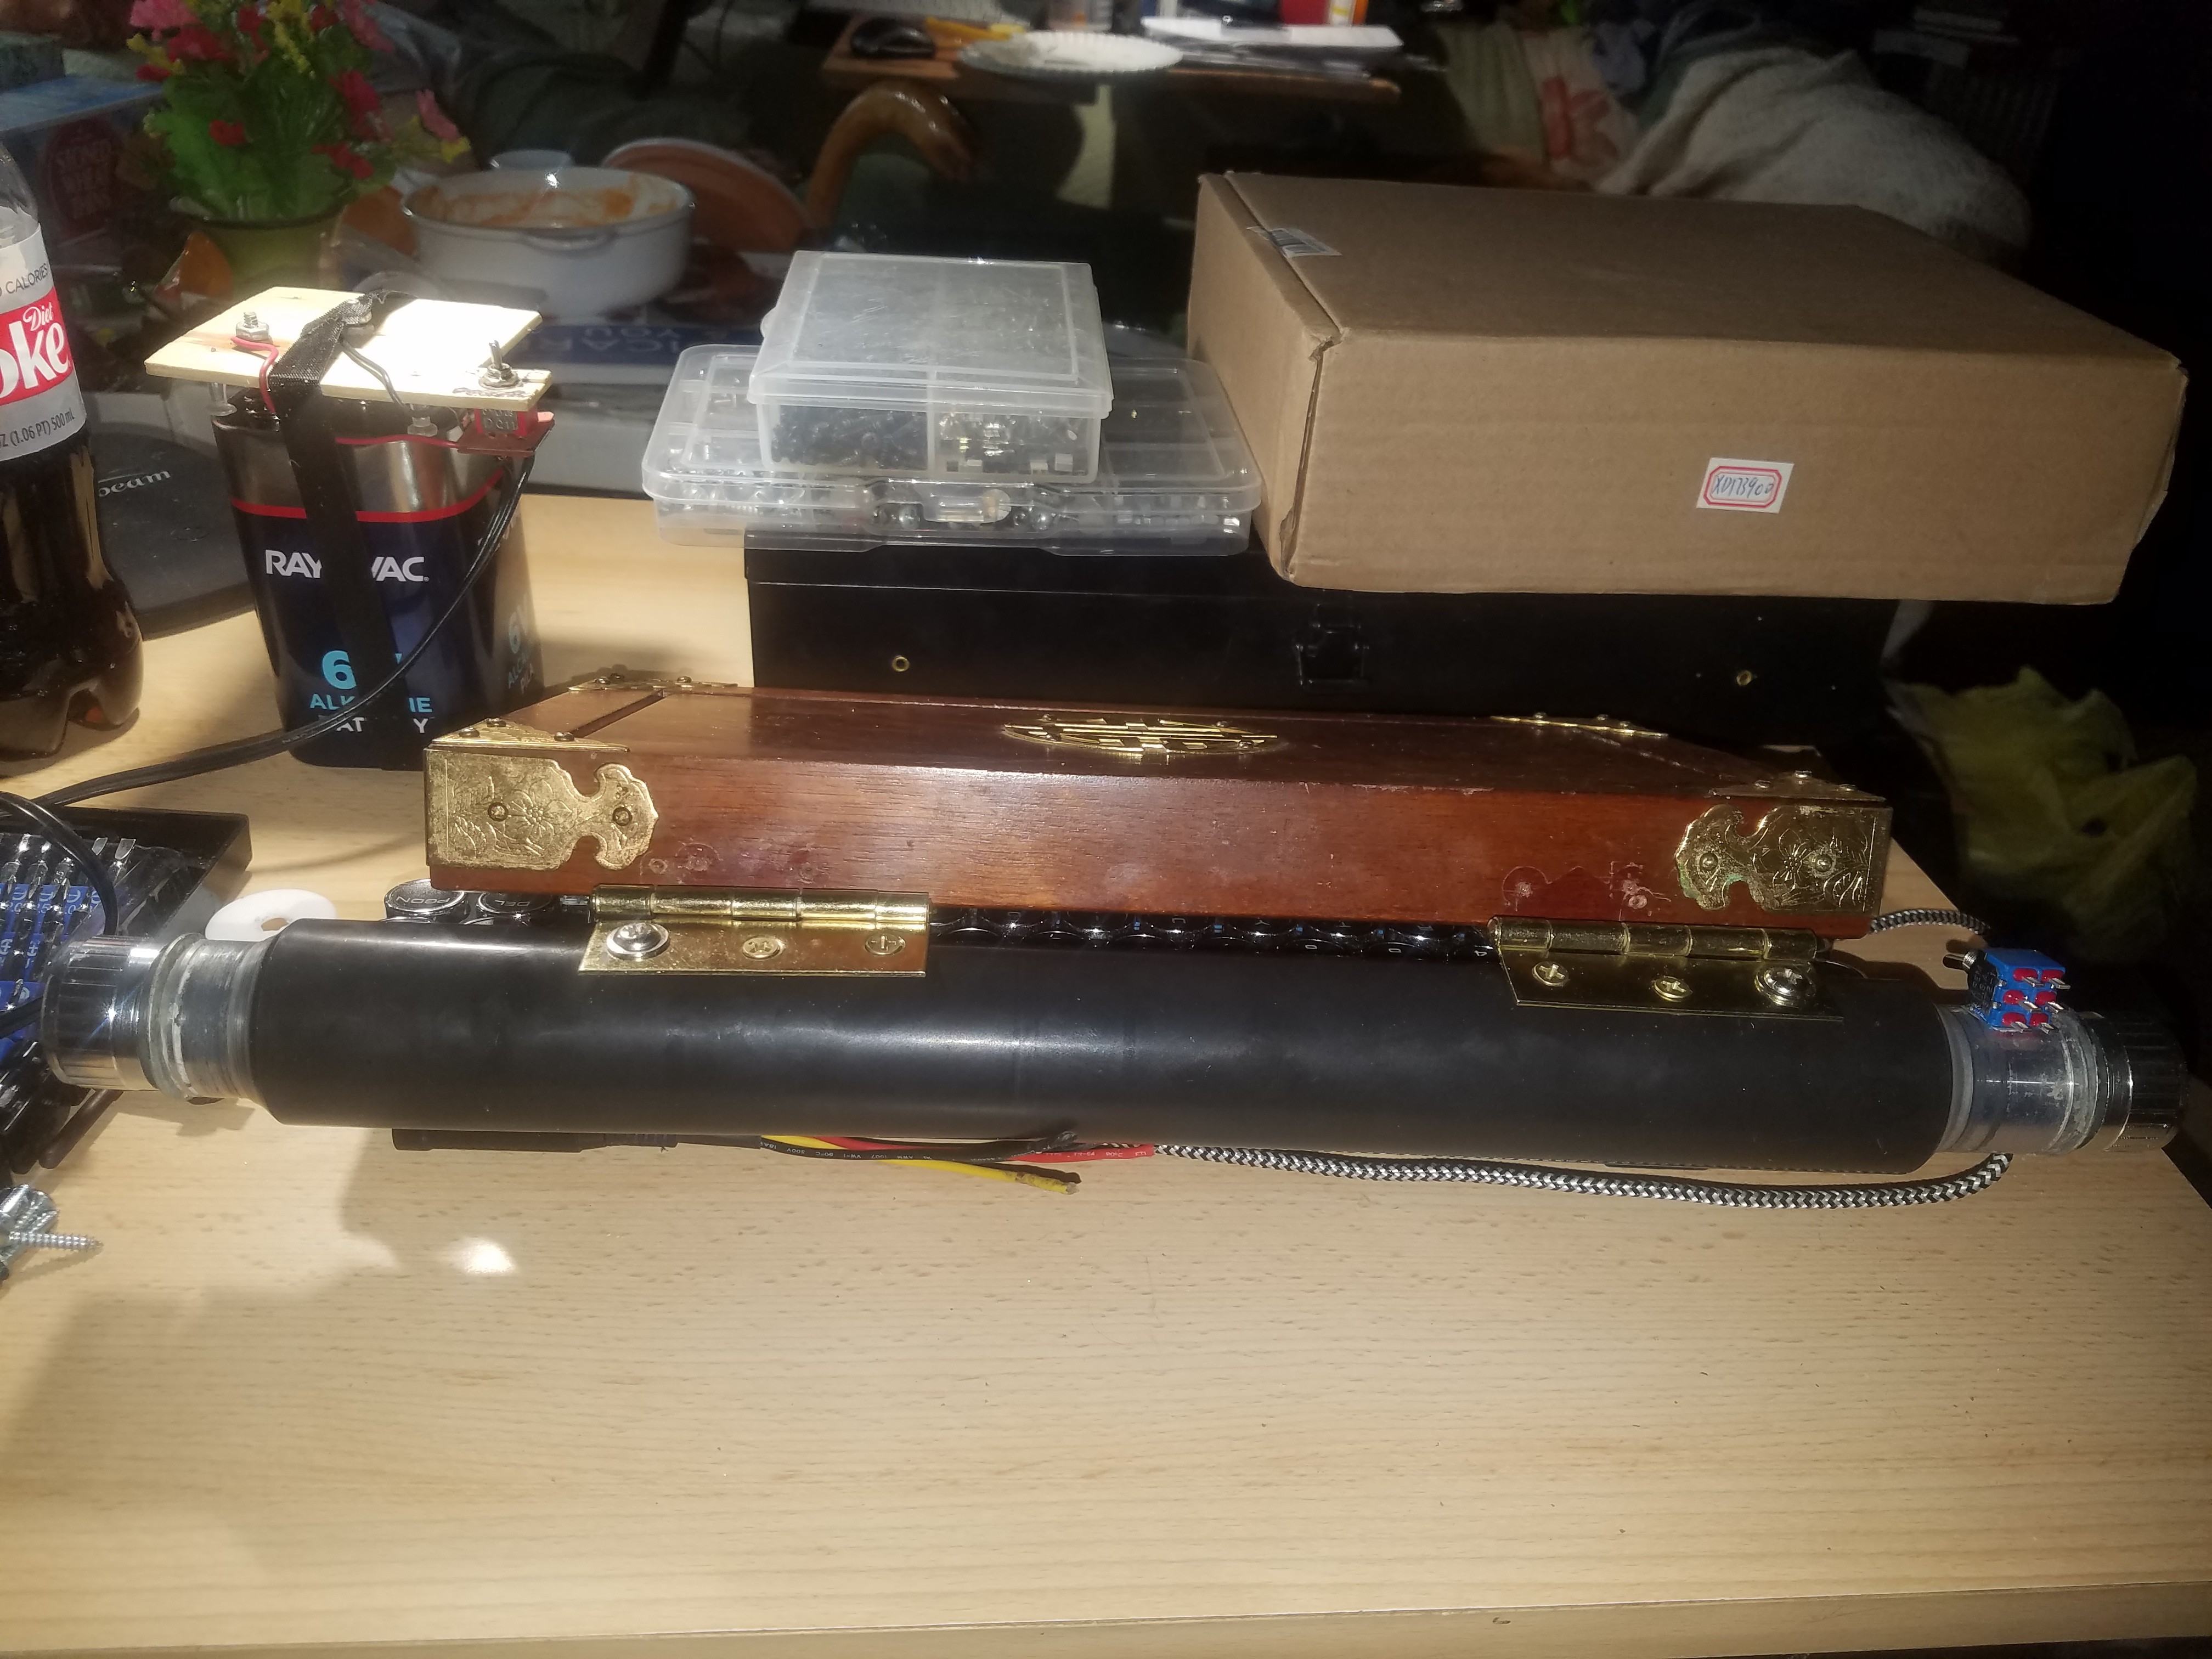
The next morning I was able to locate a pair of slim brass door hinges, and I found that if I put a washer on the middle of the three screws that held it on, and used two of the brass screws it came with along with a third, bigger, washer-head screw from God-only-knows-where, the hinges would hold very nicely to the drum. A similar approach with the keyboard brackets yielded similarly positive results. I soon affixed the power supply socket (a Kycon four-pin job, since I would be powering this system with a LaCie Bigger Disk brick) and the master power switch. Then I took some more photos...
![]()
![]()
![]()
"Now, ain't that jus' purty..."
-
Lightning in a Bottle
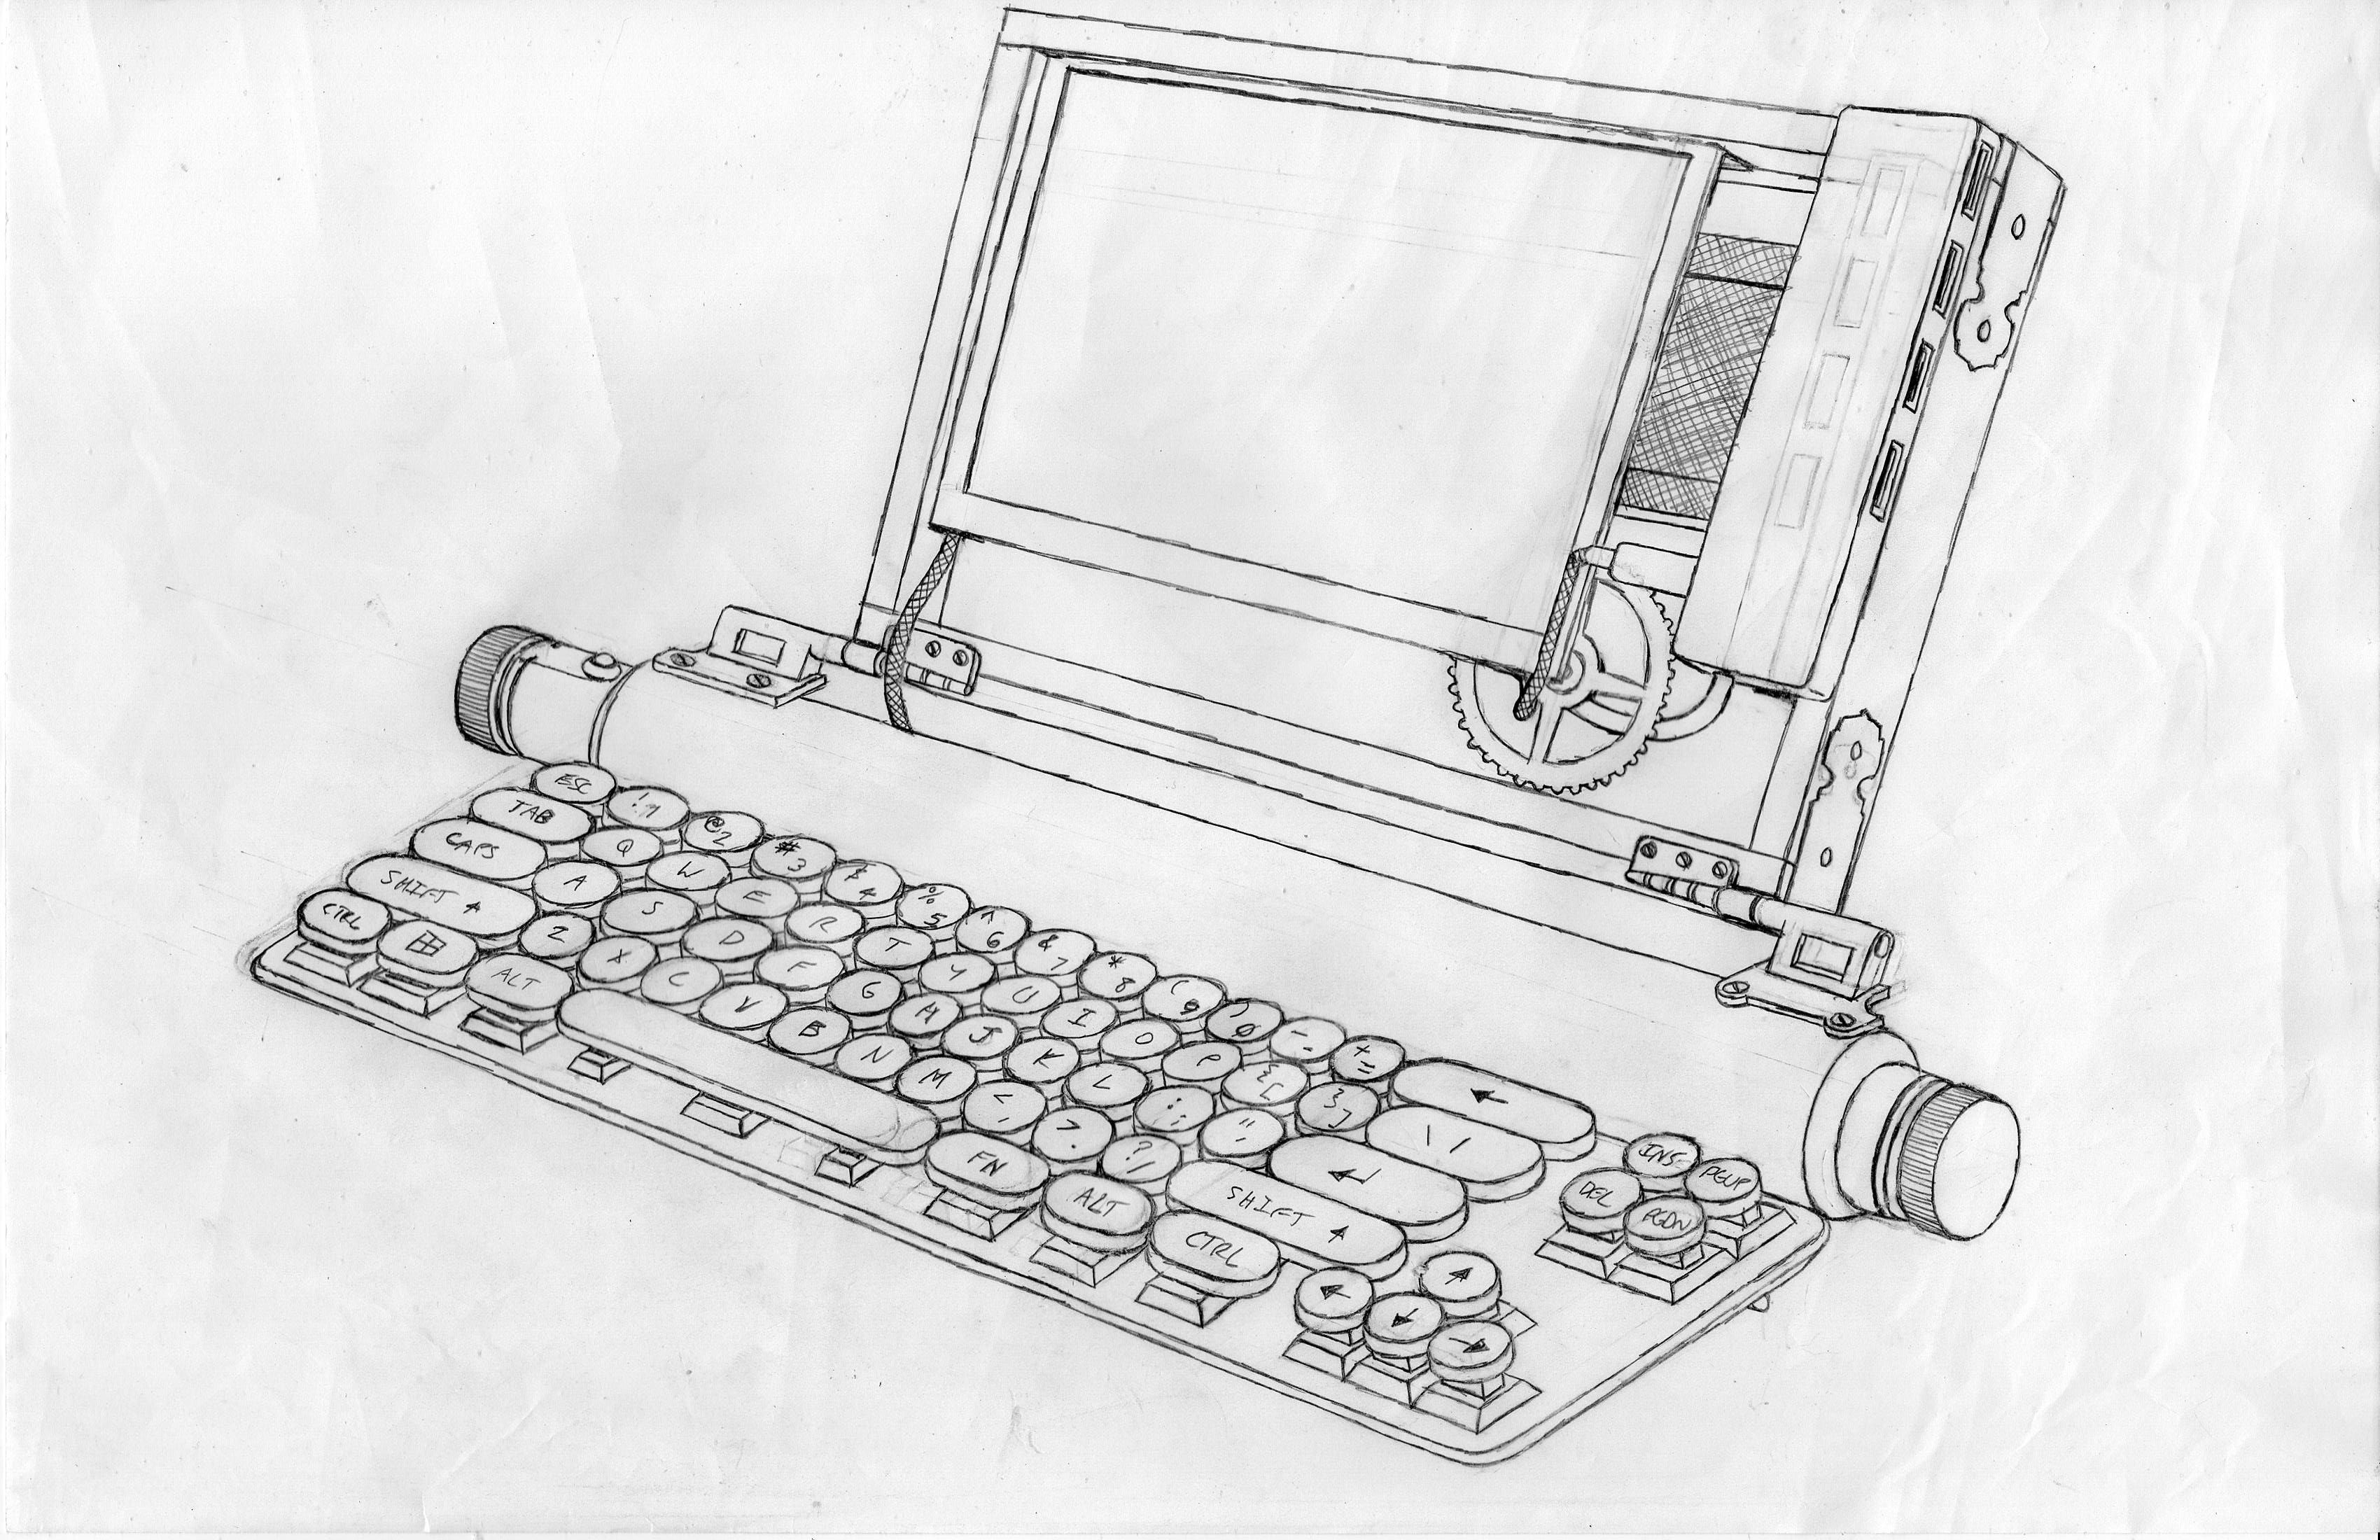
03/30/2019 at 18:05 • 0 commentsThe initial concept art for what was now being called "The Rebuild", was done mostly in my imagination. I didn't try fitting the components together to see how they interacted; I just assumed that they would interact in a somewhat useful manner and arranged them on the page according to my taste. This was the result...
![]()
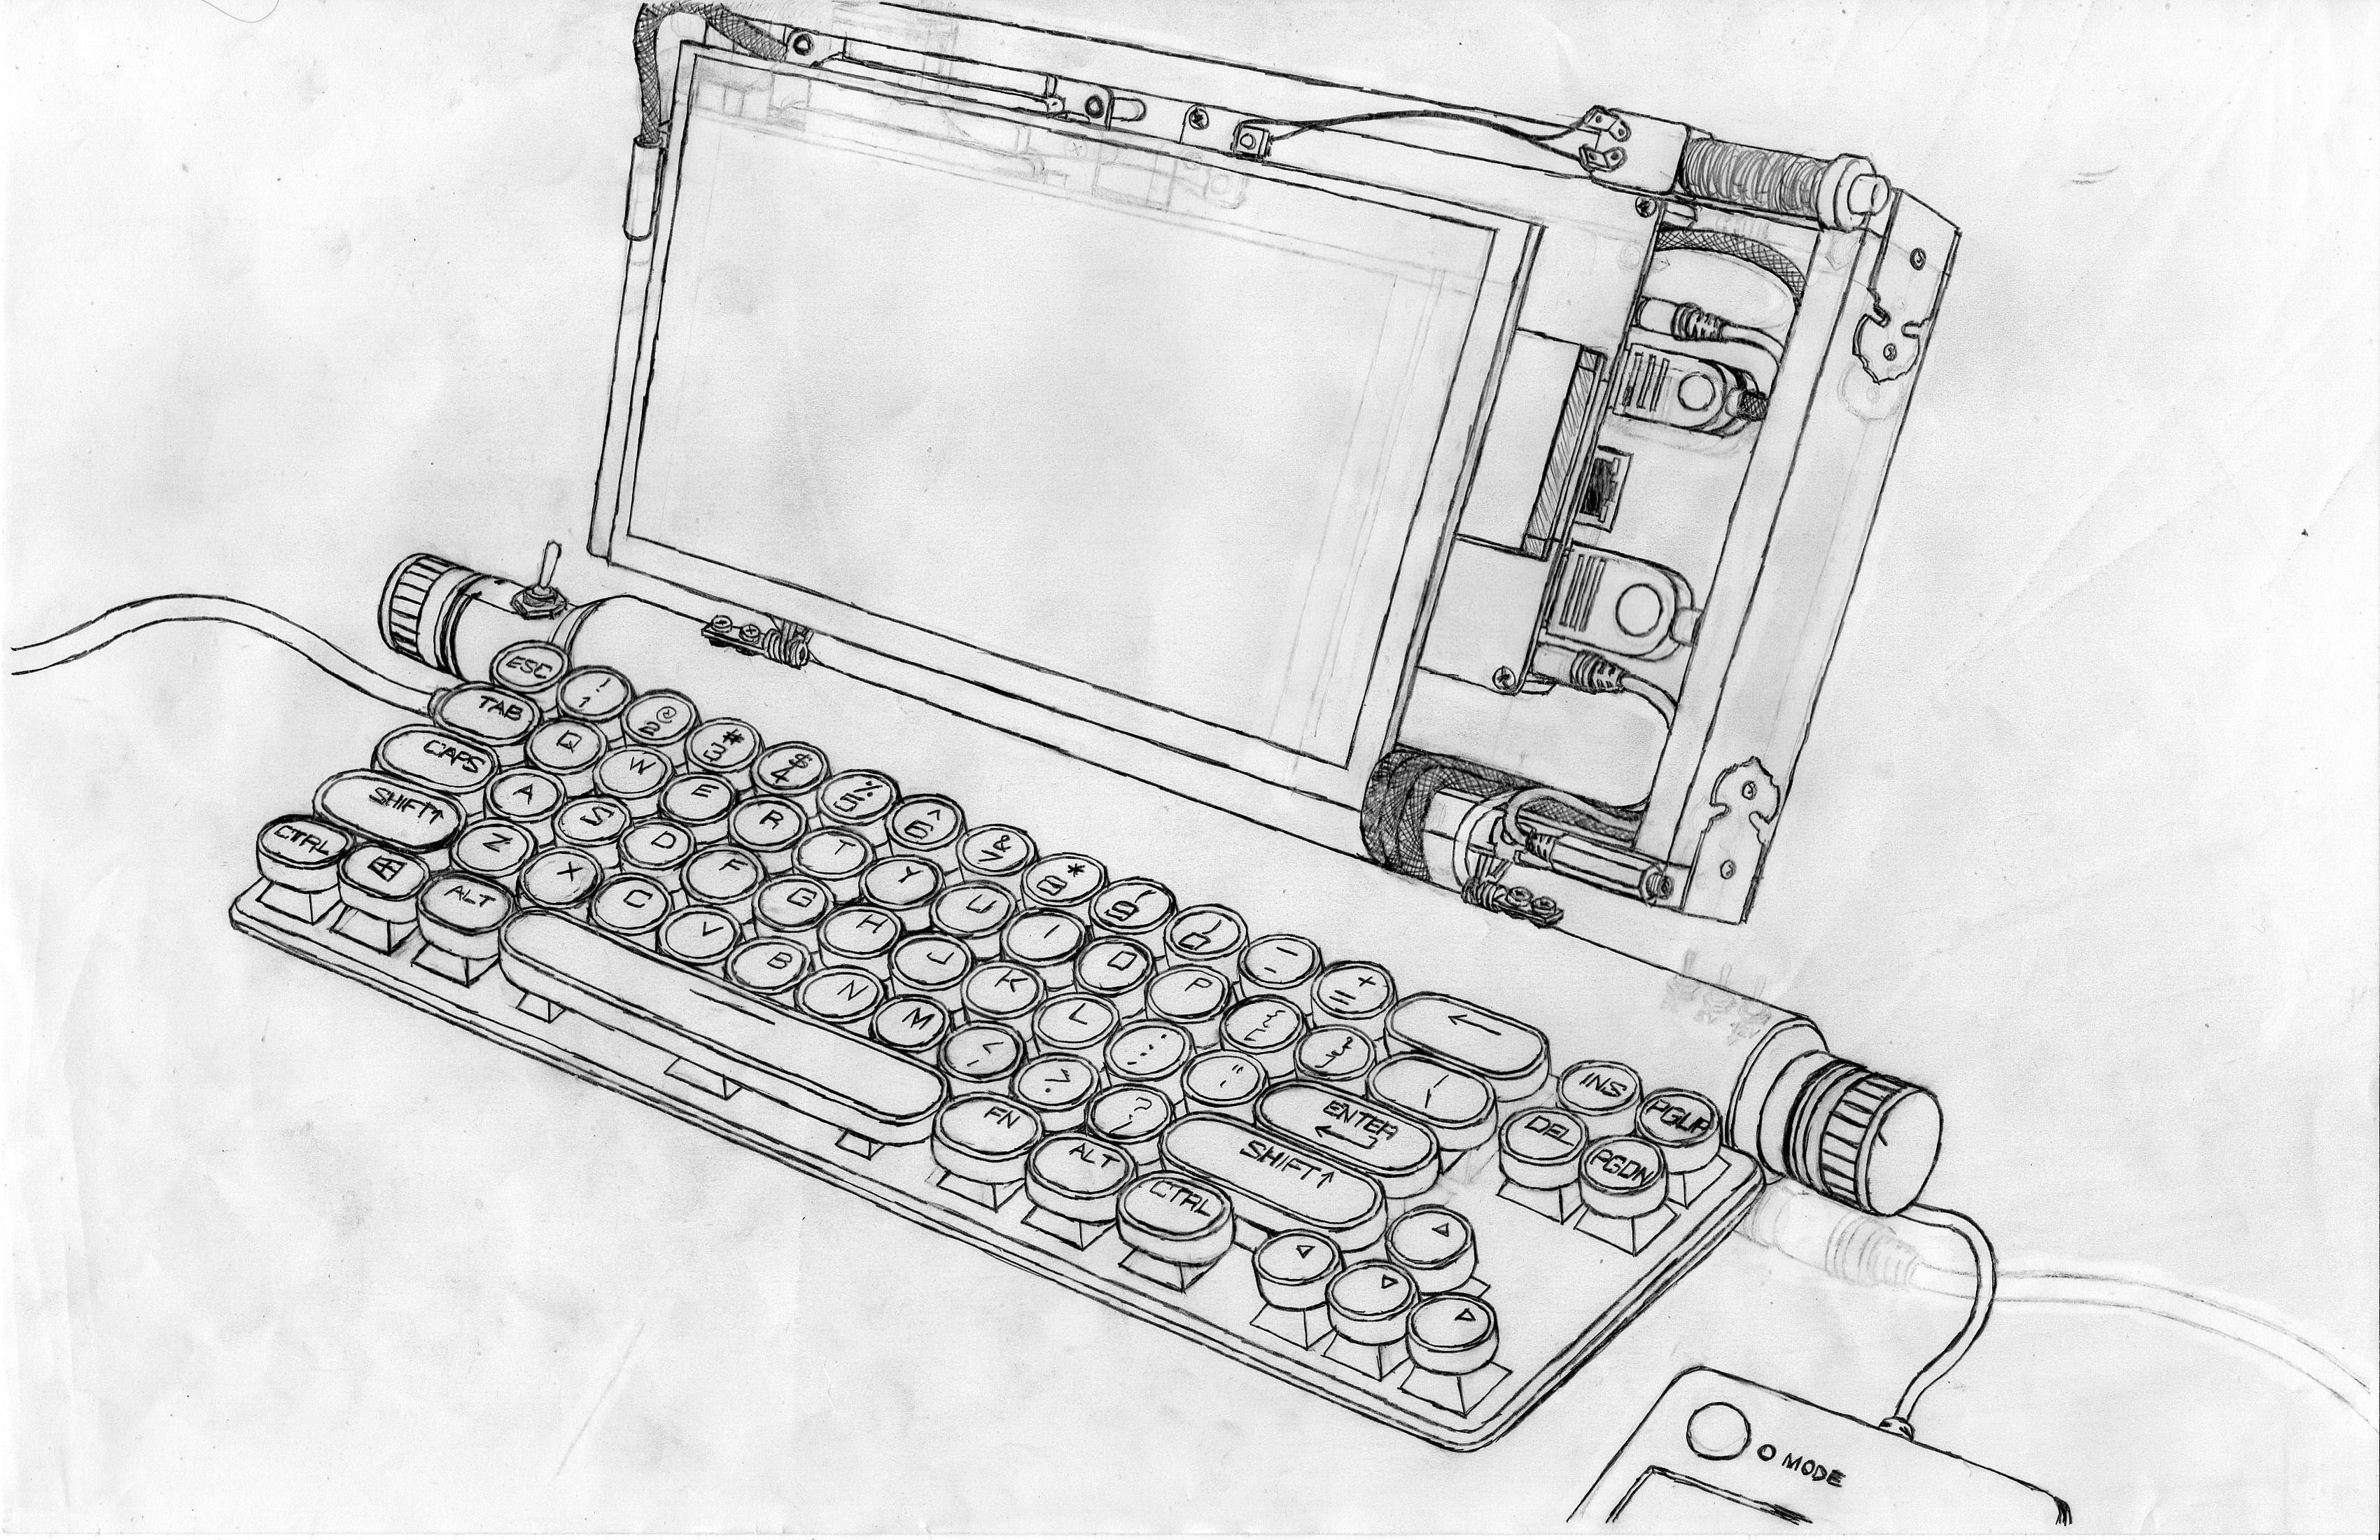
Unfortunately, this worked out to be a highly unlikely configuration, as I very quickly discovered when I did start putting parts together a little bit, just to see how they fit and not in any permanent manner. Most things, in fact, were not going to fit the way I wanted. So I got out another piece of paper, and redrew it. (It's the second work in the Gallery.) Then I reworked that, realizing that I'd drawn some things badly, and that yielded the final piece of concept art...
![]()
...which is still not strictly speaking perfectly correct, but it'll do.
-
Planning for the Second Coming...
03/30/2019 at 02:05 • 0 comments...no, not that Second Coming, but rather the second coming of the Homebrew Steampunk Laptop. Sorry, but to be quite blunt, I'm not anywhere near religious enough to warrant preparations for the one you were (probably) thinking of.
Up till this point, the motherboard for my Homebrew laptops had primarily come from a company called MeeGoPad. MeeGoPads are cheap knockoffs of the Intel Compute Stick usually, and when they aren't that, they're desktop-style "MiniPCs". They're decently popular on Amazon and eBay. My alternate motherboard source was traditionally a SunChip "Wintel CX-08" MiniPC. Both system lines tended towards identical specs -- an Intel Atom Z3735F CPU, 2gb soldered-down DDR3L RAM with no expansion ability, and a 32gb "eMMC" chip for an SSD. The notable exception here, my Cyberdeck system, used a MeeGoPad T09 MiniPC, which has an Intel Atom x5 Z8300 and 4gb RAM.
However, I managed somehow to trip over a NUC box on eBay for $70, which is to say, essentially free. It was being sold barebones -- no hard drive or SSD, no RAM< no OS -- and it was a 2014 model, so a little out-of-date, but at that price I wasn't about to be picky. I had the money, so I bought it. I also soon tripped over another cool thing -- a keyboard called the Qwerkywriter. It looked very nice, and it had some nifty extra functions, but cost an absolute mint. I took a look in my closet junkpile and dug out the original keyboard from the Steampunk Laptop, as well as a smallish copier drum and some brackets that originally held up the dial pad of a Western Electric (cloned by ITT) Model 2500 desk phone, I soon determined that I could rewire the original keyboard to add the Qwerkywriter's extra features, or, at least, the ones I cared about.
At this point I got out my pencil, assembled the parts I had (and added, by way of imagination, some that were still on order), and a paper concept emerged.
-
Family Matters
03/30/2019 at 01:39 • 0 commentsI must note, at this point, that my family has something of an unusual structure. My parents divorced in 1995, but while my mother (Kate) has been single since, my father (John) has remarried twice since. I would prefer to say as little as possible regarding his second wife, but his third seems to be something of a match. Ironically, she is a family law attorney specializing in divorce, so I really hope (for his sake) that Dad never actually manages to tick her off to any real significance. My stepmother, then -- Dad's divorce-lawyer third wife -- is named Aida and is one-quarter Egyptian.
It must also be explained that my father, when he retired recently from his job, he and Aida decided to move from their home in a subdivision in Raleigh, North Carolina to the Outer Banks -- a set of islands on the North Carolina coastline. Specifically, they wound up in the tiny town of Salvo, North Carolina, which buts up against another hamlet named Waves, which buts up against a third hamlet named Rodanthe ("rho-DAN-thee"), within which the famous romance movie "Nights in Rodanthe" takes place.
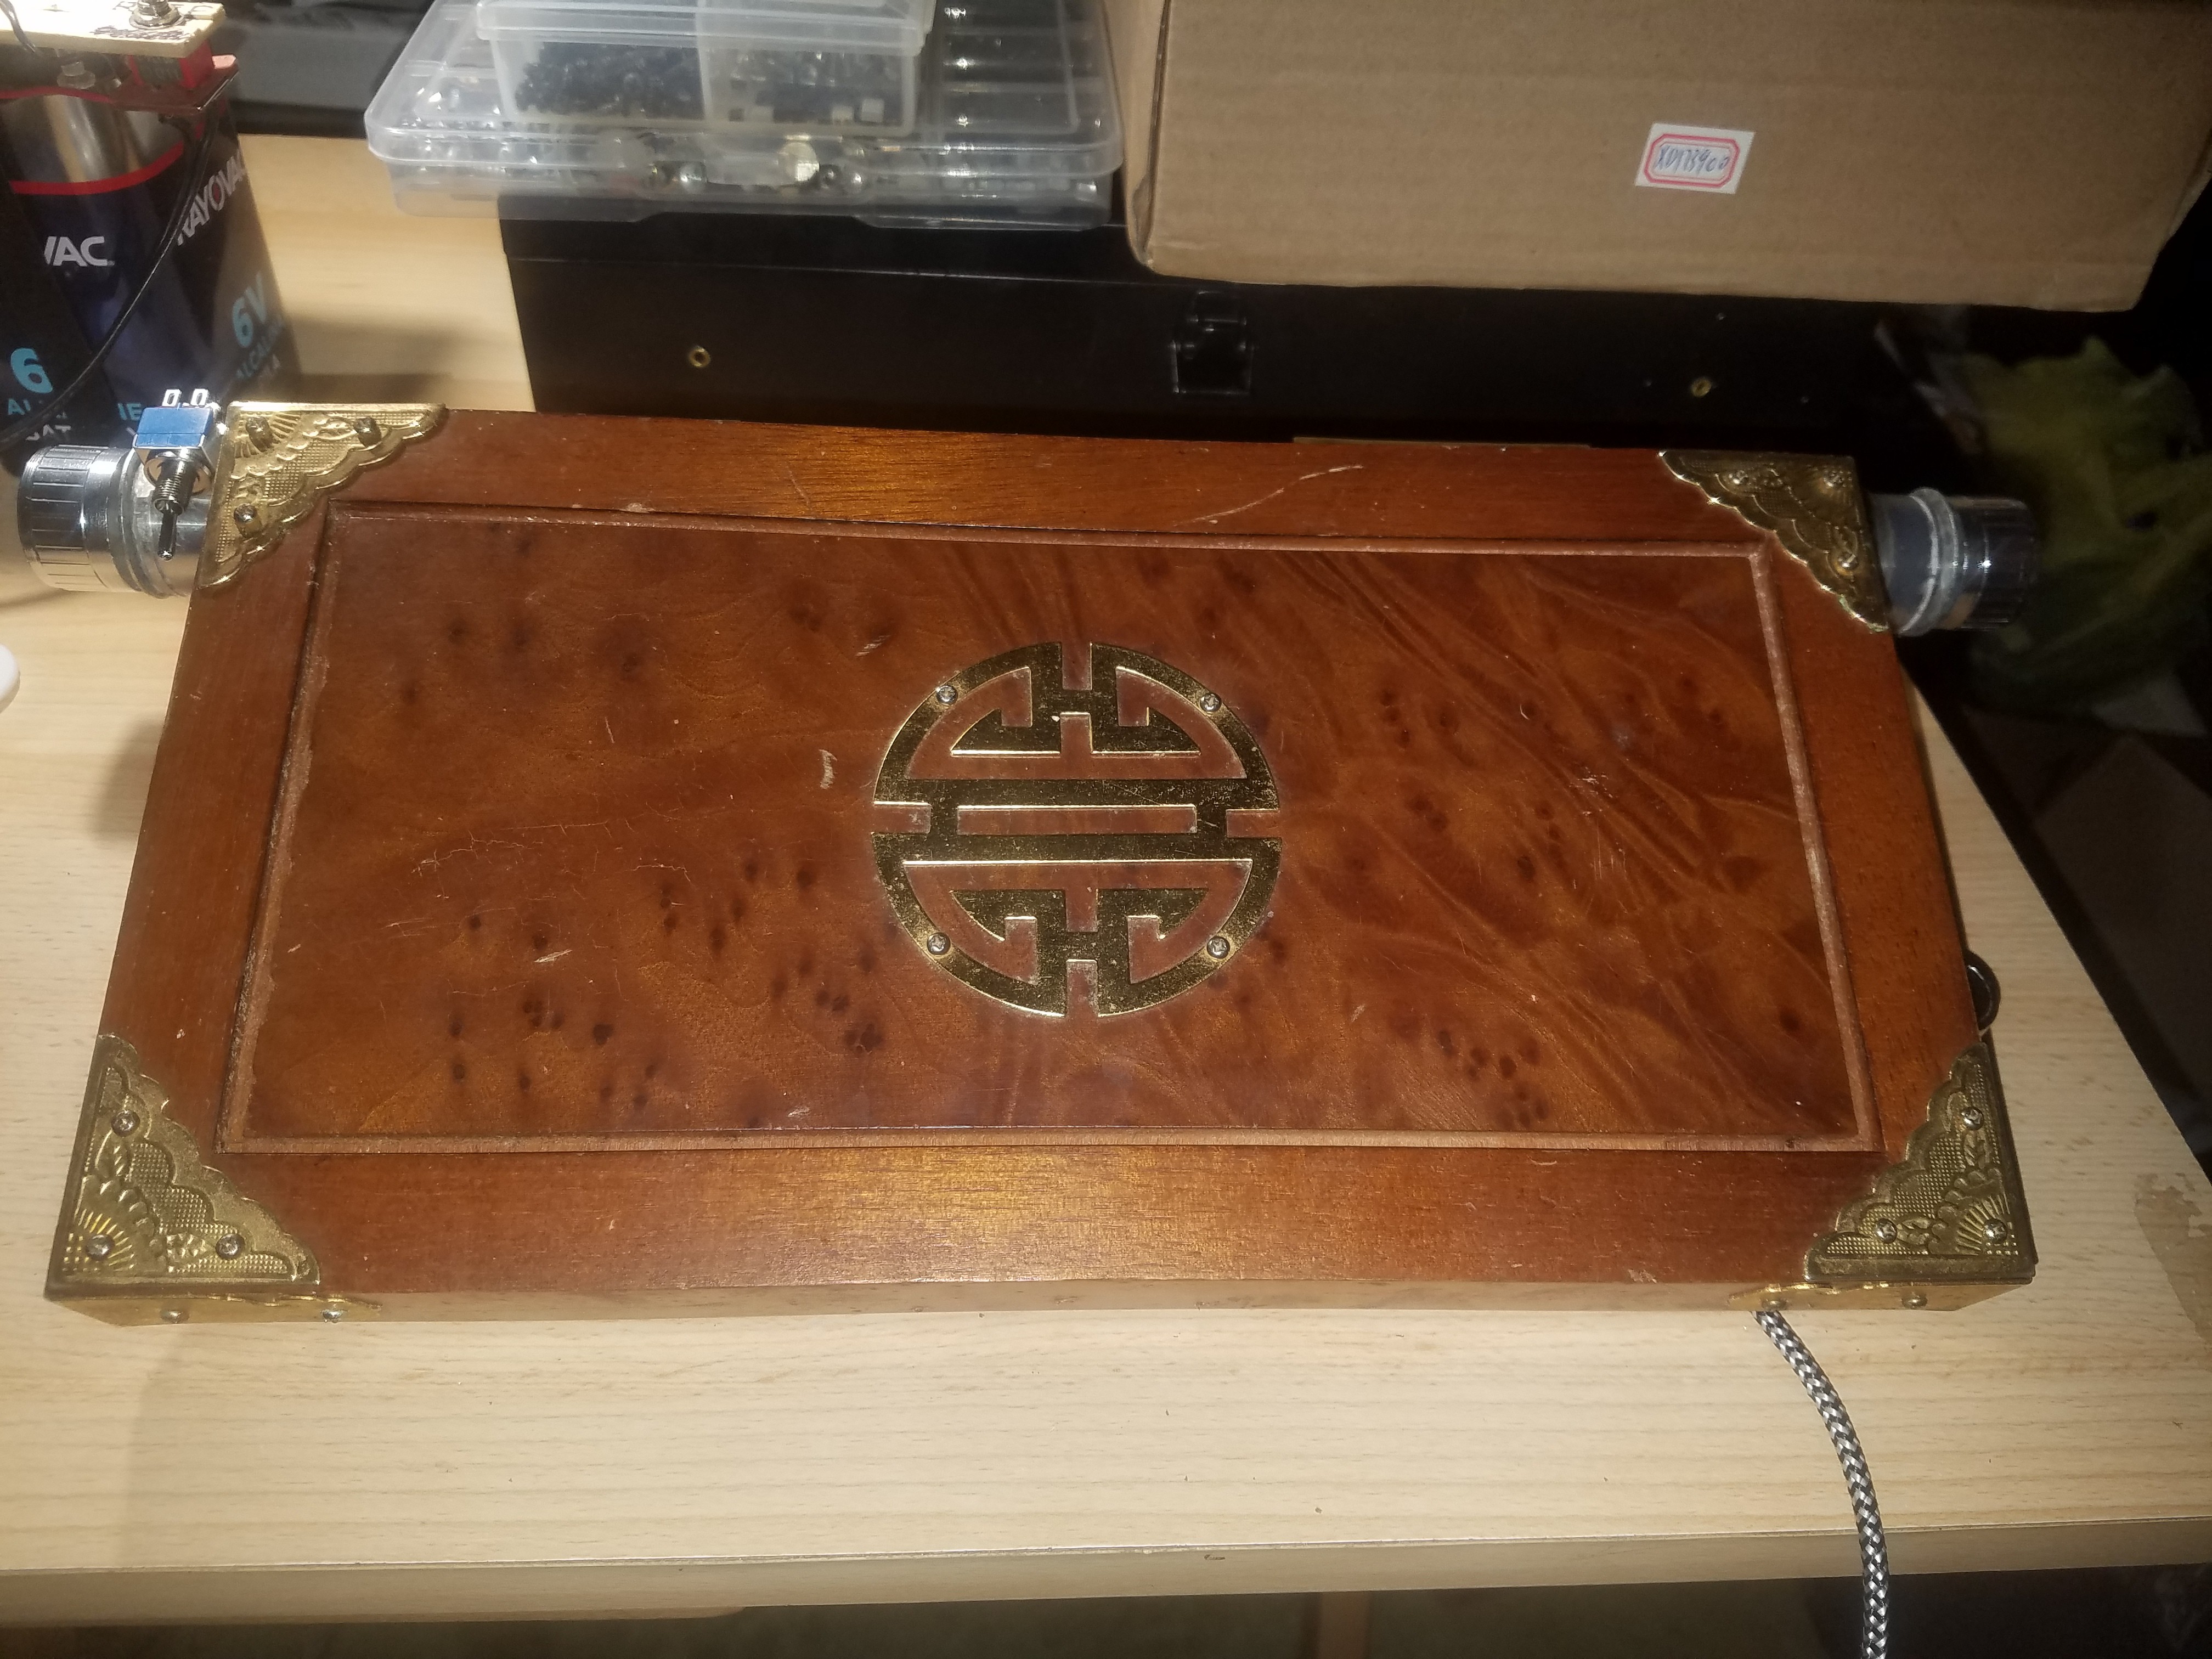
At some point in the process of helping Dad and Aida clean out their Raleigh home, I happened to notice a jewelry box of Aida's. It was made of some sort of reddish burled wood, with brass corners, hinges, clasp, and a brass design on the lid. it was quite beautiful, in other words, and when I asked about it, I was told I could have it.
At some point, months later, I took it to a friend of mine, Jody, who runs the best of the local tech shops (by a considerable margin) -- shameless plug, on that note, actually -- if you happen to be in or near the Triangle/RTP area of North Carolina, Tritech Computer Solutions is a place you should go for computer repair. Their website is http://nctritech.com/ and they are friggin' awesome.
*ahem*
Anyways, one thing Jody is masterful with is the application of a heat gun to various materials. I wanted to use the jewelry box's lid for this project, and I couldn't do that with a glass mirror inside, which is how it came. I knew it was glued in because there was no edging around it, and I knew it was glass from the sound it made when I plinked it, and I knew I didn't want shattered glass bits all the freak over my very nicely carpeted little apartment, so I went to Jody to see if he could loosen the glue with a heatgun and then thwack the glass out. It took considerable effort, and a few extra tools, but eventually we got the mirror out and I was later able to remove most of the glue with a few tricks, back at the apartment.
Then I started planning.
-
"I Vas Verking In The Lab, Late One Night..." or, the death of a Steampunk Laptop
03/30/2019 at 01:04 • 0 commentsI was working on the original Homebrew Steampunk Laptop, trying to correct a minor fault with major surgery. It was stupid late at night, my eyes were well past bleary and approaching Krispy Kreme levels of glazed (substitute Dunkin Donuts if you're Up North -- sorry, I'm stuck in North Carolina), and pads were lifting off of PCBs. Not good.
I had removed a troublesome barrel jack from a USB hub -- it was getting so that it would intermittently let go of its plug a little easily, because the jack and thus the plug were really too small for the current requirements that it was being subjected to. I then had clumsily managed to lift the pad for the center pin of the barrel jack, and -- having traced out the circuit as best I could -- thought I knew which trace to get the coating off of to wire up the positive lead so that it would still operate. Clearly, I should've taken a step or two back and said, hold on, this might be a bad thing at this point to persist onward.
Being given, however, to be more stubborn (and at times, less intelligent) than the proverbial rented mule, that is not what happened. Instead, I very quickly discovered, upon reassembly and subsequent application of power, that I had not been nearly as successful as i'd hoped. I had exceeded the limits of my luck, and the result was a shorted-dead USB hub and a motherboard with a lot less Magic Smoke inside.
Oh, dear.
At this point I was out of religious deities and swear words both (not to mention any hope of proper functionality), so I very wisely set the mess down, sighed and shrugged, and dejectedly signaled my surrender by going off to bed.
The next morning. it occurred to me that, while that particular machine was likely unsalvageable, there was still a way to turn my epic fail into something of a phoenix. I had been idly musing of producing a successor machine from the original, and while I was no longer able to pull substantial parts from the original, that by no means precluded me from making a new machine in some sort of reinterpretation of the image of the deceased.
Being something of a sketch artist, this is approximately where I picked up my pencil and got down to artwork.
The Homebrew Steampunk Laptop v2
"Admiral, this is an almost totally new Enterprise." (...er, Homebrew Steampunk Laptop)