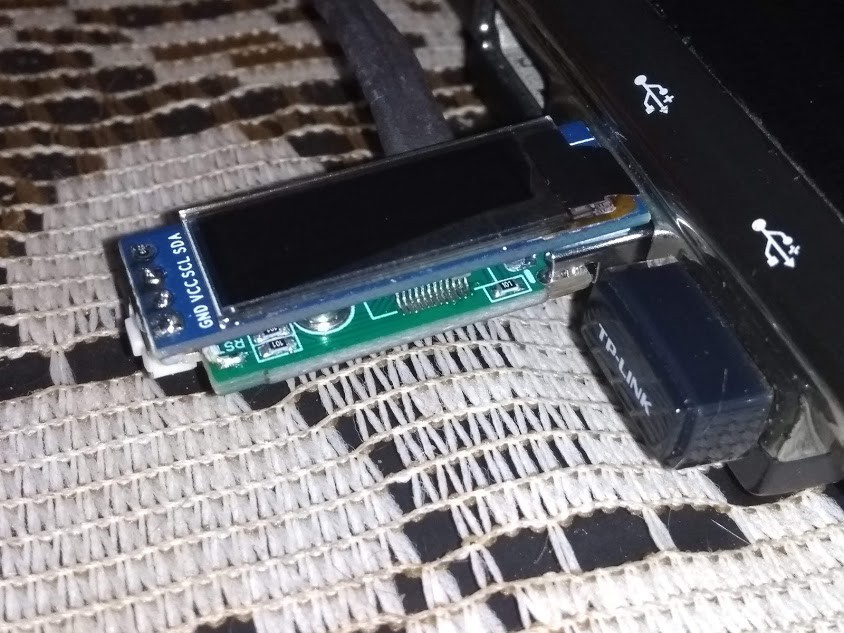
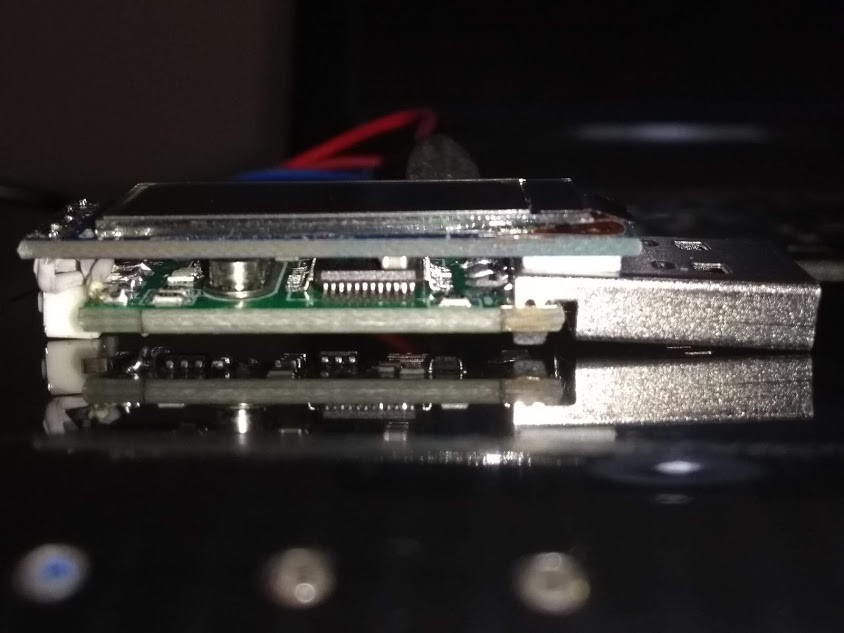
So after playing a lot with OpenSCAD I decided to simply go ahead and build a prototype without a case and later worry about case. Moreover, I was trying to think how would I solder two buttons since there isn't really much space and I/O pins are well distributed on the back of the board. So, I decided to go ahead with just one button, which will be enough for confirming an action or not. Going into menus and options would be possible by holding down the button, but it feels annoying. At the moment I will just use the OLED to display current request which will also make it really simple to program.

I must say the prototype looks really good since it feels like it is all custom made. I soldered the OLED to the SWIM and NRST pins, which nicely map to I2C pins. 3.3V and GND are also available at the top side. On the bottom side, I soldered the button between 5V and SWDIO, which makes it readable on PB14. Finally, there's a LED at PA9. I used very short cable for the display and placed some tape to hold the screen in place and also provide some separation/cushion to the board.

I have the (internal) SWD pads soldered so that I can flash it with (another) ST Link. The first thing was to unlock the flash (it usually comes locked) and then use openocd to write a DFU loader (I use generic binary with LED on PA9 from STM32duino project). Then, I used the arduino IDE with the STM32_Arduino package.
With this I could blink the LED and read the button (requires an input pull-down to read correctly). You can see the result here:
Moreover, I could use the SSD1306 library from Adafruit (modified for STM32). Since I made a mistake and soldered SCL with SDA and viceversa (I will fix it tomorrow) I had to resort to SoftWire, which allows me to swap SCL and SDA pins:
I will now continue porting the Solo code to NuttX. I think this will eventually require porting some of this upstream since the project appears to be very active.
 Matias N.
Discussions
Become a Hackaday.io Member
Create an account to leave a comment. Already have an account? Log In.