Current status
Currently I have a full offline working version as following:
I'll start briefing what is the status of this project and later will explain step by step how I designed and how can you replicate it, just don't forget to mention this page as reference!
If you agree with some improvement point and want to cooperate, just send me a message.
Mechanical design:
- Fusion 360 project is stable and works, but doesn't have any assembly, only 2d project;
- Second version cut on laser, has a sliding door that can be locked;
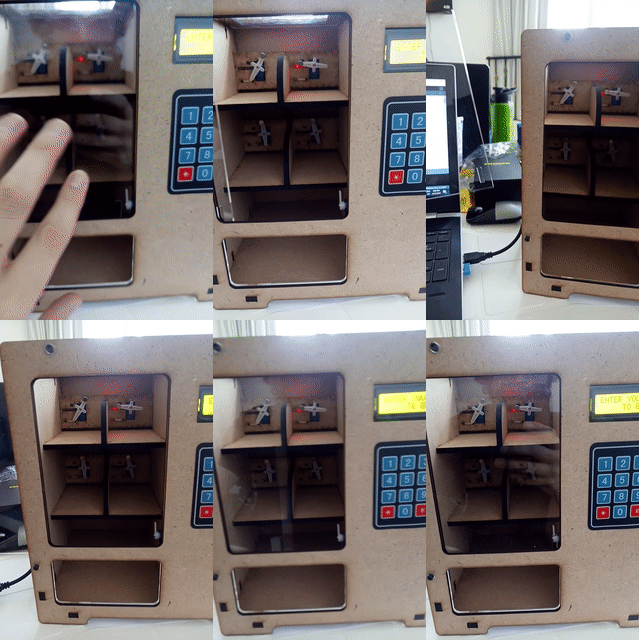
- Didn't find a reliable solution to the delivery spring;
- Improvement points:
- Match Arduino connector cuts, currently they are a bit decentralized and big;
- Center display, so far it's decentralized and it freaks me out;
- Finish 3d design;
- Automatically change the project creating all mechanics (3d and dxf) based on the following parameters:
- n rows of product cells;
- n columns of product cells;
- n products per cell;
- payment method (coin, rfid, login/password);
Electronics hardware design:
- Shield designed compatible to Arduino and WordSkills STM32L board, both work;
- Be careful with the continuous rotation motors! At the detailed description session there is a better explanation;
- Improvement points:
- Would be way better if the motor were i2c (or any other addressed communication), specially if this project escalate to a parametric design. Currently there are no available pins and a parametric design would increase the number of necessary motors;
- Shield isn't compatible to a coins reader;
- There are no available pins to control the LEDs;
- Add some network to access a web database, W5100 or ESP;
Embedded software design:
- So far the basic offline system works fine in Arduino. I'll release the complete solution as soon as I finish it. The issue with continuous motor were unexpected and I spend more time than I wanted to solve it;
- I didn't have time to finish the STM32 version code;
Alright, now let's finally start!
Introduction
I made a small research and found a couple vending machine projects:
- https://blog.arduino.cc/2016/06/29/venduino-is-a-diy-arduino-vending-machine/
- https://howtomechatronics.com/projects/diy-vending-machine-arduino-based-mechatronics-project/
I really enjoyed the first project proportions, but didn't like the number of bolts and internal electronics/cabling. The second one is really better for escalating in size, but I was looking for something simpler, more similar to the first option (the one isn't fully open source).
At the end my decision was to start from scratch and I came up with the following features list:
- Small size;
- 2 rows by 2 columns and 3 products per cell, every product allocated in 3cm threads;
- No motor apparent from outside;
- A "lockable" front door;
- Arduino uno and WorldSkills STM32L boards compatible;
- Login/password to "buy"
- RFID to "buy"
- Mechanics reliable and digitally fabricated.
First design decisions
As a first step after deciding the project features, I like to choose which tools I'll use to design. Usually for those non profitable designs I rather selecting software, devices and technologies that I never used before and want to learn, so if you're specialist in some of those tools and could give me some tips, I'll be glad to hear.
I might update this list in the future (after adding network for instance) but to do stuff as it is now I've used the following:
- Fusion 360 to the mechanics;
- InkScape to prepare dxf files to lasercut;
- Eagle to design the PCB;
- Arduino IDE to program Arduino;
- Keil to program the STM32;
- CubeMX to start the code for STM32;
- A3144EU hall sensor;
- RC522 RFID module;
- Continuous rotation micro-servo 9g;
- Regular 0-180 deg micro-servo 9g;
- LCD 16X2 display;
- 4x4 keypad (ended up being analog to save some pins);
- Arduino UNO;
- STM32L WorldSkills PCB;
Mechanics
Finally, after wondering how this machine would work, I started by what I'm bad at, the mechanical design.
My starting point was the https://www.makercase.com/ but I made some major changes and if you open the fucion file, v102 you'll see the following screen:
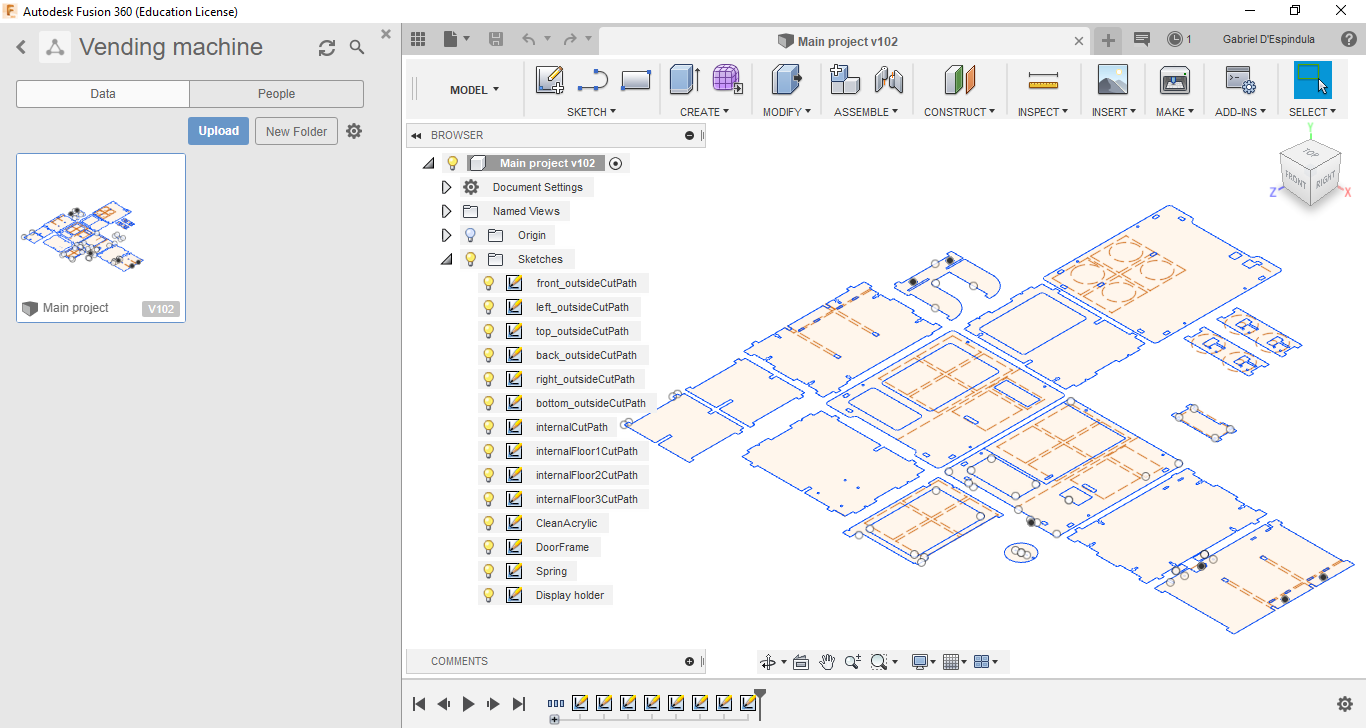
Yeah, if you were expecting some 3d, wait a bit more because this is a improvement point. I did all parts only in 2d sketches, didn't put them together. But all connections work well and I'm proud about the final product.
This design used 6 and 3mm MDF for the body and 2.8mm clean acrylic to the windows and front door. There are some more detailed information about the assembly in the project instructions.
The way I did the clean acrylic and 3mm mdf as a sandwich was to avoid adding screws. In fact the whole body uses 16 screws to keep the parts together, all internal joints were made without glue or bolts.
I never tried to create some parametric design, and for the next step I wonder to use the https://www.festi.info/boxes.py/ project or the fusion features to create parametric designs, I'm not aware of what would be the best solution, if you have some idea let's start a discussion about it!
Electronics
Well, this was pretty straight forward to me. Circuit was simple, I just added everything on Eagle and came up with a schematics:
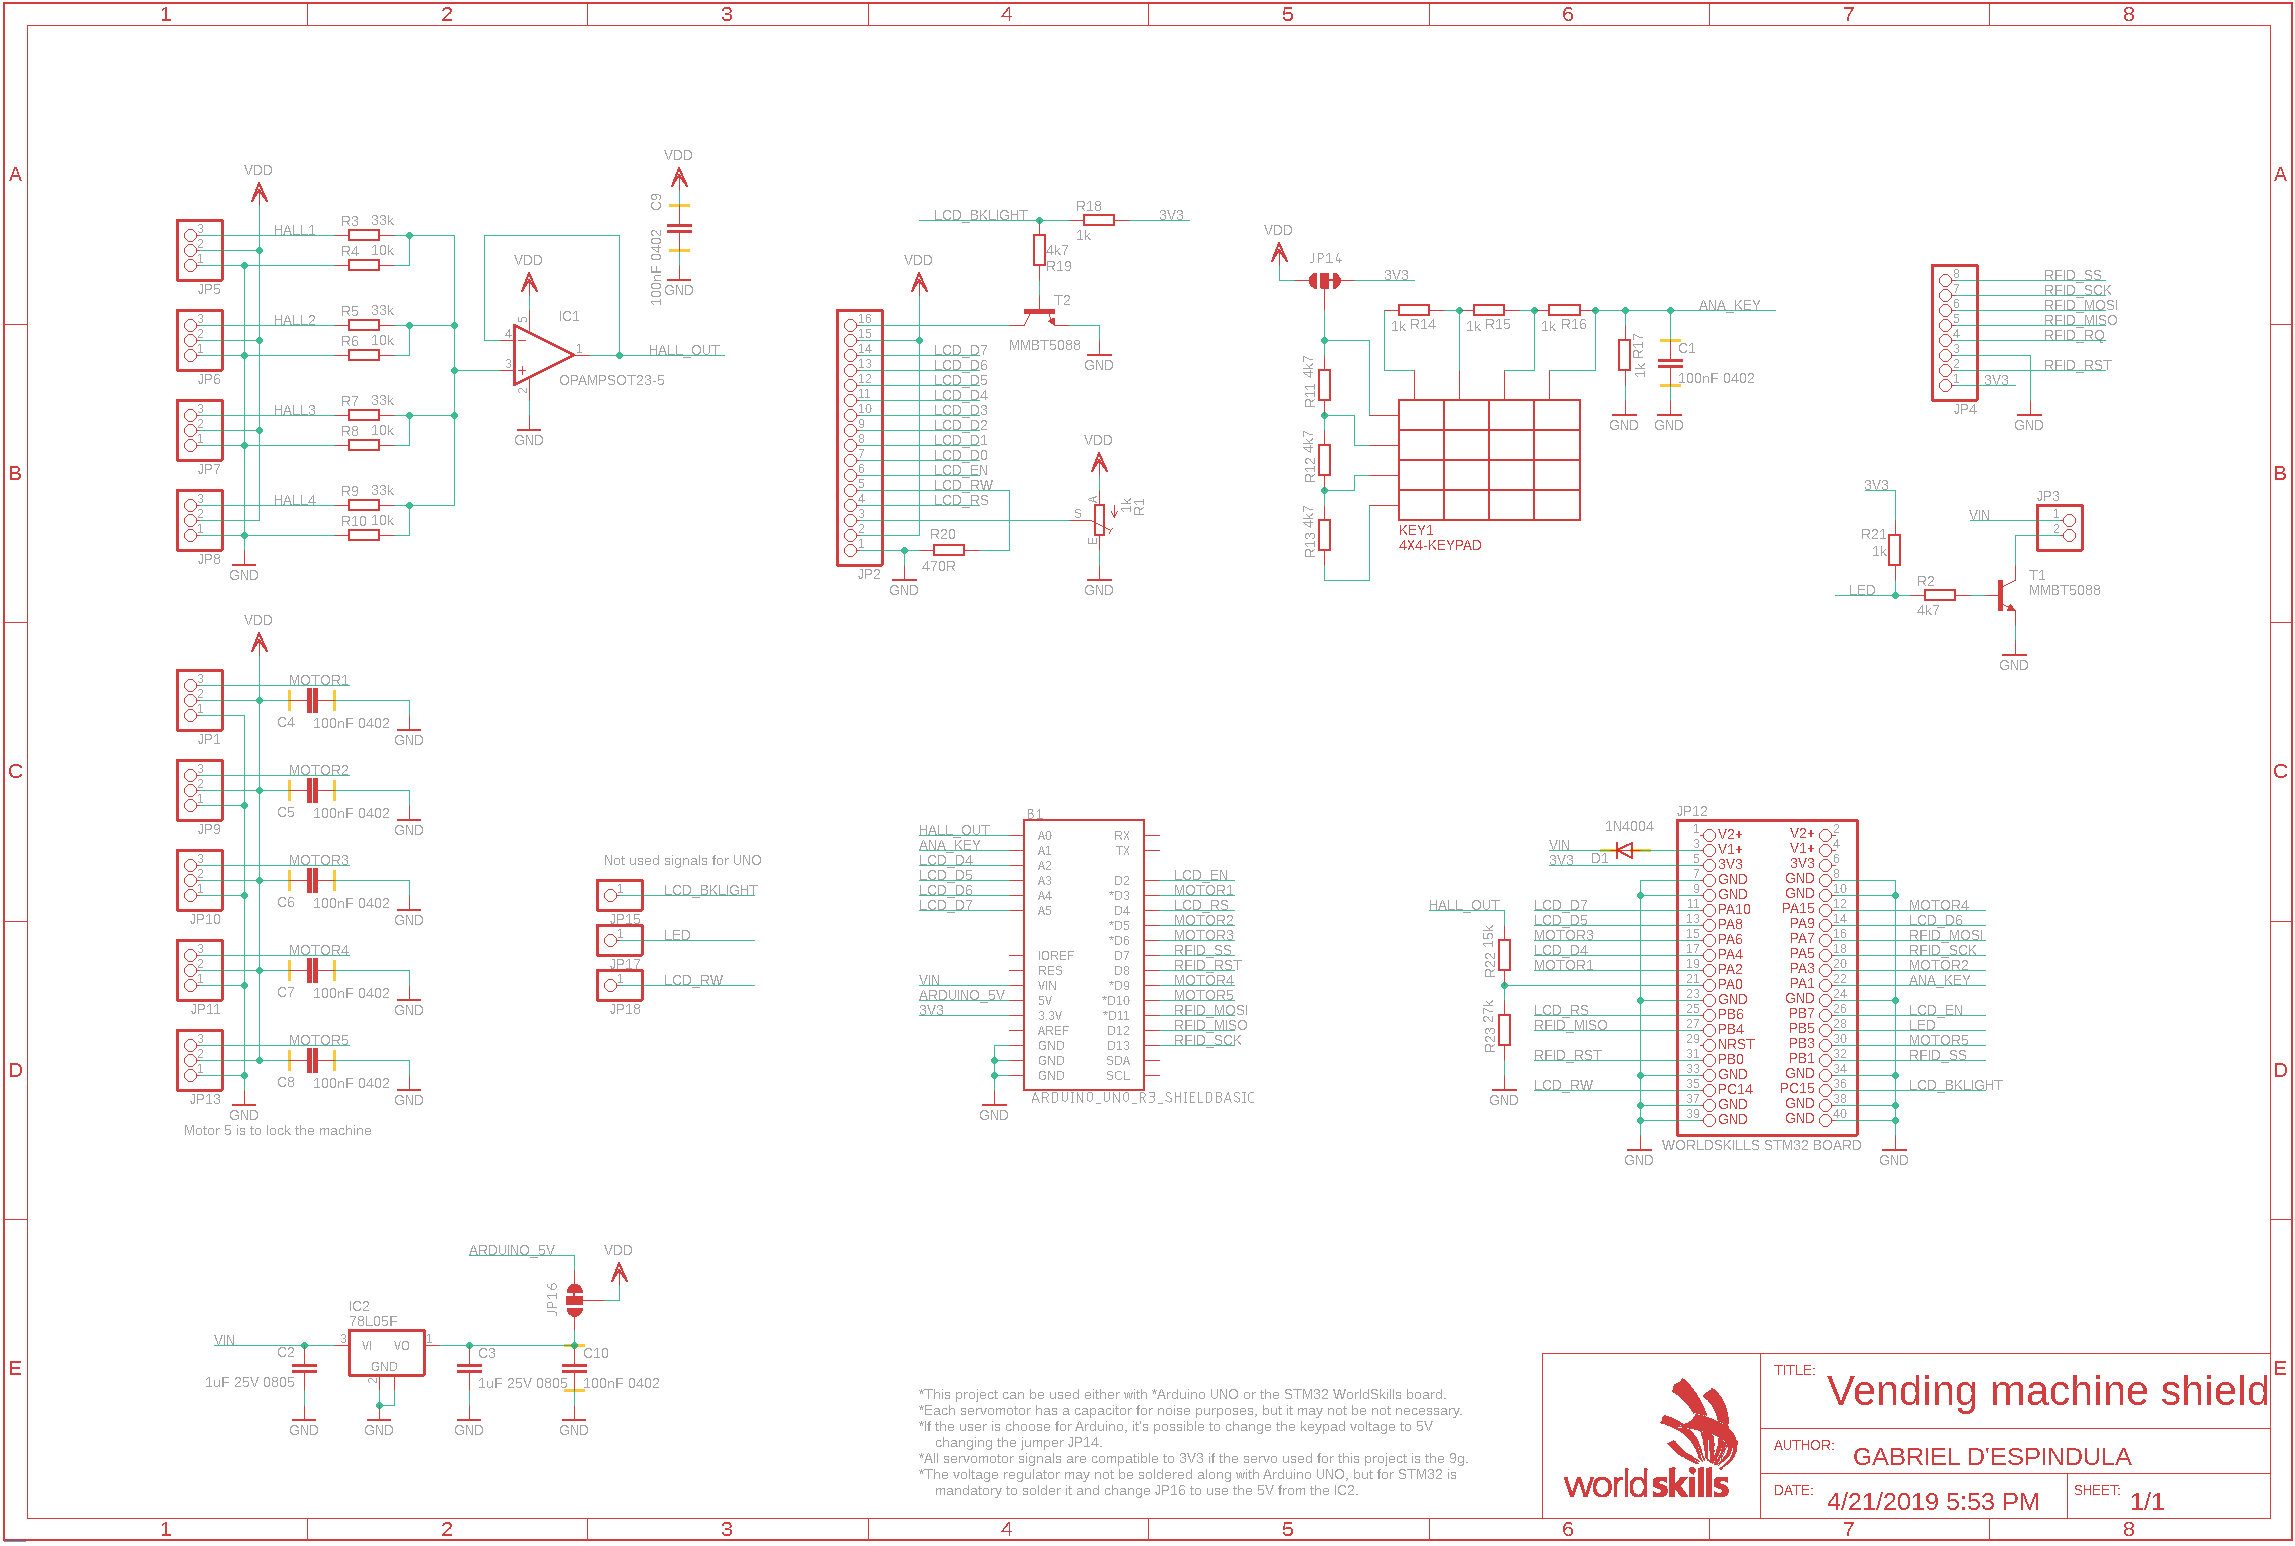
There are a few points here to clarify:
- STM32 board is 3.3V and the board I use doesn't have a power regulator, so I added one;
- If you calculate the voltages on the analog keypad will notive that is too risky to keep it 3.3V, reason why I added the first jumper, I needed to solder it to use on the UNO board;
- The UNO board doesnt had enough pins, but I added some testpoints to allow further modifications, as default the display RW is set to LOW while the LCD backlight and LEDs are ON.
From the Schematics to PCB, I designed a two layers board, put most of components on the bottom to keep the top clear for some silk indications, and sent to China for manufacturing. The end result was not bad!
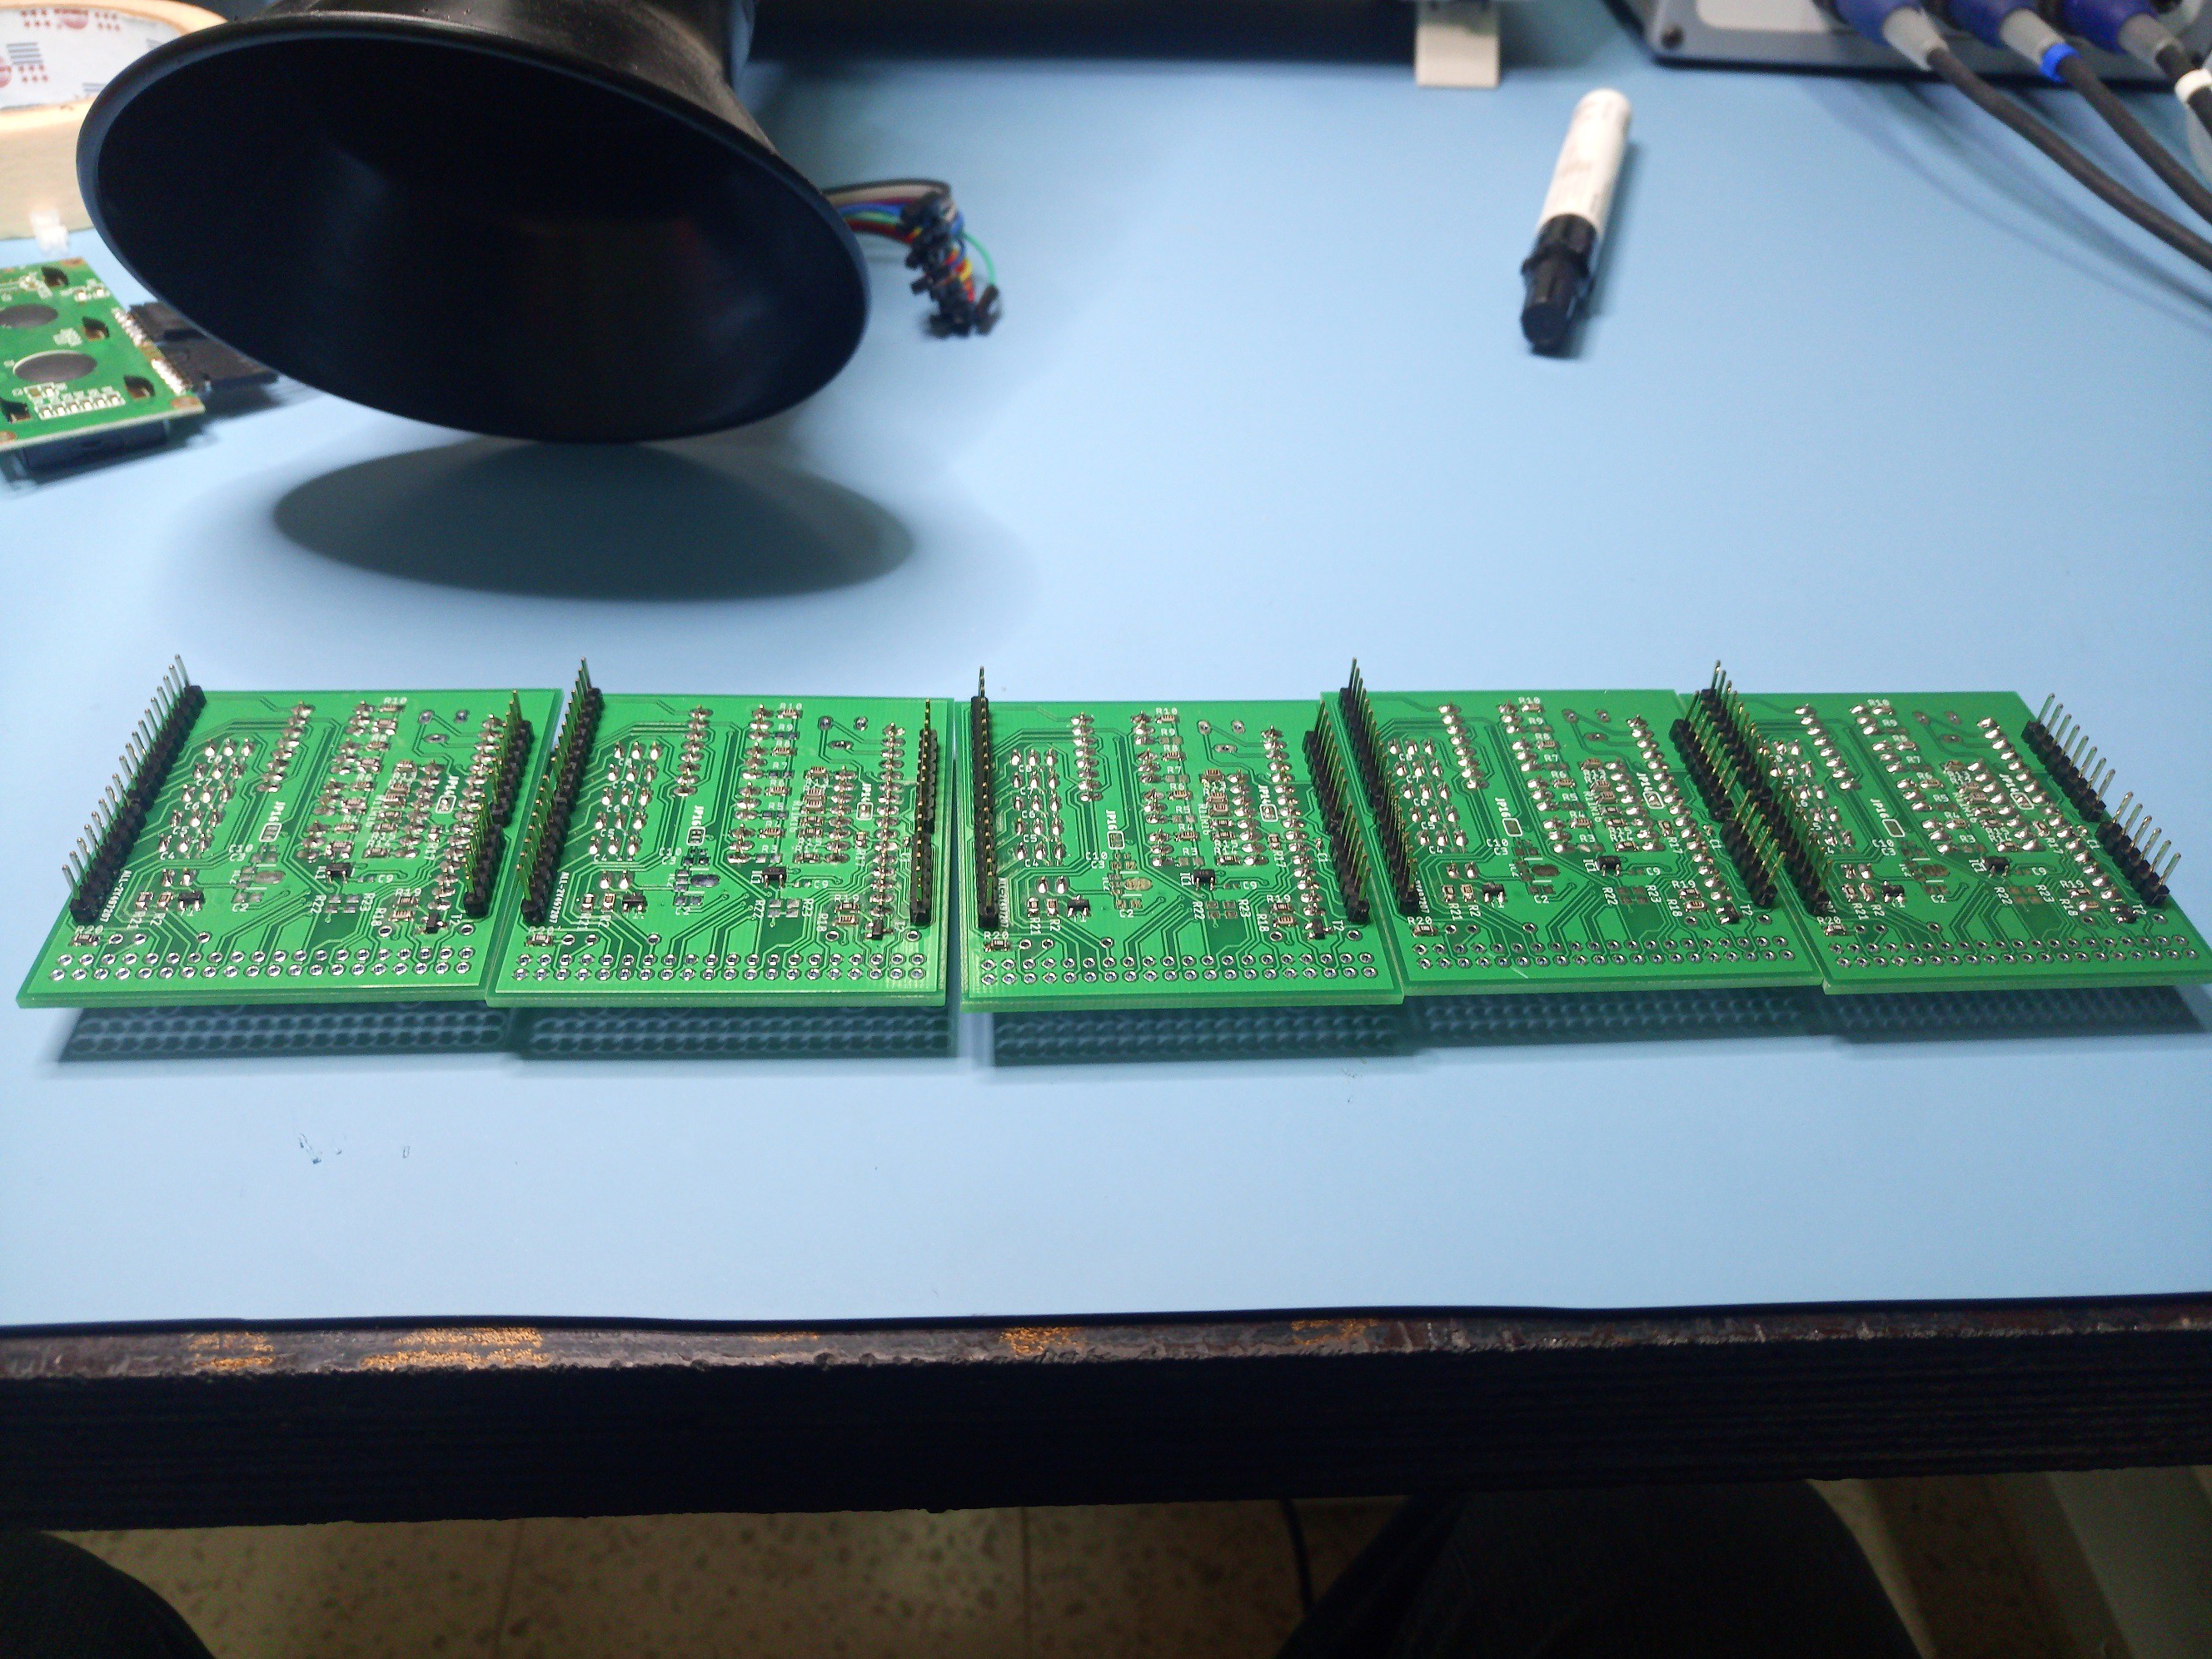
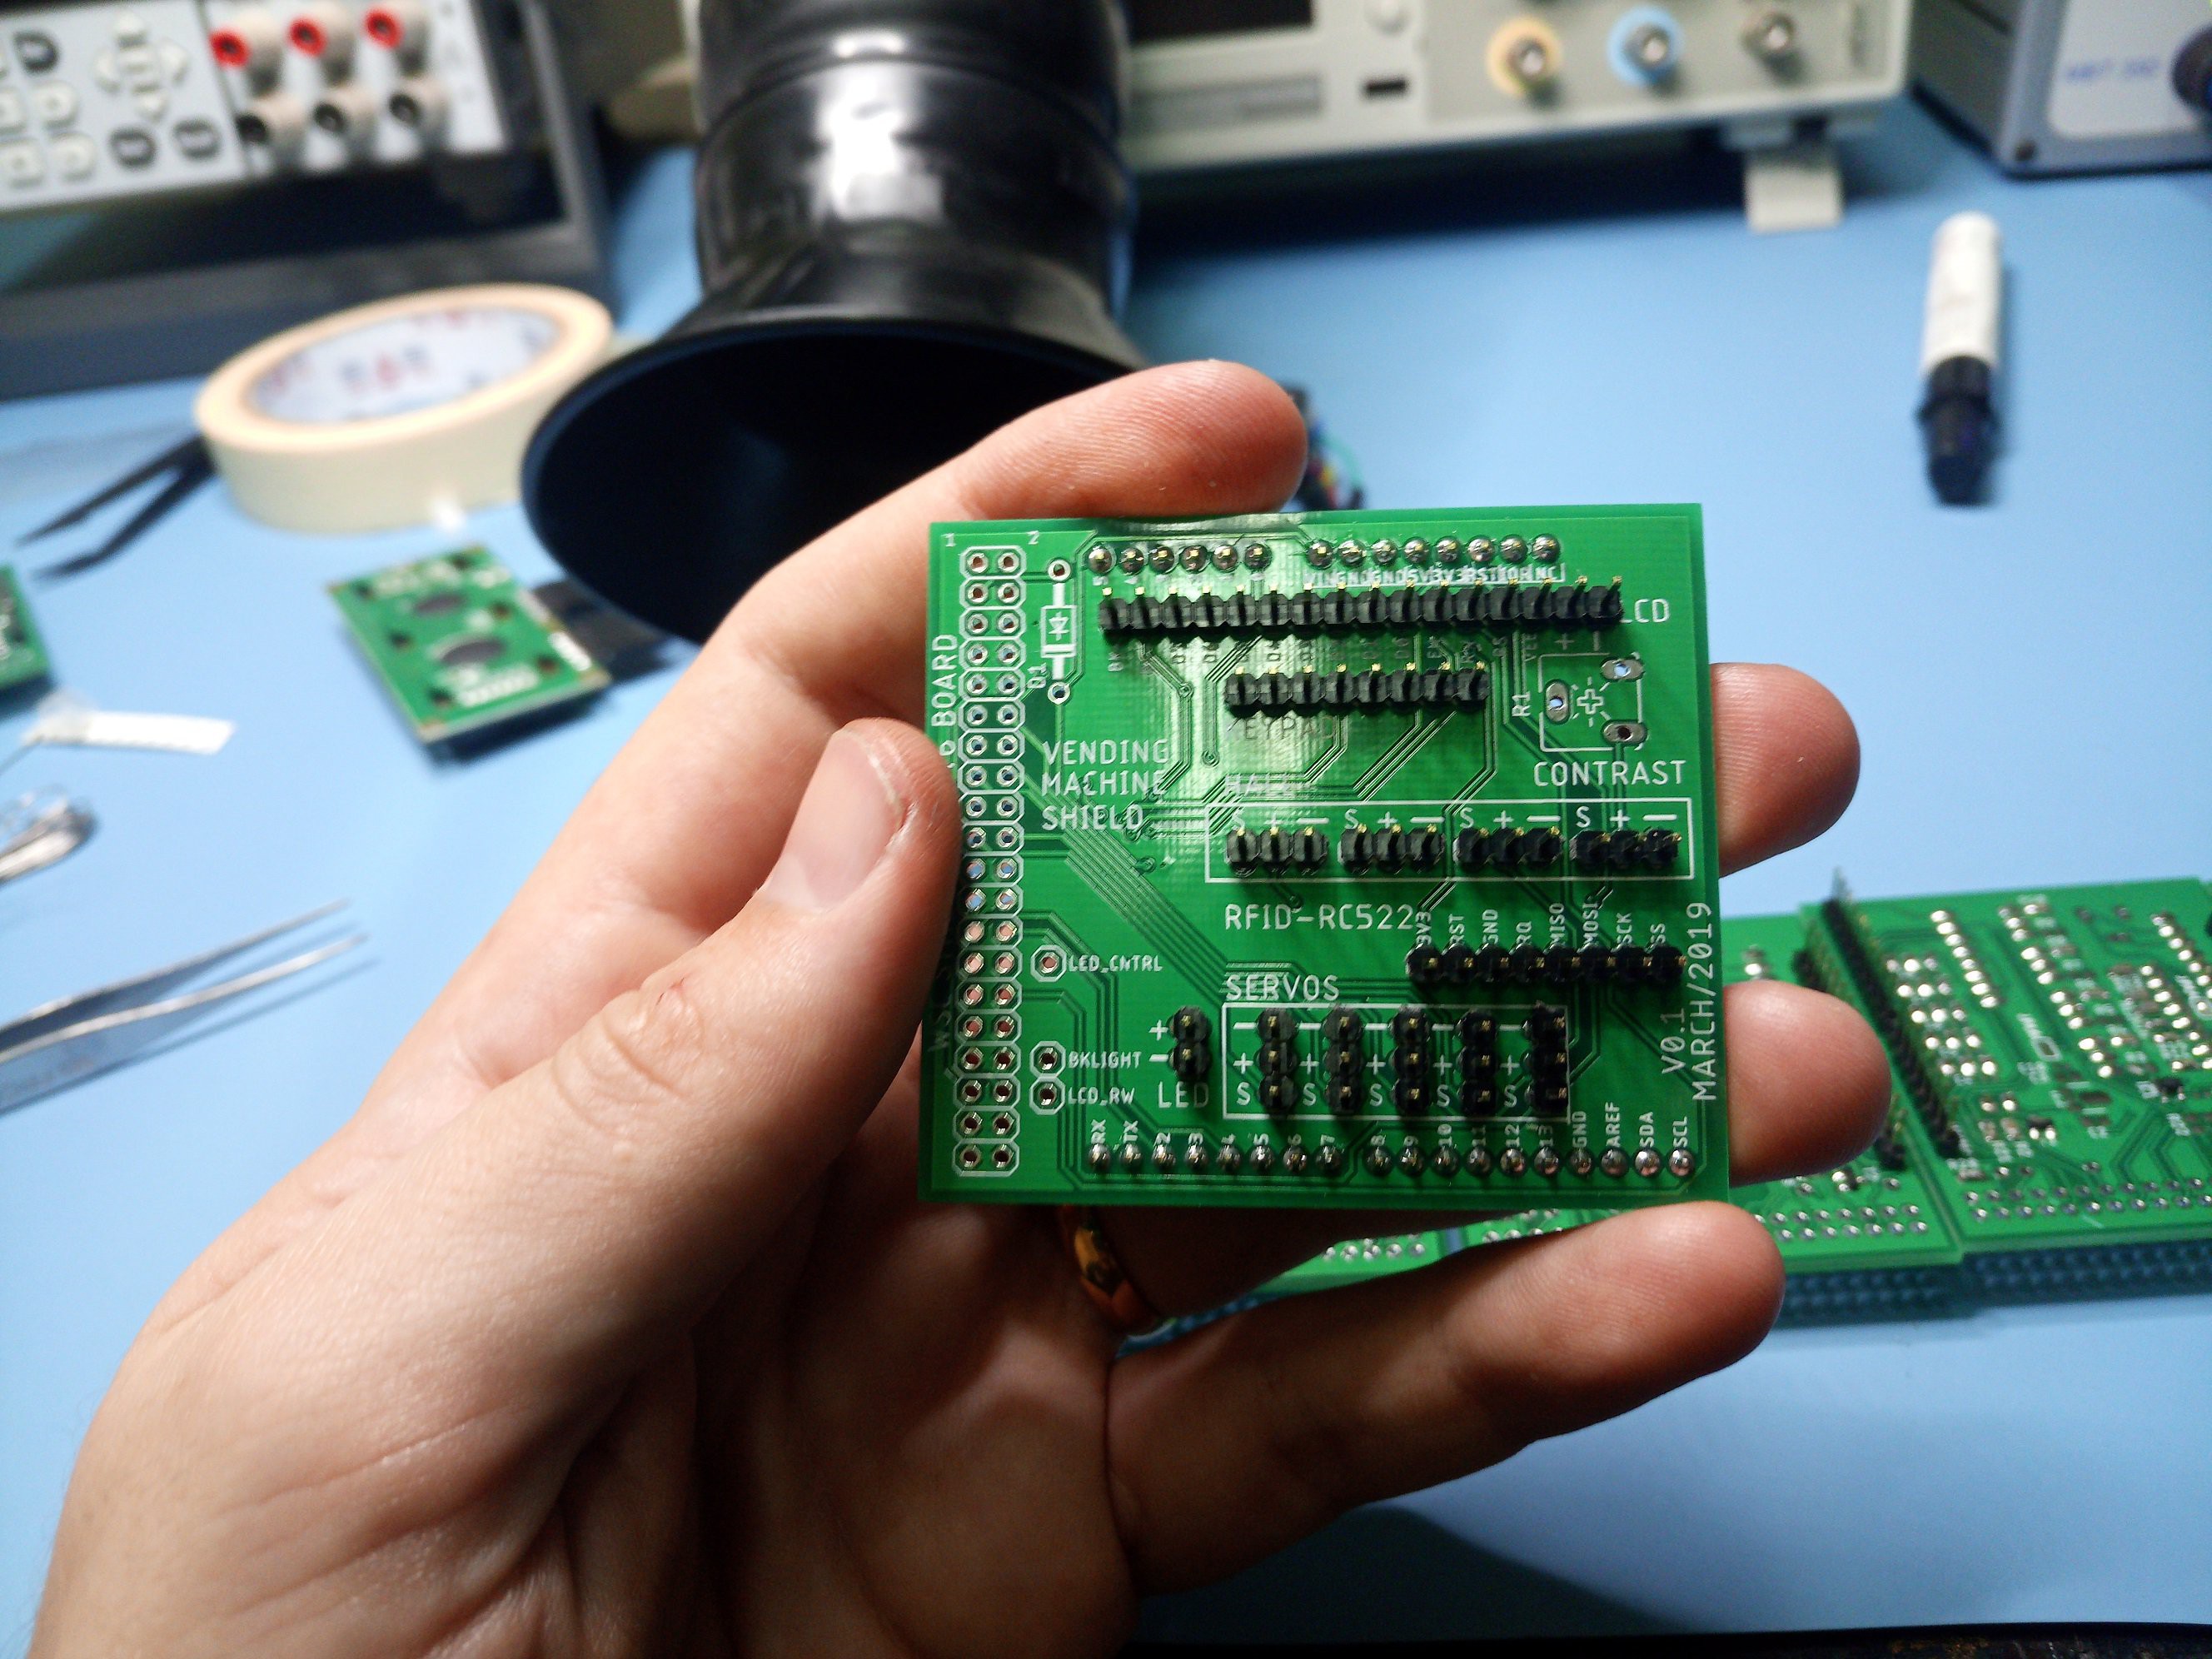
I've used the https://www.allpcb.com to order the PCBs, they have the best shipping price to UAE (where I live) but I had issues with them before, can't say I recommend.
All Eagle files and BOM are attached to this project.
Embedded Code
As pointed in the briefing above, I still didn't have time to finish a proper code. What I have so far is only the Arduino code, and it works as the following state machine:
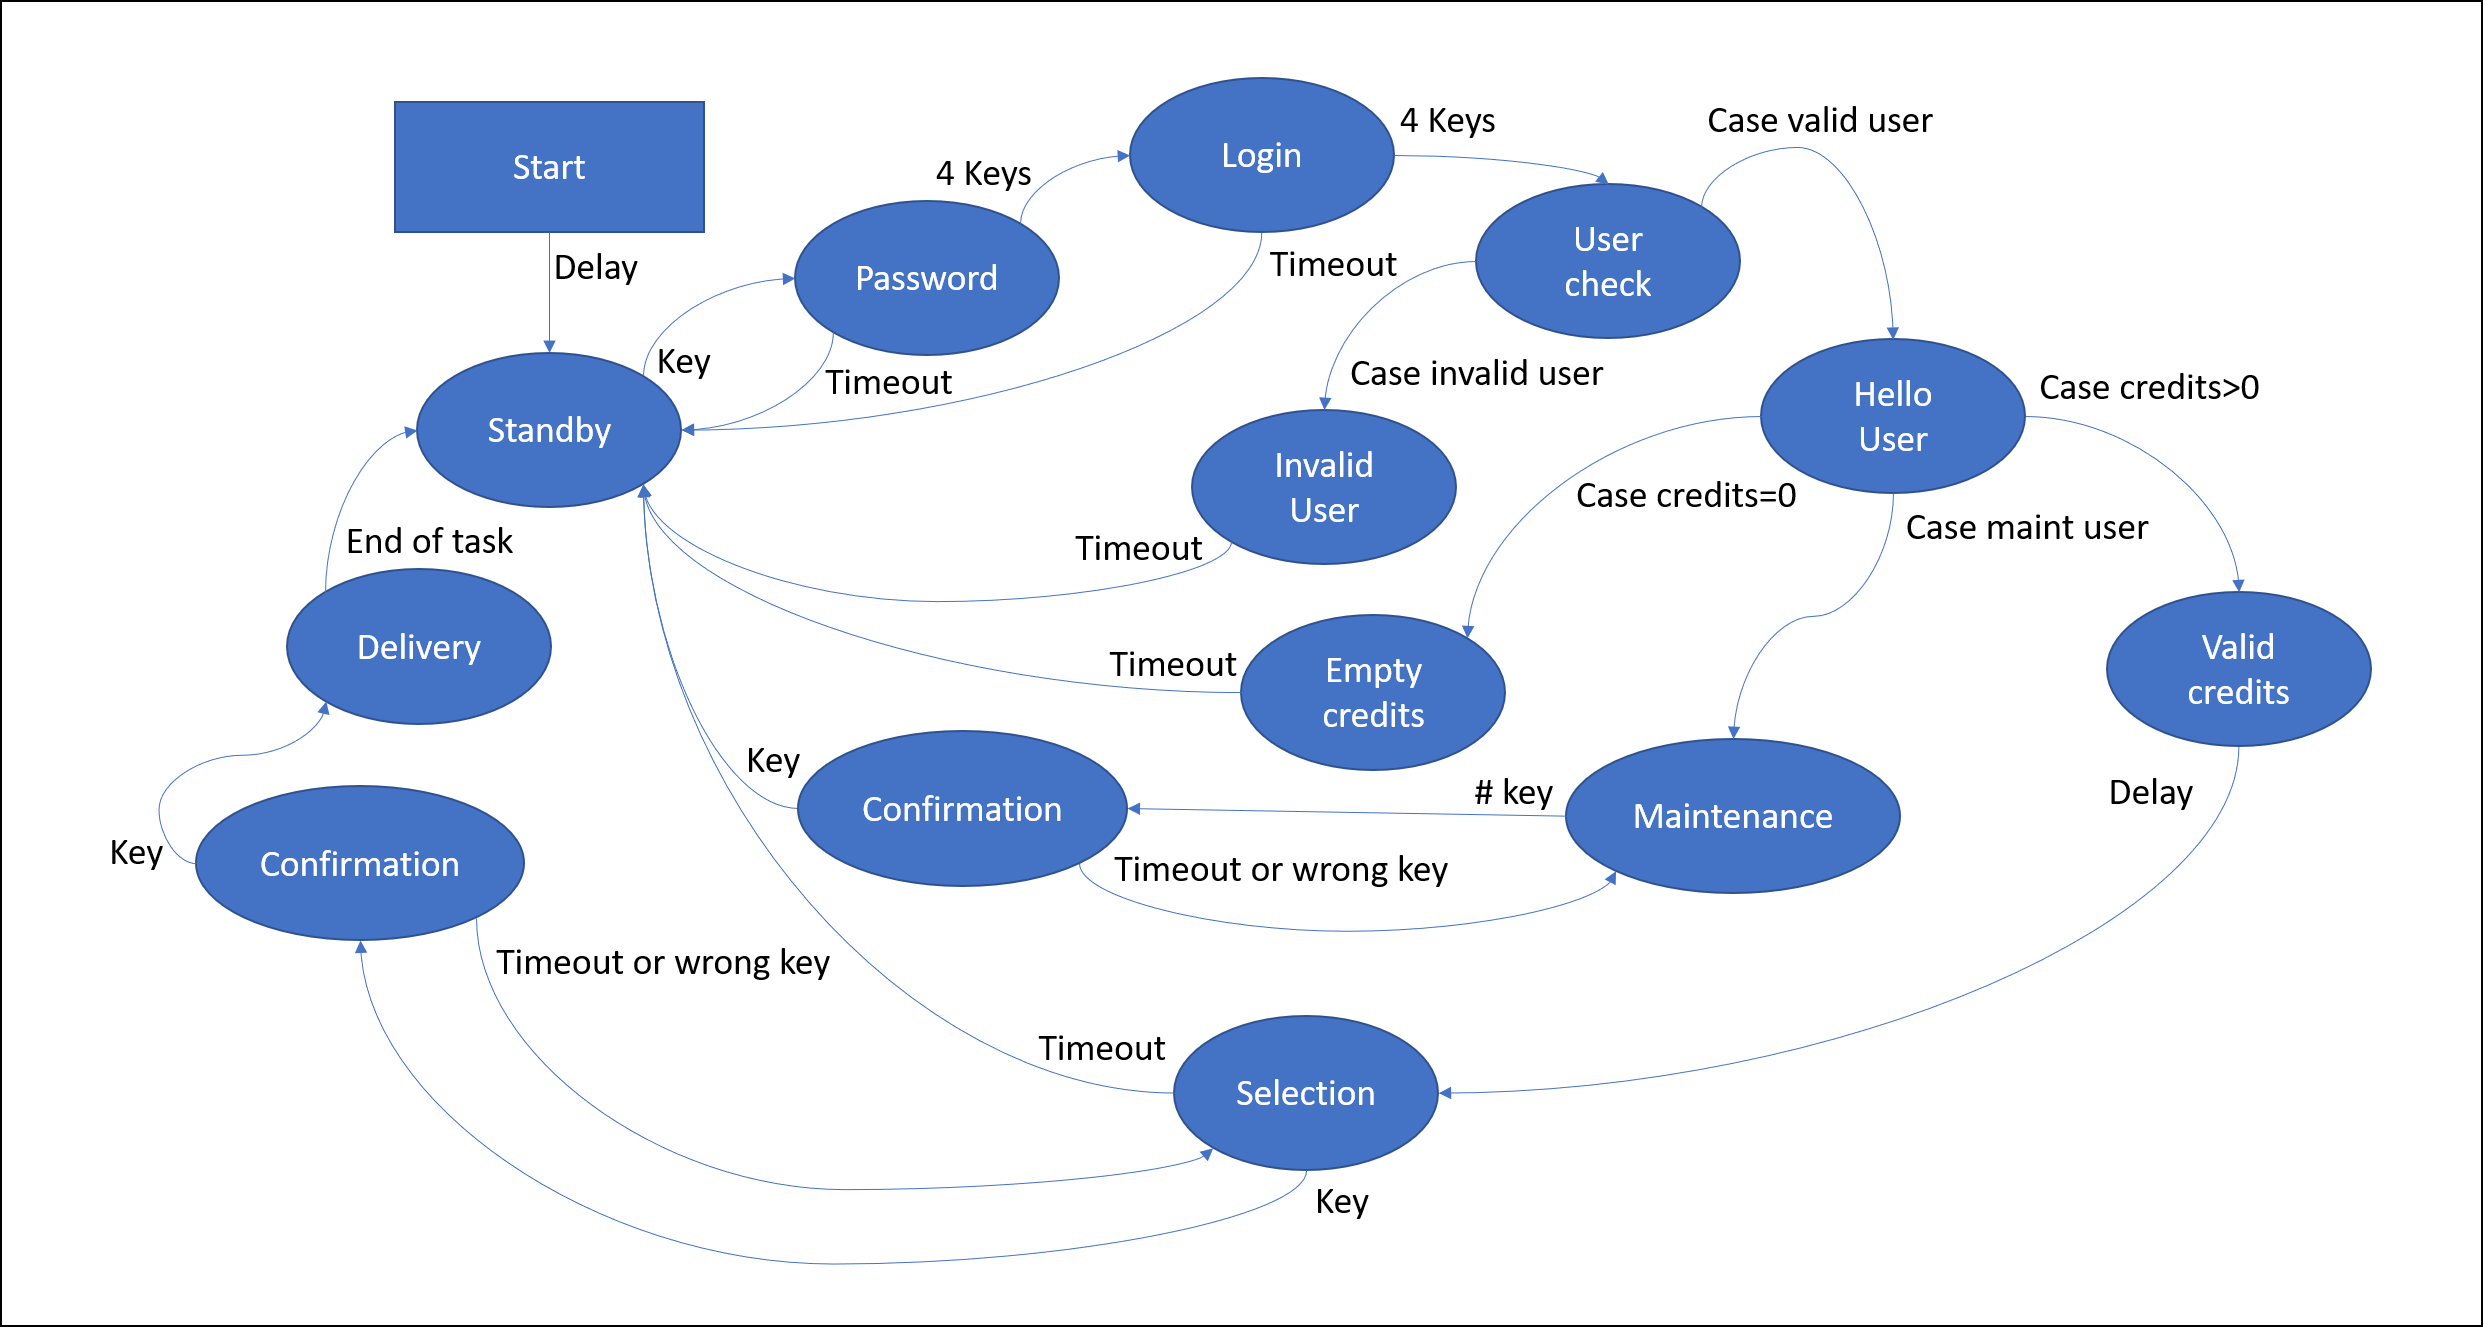
Hopefully I'll update it soon!
 Gabriel D'Espindula