 Madaeon
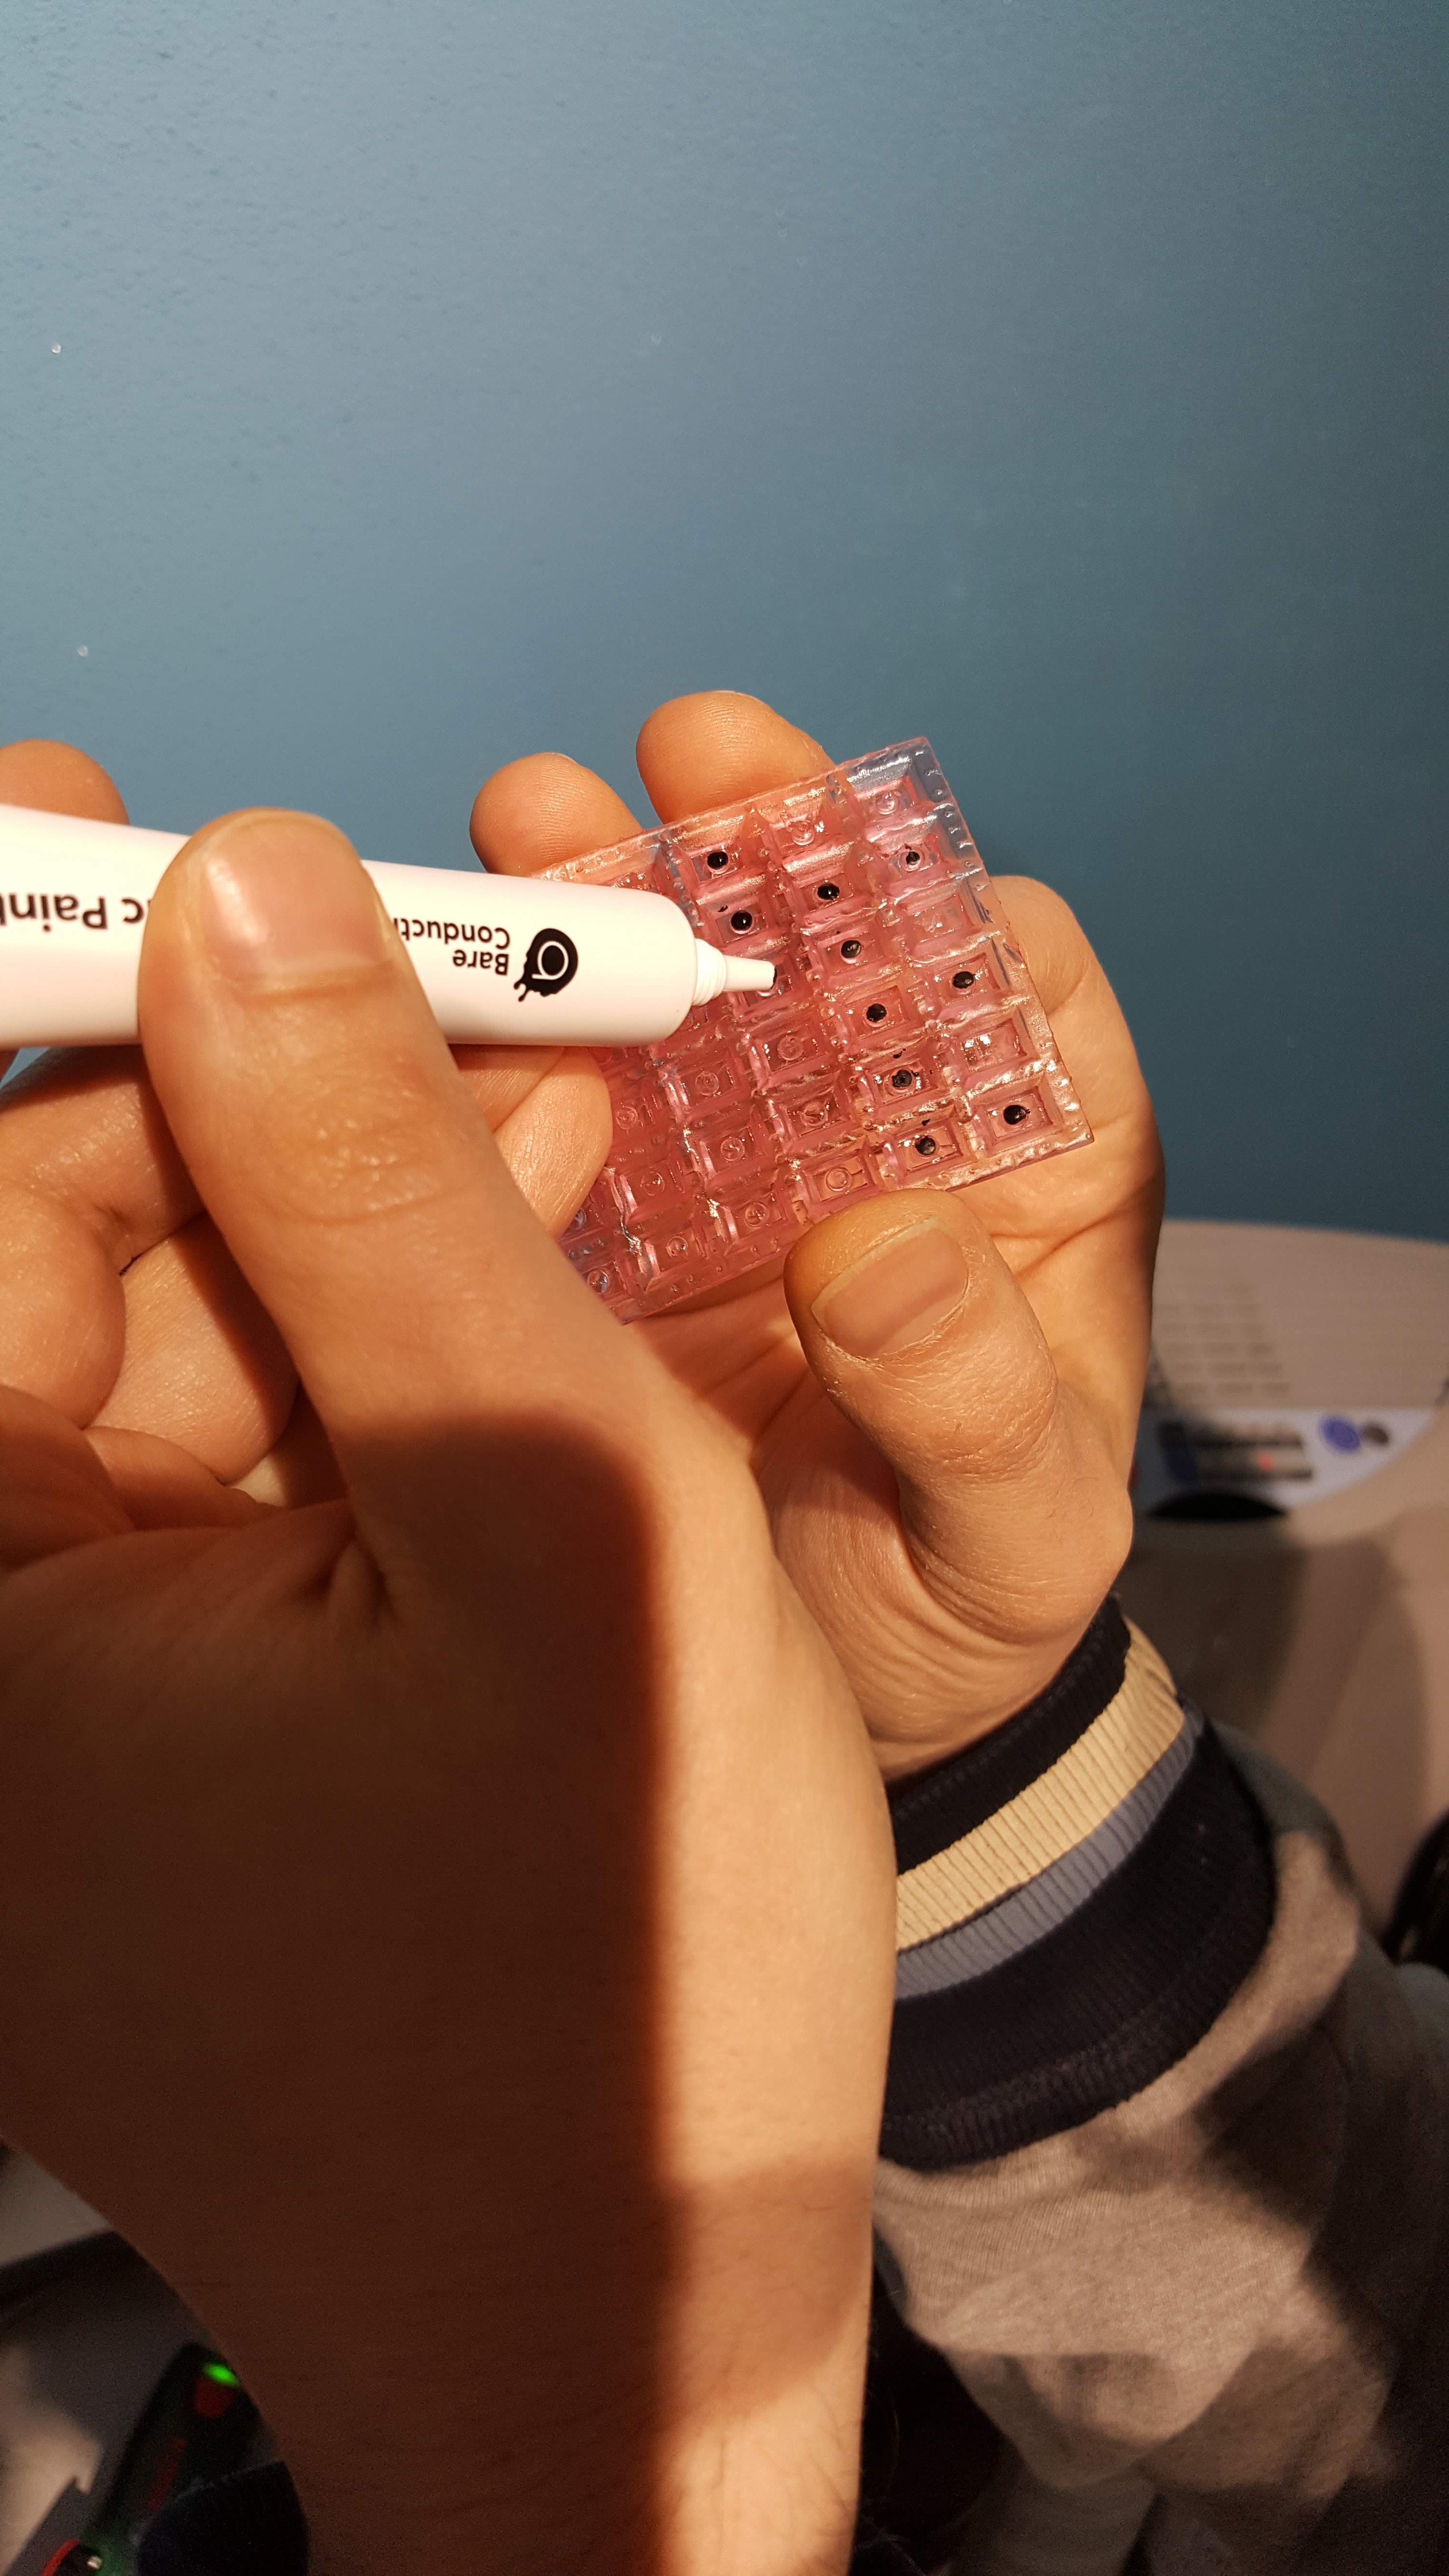
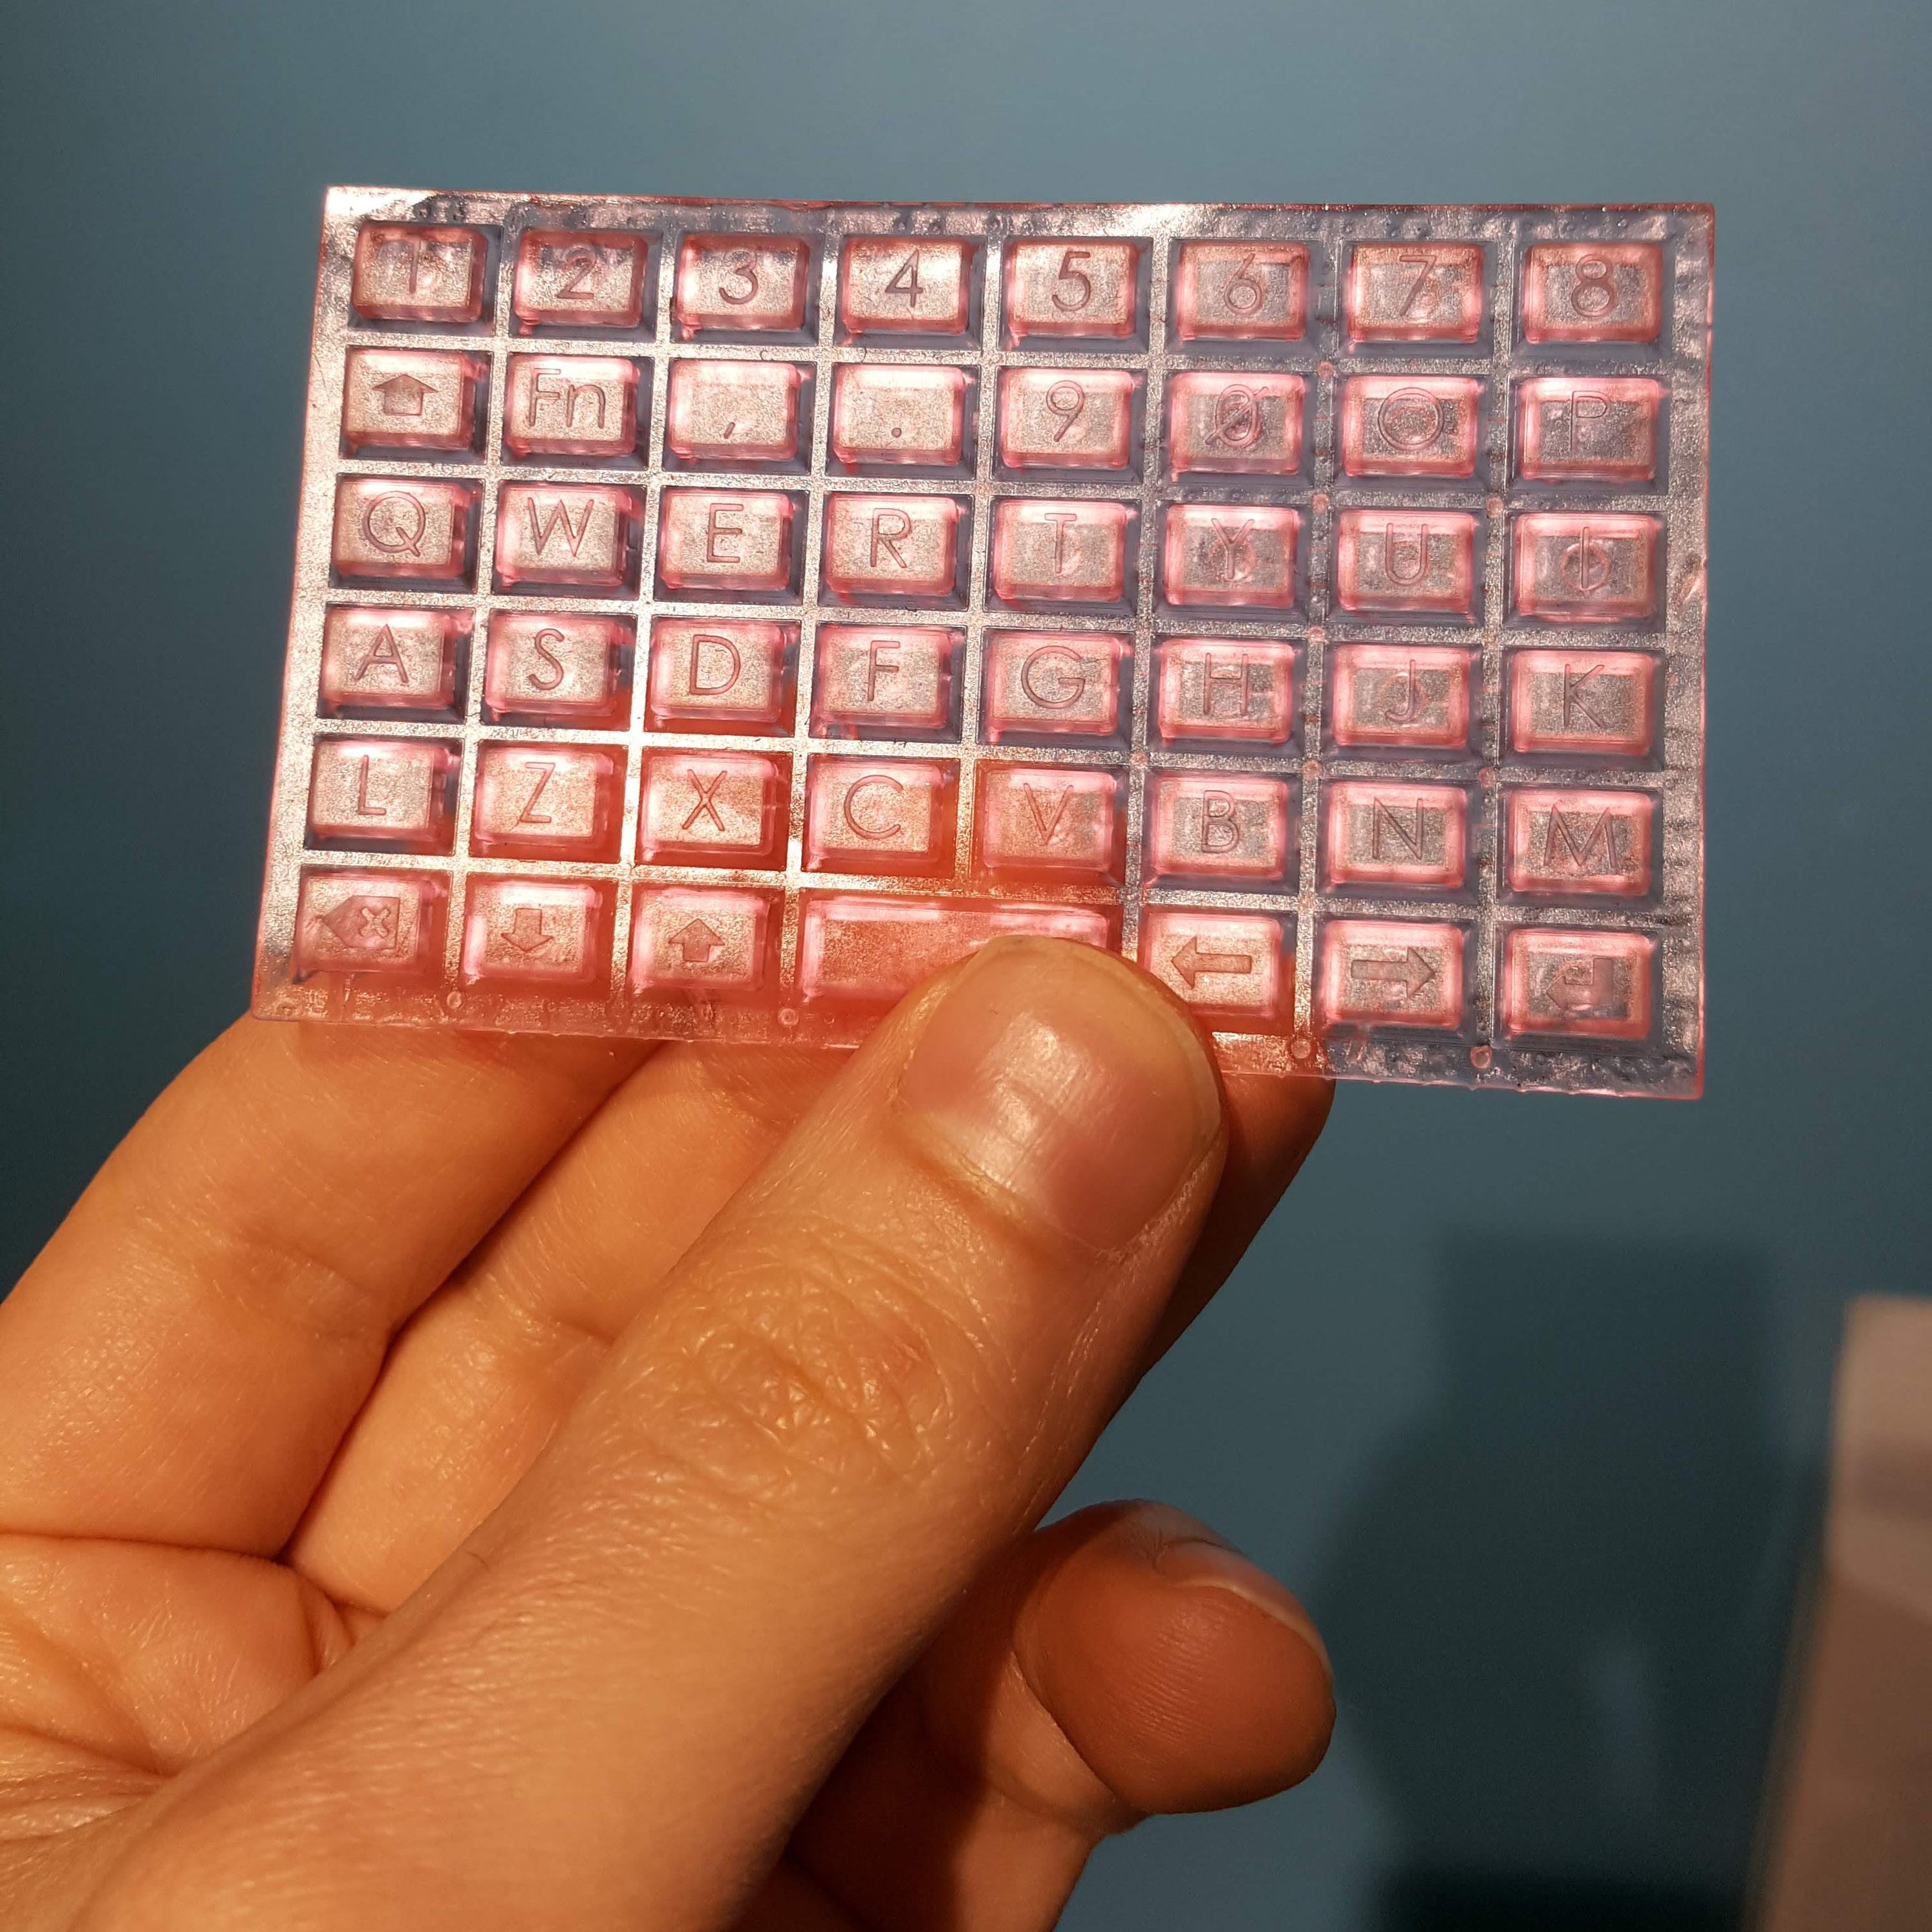
The front part is supposed to be 3D printed with flexible resin. Bare conductive ink is applied on the 3d printed "pill" that will be touching the PCB. A flexible PCB would allow a bendable, rollable keyboard.
0%
0%
DIY Flexible keyboard without using silicone
A DIY flexible keyboard project; instead of using silicone, a SLA highly flexible resin is used.
Become a Hackaday.io member
Already have an account? Log in.
Just one more thing
To make the experience fit your profile, pick a username and tell us what interests you.
Pick an awesome username
hackaday.io/
Your profile's URL: hackaday.io/username. Max 25 alphanumeric characters.
Pick a few interests
Projects that share your interests
People that share your interests


 TRAN.VINH.QUANG
 B K
B K
 Aidan Leitch
 Charlie Godfrey
I need an xvkbd layout for my smart phone I make them out of super glue and plastic bags now and it's very messy.