 Misty Lackie
The main parts used were the Arduino Uno, sensor shield, motor board, 2 DC motors & wheels, coroplast for the body and a modified PS2 controller. You can see the list of parts and supplies we used from here.
Following are visual diagrams on how everything is wired up.
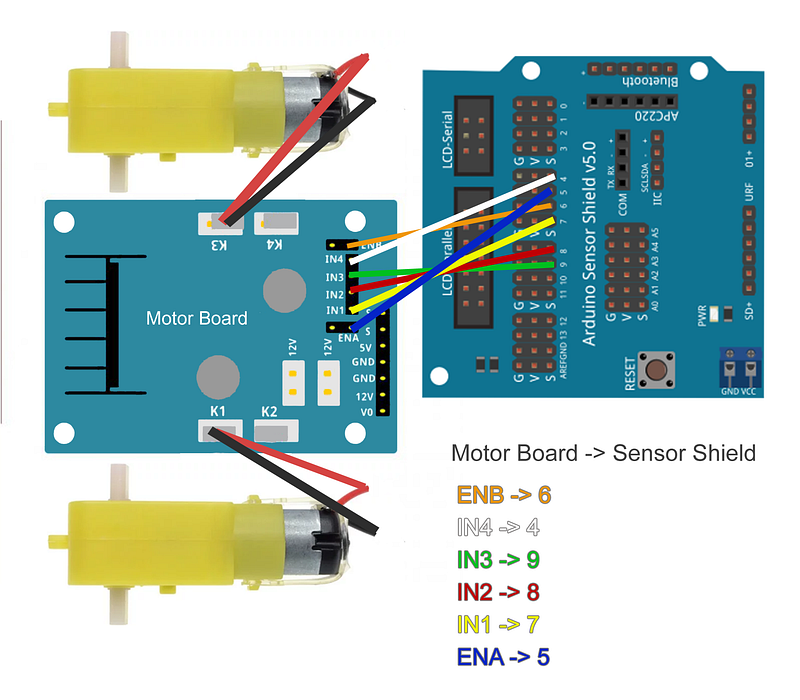
Motor Board
This is wiring for the motor board. This shows how the motor wires are connected to the motor board and also how the wires are connected from the motor board to the sensor shield.
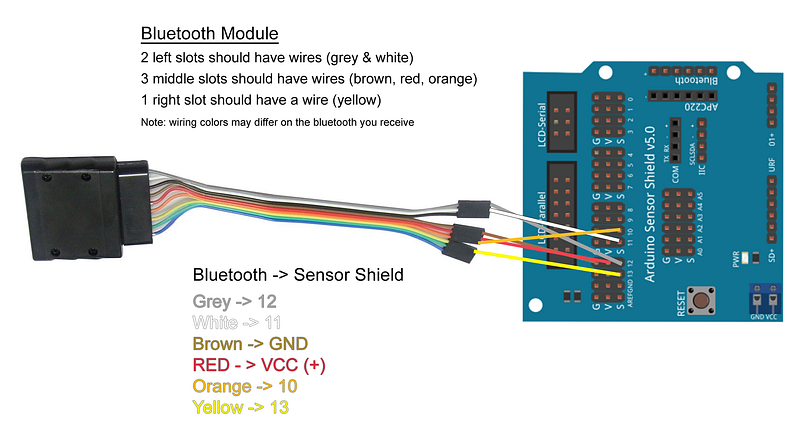
PS2 Controller Bluetooth Wiring
This diagram displays how to connect the bluetooth wiring up to the sensor shield.
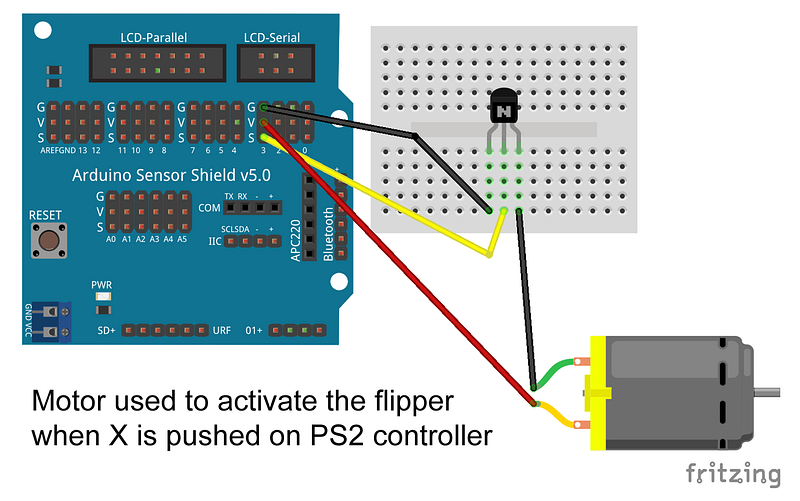
Extra Motor Wired To Sensor Shield & Breadboard With Resistor
This is an extra motor that was added to activate a flipper or spinner when the PS2 X button is pressed.
The students built the bot bodies with the coroplast using screws, nuts bolts, duct tape, double sided tape and velcro tape to hold everything together. It was fun to see some of the designs & concepts they came up with using the limited supplies they were given.
Following is a battle in action
Other useful links if you want to create your own BattleBot
- View Full Build a BattleBot Guide Here
- View Wiring & Diagrams Here
- Download The Code Here
- Download 3D Printed Parts Here
- Get List Of Parts Used Here